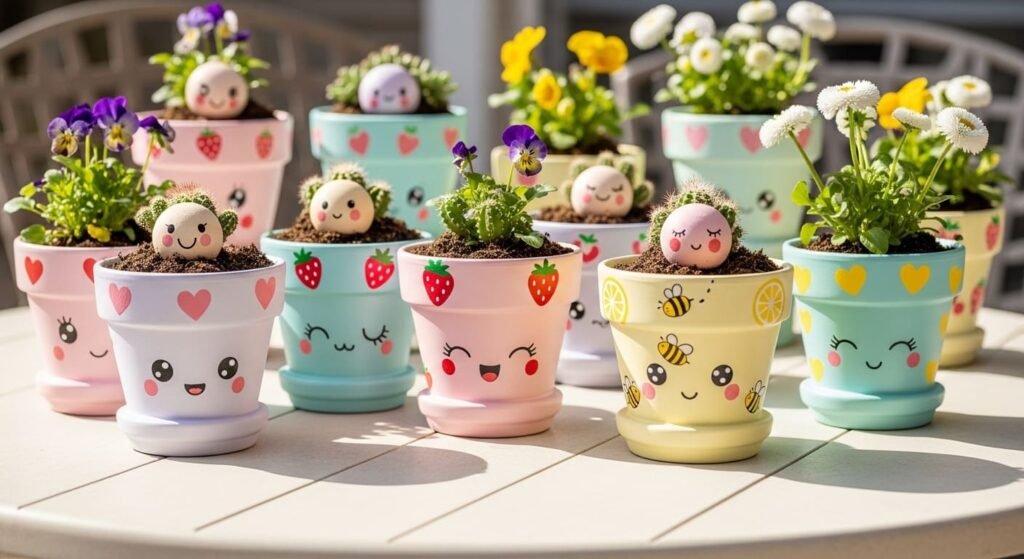
Cute flower pot painting is best when the design is simple, charming, and easy to finish. You do not need advanced painting skills. A pastel base, tiny eyes, blush cheeks, food shapes, dots, or playful plant puns can turn plain terracotta pots into adorable decor for shelves, patios, kids’ rooms, desks, and garden corners. Use acrylic paint, paint pens, cotton swabs, tape, and a basic sealer. Start with one small pot. Finish it. Then make a matching set.
1. Kawaii Face Flower Pots
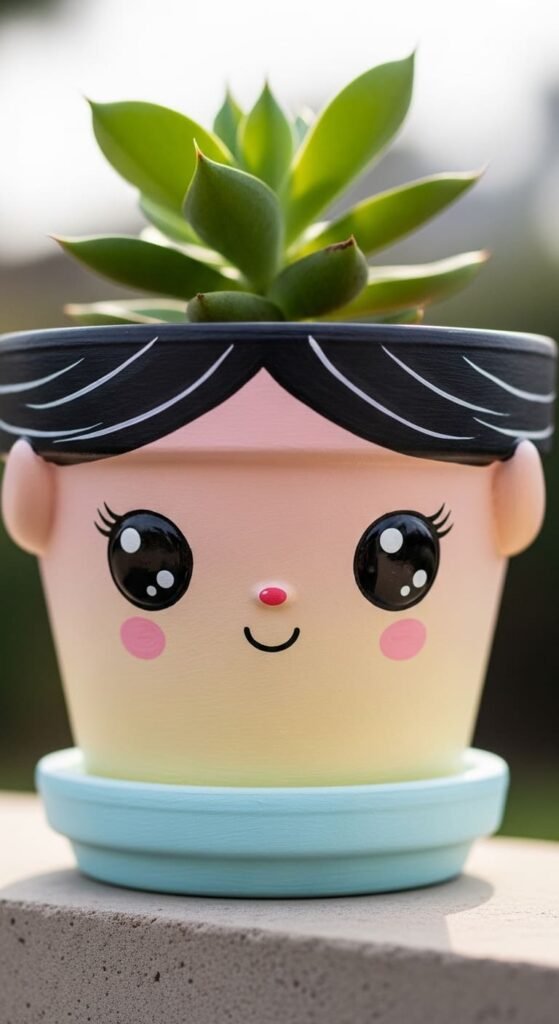
Kawaii faces are the safest cute pot idea because the shapes are simple.
Paint the pot in a pastel base color. Try soft pink, mint, cream, or lavender.
Once dry, use a paint pen for the eyes. Big circles work well. Add a tiny curved mouth.
For cheeks, use a cotton swab dipped in light pink paint. Dab gently on both sides.
Do not add too many details. That is how cute turns messy.
A small succulent works great because it looks like hair. A trailing plant makes the face look even funnier.
For a budget version, use leftover craft paint and an old pencil eraser for the blush dots.
Seal the pot if it will sit near a sunny window or outdoors.
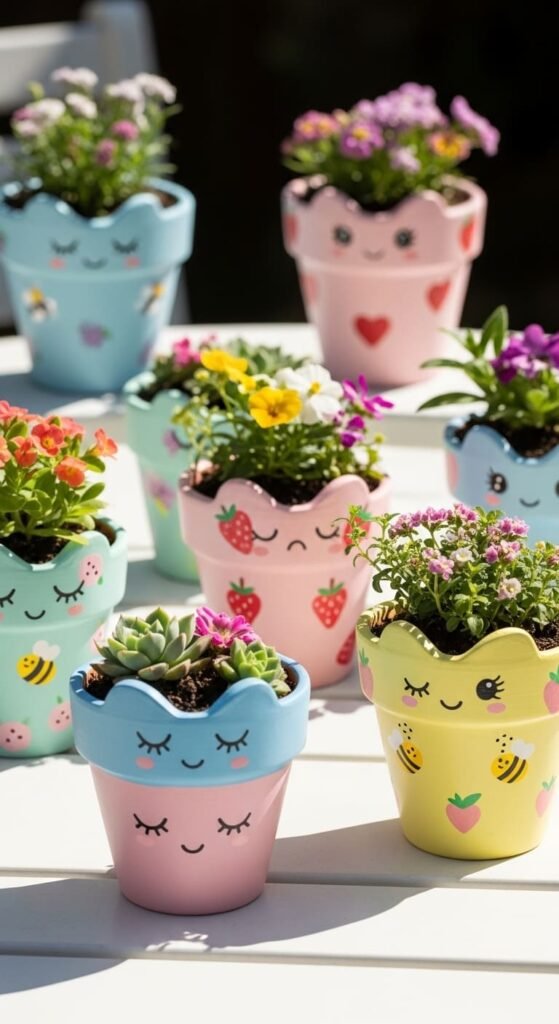
2. Sleepy Eyes Planters
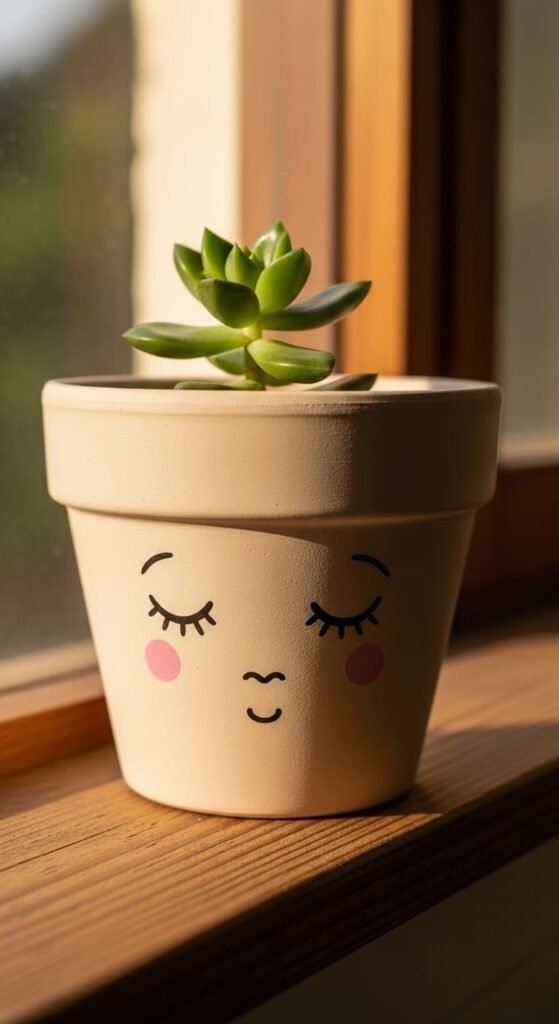
Sleepy eyes are perfect if you want cute without drawing a full face.
Paint the pot a pale color first. White, cream, blush, or peach all work.
Use a thin brush or black paint pen to draw two curved half-moon eyes. Add a few short lashes.
Place blush dots below the eyes. Keep them light.
This design works well for bedrooms, nurseries, desks, and calm shelf displays.
The best part is how fast it is. One base coat. Two eyes. Two cheeks. Done.
Use paint markers if brushes make your lines shaky.
Pair this pot with a small fern or succulent. The plant becomes the “hair,” which makes the whole piece cuter.
For a matching set, paint three pots with different sleeping expressions.
3. Ice Cream Cone Pots
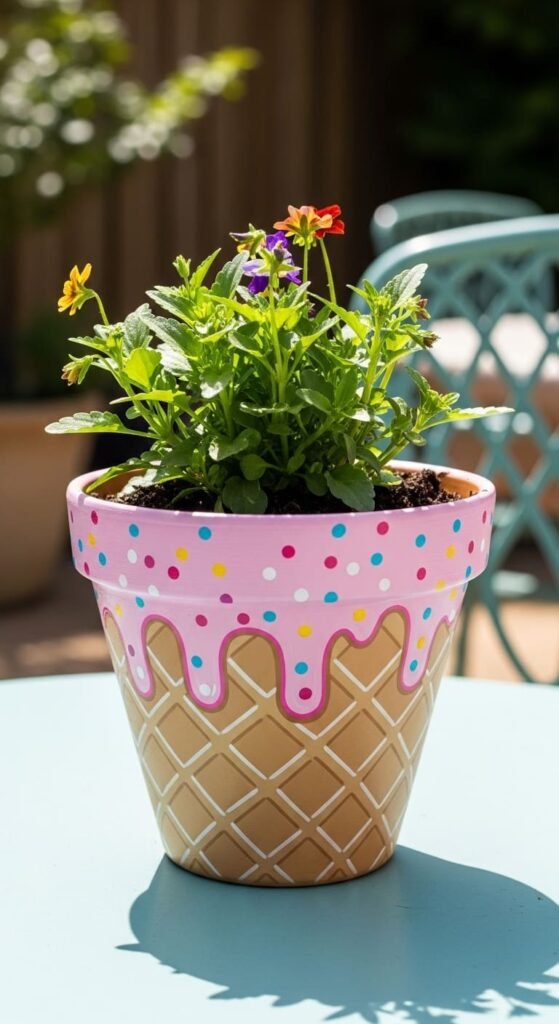
Ice cream pots are cute because they look playful right away.
Paint the bottom half tan or light brown. This becomes the cone.
Use a thin brush to add crisscross lines if you want a waffle look.
Paint the top rim like melting ice cream. Pink, white, mint, or chocolate brown all work.
Let the drips curve naturally. They do not have to match.
Add sprinkles with tiny dots and short lines. Use a toothpick, cotton swab, or paint pen.
This idea is great for kids because the design can be imperfect and still look fun.
Use cheap acrylic paint. You only need small amounts.
A bright flower or small cactus looks great inside this pot.
Seal it with a clear coat if you plan to use it outside.
4. Watermelon Slice Pots
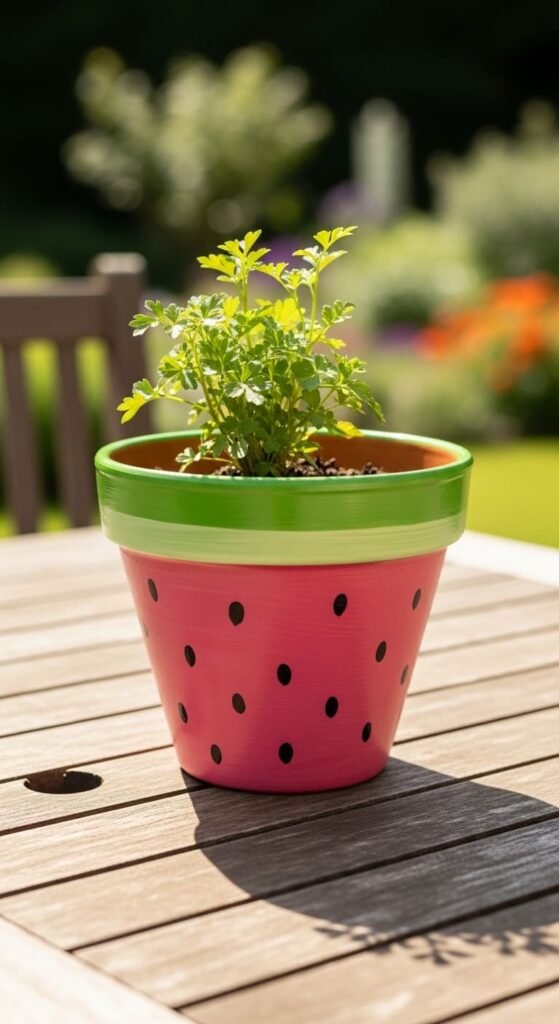
Watermelon pots are one of the easiest fruit designs.
Paint the rim green. Add a lighter green stripe if you want more detail.
Paint the body pink or red.
Once dry, add small black seed shapes. Use a paint pen or the end of a toothpick.
That is the whole design.
This works best on round pots because the shape already feels like fruit.
Use a small herb plant, succulent, or marigold inside. The green leaves match the rind.
For a cute set, make one watermelon pot, one lemon pot, and one strawberry pot.
This is a low-cost summer craft for patios, balconies, and kitchen windowsills.
Do not overwork it. The charm comes from simple color blocks.
5. Bumble Bee Pots
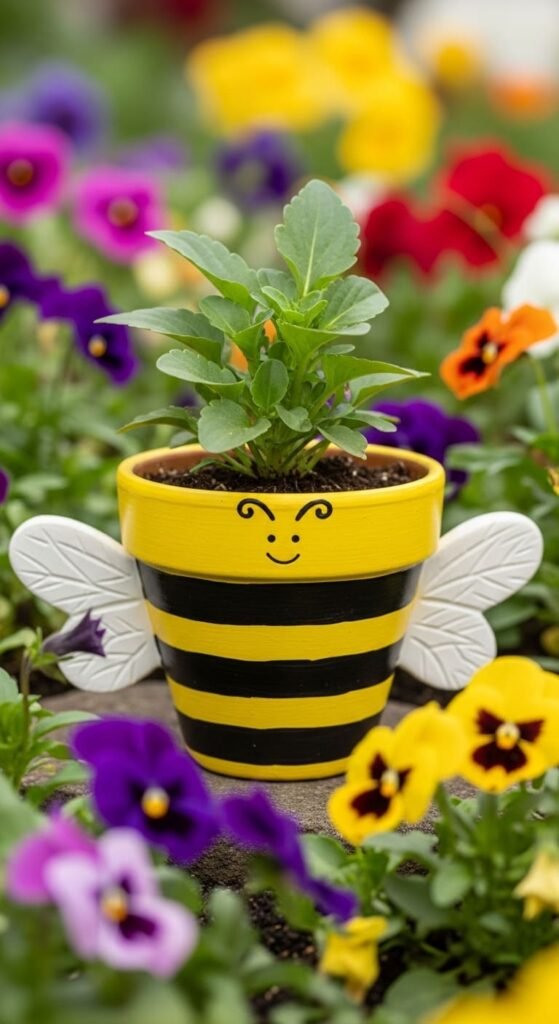
Bumble bee pots are cute, bright, and perfect for garden corners.
Start with a yellow base coat.
Add black horizontal stripes around the pot. Painter’s tape helps if you want cleaner lines.
Paint a tiny face near the top. Two dots for eyes and a small smile are enough.
Add white wings on the sides. Simple oval shapes work.
You can also paint tiny bees flying around the pot.
This idea pairs well with pollinator-friendly flowers like marigolds, lavender, or zinnias.
For a cheaper version, skip the white wings and only use yellow and black paint.
Kids can make this with sponge brushes or cotton swabs.
Finish with sealer if the pot will sit outside.
6. Cat Face Pots
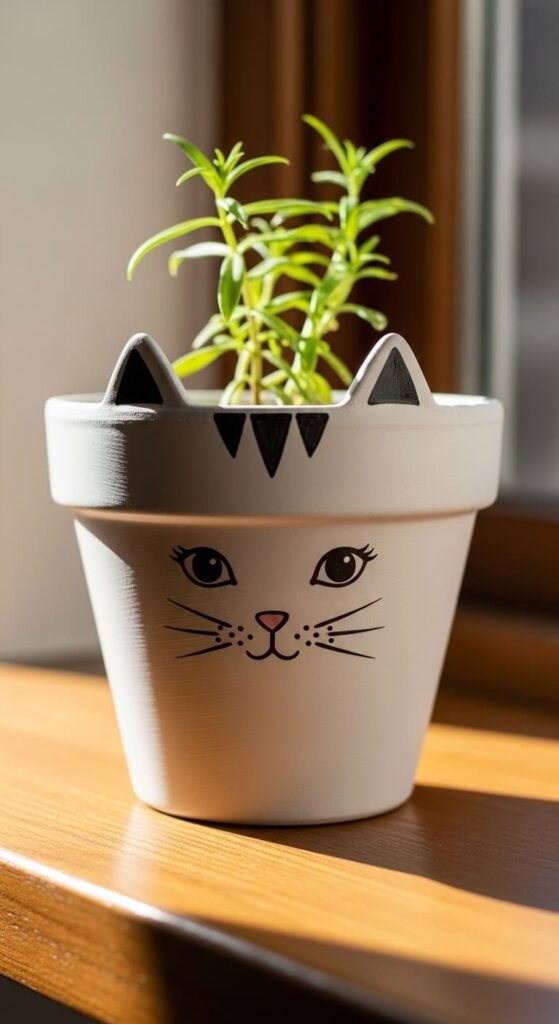
Cat face pots are easy because the features are basic shapes.
Paint the pot white, gray, orange, or black.
Add triangle ears near the upper edge. If the pot shape makes that hard, paint the ears directly on the front.
Use a paint pen for eyes, whiskers, and a tiny nose.
Pink works well for the nose and cheeks.
Do not try to paint realistic fur. It will make the design look crowded.
A small grass-like plant works well because it looks like wild cat hair.
This is a great gift for cat owners.
Use a mini terracotta pot for a desk version.
You can also paint a set of different cat faces. One happy. One sleepy. One grumpy.
That variety makes the display more fun.
7. Bunny Face Pots
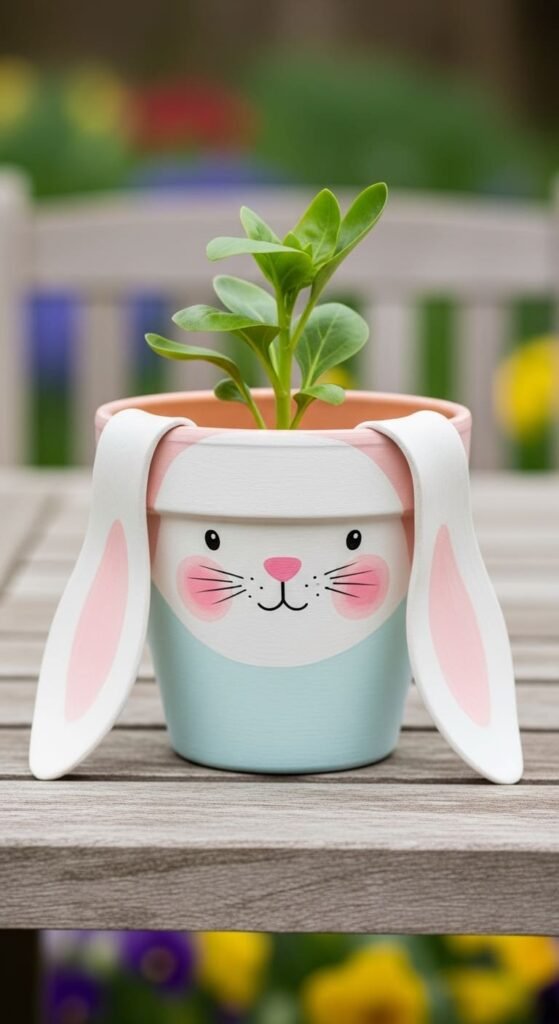
Bunny pots are sweet and simple.
Start with a white or pale gray base.
Paint long ears on the front or add air-dry clay ears if you want a raised look.
Use a small pink oval for the nose.
Draw two dots for eyes and short whiskers on both sides.
Rosy cheeks make the bunny cuter.
This idea works well for spring decor, Easter crafts, and kids’ rooms.
Use cotton swabs for cheeks and a thin marker for whiskers.
A small round plant looks best because it keeps the design soft.
If you add clay ears, attach them before painting and let them dry fully.
Keep the face minimal. Too much detail makes it look busy.
8. Ladybug Flower Pots
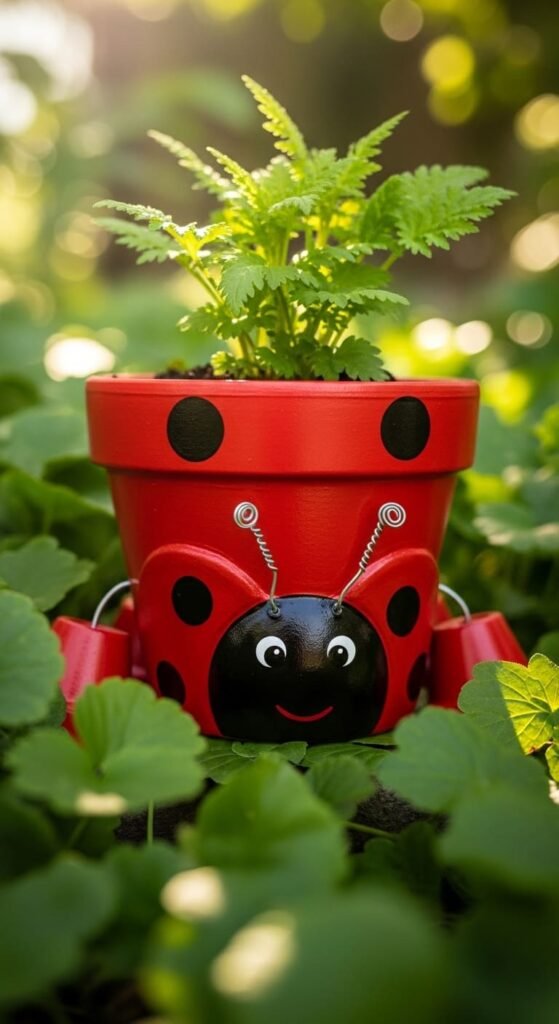
Ladybug pots are bold, cute, and very beginner-friendly.
Paint the whole pot red.
Add black dots using a pencil eraser or sponge dauber.
Paint a black section near the top for the head.
Add two small white eyes if you want a cartoon look.
This is a strong choice for outdoor gardens because the colors stand out against green plants.
Use a small flowering plant inside for extra color.
You can make several tiny ladybug pots and line them along a windowsill.
This is also a good craft for kids because dots are easy to repeat.
Use two coats of red paint so the terracotta does not show through.
Seal the pot after painting, especially if it will sit in rain or strong sun.
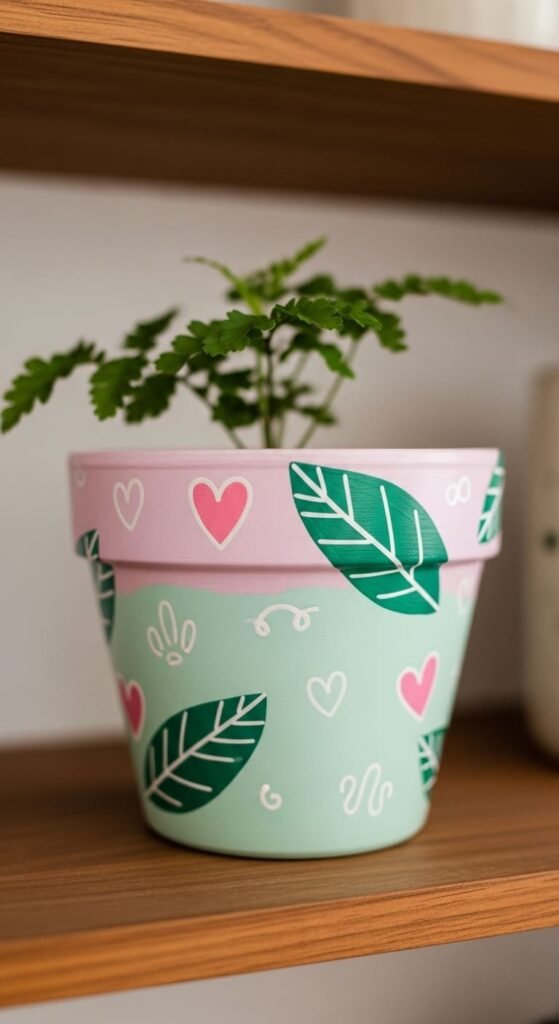
9. Pastel Heart Pots
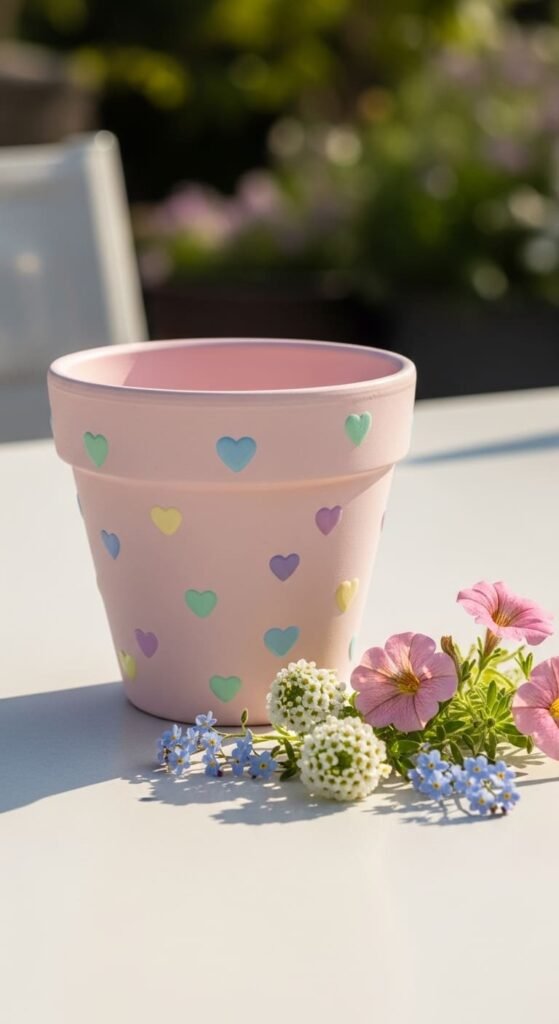
Pastel heart pots are cute without being hard.
Paint the pot white, cream, or pale pink.
Use a tiny brush or paint pen to draw small hearts across the surface.
Keep the hearts uneven. Handmade spacing looks better than forced perfection.
Try pink, lavender, peach, and mint.
This design works well for gifts, Valentine decor, mother’s day crafts, or bedroom plant displays.
If hearts are hard to draw, use two dots and pull them down into a point with a toothpick.
You can also make one large heart on the front and leave the rest plain.
For a budget tip, use leftover nail art brushes or toothpicks instead of buying detail brushes.
A small trailing plant looks lovely in this style.
Finish with a clear coat to protect the paint.
10. Smiley Face Plant Pots

Smiley face pots are fast and cheerful.
Paint the pot yellow, white, or pastel blue.
Use a black paint pen to draw round eyes and curved smiles.
You can cover the whole pot with tiny smileys or paint one large face in front.
Tiny smileys look playful. One large smiley looks bold.
Use a pencil first if you are nervous.
This design is great for desks, balconies, and kids’ craft days.
A green plant on top makes the face feel alive.
Use cheap acrylic paint and a marker-style paint pen. That keeps the project simple.
Try different expressions across multiple pots. Happy, sleepy, surprised, and silly.
Do not make every face perfect. The uneven ones often look better.
11. Donut Glaze Pots
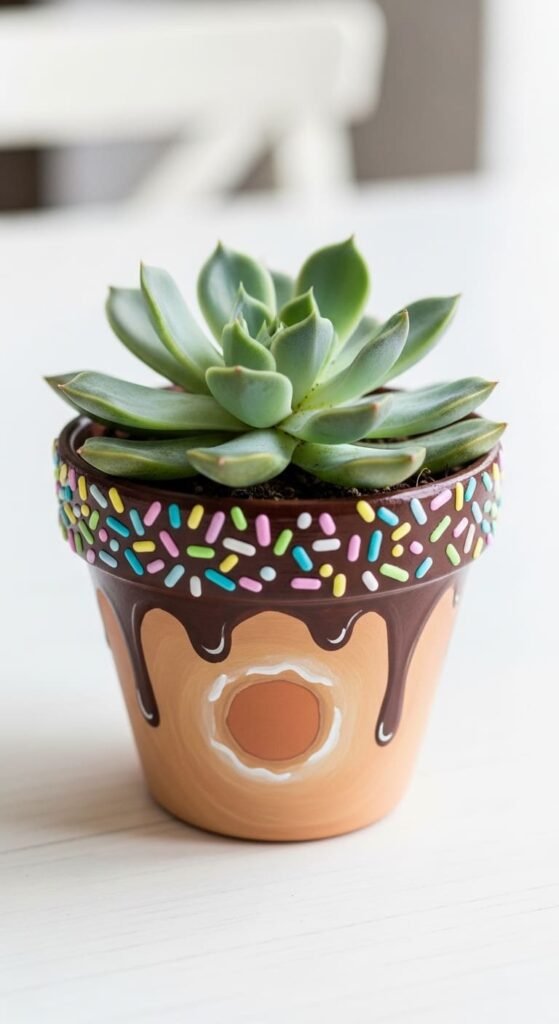
Donut pots are cute because they use dessert colors.
Paint the pot base tan or light brown.
Paint a dripping glaze shape around the rim. Use pink, chocolate, vanilla, or mint.
Add sprinkles with tiny colorful lines.
This is easier than painting a real donut shape because the pot rim already gives you the round form.
Use a small brush for the glaze edge and a toothpick for sprinkles.
This design works well for kitchen windows, kids’ rooms, and playful gift baskets.
For a set, make different “flavors” using the same pot size.
A succulent works well because it keeps the top compact.
Let each color dry before adding sprinkles. Wet paint will smear.
Seal the pot if it will be handled often.
12. Strawberry Pots
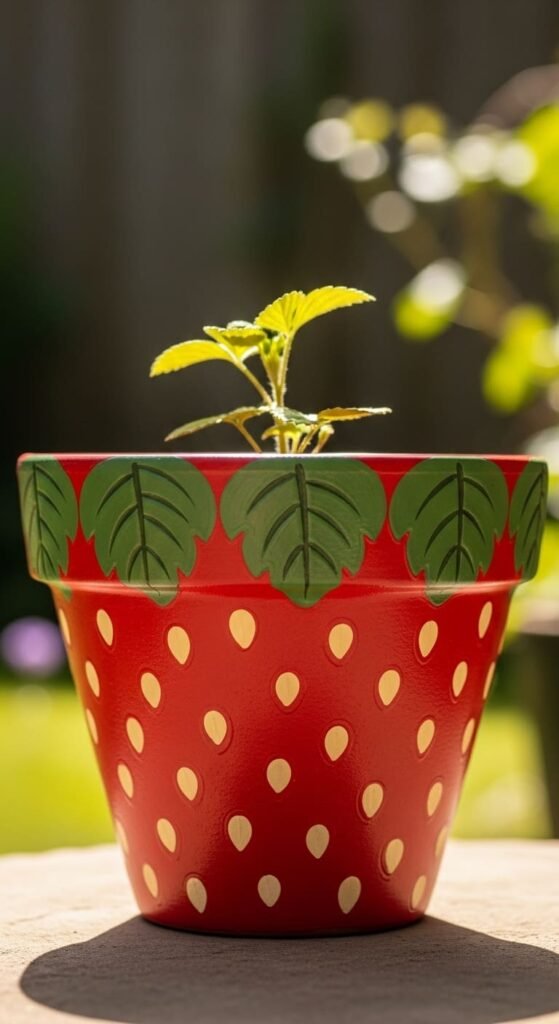
Strawberry pots are simple and sweet.
Paint the body red.
Add tiny yellow or white seed dots across the pot.
Paint green leaf shapes around the rim.
That is enough.
Use a cotton swab for seed dots if you want a softer look.
A detail brush works better for sharper seeds.
This design looks great with herbs, small flowers, or a compact succulent.
Make a fruit set by pairing it with watermelon and lemon pots.
For a cheaper version, skip the green leaf rim and only use red with seed dots.
This is a good first project because the pattern is easy to repeat.
Do not make the seeds too large. Small dots look cuter.
Add sealer after the final coat dries.
13. Lemon Slice Pots
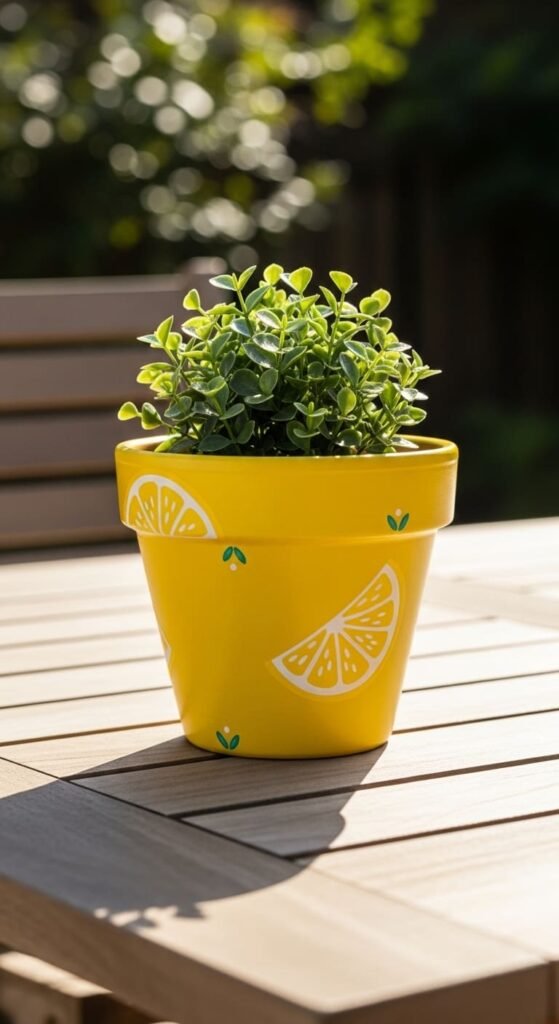
Lemon pots bring a sunny look with very little work.
Paint the pot bright yellow.
Use white paint to add curved lemon slice lines or simple wedges.
Add a few green leaves near the rim if you want extra detail.
This design works well for kitchen herbs like basil, mint, or thyme.
The colors match food spaces and outdoor tables.
Use painter’s tape if you want a clean white band near the top.
For tiny pots, skip the slice lines and paint small white dots instead.
Lemon pots also look good beside blue or white decor.
Use acrylic paint for the base and a paint pen for the fine lines.
Let yellow dry fully before adding white. Otherwise, the colors will muddy.
Seal it if it will live outdoors.
14. Plant Pun Pots
Plant pun pots are cute when the lettering is clean and the design stays simple.
Use a plain base color like white, blush, sage, or beige.
Add a short saying with a paint pen.
Keep it brief. Long wording looks cramped on curved pots.
Surround the phrase with tiny leaves, hearts, dots, or vines.
If handwriting is not your strength, write lightly in pencil first.
You can also use letter stickers as a guide, then paint over them.
This idea works well for gifts because it feels personal.
Use phrases that fit the plant or person.
Do not crowd the pot with too many doodles.
A single saying plus a few small accents looks cleaner.
Seal the pot so the lettering does not rub off.
15. Mini Pocket Pal Pots
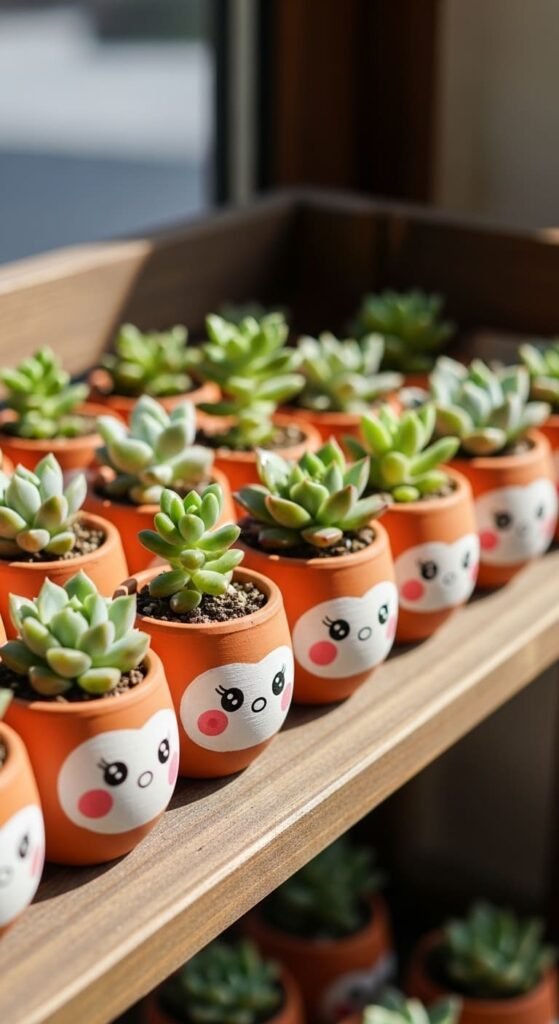
Mini pots are perfect for cute designs because small faces look extra charming.
Buy tiny terracotta pots from a craft store or dollar section.
Paint each one a different pastel color.
Add simple faces with paint pens.
Use blush dots, tiny mouths, and different eye shapes.
Make a set of plant “pals” for a desk, shelf, or window ledge.
Small succulents or cuttings are ideal because they fit the scale.
This is also a smart way to use leftover paint.
The smaller the pot, the less detail you should add.
Too much detail can make the design look cramped.
Paint three to five pots as a set. Groups look better than one lonely mini pot.
Add a clear coat if they will be moved around often.
16. Flower Crown Face Pots
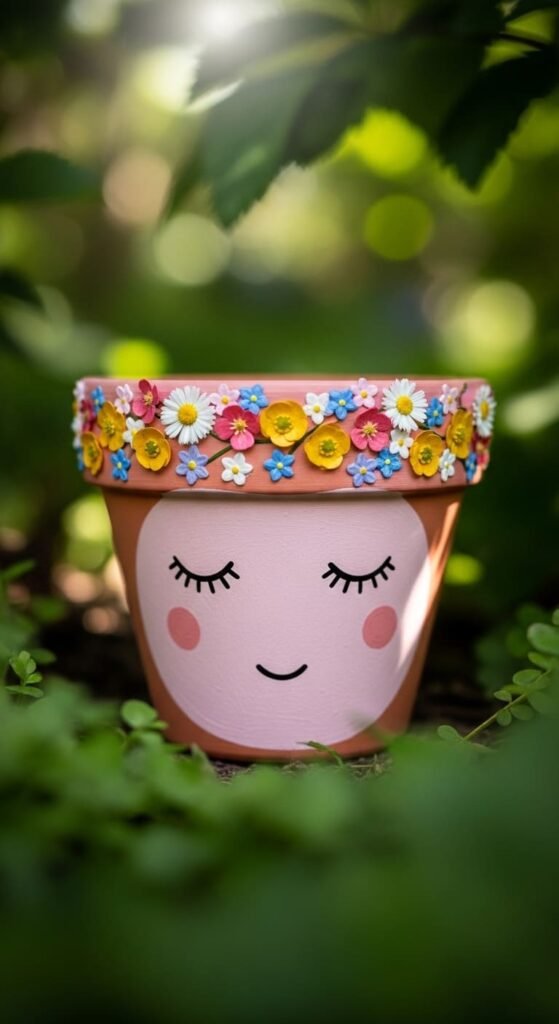
Flower crown pots are cute and soft.
Paint a simple face first. Sleepy eyes or a tiny smile works best.
Then add small flowers around the rim.
Use dots for flower centers and short strokes for petals.
Keep the flowers small so they do not overpower the face.
Try white daisies, pink blossoms, or tiny yellow flowers.
This design pairs well with trailing plants or small succulents.
Use a cotton swab for flower centers and a detail brush for petals.
For a budget version, use only two paint colors: green leaves and white petals.
A matte finish looks nice for this style.
Let the face dry before adding the crown so you do not smear the lines.
This pot makes a sweet handmade gift.
17. Rainbow Cheek Pots
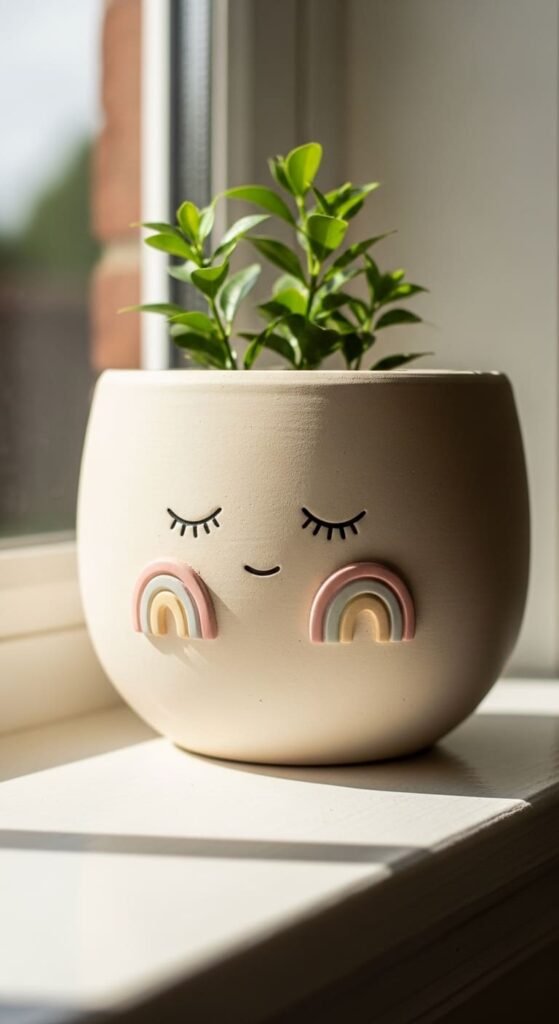
Rainbow cheeks add color without painting the whole pot.
Start with a cream or white base.
Draw a simple face with closed eyes.
On each side, paint tiny rainbow arcs as cheeks.
Use thin strokes in pink, orange, yellow, green, and blue.
Keep the arcs small. Oversized cheeks can look messy.
This design works well for kids’ rooms and playful shelves.
Use paint pens if brushes feel too hard to control.
Pair it with a small plant that has soft leaves.
You can also paint only one rainbow cheek and one pink blush dot for a quirky look.
This is a good way to use leftover paint colors.
Let each arc dry for a few minutes before adding the next.
Seal lightly so the fine lines stay protected.
18. Cute Cow Print Pots
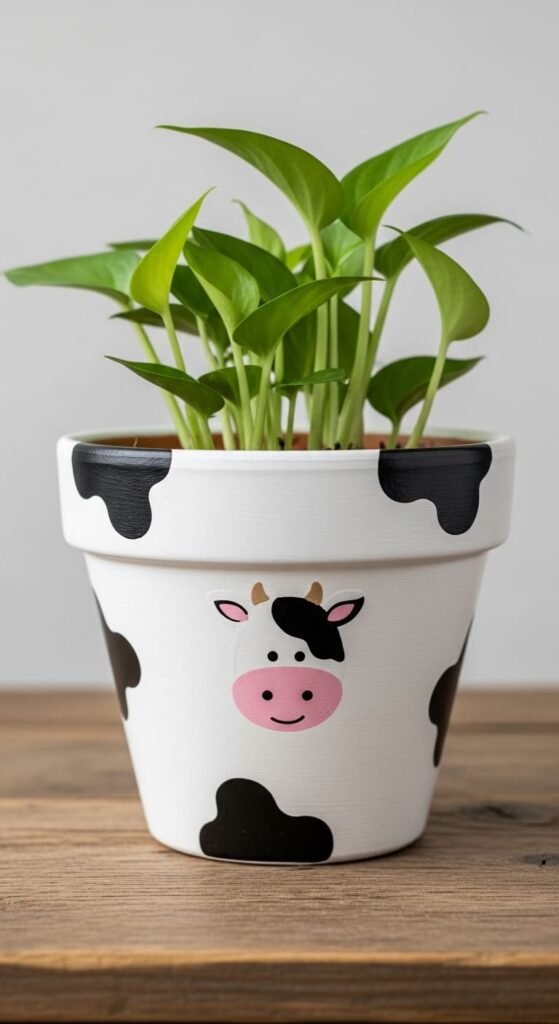
Cow print pots are cute and low-pressure.
Paint the pot white.
Add uneven black spots around the surface.
Do not make the spots too regular. Random shapes look more natural.
For extra cuteness, paint a small cow face on the front.
Use a pink oval for the nose and two black dots for eyes.
This design pairs well with farm-style decor, kids’ spaces, or kitchen herbs.
Use a sponge for large spots and a brush for smaller patches.
You can also make a pink cow version for a softer look.
This is a good project for beginners because crooked spots still look right.
Add a clear protective coat if the pot will sit outside.
19. Cute Zebra Stripe Pots
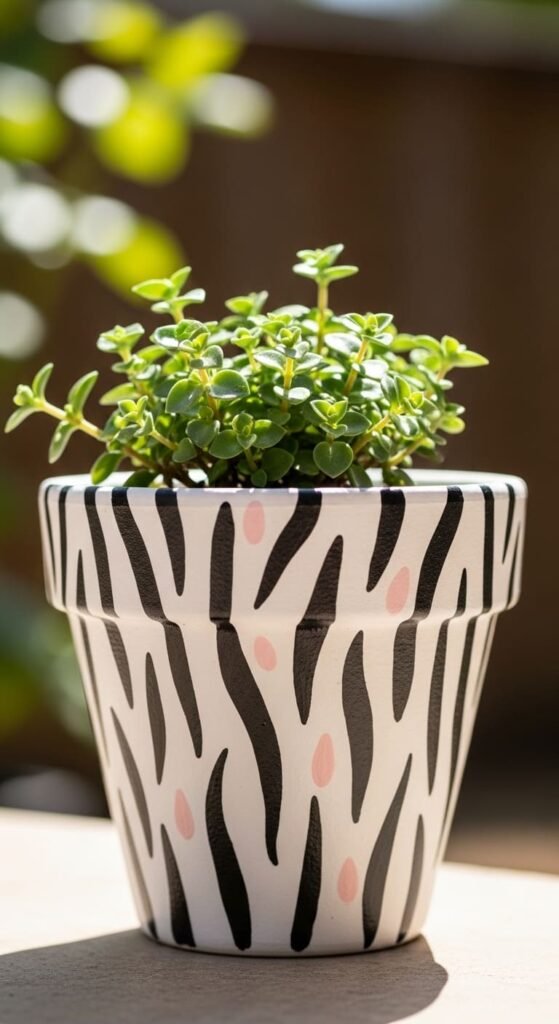
Zebra stripe pots give an animal theme without drawing a full animal.
Paint the pot white.
Use a thin brush or paint pen to add black uneven stripes.
The stripes should curve around the pot.
Do not make them perfectly straight.
Add pink cheeks or a tiny face if you want a cuter look.
This works well with small green plants because the black-and-white base makes the leaves stand out.
Use painter’s tape only if you want sharper sections. Freehand looks more playful.
For kids, let them draw thick stripes with a marker-style paint pen.
This design also works on mini pots.
Seal it after drying so the black lines do not scratch off.
20. Caterpillar Dot Pots
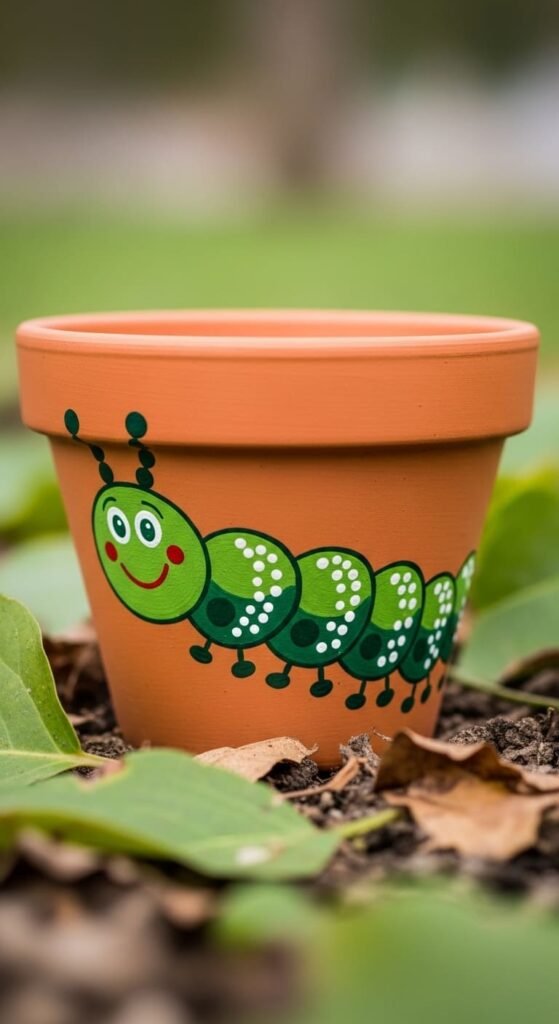
A caterpillar pot is made from dots, so it is very beginner-friendly.
Paint the pot in a soft base color.
Use a sponge dauber, pencil eraser, or cotton swab to create connected green circles.
Add a tiny face on the first circle.
Draw little legs if you want, but they are optional.
This design is great for garden projects with kids.
A caterpillar crawling around the pot gives movement without hard drawing.
Use two shades of green for a more playful look.
Add small flowers or leaves around it if the pot feels empty.
Do not crowd the whole surface. Let the caterpillar be the main feature.
This idea works well for herbs, seedlings, or classroom planting crafts.
Seal before outdoor use.
21. Pastel Polka Dot Pots
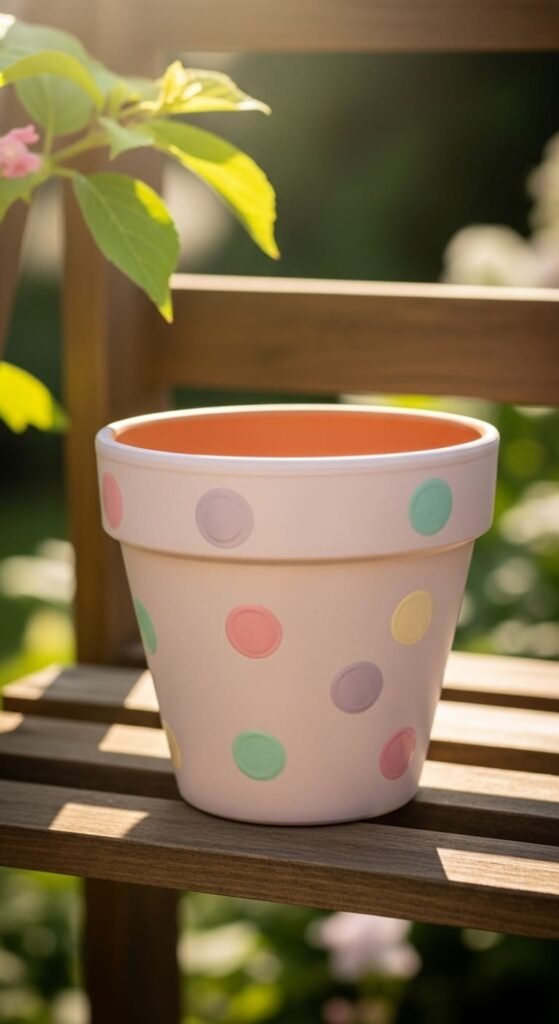
Polka dots are cute because they are clean and easy.
Paint the pot with a light base color.
Use a pencil eraser to stamp dots across the surface.
Try pastel pink, mint, lavender, yellow, and cream.
Keep the dots spaced out for a softer look.
For a bolder style, place dots closer together.
This idea works for any pot size.
It also helps hide small paint mistakes.
Use the same dot colors across several pots for a matching set.
Kids can help with stamping because the motion is simple.
Let dots dry before touching the pot. They can smear easily.
A clear sealer helps protect the raised paint.
This is one of the best starter ideas if you have zero confidence.
22. Graffiti Heart Pots
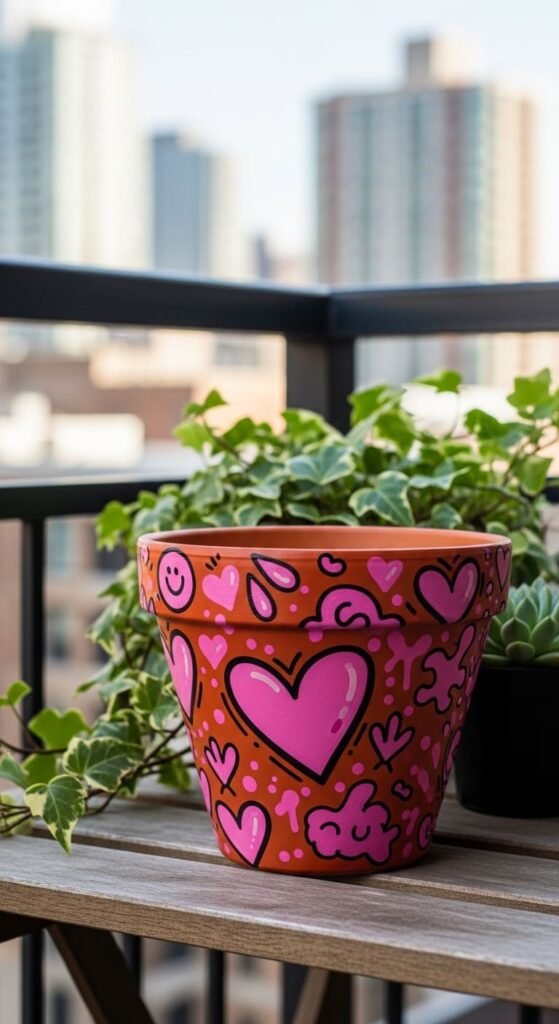
Graffiti heart pots are cute with a little attitude.
Start with a white, black, or pale pink base.
Paint hearts in different sizes.
Add small dots, stars, and quick brush marks around them.
Keep the colors limited. Pink, red, white, and black are enough.
This style works well for teens, balconies, and bold plant displays.
Use paint pens for doodles if brushes feel too loose.
Do not try to make every heart match. Variation makes the pot feel handmade.
You can add a clear glossy coat for a sticker-like finish.
This is also a good idea for old pots with marks or stains.
Paint over the flaws and turn them into part of the design.
Pair with a spiky cactus or trailing plant for contrast.
23. Pet Portrait Pots
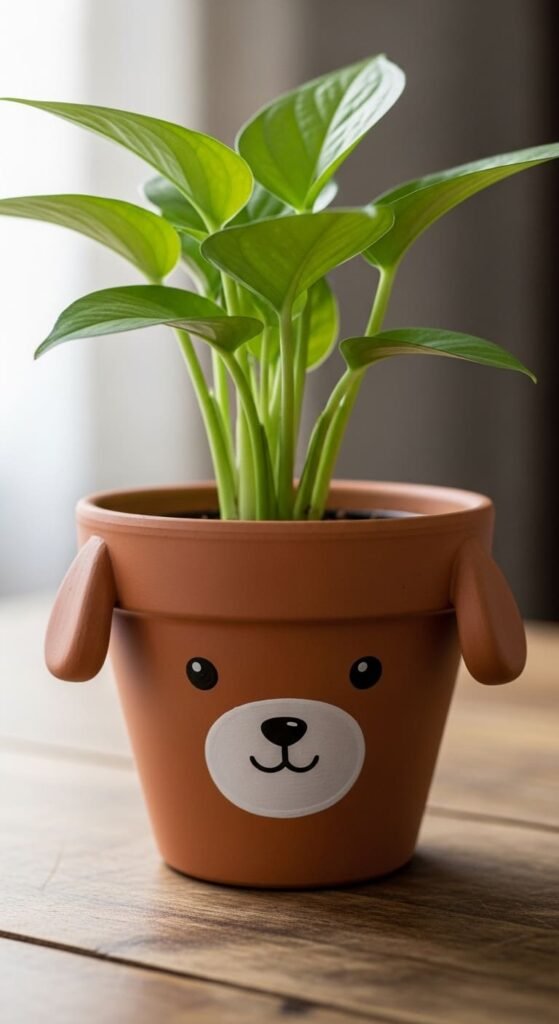
Pet portrait pots sound hard, but keep them simple.
Do not paint a realistic portrait.
Pick three features: ears, face color, and nose shape.
Paint the base in the pet’s main color.
Add ears on the sides or front.
Use dots for eyes and a small oval for the nose.
Add spots only if the pet has a clear pattern.
This makes a sweet handmade gift for dog or cat owners.
Use a photo only as a loose guide.
Paint pens help with eyes, whiskers, and outlines.
If you mess up, let it dry and paint over the face with the base color.
That is the advantage of acrylic paint.
Finish with a sealer so the design lasts longer.
24. Swan Romance Pots
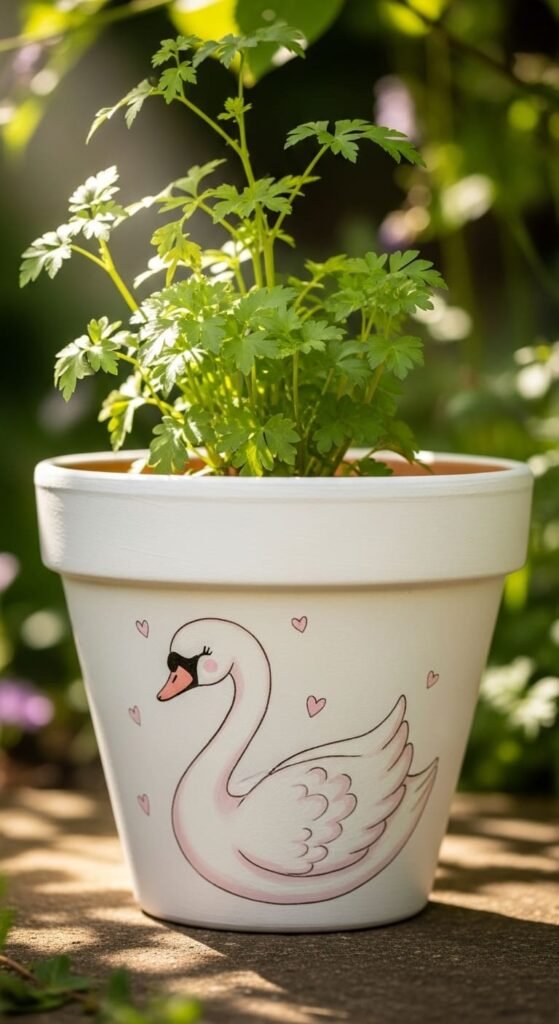
Swan pots are cute if you keep the shape simple.
Paint the pot pale blue, blush, or white.
Draw a curved swan neck on the front.
Add a small orange beak and one black eye.
Paint a few tiny hearts or flowers around it.
Do not attempt detailed feathers. Use simple wing shapes instead.
This design works well for soft, romantic plant displays.
It also looks lovely with white flowers or delicate trailing plants.
Use a pencil sketch first if the curve feels tricky.
A thin paint pen can help with the neck line.
For a cheaper option, skip the full body and paint only the swan head and neck.
Seal gently after drying.
Conclusion
Cute flower pot painting works best when you stop trying to make it perfect. Use simple faces, fruit shapes, dots, bugs, hearts, and food themes. Pick cheap terracotta pots, basic acrylic paint, and paint pens. Start with one small design today. Finish it, seal it, plant something in it, and then make a matching set. That is how plain pots turn into adorable plant displays.