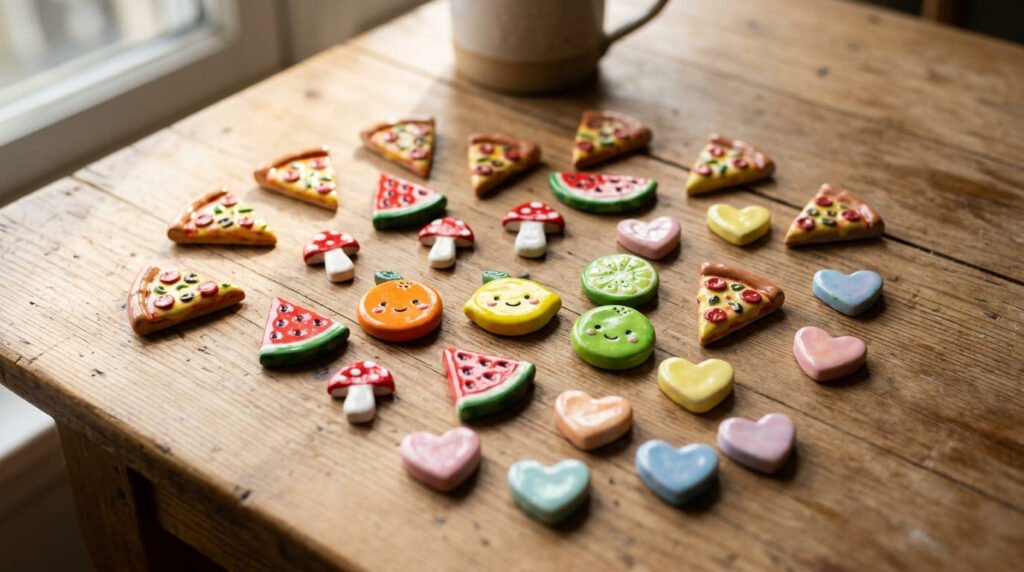

Handmade gifts hit different. They feel personal in a way store-bought stuff never will. Clay magnets are one of the easiest ways to make something cute, useful, and genuinely fun. You shape it, you bake or dry it, you stick a magnet on the back. That’s it. The supplies are cheap. Most projects cost under $10 and take about an hour. Whether you grab polymer clay or air dry clay, these 25 ideas are beginner-friendly, budget-friendly, and perfect for gifting. Let’s get sticky.
1. Pizza Slice Magnets
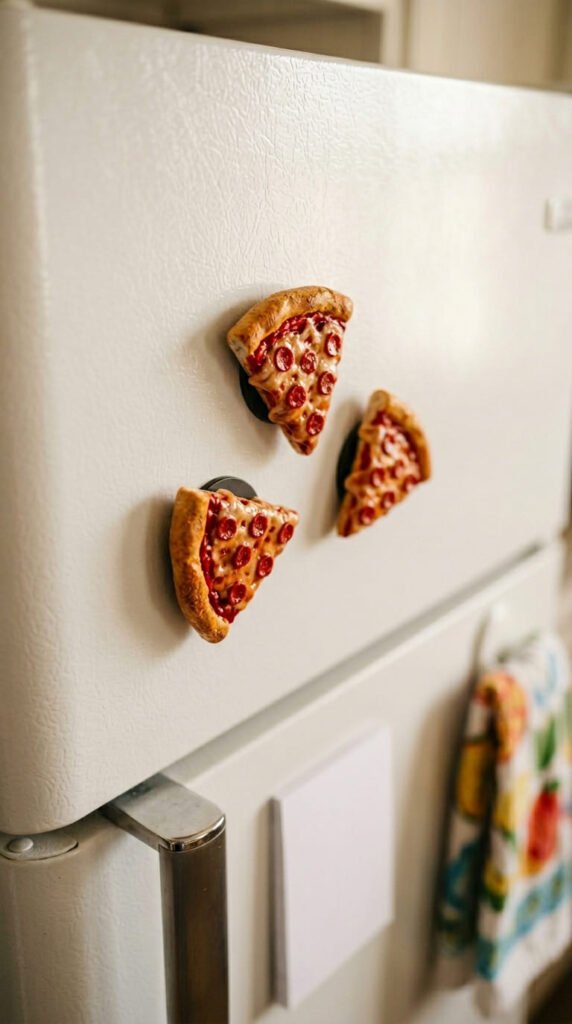
Pizza slices are the number one trending design for good reason. They look amazing and they’re simple. Roll a small triangle of tan clay for the base. Add a thin red layer for sauce. Use cream or pale yellow clay for cheese, then press it with a toothbrush to get that stretchy melted look. Tiny pepperoni dots finish it off. Bake at 275°F for 15 minutes if you use polymer clay. Air dry clay just sits out for a day. Once it’s hard, brush a coat of gloss varnish over the cheese and sauce so it looks good enough to eat. Glue a strong magnet on the back with E6000. Let the glue cure for a full 24 hours before you stick it anywhere. Don’t rush this part. The magnet will fall off if the glue is still soft. Want to save money? One block of clay makes a dozen slices. Mini pizza magnets make great little gifts for friends who love food. Keep the crust about a quarter inch thick so it doesn’t snap. Thin clay breaks easily. A chunky little slice is much sturdier and honestly looks cuter.
2. Glazed Donut Magnets
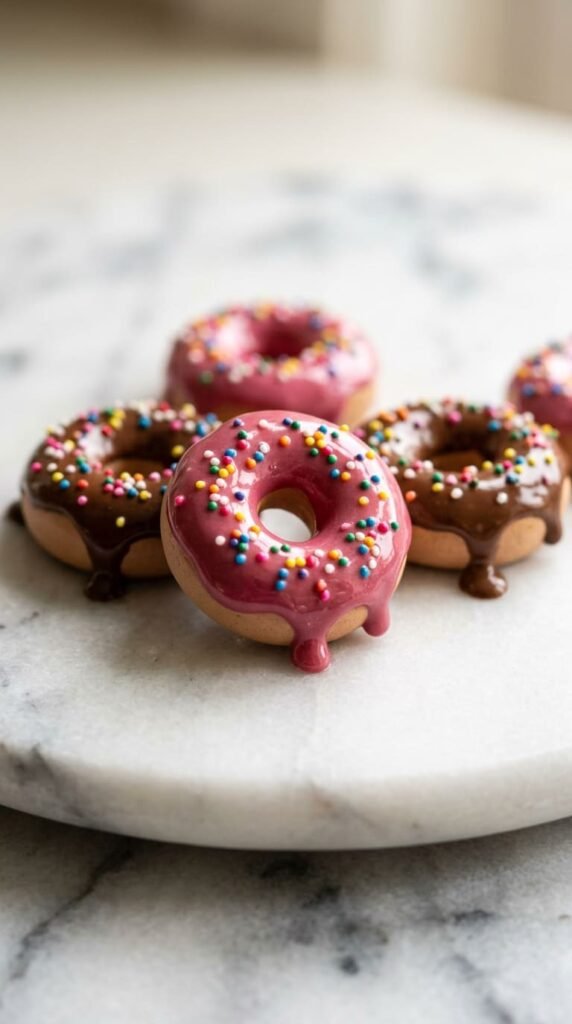
Donuts are tiny and adorable. They’re also forgiving for beginners. Roll a ball of tan clay, flatten it slightly, then poke a hole in the middle with a pencil. That’s your donut base. The fun part is the glaze. Press a thin layer of pink, brown, or white clay over the top and let it drip a little down the sides. That drip makes it look real. Add tiny rolled clay bits as sprinkles while everything is still soft so they stick. After baking or drying, coat the glaze in gloss finish for that wet, sugary shine. The donut base stays matte, so the contrast pops. Glue a magnet on the back and wait a full day. A set of three donuts in different glaze colors makes a sweet gift. You can use leftover clay scraps for the sprinkles, so nothing goes to waste. Want a budget hack? Skip fancy clay colors and just mix white clay with a dot of acrylic paint. Knead until the color spreads. Keep your donuts small, around the size of a coin. Smaller magnets are lighter, which means cheaper magnets hold them up just fine.
3. Watermelon Wedge Magnets
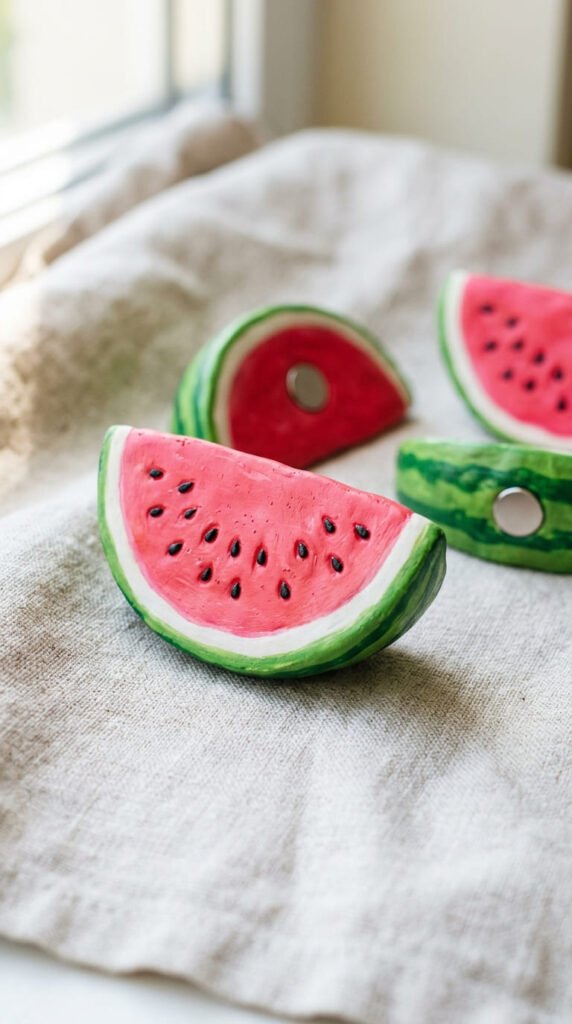
Watermelon wedges scream summer. They’re a classic for a reason. Start with a flattened triangle of pink or red clay for the fruit. Wrap a thin white strip around the curved edge, then a green strip outside that for the rind. Press the layers together gently so they bond. Now the detail that makes it: seeds. Add five to seven tiny black seeds scattered randomly across the pink. Random beats neat here. Real watermelon seeds aren’t in straight lines. After baking or air drying, you can leave it matte for a natural look. Glue your magnet, let it cure 24 hours, done. These are cheap to make in batches. One small wedge uses barely any clay. Make a whole set and gift them in a little jar. Kids love these too, so they’re great for a low-cost classroom craft. Budget tip: you don’t need three separate clay colors if money is tight. Paint the white ring and green rind onto a plain pink wedge after it dries. Acrylic paint covers air dry clay beautifully. Keep wedges a quarter inch thick. A thin watermelon tip will chip off the first time it bumps the fridge.
4. Fried Egg Magnets
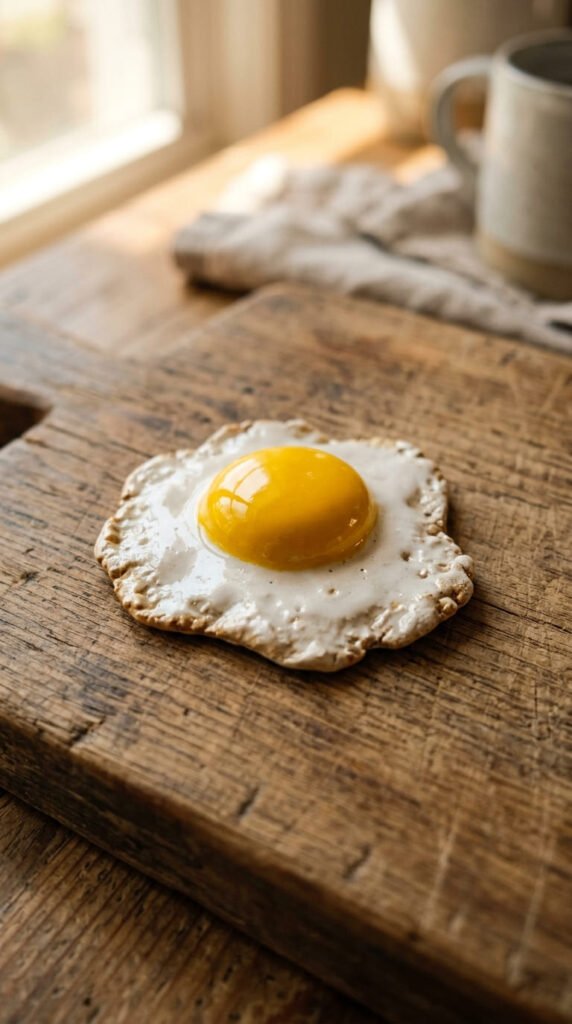
Fried eggs are weirdly satisfying to make. They look complicated but they’re not. Flatten a blob of white clay into a wobbly, uneven circle. Real fried egg whites are never perfectly round, so embrace the mess. Roll a small ball of bright yellow clay for the yolk and press it slightly into the center. That’s the whole shape. The trick to making it look real is the glossy yolk. After baking or drying, paint a thick coat of gloss varnish only on the yolk. Leave the white part matte. That contrast sells the whole thing. Want extra realism? Sprinkle a tiny bit of black pepper texture using a needle tool, or add real cracked pepper before sealing. Glue a magnet on the back and let it cure overnight. These cost almost nothing. White and yellow are common clay colors and you barely use any. A fried egg magnet is a fun, quirky gift for someone who loves breakfast. Pair it with a toast magnet for a full set. Keep the egg flat but not paper-thin. A quarter inch keeps it strong. If your white spreads too thin, it’ll crack at the edges as it dries.
5. Whimsical Mushroom Magnets

Mushrooms are the rising trend right now. They’re cute, cozy, and surprisingly easy. Shape a small dome for the cap and a short fat stem. Press them together. For the classic toadstool look, use red clay for the cap and white for the stem. Then add white polka dots by pressing tiny flattened clay circles onto the cap. You can also paint the dots on later if you only have one clay color. Want it extra charming? Give your mushroom a tiny sleepy face with two dots for eyes. Use a permanent marker after the clay is sealed. Bake or air dry, then seal it. A light gloss coat makes the cap look plump and storybook-perfect. Glue your magnet and wait a day before use. These are great gifts for anyone who loves nature or cottagecore vibes. They’re cheap too, since each mushroom is tiny. Budget hack: make a whole forest cluster from one block of clay and gift them as a set. Vary the cap sizes so they look natural. Keep stems thick and short. A long skinny stem snaps off easily. A stubby little mushroom is sturdier and honestly looks even cuter on the fridge.
6. Citrus Slice Magnets
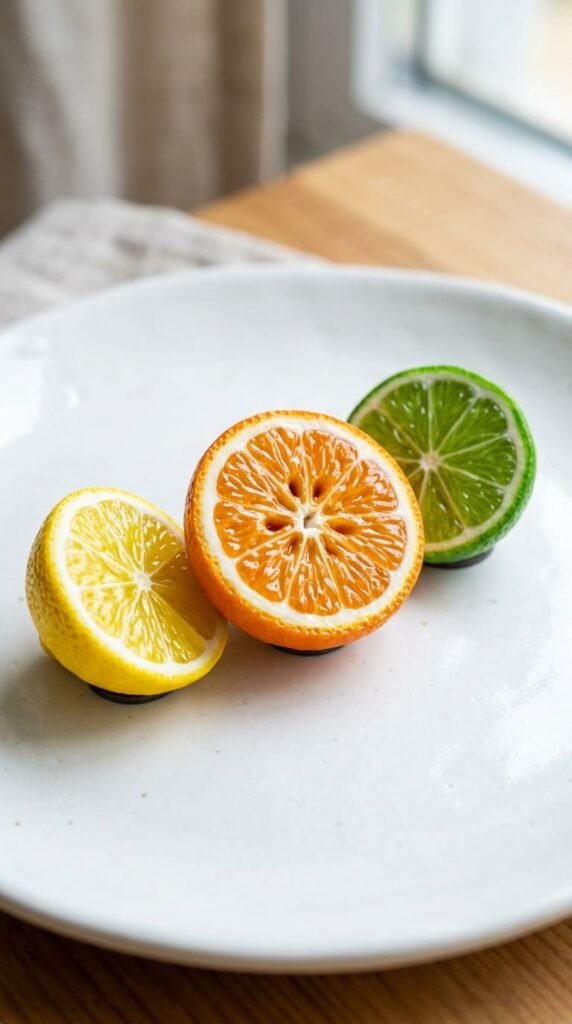
Citrus slices look impressive but follow a simple trick. Roll a round disk of orange, yellow, or green clay for the base. Then build the segments. Add thin lines of slightly lighter clay radiating from the center like spokes on a wheel. A needle tool helps you press these lines in cleanly. Wrap a thin white strip around the outer edge for the pith, then a colored rind outside that. The segmented look is what makes people stop and say wow. After baking or drying, paint a glossy coat over the fruit part so it looks juicy. The rind stays matte. Glue a magnet on, cure 24 hours, done. Want to make a fruit bowl set? Do orange, lemon, and lime in one batch. They share the same technique, just different colors. Budget tip: you only need a sliver of white clay for all three pith rings. A little goes far. Keep slices a quarter inch thick so the thin segment lines don’t crack. If you’re short on clay colors, make plain pale disks and paint the colors on after drying. Acrylic gives you orange, yellow, and green without buying three separate clay blocks.
7. Avocado Half Magnets
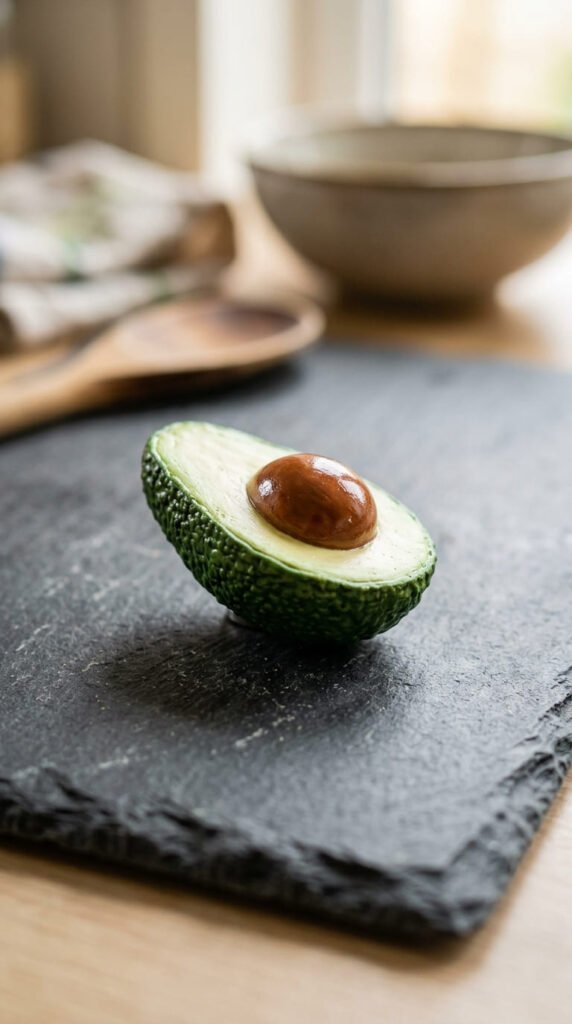
Avocados are a foodie favorite, and the magnet version is fun to make. Shape a fat oval and press a thumb dent into the middle for the pit hollow. Use pale green clay for the flesh and a thin darker green or brown layer for the skin around the edge. The pit is a small brown ball pressed into the center. The detail people love is bumpy avocado skin. Press the outside with a toothbrush or rough sandpaper to give it that classic Hass texture. It takes ten seconds and makes a huge difference. After baking or drying, give the pit a gloss coat so it looks smooth and shiny against the matte flesh. Glue your magnet, cure overnight, and it’s ready. These are great gifts for the avocado lover in your life. Budget tip: one clay block makes several avocado halves, and the texturing tools are stuff you already own. No special supplies. Keep the magnet under a quarter inch so it isn’t too heavy for a basic magnet. If you want a twist, smash some pale green clay flat for an avocado toast magnet instead. Add a fried egg on top for a brunch set.
8. Sushi Roll Magnets

Sushi rolls look fancy but break down into easy layers. Start with a short fat cylinder of dark green clay for the nori wrap. Fill the inside with a ball of white clay for the rice. Press the white with a needle tool or toothbrush to get that bumpy rice texture. Then add tiny colored bits in the center, orange for salmon, green for avocado, pink for tuna. Slice the cylinder gently to reveal the round roll face. That cross-section view is what makes it look like real sushi. Bake or air dry, then seal. A gloss coat on the fish makes it look fresh while the rice stays matte. Glue a magnet, cure a full day, and you’re set. A set of different rolls makes a clever gift for sushi fans. Budget tip: you need only small dabs of the filling colors, so a little clay stretches a long way. Keep each roll small and chunky. Thin slices crack. A short, fat little roll holds up better and is easier to handle. If your clay colors are limited, make plain white-and-green rolls and paint the fillings on after drying. The texture still reads as sushi.
9. Taco Magnets
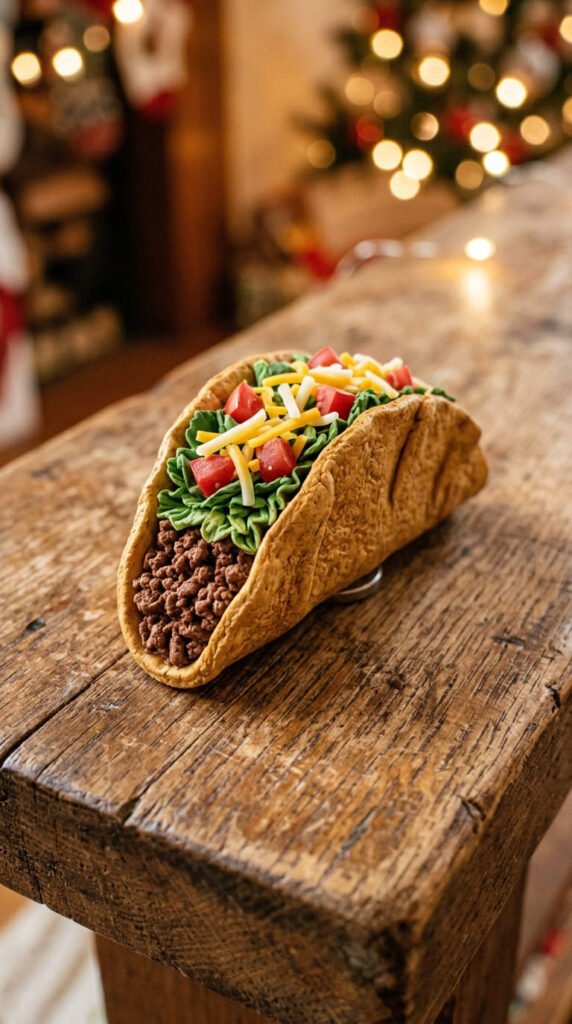
Tacos are festive and full of fun little details. Roll a circle of tan clay and fold it into a U shape for the shell. Now fill it. Brown clay pressed with a toothbrush makes ground meat texture. A thin ruffled strip of green clay becomes lettuce. Tiny red cubes are tomato. Thin yellow threads are cheese. Layer them inside the shell so the fillings peek out. The more layers, the more mouthwatering it looks. Bake or air dry, then seal. Keep the finish mostly matte since tacos aren’t glossy, but a light shine on the tomatoes adds a nice touch. Glue your magnet on the flat back of the shell and cure for 24 hours. These are a hit at any kitchen and make a playful gift. Budget tip: the fillings use tiny scraps, so this is a great way to use up leftover clay bits from other projects. Nothing wasted. Keep the shell thick enough to hold its fold without cracking. If the fold is too thin, it splits as it dries. Want a matching set? Make a few tacos with different fillings and gift them tied together. A taco trio looks great on any fridge.
10. Macaron Magnets
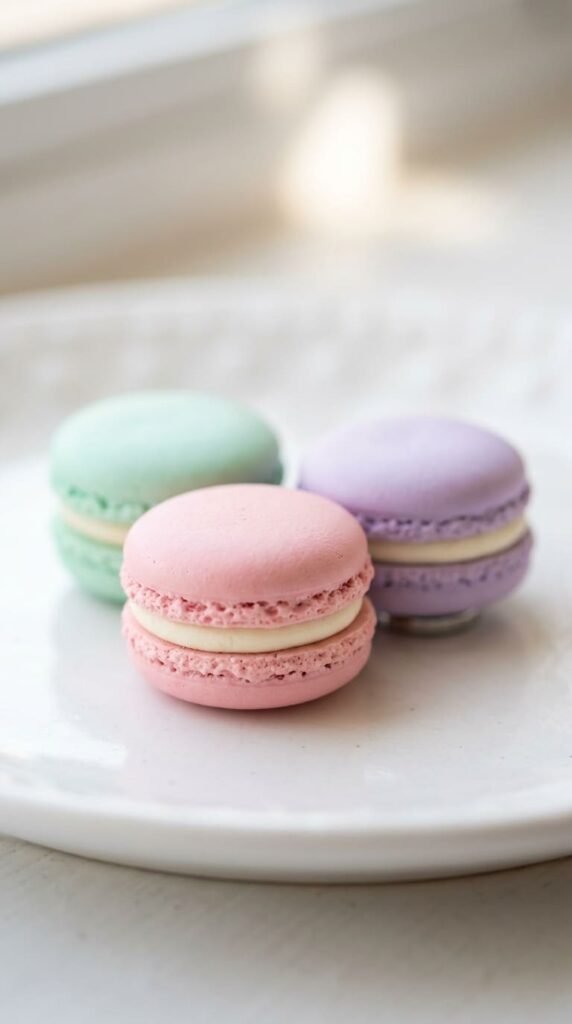
Macarons are pure cuteness. They come in soft pastel colors and look bakery-fresh. Make two small flat domes of the same color clay. These are the shells. The signature macaron detail is the ruffled foot, the bumpy ring around the base of each shell. Press the edges gently with a toothbrush to fake it. Then sandwich a thin disk of cream-colored clay between the two shells for the filling. That’s the whole macaron. Bake or air dry, then seal with a matte finish so they look soft and powdery, not shiny. Glue a magnet on the flat back and wait a day before sticking it up. Pastel macarons make elegant gifts. A box of three in different colors looks like it came from a fancy patisserie. Budget tip: pastels are easy to mix yourself. Add a tiny bit of colored clay to white clay and knead until soft. You get pink, mint, and lavender from almost nothing. Keep each shell small and thick. Thin shells crack and lose their cute dome. If you want extra realism, dust the shells lightly with chalk pastel before baking for a subtle baked tint. They’ll look almost edible.
11. Egg-on-Toast Magnets
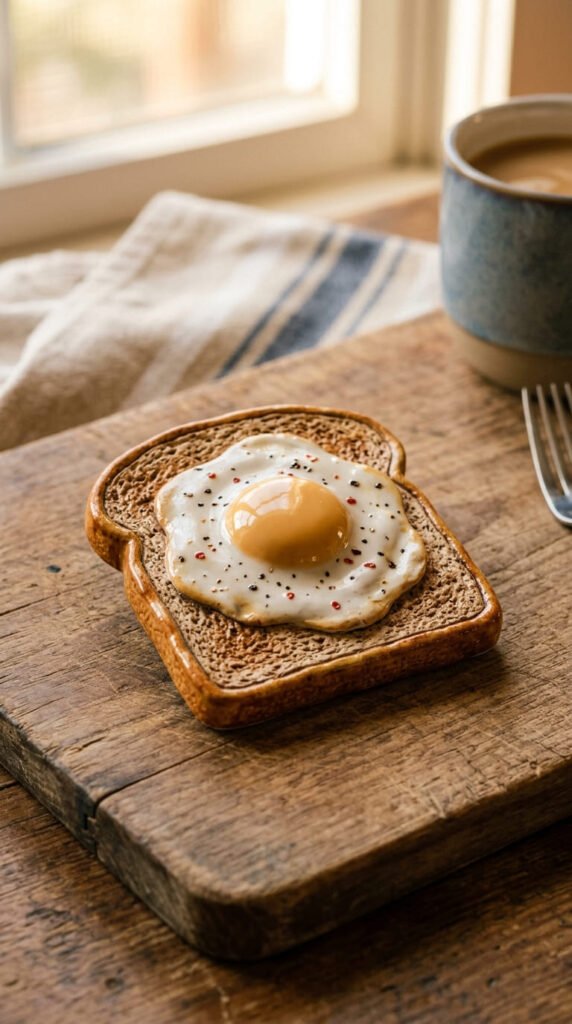
Egg on toast combines two cute ideas into one magnet. Start with a slice of toast. Roll a small square of tan clay and round the corners. Press the surface lightly with a toothbrush for that bread texture, and add a slightly darker edge for the crust. Then plop a tiny fried egg on top, a white wobbly blob with a yellow yolk in the middle. Bake or air dry, then seal. The trick is to gloss the yolk and leave the toast matte. That shine on the yolk makes the whole thing look hot and fresh off the pan. Glue a magnet to the flat back and cure overnight. This is a charming gift for breakfast people and brunch lovers. Budget tip: this uses three common clay colors and barely any of each, so it’s one of the cheapest designs here. Keep the toast a quarter inch thick. Thin toast snaps. If you don’t have yellow clay, paint the yolk after drying. A dot of bright acrylic plus gloss does the job. Want a twist? Smash some green clay under the egg for avocado toast. Same easy steps, totally different vibe. Both look adorable on a fridge.
12. Croissant & Breakfast Magnets
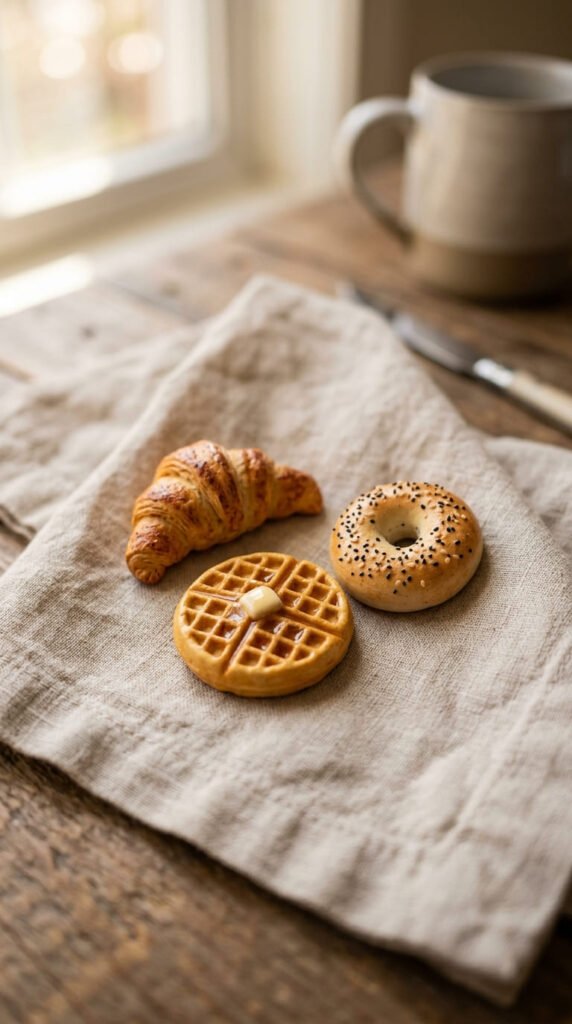
Breakfast foods are a rising magnet trend, and croissants lead the pack. For a croissant, roll a tan log, taper the ends, and curve it into a crescent. Press shallow diagonal lines across the top for the flaky layers. Brush a little brown chalk pastel on before baking for that golden color. For a waffle, flatten a circle and press a square grid into it with a knife or a real waffle-shaped tool. For a bagel, roll a ring and poke a hole. All three follow the same basic steps. Bake or air dry, then seal mostly matte with a hint of gloss on the waffle for syrup vibes. Glue magnets, cure 24 hours, done. A breakfast set makes a fun, themed gift. Budget tip: tan clay covers all three shapes, so one block goes a long way. The texture tools are stuff in your kitchen. Keep each piece thick enough to hold up. Thin croissant tips snap off, so curve them gently. If you want the golden brown look without pastels, dry-brush a little brown acrylic over the ridges after drying. It catches the texture and adds instant depth. Gift them tied together in a little bundle.
13. Leaf Impression Magnets
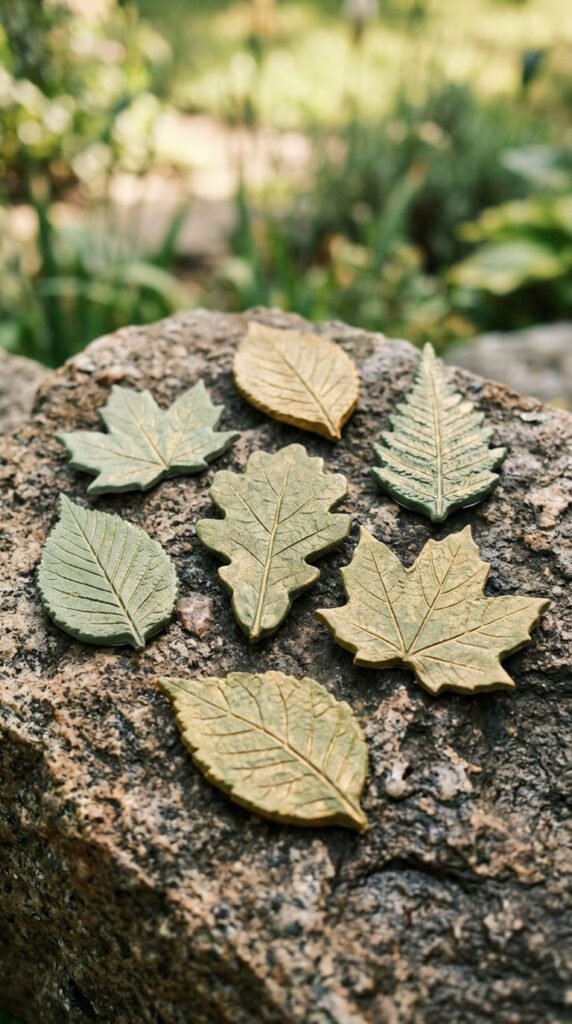
Leaf magnets are the easiest project on this list. They take about five minutes. Roll out a flat sheet of clay. Find a real leaf with nice deep veins, like mint, basil, or a maple leaf. Press it firmly into the clay, then peel it off. The veins leave a beautiful detailed imprint. Cut around the shape with a craft knife, following the leaf outline. That’s it. No sculpting skills required. Bake or air dry, then paint. Green and gold look natural, but you can go any color you like. Seal it, glue a magnet, and cure overnight. These make lovely gifts and look great on a fridge or a magnetic board. Budget tip: this is the cheapest magnet you can make. You already have leaves in your yard or a houseplant, and you use very little clay. Free texture, basically. Keep the clay a quarter inch thick so the leaf shape stays strong. Thin edges crack and curl. Want a polished look? Sand the edges smooth with fine-grit sandpaper before painting. It gives a clean, finished feel. Make a set of different leaf shapes and you’ve got a nature-themed gift that looks far more skilled than the effort it took.
14. Marbled Terrazzo Magnets
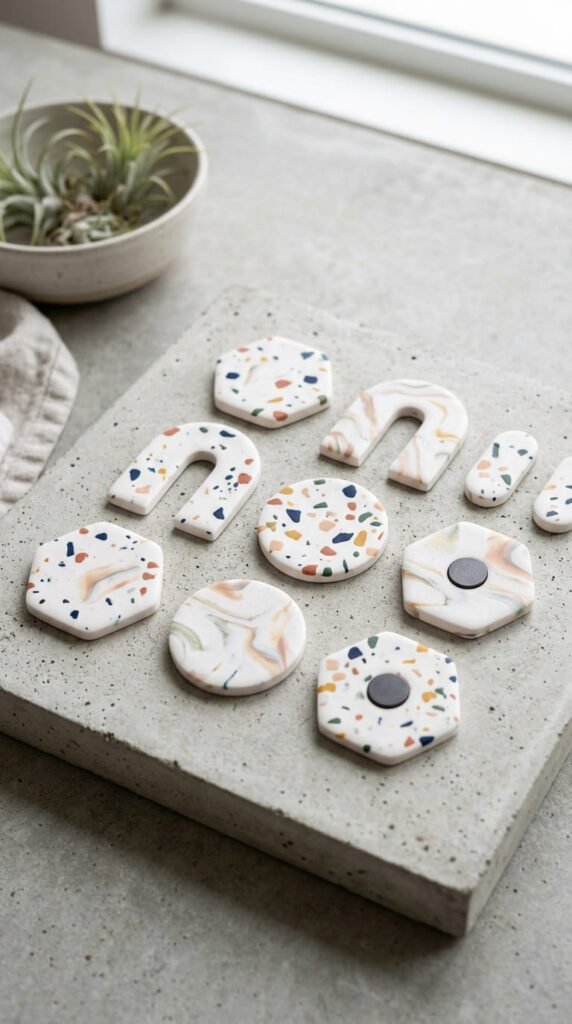
Marbled and terrazzo magnets fit modern, minimalist homes. Every piece comes out unique, which is part of the charm. For marbling, twist two or three clay colors together loosely, then roll them out. Don’t over-mix or the colors turn muddy. You want streaks and swirls, not one solid shade. For terrazzo, press tiny flecks of colored clay into a white base, then roll flat so they sit flush. Cut into circles, squares, or soft blobs with a cookie cutter or knife. Bake or air dry, then seal with a glossy coat for a polished, ceramic look. Glue a magnet on the back and cure a day. These look high-end but cost almost nothing. Budget tip: this is the perfect way to use up leftover clay scraps. Toss all your odd bits together and you get one-of-a-kind marbling for free. Keep the magnets flat and a quarter inch thick so they don’t crack. Want a calmer look? Use two soft neutral tones instead of bright colors. They suit a grown-up gift. A set of three marbled magnets in matching tones makes a stylish present for someone who loves clean, modern decor. No two will ever look the same.
15. Kawaii Critter Magnets
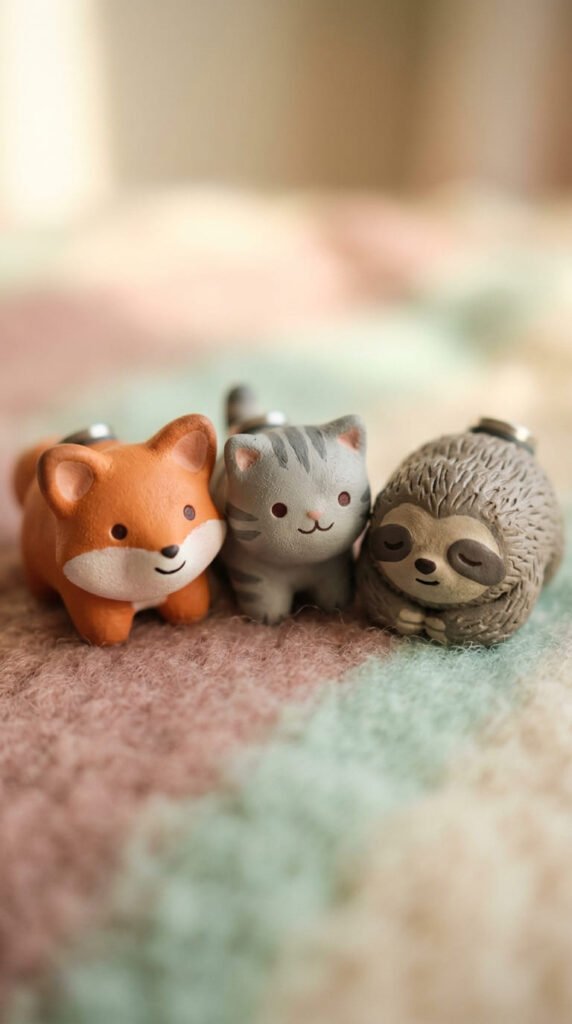
Cute little animals are gift gold. The secret to kawaii style is simple: big heads, tiny features. Make the head large and round, the body small, and keep the face minimal. Two dot eyes and a tiny smile is all you need. A fox is an orange teardrop with little ears. A cat is a round ball with triangle ears. A sloth is a beige oval with a sleepy face. Less detail looks cuter, not lazier. Bake or air dry, then add the faces with a permanent marker after sealing. That keeps the lines crisp. Seal again lightly if you want them protected. Glue a magnet on the back and cure overnight. These critters melt hearts and make great gifts for kids and adults alike. Budget tip: each animal is tiny, so one clay block makes a whole zoo. You also don’t need many colors since the faces are drawn on, not sculpted. Keep the shapes chunky and rounded. Thin ears and tails snap off, so make them short and stubby. Want a holiday set? Make a few critters in seasonal colors and gift them together. A little animal magnet brings a smile every time the fridge opens.
16. Personalized Initial Magnets
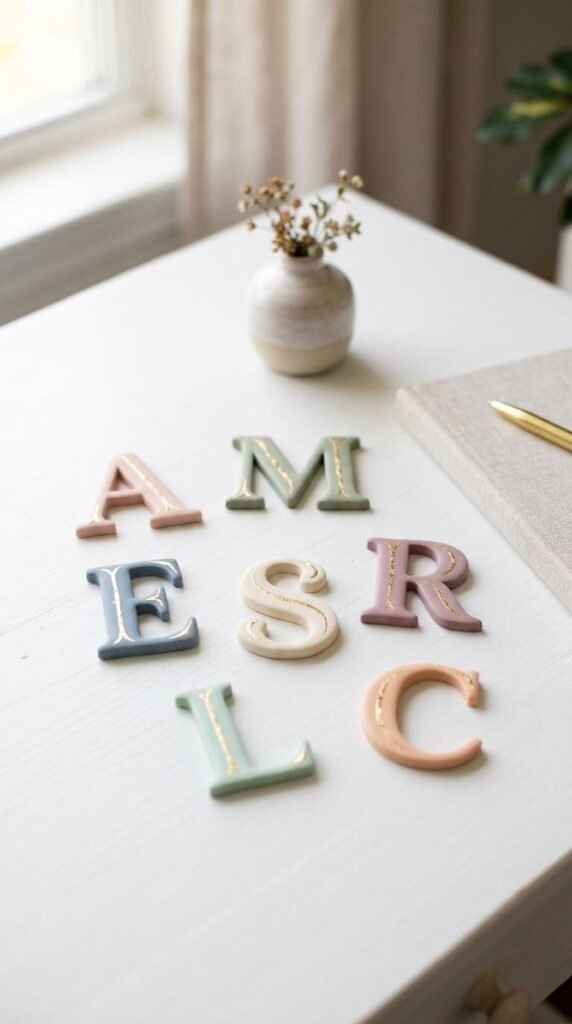
Want a gift that feels personal? Make it their initial. Personalized magnets are practical and thoughtful. The easiest way is to use alphabet cookie cutters. Roll out a flat sheet of clay, press the letter, and lift it out. No freehand sculpting required, so beginners get clean results every time. Bake or air dry, then paint. A soft base color with a thin gold edge looks elegant. You can also marble the clay first for a fancier finish. Seal, glue a magnet, and cure 24 hours. These make great gifts for weddings, housewarmings, or just a friend who loves their own name. Budget tip: alphabet cutters are cheap and reusable forever, so the cost per letter drops to almost nothing after the first set. One clay block makes a full name. Keep the letters a quarter inch thick. Skinny letters like I or L crack easily, so give them a little extra body. Want a personal gift on a budget? A single initial magnet costs maybe fifty cents to make but feels custom and special. Make a set spelling a short word or someone’s monogram. Tie a ribbon around it and you’ve got a present that looks store-bought.
17. Chalkboard Note Magnets
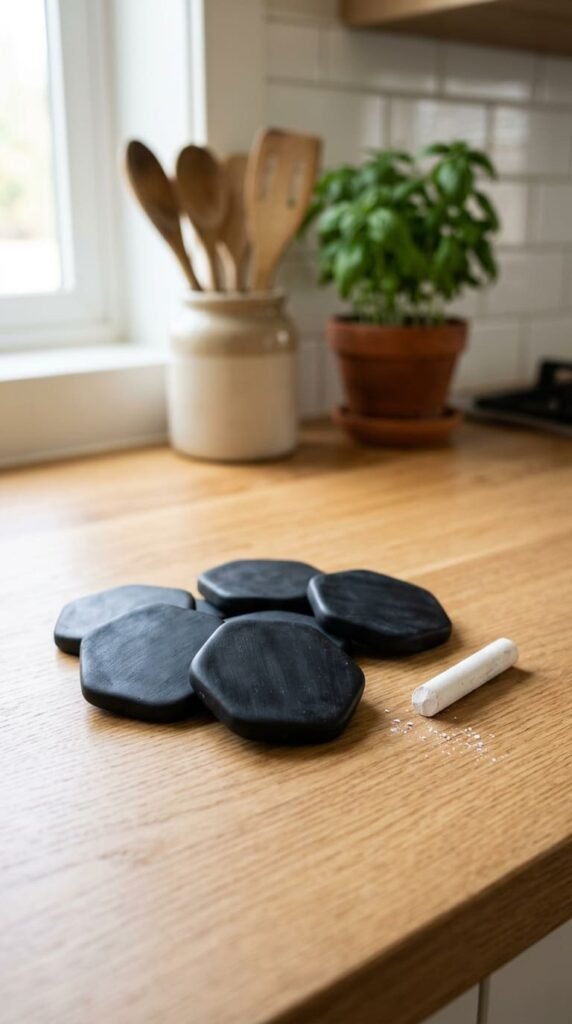
Here’s a magnet that actually does something. Chalkboard magnets let you write little notes. Shape a flat clay tile in any form, a cloud, a square, a speech bubble. Bake or air dry until hard. Then paint the front with chalkboard paint, which you can find cheaply at any craft store. Two thin coats give the best surface. Glue a strong magnet on the back and cure overnight. Now you can scribble reminders, grocery items, or sweet messages right on the fridge. Wipe and reuse forever. These are a practical gift for busy people, students, or anyone with a messy fridge. Budget tip: one small bottle of chalkboard paint coats dozens of magnets, so the cost per piece is tiny. The clay shape uses very little material too. Keep the tile a quarter inch thick so it stays sturdy under daily use. Thin tiles chip at the corners. Round the edges with sandpaper before painting for a smooth, finished feel. Want a themed gift? Make a set in matching shapes for a home office or a shared kitchen. A little chalk piece tied to the bundle makes it feel complete. Useful gifts always land well.
18. Sleeping Cloud & Star Magnets
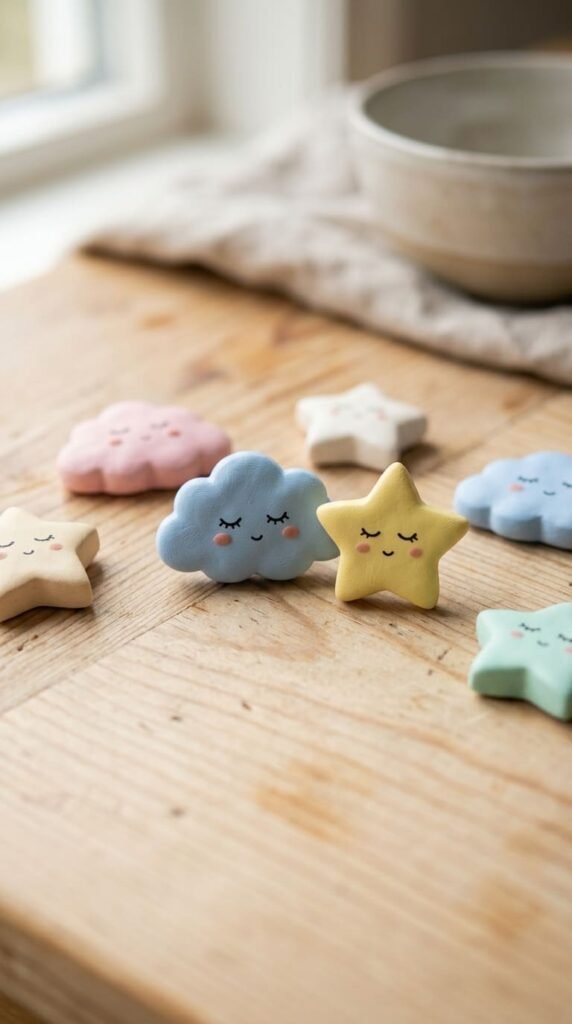
These are the coziest magnets on the list. Sleepy clouds and stars with little closed eyes. The shapes are super simple. A cloud is a soft bumpy blob. A star is a basic five-point shape you can cut with a cookie cutter. A crescent moon is an easy curve. Keep them in soft pastel colors for that dreamy bedtime feel. Bake or air dry, then seal. Add the sleepy “^^” eyes with a permanent marker after sealing so the lines stay sharp. Glue a magnet, cure a day, done. These make sweet gifts for kids’ rooms, nurseries, or anyone who loves cute decor. Budget tip: pastels are easy to mix from white clay plus a tiny dot of color, so you don’t need to buy special shades. Each piece is small, so one block makes a whole sky set. Keep star points a little chunky. Thin sharp points snap off the first time they bump something. Rounded points last longer and still read as stars. Want a calming gift set? Make a cloud, a star, and a moon in matching soft tones and gift them together. They look adorable grouped on a fridge or a child’s magnetic board.
19. Succulent Pot Magnets
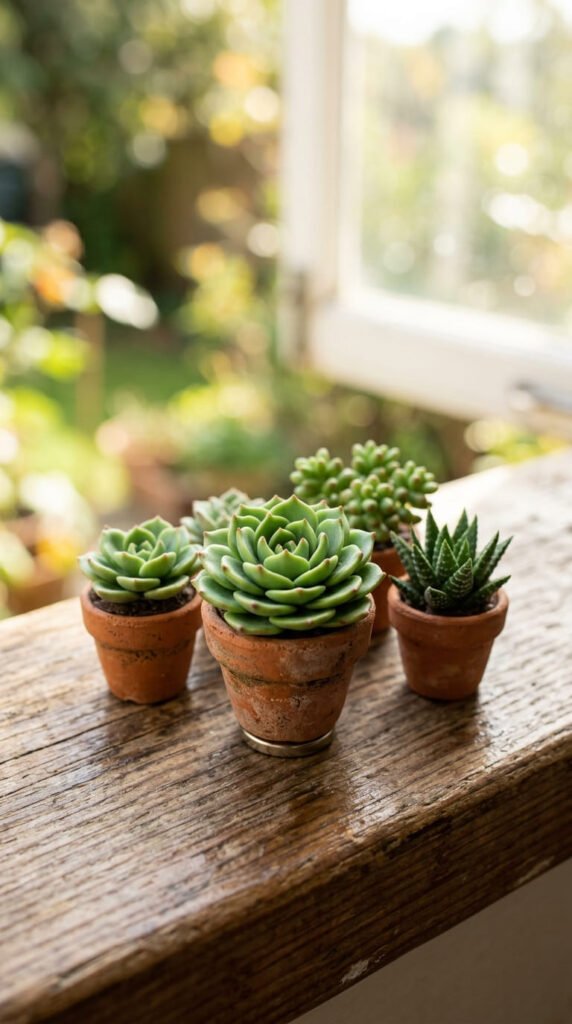
Succulents make charming little magnets that never need watering. Start with a tiny pot. Shape a small terracotta-colored cup. Then build the plant. Roll small teardrop leaves and arrange them in a spiral, starting from the center and working out. That rosette shape is what makes it look like a real succulent. Press the leaves together so they bond. Bake or air dry, then paint the leaves in soft greens with a hint of pink at the tips. A light dry-brush of lighter green adds depth. Seal, glue a magnet, cure overnight. These are a lovely gift for plant lovers who kill real plants. No green thumb required. Budget tip: each succulent uses tiny clay scraps, so it’s a great leftover-clay project. The pot uses a sliver of terracotta clay. Keep the leaves thick and short. Thin leaf tips break off easily, so make them stubby. Want a bigger gift? Make a few succulents in different shapes and group them. Some round, some pointed, some with more leaves. They look like a tiny garden on the fridge. Add a thin gold rim to the pot for a fancier touch. Plant magnets bring greenery indoors with zero upkeep.
20. Heart Magnets
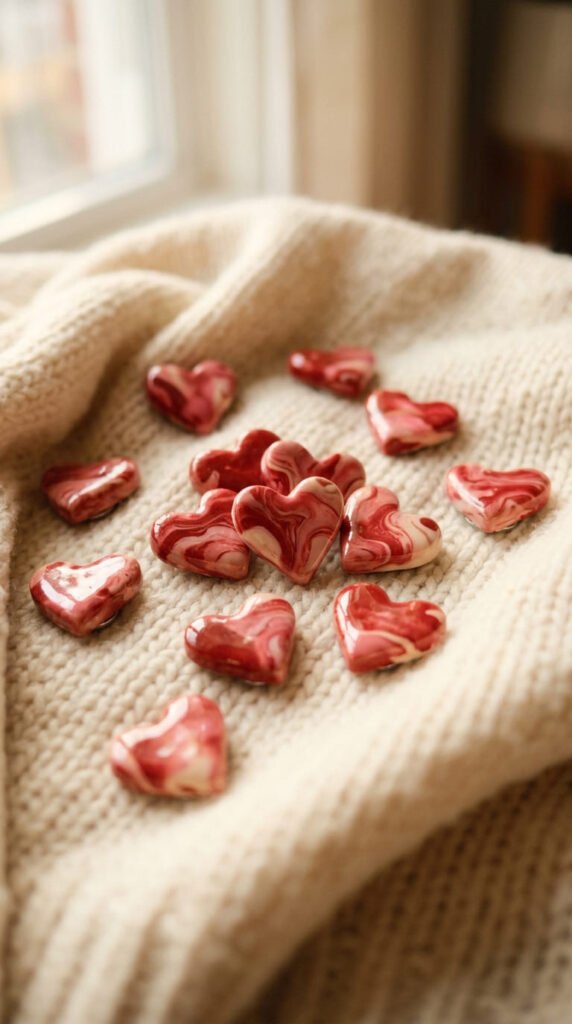
Hearts are timeless and beginner-proof. They work for Valentine’s Day, anniversaries, or just a sweet little gift. The easiest method is a heart cookie cutter. Roll out flat clay, press the cutter, and lift the shape. Clean and quick. For variety, try marbling pink and white clay first, so each heart has its own swirl. Bake or air dry, then seal. A gloss coat gives a smooth candy-like finish, while matte feels softer and more handmade. Both look great, so pick your vibe. Glue a magnet on the back and cure a full 24 hours. These make affordable gifts for almost any occasion. Budget tip: one heart cutter and one clay block make a dozen hearts for a few dollars. Cheaper than a single store card. Keep them a quarter inch thick so the points don’t crack. The bottom tip of a heart is the weak spot, so give it a little extra body. Want a personal touch? Press a tiny initial into one heart before baking. Or stack a small heart on a bigger one for a layered look. A set of marbled hearts tied with twine makes a thoughtful, low-cost present that feels far more special than the price tag.
21. Scented Bakery Magnets
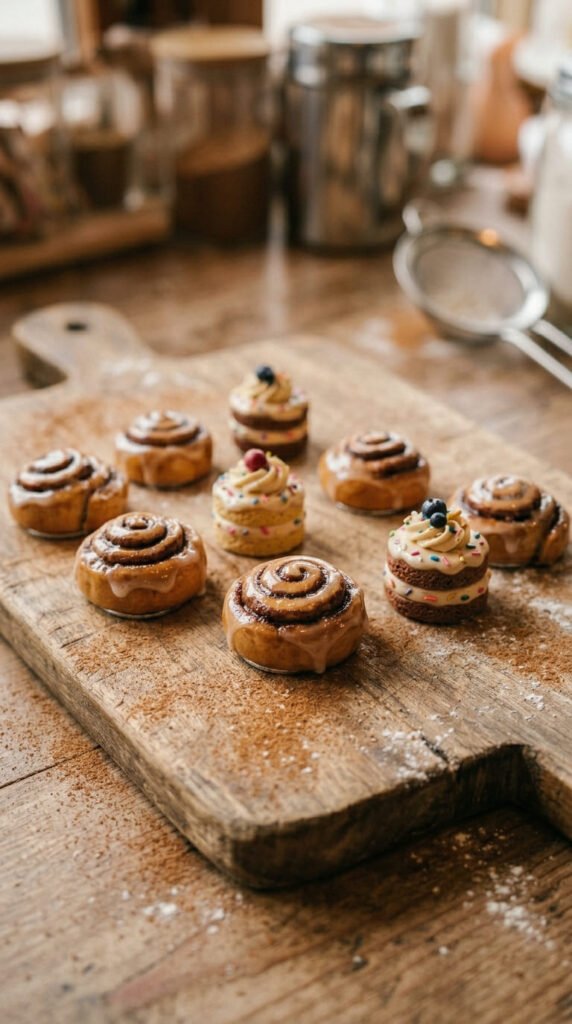
Want a magnet that smells as good as it looks? Add a scent. A drop of vanilla or bakery fragrance oil mixed into the clay gives a subtle smell that lasts. This works best with air dry clay, since baking can burn off the scent. Shape bakery treats like cinnamon rolls, mini cakes, or cookies. A cinnamon roll is a tan spiral with a swirl of brown inside and white icing on top. Let it dry fully, then seal the icing with gloss and leave the dough matte. Glue a magnet, cure overnight. These are a delightful sensory gift, especially for anyone who loves cozy kitchen vibes. Budget tip: a tiny bottle of fragrance oil scents many magnets, so the cost spreads thin. The clay shapes use small amounts. Keep pieces thick enough to hold their form. Thin cinnamon roll edges crack as they dry. If you don’t have fragrance oil, you can still skip the scent and the magnets look just as cute. Want a gift set? Make a few different bakery treats and tuck them into a little box with tissue. The faint vanilla smell when they open it is a sweet surprise. Scent makes a simple gift feel extra special.
22. Mini Quote Plaque Magnets
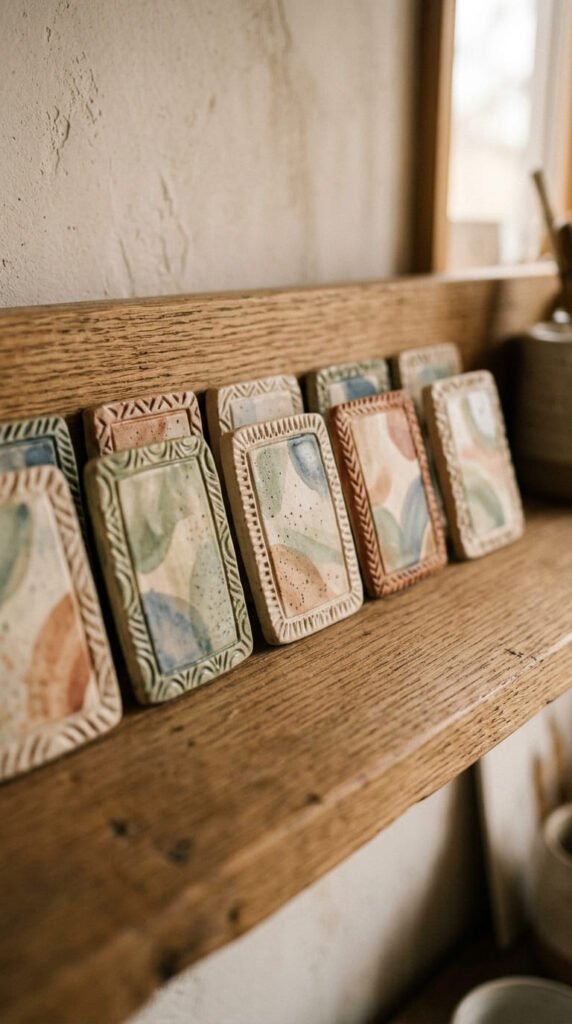
Tiny plaques make sweet, sentimental gifts. Roll a flat rectangle or oval of clay and round the corners. Press a simple decorative border around the edge with a needle tool or a stamp. You can carve a small design like a flower or a sun in the corner. Keep it clean and pretty. Bake or air dry, then paint the background a soft color. A dry-brush of a lighter shade over the border makes the texture pop. Seal, glue a magnet, and cure overnight. These work as little keepsake gifts, especially with a meaningful design pressed in. Budget tip: one clay block makes several plaques, and stamps can be anything around the house, a button, a coin, a textured leaf. Free patterns everywhere. Keep the plaque a quarter inch thick so it holds up. Thin plaques crack along the flat surface. Sand the edges smooth before painting for a polished, gift-worthy finish. Want a personal present? Press a small symbol that means something to the person, a paw print for a pet lover, a wave for a beach fan. The thoughtfulness shows. A little painted plaque magnet looks like artisan work but costs only pennies to make at home.
23. Tiny Photo Frame Magnets
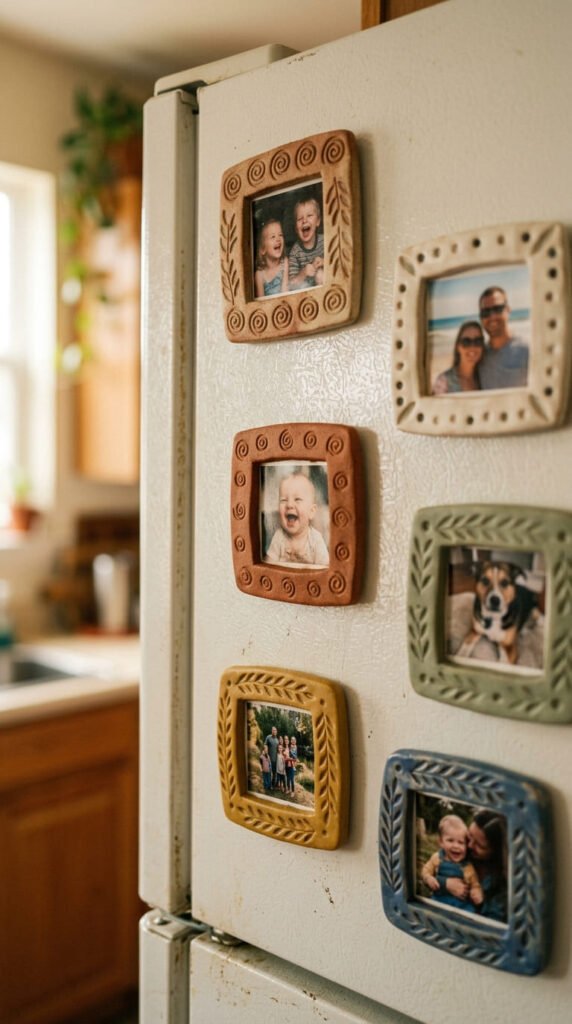
A photo frame magnet holds a memory right on the fridge. Roll a flat clay square and cut a smaller square hole in the center for the photo window. Decorate the frame border with pressed patterns, dots, or a marbled finish. Bake or air dry, then paint and seal. Glue a strong magnet on the back, cure overnight, then tape a tiny photo behind the window. Simple and sentimental. These make heartfelt gifts for family, especially with a printed snapshot already inside. Budget tip: you print photos tiny, so even a single photo sheet makes many. The clay frame uses little material. One block makes several frames. Keep the border thick and a quarter inch deep so it doesn’t crack around the open window. Thin frame edges snap easily, so give them enough body. Sand the frame smooth before painting for a clean look. Want a personal gift? Make a frame and slip in a photo of you and the person before wrapping it. That instant memory makes it feel priceless even though it cost almost nothing. A set of small frames for a grandparent’s fridge, each with a different grandkid, turns cheap clay into a treasured present.
24. Color Block Geometric Magnets
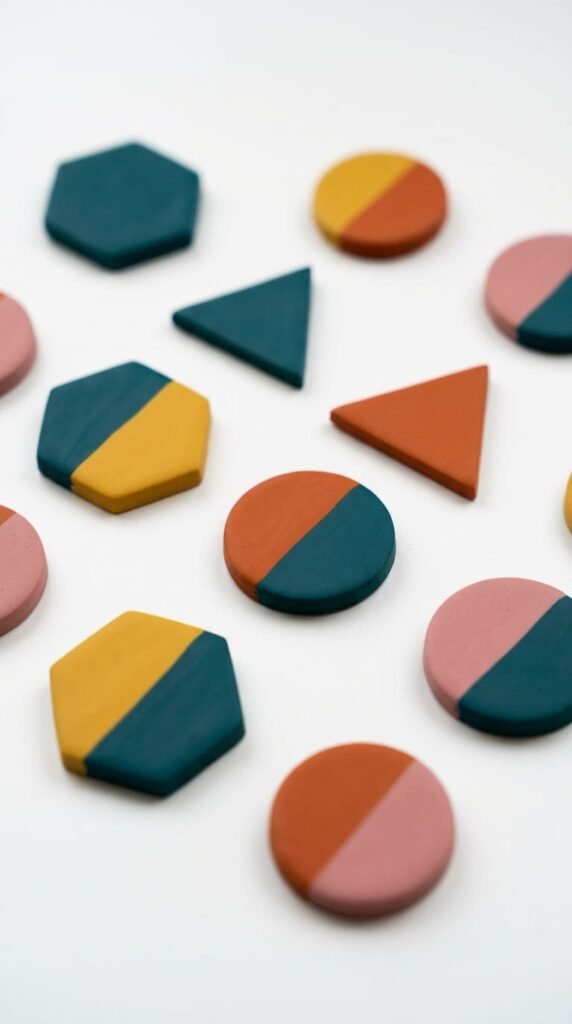
For a modern, grown-up gift, go geometric. Color block magnets are clean, simple, and stylish. Cut clay into hexagons, triangles, or circles using cookie cutters or a knife and a ruler. Press two contrasting colors together for a half-and-half block, or layer a small shape over a bigger one. The straight lines and bold colors feel contemporary. Bake or air dry, then seal with a glossy finish for a sleek ceramic look. Glue a magnet on the back and cure a day. These suit a minimalist home and make a tasteful gift for someone with modern taste. Budget tip: this is another great scrap-clay project. Combine leftover colors into clean blocks for free. Cutters give you perfect shapes with zero skill. Keep the magnets flat and a quarter inch thick so they don’t snap. Sand the cut edges smooth for crisp, professional lines. That extra step separates handmade-cute from handmade-amateur. Want a coordinated gift set? Pick two or three colors that match and make a small collection of shapes. Group them on a fridge and they look like designer magnets. The whole set costs a couple of dollars but reads as something you’d buy at a boutique. Simple, sharp, and giftable.
25. Honeycomb & Bee Magnets
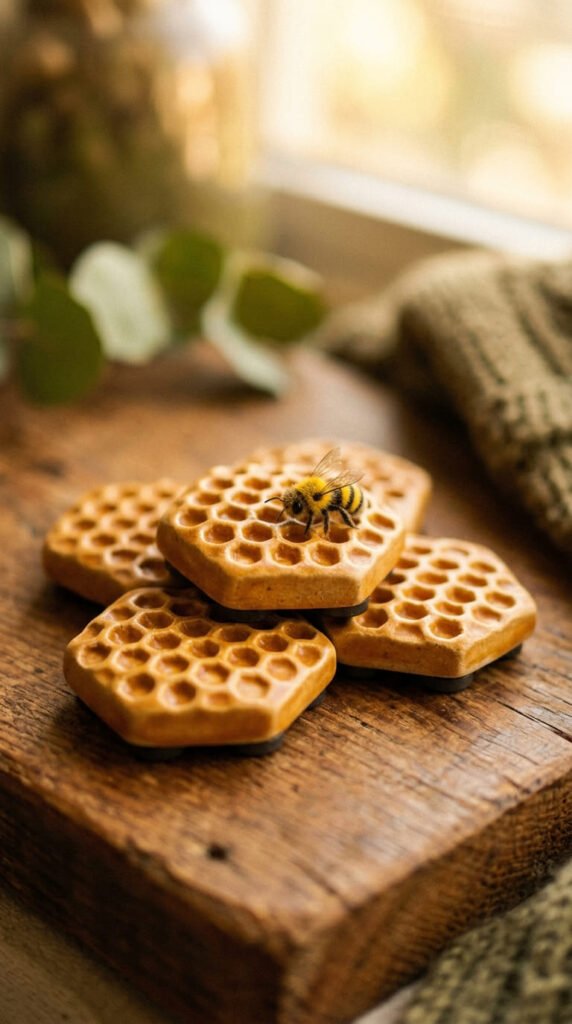
End on something sweet: honeycomb with a little bee. For the honeycomb, roll a golden clay tile and press a hexagon pattern into it using bubble wrap or a small hex stamp. That texture instantly reads as honeycomb. Brush a glossy amber coat over it after sealing so it looks like dripping honey. For the bee, roll a tiny yellow oval and add thin black stripes. Two small flattened white bits become wings. Press the bee onto the honeycomb before baking or drying so they stick. Seal, glue a magnet, cure overnight. These charming magnets make a warm, cozy gift. Budget tip: bubble wrap for the honeycomb texture is free, and each piece uses little clay. One golden block makes a whole hive. Keep the tile a quarter inch thick so the textured surface doesn’t crack. The bee should be small and chunky so its wings don’t snap off. Give the wings a little body. Want a fuller gift? Make a few honeycomb tiles with bees in different spots and gift them as a set. The golden gloss catches the light beautifully on a fridge. Sweet, simple, and a happy note to end your magnet-making on.
Conclusion
Clay magnets prove that the best gifts don’t cost much. With one block of clay, a few cheap tools, and an hour of your time, you can make something cute, personal, and genuinely useful. Pick a few designs from this list, food art if you want fun, geometric if you want sleek, photo frames if you want sentimental. Remember the basics that make them last: keep your clay a quarter inch thick, use a strong neodymium magnet with E6000 glue, and let that glue cure a full 24 hours before sticking anything up. Seal your work for a finish that holds up. Start with the easy ones like leaf imprints or hearts, then work your way to layered food magnets as you gain confidence. Mix scraps for free marbled designs. Print tiny photos for frames. Add a drop of scent for a sweet surprise. Each little magnet you make is cheap to produce but feels handmade and thoughtful, which is exactly what makes a gift memorable. Grab some clay this weekend and make a set. Your fridge, and everyone you gift them to, will thank you.