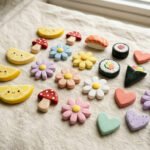
Ever stared at a blank fridge and wished it had a little personality? Clay magnets fix that fast. They’re cheap, they’re cute, and you can make a whole batch in under an hour. No fancy skills, no expensive tools, just clay, magnets, and a bit of fun. Whether you want food-shaped magnets, tiny animals, or simple hearts, this guide walks you through every step.
Let’s make some.
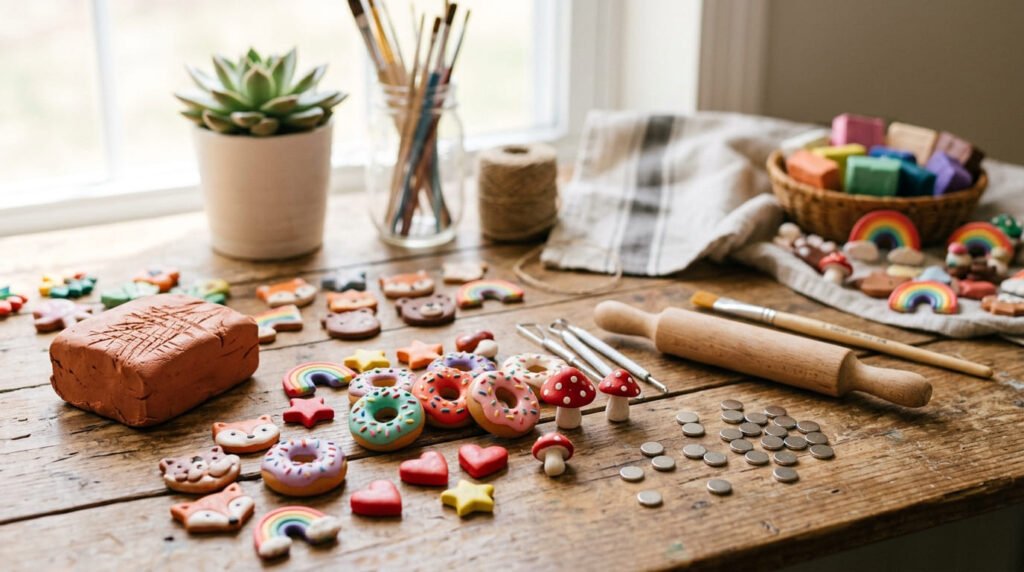
What You’ll Need
The supply list is short and easy on your wallet. Most of this costs under $15 total.
- Clay — air dry clay (no oven needed) or polymer clay (bakes hard and durable)
- Small magnets — neodymium magnets work best because they’re strong and flat
- Strong glue — E6000 or Gorilla Glue, not regular craft glue
- Rolling pin — or a smooth glass or bottle
- Cookie cutters — your secret weapon for clean shapes
- Acrylic paint — for color
- A toothpick or needle tool — for texture and tiny details
- Clear varnish — gloss for a shiny finish, matte for a soft one
That’s it. You probably have half of this at home already.
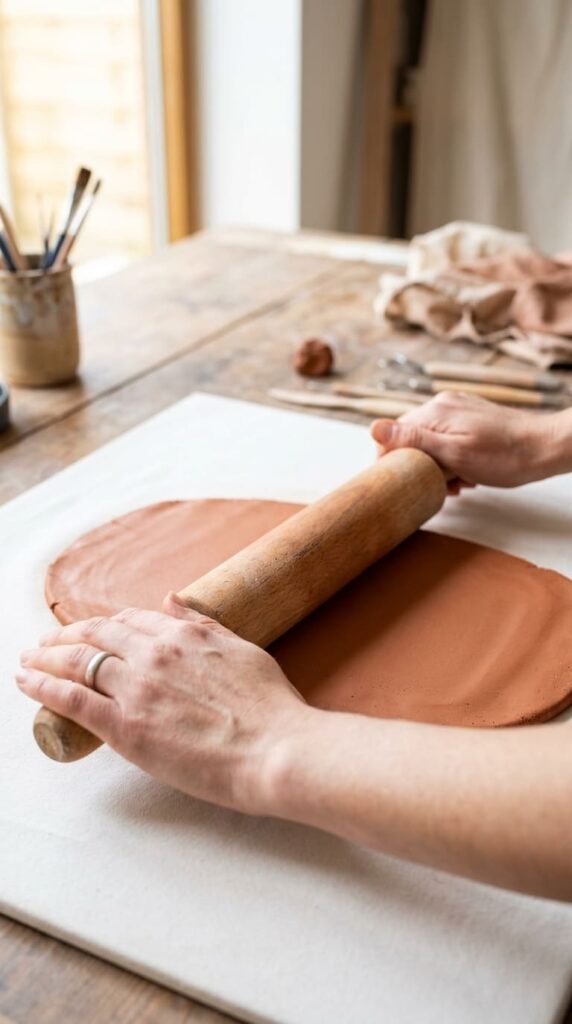
Step 1: Roll Out Your Clay
Start by softening the clay in your hands for a minute. This makes it easier to shape.
Then roll it flat on a smooth surface. Aim for about a quarter inch thick. Too thin and it cracks. Too thick and it looks chunky.
A small piece of plexiglass or a plate makes a great work surface since the clay lifts off easily.
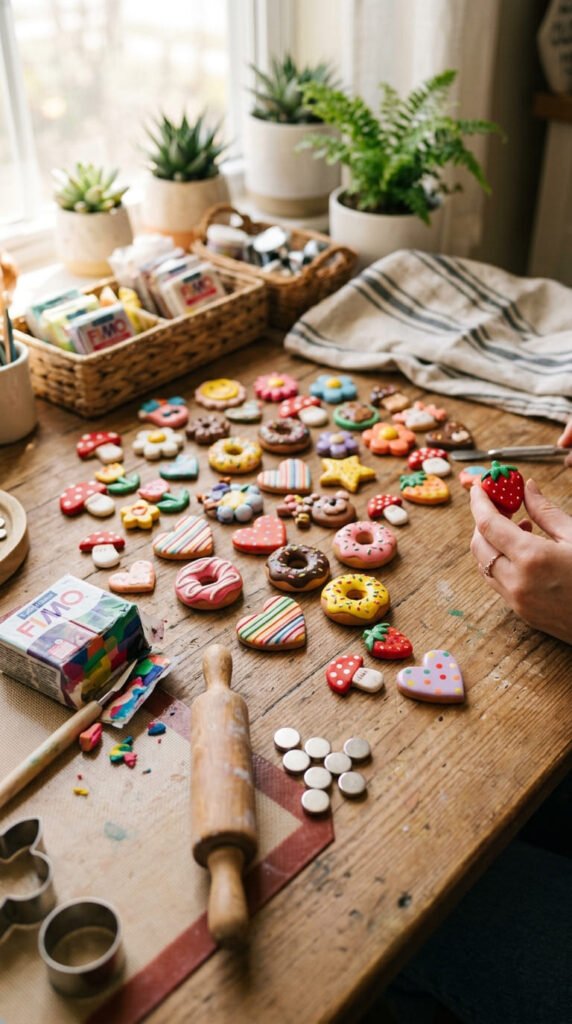
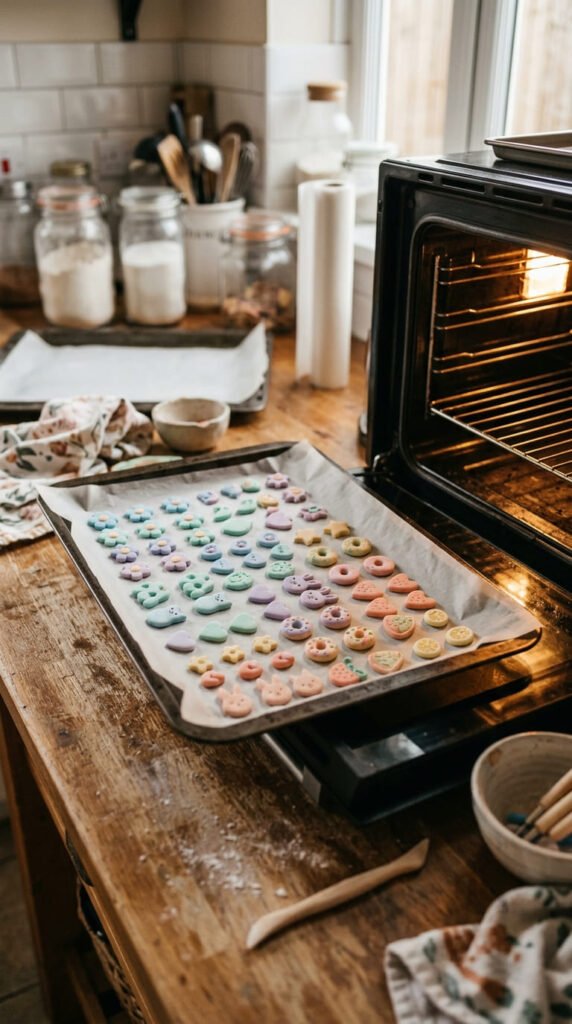
Step 2: Cut and Shape
Now for the fun part. Press a cookie cutter into the clay and lift out your shape. Hearts, stars, flowers, animals, whatever you like.
No cutter? Use a craft knife and cut freehand. Simple shapes look great too.
Want texture? Try these quick tricks:
- Press a real leaf into the clay for instant veins
- Poke tiny dots with a toothpick for seeds or eyes
- Use a fork or stamp for patterns
Keep shapes small. Smaller magnets are lighter, which means cheap magnets hold them up just fine.
Step 3: Dry or Bake
This step depends on your clay.
Air dry clay: Just leave it out at room temperature for 24 to 48 hours. Flip it halfway so both sides dry evenly. You’ll know it’s done when the color shifts from gray to a lighter, even tone and it feels hard.
Polymer clay: Bake at 275°F (130°C) for 15 to 30 minutes on parchment paper. Let it cool completely before touching.
Don’t rush the drying. Damp clay underneath leads to cracking later.
Step 4: Sand and Paint
Once your magnet is hard, run fine-grit sandpaper (around 150 grit) over the edges. This smooths out fingerprints and rough spots, especially on air dry clay.
Then paint. A few tips for clean results:
- Use thin coats and let each dry before adding the next
- Try dry brushing for texture: dab a tiny bit of paint on a dry brush and lightly sweep it over raised areas
- Use a paint pen for tiny details like eyes or dots, since it’s easier than a brush
When you’re happy with the color, seal it with varnish. Gloss makes food magnets look good enough to eat. Matte keeps things soft and natural.
Step 5: Attach the Magnet
Almost done. Flip your magnet over and dab strong glue on the back. Press a magnet firmly into place.
Here’s the part people skip: let the glue cure for a full 24 hours before sticking anything on the fridge. If you rush this, the magnet pops right off.
Using Gorilla Glue? It expands a little as it dries. Wipe away any excess with a toothpick before it sets.

Quick Tips for Better Magnets
A few small things make a big difference:
- Mix your own colors. Add a dot of paint or colored clay to white clay and knead it in. Saves money on buying every shade.
- Use scraps. Twist leftover clay bits together for a marbled look. No two come out the same.
- Make themed sets. A trio of fruit, animals, or hearts makes a sweet handmade gift.
Time to Get Crafting
That’s all there is to it. In under an hour of hands-on work, you’ve got custom magnets that look store-bought but cost pennies. They make thoughtful little gifts, brighten up a boring fridge, and use up clay scraps you’d otherwise toss.
Start with one easy shape, then build a whole collection as you get the hang of it.
Save this guide for your next craft afternoon and have fun making your own!