You’ve seen those tiny clay magnets online that look almost too perfect to be handmade. Crisp edges, smooth surfaces, glossy little details. Here’s the good news: you can make them at home, and it’s easier than it looks. The difference between a magnet that looks homemade and one that looks professional comes down to a few simple habits. Conditioning your clay, baking it right, and finishing it well. Let’s walk through every step so your first batch looks like it came from a boutique.
What You’ll Need
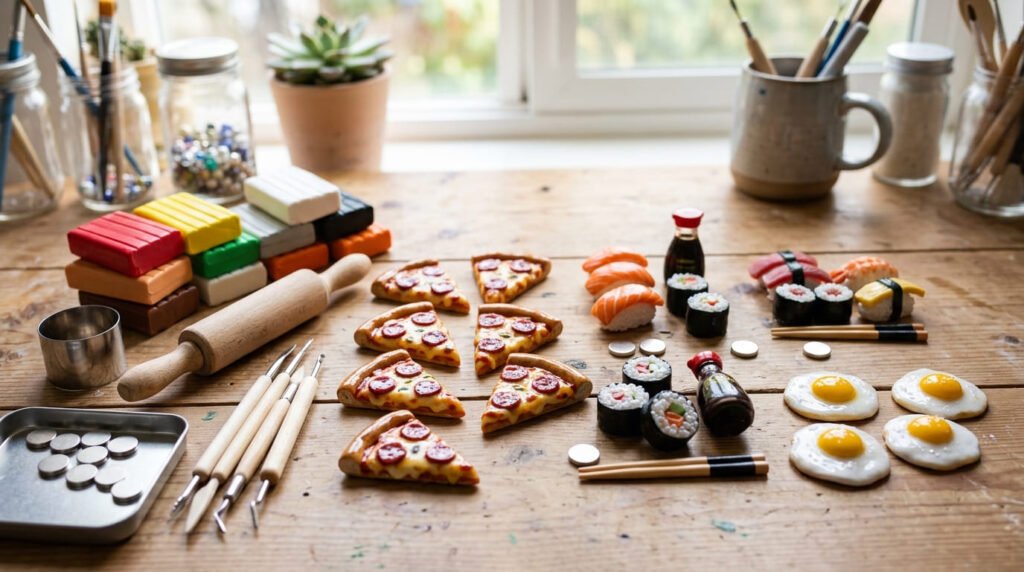
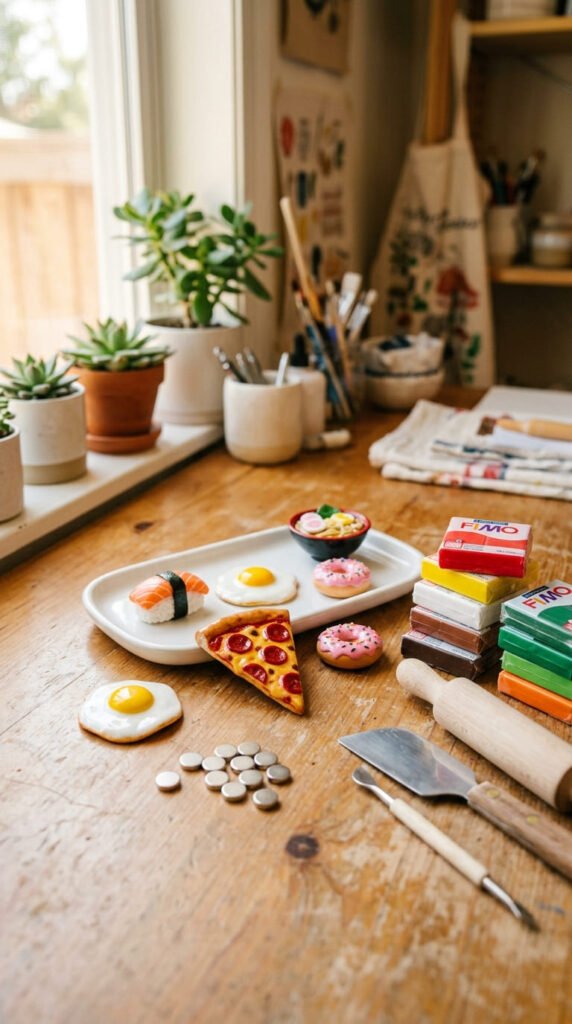
The supply list is short and budget-friendly. The whole kit runs under $15.
- Polymer clay (also called oven bake clay), like Sculpey
- Small strong magnets — flat neodymium or ceramic
- Super glue or Gorilla Glue — not regular craft glue
- Rolling pin — or a smooth drinking glass
- Cookie cutters — for clean shapes without sculpting
- A toothpick or needle tool — for texture and details
- Acrylic paint (optional, for accents)
- Gloss or matte varnish — for that finished look
- A tile or oven-safe dish — for baking
That’s the lot. Most of it you can find at any craft store.
Step 1: Condition Your Clay
This is the step beginners skip, and it’s the one that separates amateur from professional. Fresh from the package, polymer clay is stiff. Conditioning softens it so it shapes cleanly and bakes without cracks.
Just knead it in your hands. Roll it, fold it, squeeze it. After a couple of minutes it turns soft and smooth. A pasta machine speeds this up if you have one, but your hands work fine.
Soft, well-conditioned clay is the foundation of a clean magnet.
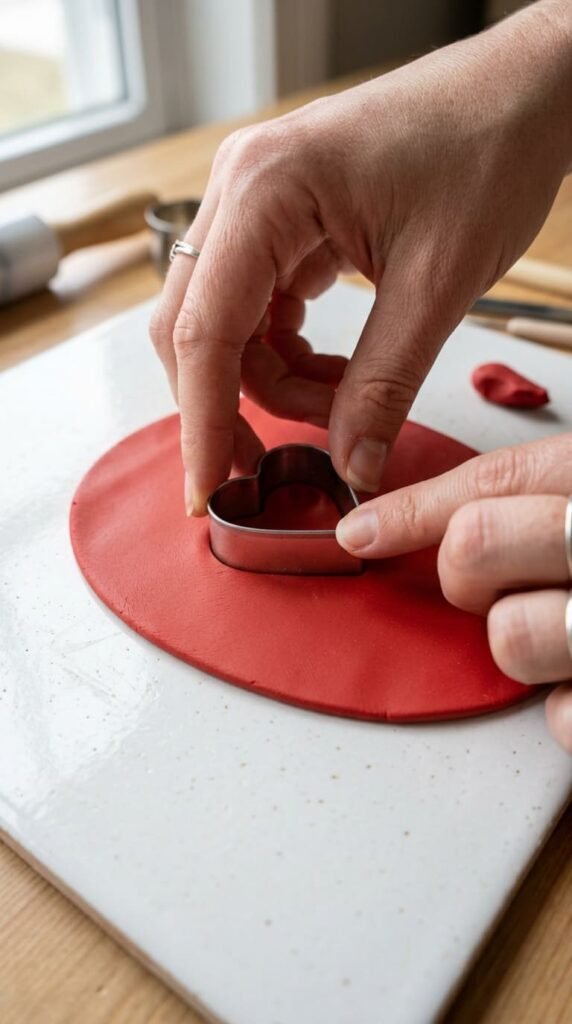
Step 2: Roll and Cut
Roll your clay flat on a tile or a small piece of glass. Aim for 1/8 to 1/4 inch thick. Too thin and it crumbles. Too thick and it looks clunky.
Then shape it:
- Press a cookie cutter for instant clean shapes
- Use a craft knife for custom designs
- Build 3D shapes by stacking small coils and slabs
A tile makes a great work surface because you can bake right on it without moving your design.
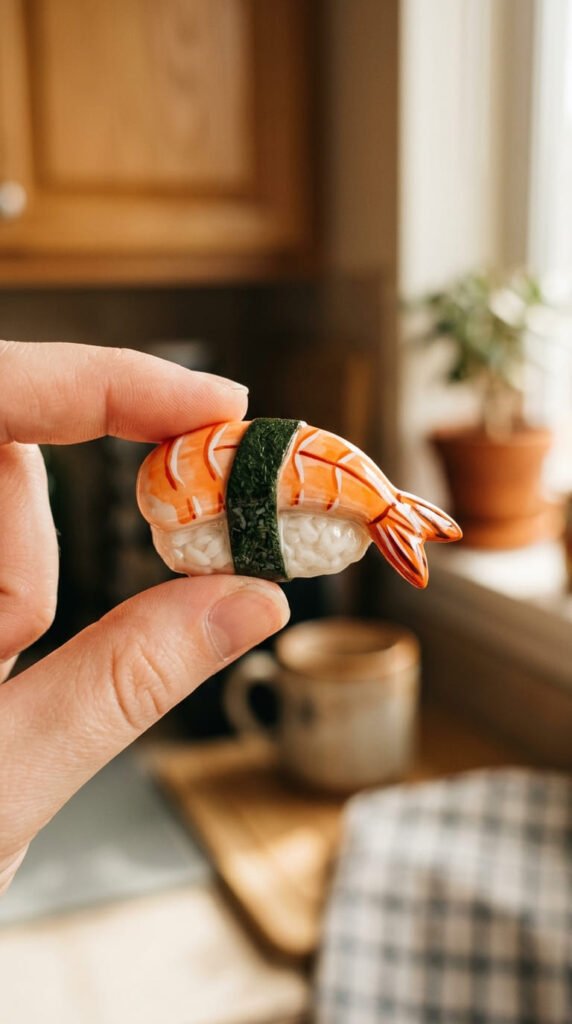
Step 3: Add Texture and Detail
This is where magnets start looking real. Small textures add depth.
- Press a toothpick for dots, seeds, or patterns
- Use a real leaf or fabric for surface texture
- Press a texture sheet for bread, cookie, or basketweave looks
Keep details small and intentional. A few well-placed marks read as “crafted.” Too many look messy.
Take a moment to smooth your edges with a finger before baking. Clean edges are a huge part of that professional finish.
Step 4: Bake It Right
Now the part people fear, but it’s simple. Place your design on a tile or oven-safe dish.
Bake at 265°F (130°C) for 15 to 30 minutes, depending on thickness. Always check your clay package, since brands vary slightly.
A few rules for clean results:
- Don’t crank the heat. Too hot and the clay scorches or turns brown.
- Use an oven thermometer if you can. Many ovens run hot.
- Let it cool completely before touching. Warm clay is soft and bends, but it hardens as it cools.
Rushing the cooling is a common mistake. Be patient here.
Step 5: Finish Like a Pro
Once cool, this is where the magic happens. Two small touches make your magnet look store-bought.
Sand the edges. Run fine-grit sandpaper over any rough spots. This smooths fingerprints and gives clean lines.
Add a finish. A coat of varnish changes everything:
- Gloss makes food magnets look juicy and fresh-sliced
- Matte keeps a soft, natural, modern look
For painted accents, try dry brushing. Dab a tiny bit of paint on a near-dry brush and sweep it lightly over raised areas. It catches texture and adds shadow and depth in seconds.
Step 6: Attach the Magnet
Almost done. Flip your magnet over and dab strong glue on the back. Press a magnet firmly into place.
Here’s the part to never skip: let the glue cure for a full 24 hours before sticking anything on the fridge. Rush it and the magnet pops right off.
Using Gorilla Glue? It expands a little as it dries, which fills any gaps nicely. Just wipe away excess with a toothpick before it sets.
A Few Pro Tips
Small habits that make a big difference:
- Make themed sets. A pizza, sushi, and donut trio looks intentional and makes a great gift.
- Mix your own colors. Knead two clay colors together for custom shades.
- Keep a light touch. Less detail, done cleanly, beats lots of detail done messily.
Ready to Get Crafting
That’s the whole process. Condition your clay, roll it even, bake it cool and low, then sand and seal. Those few steps turn a simple shape into a magnet that looks professionally made, all for a couple of dollars and an afternoon of fun. Start with one easy design, get a feel for the steps, then build a whole collection.
Save this guide for your next craft day and make some magnets you’ll be proud to gift!