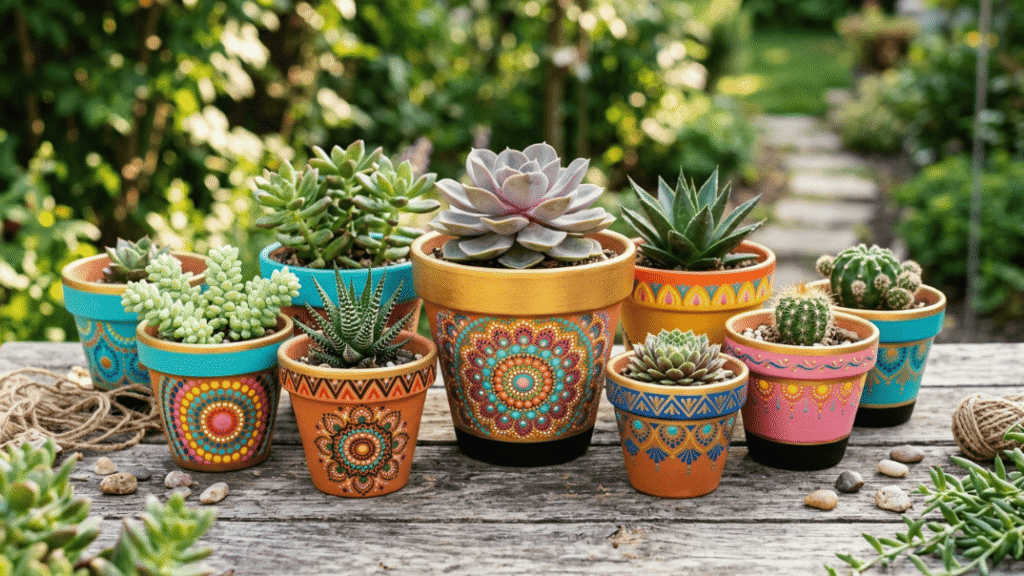
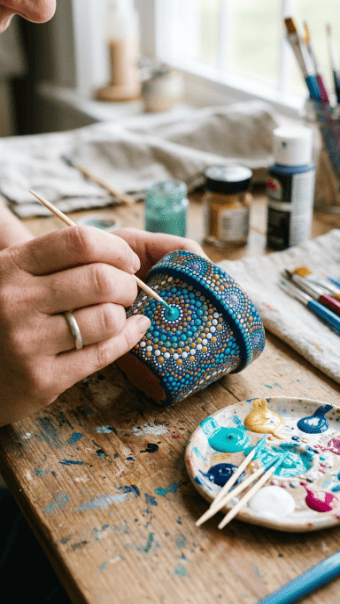
Mandala flower pot painting turns plain planters into calm, handmade decor with dot art, radial symmetry, acrylic color rings, and boho-style detail. The best part is simple: you can start with a cheap terracotta pot, a few paint colors, and homemade dotting tools. Crochet hooks, toothpicks, pencil ends, and cotton swabs can all work. The trick is patience. Build from the center outward, let dots dry, and stop before the design gets crowded.
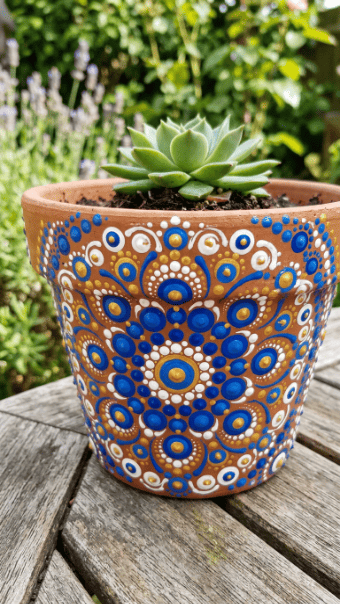
1. Classic Dot Mandala Terracotta Pot
Start with a plain terracotta pot. Wipe off dust first. Clay holds loose grit, and paint will drag if the surface is dirty.
Use a light primer or thin white base if the clay is very porous. This helps your dots sit on top instead of sinking in.
Pick three acrylic colors. White, turquoise, and mustard work well.
Place one center dot first. Then add rings around it.
Use a pencil end for large dots. Use a toothpick for tiny ones.
Do not rush the rings. Turn the pot slowly as you work.
If the spacing looks uneven, keep going. Mandala pots look better when they feel handmade.
Budget tip: practice the dot pattern on paper first. It saves paint and frustration.
Seal the pot once dry, especially if it will sit near water.
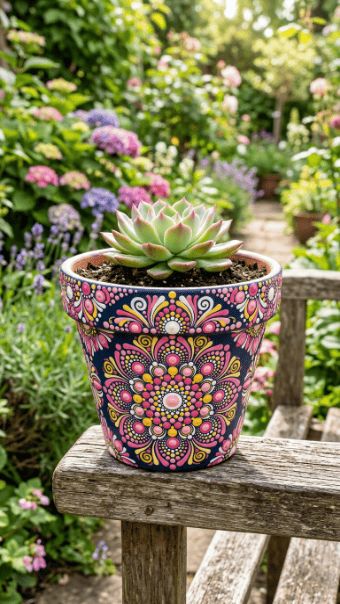
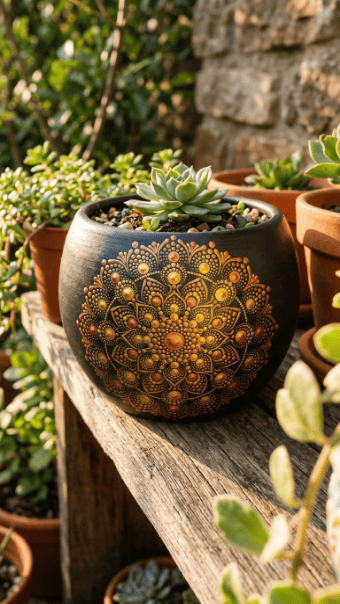
2. Black Base Mandala Pot
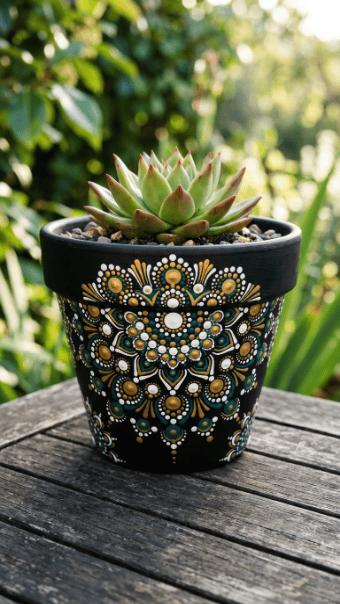
A black base makes mandala dots stand out fast.
Paint the pot with matte black acrylic. Let it dry fully. Don’t paint dots on a tacky surface. They will smear.
Use white for the first ring. Then add gold and teal for contrast.
This design works because the dark background gives every dot clear shape.
Use a crochet hook handle for medium dots. Use the pointed end for smaller dots.
Keep the pattern centered on the front of the pot if you’re nervous. You don’t have to cover the whole surface.
A half-mandala on one side can look cleaner than a full wrap.
Budget tip: use black chalk paint if you already have it. Acrylic works too.
Finish with a clear coat. Gloss makes the dots brighter. Matte keeps it softer.
3. Rainbow Ring Mandala Pot
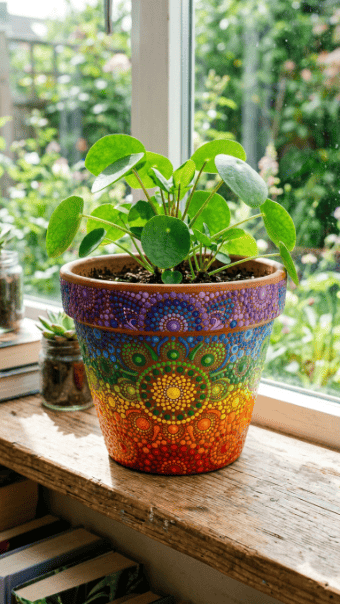
This one is bold. Don’t make it messy.
Start with a white or black base. White feels bright. Black makes the colors sharper.
Use rainbow colors in rings. Red near the center. Then orange, yellow, green, blue, and purple.
Keep each ring consistent. Same dot size. Same spacing.
That is what makes the design feel controlled.
Use the back of paintbrush handles in different sizes. Bigger handles make bigger dots.
Wipe tools between colors. Muddy dots ruin the look.
Cheap tip: buy a small acrylic paint pack instead of full bottles. You don’t need much.
This idea works well on small indoor planters. It can look too loud on very large pots.
Add a succulent or leafy plant to soften the bright pattern.
4. Gold Rim Mandala Pot
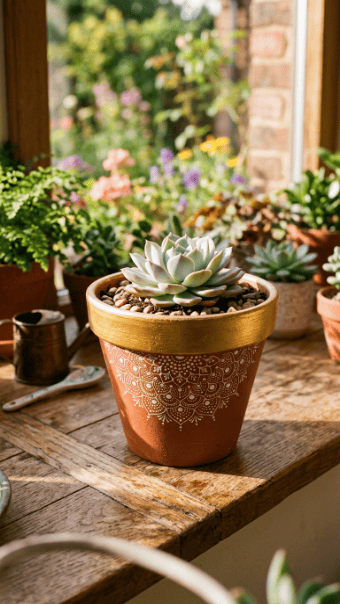
A gold rim makes a simple mandala pot feel finished.
Paint the rim first. Use painter’s tape if you want a cleaner edge.
Let the gold dry before adding dots. Metallic paint smears easily.
Keep the pot body terracotta or paint it deep brown.
Add small white dot mandalas below the rim.
Don’t cover every inch. The gold already adds enough shine.
Use tiny dots near the rim and larger dots lower down. That gives better balance.
Budget tip: metallic craft paint is enough. Skip gold leaf unless you already have it.
This design works well for gift pots. It looks polished without being hard.
Seal lightly so the rim does not scratch.
5. Beginner Crochet Hook Dot Pot

You do not need fancy dotting tools.
Crochet hooks make great dot tools because each size creates a different dot.
Use the rounded end for smooth circles.
Dip lightly into paint. Press straight down. Lift straight up.
That motion matters. If you drag the tool, the dot becomes a smear.
Start with a small pot. Curved surfaces are easier when the project is not huge.
Mark a center point with pencil. Then build rings around it.
Keep paint on a paper plate. It dries fast, so only pour a little.
Budget tip: borrow hooks or use old ones from a sewing kit.
This is the best starter method because it teaches pressure control.
Once you learn that, every mandala design gets easier.
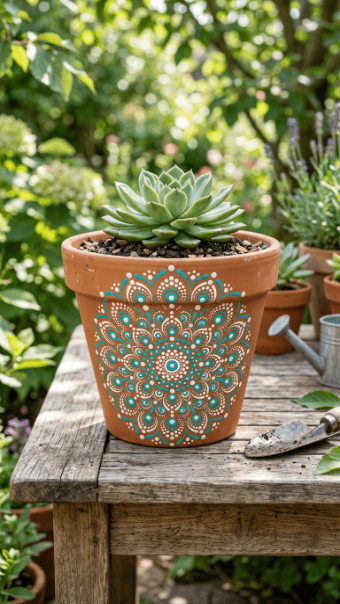
6. White-on-Terracotta Mandala Pot
This is the cleanest mandala style.
Leave the pot natural. Use only white acrylic dots.
The clay color gives warmth. The white dots give pattern.
That’s enough.
Start with a large center flower shape. Add rings of small dots around it.
Keep your pattern open. Too many dots can make the pot look busy.
A white paint pen can help with tiny details, but dot tools give better raised texture.
Budget tip: one bottle of white acrylic can decorate several pots.
This idea works well with herbs, cactus, and small indoor plants.
If the pot will go outside, seal it. White paint picks up dirt quickly.
Simple does not mean lazy. It means you stopped before ruining it.
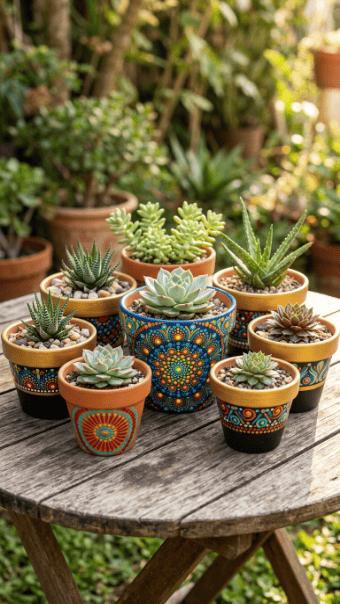
7. Mini Desk Mandala Pots
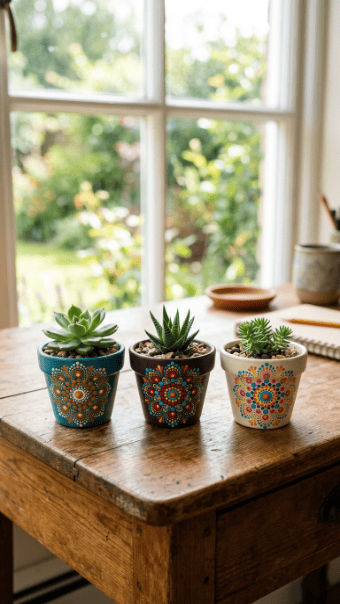
Mini pots are ideal for testing designs.
They cost less. They dry faster. Mistakes hurt less.
Paint each one with a different mandala pattern.
Use one color family per pot. For example, blue and white on one, pink and gold on another, green and cream on the third.
Small pots get crowded fast, so avoid large patterns.
Use tiny dots around the rim or one centered mandala on the front.
Budget tip: dollar-store mini pots are fine. Sand rough spots before painting.
These are great for desks, shelves, or windowsills.
Add tiny succulents to match the scale.
Do not overwater after painting. Moisture can weaken cheap paint if the pot is not sealed.
8. Floral Mandala Fusion Pot
This idea mixes flower shapes with mandala structure.
Start with a center dot. Around it, add oval dots like petals.
Use pink, white, and yellow for a soft floral look.
Repeat the flower shape around the pot or keep one large bloom in front.
The key is symmetry. Each petal ring should follow the same spacing.
Use a larger tool for petals and a toothpick for tiny center dots.
Budget tip: use leftover paint from other crafts. Floral mandalas do not require many colors.
This pot works well for spring plants, herbs, or small blooms.
Avoid painting full realistic flowers. That gets messy fast.
Stick to dot petals. They’re easier and cleaner.
9. 3D Layered Dot Mandala Pot
Raised dots create depth.
Use thicker acrylic paint. Don’t water it down.
Start with a big dot. Let it dry. Then place a smaller dot on top in another color.
This creates a stacked effect.
Do not do this everywhere. Use it only on the center or main rings.
Too much raised paint can crack or peel.
Let each layer dry before adding the next. That part is non-negotiable.
Budget tip: use paint straight from the bottle for thicker dots.
This design looks best on ceramic or primed terracotta.
Seal gently. Heavy brushing can flatten the dots.
Use spray sealer if you want less contact.
10. Mandala Rim-Only Pot
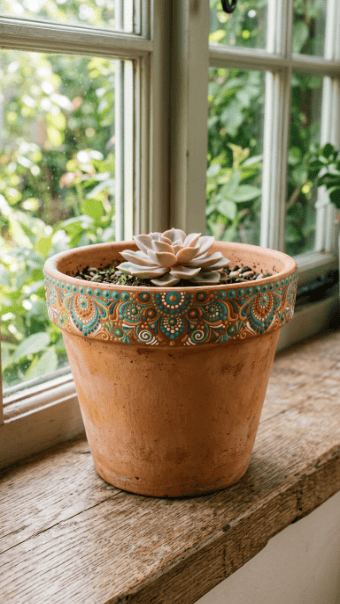
You don’t have to paint the entire pot.
A rim-only mandala border looks clean and controlled.
Paint dots around the top edge in repeating colors.
Use small dots first. Add larger dots between them.
This creates rhythm without taking hours.
Keep the body plain or add a light wash.
Budget tip: this is great when you have very little paint left.
It also works well for larger pots because you avoid the hardest curved area.
Turn the pot slowly as you dot. Rest your hand on the table to keep it steady.
This style is good for beginners who want a finished look without a huge time sink.
11. Oval Pot Mandala Design
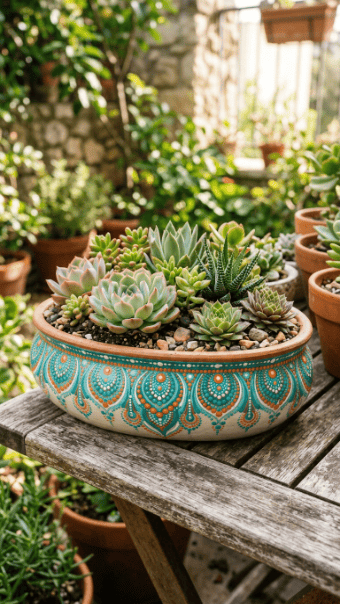
Oval pots are tricky. A round mandala can stretch oddly.
Use an elongated design instead.
Place the center near the widest part. Then build oval rings, not circles.
Follow the pot shape. Don’t fight it.
Use dots that taper at the ends. Smaller dots near the narrow sides help the pattern flow.
Budget tip: sketch light guide marks with pencil before painting.
This design looks great on succulent bowls and tabletop planters.
Keep the color palette tight. Two bright colors plus white are enough.
If the pot is glossy ceramic, sand lightly or use paint made for slick surfaces.
Seal after drying to protect the dots from handling.
12. Toothpick Fine Detail Pot
Tiny dots make a mandala look more finished.
Use a toothpick for the smallest details.
Dip only the tip. Press gently.
Too much paint creates blobs.
Add tiny dots between larger rings. This fills gaps without crowding the design.
Toothpicks are also useful for fixing mistakes. Scrape a wet dot away before it dries.
Budget tip: keep a pile nearby. Once the tip gets paint buildup, switch to a clean one.
This method is slow, but it gives better control.
Use it for centers, borders, and final accents.
Don’t try to paint the whole pot with toothpicks. You’ll waste time and patience.
Use them only where small detail matters.
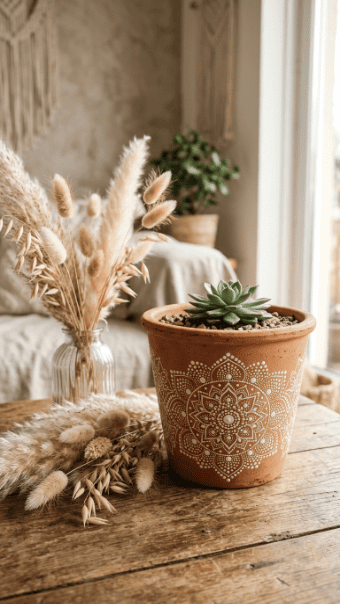
13. Boho Succulent Mandala Pot
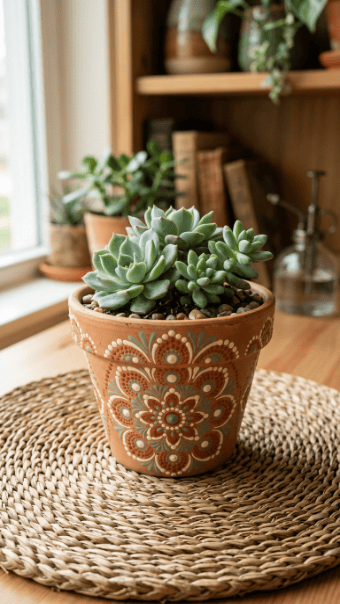
Mandala pots pair well with succulents.
Use earthy colors like rust, cream, sage, and clay.
Paint a mandala on the front instead of wrapping the whole pot.
This keeps the plant as the focus.
Succulents already have radial shapes, so they match mandala patterns naturally.
Budget tip: use one small succulent cutting instead of buying a full plant.
Paint the pot first. Plant after sealing.
If you plant first, soil gets everywhere and ruins your finish.
Keep the design low enough that leaves don’t hide it.
This is a strong gift idea because it looks handmade but not chaotic.
14. Metallic Dot Mandala Pot
Metallic dots work best on dark bases.
Paint the pot black, navy, or deep brown.
Then use gold, copper, or bronze acrylic for the dots.
Keep the pattern simple. Metallic paint already catches attention.
Use larger dots near the center and smaller dots outward.
Budget tip: one metallic color is enough. Don’t buy every shade.
Shake the paint well. Metallic pigments separate in the bottle.
Apply dots carefully because metallic smears are easy to spot.
This design looks better indoors than outdoors. Sun and rain can dull metallic paint.
Seal with a clear coat once dry.
Use it for shelves, entry tables, or covered patios.
15. Primer Prep Mandala Pot
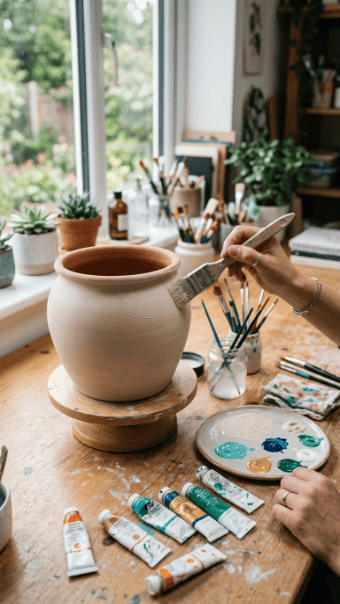
Prep is boring. Skipping it is why your pot looks patchy.
Terracotta absorbs paint. Primer helps create a smoother surface.
Apply one thin coat. Let it dry.
You can use white primer, chalk paint, or a light acrylic base.
Then paint your mandala dots.
The dots will look cleaner because the paint sits better.
Budget tip: use leftover white wall paint if it is suitable for craft use.
Do not glob primer on. Thick layers chip faster.
This step matters most if you want bright colors.
On raw clay, bright colors can look dull.
After painting, seal the pot inside and outside if it will hold real soil.
Moisture moves through terracotta. Paint hates that.
16. Half-Mandala Front Pot

A full mandala wrap can feel like too much.
Paint a half-mandala rising from the bottom edge instead.
Start at the lower center. Add rings upward in arcs.
This creates a sunburst shape.
It’s easier than painting around the whole pot.
Use three colors max. Too many colors can make the arc look messy.
Budget tip: use masking tape to mark the center line if you want balance.
This design works well on medium pots.
It also hides small mistakes because only one side carries the pattern.
Place the decorated side facing outward on a shelf or patio.
The plain back does not matter.
That’s efficient, not lazy.
17. Pastel Mandala Pot
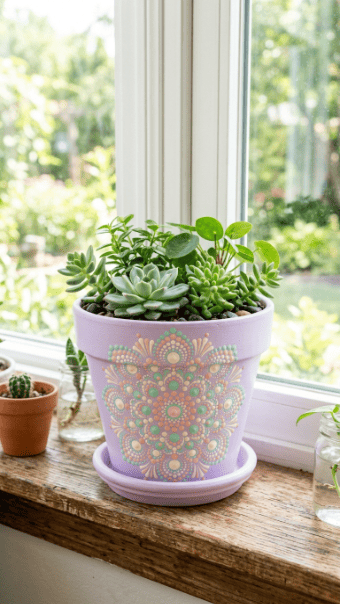
Pastel mandalas look softer than rainbow designs.
Start with a pale base like lavender, cream, or blush.
Use mint, peach, soft pink, and white dots.
Keep the pattern airy. Pastels lose impact when packed too tightly.
Use larger spacing between rings.
This works well for nursery decor, bedroom plants, or light interiors.
Budget tip: mix white into regular acrylic colors to make pastels.
You don’t need separate bottles.
Make sure each mixed color is consistent before dotting.
If you run out halfway, matching it again can be annoying.
Seal with matte finish if you want a gentle look.
Gloss can make pastels feel too shiny.
18. Earth Tone Mandala Pot
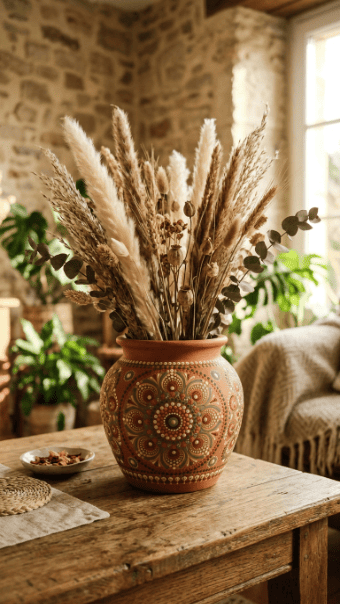
Earth tones are safer than loud colors.
Use rust, cream, sage, tan, and brown.
They work with terracotta instead of fighting it.
Paint a centered mandala or several small ones around the pot.
Keep the dots slightly muted.
Budget tip: mix colors yourself from red, yellow, green, black, and white.
You can create many earthy shades from basic paints.
This style fits boho rooms, patios, and herb gardens.
It also looks better as it ages.
Small scuffs don’t stand out as much.
If you’re making several pots, use the same palette across all of them.
Different patterns will still feel connected.
19. White and Gold Wedding Favor Pot
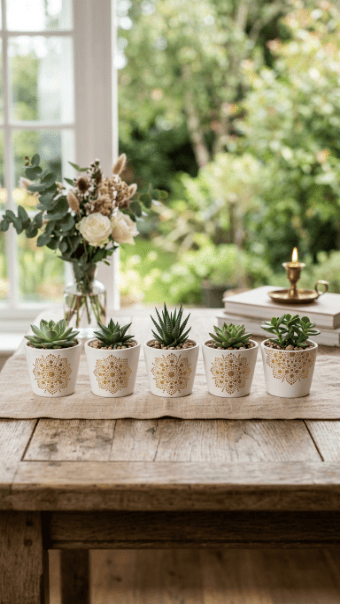
Small mandala pots make strong favors.
Paint mini pots white. Add gold dot mandalas on the front.
Keep the design small and centered.
Add a tiny succulent or herb.
Budget tip: make one sample first. Time yourself. Multiply that by the number of pots.
Don’t commit to 50 detailed designs unless you enjoy regret.
Use simple rings. Three or four rings are enough.
Gold paint looks best when applied in small dots, not thick puddles.
Let everything dry overnight before handling.
Add sealer if guests will take them home.
This idea works because it feels personal without being expensive.
The danger is overdesigning. Keep it clean.
20. Mandala Band Around the Middle
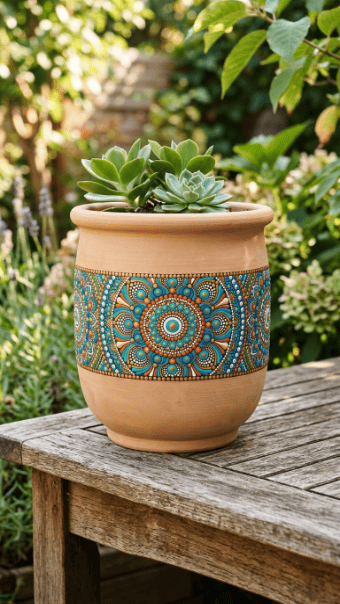
A middle band gives structure.
Mark two light pencil lines around the pot.
Paint dots between those lines.
Use repeating mini mandalas, arches, or dotted diamonds.
Leave the top and bottom plain.
This makes the design look intentional.
Budget tip: use rubber bands as temporary guides if pencil marks are hard to keep even.
Do not paint the band too wide. A narrow band looks cleaner.
This design is great for cylinder pots because the shape supports the pattern.
Use contrast colors so the band does not disappear.
Seal once dry.
If you mess up, paint over the band with a solid color and restart.
No drama.
21. Mandala Dot Daisy Pot
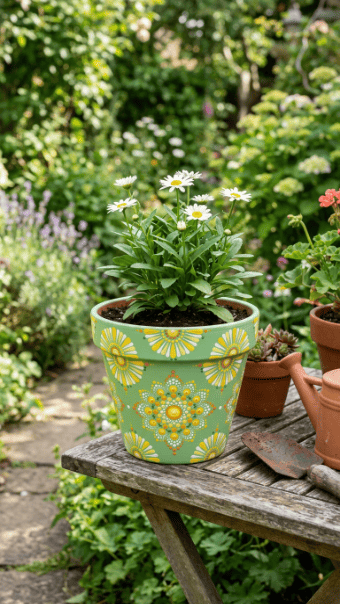
Dot daisies are beginner-friendly.
Paint the pot sage green or pale blue.
Add yellow center dots. Around each one, place white petal dots.
Repeat the flowers around the pot.
This gives a floral mandala feel without complex symmetry.
Use orange or gold dots inside the centers for extra depth.
Budget tip: cotton swabs make good petal dots.
They are cheap and easy for kids to use.
Keep flower spacing loose. Too many daisies make the pot look cluttered.
This idea suits herbs, small blooms, or balcony plants.
Seal it if it will sit near water.
The final look is cheerful without being childish.
22. Dark Blue Night Mandala Pot
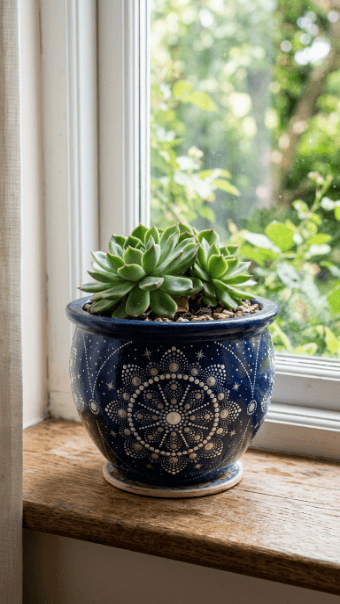
A navy base gives a night-sky feel.
Paint the pot deep blue. Let it dry fully.
Use white and silver dots for the mandala.
Keep the pattern crisp and limited.
Add tiny scattered dots around the main design if you want a star effect.
Don’t overdo it. Too many dots make it noisy.
Budget tip: mix blue with a little black if you do not have navy paint.
This pot looks best with trailing plants or pale green leaves.
Use a satin sealer for a soft finish.
Avoid heavy gloss unless you want a shiny ceramic look.
This design is calm, but still artistic.
Good for bedrooms, reading corners, or covered patios.
23. Raised Center Mandala Pot

Make the center the star.
Use a large raised dot in the middle. Let it dry.
Build smaller dots around it.
Use thick paint and steady pressure.
The raised center gives the whole design more dimension.
Do not touch it while drying. Thick dots can look dry on top while still soft underneath.
Budget tip: place the pot on a turntable, plate, or lazy Susan while painting.
Rotating the pot helps keep the pattern even.
This idea works well on the front of larger pots.
Keep the rest of the pot plain or lightly speckled.
The contrast makes the center stand out.
Seal with spray, not a brush, if the dots are very raised.
24. Mandala Border with Plain Body
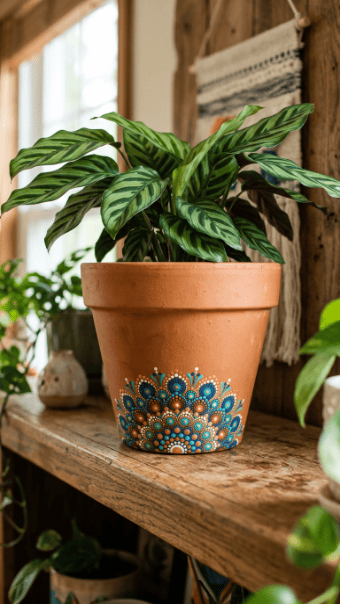
A lower border feels grounded.
Paint dots around the bottom third of the pot.
Leave the upper body plain.
This works well when the plant has large leaves that cover the top area.
Use small repeating arcs or circles.
Keep the border aligned with the pot base.
Budget tip: place the pot upside down while painting the lower section. It may be easier to reach.
Use earthy colors if the pot is terracotta.
Use white or gold if the base is black.
This design saves time and still looks finished.
It is also practical because lower patterns stay visible under leafy plants.
Seal the bottom well. It may touch damp surfaces.
25. Full Wrap Statement Mandala Pot
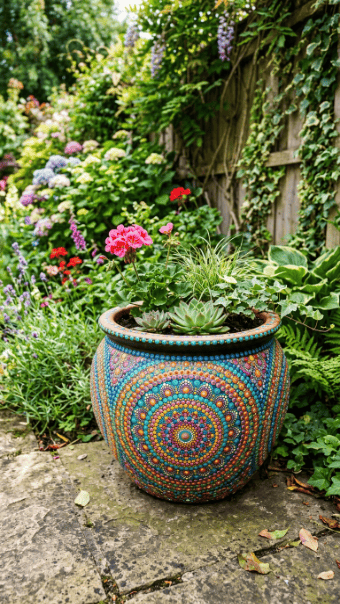
This is the big one.
A full wrap mandala takes patience. Don’t start here if you’re new.
Paint the base first. Black, white, or terracotta all work.
Plan your pattern in sections. Front, sides, back.
Use repeating rings, dotted flowers, and small filler dots.
Keep the color palette controlled. Four colors are enough.
Budget tip: use homemade tools before buying a dotting set.
Work in short sessions. Let each area dry before rotating the pot.
This prevents smears.
A full wrap pot looks best with a simple plant. Let the pot do the visual work.
Seal it well because large designs take effort.
If you skip sealer, you’re asking for scratches and fading.
Conclusion
Mandala flower pot painting rewards patience more than talent. Start with a clean surface, choose a tight color palette, and build your dots from the center outward. Use cheap tools before buying specialty supplies. Toothpicks, crochet hooks, cotton swabs, and pencil ends can handle most designs. The best pots are not the ones packed with the most detail. They are the ones where the pattern, colors, and plant work together. Pick one idea, finish it carefully, seal it, and then move on to a harder version.