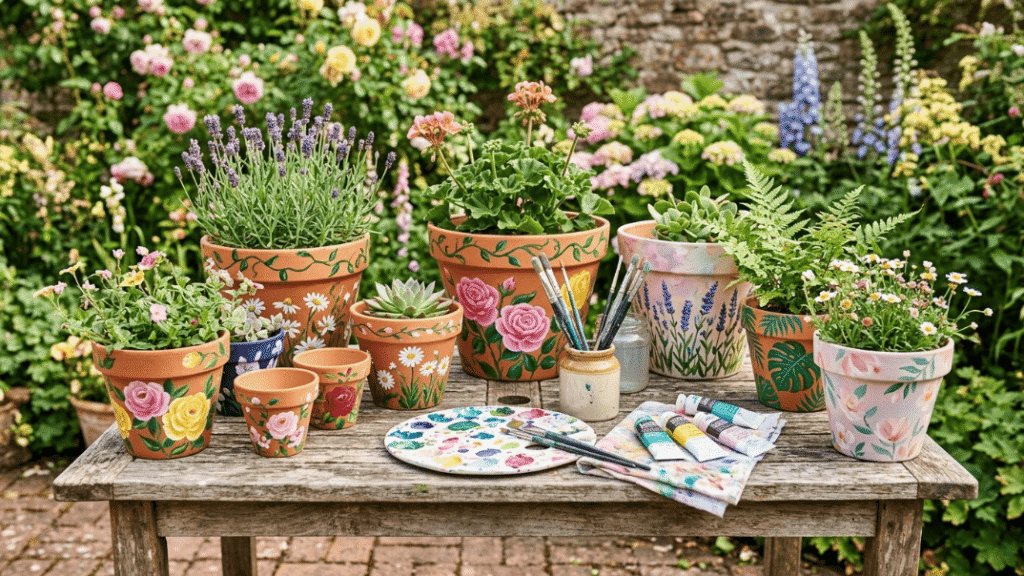
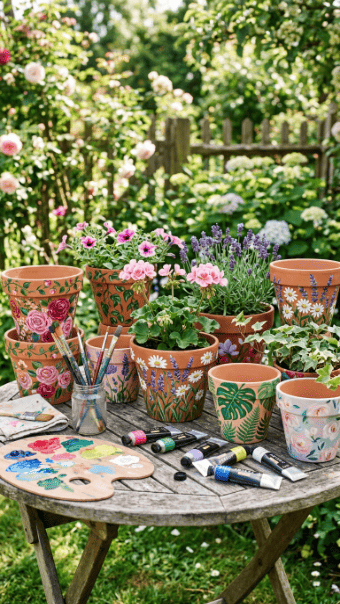
Floral flower pot painting is an easy way to turn plain terracotta into garden decor that feels personal, colorful, and handmade. You can paint roses, daisies, vines, lavender bunches, tropical leaves, or abstract petals with basic craft paint and a few cheap tools. The trick is not artistic perfection. It is choosing one clear floral style, using simple shapes, and sealing the pot so your work lasts indoors or outside.
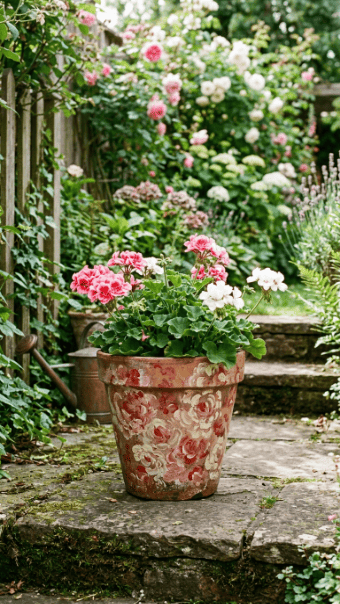
1. Hand-Painted Rose Pot
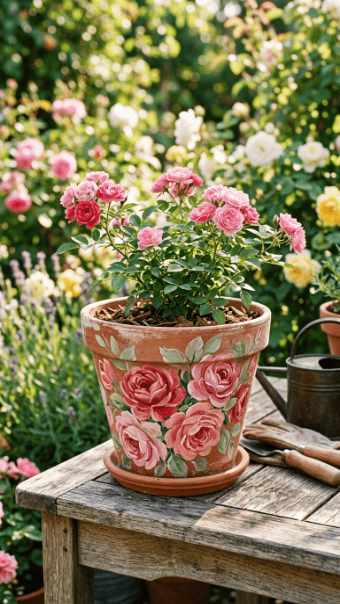
Roses look hard, but they are mostly curved strokes.
Start with a pale base. Cream, blush, or soft green works well.
Paint small comma-shaped strokes in dark pink. Add lighter pink strokes around them.
Do not try to make every rose perfect. Real flowers vary.
Add small green leaves between the blooms. This fills gaps without crowding the pot.
Use a small round brush for petals. Use a thinner brush for leaves.
Budget tip: mix red with white to create several pink shades.
Let each layer dry before adding highlights.
A rose pot works well for patios, windowsills, or gift planters.
Seal it if it will sit outside.
2. Sponge Daisy Pot
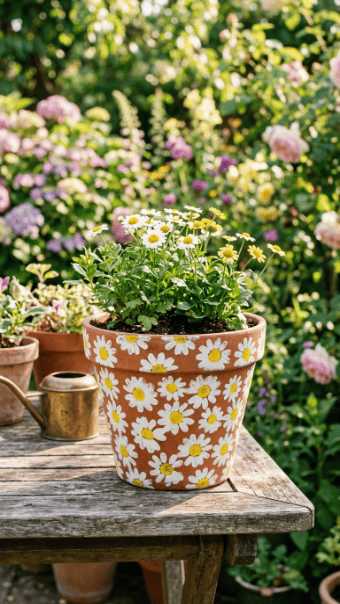
A sponge makes daisies fast.
Paint the pot blue, sage, or plain terracotta.
Cut a small sponge into a petal shape. Dip it into white paint. Press around a yellow center.
The result looks textured, not flat.
Use a cotton swab for the yellow centers.
Keep the daisies spaced out. Too many flowers will make the pot look messy.
Budget tip: use an old kitchen sponge. Just wash and dry it first.
This is a strong project for kids because the shape is simple.
If the petals look uneven, leave them. Sponge marks are part of the charm.
Finish with a clear coat after everything dries.
3. Lavender Corner Pot
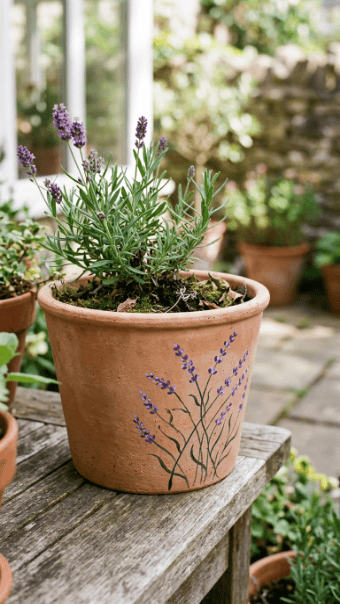
Lavender works best when it is placed lightly.
Do not cover the whole pot.
Paint thin green stems rising from one lower corner.
Then add small purple dots along each stem.
Use a toothpick, cotton swab, or the end of a small brush.
Keep the bunch angled, like it is growing naturally.
A cream or terracotta base works better than a loud background.
Budget tip: mix purple with white for lighter buds.
This design is good for herb pots because it feels calm and clean.
Add a few tiny leaves near the base.
Stop early. Lavender loses its shape when you overfill it.
Seal with matte finish for a softer look.
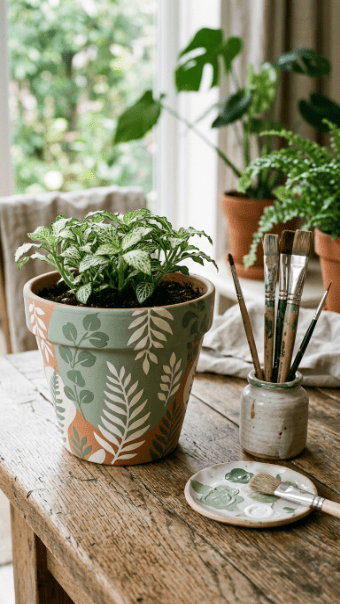
4. Tropical Leaf Floral Pot
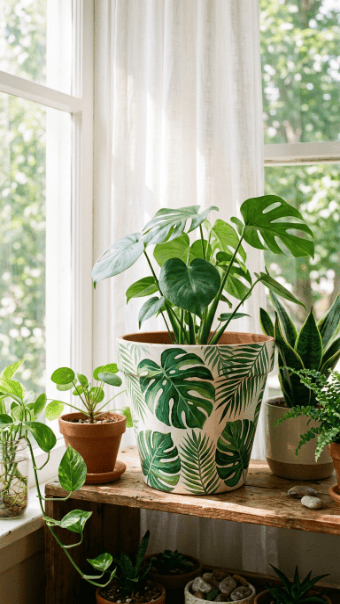
Tropical leaves are easier than detailed flowers.
Paint a white, black, or terracotta base.
Use green paint to create large leaf shapes.
Monstera leaves can be simple ovals with cut-out lines painted in the base color.
Palm leaves are long strokes from one stem.
Use two greens for depth.
Budget tip: mix green with yellow for lighter tones and green with black for darker tones.
This style works especially well for indoor plants.
Keep the leaves oversized. Tiny tropical leaves look fussy.
Add a few small flowers only if the pot feels empty.
Do not add too many details. Large shapes carry the design.
Seal it if the pot will be handled often.
5. Poured Paint Petal Pot
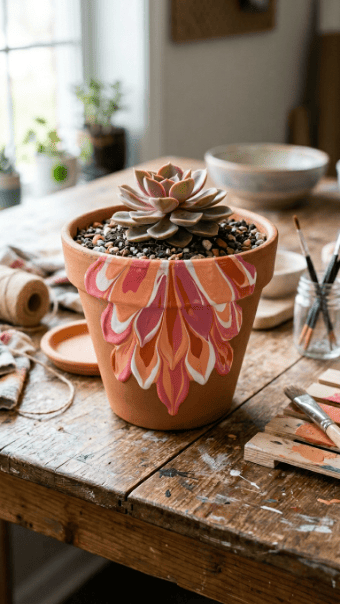
Paint pouring gives you floral movement without precise brushwork.
Place the pot upside down on a cup.
Pour small amounts of pink, orange, and white paint near the top edge.
Let the paint run down naturally.
Do not keep touching it. That is how people ruin pour designs.
Once dry, add small flower centers with a brush or dot tool.
This turns the drips into abstract petals.
Budget tip: use leftover acrylic paint thinned slightly with water.
Protect your table. This gets messy fast.
This idea works well on old pots with scratches because the flowing paint hides flaws.
Let it dry longer than usual.
Seal with gloss if you want a shiny finish.
6. Vintage Floral Rim Pot
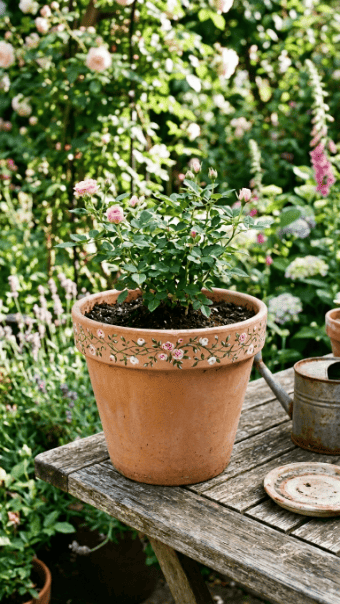
A rim-only floral design is smart.
It looks finished without taking hours.
Leave the body plain or paint it a neutral color.
Around the rim, paint a thin green vine.
Add tiny pink, yellow, or white flowers along the line.
Use a detail brush or paint pen.
Budget tip: practice the vine on paper first. Curved rims can be awkward.
This design is great for larger pots because you avoid painting the whole surface.
It also works well with leafy plants since the pattern stays visible.
Keep the flowers tiny.
Large flowers around a rim can look clumsy.
Seal the rim carefully because it gets touched often.
7. Botanical Stencil Pot
Stencils help if your freehand work is weak.
Pick a leaf or floral stencil.
Tape it flat against the pot.
Use a sponge brush with very little paint.
Too much paint causes bleeding under the stencil.
Dab gently. Do not drag the brush.
Lift the stencil slowly while the paint is still slightly wet.
Budget tip: cut your own stencil from thin cardboard or plastic packaging.
Use one color for a cleaner result.
This method works well for repeating leaves around the pot.
If you make a mistake, paint over it once dry and try again.
Stencils are not cheating. They are practical.
Finish with sealer if the pot goes outdoors.
8. Sunset Flower Pot
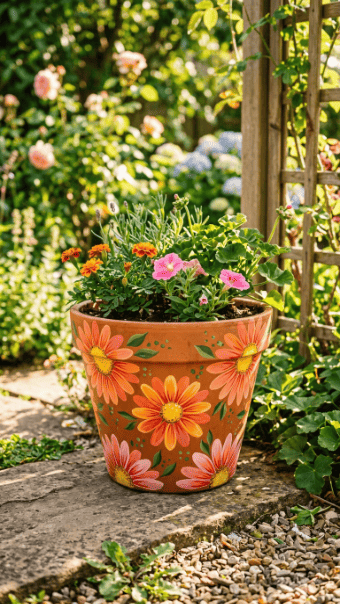
A sunset floral pot uses warm colors.
Paint the base pale peach or cream.
Create flowers with orange, coral, and pink petals.
Use yellow centers to tie the colors together.
The easiest method is to paint simple oval petals around a circle.
Use a sponge for soft edges or a brush for cleaner petals.
Budget tip: buy only red, yellow, and white paint. Mix the rest.
Keep the flowers large.
Small sunset flowers can look muddy because the colors are close.
Add dark green stems for contrast.
This design looks strong with marigolds, geraniums, or small patio flowers.
Seal with outdoor-safe clear coat if placed in sun.
9. Dandelion Puff Pot
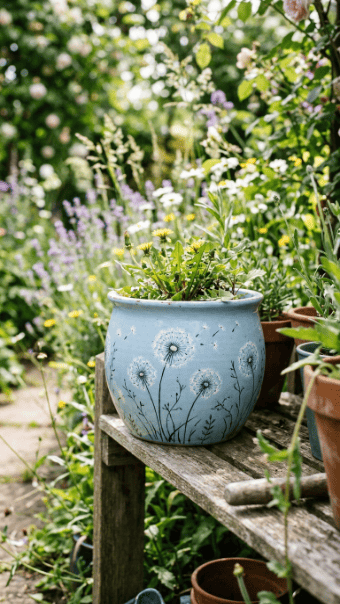
Dandelions are simple and forgiving.
Paint the pot pale blue, gray, or mint.
Draw thin stems first.
At the top, paint a small center dot.
Use short white strokes or tiny dots radiating outward.
Let some seed dots float away across the pot.
This creates motion.
Budget tip: use a toothpick for the smallest white dots.
Do not make the puff too dense. It should feel light.
This design suits balcony pots and small indoor planters.
Use black or dark green for stems.
A white paint pen helps if you struggle with thin brush lines.
Seal after drying so the tiny details do not scratch off.
10. Cottage Mushroom Floral Pot
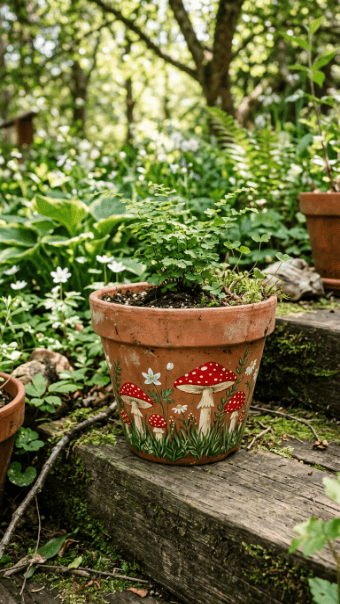
This is floral with a woodland twist.
Paint small mushrooms near the bottom of the pot.
Add tiny flowers around them.
Use red caps, white dots, green grass, and yellow flower centers.
Keep the design low so it feels like a little garden scene.
Budget tip: use the end of a brush for mushroom dots and flower centers.
This works well for kids, but adults can make it look polished with cleaner outlines.
Do not overload the pot with too many mushrooms.
Three or five are enough.
Add trailing vines if the top feels empty.
This pot pairs well with herbs or small leafy plants.
Seal it well if used outside.
11. Plastic Wrap Petal Texture Pot

Plastic wrap can create petal texture fast.
Paint a flower shape in pink or white.
While the paint is wet, press crumpled plastic wrap onto it.
Lift it off gently.
You’ll get wrinkled marks that look like layered petals.
Use this for large flowers, not tiny ones.
Budget tip: reuse clean packaging wrap instead of buying supplies.
Let the textured petals dry before adding centers.
Add dark outlines only if the flowers look unclear.
This technique works best on a smooth painted base.
Do not press too hard or the paint may lift completely.
Try one test flower before covering the pot.
Seal after drying to protect the raised texture.
12. Rag-Rolled Floral Pot
Rag rolling creates soft, uneven color.
Dip a small cloth into paint.
Dab off extra paint.
Press and roll it lightly onto the pot to create petal shapes.
This works for roses, peonies, and abstract blooms.
Use one darker color and one lighter color.
Budget tip: cut up an old cotton shirt.
Keep the rag marks loose. If you overwork them, they turn into smudges.
Once dry, add flower centers and leaves with a brush.
This technique is useful if you dislike detailed painting.
It gives depth without careful petal lines.
Use it on medium or large pots.
Small pots do not have enough space for the texture.
Finish with a protective coat.
13. Geometric Floral Frame Pot
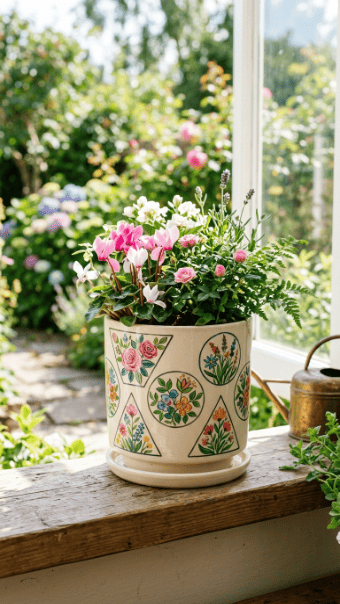
Mix flowers with simple shapes.
Paint a triangle, circle, or arch on the pot.
Inside the shape, paint small flowers or leaves.
This keeps the design organized.
Without the frame, florals can spread everywhere and look messy.
Use white or beige for the frame.
Paint flowers in soft pink, yellow, or orange.
Budget tip: use painter’s tape for straight lines.
This style works well on ceramic pots and smooth terracotta.
Keep one main frame on the front instead of wrapping the whole pot.
Add a plant that does not cover the design.
This is a good choice for modern homes that still want floral detail.
Seal carefully so the frame edges stay clean.
14. Chalkboard Floral Sketch Pot
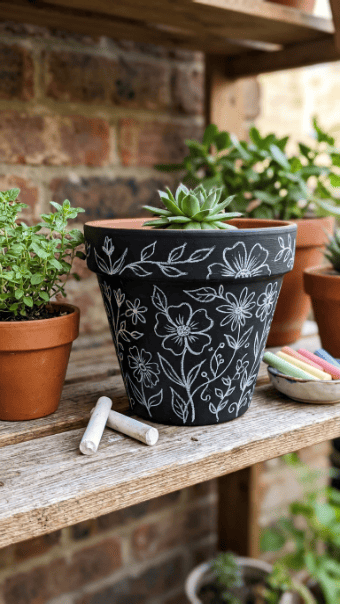
Chalkboard paint gives you changeable florals.
Paint the pot with chalkboard paint.
Let it cure fully based on the paint label.
Then draw flowers, vines, or leaves with chalk.
Budget tip: use chalk markers for cleaner lines, but regular chalk is cheaper.
This idea is great if you like changing designs by season.
Draw daisies in spring, sunflowers in summer, and vines later.
Do not use this for pots that get rained on.
Chalk will wash away.
Best use: indoor herbs, covered porch plants, or shelf decor.
If you want a permanent version, use a white paint marker instead of chalk.
The black base gives strong contrast.
Keep the drawings simple.
Too much detail disappears on a curved pot.
15. Sunflower Sponge Pot
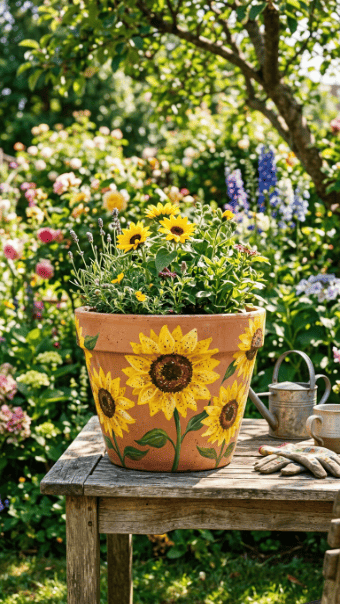
Sunflowers are bold and beginner-friendly.
Paint large yellow petals around a dark brown center.
Use a sponge for petals if brushwork feels hard.
Press outward from the center.
Layer orange over yellow for richer petals.
Use small dots in the center to create seed texture.
Budget tip: use brown mixed from red, yellow, and a little black.
Keep sunflowers large.
Tiny sunflowers lose impact.
Paint one big flower on the front or three around the pot.
Add simple green leaves near the bottom.
This pot looks good with outdoor flowering plants or herbs.
Use patio paint if it will stay outside.
Regular craft paint can work indoors but may fade outside faster.
Seal after drying.
16. Blue Hydrangea Cluster Pot
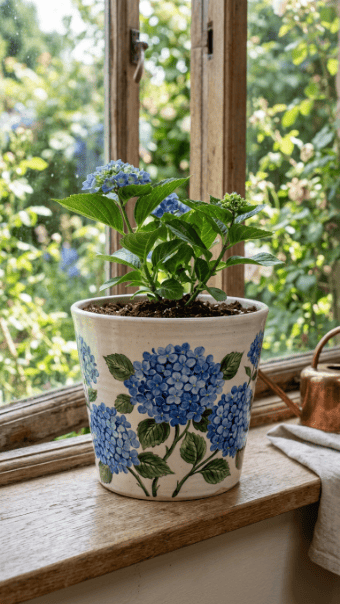
Hydrangeas are clusters, not single flowers.
Paint small rounded petals close together.
Use blue, lavender, and white.
Group them into ball shapes.
Add green leaves underneath each cluster.
Budget tip: use cotton swabs for the small petals.
This gives a soft clustered effect with little skill.
A pale gray or white base works best.
Do not outline every petal. It will look stiff.
Let the soft shapes do the work.
This design pairs well with leafy indoor plants.
It also looks good on larger ceramic planters.
Seal lightly when dry.
If using outside, choose weather-safe paint and clear coating.
17. Tulip Border Pot
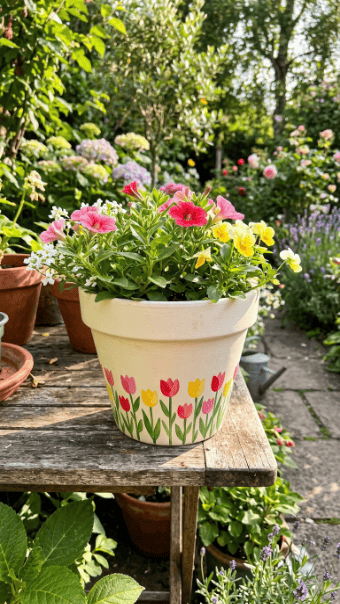
Tulips make a clean border.
Paint green stems from the bottom upward.
Add cup-shaped petals at the top of each stem.
Alternate pink, red, and yellow.
Keep the flowers the same height for a neat border.
Budget tip: use a flat brush. One press can form a tulip petal.
This design works around the bottom or middle of the pot.
Leave the upper section plain.
That gives the flowers breathing room.
Tulips are easier than roses because the shape is simple.
Do not add too many leaves.
Two per stem is enough.
This pot looks good with spring bulbs or herbs.
Seal near the bottom because water splashes there often.
18. Wildflower Meadow Pot
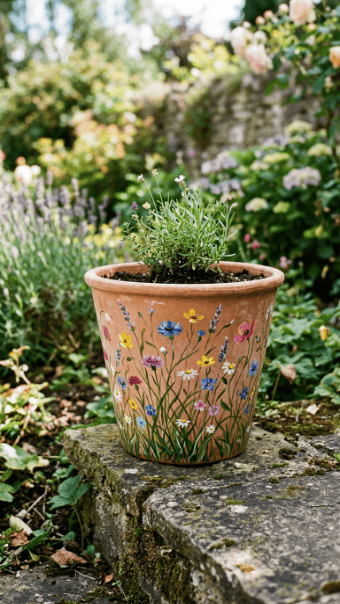
A wildflower pot should look loose.
Paint thin stems in different heights.
Add tiny dots and small petals at the top.
Use yellow, white, pink, purple, and blue.
Keep flowers scattered, not lined up perfectly.
Budget tip: use toothpicks for tiny blooms.
Paint grass strokes along the bottom.
This creates a meadow effect.
Do not make every flower different. Repeat a few shapes so the pot feels connected.
This idea hides mistakes well.
If one flower looks bad, add more around it.
Use a terracotta or pale green base.
Seal after drying.
This style works well for outdoor patios, cottage gardens, and small balcony planters.
19. Monochrome White Floral Pot
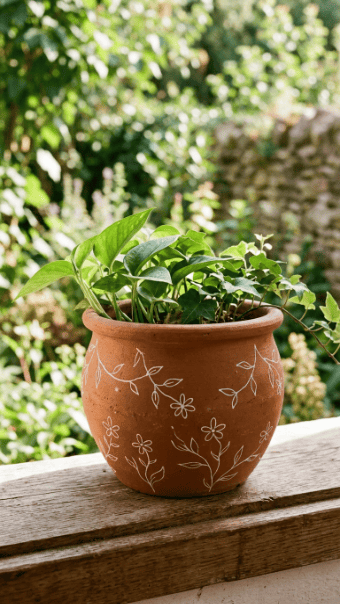
One color can be stronger than many.
Leave the pot terracotta.
Paint flowers and vines using white only.
Use line art, dots, and simple petal shapes.
The contrast is clean and timeless.
Budget tip: one white paint marker can finish several pots.
This design is great for people who don’t trust their color choices.
Keep lines thin.
Add small dot clusters to fill empty areas.
Do not cover the whole pot.
Negative space makes the design look cleaner.
This pot works well with green plants because the leaves add natural color.
Seal with matte finish if you want a soft clay look.
Gloss may make it feel too shiny.
20. Abstract Galaxy Flower Pot
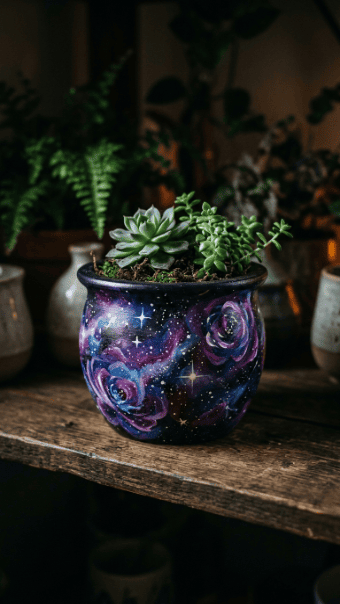
This is for people who like abstract florals.
Paint the pot dark blue or black.
Sponge purple, blue, and pink patches across the surface.
Add white speckles with a toothbrush.
Then paint loose flower centers over the color patches.
The result feels like flowers in a night sky.
Budget tip: use old toothbrushes for speckles.
Do this outside or over newspaper.
Keep the flower shapes loose.
If you try to make them realistic, the background will fight them.
This works best on smooth ceramic pots.
Use a gloss sealer if you want the colors to shine.
Pair it with silver-leaf plants or trailing greenery.
21. Peony Layered Petal Pot
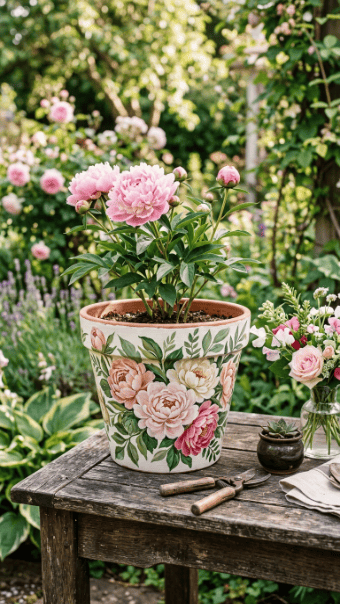
Peonies are all about layers.
Start with a round flower shape.
Add curved petal strokes around the center.
Use blush, cream, and darker pink.
Keep the outer petals larger.
Add small darker strokes near the middle.
Budget tip: mix all shades from red, white, and a touch of yellow.
Use a medium round brush.
Do not outline every petal.
Peonies should feel soft and full.
Paint one large peony on the front instead of many small ones.
That gives the design focus.
Add two or three leaves behind the flower.
Let dry between layers or the colors will turn muddy.
Seal after painting.
This pot works well as a gift or table planter.
22. Trailing Vine Flower Pot
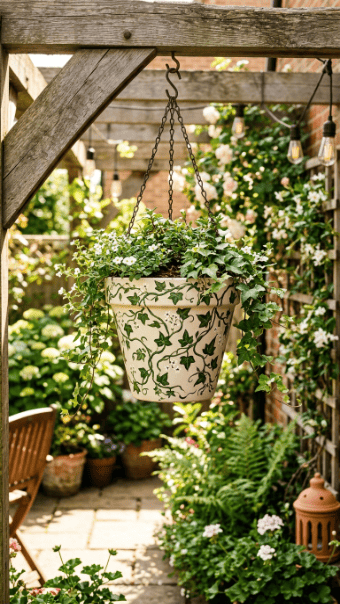
Trailing vines work with the pot shape.
Start near the rim.
Paint thin green lines curving downward.
Add small leaves along each vine.
Then dot tiny white or yellow flowers between the leaves.
Budget tip: use a fine brush or paint marker for the vines.
This design looks great on hanging pots or tall planters.
It also suits trailing plants because the painted vines echo the real plant.
Keep spacing loose.
Too many vines can make the pot look tangled.
Use a neutral base so the green lines stand out.
Seal especially well near the rim because it gets touched and watered.
This idea is simple, affordable, and hard to mess up.
Conclusion
Floral flower pot painting works best when you stop trying to paint every detail. Pick one flower style, one surface color, and a few tools that match your skill level. Sponge daisies, stencil leaves, lavender dots, and rim vines are easy starting points. Roses, peonies, and poured petals take more control, but they are still manageable if you work slowly. Use cheap terracotta, test your colors first, and seal the finished pot. That is how a plain planter becomes garden decor worth keeping.