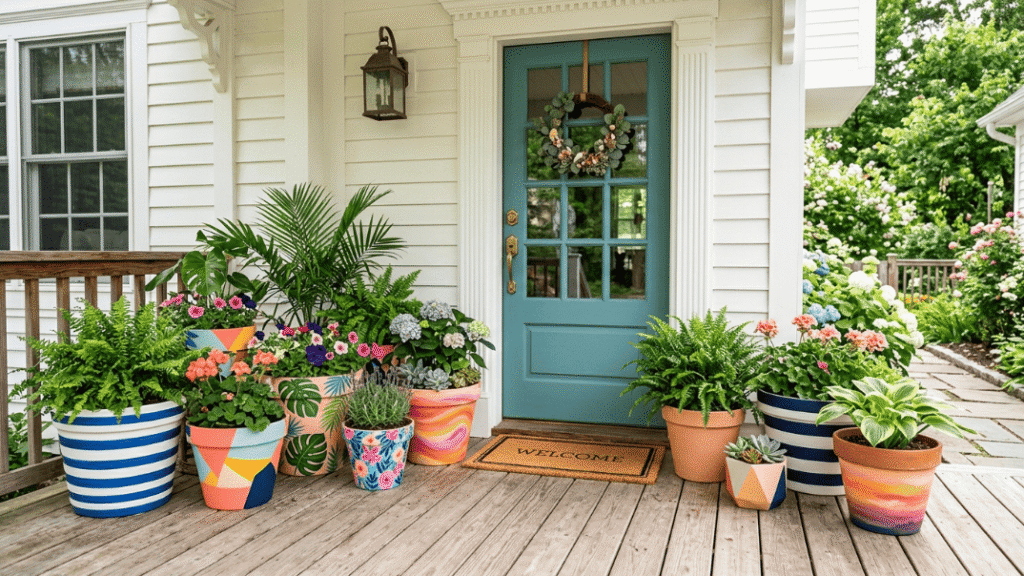

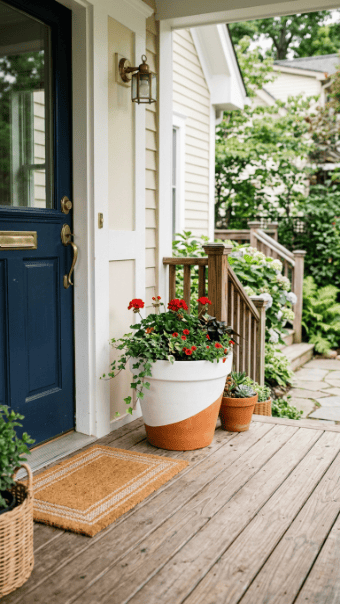
Porch flower pot painting is a cheap way to make an entryway feel warmer, brighter, and more personal. Plain terracotta, plastic, or thrifted planters can look custom with outdoor paint, bold color, painter’s tape, stencils, and a clear sealer. The smartest porch designs are simple enough to finish in one afternoon, strong enough to handle weather, and clear enough to stand out from the sidewalk.
1. Rainbow Stripe Porch Pots
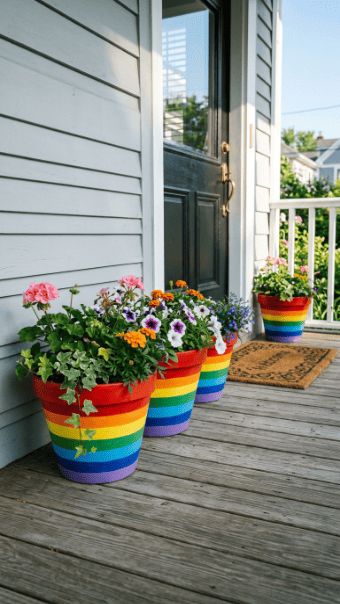
Rainbow stripes are easy, cheap, and hard to miss.
Start with a clean pot. Wipe off dust and let it dry.
Use painter’s tape to mark horizontal bands. Press the tape edges down firmly.
Paint one color at a time.
Let each stripe dry before touching nearby sections. Rushing will create smears.
Use outdoor acrylic or patio paint if the pots sit in direct sun.
Budget tip: buy sample-size paint pots instead of full cans.
Keep the stripe widths uneven if you want a relaxed look. Use equal widths if your porch style is cleaner.
Seal the pot after painting.
This matters outdoors. Rain, sun, and porch dirt will wear down craft paint fast.
Use these pots near steps, railings, or a front door.
They work best when the flowers are simple, like white petunias or green trailing plants.
2. Sunset Gradient Planter
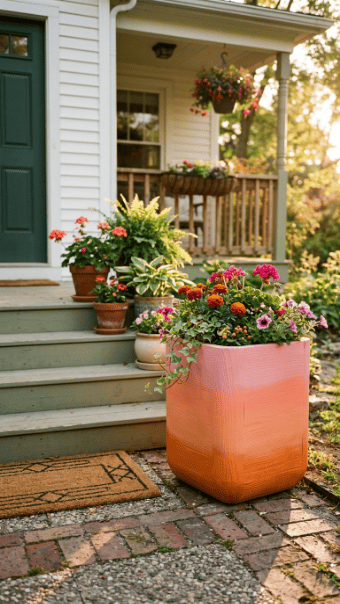
A sunset gradient gives a porch a warm welcome.
Use orange, coral, pink, and pale yellow.
Paint the darkest color near the bottom.
Add the lighter shade above it while the paint is still damp.
Use a wide brush or sponge to soften the meeting point.
Do not overwork it. Too much brushing turns the colors muddy.
Budget tip: mix red, yellow, and white to create most sunset shades.
This design looks great on wide terracotta pots.
It also works on plastic planters if you use paint made for plastic.
Add flowers in yellow, white, or purple for contrast.
Seal with an outdoor clear coat after drying.
Place these pots where the afternoon light hits them.
The color will look warmer near a porch rail or front step.
3. Geometric Color Block Pot
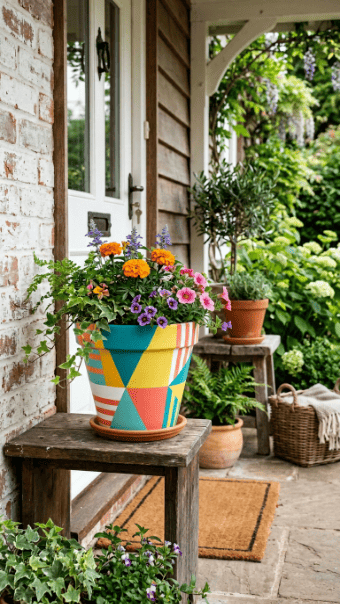
Color blocking looks modern without being hard.
Use painter’s tape to create triangles, arches, or angled bands.
Pick three colors max.
Too many colors can make the pot look chaotic.
Paint one section at a time. Let it dry before peeling tape.
Pull tape slowly.
If paint bleeds, clean the edge with a small brush.
Budget tip: use leftover wall paint samples if they are safe for the surface.
This idea works well on square, cylinder, or tapered pots.
Large shapes show better from the street.
Tiny shapes disappear outdoors.
Pair with simple greenery so the pot stays the main feature.
Seal the finished planter.
For plastic pots, sand lightly before painting so the paint grips better.
This is a strong choice for front porches with modern doors, black railings, or plain siding.
4. Tropical Leaf Porch Pot
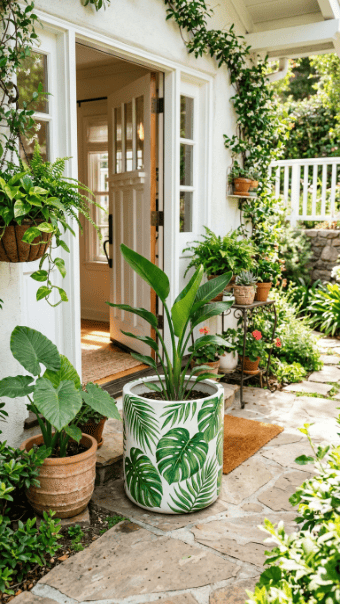
Tropical leaves create a bold porch look.
Paint the pot white, black, or terracotta first.
Use green paint for large monstera, palm, or banana leaf shapes.
Keep the leaves oversized.
Small leaves look weak from a distance.
Use two green tones. Dark green for the base shape. Lighter green for veins.
Budget tip: mix green with yellow for a lighter shade.
You can freehand the leaves or cut a stencil from cardboard.
Stencil edges may bleed, so use very little paint.
This design works well with ferns, palms, snake plants, or trailing vines.
For outdoor use, choose paint that can handle moisture.
Seal the pot after the design dries.
Place it near a porch corner or door frame for a strong leafy accent.
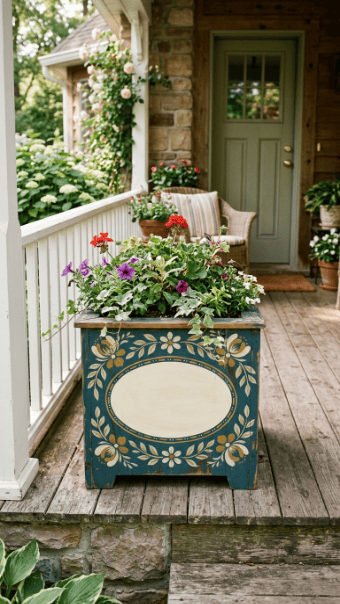
5. Floral Corner Accent Pot
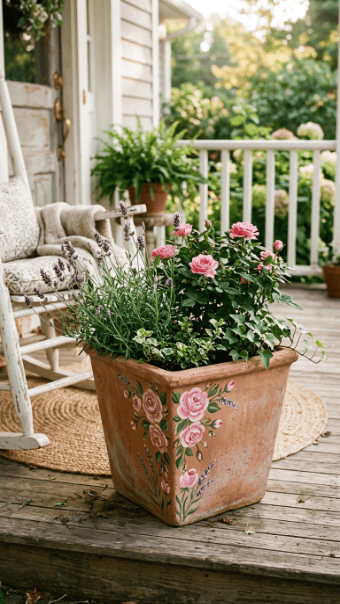
You do not have to cover the whole pot.
Paint flowers in one corner only.
This looks cleaner and takes less time.
Start with small roses, lavender stems, or daisies.
Use green leaves to fill gaps.
Leave the rest of the pot plain terracotta or a soft neutral color.
Budget tip: use one flower color, one leaf color, and white for highlights.
This keeps cost down and stops the design from getting messy.
Corner florals work well on larger porch pots because the empty space feels intentional.
Use a detail brush for stems.
Use cotton swabs for flower centers.
Seal the pot, especially if it sits where rain can reach it.
This style works nicely beside a welcome mat, bench, or porch table.
6. Neon Geometric Porch Planter
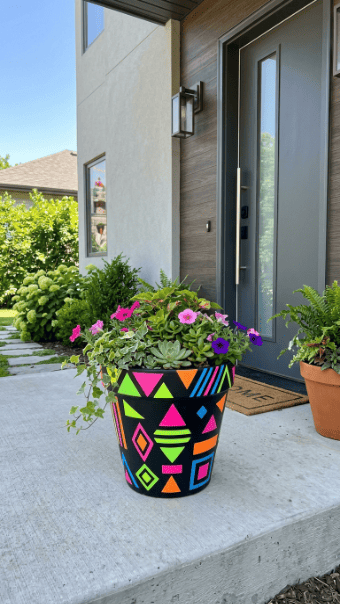
Neon can look great, but only if you control it.
Start with a black or dark gray base.
Add neon triangles, dots, or angled lines.
Do not cover the whole pot.
A few bright shapes are enough.
Use painter’s tape for sharper edges.
Budget tip: buy one neon paint color first. Test it before buying more.
Neon paint often dries thinner than expected, so two coats may be required.
This design works best on smooth plastic or ceramic pots.
For terracotta, use primer first or the color will look dull.
Pair neon pots with simple green plants.
Flowers with too many colors can clash.
Seal with outdoor spray after drying.
Place these on covered porches if possible. Neon colors can fade faster in harsh sun.
7. Paint Pour Marble Pot
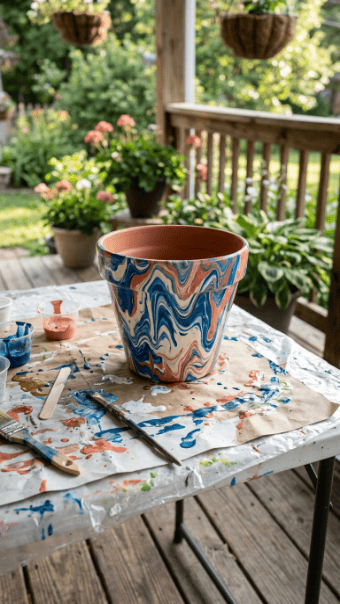
Paint pouring is messy, but it hides old pot damage well.
Place the pot upside down on a cup or can.
Cover the work area with cardboard or a drop cloth.
Pour two or three paint colors around the top edge.
Let them run downward.
Do not keep touching the paint.
That is how the marbling turns muddy.
Budget tip: use leftover acrylic paint thinned slightly with water.
Choose colors that work together, like blue and white, coral and cream, or green and gold.
Let the pot dry longer than usual.
Thick poured paint takes time.
Use a strong clear sealer before putting it outside.
This design works well for porch pots that are scratched, stained, or thrifted.
Add simple plants so the marble pattern does not compete with busy flowers.
8. Desert Cactus Porch Pot
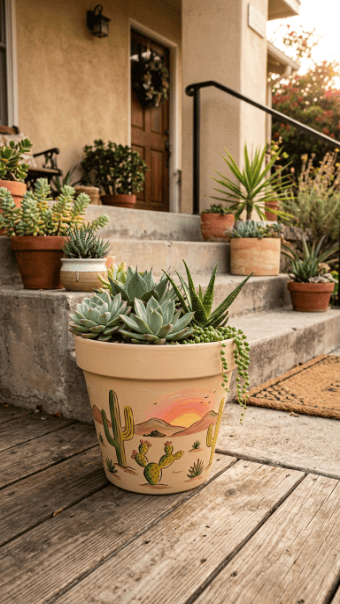
A desert theme works well for sunny porches.
Paint the base beige, tan, or clay orange.
Add small cactus shapes in dark green.
Use black or brown for tiny spines.
Add a few white dots or simple flowers on the cactus arms.
Budget tip: use a thin marker for spines instead of buying detail brushes.
This design pairs well with succulents, aloe, agave, or drought-tolerant plants.
Keep the pattern simple.
Too many cactus shapes will make the pot look crowded.
Use a matte sealer for a clay-like finish.
If using real succulents outside, check that the pot drains well.
Paint does not fix poor drainage.
This idea fits porches with stone, brick, wood, or neutral siding.
9. Galaxy Porch Night Pot

A galaxy pot gives a porch a moody evening look.
Paint the pot black or deep navy.
Sponge on purple, blue, and pink patches.
Use a toothbrush to flick tiny white speckles.
Do this outside or over cardboard.
It gets messy fast.
Budget tip: use an old toothbrush and leftover paints.
Add a few larger white dots for stars.
Do not add too many. It can turn childish quickly.
This design looks best with silver foliage, dark purple flowers, or trailing greenery.
Use outdoor-safe sealer after drying.
Gloss sealer makes the colors brighter.
Matte sealer makes it softer.
Place galaxy pots under porch lights or near dark railings for the best effect.
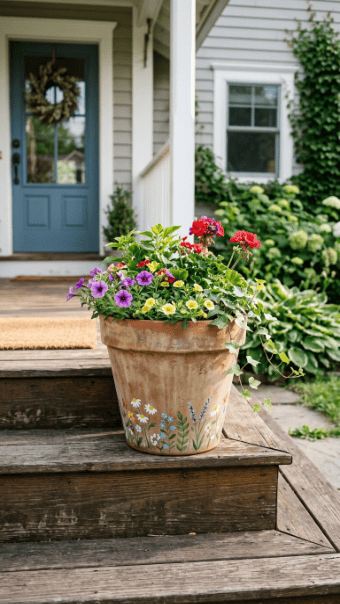
10. Botanical Stencil Planter
Stencil designs are useful if freehand painting is not your strength.
Paint the pot with a solid base color.
Cream, black, sage, or terracotta all work.
Tape the stencil firmly in place.
Use a sponge brush with very little paint.
Dab lightly.
Do not drag the brush under the stencil edge.
Budget tip: make a stencil from cardboard, freezer paper, or thin plastic packaging.
Use large leaf shapes for porch pots.
Small details disappear from the walkway.
Repeat the stencil around the pot or place one large leaf on the front.
Let it dry before sealing.
This idea is clean, cheap, and beginner-friendly.
It works on terracotta, plastic, and ceramic with the right paint.
Pair with ferns, hostas, or simple flowering plants.
11. Mediterranean Blue Tile Pot
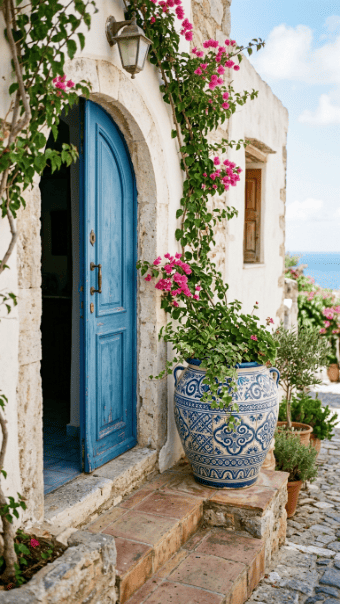
Blue and white tile patterns look crisp on porch pots.
Paint the base white.
Add blue diamonds, dots, vines, or small square shapes.
You can use a stencil or painter’s tape.
Do not attempt tiny tile detail unless you have patience.
Large tile-inspired shapes read better outdoors.
Budget tip: use one bottle of blue paint and one white base.
This keeps the design low-cost and coordinated.
Add herbs, citrus plants, or white flowers for a clean entry look.
Seal carefully because white pots show dirt.
Place these near blue doors, white trim, brick, or stone.
If your porch already has many colors, this design may clash.
Keep surrounding decor simple.
This pot style works because it feels ordered without feeling boring.
12. Citrus Accent Pot
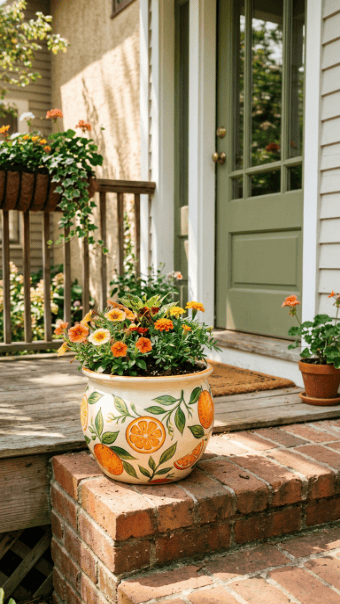
Citrus designs are cheerful without being complicated.
Paint the pot cream or pale yellow.
Add orange circles or half-circles.
Use white lines inside each circle to suggest slices.
Add green leaves between the fruit shapes.
Budget tip: use the bottom of a cup to trace circles.
This design works well near summer flowers, small trees, or herb planters.
Keep the oranges large.
Tiny citrus slices look fussy.
Use outdoor paint and sealer if the pot gets sun.
Orange can fade if left unprotected.
Pair this pot with green plants instead of orange flowers.
That keeps the design from feeling overloaded.
Use it near a porch bench, side table, or door planter group.
13. Scalloped Edge Porch Pot
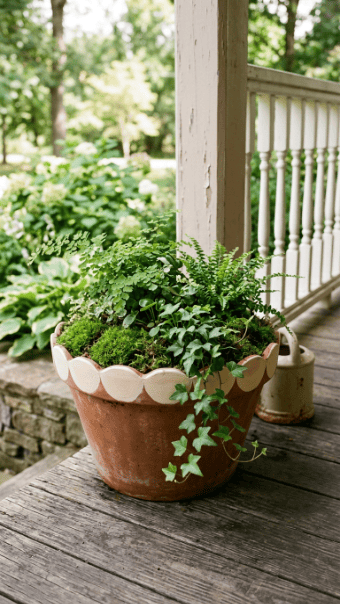
Scalloped edges add detail without covering the pot.
Paint half-circles around the rim.
Use white, cream, sage, or navy.
A round sponge or bottle cap can help shape the scallops.
Budget tip: trace around a small lid with pencil before painting.
Keep the rest of the pot plain.
The rim does enough.
This design works well with moss, ferns, and trailing plants.
It also looks good on grouped pots.
Use the same scallop color across different pot sizes to make them feel connected.
Seal the rim well because it gets touched often.
Do not paint scallops too small.
Large rounded shapes show better on a porch.
This is a strong option when you want a soft style without painting flowers.
14. Wicker-Inspired Painted Pot
A painted wicker effect helps plastic pots look warmer.
Start with a tan base.
Paint loose horizontal and vertical brown lines.
Then add diagonal strokes for a woven look.
Do not chase perfection.
Real wicker is uneven.
Budget tip: use leftover tan wall paint and a small brown craft paint bottle.
This design works well if your porch already has baskets, rattan chairs, or natural mats.
Keep the color muted.
Bright wicker patterns look fake.
Use a matte sealer for a more natural finish.
This idea is good for old plastic pots that look too shiny.
Sand the surface lightly first.
Then prime before painting.
Pair with leafy plants or white flowers for a relaxed entryway look.
15. Bold Black and White Stripe Pot
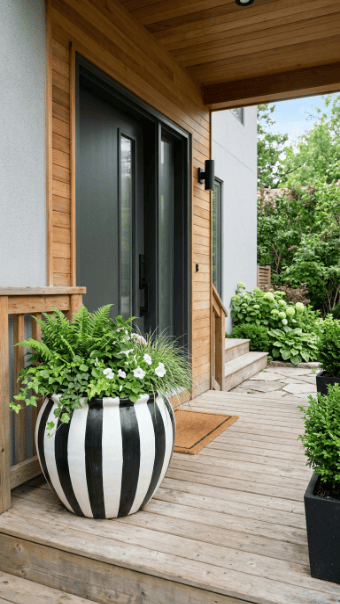
Black and white stripes are clean and visible.
Use vertical stripes for height.
Use horizontal stripes for a wider look.
Tape carefully.
Paint white first, then black.
Black covers better than white.
Budget tip: use leftover exterior white paint and a small black acrylic bottle.
Keep the stripe count low.
Too many narrow stripes can look dizzy.
This pot works well beside modern doors, black fixtures, and simple porch rugs.
Pair it with green plants only.
Bright flowers may fight the pattern.
Seal the pot with outdoor clear coat.
If the pot is plastic, use primer made for plastic first.
This is one of the easiest ways to make cheap planters look more expensive.
16. Polka Dot Porch Pot
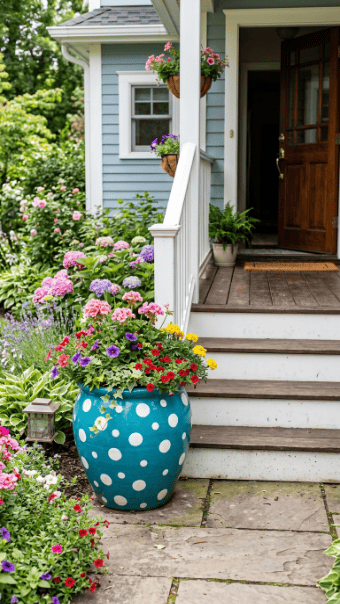
Polka dots are simple, but spacing matters.
Paint the pot one solid color.
Teal, coral, navy, or yellow all work.
Use a round sponge, pencil eraser, or bottle cap to make dots.
Dip lightly and press straight down.
Budget tip: pencil erasers make clean small dots for almost no cost.
Keep dots large enough to see from the sidewalk.
Tiny dots are wasted effort outdoors.
You can place dots randomly or in rows.
Rows look cleaner. Random dots feel playful.
Seal after drying.
This design works well for kids’ craft days because the technique is easy.
Use it on porch steps, patio corners, or balcony planters.
Pair with white flowers or trailing greenery.
17. House Number Accent Pot
This idea is practical, but skip actual numbers in the image prompt.
For the real project, paint a simple badge shape on the front of the pot.
Use an oval, arch, or rectangle.
Add your house number with a stencil or paint marker.
Surround it with small leaves or dots.
Budget tip: use paper cutouts as a stencil guide.
Keep the number large and readable.
Tiny decorative writing defeats the point.
Use contrast. Dark number on light badge, or light number on dark badge.
Seal it heavily because this pot will face weather.
Place it near the door or top step.
Do not hide it behind tall flowers.
Use shorter plants or trailing greenery so the painted area stays visible.
This is decor with actual function.
18. Checkerboard Porch Pot
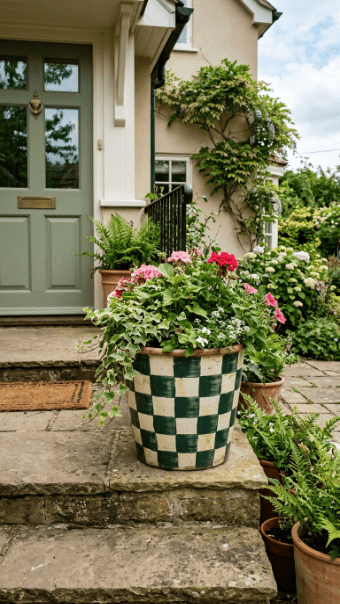
Checkerboard pots are trendy but easy to mess up.
Use larger squares.
Small checkerboards take forever and look busy.
Paint the base color first.
Mark light grid lines with pencil.
Paint every other square.
Budget tip: use painter’s tape only for the first row, then follow it by hand.
A slightly imperfect checkerboard feels handmade.
Use cream and green, black and white, or terracotta and beige.
Seal well because the many paint edges can chip.
This pattern works on cylinder pots, but square pots are easier.
Pair with plain plants.
The pattern already has movement.
Place checkerboard pots in a group with solid-colored pots so the porch does not feel overdone.
19. Faux Terracotta Wash Pot
Old plastic pots can look cheap.
A terracotta wash can fix that.
Sand the pot lightly.
Prime it.
Paint a warm clay base.
Then dry-brush lighter beige over the surface.
Add darker brown around edges for age.
Budget tip: use a sponge instead of buying texture tools.
This design works when you want a natural porch style without buying new planters.
It pairs well with brick, wood doors, and neutral rugs.
Use matte sealer.
Gloss will ruin the clay effect.
Do not make the surface too perfect.
Real terracotta has variation.
This is a good project for large plastic pots that are faded but still usable.
Clean them well before painting or the finish may peel.
20. Front Step Flower Border Pot
A flower border adds charm without taking over.
Paint small stems around the bottom edge.
Add tiny dots or petals at the top.
Use white, yellow, pink, or purple.
Keep the flowers low so the plant remains the focus.
Budget tip: use cotton swabs for flower dots.
This design works well on terracotta pots.
You can leave the upper portion plain.
That saves time and paint.
Use this idea for pots lining steps.
The repeated border creates a pulled-together look.
Seal the bottom carefully.
That area gets splashed by rain and watering.
Avoid painting detailed flowers too low if the pot sits directly on the ground.
Dirt will hide the design.
Use pot feet or a saucer if possible.
21. Two-Tone Dip Paint Pot
A two-tone pot is one of the fastest upgrades.
Tape around the middle.
Paint the lower half one color.
Leave the top terracotta or paint it white.
Remove tape slowly after the paint starts to set.
Budget tip: use leftover exterior paint for the lower section.
This style works across several pot sizes.
Use the same two colors for a matched porch group.
Try black and terracotta, sage and cream, or navy and white.
Do not add too much detail.
The clean divide is the design.
Seal the painted section if it faces rain.
This idea is great for people who want a tidy porch without spending all weekend crafting.
Pair with flowers that repeat one of the pot colors.
That makes the whole entry look intentional.
22. Hanging Porch Pot With Painted Vines
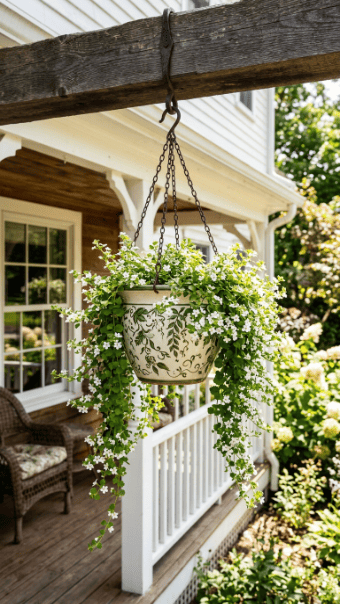
Hanging pots look better when the design follows gravity.
Paint vines starting at the rim and trailing downward.
Add small leaves along the lines.
Dot tiny flowers between leaves.
Budget tip: use a green paint marker for quick vine lines.
Keep the pattern loose.
If it gets too dense, it looks tangled.
This design works well with real trailing plants like ivy, pothos, or petunias.
Do not paint the top rim too heavily.
Hanging pots get handled there.
Seal the whole pot after drying.
Check hooks and chains before rehanging.
Paint does not matter if the pot is not secure.
Use light plastic pots for hanging areas.
Paint them properly with primer and outdoor sealer.
This gives you the look without too much weight overhead.
23. Air-Dry Clay Add-On Pot
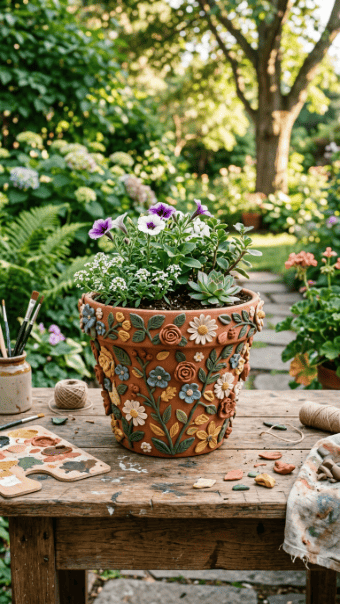
Air-dry clay adds texture to porch pots.
Make small flowers, leaves, dots, or arches.
Let the clay dry fully.
Glue the pieces to the pot with strong outdoor adhesive.
Then paint over them.
Budget tip: use clay only for a few accents. Covering the whole pot costs more and takes longer.
Keep add-ons low-profile.
Large pieces can break off outdoors.
Paint the base first, attach clay pieces, then touch up around them.
Use earthy colors or white for a clean look.
Seal everything well.
This step matters because clay can absorb moisture.
Use this idea for covered porches rather than fully exposed steps.
It gives a handmade look without advanced painting skill.
Pair with simple plants so the raised details stay visible.
Conclusion
Porch pot painting works best when the design is bold, readable, and protected from weather. Start with cheap planters, clean the surface, use paint made for the material, and seal every finished pot. Stripes, color blocks, stencils, borders, and two-tone designs are the safest starting points. Paint pouring, galaxy finishes, and clay add-ons take more patience, but they can rescue old pots that would otherwise sit unused. Pick one idea, finish it properly, and your entryway will look more welcoming without a big spend.