There’s something almost magical about watching a hand-drawn design curl up in the oven and shrink into a tiny, glossy charm. One minute it’s a flat piece of plastic, the next it’s a thick little pendant ready to hang on a bracelet or necklace. Best of all, you can make a whole set in an afternoon using stuff you already have at home.
Here’s how to make shrink plastic charms that turn into jewelry you’ll actually want to wear.
What You’ll Need
You don’t need a craft store haul to start. Most of this is already in your kitchen or junk drawer:
- Shrink plastic sheets or clear #6 plastic from takeout containers
- Permanent markers or colored pencils
- Scissors
- A hole punch
- Parchment paper and a baking tray
- Jump rings, plus a chain or bracelet
- Small pliers
The #6 plastic is the budget secret. Check the bottom of deli tubs and cookie trays for the number 6 inside the recycling triangle. Wash a flat section, dry it, and you’ve got free charm material.
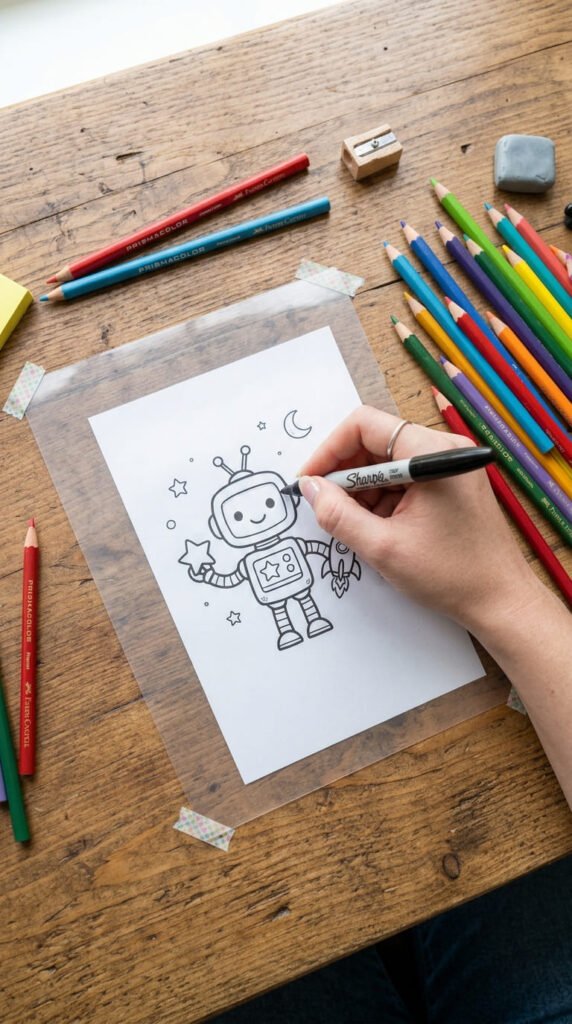
Step 1: Draw or Trace Your Designs
This is where the fun starts.
Pick simple shapes that read well when small. Hearts, stars, tiny animals, fruit, or a favorite character all work. Remember the plastic shrinks to about one-third of its original size, so draw bigger than you want the final charm.
- Trace a printed image by taping it under the plastic.
- Or draw freehand with a Sharpie.
Color in your shapes with markers or colored pencils. Press firmly for bold color, since shrinking makes everything darker and more saturated. If you’re using glossy plastic, draw on the rougher side so the ink grips better.
Step 2: Cut and Punch
Cut around each design, leaving a small border so nothing looks crowded.
Now the most important tip on this whole list: punch your hole before baking. The plastic gets hard and brittle once it shrinks, and trying to punch a hole afterward will crack it.
A few pointers:
- Punch the hole near the top of the charm.
- Make it a little bigger than you think. The hole shrinks too.
- Round any sharp corners so the charm sits comfortably.
This is the step that turns a plain charm into something you can actually attach to a chain.
Step 3: Bake and Watch
Here’s where people get nervous, but there’s no reason to.
Line your tray with parchment paper and space the charms apart so they don’t touch. Pieces that bump into each other in the oven will fuse together.
Bake at a low to moderate heat, around 250–325°F, and stay at the oven the whole time.
You’ll see something a little alarming happen:
- The charm curls up and twists.
- It keeps moving and shrinking.
- It uncurls and flattens back down.
- It stops moving completely.
Don’t panic when it curls. That’s normal. The whole cycle usually takes 1 to 3 minutes. Pull the charms out when they lie flat and stop moving, not by a fixed timer.
Step 4: Flatten While Warm
Sometimes a charm comes out a little bent. Easy fix.
The second you take it out, the plastic is still soft. Press it flat right away:
- Lay a flat glass or a hardcover book on top.
- Press gently and hold for a few seconds.
- Let it cool completely under the weight.
The plastic hardens fast as it cools, so whatever shape it’s in is the shape it keeps. Flatten in those first warm seconds and you’ll get smooth, even charms every time.
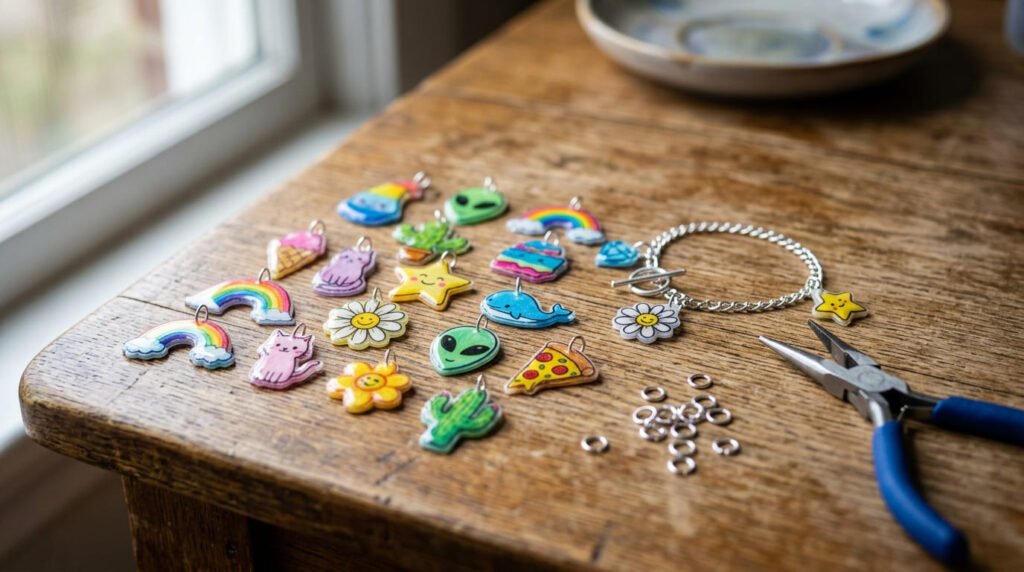
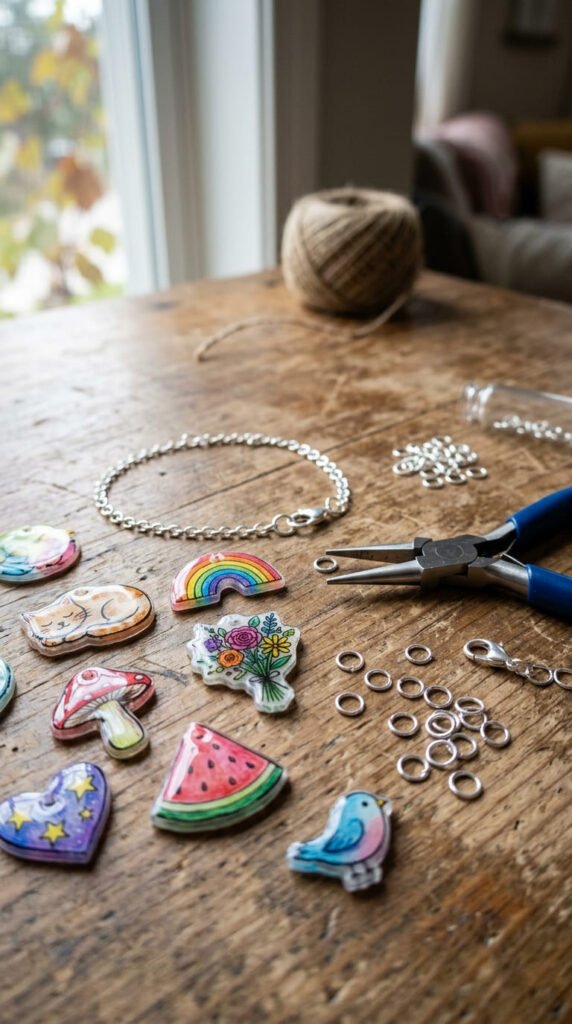
Step 5: Turn Charms Into Jewelry
Now for the part that makes it wearable.
To attach a charm, you’ll use a jump ring, the small metal loop that connects everything:
- Open the jump ring by twisting it sideways with pliers (don’t pull it apart).
- Slip it through the punched hole.
- Add your chain or bracelet link.
- Twist the ring closed again.
For a bracelet, space several charms along the links for a charm-bracelet look. For a necklace, a single charm on a chain keeps it simple and elegant.
Want extra shine and protection? Brush on a thin coat of clear gloss or even clear nail polish. It makes the colors pop and keeps the design from scratching off over time.
A Few Quick Tips
- Charms fusing together? Space them farther apart next time.
- Colors looking dull? Press harder when coloring, since shrinking darkens everything.
- Want a matching set? Bake a whole batch at once and keep a consistent color theme.
Final Takeaway
Making shrink plastic charms is one of the easiest ways to create real, wearable jewelry on a tiny budget. Draw, cut, punch, bake, and attach. That’s the whole process. Start with a few simple shapes, work up to a full matching bracelet, and you’ll have handmade pieces that look far pricier than the scraps they came from.
Save this for your next craft day, and make a charm set you’ll actually wear!