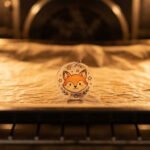
Shrinky Dinks aren’t just a kid’s craft anymore. Grown-ups have rediscovered shrink plastic as a quick, cheap way to make jewelry, charms, and tiny art that actually looks polished. You draw a design, bake it, and watch it shrink into something thick, glossy, and giftable. The magic is in how grown-up the results can look when you ditch cartoon shapes for mandalas, geometric patterns, and minimalist designs. Each piece costs pennies and comes together in one sitting. Below are 22 ideas built for adult taste, with simple steps, budget tips, and realistic examples. Grab a sheet of shrink plastic and a few markers, and pick whichever one pulls you in.
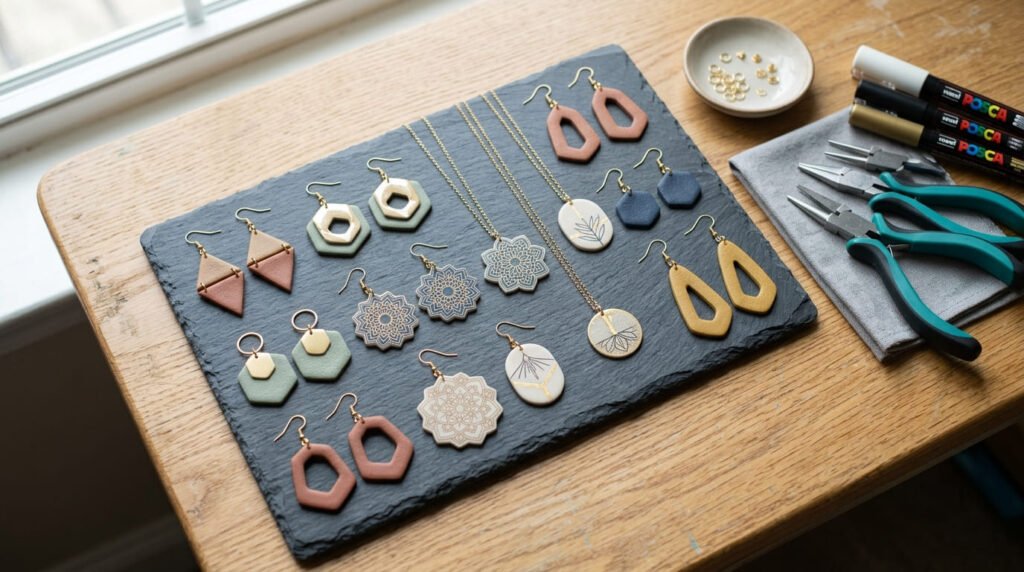
1. Geometric Statement Earrings
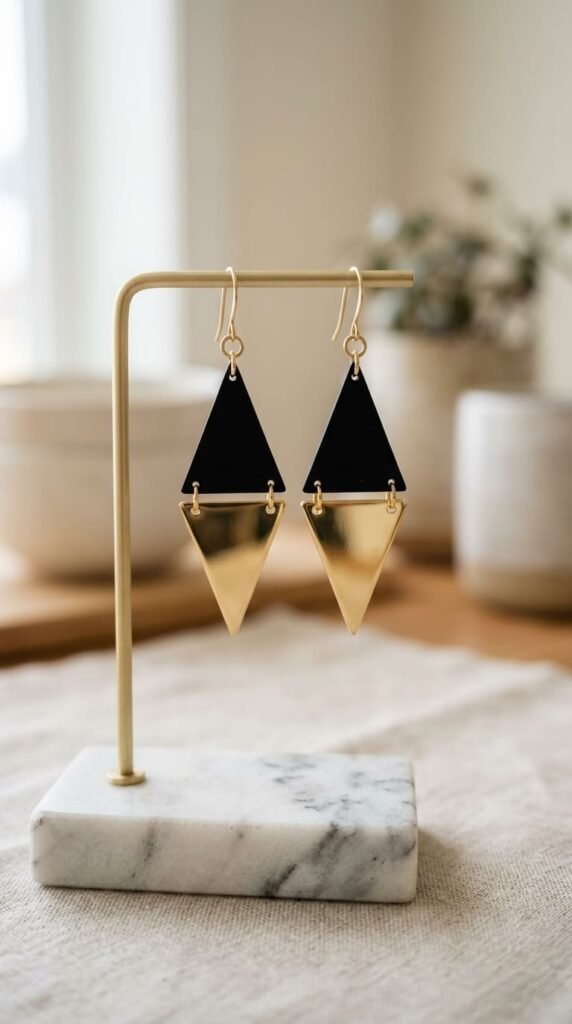
Bold shapes make the best adult earrings. Clean geometric forms read as modern and intentional, not crafty. Cut triangles, arcs, or hexagons from your shrink sheet. Color them in flat, solid tones. Keep the lines sharp and the colors limited to two or three.
Shrinking tightens every angle, so a slightly uneven cut bakes into a crisp, even shape. Geometry forgives a shaky hand.
Budget tip: One sheet makes several pairs. A pack of earring hooks costs a couple of dollars for dozens. Your cost per pair drops to almost nothing.
Match each pair for symmetry. Cut both shapes at once by stacking the plastic so they shrink the same.
Punch the hole at the top before baking. Bake on parchment, flatten while warm, and cool flat.
Add a jump ring and an earring hook. Black, white, and gold tones look the most refined. Skip busy patterns here.
These suit anyone who likes minimal, modern jewelry. A pair of clean geometric earrings looks like something from a design boutique but came off your kitchen tray for spare change.
2. Hand-Drawn Mandala Pendant
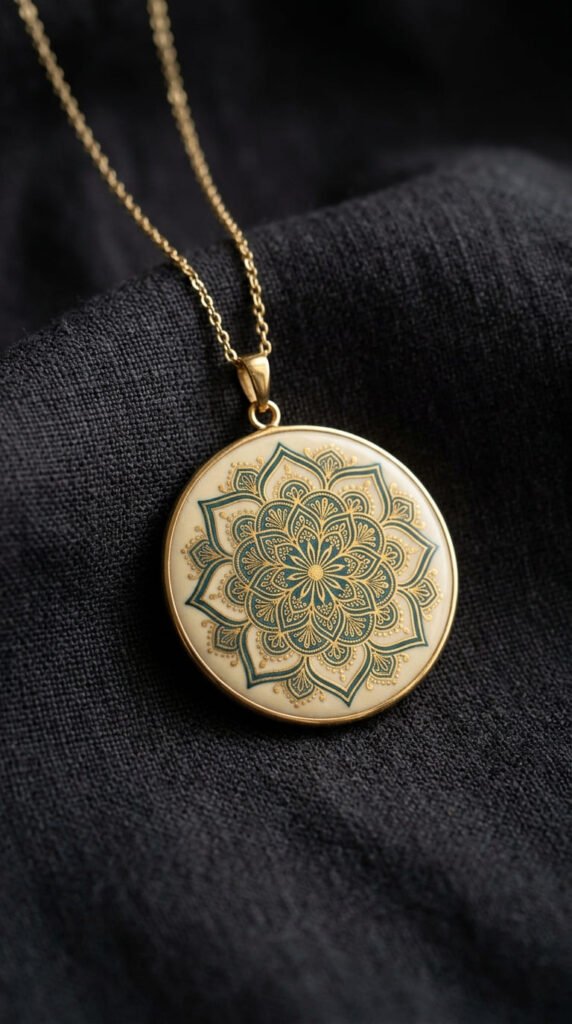
A mandala turns a plain charm into detailed art. Symmetrical line work looks sophisticated and meditative to draw. Start with a center dot. Build rings of repeating shapes outward. Keep each ring even and balanced.
Shrinking pulls the fine lines tighter, so a loose mandala bakes into a crisp, detailed piece. Small imperfections vanish as it shrinks.
Budget tip: A single fine-tip marker draws the whole thing. No special tools. Print a mandala template and trace it underneath if freehand feels hard.
Use one or two colors against a neutral background. Restraint makes mandalas look elegant rather than busy.
Cut a clean circle. Punch the hole at the top before baking.
Bake on parchment so the lines stay sharp. Flatten while warm and cool flat.
Seal with a gloss coat to make the colors pop and protect the lines. The drawing process itself is calming, almost like coloring for grown-ups.
These suit anyone who likes detailed, decorative jewelry. A mandala pendant on a fine chain looks like collectible miniature art, made affordably at your own table.
3. Photo Silhouette Pendant
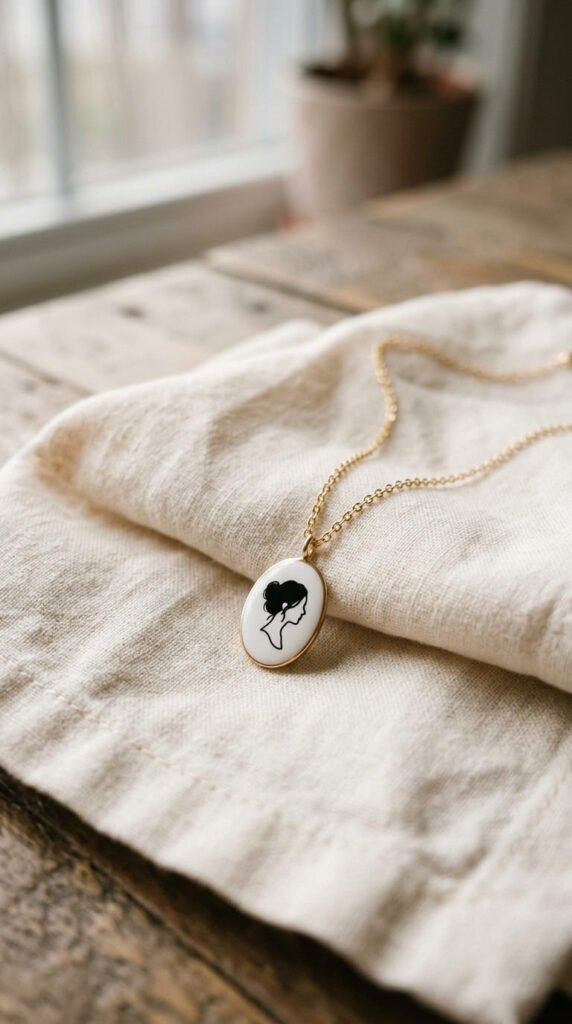
Trace a profile photo into a keepsake. Side-profile silhouettes look refined and carry real meaning. Snap a phone photo of someone facing sideways. Print it small. Tape it under the shrink sheet and trace the outline. Fill it solid black.
Shrinking sharpens the edges and darkens the fill, so a rough trace bakes into a clean, bold silhouette. Wobbly lines tighten up.
Budget tip: A regular marker and free printer paper do the job. No fancy supplies. One sheet makes several attempts.
Make a set for family members using each person’s profile. A silhouette of a partner or child makes a deeply personal gift.
Keep the original photo small. Smaller traces hide mistakes since shrinking tightens everything.
Punch the hole at the top before cutting and baking. Bake, flatten while warm, and cool flat.
Seal with gloss for shine. These make thoughtful, low-cost keepsakes for anniversaries, new parents, or grandparents.
String it on a delicate chain for a quiet, elegant piece. It looks like a custom jeweler’s silhouette necklace but cost you almost nothing to make.
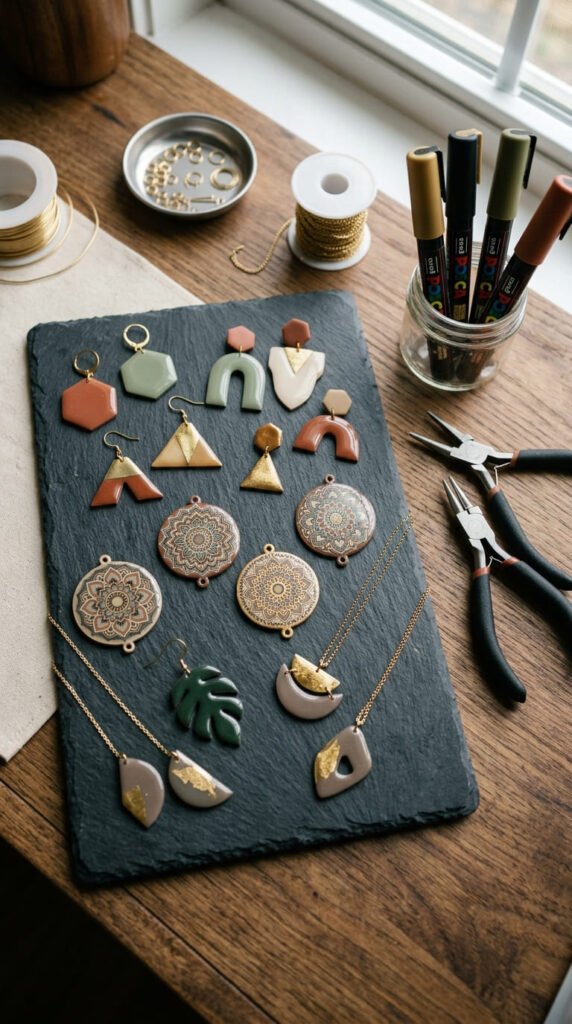
4. Custom Stacking Rings
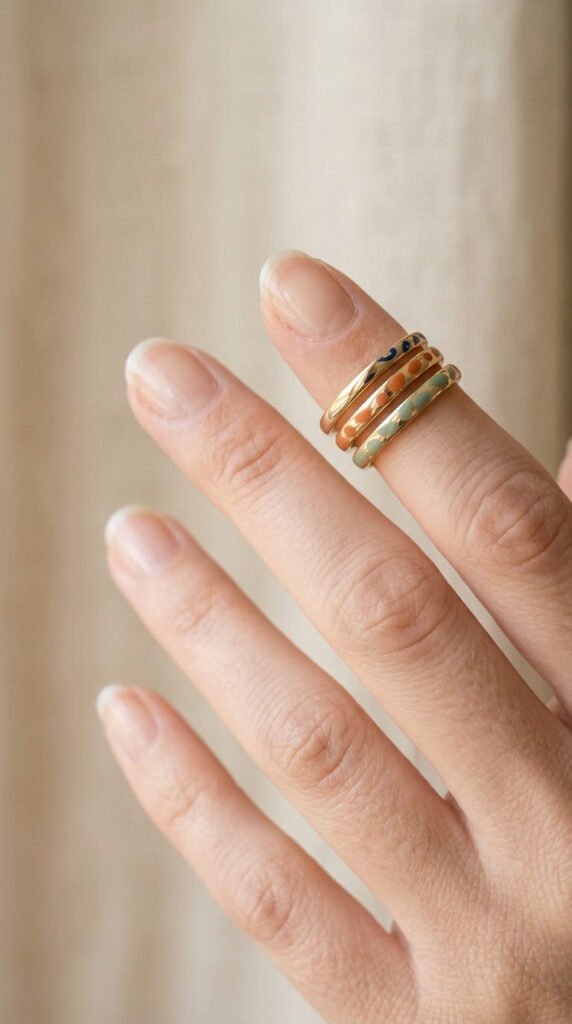
Make rings sized to your own fingers. Adjustable shrink rings are a quick win once you nail the sizing. Cut a thin strip of shrink plastic. Decorate it with a small pattern. Curl it into a ring shape using a marker or dowel right after baking, while it’s soft.
Shrinking thickens the strip into a sturdy little band. The warmth lets you shape it before it hardens.
Budget tip: Strips use almost no material. One sheet makes a dozen rings. Practice sizing on scraps first since it takes a try or two.
Remember the plastic shrinks to about a third of its size. Cut your strip longer than you think to account for the shrink.
Color with paint pens for flat, bold tone. Punch no hole here.
Bake, then quickly wrap the warm strip around a pen or your finger to set the curve. Hold until cool.
Stack two or three in different colors. These suit anyone who likes layered, minimal rings. A handful of custom bands costs less than one store-bought ring.
5. Faux Marble Pendant
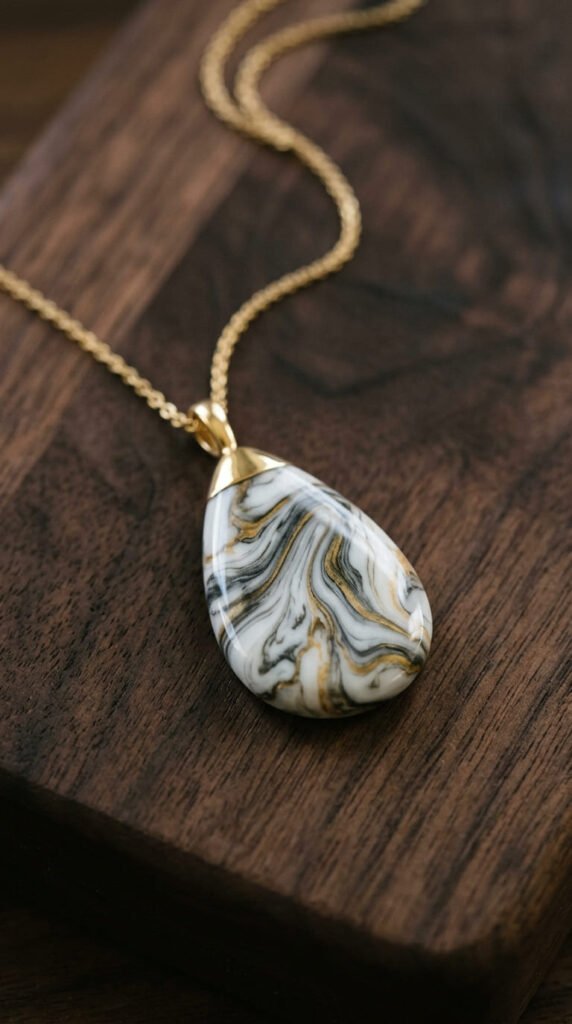
Fake the look of stone with two markers. Faux marbling turns plain plastic into something that looks like real stone. Color the charm light gray. While the ink sits wet, drag a darker gray and a touch of gold in swirling lines. Let them blend slightly.
Shrinking tightens the swirls into fine veins. Messy marbling actually bakes into convincing texture.
Budget tip: Gray and a gold pen are all you need. A metallic marker adds the luxe veins. Both reuse for many charms.
Keep veins thin and uneven. Real marble is never symmetrical, so embrace the randomness.
Cut a clean circle, oval, or bar. Simple shapes show off the pattern best.
Punch the hole at the top before baking. Bake on parchment, colored side up.
Flatten while warm and cool fully. The gloss coat is the secret here. A high-shine finish makes plastic look polished like a real marble cabochon.
These suit anyone who likes understated, elegant pieces. Hang it on a thin gold chain and most people won’t guess it started as a sheet of plastic and a couple of markers.
6. Zentangle Pattern Charms
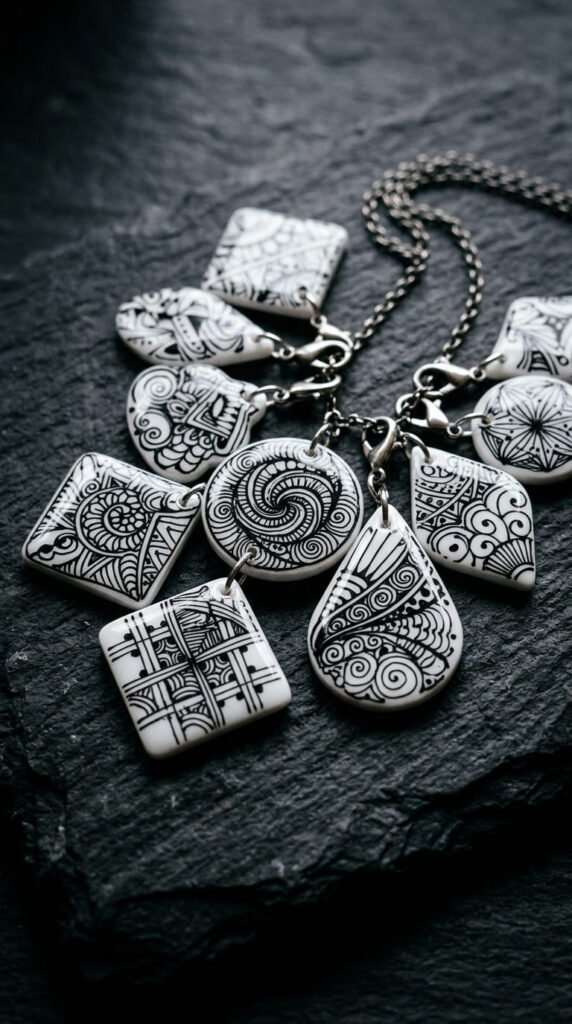
Fill a charm with meditative line patterns. Zentangle designs are intricate, calming to draw, and look impressively detailed. Divide a shape into sections. Fill each section with a different repeating pattern. Dots, waves, grids, spirals.
Shrinking pulls the dense patterns tighter, so detailed line work bakes into something that looks hand-engraved. The shrinking improves the precision.
Budget tip: One black fine-tip marker draws every pattern. No color required. Black on white reads the most graphic and modern.
Don’t plan too much. Zentangle works freeform, so let each section flow as you go.
Keep the patterns small and dense for the best shrunk effect.
Cut any shape. Punch the hole before baking. Bake on parchment, flatten while warm, cool flat.
Seal with gloss to protect the fine lines and add shine.
The drawing itself is the relaxation here. It’s a screen-free hobby that gives you something wearable at the end.
These suit anyone who likes detailed, monochrome jewelry. A zentangle charm looks like fine miniature art and costs only the price of a marker and a plastic scrap.
7. Miniature Art Pendant
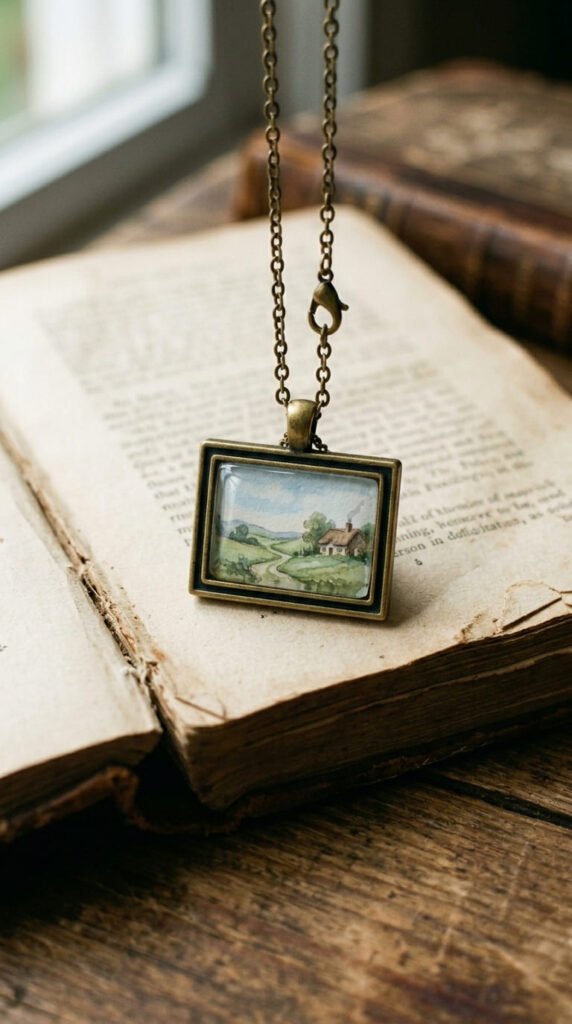
Turn a tiny painting into wearable art. Miniature art feels collectible and elevates the craft past simple charms. Pick a small scene. A landscape, a moon, an abstract shape. Draw it carefully with colored pencils or fine markers on a small charm.
Shrinking concentrates the detail, so a small painting becomes a tiny, jewel-like piece. The color deepens beautifully.
Budget tip: Colored pencils you already own work great. Frosted shrink plastic grabs pencil color better than glossy sheets.
Keep the scene simple. Detail gets tiny after shrinking, so don’t overcrowd it.
Add a thin dark border to frame the art like a real miniature painting.
Punch the hole at the top before baking. Bake on parchment, flatten while warm, cool flat.
Seal with gloss to bring out the colors and give it a finished, framed look.
These suit art lovers and anyone who likes one-of-a-kind jewelry. Each piece captures a little painting nobody else has. String one on a chain for a wearable gallery piece, made for the cost of a plastic sheet.
8. Elegant Halloween Charms
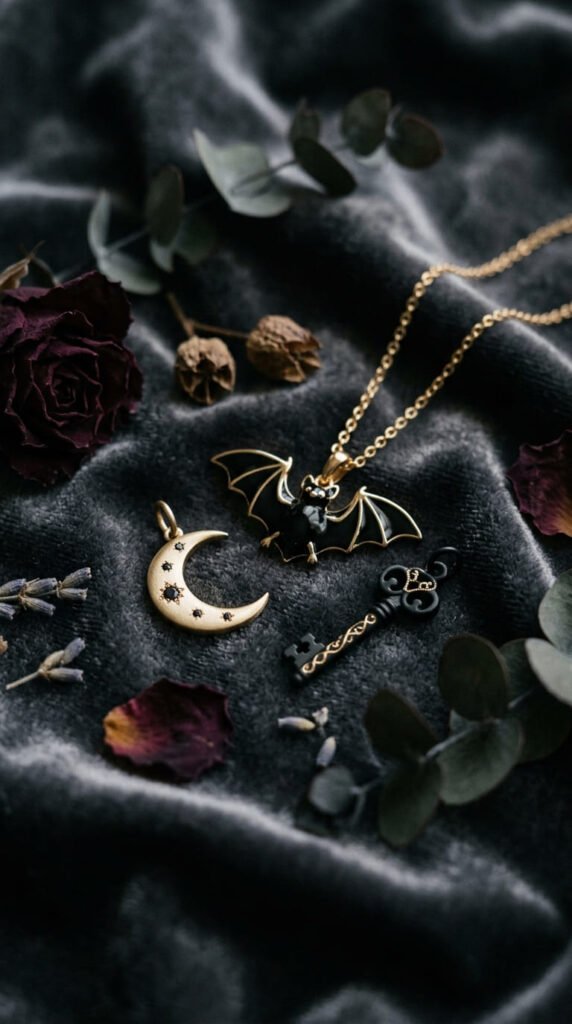
Do Halloween without the cartoon look. Grown-up spooky charms lean dark and refined, not childish. Pick elegant motifs. A black bat, a crescent moon, a skeleton key, a raven. Color them in black and gold. Keep the shapes sleek.
Shrinking sharpens the silhouettes, so a clean cut bakes into a crisp, gothic charm. Detail stays sharp.
Budget tip: Black marker and a gold pen cover the whole set. One sheet makes a dozen spooky charms for party gifts or your own jewelry.
Skip bright orange. Black, gold, and deep purple read as sophisticated Halloween.
Cut clean silhouettes. Punch the hole before baking. Bake on parchment, flatten while warm, cool flat.
Seal with gloss for a dark, glassy shine.
These suit anyone who loves gothic or moody style year-round, not just in October. String a bat or moon on a black cord for an everyday piece with an edge.
Make a batch as affordable handmade gifts for a Halloween party. They look far classier than store-bought plastic décor and cost a fraction of the price.
9. Botanical Leaf Pendant
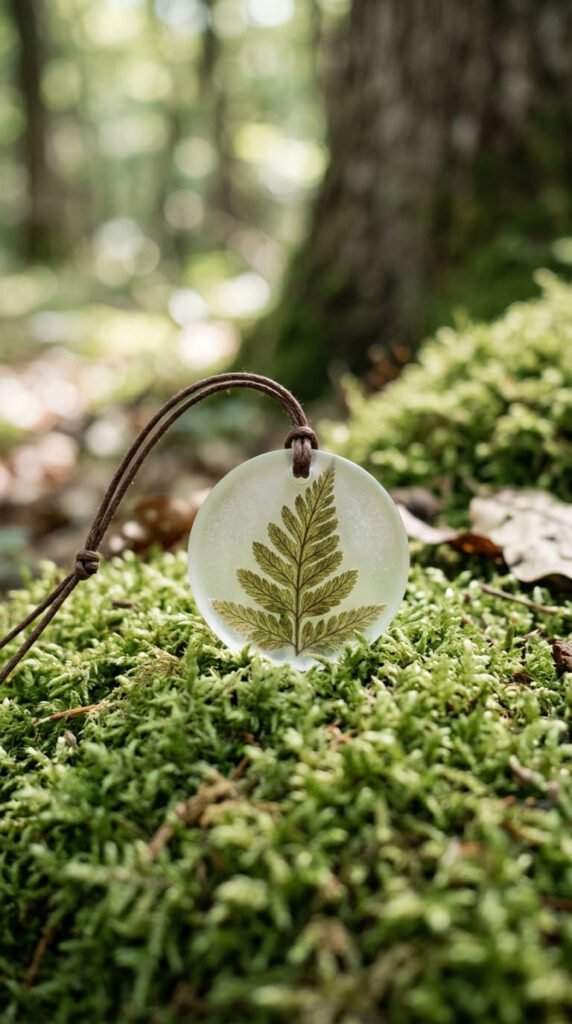
Capture a plant’s detail in a charm. Botanical designs look organic, calming, and grown-up. Place a real leaf under your shrink sheet and trace its outline and veins. Or draw a simple leaf and add veins freehand. Color it in greens.
Shrinking sharpens the fine vein lines, so a delicate tracing becomes a detailed natural charm. Faint lines darken just right.
Budget tip: Real leaves from your yard are free templates. Lay one under, trace, and you’ve got perfect detail for nothing.
Use two or three green pencils for depth. Layering greens reads as natural shading once shrunk.
Cut along the leaf shape for an organic edge. Punch the hole at the stem end before baking.
Bake on parchment, flatten while warm, and cool. Seal with matte for a natural feel or gloss for a fresh-leaf shine.
These suit plant lovers and anyone who likes earthy, botanical style. A fern or eucalyptus charm on a natural cord feels grounded and calm.
Make a set of different leaves for a collected, garden-inspired look that costs only the plastic and a few pencils.
10. Pet Portrait Charm
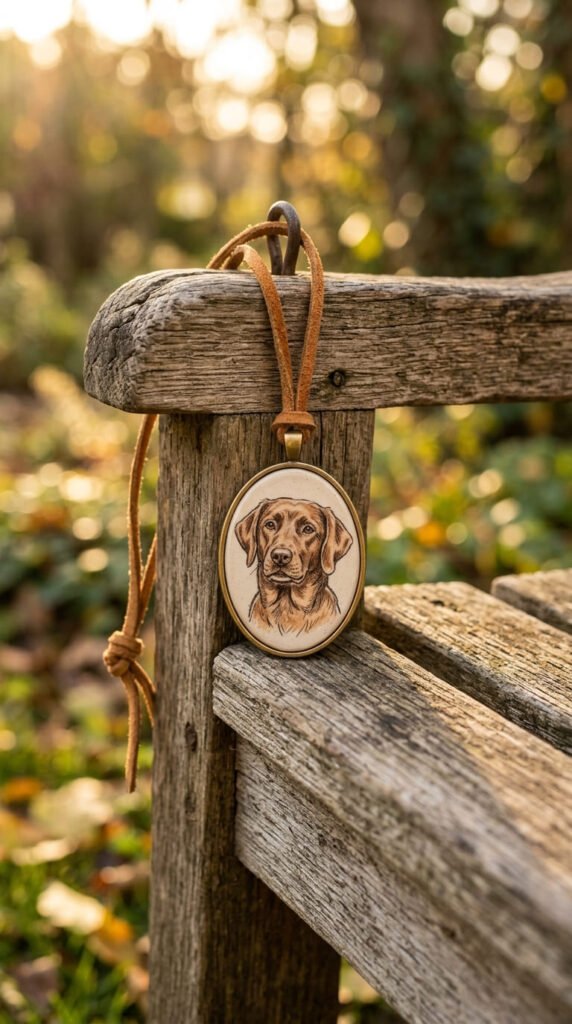
Carry your pet on a tiny charm. A pet portrait sounds hard but a traced photo makes it doable. Pick a clear side photo of your dog or cat. Print it small. Tape it under the sheet and trace the main shapes and features.
Detail tightens as it shrinks, so even a loose trace looks recognizable after baking. Wonky features straighten out.
Budget tip: Use a phone photo and home printer. No art skills required. Tracing does the drawing for you, and one sheet makes several tries.
Add fur color with colored pencil. Keep it simple. A few well-placed marks read as fur better than scribbling.
Outline in black marker for definition. Punch the hole near the top before cutting and baking.
Bake on parchment, flatten while warm, cool flat. Seal with gloss to protect the face from wear.
These become daily-wear pieces and heartfelt gifts for fellow pet owners. Make a second as a present for anyone who loves the same pet.
A pet charm on a chain keeps your companion close for the cost of a plastic scrap and a little tracing.
11. Faux Enamel Pin Charms
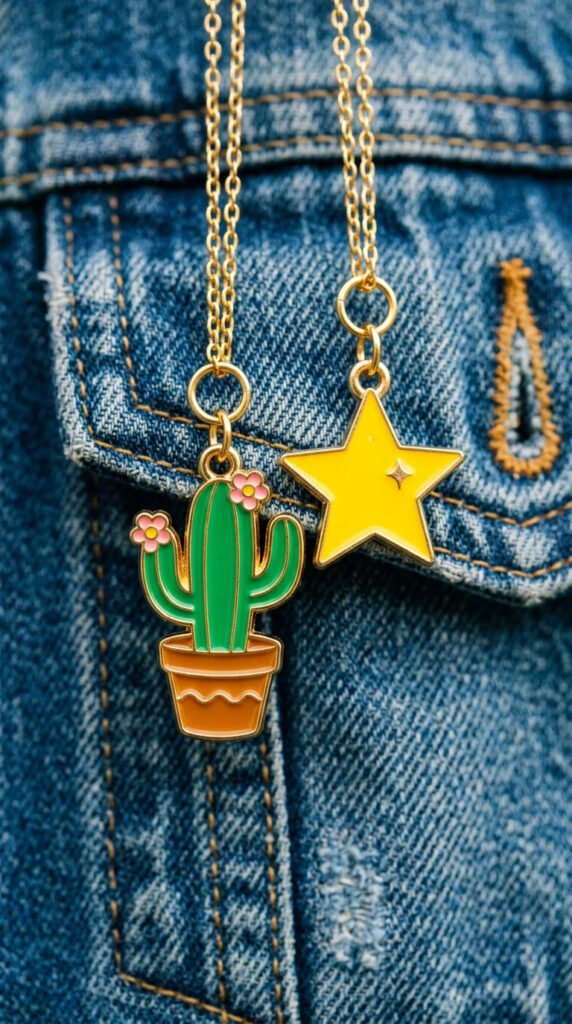
Copy the trendy enamel-pin look. Faux enamel designs have bold flat colors and clean outlines that adults love. Draw a simple icon. A cactus, a star, a tiny animal. Outline it in heavy black or gold. Fill with flat, solid bright colors.
Shrinking thickens the outline and saturates the colors, giving that glossy enamel finish. Solid fills bake darker and richer.
Budget tip: Bold markers and one outline pen make this. A gold outline mimics metal pin edges, and a gold pen costs only a couple of dollars.
Keep the icon simple and colors flat. No shading needed since enamel pins are clean color blocks.
Cut along the icon’s edge. Punch the hole at the top before baking.
Bake colored side up, flatten while warm, cool flat. Seal with a thick gloss coat. The heavy shine sells the enamel look.
These suit anyone with a playful, modern style. String one on a thin chain or clip it to a bag.
A faux enamel charm looks like the pins everyone collects, made for a fraction of the boutique price right at your table.
12. Modern Christmas Ornaback Charms
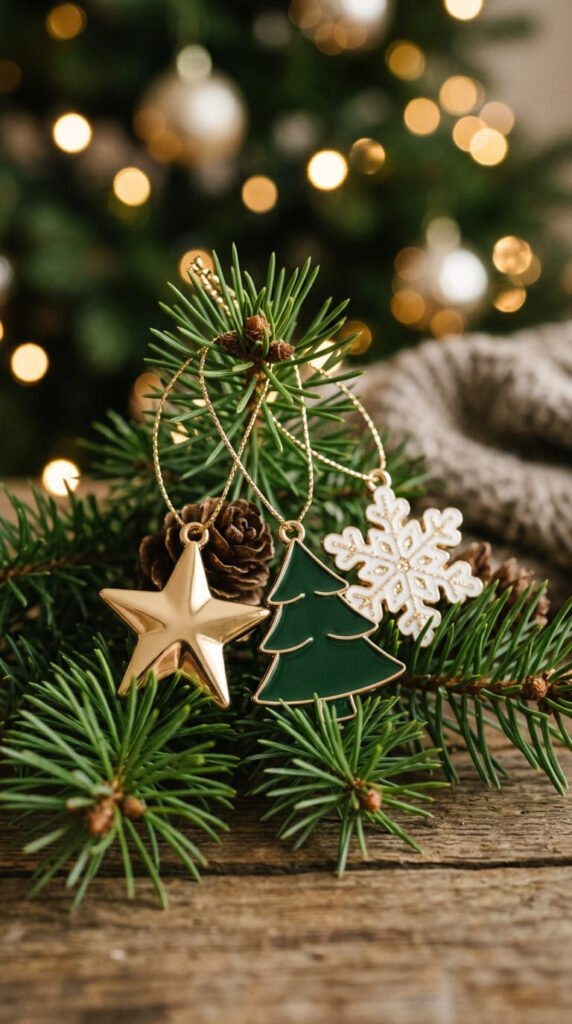
Make holiday charms that skip the kitsch. Minimalist Christmas designs suit grown-up taste. Pick clean symbols. A simple star, a thin tree outline, a single snowflake. Color them in gold, white, and deep green.
Shrinking sharpens the shapes, so a clean drawing bakes into a crisp, elegant charm. Simple lines hold up best.
Budget tip: One sheet makes a whole set of charms or tiny ornaments. Batch them in one baking session for gifts and decorations.
Keep it minimal. Two or three colors max reads as modern, not cluttered.
Make slightly larger versions as mini tree ornaments. Make smaller ones as charms or gift-tag toppers.
Punch the hole before baking. Bake on parchment, flatten while warm, cool flat.
Seal with gloss for shine. Tie ornaments with thin ribbon and charms onto chains.
These make affordable handmade gifts and classy package decorations. A set of gold-and-white charms looks designed, not crafty.
One inexpensive sheet gives you a year’s worth of holiday pieces, far cheaper than store-bought ornaments and far more personal.
13. Minimalist Bookmark Charms
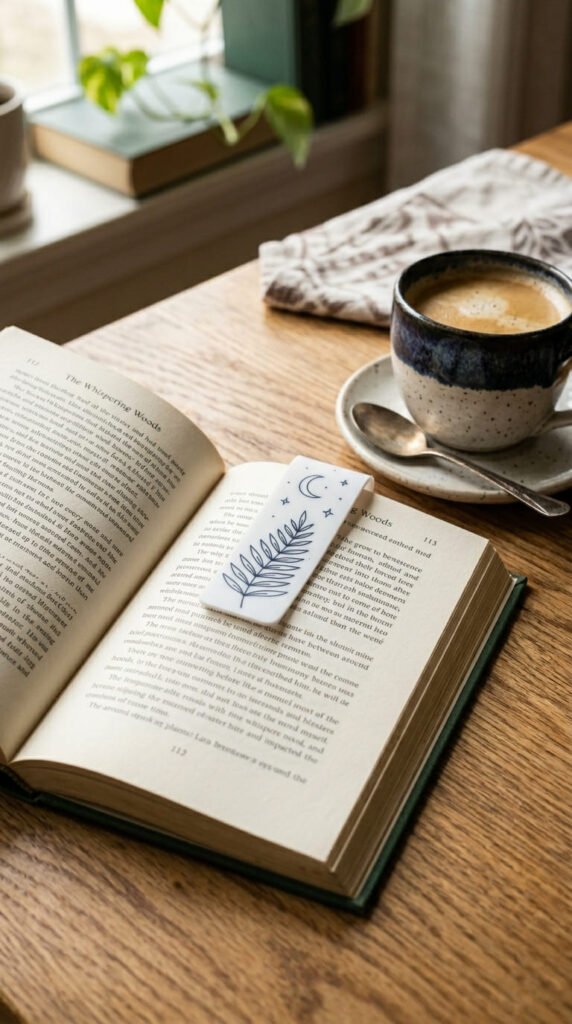
Go beyond jewelry with a desk-friendly piece. Bookmark charms give adults a non-wearable use for shrink plastic. Cut a small shape with a hole. Add a minimalist line design. Attach it to a ribbon or a paper clip to mark your page.
Shrinking thickens the charm into a sturdy little tag. It holds up to daily page-flipping.
Budget tip: Scraps work perfectly here. Use leftover bits from other projects and spend nothing extra.
Keep the design simple and graphic. A single line drawing or a small icon reads best.
Punch the hole at the top before baking. Bake on parchment, flatten while warm, cool flat.
Loop a ribbon or jump ring through the hole. Slide a paper clip on for a sliding bookmark.
These suit readers and anyone who wants office-friendly crafts. A charm clipped to a ribbon makes a small, useful gift for book lovers.
Make a few in different designs to match your reading mood. It’s a tiny, practical project that uses up scraps and costs basically nothing while adding a personal touch to your desk or shelf.
14. Abstract Shape Necklace
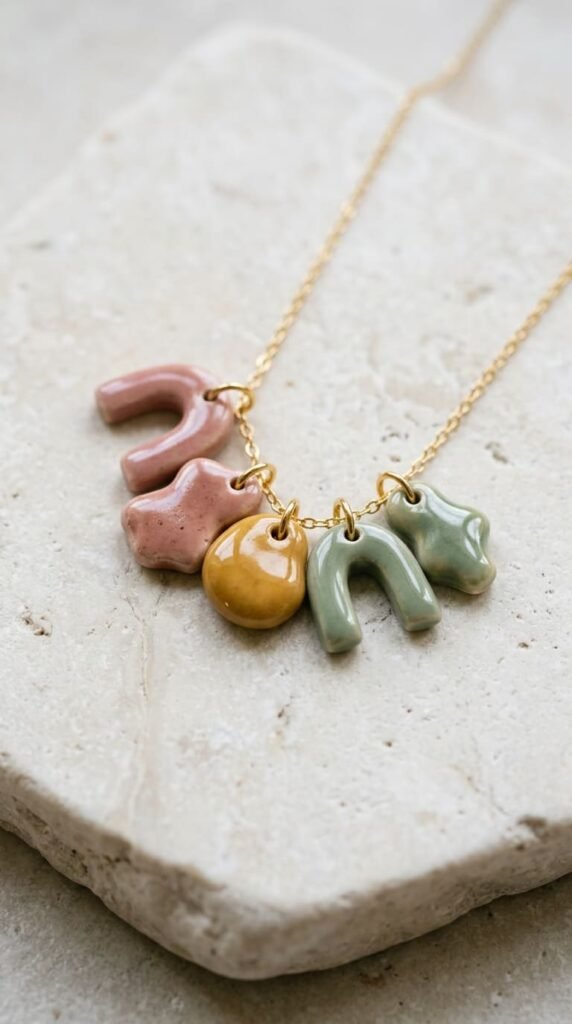
Lean into organic, artsy forms. Abstract shapes look modern and require zero drawing skill. Cut free-form blobs, arches, and squiggles. Color them in muted, earthy tones. Group a few different shapes on one chain.
Shrinking smooths the edges and deepens the colors, so a rough cut becomes a clean, sculptural charm. Imperfection works in your favor.
Budget tip: No template, no drawing. Just cut interesting shapes freehand and color them flat. One sheet makes a dozen.
Stick to a muted palette. Dusty rose, ochre, and sage read as artsy and grown-up.
Vary the sizes a little for visual interest. Punch a hole in each before baking.
Bake them all on one tray. Flatten while warm. Cool flat.
Add jump rings and space them along a chain. Seal with gloss for a uniform shine.
These suit anyone who likes modern, gallery-style jewelry. A cluster of abstract shapes looks like a designer piece from a craft fair.
The whole necklace costs the price of one plastic sheet and a few markers, but looks like something you’d find in a boutique.
15. Map Coordinates Pendant
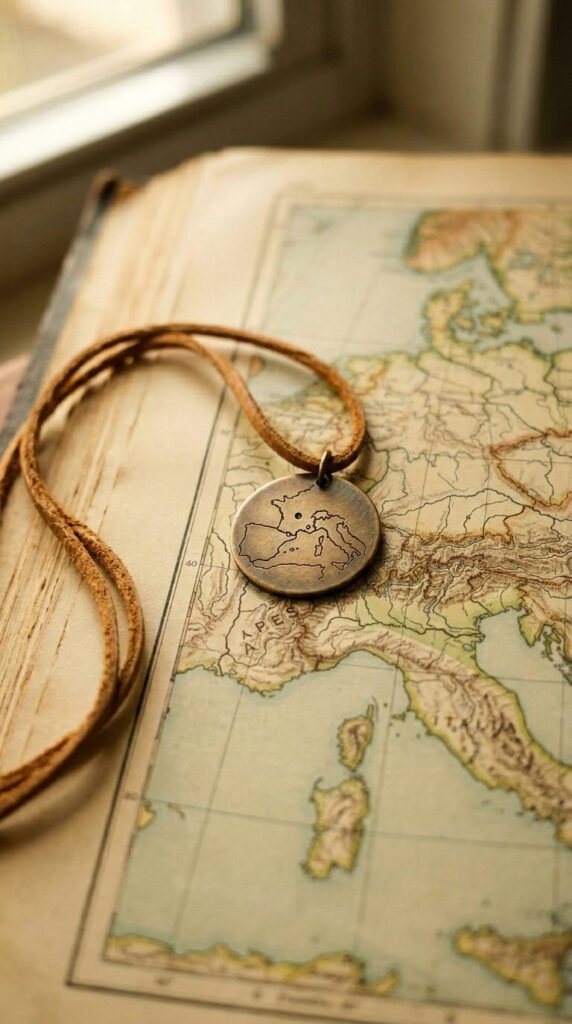
Pin a meaningful place on a charm. A map or coordinates design holds real sentiment for adults. Draw a simple map outline of a favorite spot, or write the latitude and longitude numbers. Add a small dot on the exact location.
Shrinking sharpens thin lines and tiny text, so a delicate map stays readable after baking. Shaky lines firm up.
Budget tip: Print a screenshot of the map, tape it under, and trace the coastline or main roads. No drawing talent required, and it’s free.
Mark where you met someone. Mark a hometown. Mark a place you traveled. The single dot carries the meaning.
Use a fine-tip marker for clean lines. Sepia pencil gives a vintage-map feel.
Cut a circle. Punch the hole at the top before baking. Bake, flatten while warm, and cool.
Seal with matte for an old-map vibe or gloss for shine.
These make deeply personal gifts for anniversaries, moves, or weddings. String one on a leather cord for a piece with a story behind it.
A coordinates pendant looks like a custom keepsake from a jeweler, made affordably at your own table.
16. Custom Phone Charms
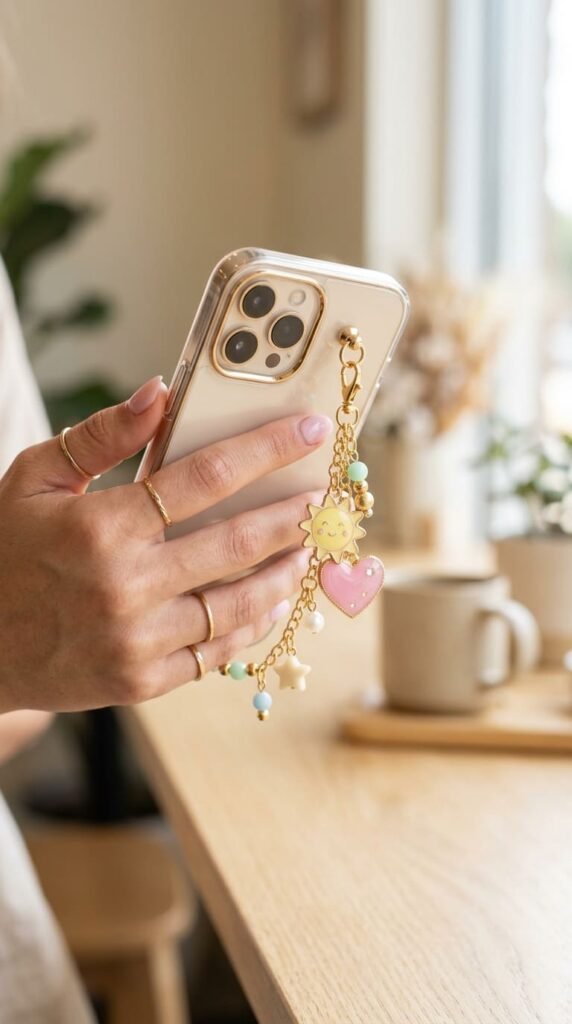
Decorate your phone with tiny charms. Phone charms are an emerging accessory that adults are loving. Make a few small shapes. Suns, hearts, stars, tiny abstract forms. Keep them small so they dangle nicely without weighing the phone down.
Small charms shrink fast and bake evenly, so a batch comes together quickly. Tiny shapes hold detail well.
Budget tip: Scraps are perfect for these. Use leftover bits and a length of beaded cord or chain. Costs almost nothing.
Pick a small theme. A matching set looks more intentional than random shapes.
Punch a hole in each before baking. Bake on parchment, flatten while warm, cool flat.
String them on a phone charm cord or a short beaded strand. Seal with gloss for shine.
These suit anyone who likes to personalize their tech. A custom charm strand makes a fun, affordable gift for a friend.
Phone charms are an easy way to use up scraps from bigger projects. The whole set comes from material you’d otherwise toss, plus a cheap cord, for a personal accessory that costs next to nothing.
17. Faux Stamped Locket Charm
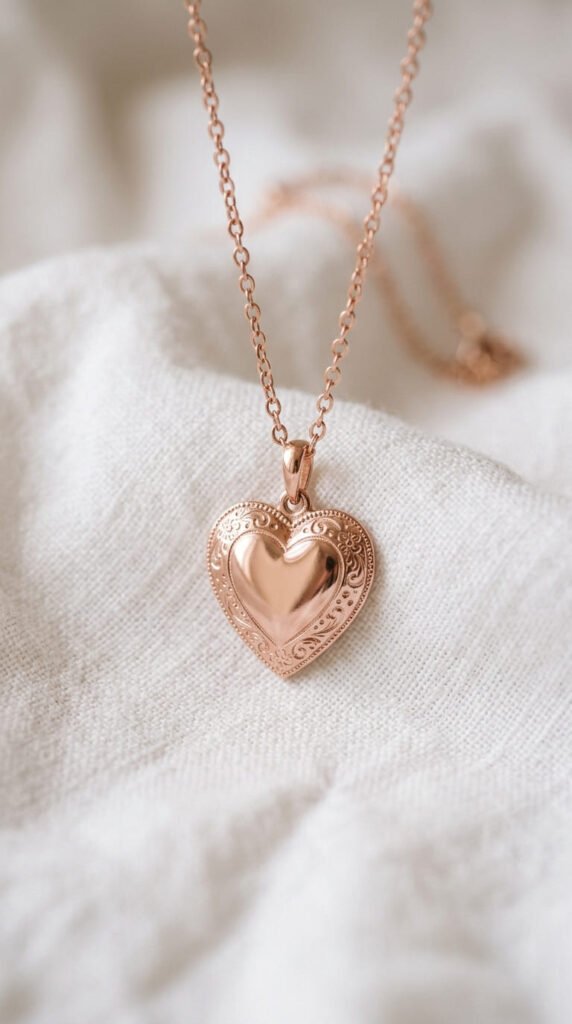
Borrow the look of an engraved locket. Stamped-style patterns around the edge give a vintage, metal-worked feel. Cut a heart or oval. Draw a border of dots, dashes, or tiny flowers around the rim with a fine marker.
The pattern shrinks into a delicate, lacy edge. Hand-drawn dots that look uneven turn even and tight.
Budget tip: No stamps or metal tools. A fine-tip marker draws every mark for free. The whole charm costs almost nothing.
Fill the center with a soft color or a tiny initial. A small detail in the middle keeps it from looking empty.
Try a blush charm with a gold-pencil border. Punch the hole at the top or side before baking.
Cut clean curves. Bake, press flat, cool. Seal with gloss to keep the color bright.
These make elegant gifts for partners, friends, or moms. A faux-stamped heart looks like an heirloom locket.
Pair it on a fine chain for a piece that looks like it came from a jewelry counter, made for the cost of a plastic scrap and one marker.
18. Art Deco Earrings
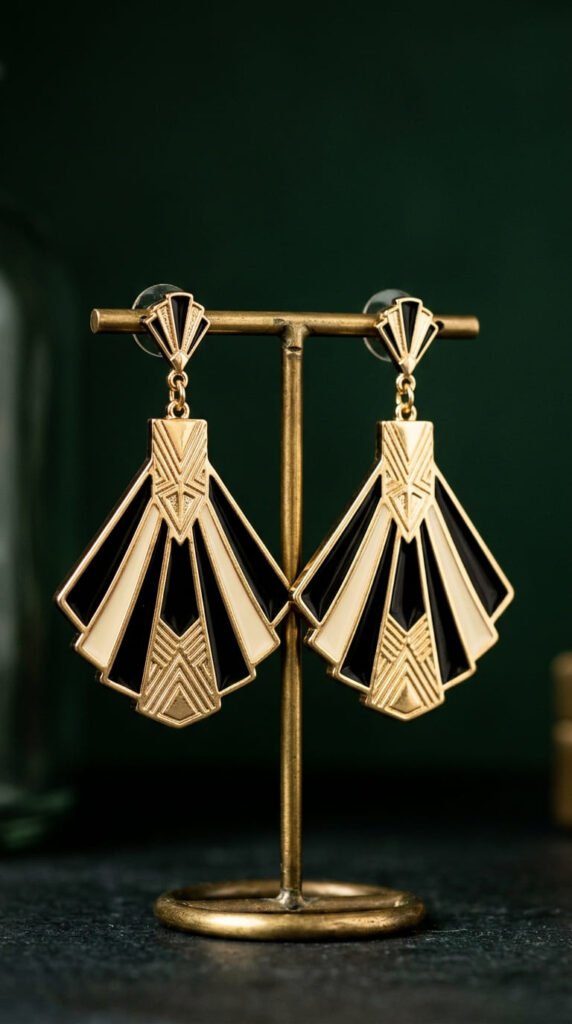
Channel 1920s glamour into earrings. Art Deco patterns use bold symmetry and gold accents that look refined. Cut fan or stepped shapes. Add geometric line detailing. Color in black, cream, and gold.
Shrinking sharpens the angular lines, so a clean drawing bakes into a crisp, glamorous piece. The geometry tightens up.
Budget tip: Black marker and a gold pen cover the whole look. One sheet makes several pairs, so cost per pair is tiny.
Keep the patterns symmetrical. Art Deco is all about balance, so mirror your designs on each earring.
Cut both shapes stacked so they match. Punch the hole at the top before baking.
Bake on parchment, flatten while warm, cool flat. Seal with gloss for a polished, lacquered shine.
Add jump rings and earring hooks. The black-and-gold combo reads as vintage luxury.
These suit anyone who loves retro or glamorous style. A pair of Deco earrings looks like vintage costume jewelry from an antique shop.
They cost only a plastic sheet and two markers but carry serious old-Hollywood elegance.
19. Fandom Symbol Charms
Wear a nod to what you love. Fandom-inspired charms let adults show their interests subtly. Pick a simple symbol from a favorite book, game, or show. Keep it iconic and minimal. Outline it cleanly and fill with bold color.
Shrinking thickens the outline and saturates the color, so a clean icon bakes into a sharp, recognizable charm. Simple shapes work best.
Budget tip: Markers you own cover most symbols. Trace a printed icon underneath if drawing freehand feels tricky. Free and easy.
Keep it simple. An iconic symbol reads instantly even when tiny.
Stick to recognizable shapes over detailed scenes. Detail gets lost at small sizes.
Punch the hole before baking. Bake colored side up, flatten while warm, cool flat.
Seal with gloss for shine and durability.
These suit anyone in a fandom who wants a subtle piece, not a loud one. A small symbol charm signals your interest to those who know.
Make matching ones for friends who share the fandom. They cost only a plastic scrap and a marker but mean a lot to the right person.
20. Monogram Initial Charm
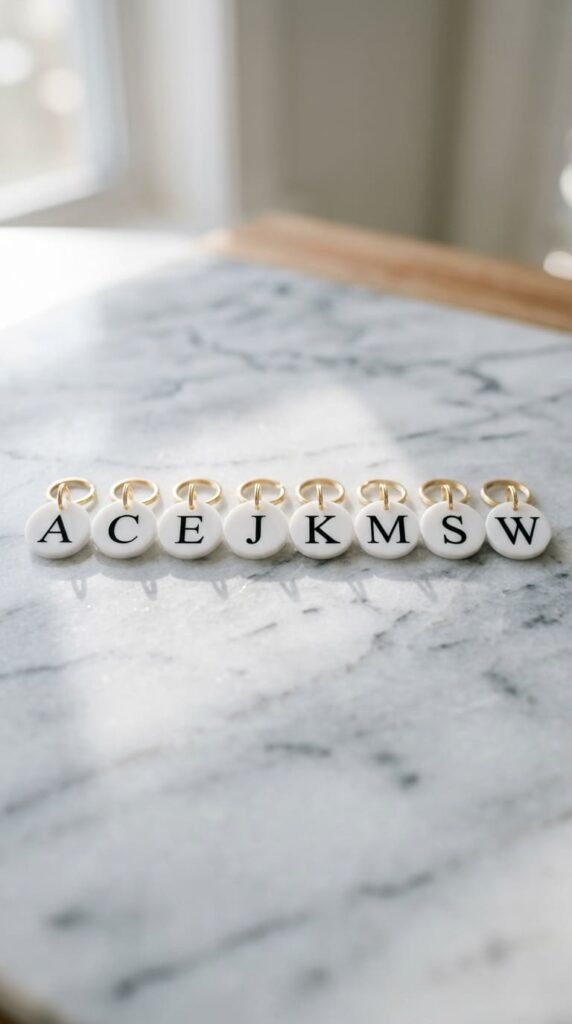
One letter says plenty. A single-initial charm is fast and works for any style. Pick a font you like. Print the letter at about three inches tall. Trace it onto your shrink sheet and fill it in.
Big letters shrink down to a tidy, weighty charm. The thickness after baking gives it a premium feel.
Budget tip: Free font sites let you preview hundreds of styles. Pick a bold serif for a classic look. Costs nothing.
Make matching initials for friends. Make a stack of initials for a family on one cord.
Outline the letter, then fill solid. Solid fills shrink darker and cleaner than open outlines, so go bold.
Punch the hole inside a thick part of the letter when you can. It hides the hardware.
Bake, flatten while warm, cool, and seal. A clear coat over a glossy letter gives it that enamel-charm shine.
These suit anyone who likes personalized, minimal jewelry. A clean monogram looks like a piece you’d pay real money for in a store.
It comes off your tray for the cost of a plastic scrap, and you can make a whole set in one sitting.
21. Ombre Gradient Pendant
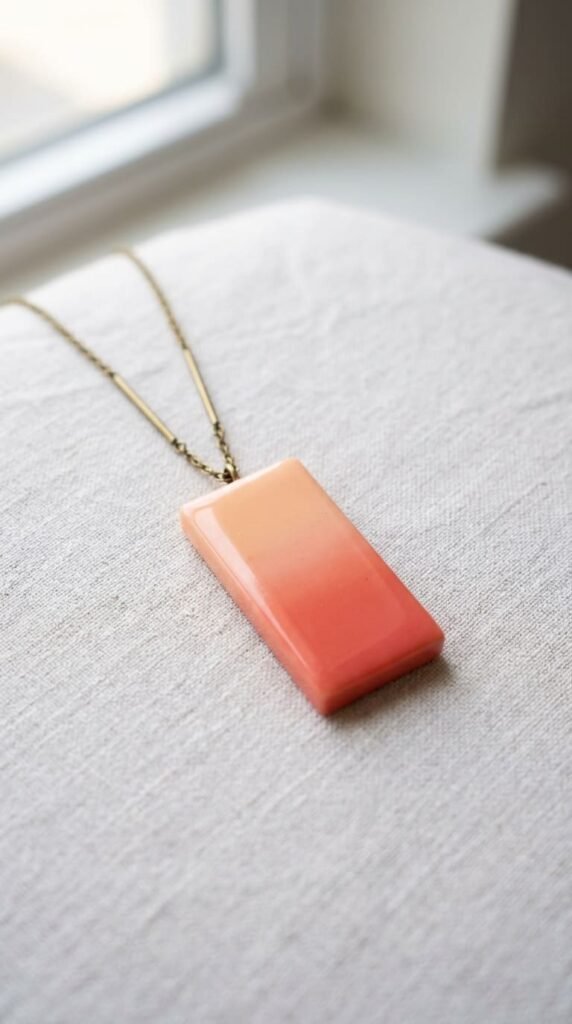
Get a soft color fade using pencils. An ombre gradient looks modern and takes patience, not skill. Use frosted shrink plastic. Color heavily at one end and lighter toward the other. Blend the middle with a finger or tissue.
Shrinking concentrates the color, so a gentle fade becomes a smooth, rich gradient. Light pressure leaves room to deepen the dark end.
Budget tip: Two pencils in similar shades make the cleanest fade. Peach to coral, or sky to navy. Use what’s in your pencil case.
Pick a tall rectangle or long oval. Vertical charms show off gradients best.
Punch the hole at the top. Bake on parchment so the matte surface stays even.
Once cool, brush on a clear gloss to wake up the colors and add shine. The matte fade turns glossy and bright.
These suit anyone who likes soft, modern jewelry. A gradient pendant on a simple chain lets the color do all the talking.
It costs only a plastic sheet and two pencils but looks like a designed, intentional piece from a boutique shelf.
22. Giftable Charm Sets
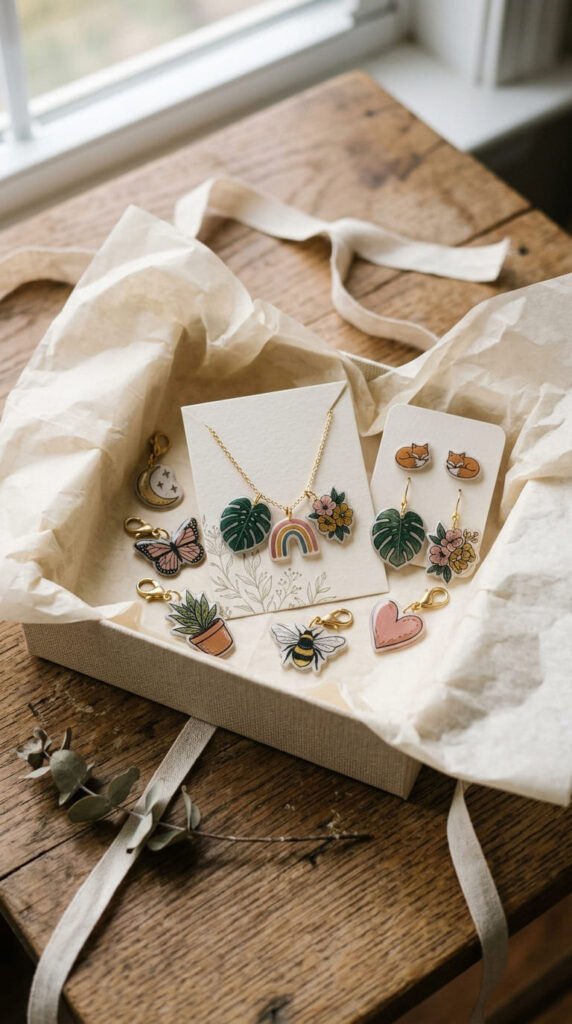
Package your charms into a real gift. A curated set turns single charms into a present worth giving. Make three or four matching pieces. A necklace, earrings, and a charm in one style. Nestle them in a small box with tissue paper.
Shrinking gives each piece a polished, store-bought feel. A matched set looks intentional and high-end.
Budget tip: One sheet makes a full set. Small boxes and tissue cost a dollar or two. The whole gift comes in well under store prices.
Pick one theme for the set. Matching colors and style tie everything together.
Make a mandala necklace with mandala earrings. Or a marble pendant with marble studs.
Punch holes before baking. Bake the batch together. Flatten while warm, cool flat, and seal all with gloss.
Add hardware, then arrange in the box. A handwritten note finishes it.
These make impressive, affordable gifts for birthdays and holidays. A coordinated handmade set looks far pricier than its few dollars of materials.
It’s the kind of present people assume came from a boutique, made entirely at your own table for spare change.
Conclusion
Shrink plastic earns its spot as a grown-up hobby once you swap cartoon shapes for mandalas, marble, geometric earrings, and miniature art. A single cheap sheet and a few markers cover nearly every idea here, and most pieces come together in one relaxing sitting. Start with something simple like geometric earrings or a monogram charm, then work toward zentangle patterns or a full giftable set once you find your rhythm. Punch your holes before baking, seal each piece with gloss, and pick your hardware to match your style. Grab a sheet this weekend and make a few. The best part is that no two pieces ever come out exactly alike, so whatever you create is genuinely your own, made for the price of a coffee.