Shrink plastic isn’t just for charms anymore. Crafters are turning it into tiny, glossy art prints that hang on the wall and pack a real punch. You draw or trace a design, bake it, and watch it shrink into a thick, saturated mini masterpiece. The small scale is the whole appeal, since a wall of little framed pieces looks collected and intentional. Each print costs almost nothing, especially if you trace templates or use scrap plastic. Below are 22 bold ideas for mini wall art you can make this weekend, each with a simple plan, a budget tip, and an easy way to start. Grab a sheet of shrink plastic and some markers, and pick whichever one grabs you.
1. Bold Geometric Pattern Print
Sharp shapes make striking wall art. Bold geometric patterns read clean and modern at any size. Draw a design of triangles, blocks, or angled lines. Color them in two or three strong shades. Keep the lines crisp and the color flat.
Shrinking tightens every angle, so a slightly uneven drawing bakes into a sharp, even print. Geometry forgives a shaky hand.
Budget tip: A ruler and a few markers make this. Straight edges keep it clean, and you likely own both already.
Stick to a limited palette. Two or three bold colors read as designed, not busy.
Cut a clean rectangle or square. Punch no hole, since this mounts in a frame.
Bake on parchment, flatten while warm, and cool flat. Seal with gloss for a rich, saturated finish.
Mount it in a small frame or glue it to a tiny canvas.
These suit anyone who likes modern wall décor. A single bold geometric print looks like designer art. Make a set of three in matching colors for a coordinated gallery wall that costs only a plastic sheet and a few markers.
2. Abstract Color-Block Print
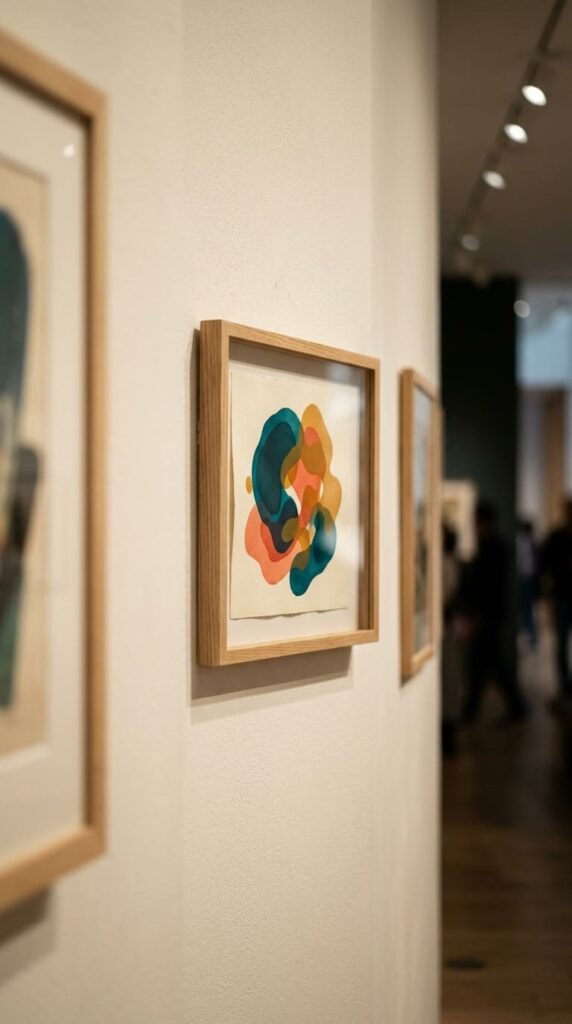
Skip drawing skill and go abstract. Abstract color blocks look artsy with zero technique. Draw a few overlapping shapes. Blobs, arcs, and squares. Color them in a muted, modern palette. Let some shapes overlap for depth.
Shrinking deepens the colors, so a simple arrangement becomes a rich, gallery-style print. Imperfection works in your favor.
Budget tip: No template, no drawing skill. Just arrange interesting shapes and color them flat. One sheet makes several.
Pick a modern palette. Teal, coral, and ochre read as artsy and grown-up.
Overlap a couple of shapes for a layered look.
Cut a clean rectangle. Bake on parchment, flatten while warm, cool flat.
Seal with gloss for a saturated, finished surface.
Frame it in a slim wood or metal frame.
These suit anyone who wants modern art on a budget. A small abstract print looks like a piece from a design shop. Make a series in one palette for a cohesive set. The whole gallery wall costs the price of one sheet and a handful of markers, but reads as curated, intentional art.
3. Botanical Line-Art Print
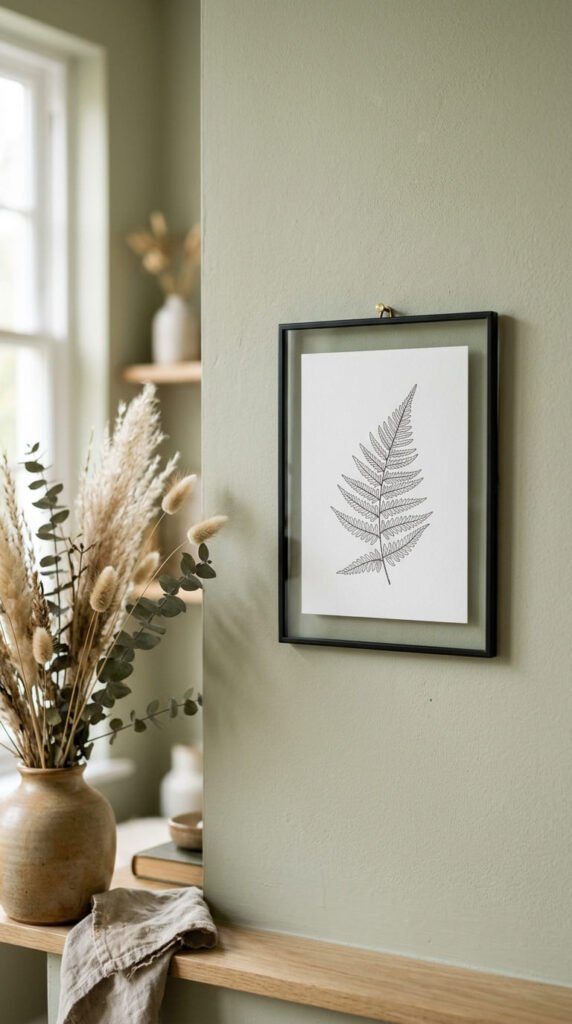
Capture a plant in clean lines. Botanical line art is calming and looks refined. Draw a single plant. A fern, a leaf, a sprig. Use a fine black marker and keep the lines minimal. Skip color for a modern look, or add one soft tone.
Shrinking sharpens the fine lines, so a delicate drawing bakes into a crisp, detailed print.
Budget tip: One fine-tip black marker makes this. Trace a real leaf or a printed image underneath if freehand feels hard. Costs almost nothing.
Keep it minimal. A single plant in clean lines reads as modern botanical art.
Leave plenty of white space around the design.
Cut a clean rectangle. Bake on parchment, flatten while warm, cool flat.
Seal with matte for a paper-print feel or gloss for shine.
Frame it in a thin black or wood frame.
These suit anyone who likes calm, natural décor. A set of botanical line prints looks like something from a stationery boutique. Make three different plants for a coordinated trio that costs only a marker and a plastic sheet.
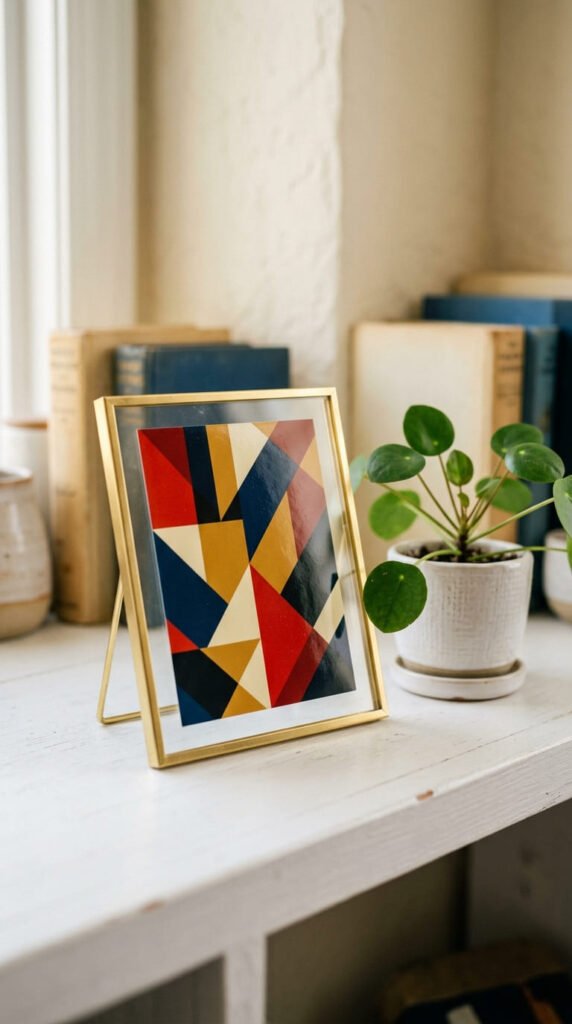
4. Mini Famous-Art Recreation
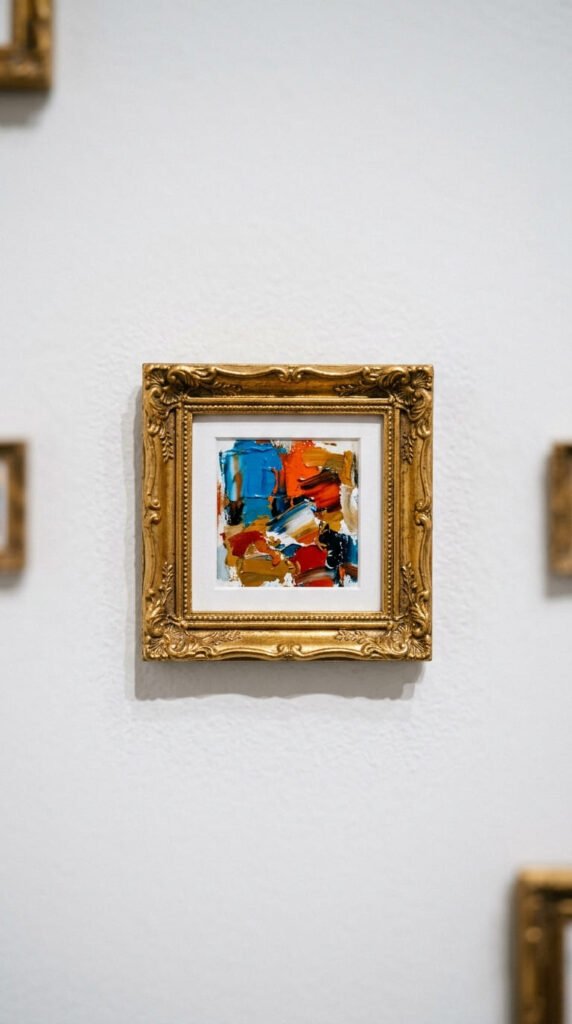
Shrink a masterpiece down to charm size. A mini art recreation turns wall space into a tiny gallery. Pick a famous painting with bold, simple shapes. Trace or sketch its main color fields onto the plastic. Focus on the overall look, not fine detail.
Shrinking concentrates the colors, so a loose recreation becomes a rich, jewel-like print.
Budget tip: Use a printed image as a guide. Trace the main shapes for free. One sheet makes several mini masterpieces.
Pick paintings with bold, blocky color that read well when small.
Skip the fine detail. The overall shapes carry the look at this size.
Cut a clean rectangle. Bake on parchment, flatten while warm, cool flat.
Seal with gloss for a painterly, saturated finish.
Frame each in a small gold frame for a gallery feel.
These suit art lovers who want a quirky display. A wall of tiny famous-art recreations looks playful and cultured. Make a set of your favorites for a miniature gallery that costs only a plastic sheet and some markers, far cheaper than real prints.
5. Pop-Art Comic Print
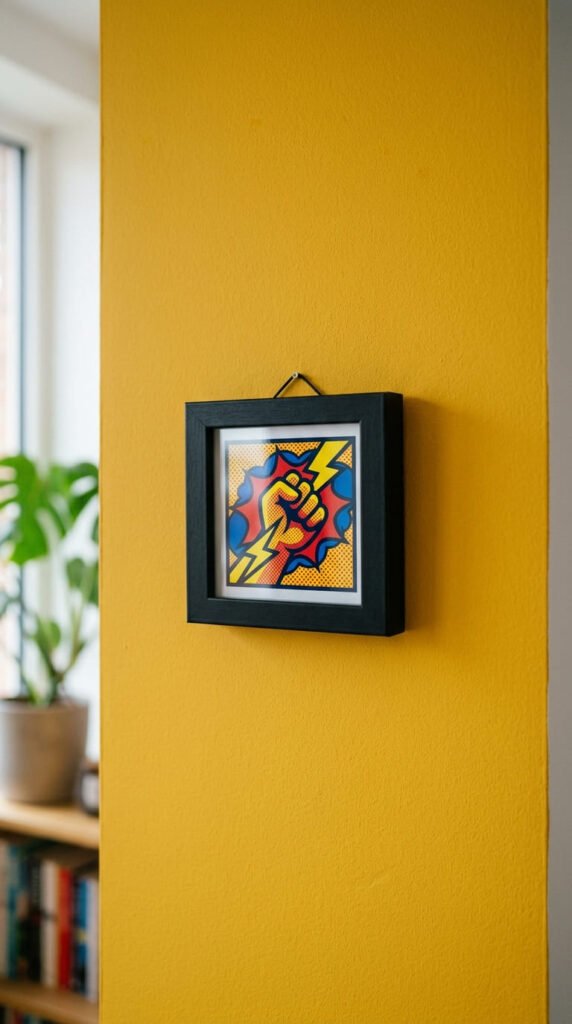
Channel comic-book energy onto the wall. Pop-art prints use bold colors and thick lines that shrink beautifully. Draw a simple icon or shape. Outline it in heavy black. Fill with primary colors. Add dots for that comic shading.
Shrinking thickens the outlines and tightens the dots, giving a crisp, printed look.
Budget tip: Red, yellow, blue, and black markers make every pop-art look. Four markers, dozens of prints.
Pick one bold image. Simple icons read best because pop art is about clean, loud shapes.
Keep the black outlines thick. Thin lines lose the punch.
Cut a clean rectangle. Bake on parchment, flatten while warm, cool flat.
Seal with heavy gloss for a printed-panel shine.
Frame it in a bold black frame.
These suit anyone with a playful, retro style. A pop-art mini print adds energy to any wall. Make a few in a series for a fun, coordinated display. The whole set costs spare change but looks loud and intentional, like real pop-art prints.
6. Celestial Moon and Stars Print
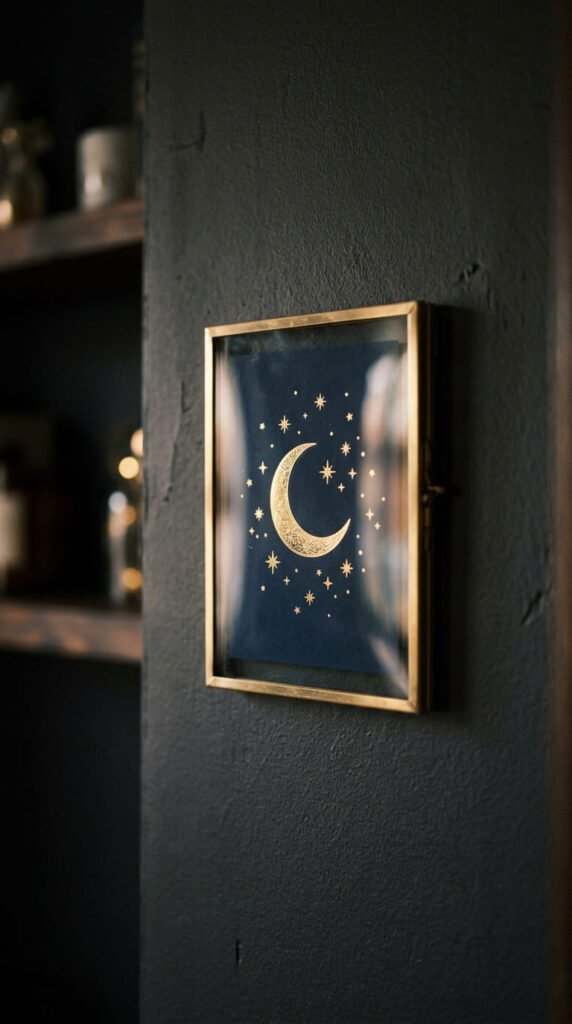
Bring the night sky to the wall. A celestial design feels magical and looks elegant. Color a print deep navy or black. Add a gold crescent moon and scattered stars. Keep the stars varied in size for a real-sky feel.
Shrinking deepens the dark background and sharpens the gold, so a simple design bakes into a rich, glowing print.
Budget tip: A dark marker and a gold pen make this. A gold pen costs a couple dollars and lasts for dozens.
Color the background dark first. Pale stars pop against a deep sky.
Vary the star sizes. A few bigger, many smaller.
Cut a clean rectangle. Bake colored side up on parchment.
Flatten while warm, cool flat, and seal with gloss for a glassy night-sky shine.
Frame it in a slim brass or gold frame.
These suit anyone who likes mystical, moody décor. A celestial mini print looks like boutique art. Make a moon-phase series across several prints for a coordinated wall that costs only a sheet and two pens.
7. Stylized Animal Portrait Print
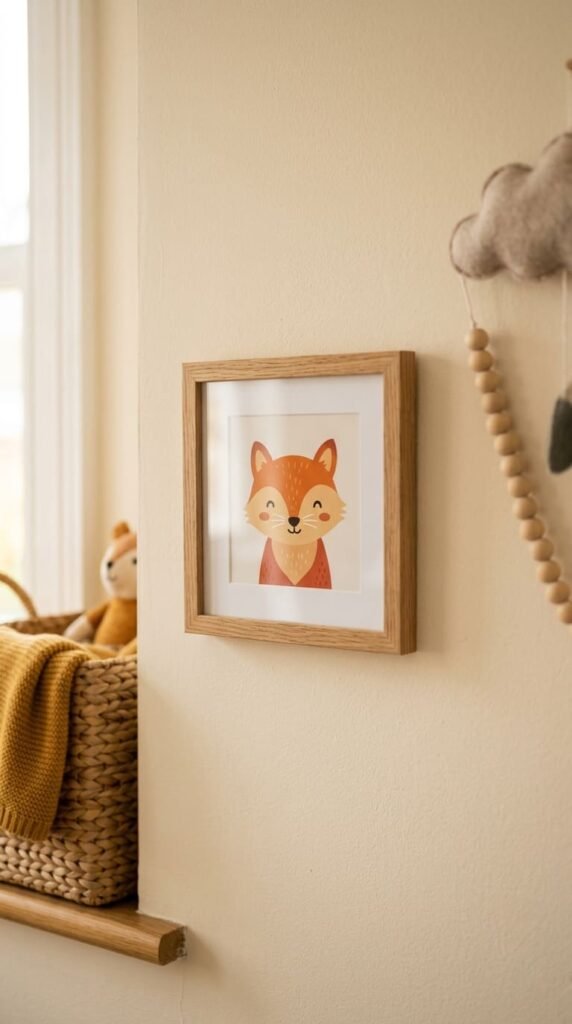
Feature a favorite animal as wall art. A stylized animal portrait is cute and full of personality. Pick an animal. A fox, a cat, a bear. Draw it in a simple, bold style. Outline cleanly and fill with flat color.
Shrinking thickens the outline and saturates the color, so a clean drawing bakes into a sharp, charming print.
Budget tip: Trace a printed animal image for free. No drawing skill required. One sheet makes several portraits.
Keep the style simple and bold. Clean shapes read best when small.
Pick warm, friendly colors for a cozy feel.
Cut a clean rectangle. Bake on parchment, flatten while warm, cool flat.
Seal with gloss for a bright, finished surface.
Frame it in a thin wood frame.
These suit nurseries, kids’ rooms, or animal lovers. A set of animal portraits makes a sweet themed wall. Make a woodland trio of a fox, owl, and bear for a coordinated nursery display, all from one cheap sheet of plastic and some markers.
8. Layered Landscape Print
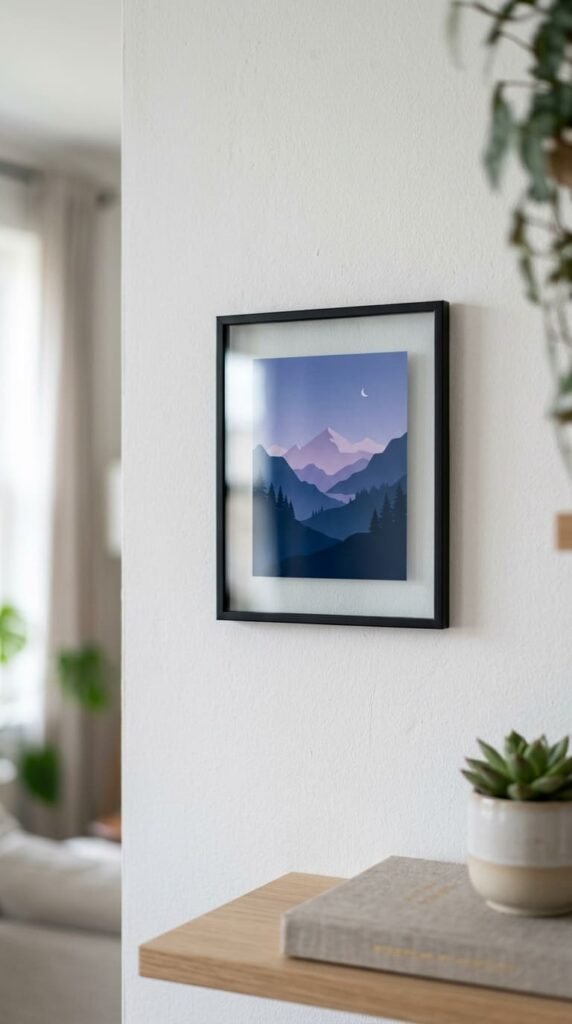
Capture a scenic view in layers. A layered landscape looks calming and modern. Draw simple overlapping shapes for mountains, hills, or waves. Color each layer a slightly different shade for depth. Keep it simple and silhouette-style.
Shrinking deepens the colors, so a simple layered scene becomes a rich, dimensional print.
Budget tip: A few shades of one color make this. Blues for mountains, greens for hills. Use what’s in your marker set.
Layer the shapes from light to dark. Different shades create depth without detail.
Keep the style minimal. Silhouette layers read as modern landscape art.
Cut a clean rectangle. Bake on parchment, flatten while warm, cool flat.
Seal with gloss or matte depending on the look you want.
Frame it in a slim frame.
These suit anyone who likes calm, scenic décor. A layered landscape print looks like minimalist wall art. Make a set showing mountains, ocean, and desert for a travel-themed trio that costs only a sheet and a few markers.
9. Intricate Mandala Print
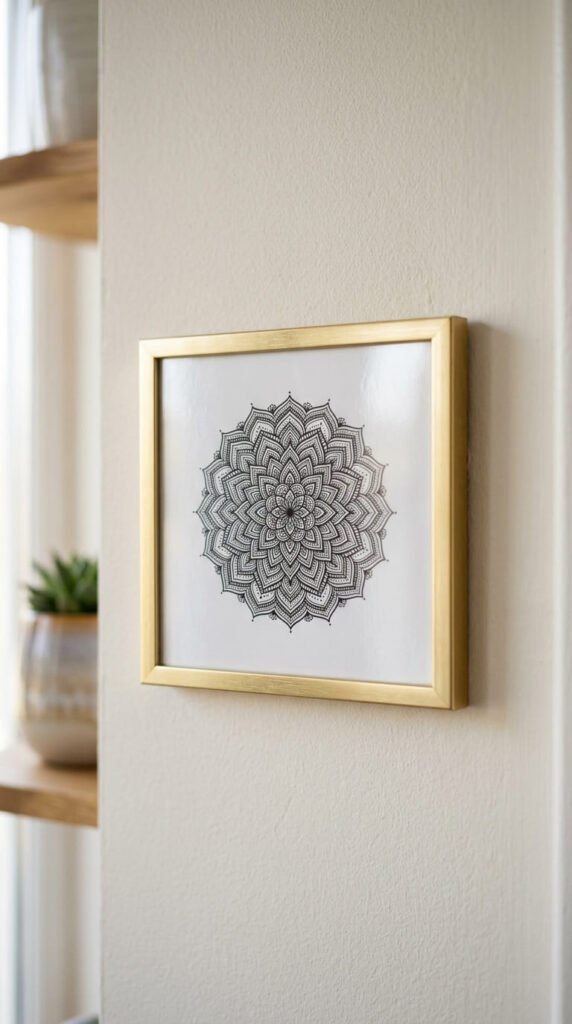
Fill a print with meditative symmetry. A mandala design looks detailed and calming. Start with a center dot. Build rings of repeating shapes outward. Keep each ring balanced and even.
Shrinking pulls the fine lines tighter, so a loose mandala bakes into a crisp, detailed print. Small imperfections vanish.
Budget tip: One fine-tip marker draws the whole thing. Print a mandala template and trace it if freehand feels hard.
Use black on white for a graphic look. Restraint keeps it elegant.
Keep the rings symmetrical and balanced.
Cut a clean square. Bake on parchment, flatten while warm, cool flat.
Seal with gloss to protect the fine lines and add shine.
Frame it in a thin gold or black frame.
These suit anyone who likes detailed, decorative art. The drawing itself is relaxing, almost like coloring for grown-ups. A mandala mini print looks like fine ink art. Make a set in different patterns for a coordinated wall that costs only a marker and a plastic sheet.
10. Mid-Century Modern Print
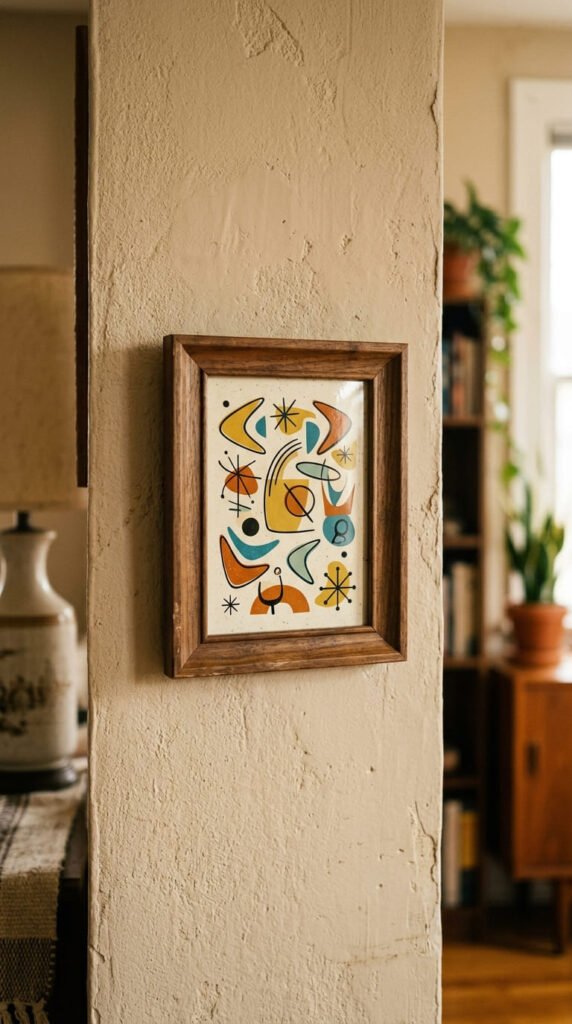
Channel retro design into wall art. Mid-century modern patterns use atomic shapes and warm tones. Draw boomerang shapes, starbursts, or simple organic forms. Color them in mustard, teal, and burnt orange. Keep the look clean and retro.
Shrinking sharpens the shapes, so a simple design bakes into a crisp, vintage-style print.
Budget tip: A few retro-toned markers make this. Mustard, teal, and orange are the classic palette.
Keep the shapes simple and spaced out. Atomic-era forms read as mid-century.
Use a warm, muted palette for authenticity.
Cut a clean rectangle. Bake on parchment, flatten while warm, cool flat.
Seal with gloss for a saturated, retro finish.
Frame it in a walnut or wood-tone frame.
These suit anyone who loves vintage style. A mid-century mini print looks like retro gallery art. Make a set of three in matching tones for a coordinated wall that pairs with vintage furniture, all from one cheap sheet and a few markers.
11. Decorative Single-Letter Print
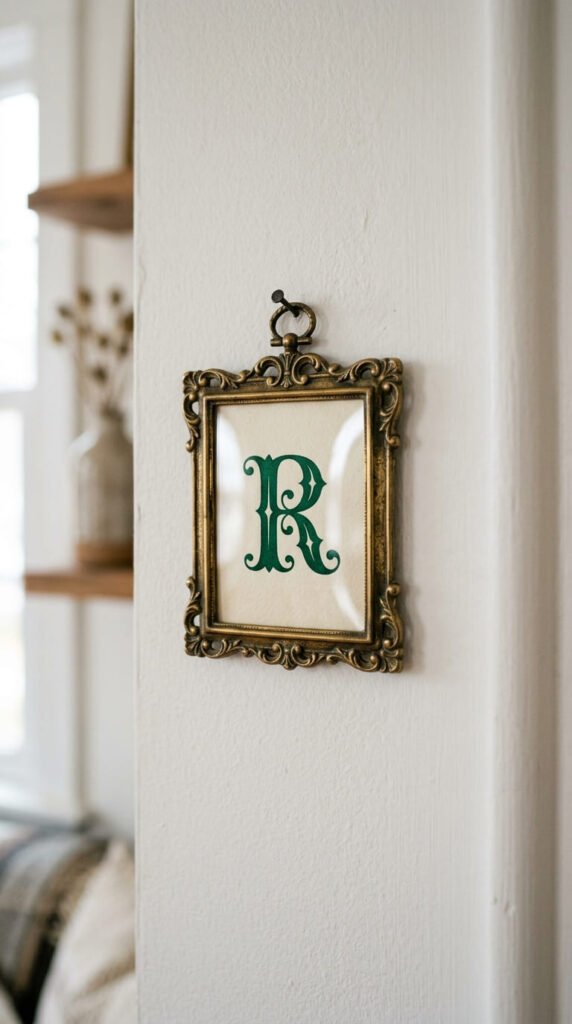
Make a bold initial into art. A decorative letter print is simple and personal. Pick a letter and a striking font. Print it large, trace it onto the plastic, and fill it solid. Add a small pattern inside or around it.
Shrinking thickens the letter and sharpens the edges, so a clean trace bakes into a bold, polished print.
Budget tip: Free font sites preview hundreds of styles. Pick a decorative serif for impact. Costs nothing.
Make the letter the focus. One bold initial reads as graphic art.
Add a subtle pattern inside for extra interest, or keep it solid.
Cut a clean square. Bake on parchment, flatten while warm, cool flat.
Seal with gloss for a rich, saturated surface.
Frame it in a brass or gold frame.
These suit anyone who wants personalized décor. A monogram print makes a sweet gift or a personal touch on a shelf. Make a set spelling a short name or word across several frames for a custom display, all from one cheap sheet of plastic.
12. One-Line Portrait Print

Draw a face in a single flowing line. A one-line portrait looks artistic and modern. Sketch a simple face or figure without lifting your marker. Keep it loose and continuous. The imperfect line is the charm.
Shrinking smooths and thickens the line, so a wobbly sketch bakes into a clean, intentional-looking print.
Budget tip: One black marker makes this. No color, no detail. The single line is the whole design.
Keep the line continuous. One unbroken stroke is the signature look.
Don’t aim for realism. The abstract quality is the point.
Cut a clean rectangle. Bake on parchment, flatten while warm, cool flat.
Seal with matte for a paper feel or gloss for shine.
Frame it in a thin minimal frame.
These suit anyone who likes modern, artsy décor. A one-line portrait looks like trendy gallery art. Make a few different faces for a coordinated set. The whole display costs only a marker and a plastic sheet but reads as intentional, contemporary art.
13. Bold Fruit Print

Add a pop of color with fruit art. A bold fruit print is cheerful and great for kitchens. Pick a fruit. A lemon, a strawberry, an orange. Draw it in a simple, bold style. Outline it clean and fill with bright, flat color.
Shrinking saturates the color, so a simple drawing bakes into a punchy, vivid print.
Budget tip: A couple of bright markers make each fruit. One sheet makes a whole fruit series.
Keep the style bold and simple. Clean shapes and bright color read best.
Outline in black or green for definition.
Cut a clean square. Bake on parchment, flatten while warm, cool flat.
Seal with gloss for a juicy, bright finish.
Frame it in a white or light wood frame.
These suit kitchens and bright, cheerful spaces. A trio of fruit prints makes a fun kitchen wall. Make a lemon, strawberry, and orange set for a coordinated display, all from one cheap sheet of plastic and a few markers. The bold color does all the work.
14. Abstract Face Print
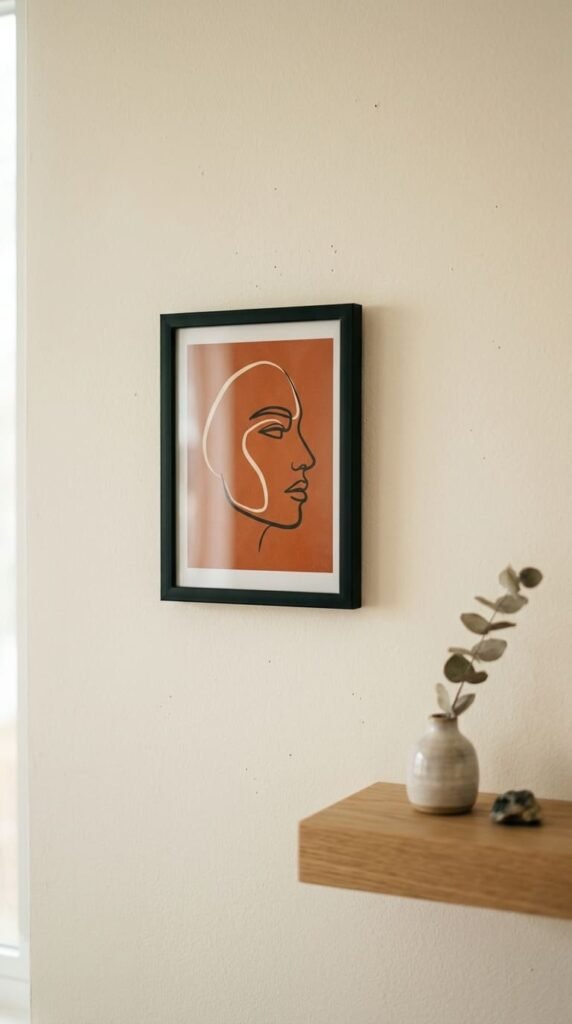
Suggest a face with simple shapes. An abstract face print is trendy and modern. Draw a loose profile or face using minimal curves and lines. Use a single warm tone like terracotta. Keep it abstract, not realistic.
Shrinking smooths the lines, so a simple shape bakes into a clean, contemporary print.
Budget tip: One marker in a warm tone makes this. Terracotta or rust reads as modern and artsy.
Keep it abstract. A few curves suggesting a face is the whole look.
Leave white space around the shape.
Cut a clean rectangle. Bake on parchment, flatten while warm, cool flat.
Seal with matte for a modern paper feel.
Frame it in a slim black or wood frame.
These suit anyone who likes contemporary, boho décor. An abstract face print looks like trendy line art from a design shop. Make a set of different abstract faces for a coordinated gallery wall, all from one cheap sheet of plastic and a single marker.
15. Rainbow Gradient Print
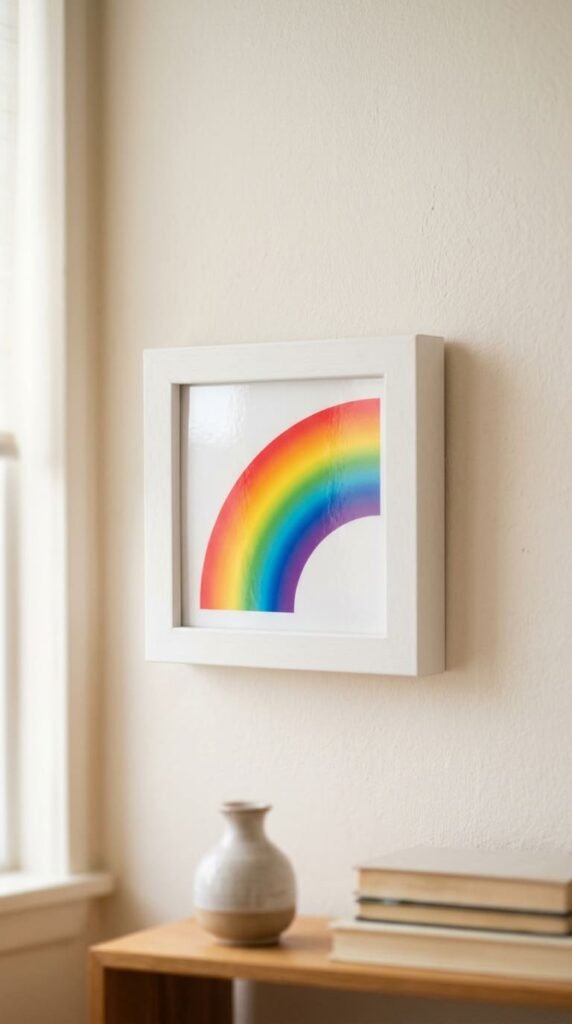
Make a happy burst of color. A rainbow gradient print is cheerful and simple. Draw a rainbow arc or smooth color bands. Color them in order and blend the edges slightly. Keep the bands clean.
Shrinking deepens the colors, so a soft gradient becomes a rich, vivid print.
Budget tip: Markers you own cover the whole rainbow. No special supplies needed.
Keep the bands in order. Smooth color transitions read as a real rainbow.
Blend the edges lightly with overlapping strokes.
Cut a clean rectangle or arch shape. Bake on parchment, flatten while warm, cool flat.
Seal with gloss for a bright, candy-like shine.
Frame it in a clean white frame.
These suit kids’ rooms and cheerful spaces. A rainbow print adds instant brightness. Make a few in different layouts, arcs, and bands for a coordinated set. The whole cheerful display costs only a plastic sheet and the markers you already have, but adds a big pop of color to any wall.
16. Wave-Pattern Print
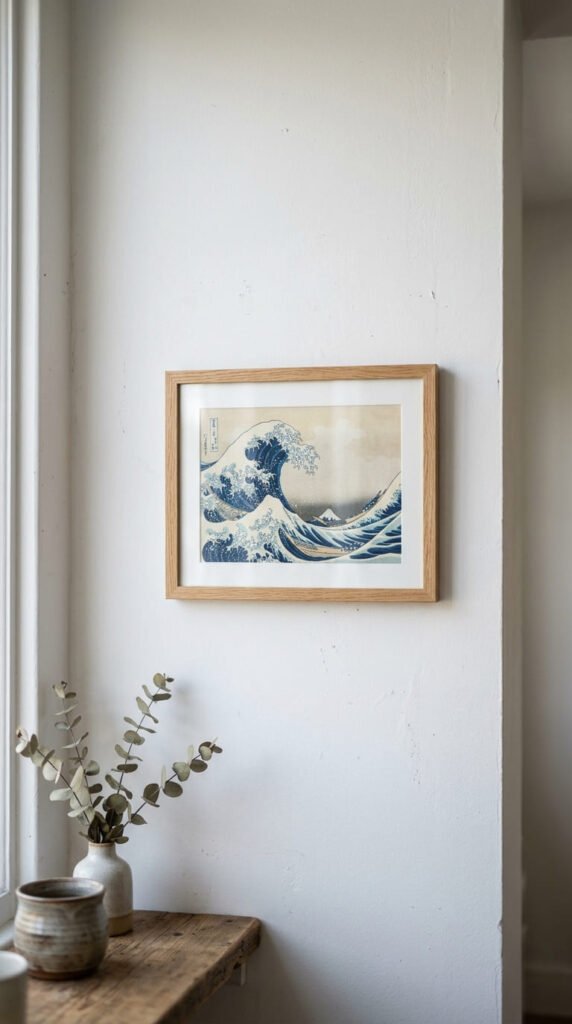
Capture a bold ocean wave. A wave-pattern print looks dynamic and graphic. Draw a stylized wave with bold curved lines, inspired by classic woodblock prints. Color it in blues and white. Keep the curves strong and simple.
Shrinking sharpens the curves, so a simple wave bakes into a crisp, dramatic print.
Budget tip: A couple of blue markers make this. Trace a printed wave image if freehand feels tricky.
Keep the lines bold and curved. Strong shapes read as a classic wave.
Use white space as foam and sky.
Cut a clean rectangle. Bake on parchment, flatten while warm, cool flat.
Seal with gloss for a deep, watery shine.
Frame it in a slim wood frame.
These suit anyone who likes coastal or Japanese-inspired décor. A wave print looks like classic art at mini scale. Make a set of different wave patterns for a coordinated ocean wall, all from one cheap sheet of plastic and a couple of markers.
17. Constellation Map Print
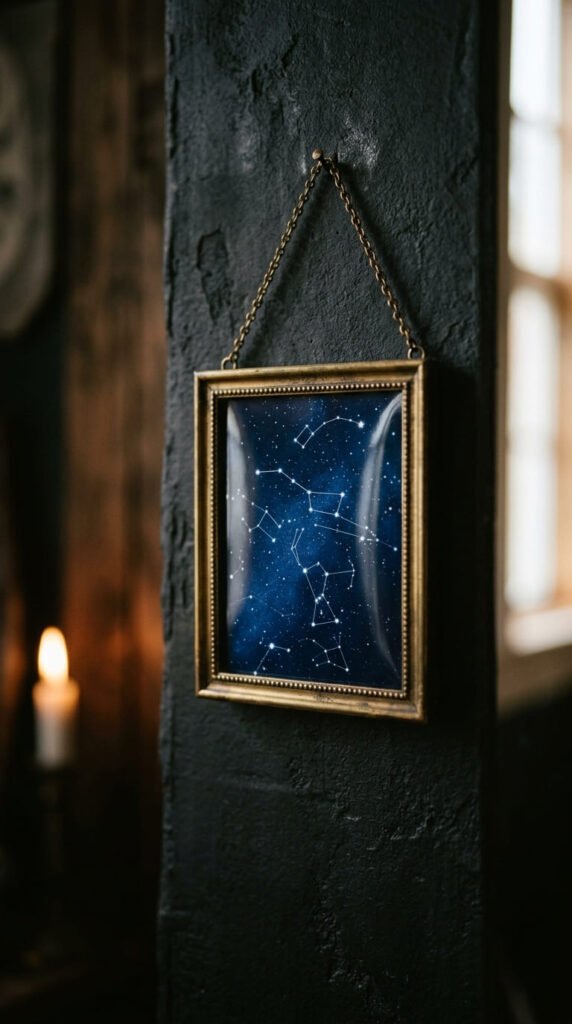
Map the stars on your wall. A constellation print feels personal and elegant. Pick a star sign or favorite constellation. Color the background deep indigo. Add white star dots connected by thin lines.
Shrinking pulls the dots and lines close, so a sparse pattern becomes a tidy little star map.
Budget tip: A white gel pen and one dark marker make this. Both cost a couple dollars and last for dozens.
Color the background dark first. Pale stars pop against deep indigo.
Connect the stars with thin, clean lines.
Cut a clean rectangle. Bake colored side up on parchment.
Flatten while warm, cool flat, and seal with gloss for a glassy night-sky finish.
Frame it in a brass frame.
These suit anyone who likes celestial, personal décor. Make a print of each family member’s zodiac for a meaningful set. A wall of constellation maps looks custom and elegant, all from one cheap sheet of plastic and two pens.
18. House Portrait Print

Turn a home into keepsake art. A house portrait print holds real sentiment. Draw a simple, stylized version of a meaningful home. Keep the shapes clean. Add a door, windows, and a roofline. Color it in warm, inviting tones.
Shrinking sharpens the lines, so a simple house bakes into a clean, cozy print.
Budget tip: No template. A house is easy to draw with basic shapes. Costs only the plastic and markers.
Keep the style simple and graphic. Clean lines read best at small scale.
Add small personal touches that match the real home.
Cut a clean rectangle. Bake on parchment, flatten while warm, cool flat.
Seal with gloss for a finished look.
Frame it in a thin frame.
These make meaningful gifts for new homeowners or as a keepsake of a childhood home. A house portrait print captures a place that matters. Make one for each home in the family for a sentimental display, all from one cheap sheet of plastic and a few markers.
19. Evil Eye Talisman Print
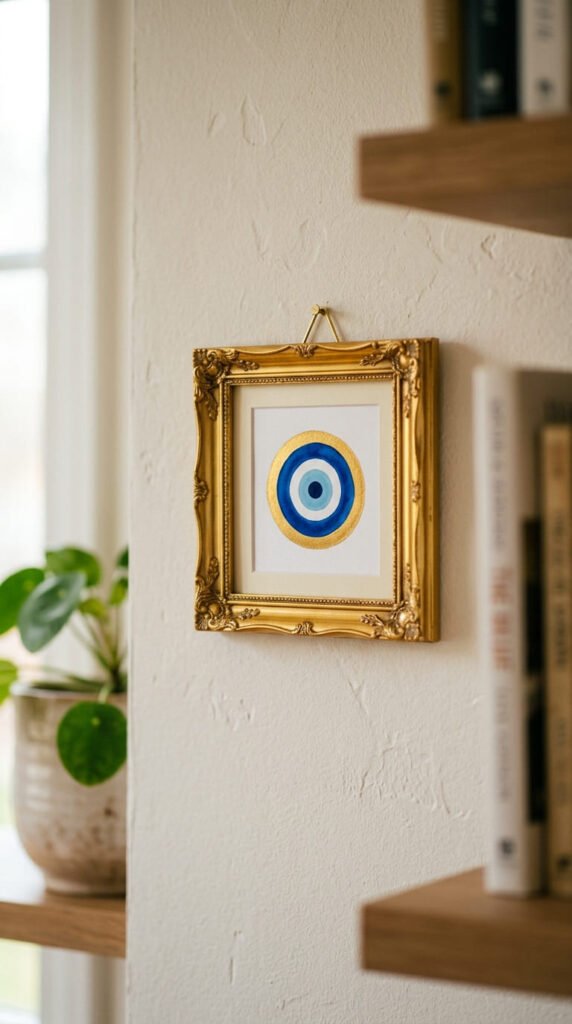
Add a protective symbol to the wall. An evil eye design is bold, symbolic, and trendy. Draw a stylized eye. Concentric circles of blue, white, and a dark center. Add gold accents around it. Keep the shape clean and graphic.
Shrinking sharpens the circles, so a simple design bakes into a crisp, striking print.
Budget tip: Blue, white, and gold markers make this. A gold pen adds the luxe touch for a couple dollars.
Keep the circles clean and concentric. The classic blue-and-white reads instantly.
Add gold rays or a border around the eye.
Cut a clean square. Bake on parchment, flatten while warm, cool flat.
Seal with gloss for a bright, glassy finish.
Frame it in a gold frame.
These suit anyone who likes symbolic, boho décor. An evil eye print adds a bold, meaningful touch. Make a small set in different color combos for a coordinated wall, all from one cheap sheet of plastic and a few markers. The symbol carries the whole look.
20. Monoprint Texture Print

Try an art-forward printing technique. Monoprinting gives organic textures you can’t draw by hand. Brush or roll a thin layer of paint onto a smooth surface. Press the shrink plastic onto it to pick up the texture. Let it dry before baking.
Shrinking concentrates the texture, so a loose print becomes a rich, dense surface.
Budget tip: Use paint you already have. A smooth tray or glass works as your printing surface. Costs almost nothing extra.
Keep the colors limited. Two tones read as intentional, not muddy.
Press lightly for delicate texture or firmly for bold marks.
Let the paint dry fully. Cut a clean rectangle. Bake on parchment, flatten while warm, cool flat.
Seal with gloss for a deep, painterly finish.
Frame it in a slim black frame.
These suit anyone who wants unique, art-forward décor. No two monoprints come out alike. A set of monoprint textures looks like real abstract art, made for the cost of scrap plastic and a little paint.
21. Bold Checkerboard Print
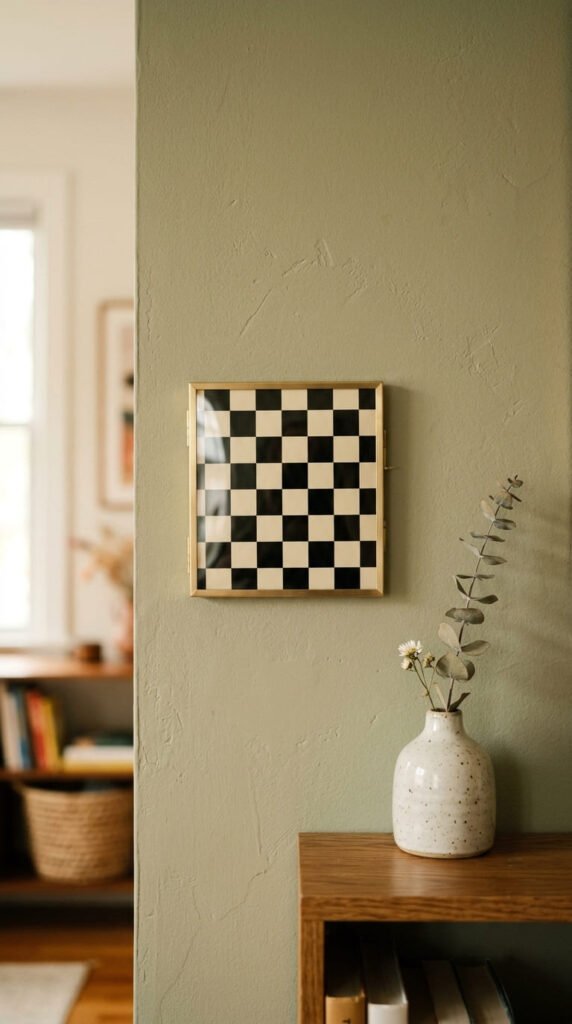
Lean into a trendy graphic pattern. A checkerboard print is simple, bold, and very on-trend. Draw a grid and fill alternating squares. Use black and cream for a classic look, or two bold colors for a playful one. Keep the squares even.
Shrinking sharpens the grid, so a slightly uneven checkerboard bakes into a crisp, even pattern.
Budget tip: A ruler and one or two markers make this. Straight lines keep it clean.
Keep the squares even. A consistent grid reads as a real checkerboard.
Pick a bold two-color combo. Black and cream, or any pair you like.
Cut a clean square. Bake on parchment, flatten while warm, cool flat.
Seal with gloss for a rich, flat finish.
Frame it in a thin frame.
These suit anyone who likes trendy, graphic décor. A checkerboard print fits the current bold-pattern look. Make a couple in different color pairs for a coordinated set. The whole trendy display costs only a plastic sheet and a marker or two, but looks current and intentional.
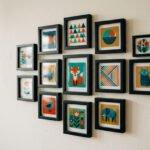
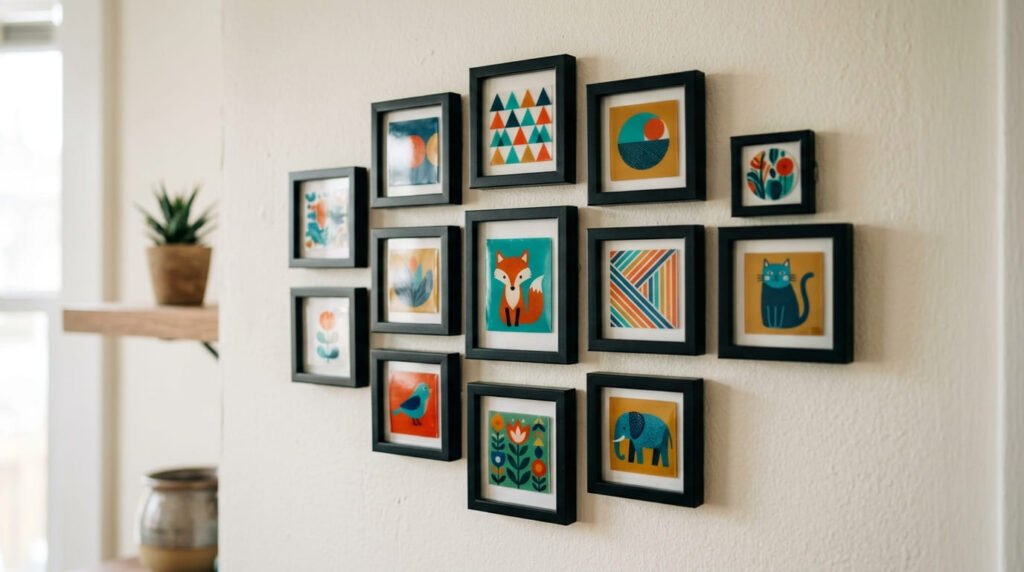
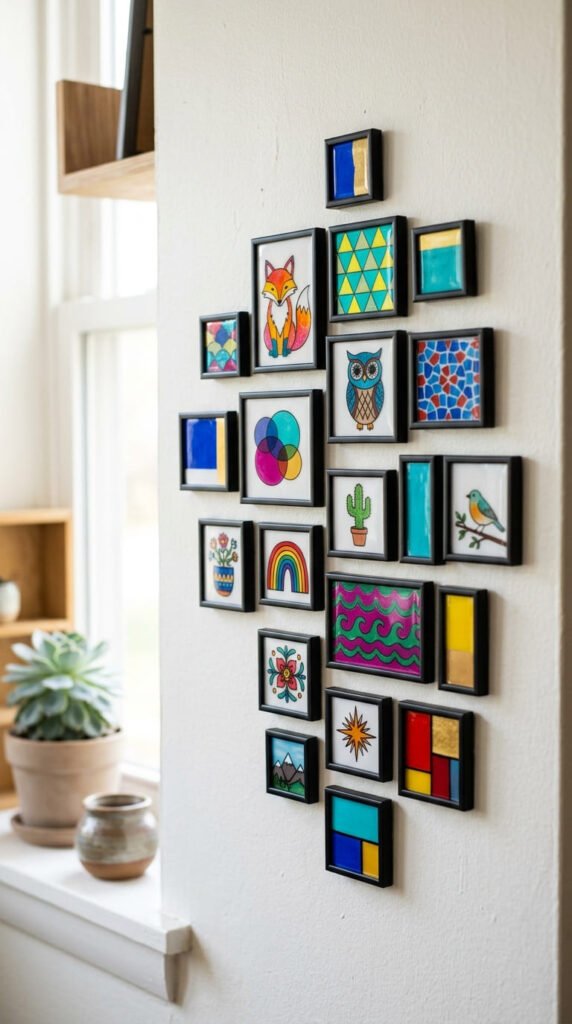
22. Mini Gallery Wall Set
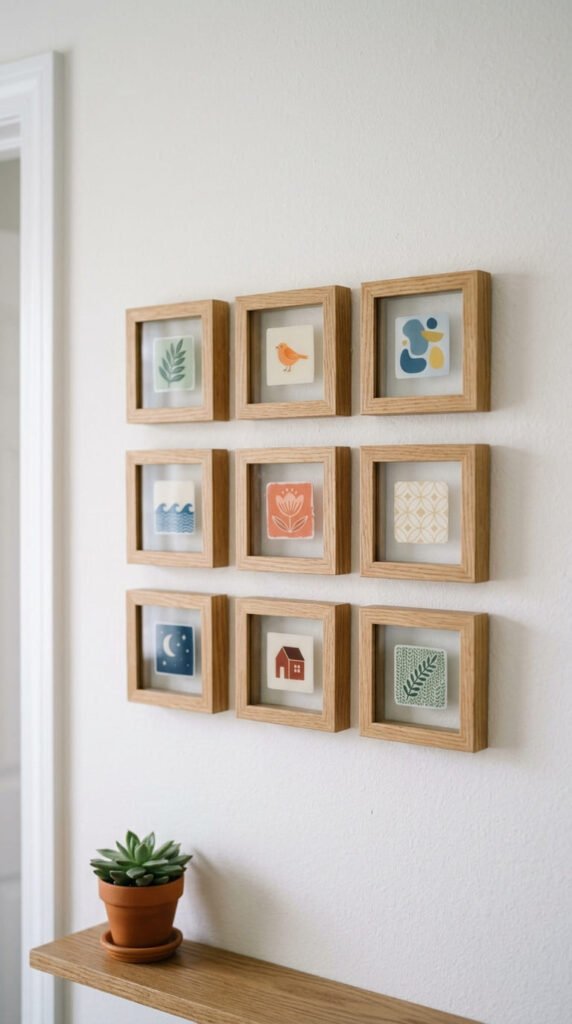
Combine your prints into a real display. A mini gallery wall turns single prints into a statement. Make several prints in a shared palette or theme. Mix designs but keep the colors coordinated. Frame them all in matching frames and arrange in a grid.
Shrinking gives each print a polished, finished look. A matched set reads as intentional, curated art.
Budget tip: One sheet makes the whole set. Small matching frames come cheap in bulk. The whole wall costs very little.
Pick one palette to tie everything together. Coordinated colors make mixed designs feel cohesive.
Mix patterns, animals, and abstracts within the same color story.
Bake the batch together. Flatten while warm, cool flat, and seal all with gloss.
Frame in matching frames. Arrange in a tidy grid or organic cluster.
These suit anyone who wants a real décor statement. A mini gallery wall looks like a designer collection. The whole coordinated display comes from one cheap sheet of plastic and some markers, but reads as a curated art wall worth real money.
Conclusion
Shrink plastic mini prints prove you can make real wall art without spending much at all. A single sheet and a few markers cover nearly every idea here, and the small scale is exactly what makes a wall of them look collected and intentional. Start with something simple like a geometric pattern or a botanical line drawing, then work toward a monoprint texture or a full gallery wall once you find your rhythm. Seal each print with gloss for that saturated, finished look, and frame them in matching frames to tie the set together. Grab a sheet this weekend and make a few. The best part is that no two prints ever come out exactly alike, so whatever you hang is genuinely one of a kind.