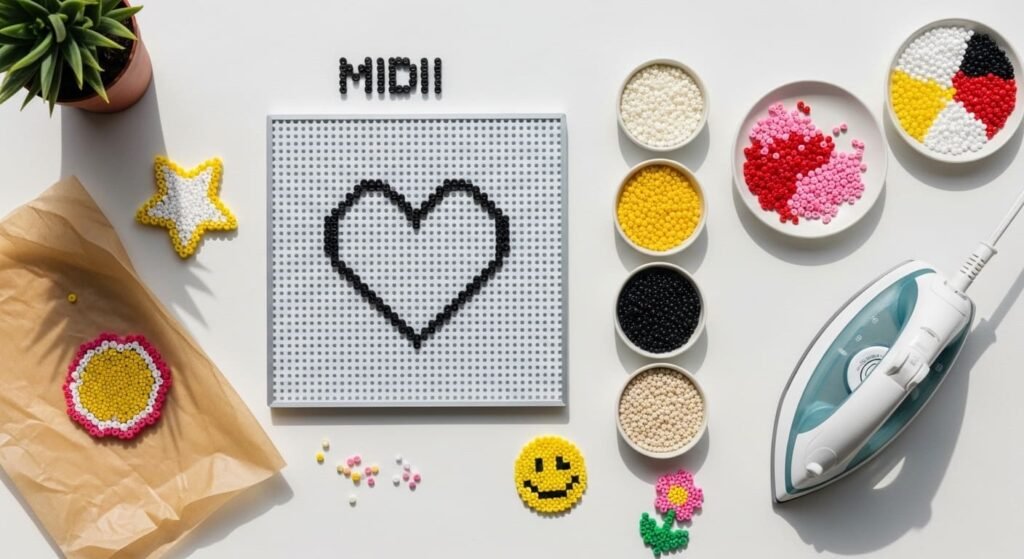

Starting with perler beads feels exciting once you have a few simple patterns to follow. Beginner perler bead patterns focus on small, recognizable shapes that fit on standard square pegboards. Think hearts, stars, smiley faces, basic flowers, and simple fruit. These designs use minimal colors, fewer than 100 beads, and finish in 15 to 30 minutes from start to ironing. The square grid eliminates the confusion of diagonal counting that trips up new crafters. These 23 simple beginner patterns work for kids, adults trying the hobby, or anyone wanting a calming creative session. Grab a starter kit with MIDI beads, a square pegboard, and ironing paper, and start your first project today.
1. Simple Solid Heart
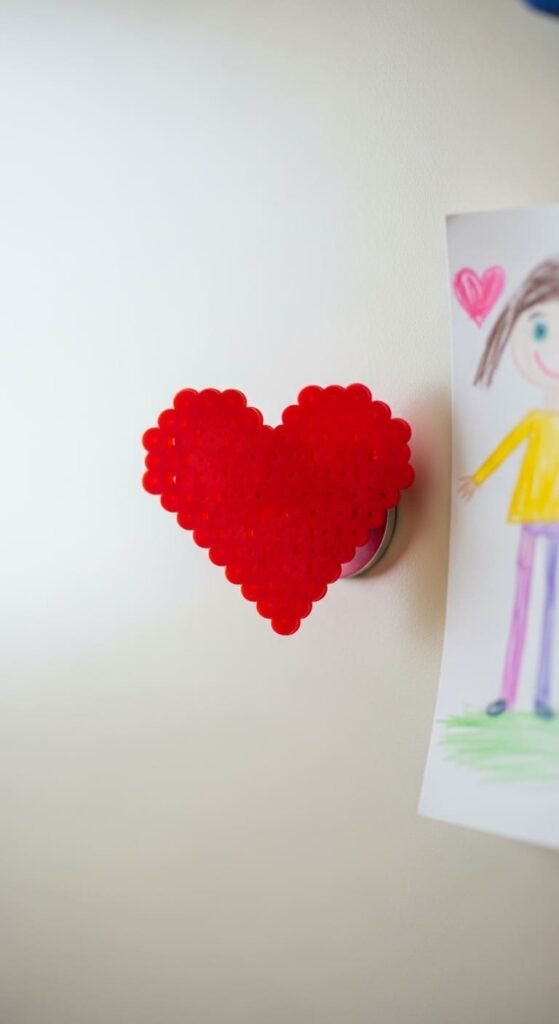
A simple solid heart is the perfect first perler bead project. Place red or pink beads in a basic heart shape on a square pegboard. The grid makes the shape easy to follow.
Each heart uses about 30 beads. Cover with parchment paper before ironing. Use medium heat for 15 to 20 seconds.
Move the iron in slow circles to fuse the beads evenly. Let it cool completely before removing from the pegboard. The simple shape forgives small mistakes.
A bag of red beads costs about three dollars and makes dozens of hearts. Pink beads work just as well for a softer look. The total cost per heart stays under fifty cents.
Add a magnet, keychain ring, or pin back to the finished heart. Each option turns the simple design into something useful. Pair with handwritten notes for sweet handmade gifts.
Make hearts in different sizes to practice. Small hearts work as charms, medium ones as magnets, larger as wall decor. Each variation builds your confidence.
This project teaches the foundational perler skills you need for everything else. Even ironing pressure prevents warping. The basic shape introduces grid placement, ironing, and finishing.
2. Five-Point Star
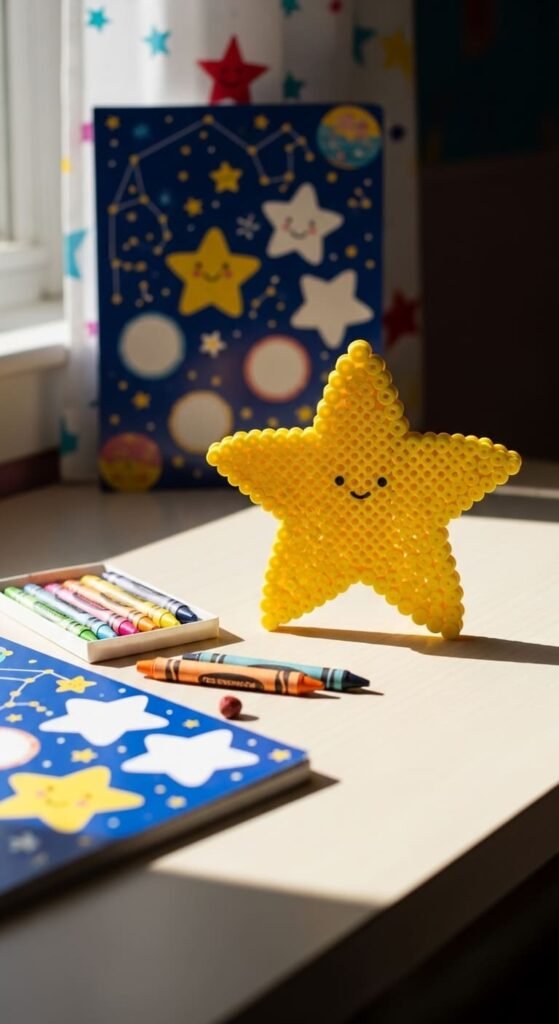
A five-point star follows simple grid placement. Place yellow or gold beads in a classic star outline. Print free star templates online for accuracy.
The star shape uses about 30 beads. Watch the star points during ironing. Thin areas can melt too thin if overheated.
Stop ironing as soon as the beads connect. The points should stay defined and crisp. Let the star cool completely before handling.
Make stars in different colors for variety. Gold for classic looks, white for snowy designs, hot pink for trendy versions. Each color tells a different story.
Attach to keychains, ornaments, or magnets. Stars work as Christmas tree ornaments year after year. Each one costs about thirty cents in beads.
Pair star magnets with academic gifts for star students. Tie one to a teacher gift basket. The simple shape carries different meanings in different contexts.
Make a constellation of stars for wall decor. Mount them in a starry pattern on a dark backing board. The grouping looks intentional and decorative.
This project teaches you to handle shapes with thin extensions. The skill helps with snowflakes, sun rays, or other pointed designs. Stars also work as bookmark toppers, hair clips, or pin-on accessories.
3. Smiley Face
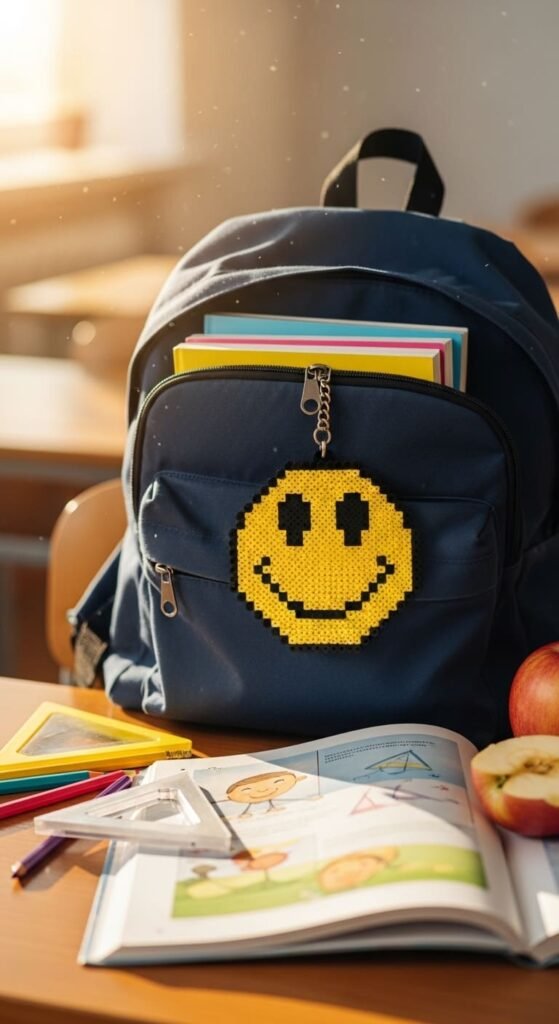
The classic yellow smiley face brings instant joy. Place yellow beads in a circle on a square pegboard. Add two black beads for eyes and a curved line of black beads for the smile.
Each smiley uses about 35 beads. The face details stay simple, perfect for beginners. The recognizable design always cheers people up.
Iron evenly in slow circles. Watch the facial features stay defined. The black beads should remain visible against the yellow background.
Make smileys in different colors for variety. Pink for cute, blue for cool, green for cheerful. Each color suits different recipients and moods.
Glue magnets on the back for fridge displays. Attach keychain rings for backpack charms. Each smiley costs under forty cents in beads.
Pair smileys with positive message cards or self-care gifts. Friends going through hard times appreciate cheerful handmade items. The simple shape carries powerful warmth.
Make smiley collections in different sizes. Tiny ones work as earrings or charms. Larger ones become wall decor or coasters. The flexible scale fits many uses.
This project teaches you to add features within a basic round shape. The skill helps with all face designs and character creations. Smileys also work as pins, bookmark tops, or sticker-backed decor.
4. Basic Flower
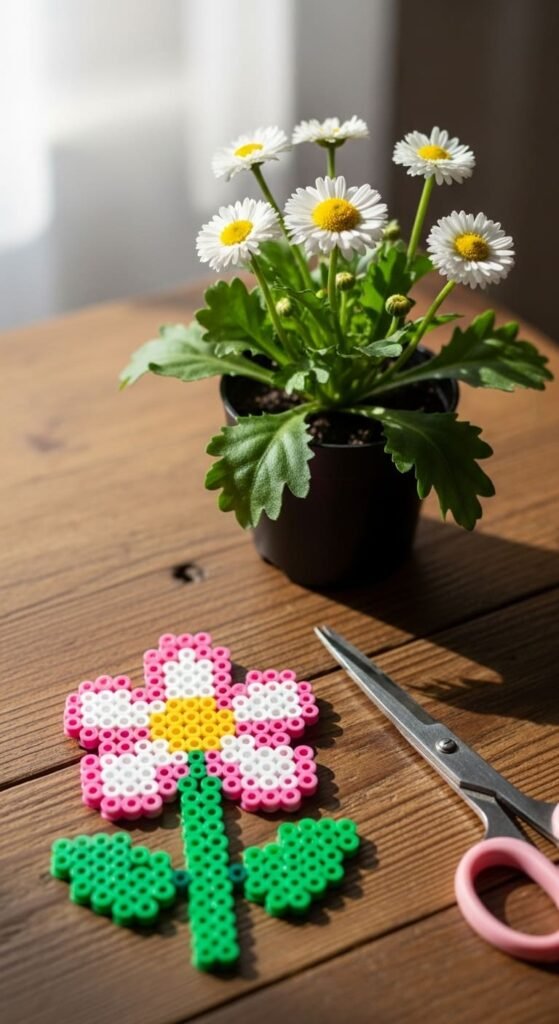
A basic daisy uses simple petal placement. Make five or six rounded petals around a center. Use one color for petals and a different color for the center.
Pink petals with yellow centers feel classic. White petals with yellow centers mimic real daisies. Each petal uses about three to five beads.
The full flower uses about 50 beads. Iron carefully across the round shape. The petals should stay distinct from the center after fusing.
Make flowers in different color combinations. Yellow with orange, white with pink, purple with white. Each combination feels uniquely cheerful.
Attach to hair clips, magnets, or pin-on brooches. Make a bouquet of flowers as wall art. Each flower costs about a dollar in materials.
Pair flower charms with garden gifts or spring presents. Tie one to a seed packet or potted plant. Garden lovers will appreciate the matching detail.
Make matching flower sets for coordinated jewelry. Earrings, pendants, and brooches in the same flower style feel curated. The collection grows over many crafting sessions.
This project teaches you to make radial symmetric designs. The skill helps with sun, mandala, or any circular pattern art. Basic flowers also work as decorative accents on bigger projects or as standalone gifts.
5. Simple Apple

A simple apple makes a thoughtful teacher gift. Place red beads in a round apple shape. Add a brown stem at the top and a green leaf to the side.
Each apple uses about 50 beads. The recognizable shape stays simple but feels meaningful. Red, green, or yellow apples all work.
Iron evenly across the round design. Watch the small stem and leaf details. The transitions between colors should fuse cleanly.
Make red, green, or yellow apples for variety. Each color suggests different apple types. The classic shape stays consistent across colors.
Attach as fridge magnets, keychains, or pendant charms. Pair with thank-you cards for teachers. Apple charms also fit fall and back-to-school themes perfectly.
Make a basket of mixed apple charms. Tie them with twine for harvest-themed gift bundles. Fall lovers will appreciate the seasonal detail.
Make smaller apples as earrings or larger ones as coasters. The flexible scale adapts to many uses. Each piece costs about a dollar in materials.
This project teaches you to combine round shapes with small accent details. The skill helps with all fruit designs and combined-element art. Apples also work as backpack tags, bookmark toppers, or seasonal decor.
6. Basic Rainbow
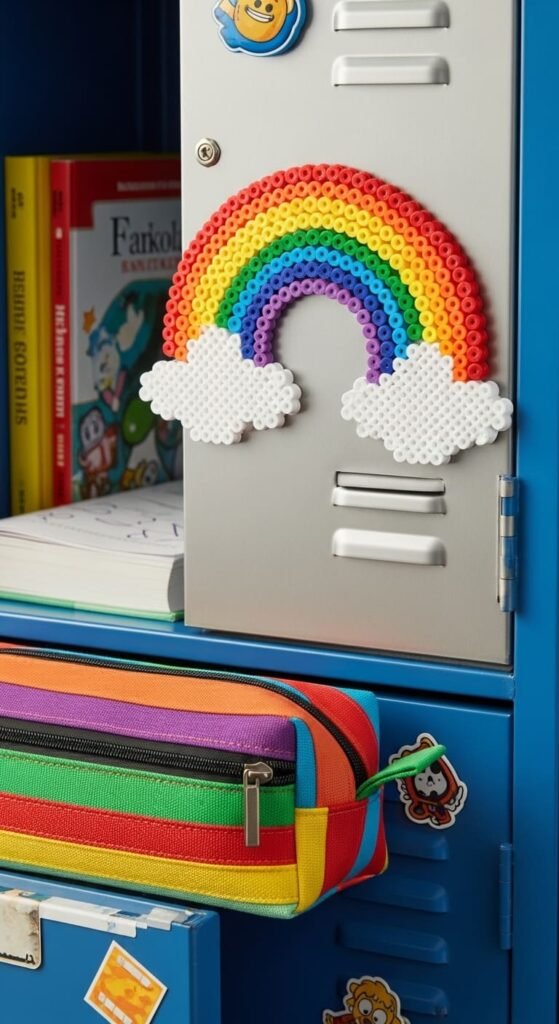
A basic rainbow uses six classic colors in arched rows. Place red, orange, yellow, green, blue, and purple beads in arch shapes. Add white clouds at each end.
Each rainbow uses about 60 beads. The arch shape uses simple grid placement. Each color row contains 6 to 8 beads.
Iron evenly across the wide arch. The clouds and rainbow fuse as one solid piece. Watch the multi-color blending stay distinct.
Glue magnets on the back for fridge displays. Pair with cheerful gifts or weather-themed presents. Kids learning colors love rainbow charms.
Make smaller rainbow versions for earrings or pins. The same pattern works in mini scale. Coordinated rainbow jewelry feels cheerful and curated.
Pair rainbow charms with kid-friendly gifts. Tie one to a coloring book or art supplies. The matching detail makes any kid gift feel special.
Make a stack of rainbow magnets as classroom gifts. Teachers can give them as student rewards. Each magnet costs about a dollar.
This project teaches you to handle multiple colors in sequence. The skill helps with sunsets, gradients, or any color-flow design. Rainbows also work as wall art, sun catchers, or backpack patches.
7. Round Sun

A simple sun design uses a yellow circle with ray extensions. Place yellow beads in a round center. Add pointed rays sticking out around the edges.
Each sun uses about 60 beads. Watch the ray points during ironing. Thin extensions need extra care to avoid overheating.
Make different ray styles for variety. Pointy triangles, rounded bumps, or wavy lines all work. Each style gives the sun different personality.
Iron evenly across the round design. Stop as soon as the ray tips connect. The sun should stay bright and defined.
Hang in windows as sun catchers. The bright color brings cheerfulness to any space. Each sun costs about a dollar in materials.
Pair sun charms with summer gifts or beach-themed presents. Tie one to a sun hat or sunscreen. The matching theme feels warm and intentional.
Make matching sun jewelry sets. Pendant necklaces and earrings in coordinated style feel curated. Summer fashion accessories love bright sun details.
This project teaches you to handle radiating shapes with thin extensions. The skill transfers to flowers, stars, or sunbursts. Suns also work as wall decor, magnets, or hair accessories for cheerful styling.
8. Simple Cross
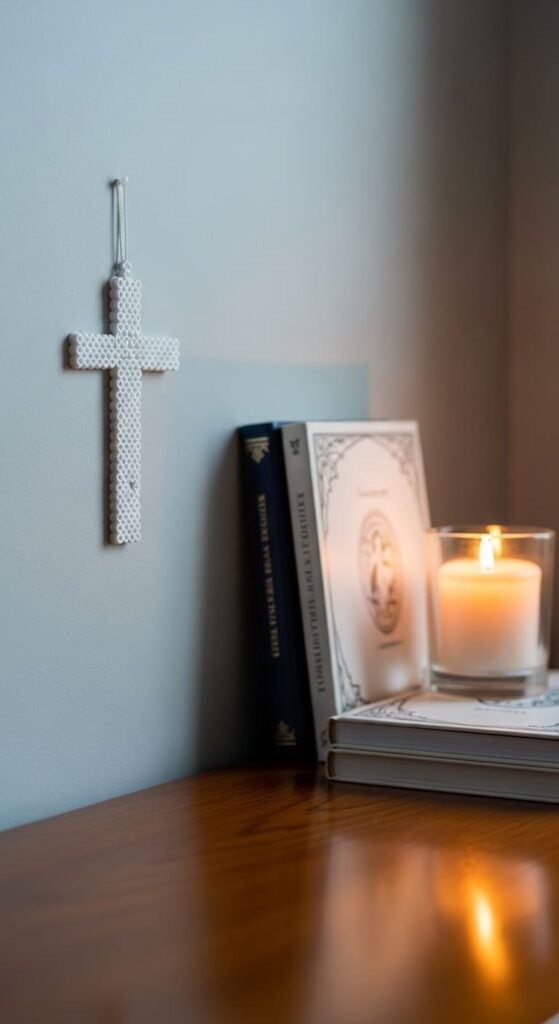
A simple cross design fits religious gifts and decor. Place beads in a vertical line and horizontal line crossing each other. Use white, gold, or any meaningful color.
Each cross uses about 25 beads. The grid placement keeps the lines straight. The square pegboard helps with perfect angles.
Iron evenly across the simple design. The straight lines fuse easily. Crisp edges define the cross shape clearly.
Make crosses in different colors for variety. Traditional gold or silver, peaceful white, or symbolic colors all work. Each color suits different recipients.
Attach as bookmark toppers for religious books. Pair with Bibles or spiritual gifts. The matching detail feels intentional and respectful.
Make matching cross jewelry sets. Pendant necklaces, earrings, and bracelets in coordinated style feel curated. Religious accessories appeal to many gift recipients.
Pair cross charms with confirmation, baptism, or first communion gifts. Tie one to a religious book or rosary. Each piece carries meaningful symbolism.
This project teaches you to make straight, intersecting lines. The skill helps with letter T, plus signs, or any geometric crossing patterns. Crosses also work as wall decor, magnets, or decorative pieces for spiritual spaces.
9. Simple Cloud
A simple cloud design uses white beads in a bumpy shape. Make a flat-bottomed shape with rounded peaks on top. The puffy outline mimics real clouds.
Each cloud uses about 40 beads. The irregular shape forgives small placement errors. White beads make beginners feel successful.
Iron evenly across the wide shape. The simple white design works for any color palette. Watch the bumpy edges stay defined.
Make clouds in different sizes for various uses. Tiny ones work as earrings, medium for charms, large for nursery decor. The flexible scale fits many projects.
Add tiny blue beads for raindrops below the cloud. Make sunny versions with yellow rays around. Both variations expand the basic cloud design.
Hang clouds from clear thread for nursery mobiles. Babies enjoy watching them sway gently. The soft theme suits any baby gift.
Pair cloud designs with weather-themed gifts. Tie one to a rain jacket or umbrella. Kids learning weather concepts will love them.
This project teaches you to make organic, irregular shapes. The bumpy cloud edges stay forgiving for new crafters. Clouds also work as wall decor, magnets, or hair accessories for soft styling.
10. Letter Initial
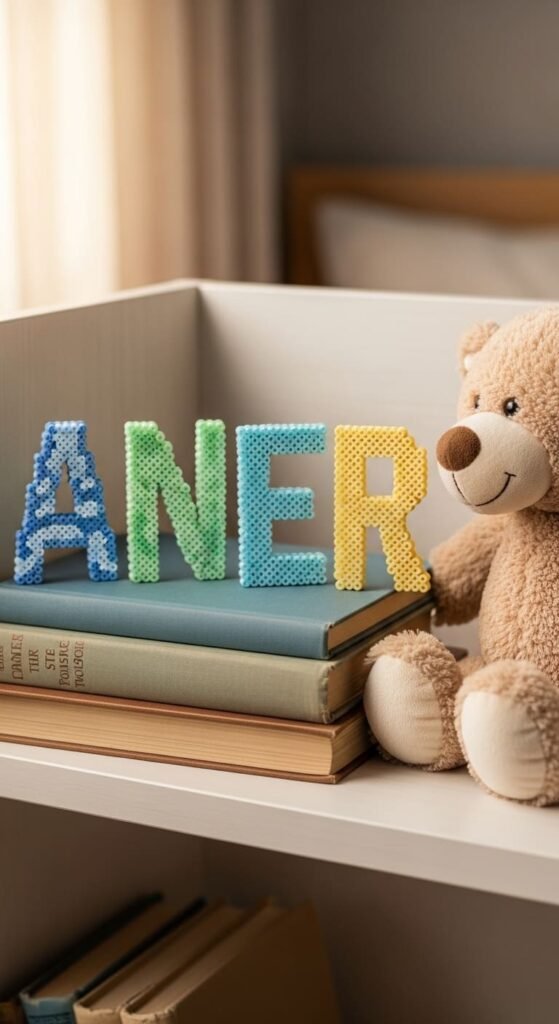
Letter initials personalize gifts beautifully. Make individual letters using square pegboard placement. Print free alphabet templates from online sources.
Block letters work easiest for beginners. Avoid curved letters like S or O until you have practice. Start with H, T, L, or I for instant success.
Each letter uses about 30 to 50 beads. Iron carefully to keep clean letter edges. The simple shapes fuse easily on a square grid.
Make initials in the recipient’s favorite color. Spell short names by combining multiple letters. Each letter feels personally crafted.
Attach as keychains, magnets, or backpack tags. Personalized gifts always feel more thoughtful. Each letter costs about fifty cents in materials.
Make alphabet sets for fridge play. Kids learn letters while playing. The educational angle adds value beyond crafting.
Pair letter charms with name-themed gifts. Tie initials to gift bags as charming tags. New parents love letter charms for nursery decorations.
This project teaches you to interpret letter shapes in pixel form. The skill helps with custom text, names, and short messages. Letters also work as bookmark toppers, jewelry pendants, or decorative wall pieces.
11. Simple Tree
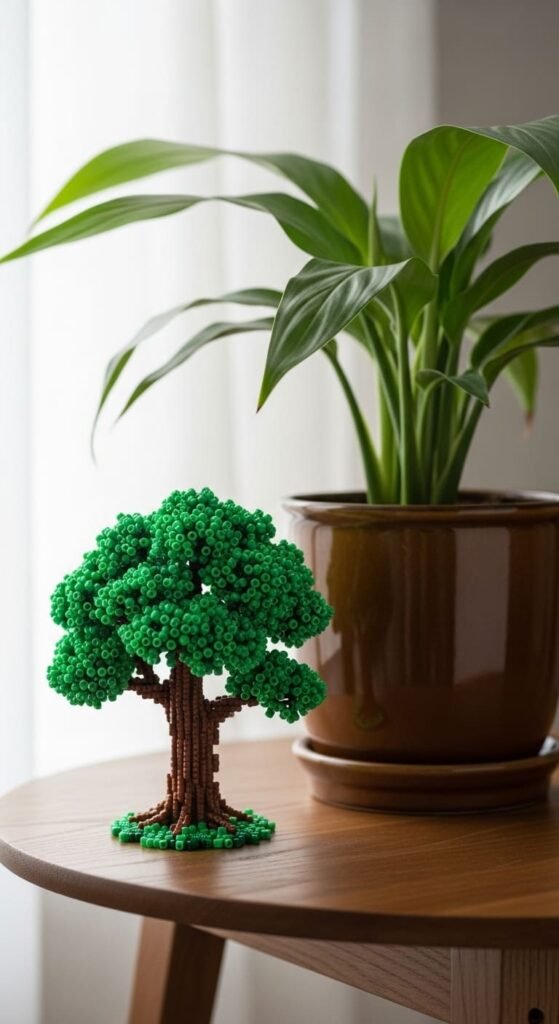
A simple tree shape fits nature themes. Make a green triangular or rounded top for leaves. Add a brown rectangle trunk at the bottom.
Each tree uses about 50 beads. The two-color design keeps things simple. Green and brown stay easy to follow.
Iron evenly across the design. The trunk and leaves fuse together as one piece. Watch the color transition stay clean.
Make different tree types for variety. Triangular Christmas trees, round oak trees, or pointed pine trees all work. Each shape tells a different story.
Add red bead apples or pink cherry blossoms to fancy versions. The accent details transform basic trees into seasonal designs. Each detail uses just a few beads.
Pair tree charms with nature gifts or hiking accessories. Tie one to a real plant or garden gift. Nature lovers will appreciate the matching detail.
Make a forest of trees as wall art. Mount different tree types together for variety. The grouping creates peaceful nature decor.
This project teaches you to combine geometric shapes simply. The skill helps with houses, mountains, or any landscape elements. Trees also work as Christmas ornaments, magnets, or decorative wall pieces.
12. Simple Cake Slice
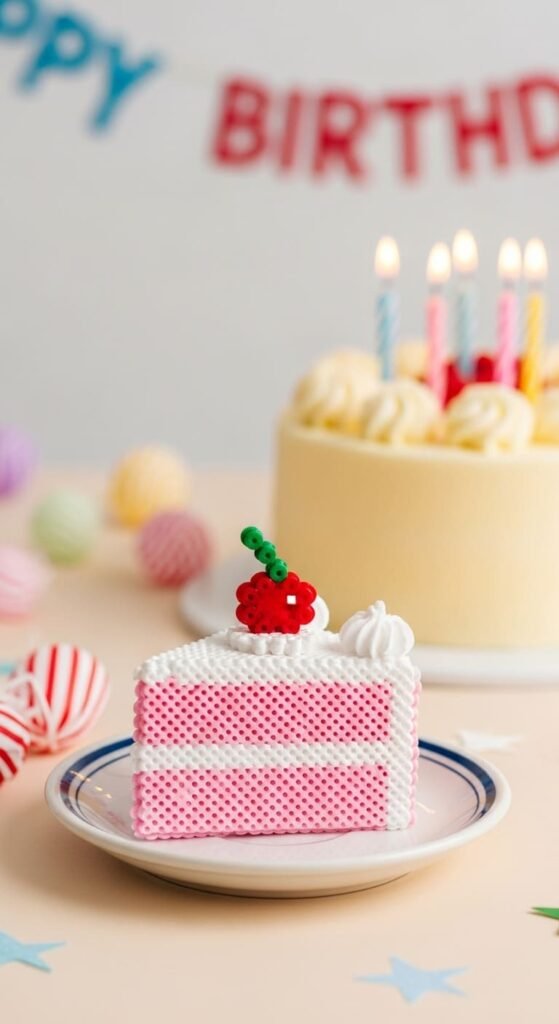
A simple cake slice celebrates with handmade charm. Make a triangle shape with the point at the bottom. Add layered colors for cake and frosting.
Use brown for chocolate cake, yellow for vanilla, or pink for strawberry. Top the slice with a single red cherry bead. The simple stack stays beginner-friendly.
Each slice uses about 35 beads. Iron carefully to keep the triangle shape defined. The layers should fuse together as one piece.
Attach as keychains for birthday celebrators. Pair with bakery gift cards or cake-themed presents. The matching theme feels intentional and sweet.
Make different cake flavors with color changes. Each variation feels like a different bakery treat. Build a whole bakery collection over time.
Pair cake charms with real cake purchases for adorable birthday gifts. Tie a charm to a cake box ribbon. Everyone loves handmade birthday touches.
Make tiny cake slice earrings or large coasters. The flexible scale fits many uses. Each piece costs about fifty cents in materials.
This project teaches you to layer different shapes within one design. The skill helps with sandwiches, parfaits, or any layered food designs. Cake slices also work as magnets, pin-on accessories, or pendant necklaces.
13. Basic Pumpkin
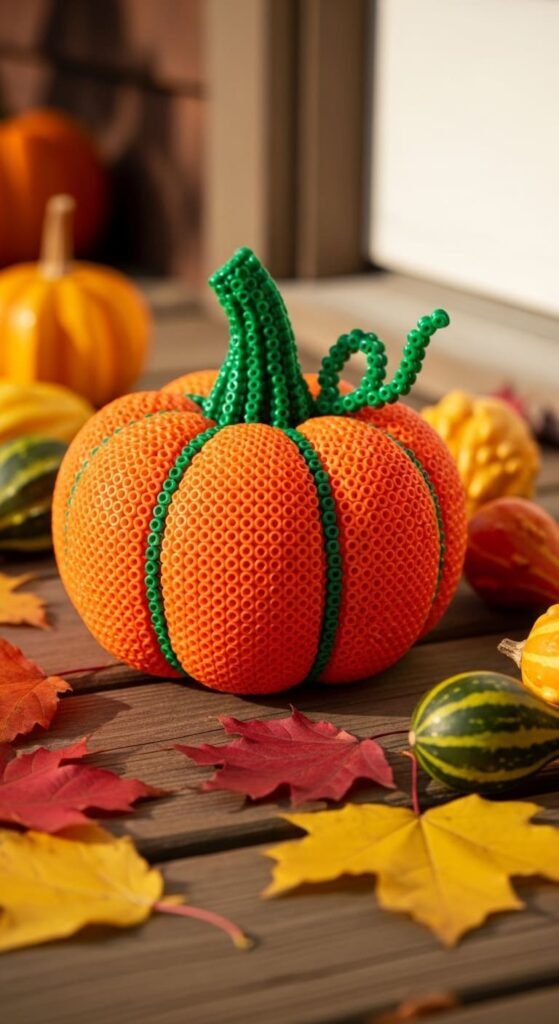
A basic pumpkin design fits fall themes. Make a round orange shape with a green stem on top. Add darker orange lines for pumpkin ridges.
Each pumpkin uses about 60 beads. The classic shape suits Halloween and Thanksgiving. Make jack-o-lantern versions with black face beads.
Iron evenly across the round shape. The stem details fuse with the main pumpkin body. Watch the connection point between stem and body.
Make pumpkins in different colors for variety. Classic orange, white, gray, or trendy teal all work. Teal supports food allergy awareness on Halloween.
Attach as fridge magnets for fall decoration. Pair with autumn-themed gifts or pumpkin spice products. Each pumpkin costs about a dollar in materials.
Make a patch of pumpkin charms as wall decor. Different sizes and colors create autumn variety. The seasonal grouping feels festive and charming.
Pair pumpkin charms with apple cider gifts or fall recipe books. Tie one to a cinnamon broom or autumn wreath. The matching theme feels coordinated.
This project teaches you to combine round shapes with small accents. The skill helps with cherries, apples, or any fruit with stems. Pumpkins also work as keychains, ornaments, or pin-on accessories.
14. Simple Snowflake

A simple snowflake design uses straight crossing lines. Make a basic six-arm shape with white or icy blue beads. The straight arms keep it beginner-friendly.
Each snowflake uses about 30 beads. The thin arms need careful ironing. Stop as soon as the beads connect.
Skip the elaborate detail patterns until you have practice. Simple straight arms still look like classic snowflakes. The clean design suits any winter style.
Make snowflakes in different sizes for variety. Tiny ones work as earrings, medium for ornaments, large for window displays. The scale adapts to many uses.
Hang snowflakes in windows or on Christmas trees. Use clear thread for invisible suspension. The icy theme brings winter magic indoors.
Pair snowflake ornaments with hot cocoa or winter gifts. Tie a snowflake to a real scarf or mittens. The matching detail makes any winter gift feel special.
Make a flurry of snowflakes for window displays. Hang them at different heights from the ceiling. The grouping looks magical with snow visible outside.
This project teaches you to make symmetric thin-arm designs. The skill helps with stars, suns, or any radial pattern. Snowflakes also work as gift toppers, jewelry, or decorative window clings.
15. Tiny Ladybug
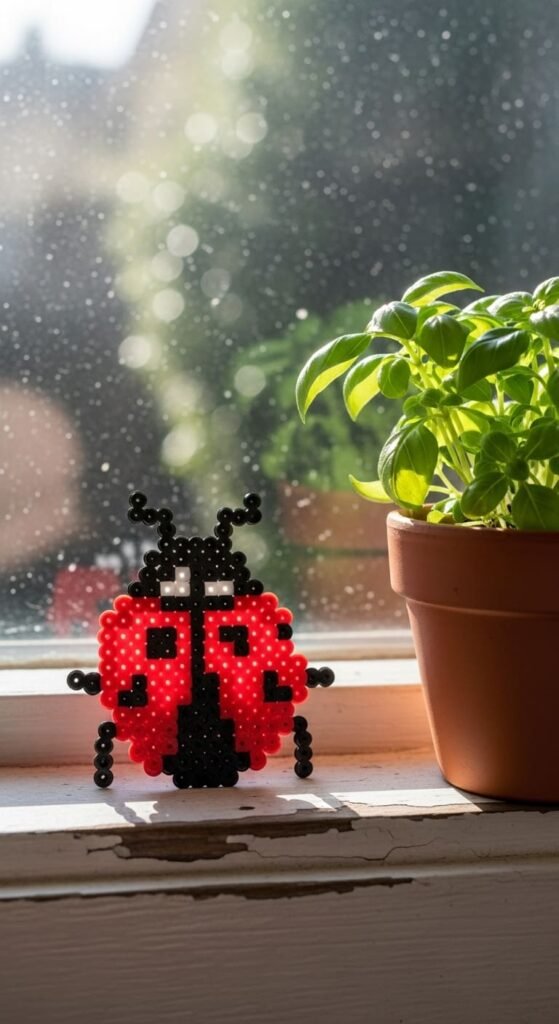
A tiny ladybug design uses red and black beads. Make a small round bug body in red. Add black beads in dot patterns for spots.
Each ladybug uses about 30 beads. The simple round shape stays beginner-friendly. The spots add character without complexity.
Iron carefully to fuse the small design. Watch the head and spot details. The contrasting colors should stay sharp after fusing.
Add a black bead head at one end. Place small black bead dots scattered across the back. The classic design becomes instantly recognizable.
Attach as fridge magnets, hair clips, or pendant charms. Make matching ladybug sets in different sizes. Each piece costs about thirty cents in materials.
Pair ladybug charms with gardener gifts or lucky-themed presents. Ladybugs symbolize good luck in many cultures. Tie one to a seed packet for charming garden gifts.
Make a swarm of ladybugs as wall decor. Mount different sizes together on green felt for grass. The grouping looks cheerful and whimsical.
This project teaches you to add patterns within solid shapes. The skill helps with all spotted or striped designs. Ladybugs also work as backpack tags, jewelry, or decorative pins for nature themes.
16. Basic Ice Cream Cone
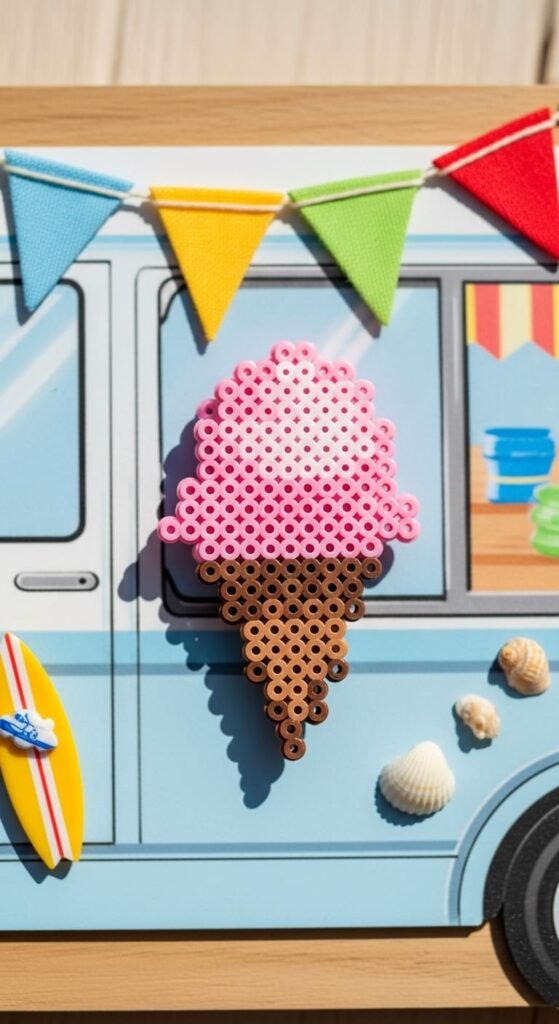
A basic ice cream cone design celebrates summer. Make a triangular brown cone shape. Add a round scoop of ice cream on top.
Pink for strawberry, brown for chocolate, white for vanilla. The two-shape design stays simple. Each scoop uses about 25 beads.
The full design uses about 50 beads. Iron evenly across the cone and scoop. The connection point between them should fuse cleanly.
Make different flavors with scoop color changes. Mint chocolate chip in green, lemon in yellow, blueberry in deep blue. The variations expand collection appeal.
Attach as keychains, magnets, or pendant charms. Pair with ice cream gift cards or summer treats. The matching theme feels coordinated and fun.
Make double-scoop versions by stacking two scoops. Add a tiny red cherry on top with a single bead. The stacked version adds visual interest.
Pair ice cream charms with summer birthday gifts. Tie one to a real ice cream coupon. Kids love the matching summer treat detail.
This project teaches you to combine geometric shapes within one design. The skill helps with cupcakes, sundaes, or any layered desserts. Ice cream cones also work as backpack charms, hair clips, or pin-on accessories.
17. Simple Cherry Pair
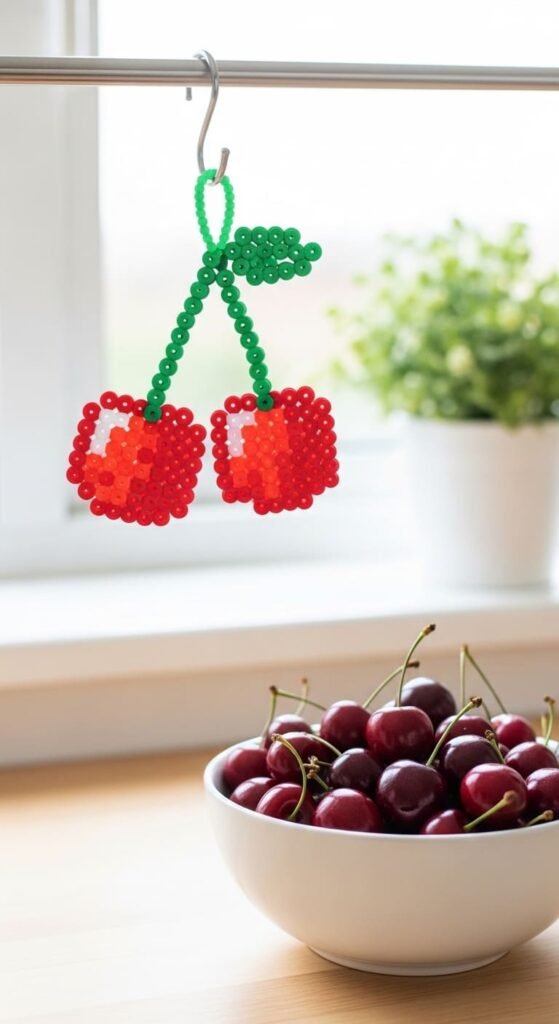
A simple cherry pair design uses two small circles. Make two red beads circles connected by green stems. Add a small green leaf where the stems meet.
Each cherry pair uses about 40 beads. The connected design stays beginner-friendly. The thin stems need watchful ironing.
Iron carefully across the connected shapes. The stems and cherries fuse as one piece. Watch the connection points for solid fusing.
Make the cherries in slightly different shades for visual interest. Or keep them identical for matching looks. Both options work beautifully.
Attach as hair clips, earrings, or pin-on brooches. The pair design suits matching jewelry sets. Each pair costs about thirty cents in materials.
Pair cherry charms with cherry-themed gifts. Tie one to homemade cherry preserves or pie ingredients. Cherry lovers will appreciate the matching detail.
Make matching pairs for friendship gifts. Two friends each take one cherry from the pair. The shared symbolism adds meaning to the gift.
This project teaches you to handle connected designs. The skill helps with grape clusters, berry bunches, or any fruit groupings. Cherry pairs also work as wall decor, magnets, or decorative pins for retro styling.
18. Easy Ghost
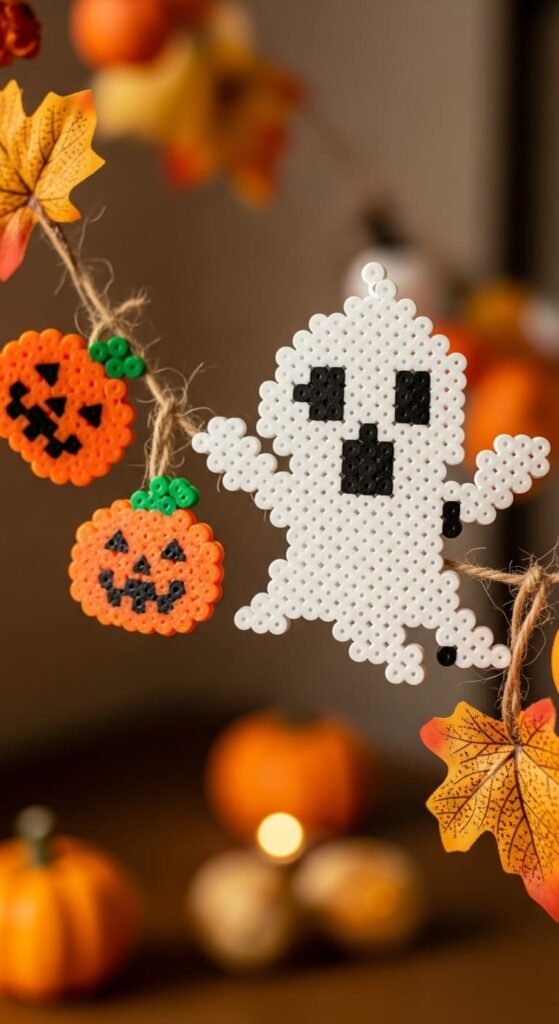
A friendly ghost design fits Halloween. Make a white blob shape with a wavy bottom edge. Add round black eyes and an O-shaped mouth.
Each ghost uses about 50 beads. The wavy bottom adds character to a simple shape. Beginners find irregular shapes forgiving.
Iron carefully across the irregular shape. The wavy edges hide minor placement errors. The round eyes and mouth fuse as solid spots.
Make ghost variations with different expressions. Some look surprised, others happy, others sleepy. Each personality adds variety to a collection.
Pair ghost charms with Halloween candy gifts. Tie one to a pumpkin spice gift card. The matching theme feels seasonal and playful.
Make a Halloween collection with ghosts, pumpkins, and bats. All in matching beginner-friendly style. The grouping feels like a cute Halloween party.
Attach as keychains for trick-or-treat bags. Kids love handmade Halloween accessories. Each ghost costs about fifty cents in materials.
This project teaches you to make irregular character shapes. The skill helps with monsters, blobs, or any organic forms. Ghosts also work as magnets, pins, or backpack charms for Halloween fashion.
19. Simple Egg Shape
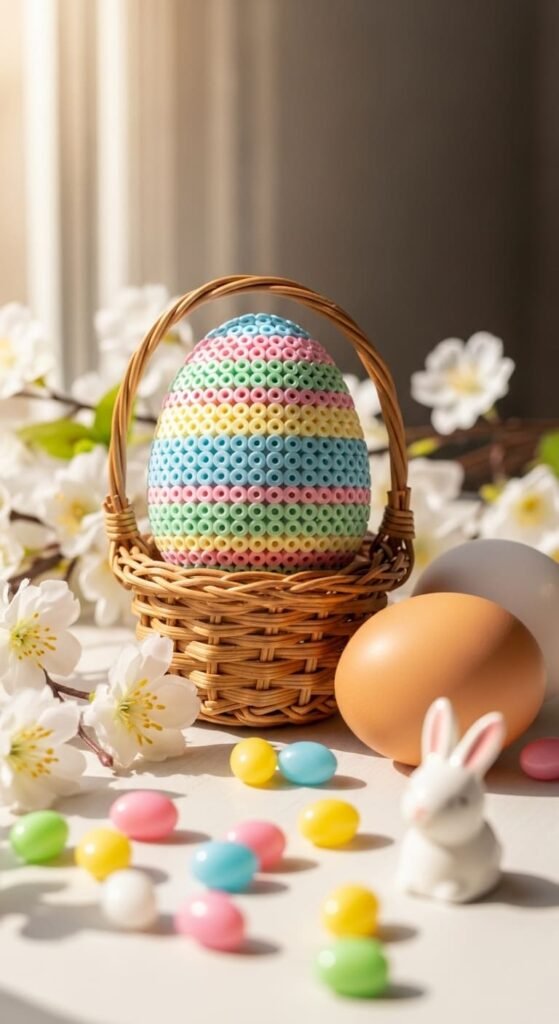
A simple egg shape suits Easter and spring designs. Make an oval shape with rounded ends. Use pastel colors like pink, blue, yellow, or lavender.
Each egg uses about 45 beads. The oval shape uses simple grid placement. The forgiving silhouette helps beginners succeed.
Iron evenly across the simple oval. Add stripe patterns for traditional Easter egg looks. The pastel colors stay vibrant after fusing.
Make decorated eggs with simple patterns. Stripes, polka dots, or zigzags all work. Each pattern feels distinctly Easter.
Attach as Easter basket charms or fridge magnets. Pair with Easter candy gifts or spring presents. The matching theme feels seasonal and cheerful.
Make a basket of egg charms in different colors. Display them in a real Easter basket for spring decor. The grouping looks festive and intentional.
Make egg charm earrings for spring fashion. Pastel jewelry brightens warm-weather outfits. Each pair costs about a dollar in materials.
This project teaches you to make simple oval shapes. The skill helps with eggs, fruits, or any rounded objects. Easter eggs also work as keychains, ornaments, or pin-on accessories for spring styling.
20. Square Coaster
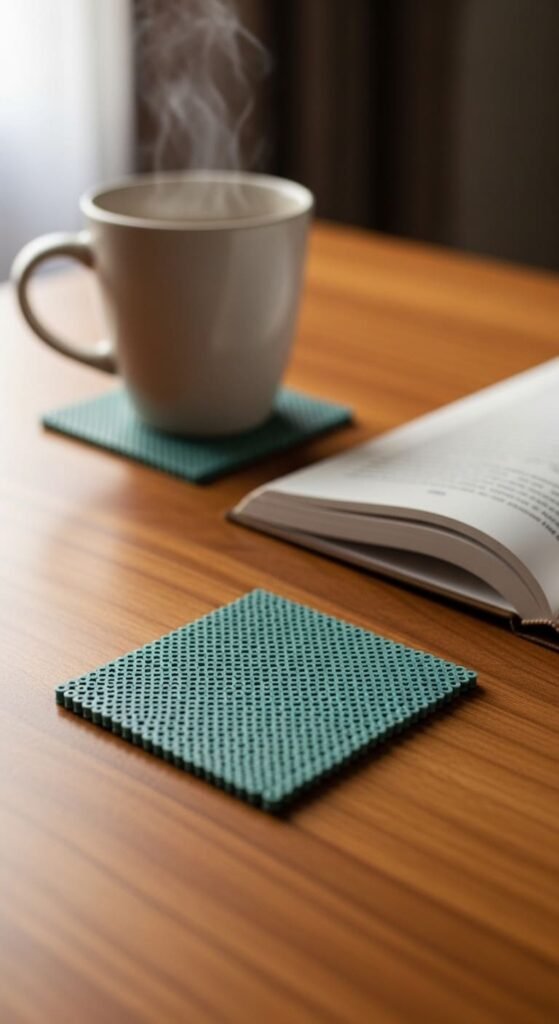
A square coaster uses straight grid placement. Make a solid color square that fills your pegboard. The basic shape stays simple but functional.
Each coaster uses about 100 beads. The single color keeps things easy for beginners. Pick a color that matches your home decor.
Iron evenly across the entire square. The solid color fuses without complications. Beginners appreciate the straightforward approach.
Make sets of four coasters in matching colors. Earth tones like terracotta, sage, or cream feel modern. Each set costs about three dollars in materials.
Glue felt to the bottom to protect tables. Coordinate the felt color with the bead color. The finished coaster looks polished and professional.
Pair coaster sets with coffee or tea gift baskets. Housewarming presents feel intentional with handmade coasters. The simple design appeals to many tastes.
Make patterned coasters with simple stripes once you have practice. The basic square pegboard handles all variations. Build up to checkered or diamond patterns over time.
This project teaches you to fill larger spaces evenly. The skill helps with all wider designs. Square coasters also work as decorative tiles, mug rugs, or trivets for hot drinks.
21. Easy Diamond Shape
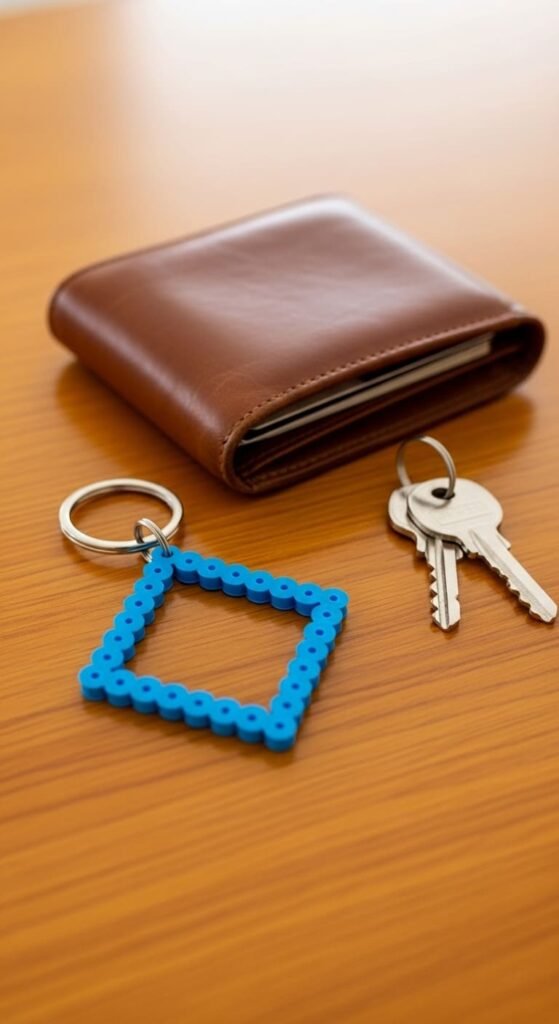
A simple diamond shape uses square grid placement. Place beads in a four-sided shape with points at top, bottom, and sides. Use one solid color for simplicity.
Each diamond uses about 35 beads. The geometric shape stays beginner-friendly. The grid makes diagonal points easy to follow.
Iron evenly across the simple shape. Stop as soon as the points connect. The clean lines stay defined after fusing.
Make diamonds in different colors for variety. Bright blue, hot pink, deep purple, or bold yellow all work. Each color suits different recipients.
Attach as keychains or pendant necklaces. The clean geometric shape feels modern. Each diamond costs about fifty cents in materials.
Pair diamond charms with modern home gifts. The geometric aesthetic suits contemporary style. Tie one to a sleek desk accessory.
Make matching diamond sets for jewelry. Earrings, pendants, and key chains in coordinated colors feel curated. The simple shape adapts to any color palette.
This project teaches you to make geometric shapes with sharp points. The skill helps with stars, kites, or any angular designs. Diamonds also work as magnets, pins, or pin-on accessories for modern styling.
22. Simple Bow Shape
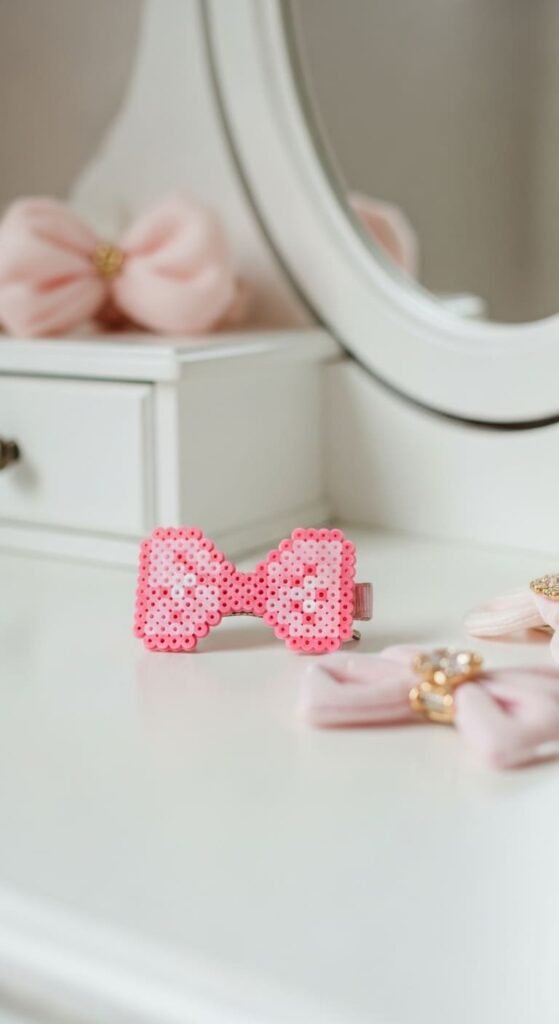
A simple bow shape works as hair accessories. Make two triangular loops connected by a center band. Use pink, red, or any feminine color.
Each bow uses about 40 beads. The two-loop design stays manageable. Add a small square in the center for the bow knot.
Iron carefully across the connected shape. Watch the center band fuse with the loops. The bow should stay defined after fusing.
Make bows in different sizes for various uses. Tiny ones work as earring details, medium for hair clips, large for headband accents. The flexible scale fits many uses.
Glue to hair clips with strong jewelry glue. A pack of hair clips costs about three dollars and makes many accessories. Each finished bow clip stays under a dollar.
Pair bow charms with hair styling gifts. Tie one to a hair brush or styling tools. The matching theme feels coordinated.
Make matching bow sets for sister gifts. Coordinated hair accessories feel curated. The simple shape adapts to any color preference.
This project teaches you to make connected shapes with multiple parts. The skill helps with butterflies, ribbons, or any tied-shape designs. Bows also work as gift toppers, decorative pieces, or pin-on accessories.
23. Basic Lightning Bolt
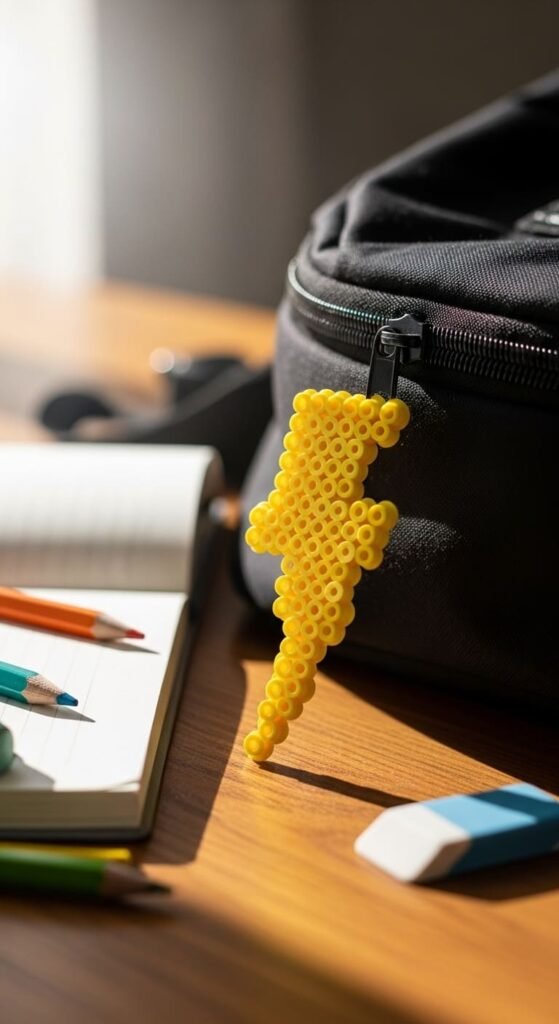
A basic lightning bolt brings energy to designs. Make a zigzag shape with sharp angles. Use yellow, gold, or hot pink for the bolt color.
Each bolt uses about 30 beads. Sharp angles define the lightning shape clearly. The zigzag works well on a square grid.
Iron carefully across the angular shape. Watch the points stay sharp. The lightning should look bold and energetic after fusing.
Make bolts in different colors for variety. Classic yellow, electric blue, hot pink for sparkle, or purple for magic. Each color tells a different story.
Attach as keychains, zipper pulls, or hair clips. Lightning bolt earrings make stylish jewelry pieces. The bold shape stands out in any setting.
Pair lightning bolt charms with superhero gift themes. Tie one to a comic book or superhero costume. Kids who love powers will treasure the matching charm.
Make matching lightning sets for friend groups. Each person takes one as a power totem. The shared symbolism feels playful and energetic.
This project teaches you to handle angular shapes with sharp angles. The skill helps with stars, sparkles, or zigzag patterns. Lightning bolts also work as magnets, pins, or pin-on accessories for bold styling.
Conclusion
Beginner perler bead patterns build confidence through simple shapes, manageable color counts, and quick finishing times. These 23 easy patterns each use fewer than 100 beads and complete in under 30 minutes. A beginner kit with MIDI beads, a square pegboard, and ironing paper costs under twenty dollars from any craft store. Pick one pattern that excites you and start tonight. Each finished project teaches you grid placement, ironing technique, and finishing skills. Build up from solid hearts to detailed designs as your confidence grows. Make magnets, keychains, ornaments, and gifts that show off your new skills. Beginner perler crafting offers calming creative time and produces handmade items you’ll feel proud to share with friends and family.


