A painted flower pot can look gorgeous on day one—and terrible by week four if you skip the sealing step. Sun, rain, soil moisture, and daily watering all attack the paint. Sealing is what keeps your DIY pots from peeling, fading, bubbling, or cracking before the season is over.
Why Sealing Painted Flower Pots Matters
Terracotta is beautiful, but it’s also porous. That means moisture can move through the pot and push against your paint from the inside. Plastic and concrete pots have their own issues too, especially with fading and surface wear.
A good sealer helps protect against:
- Rain and watering moisture
- UV fading from sunlight
- Scratches and scuffs
- Paint peeling or bubbling
- Dirt stains and outdoor grime
Do not treat sealing as optional. If the pot is going outside, it needs protection.
Let the Paint Dry Completely First
This is where impatience ruins the project.
Before sealing, make sure your painted pot is fully dry. Not “dry to the touch.” Fully dry. Paint that still has moisture trapped inside can wrinkle, bubble, or stay tacky under the clear coat.
A smart rule:
- Wait at least 24 hours after painting
- Wait longer if the weather is humid
- Make sure the pot feels dry inside and out
If you used several thick coats, give it more time. Thick paint takes longer to cure.
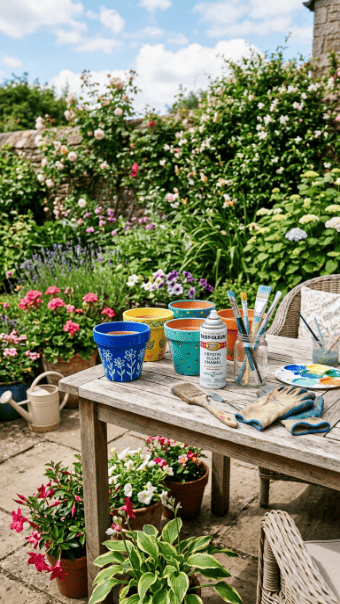
Choose the Right Sealer
The best sealer depends on your pot material, finish preference, and how exposed the pot will be outdoors.
Good options include:
- Clear acrylic spray sealer: Great for even coverage and outdoor projects
- Outdoor Mod Podge: Better for brush-on control and decorative finishes
- Krylon-style clear spray: Good for quick, smooth sealing
- Rust-Oleum clear outdoor spray: Useful for UV protection and durability
- Water-based acrylic sealer: A cleaner option for plant-focused projects
For outdoor pots, choose a product labeled for exterior use. Indoor craft sealers may look fine at first, then fail fast once rain and sun hit them.
Spray Sealer vs. Brush-On Sealer
Both work, but they behave differently.
Spray sealer is best when you want:
- Smooth, even coverage
- Fast application
- Fewer brush marks
- Better reach around curves and details
Brush-on sealer is best when you want:
- More control
- Matte, satin, or glossy finish options
- Thicker protection in specific areas
- Less overspray mess
Here’s the blunt truth: spray sealer is usually easier for beginners. Brush-on sealer can look great, but only if you apply thin coats and avoid overworking it.
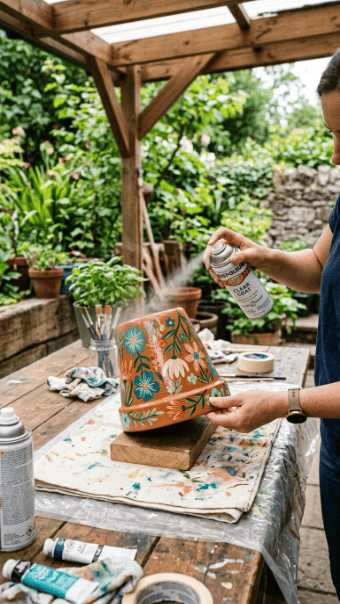
How to Seal Painted Flower Pots Step-by-Step
Set up outside or in a very well-ventilated area. Clear sealers can have strong fumes, and spraying indoors is a bad idea.
Follow these steps:
- Clean the painted pot
- Wipe away dust with a dry cloth.
- Make sure no dirt or lint is stuck to the paint.
- Place the pot upside down first
- Start with the bottom and lower edges.
- Keep the drainage hole open.
- Apply the first thin coat
- Spray in light, even passes.
- If brushing, use smooth strokes and avoid heavy buildup.
- Let it dry
- Wait 1–2 hours between coats, or follow the product label.
- Apply 2–3 total coats
- Thin coats are better than one heavy coat.
- Heavy coats can bubble, drip, or dry cloudy.
- Seal the inside too
- This helps reduce moisture pushing through the pot walls.
- Do not clog drainage holes.
Should You Seal the Inside, Outside, and Bottom?
Yes—with one exception: keep drainage open.
For terracotta pots especially, seal:
- Outside surface
- Inside walls
- Rim
- Bottom edge
Moisture can enter from the inside when you water your plants. If only the outside is sealed, the paint may still peel because water is moving through the clay from behind.
That said, don’t create a sealed bowl with no drainage. Plants need water to escape. Pretty pots are pointless if the roots rot.
Drying and Curing Time
Drying and curing are not the same thing.
A pot may feel dry after an hour, but the sealer still needs time to harden. Before planting, wait at least 48 hours after the final coat. Longer is better if the weather is cool or damp.
Before adding soil, check:
- The surface is not sticky
- There is no strong sealer smell
- The finish feels hard and smooth
- Drainage holes are clear
Common Mistakes to Avoid
These are the mistakes that make sealed pots fail:
- Applying sealer before paint is fully dry
- Using one thick coat instead of thin layers
- Forgetting to seal the inside
- Spraying too close and causing drips
- Planting before the sealer cures
- Using indoor-only products outside
- Blocking drainage holes
The biggest mistake is rushing. Outdoor durability comes from patience, not piling on product.
Best Finish: Matte, Satin, or Gloss?
This comes down to style.
- Matte: Soft, modern, natural-looking
- Satin: Subtle shine and easy to style
- Gloss: Bright, bold, and more reflective
For Pinterest-style garden decor, satin is usually the safest choice. It gives protection without making the pot look overly shiny.
Final Takeaway
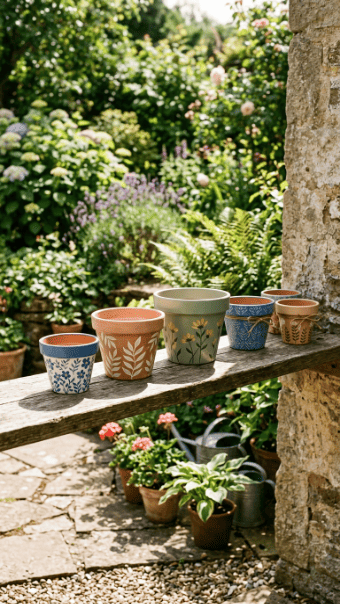
Sealing painted flower pots is not the glamorous part of the project, but it is the part that decides whether your DIY actually lasts. Let the paint dry, use an outdoor clear sealer, apply 2–3 thin coats, seal inside and out, and wait before planting.
Do it properly once, and your painted pots will look fresh far longer outside.
Save this guide before your next garden project.