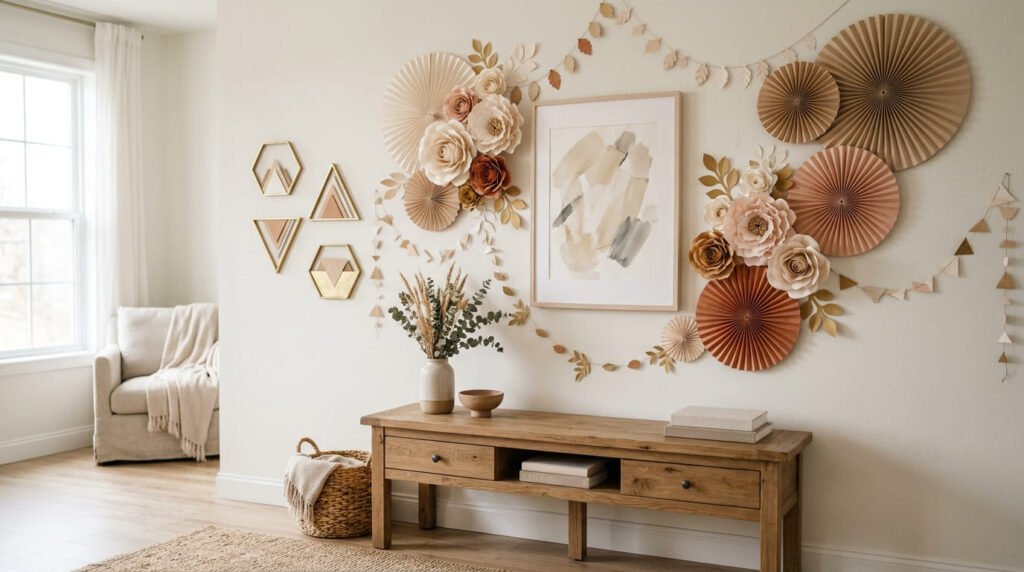
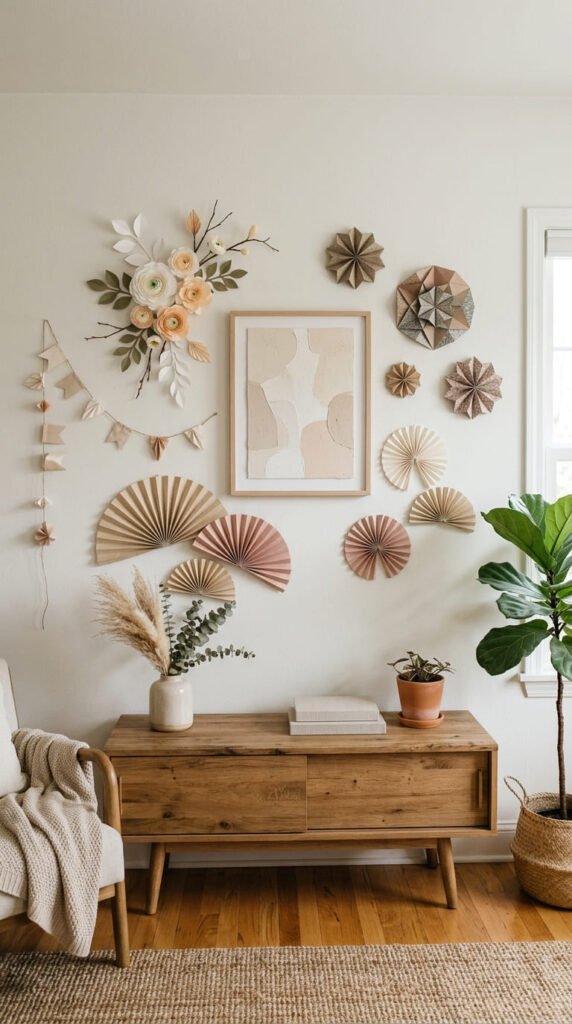
Paper wall decor crafts are a smart way to decorate a home without buying pricey artwork, wallpaper, or heavy wall pieces. With cardstock, tissue paper, book pages, kraft paper, paper bags, ribbon, and removable tape, you can create budget-friendly decorating that feels soft, elegant, and personal. These ideas work for bedrooms, living rooms, nurseries, dorm rooms, small apartments, rented homes, and party walls. The strongest wall decor ideas often use paper flowers, geometric shapes, garlands, wall hangings, and seasonal pieces.
1. Giant Paper Flower Wall Cluster
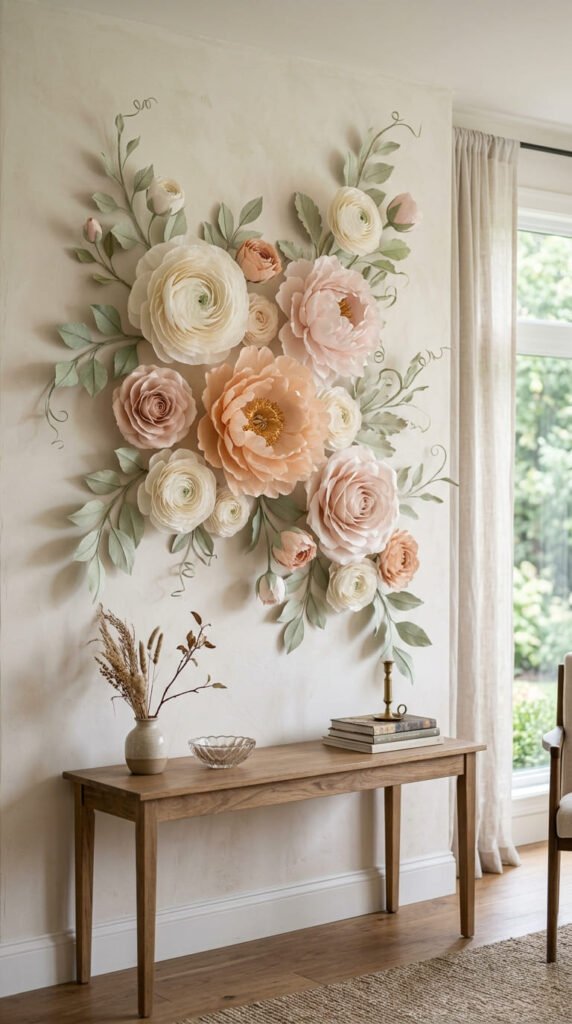
A giant paper flower wall cluster can make a plain wall feel decorated without buying large artwork.
Use cardstock for the petals because it holds shape well. Cut petals in three sizes.
Curl the edges with a pencil, marker, or spoon handle. This small step makes the petals look softer.
Glue the biggest petals onto a cardboard circle. Add medium petals next. Finish with smaller petals near the center.
Make three large flowers, four medium flowers, and a few small buds. This fills a wall area without using too much paper.
Choose two or three colors. Ivory, blush, sage, and peach work beautifully for an elegant look.
Add paper leaves around the flowers to soften the shape.
For a cheap base, cut circles from delivery boxes.
Use removable wall strips if you rent. Another easy option is to glue the flowers onto foam board and lean it behind a desk or table.
This craft works well above a bed, sofa, crib, or dessert table.
2. Neutral Paper Fan Wall Art
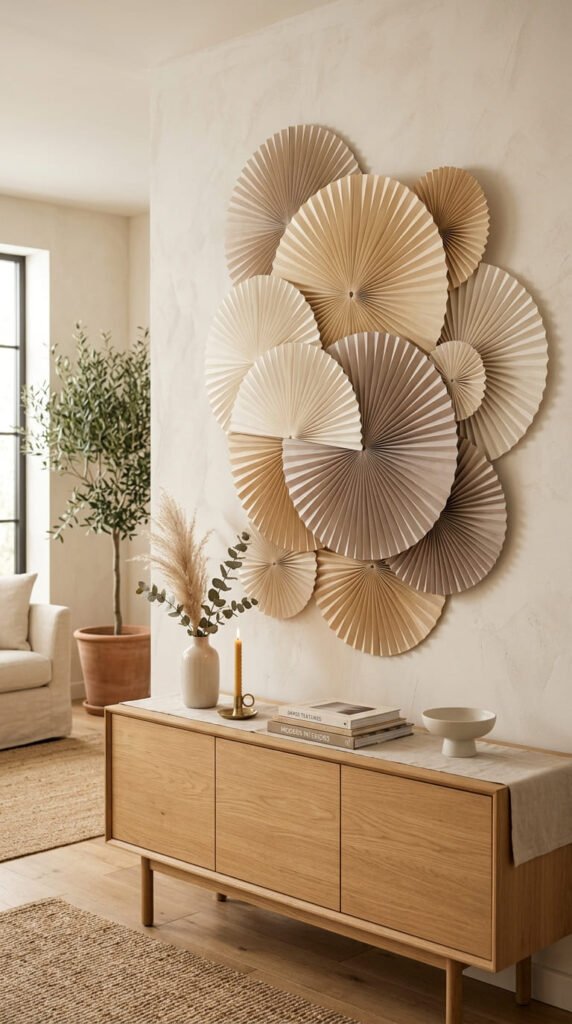
Neutral paper fan wall art is simple, calm, and perfect for modern rooms.
Use thick paper, gift wrap, or lightweight cardstock. Fold each sheet back and forth like an accordion.
Fold the pleated sheet in half. Glue the center edges together to make a half fan.
Glue two half fans together to create a full circle.
Make fans in different sizes. Large fans fill the main space. Small fans cover gaps.
Choose soft colors like cream, beige, tan, white, and pale gold.
Layer a few fans slightly over each other. This gives the wall more depth.
For a budget-friendly version, use brown kraft paper, paper bags, or leftover wrapping paper.
Attach the fans with painter’s tape, removable strips, or small hooks.
This decor looks lovely above a console table, reading chair, bed, or party table.
You can also save the fans after an event. Fold them flat and place them in a storage box.
It is light, pretty, and easy to make in one afternoon.
3. Geometric Paper Hexagon Wall
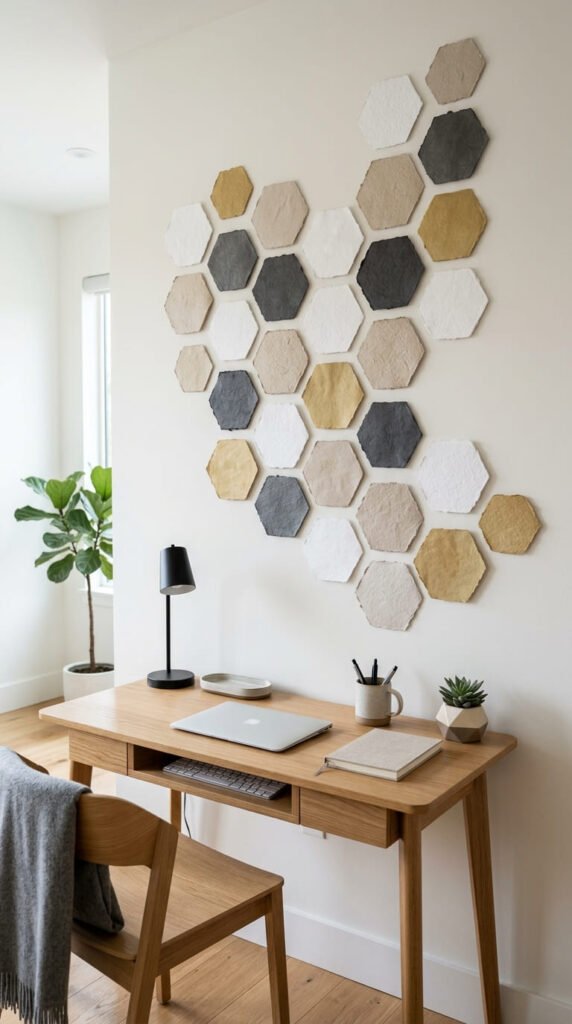
A geometric paper hexagon wall gives a room a clean and modern look.
Cut hexagons from cardstock. Use a printed shape, ruler, or cardboard template so the pieces stay even.
Pick three or four colors that match your room. White, charcoal, beige, and muted gold look polished.
Lay the pieces on the floor before adding them to the wall. This helps you test the pattern.
You can make a honeycomb shape, a corner design, or a neat grid.
For a 3D effect, fold a small edge on each side of the hexagon and mount it with foam tape.
Use cereal box cardboard covered with paper if you want stronger pieces.
This craft works well in home offices, teen rooms, dorm rooms, and small apartments.
Keep the spacing even for a clean finish.
If you want a softer style, use pastel paper instead of bold colors.
This idea works because it looks like modern wall art while using very simple materials.
4. Book Page Flower Wall
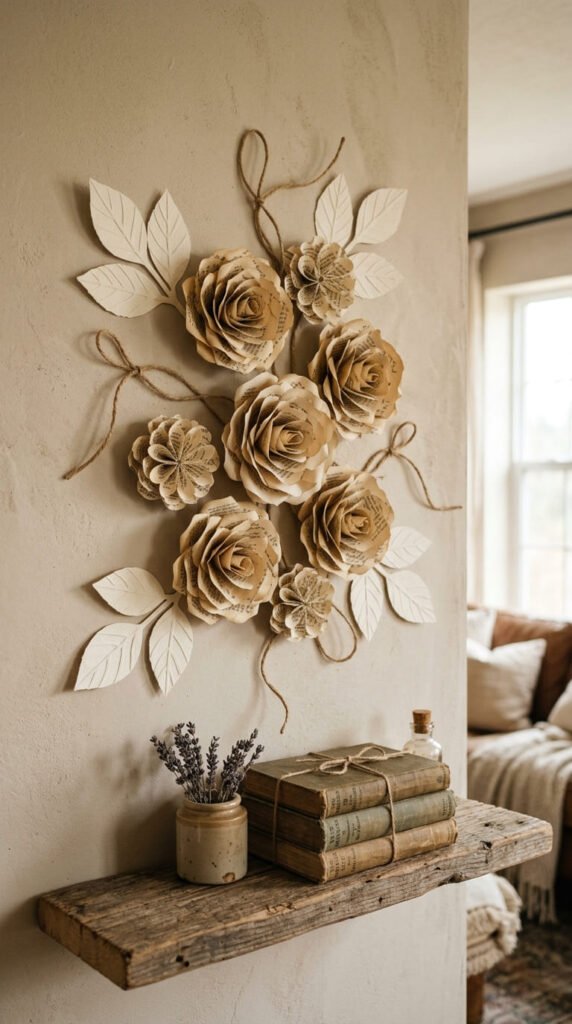
Book page flowers create warm wall decor with a vintage handmade feel.
Use pages from damaged books, thrift-store books, or printed scrap paper. Avoid cutting books you want to keep.
Cut petal shapes from the pages. Curl the edges around a pencil for soft movement.
Glue the petals around a cardboard circle. Add a rolled paper center, small bead, or button.
Make several flowers in different sizes. A mix of sizes looks more natural on the wall.
Arrange them in a corner, around a mirror, or above a small shelf.
Book page flowers look beautiful with kraft paper leaves, twine, lace, and wood tones.
For a low-cost display, glue the flowers onto cardboard backing and place it inside a frame without glass.
You can also add the flowers to a wreath base or wall hoop.
Use removable strips for hanging because the flowers are lightweight.
This craft gives old paper a second life and adds soft texture to plain walls.
It works especially well in reading corners, bedrooms, craft rooms, and cozy living spaces.
5. Layered Paper Butterfly Wall
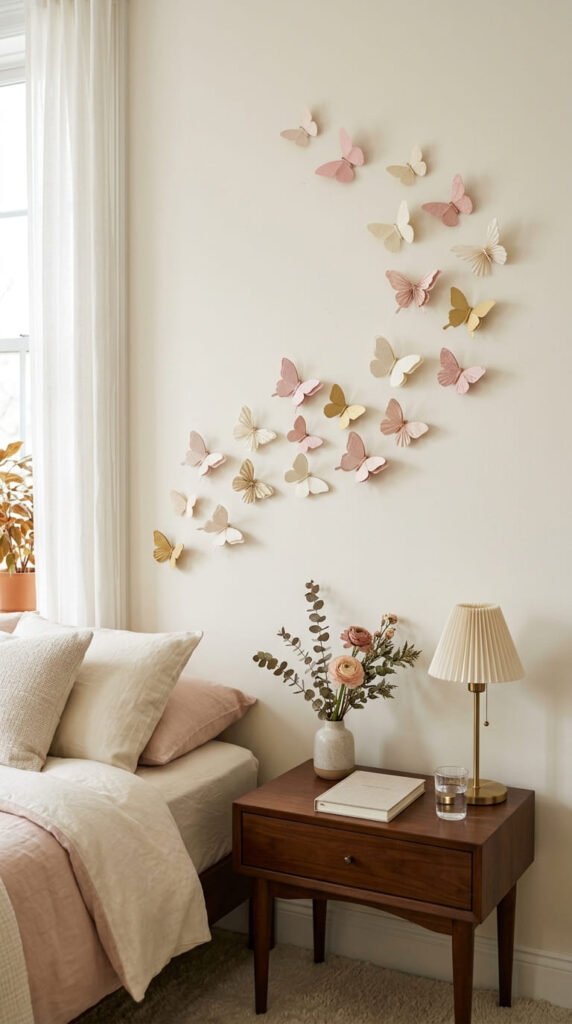
A layered paper butterfly wall feels light, graceful, and easy to customize.
Cut butterfly shapes from cardstock or patterned paper. Fold each butterfly down the middle so the wings lift from the wall.
For a richer look, glue a smaller butterfly on top of a larger one.
Use colors that fit your room. Cream and gold feel elegant. Pink and lavender feel sweet. Black and white feel modern.
Arrange the butterflies in a soft trail across the wall.
Start with the largest butterflies near the bottom. Use smaller ones as the trail rises.
Attach them with removable dots or tiny pieces of painter’s tape.
Use scrap paper for smaller butterflies to save money.
This craft is great for bedrooms, nurseries, craft rooms, and party backdrops.
Do not crowd the wall. Empty space helps the butterflies look airy.
The folded wings create lovely shadows when daylight hits them.
You can also place a few butterflies around a mirror or frame.
It is simple paper wall decor with a soft and graceful finish.
6. Paper Leaf Garland
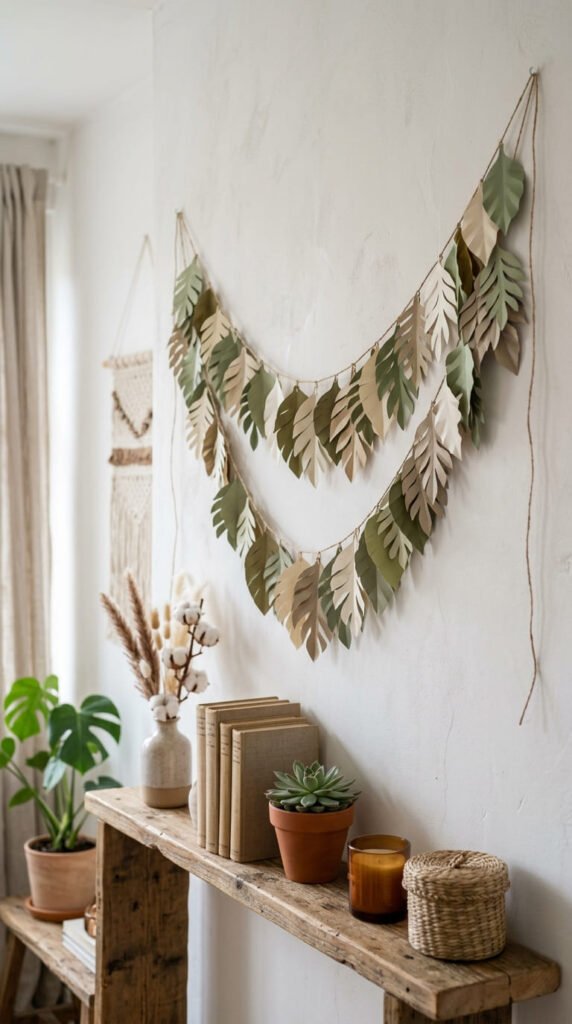
A paper leaf garland is a soft way to add natural style to a wall.
Cut leaf shapes from green, cream, beige, or brown paper.
Fold each leaf down the middle to give it shape.
Glue or tape the leaves onto twine, yarn, or thin ribbon.
Make the garland short for a shelf or long for a bed frame, window, or reading corner.
Use different leaf sizes for a more natural look.
A budget tip is to cut leaves from paper bags, old envelopes, or leftover cardstock.
For a boho look, add paper feathers or small paper flowers.
Hang it with removable hooks or painter’s tape.
This craft is lightweight and easy to store. Coil it gently and place it inside a box.
It looks good in bedrooms, entryways, nurseries, and living rooms.
The soft leaf shapes add calm texture without paint, nails, or expensive art.
You can also make seasonal versions. Use green for spring, warm brown for autumn, and white for winter decor.
7. Minimal Paper Arch Wall Art
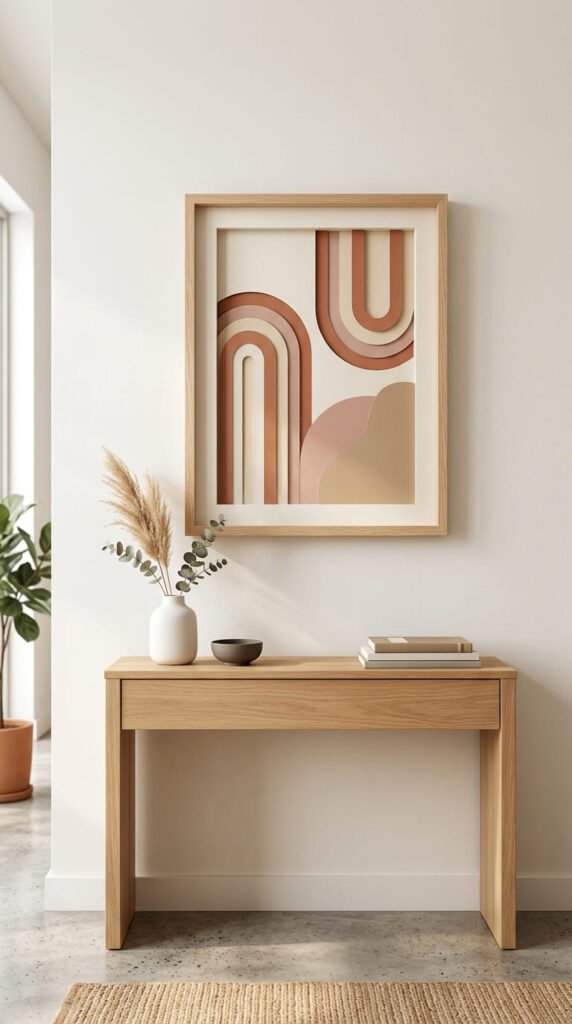
Minimal paper arch wall art is a stylish project for modern rooms.
Cut arch shapes from cardstock in different sizes. Use bowls, plates, or simple templates to trace smooth curves.
Layer the arches from largest to smallest.
Try warm colors like terracotta, cream, blush, beige, and soft brown.
Glue the layers onto thick white paper, canvas board, or cardboard.
Place the finished piece inside a frame, or hang it as a flat paper panel.
This craft is great if you like clean wall art but do not want to buy prints.
Use leftover cardstock or paint plain paper with soft colors.
Keep the design simple. A few large shapes can look better than many tiny pieces.
This wall decor works in bedrooms, offices, hallways, and living rooms.
Make a set of three panels for a gallery wall.
You can also create a larger version on poster board for a renter-friendly accent piece.
The result feels calm, modern, and easy to match with many decor styles.
8. 3D Paper Star Wall Decor
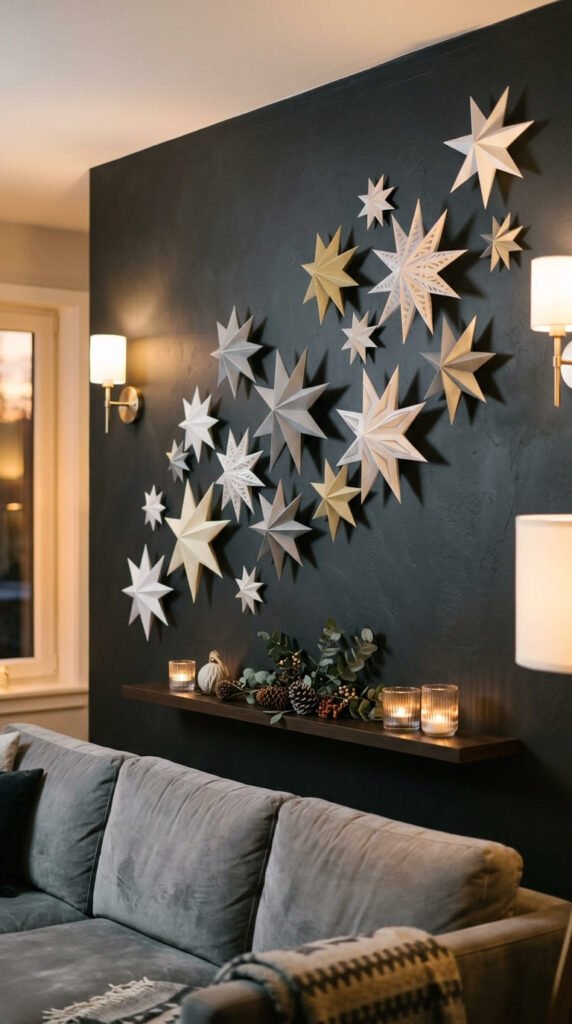
3D paper stars add shape and shadow to a wall without heavy decor.
Cut star shapes from cardstock. Score or fold from each point toward the center.
Pinch the folds so the star lifts into a 3D shape.
Use white, silver, champagne, or pale gold paper for an elegant style.
Make stars in several sizes. Place larger stars first, then fill around them with smaller stars.
This decor works for holidays, bedrooms, nurseries, party walls, and cozy corners.
For a cheap option, use old gift bags, metallic wrapping paper, or leftover cardstock.
Attach stars with removable wall dots.
You can also glue them to a cardboard moon shape for a night-sky wall piece.
Place the stars near a lamp or window so the folds create soft shadows.
Keep the layout loose instead of making a strict grid.
This craft is easy to store after use. Stack the stars gently in a shallow box.
It looks festive, but it can also feel calm and grown-up when you use soft colors.
9. Boho Paper Feather Hanging
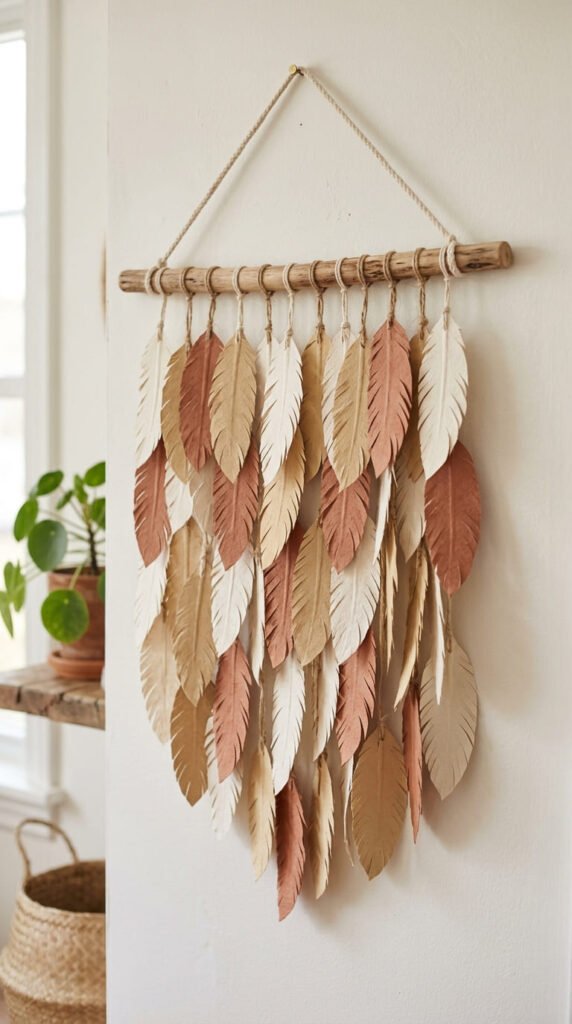
A boho paper feather hanging gives a wall soft texture without fabric or macramé.
Cut long feather shapes from paper. Fold each feather in half.
Cut small slits along the edges, stopping before the center fold.
Gently bend the feather so it has movement.
Use cream, tan, rust, brown, and muted pink for a warm boho look.
Tie each feather to string, then attach the strings to a wooden dowel, branch, or paper-covered cardboard strip.
Make the center string longest and the outer strings shorter for a soft V shape.
Use paper bags or kraft paper to save money.
Hang the piece above a bed, desk, shelf, or reading corner.
This craft is light, so removable hooks work well.
Add paper beads or tiny folded leaves if you want more detail.
Keep the feathers spaced apart so they can move slightly.
It gives a handmade wall hanging look without yarn, fabric, or pricey materials.
10. Paper Rosette Gallery Wall
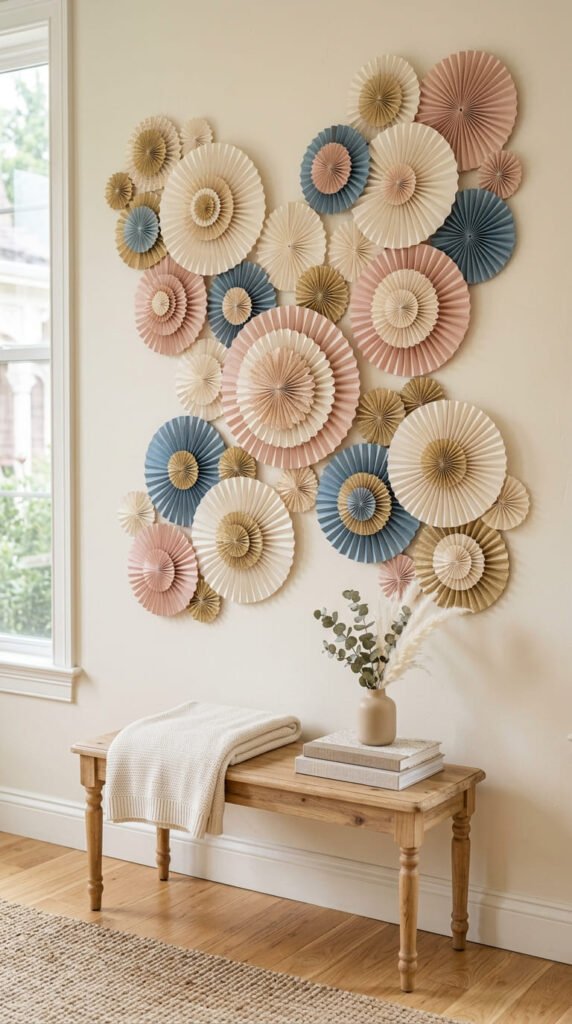
Paper rosettes are perfect for filling a wall with color and texture.
Cut long strips of paper. Fold each strip like an accordion.
Glue the ends together to make a circle. Press it flat and glue a small paper circle in the center.
Make rosettes in several sizes. Large ones fill space. Small ones shape the edges.
Use a limited color palette for an elegant look. Try cream, blush, dusty blue, and soft gold.
Arrange the rosettes like a gallery wall above a table or bench.
For a low-cost version, use wrapping paper, magazine pages, or old scrapbook paper.
Tape each rosette to the wall with removable strips.
You can also glue the rosettes onto foam board and hang the board as one piece.
This makes setup easier for parties or rented homes.
Paper rosettes work well for baby showers, birthdays, bedroom walls, and craft room decor.
They look detailed, but the folds are simple and repetitive.
The finished wall feels full, handmade, and easy to change later.
11. Tissue Paper Flower Wall
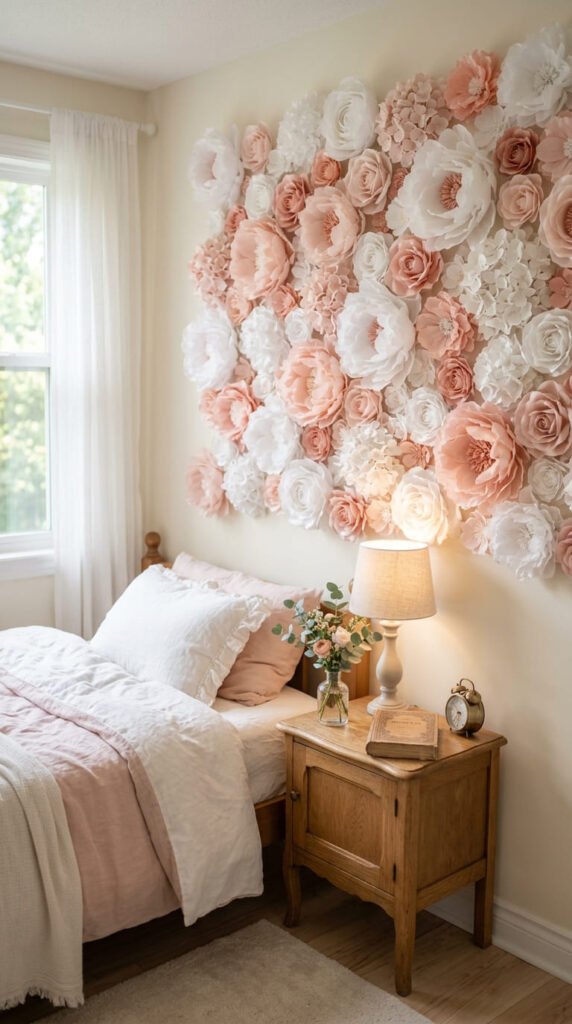
A tissue paper flower wall looks soft, full, and airy.
Stack several sheets of tissue paper. Fold them like an accordion.
Tie the center with string, then trim the ends into rounded or pointed shapes.
Pull each tissue layer upward slowly to create a flower.
Make flowers in several sizes and colors.
White, blush, peach, and pale coral create a soft elegant wall.
Use fewer flowers for a corner accent. Use more for a party backdrop.
Tissue paper is cheap, lightweight, and easy to find.
Hang the flowers with painter’s tape, removable dots, or pins if your wall allows it.
For a renter-friendly idea, attach them to a large poster board or foam board instead of directly to the wall.
This craft is great for bedrooms, nurseries, bridal showers, and photo areas.
Be gentle when storing them. Tissue paper crushes easily.
Place them in a large box when not in use.
The result looks full and romantic without a high price.
12. Paper Heart Wall Installation
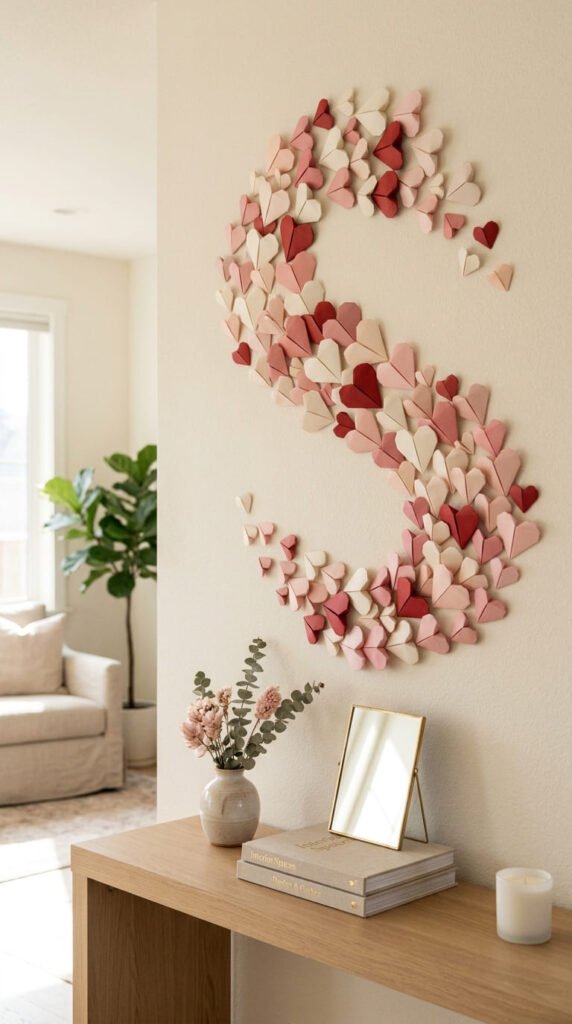
A paper heart wall installation can look elegant when the colors are soft and the layout is clean.
Cut hearts from cardstock or colored paper.
Fold each heart down the middle so the sides lift away from the wall.
Use blush, ivory, soft pink, and deep red for a warm design.
Arrange the hearts in a flowing curve, circle, or corner cluster.
Place larger hearts at the center and smaller hearts around the edges.
Attach them with removable dots or small tape rolls.
Use scrap paper for the small hearts to save money.
This craft works for Valentine’s Day, bedrooms, weddings, anniversaries, or party decor.
For everyday decor, use neutral tones instead of bright red.
You can also place the hearts inside a frame without glass.
Keep spacing between pieces so each heart creates its own shadow.
This project is fast and easy to adjust.
Move pieces around until the shape feels balanced.
The folded paper gives depth while staying very lightweight.
13. Paper Chain Wall Hanging
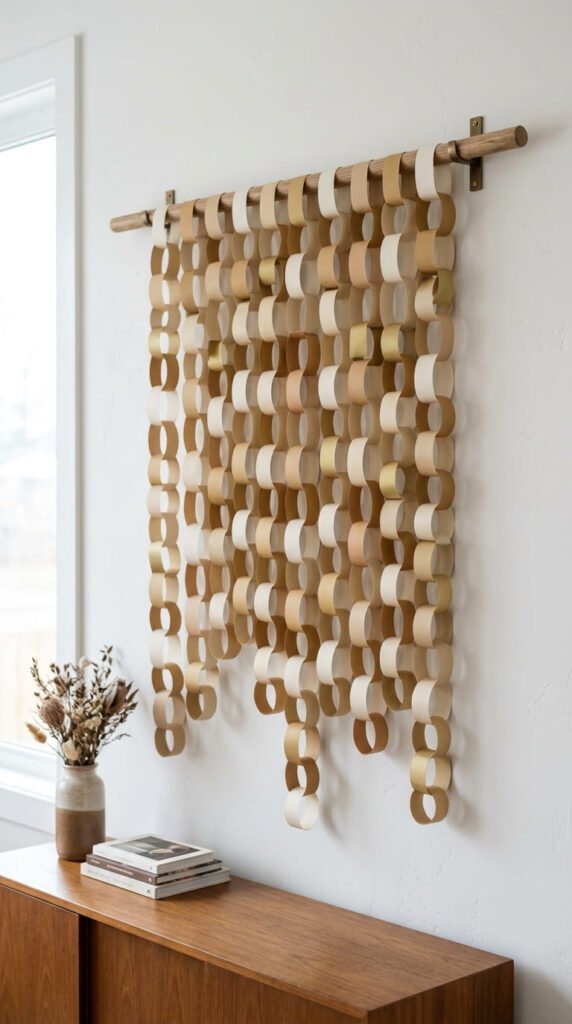
A paper chain wall hanging can look grown-up when you use calm colors and clean lines.
Cut paper strips in equal sizes.
Make loops and connect them into short chains.
Instead of one long party chain, make several vertical chains.
Attach each chain to a wooden dowel, branch, or cardboard strip.
Use cream, tan, soft brown, black, or muted gold paper for a modern look.
Vary the chain lengths so the bottom edge forms a soft wave.
This is a very budget-friendly craft because it uses simple strips of paper.
Old envelopes, kraft paper, and wrapping paper work well.
Hang the dowel with string and a removable hook.
This piece looks nice above a bed, desk, or entry table.
For a party, use brighter colors and make the chains longer.
For everyday decor, keep the tones neutral.
The repeated loop shapes create texture without much effort.
It is an easy wall hanging for beginners and a smart way to fill empty wall space.
14. Framed Paper Cutout Art
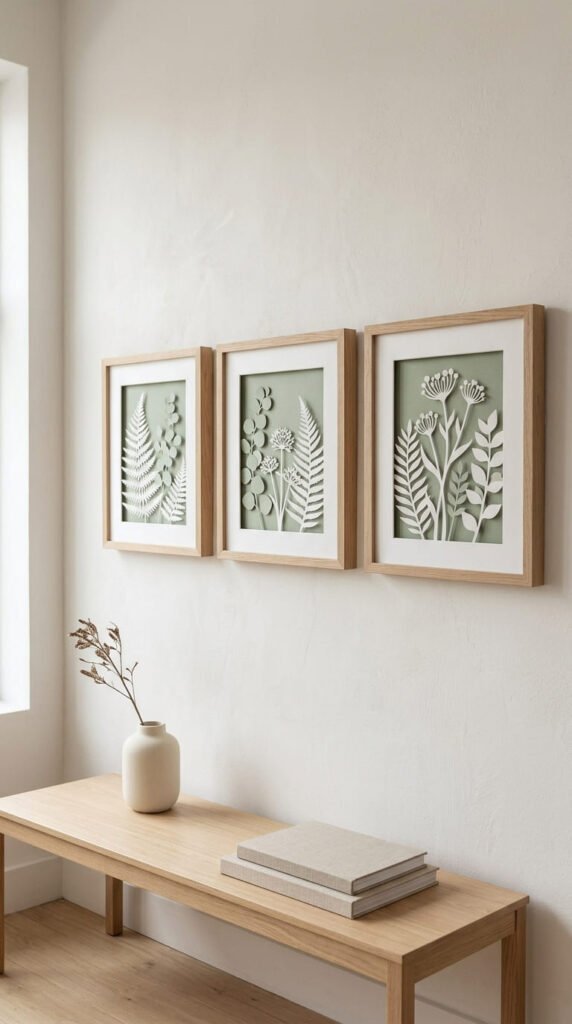
Framed paper cutout art is a simple way to make custom wall decor.
Choose a theme such as leaves, arches, flowers, moons, waves, or abstract shapes.
Cut the shapes from cardstock.
Layer them on a plain background paper. Leave some space between layers for shadow.
Use foam tape behind some pieces if you want depth.
Place the design in a frame. Remove the glass if the layers are thick.
This project is good for people who like neat wall art but want to keep costs low.
Use thrifted frames, old photo frames, or cardboard frames covered with paper.
Try white cutouts on beige paper for a calm look.
For a nursery, use soft animal shapes or clouds.
For a hallway, make a set of three matching frames.
This craft is easy to adapt to any room because you control the size and colors.
It also looks clean and polished while using very basic materials.
15. Paper Moon Phase Wall Decor
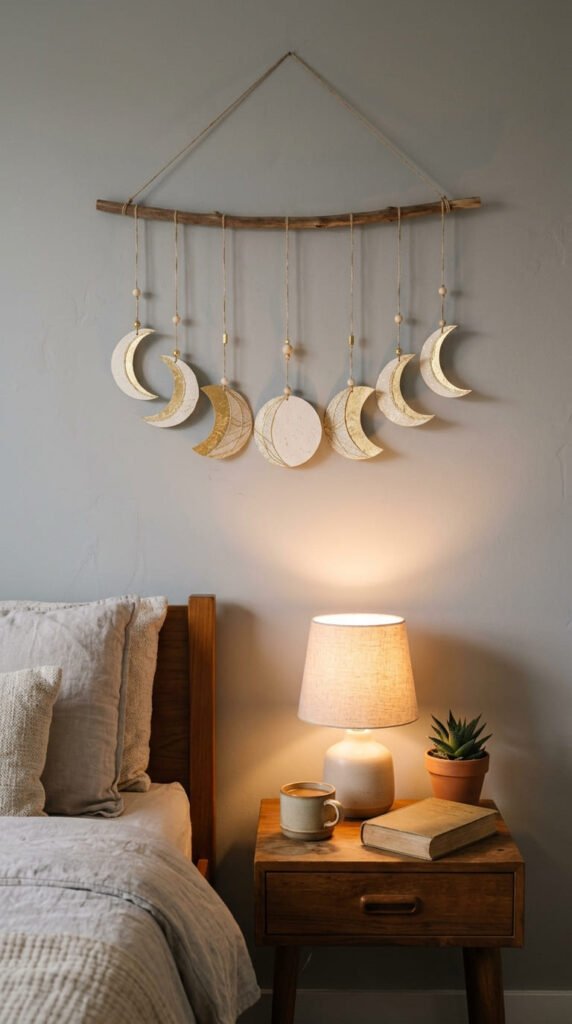
Paper moon phase wall decor adds a calm celestial style to a bedroom or reading corner.
Cut circles from cream, white, black, or metallic paper.
Trim some circles into crescent shapes to show different moon phases.
Attach the moons to string, ribbon, or thin wire.
Tie the strings to a branch, dowel, or paper-covered cardboard strip.
Make the center moon full and the outer moons smaller or thinner.
Use gold paper for a soft glow, or black and white for a modern style.
This craft is lightweight, so it is easy to hang with a small removable hook.
For a budget version, use cereal box cardboard covered with paper.
Place it above a bed, desk, dresser, or calm reading corner.
The hanging moons create gentle movement and shadows.
Keep the spacing even so the piece feels calm.
This project looks stylish but only uses circles, crescent cuts, string, and tape.
It is a great wall craft for small rooms.
16. Recycled Magazine Collage Wall
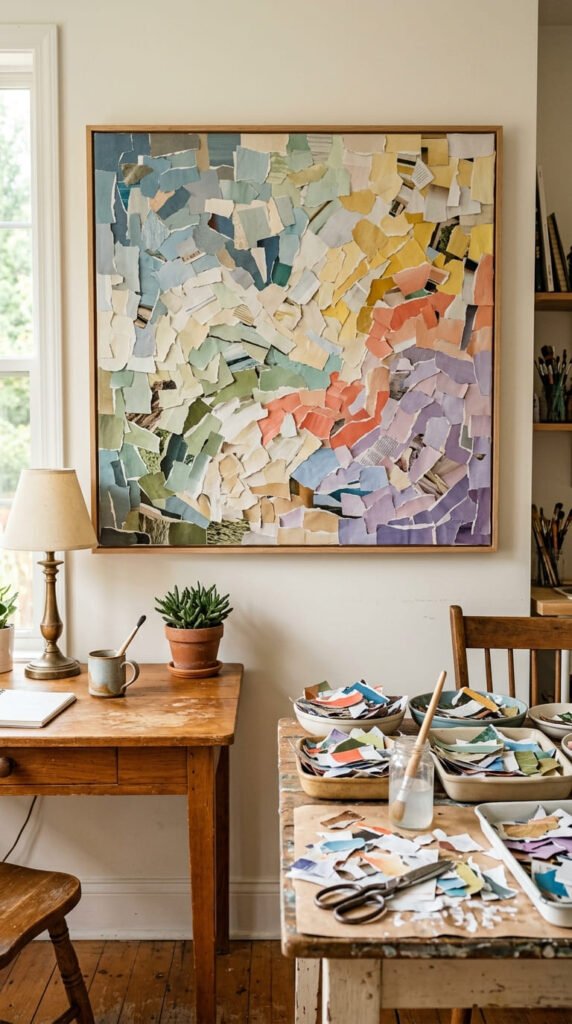
A recycled magazine collage wall turns old paper into colorful art.
Collect magazines, catalogs, old calendars, or paper packaging.
Tear or cut pieces by color. Sort them into piles before starting.
Choose a base such as cardboard, poster board, or thick paper.
Glue the pieces into an abstract pattern, landscape, floral shape, or color block design.
Keep similar colors close together if you want a calm look.
Use tiny pieces for texture and larger pieces for faster coverage.
This craft costs almost nothing if you already have magazines at home.
It is also good for renters because you can hang one finished panel instead of placing many pieces on the wall.
Use thrifted frames if you want a cleaner display.
For a modern style, create simple color bands.
For a playful style, use bright mixed pieces.
Let the collage dry flat under heavy books.
This paper wall decor feels creative, personal, and eco-friendly without expensive supplies.
17. Paper Eucalyptus Wreath
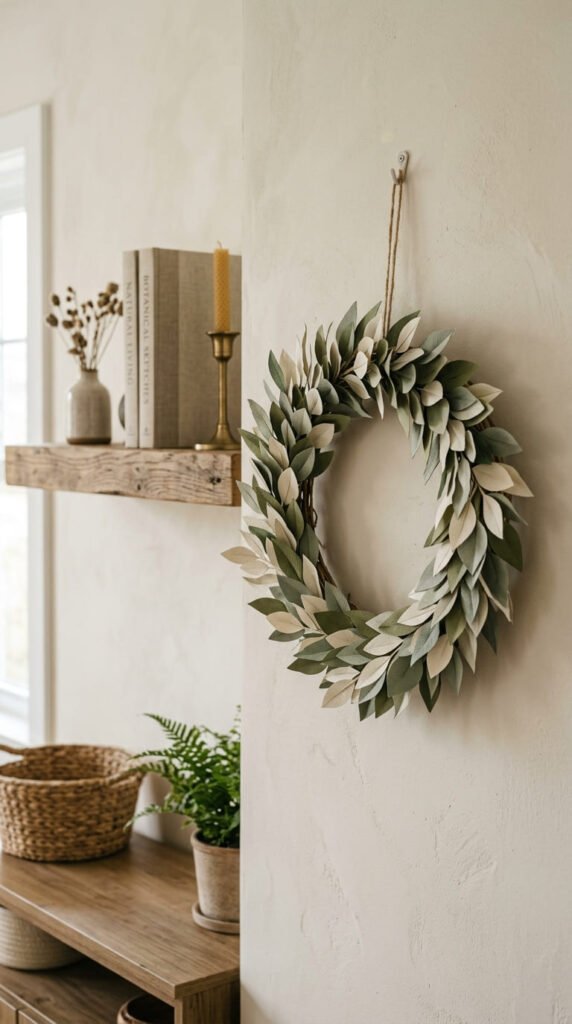
A paper eucalyptus wreath is soft, simple, and elegant for everyday wall decor.
Cut oval leaf shapes from sage, olive, and muted green paper.
Fold each leaf lightly down the middle.
Use a cardboard ring, wire hoop, or embroidery hoop as the base.
Glue the leaves around the ring, overlapping them slightly.
Add cream leaves or tiny paper berries if you want more detail.
A budget-friendly base can be cut from a cereal box or delivery box.
This wreath works well on doors, bedroom walls, entry areas, and shelves.
Keep the colors soft for a calm boho look.
Use removable hooks to hang it without wall damage.
The wreath is lightweight and easy to move.
You can make a small one for a gallery wall or a larger one above a console table.
If the leaves bend during storage, place the wreath flat in a box.
This craft looks natural, but it does not wilt or shed.
It is a lovely paper project for simple home decorating.
18. Accordion Paper Circle Wall
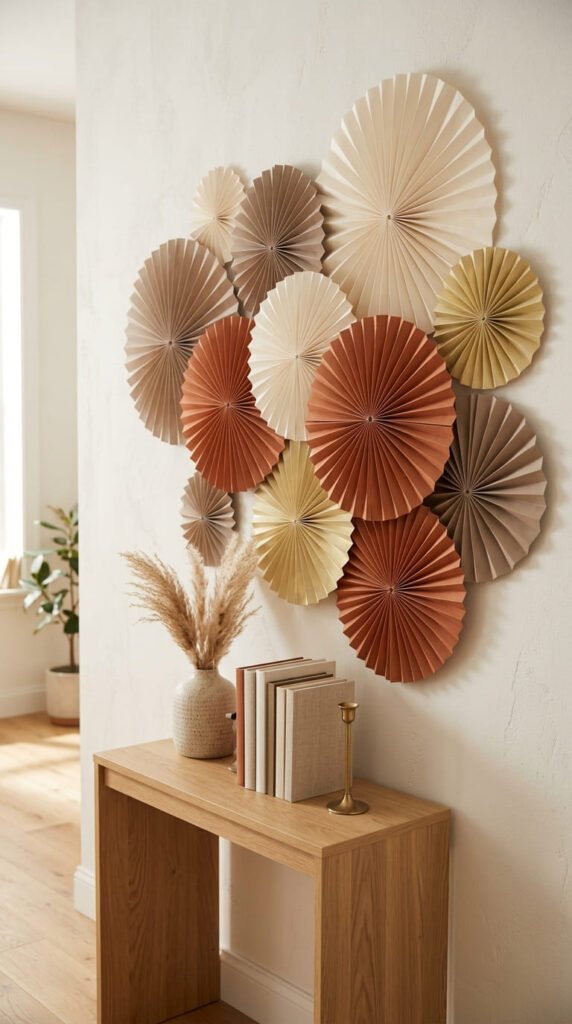
Accordion paper circles create a soft 3D wall display with very simple folds.
Fold paper strips back and forth like a fan.
Glue strips together to make a long pleated band.
Join the ends into a circle, then press flat.
Glue a paper circle in the center to hold the shape.
Make circles in different sizes. Use large pieces for the main focus and small ones for gaps.
Choose warm colors like taupe, cream, terracotta, and pale gold.
For a low-cost option, cut strips from gift wrap, paper bags, or old calendar pages.
Arrange the circles above a desk, sofa, or party table.
Stick them to the wall with removable tape.
You can also mount them to a board and reuse the whole display.
This craft works well because the folds create texture and shadow.
It looks more detailed than it really is.
Keep the wall layout slightly uneven for a relaxed, stylish look.
The result is light, affordable, and easy to pack away.
19. Paper Lantern Wall Cluster
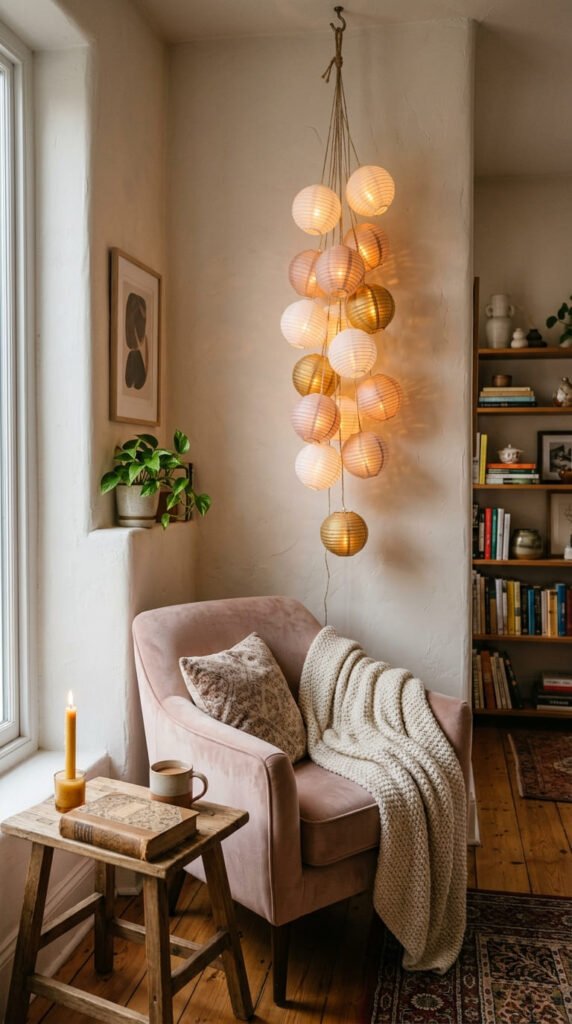
A paper lantern wall cluster adds soft volume to an empty corner.
Use lightweight paper or thin cardstock.
Cut strips or folded shapes to create small lantern forms.
You can also decorate plain mini paper lanterns with paper flowers, leaves, or fringe.
Hang them at different heights on the wall using string and removable hooks.
Choose a calm color palette for an elegant look. White, blush, cream, and gold work well.
For a budget version, make lanterns from printer paper and decorate them with scrap paper.
Use battery lights only if you want a glow. Keep paper away from real flames.
This craft is great for bedrooms, parties, nurseries, and cozy reading spaces.
Place the lanterns close enough to feel like a group, but not so close that they look crowded.
Add paper leaves or stars around them for extra wall detail.
The lantern shapes bring softness to the room and cost far less than store decor.
20. Paper Confetti Accent Wall
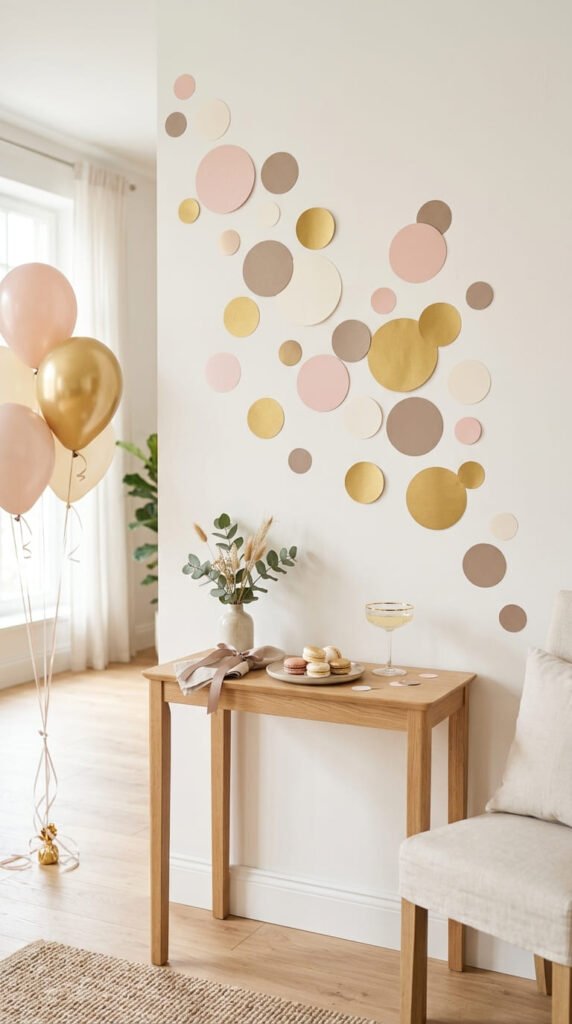
A paper confetti accent wall is fast, fun, and easy to remove.
Cut circles from colored paper. Use a circle punch, cup, or jar lid as a guide.
Choose colors that match the room or event.
For an elegant style, use cream, blush, gold, taupe, and white.
Place larger circles near the main area and smaller circles around the edges.
Use removable tape or wall-safe dots.
This project works for birthdays, nurseries, dorm rooms, office walls, and party backdrops.
It is one of the cheapest paper wall decor ideas because each circle uses very little paper.
Use old gift bags, wrapping paper, or cardstock scraps.
Try placing the dots in a loose wave instead of spreading them evenly.
This makes the wall look planned.
After the event, peel the dots off and store them in an envelope.
You can reuse them for gift tags, cards, or another wall design.
It is quick, low-cost, and perfect for blank walls.
21. Floating Paper Crane Wall
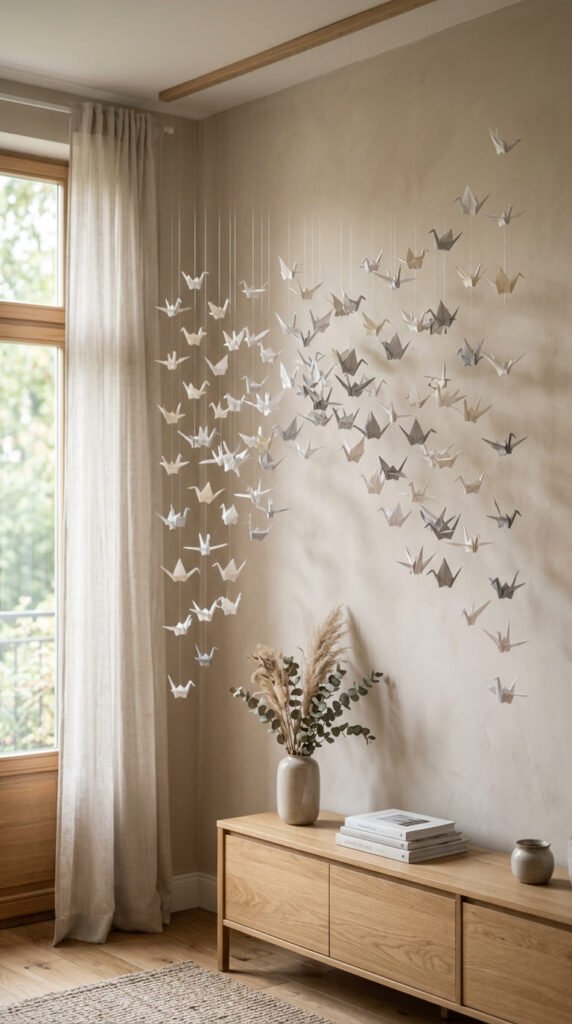
A floating paper crane wall gives a room a quiet, graceful feel.
Fold origami cranes from square paper. Use lightweight paper so they hang easily.
Choose white, gray, cream, or soft pastel tones for an elegant look.
Tie clear thread or thin string around each crane.
Hang them from a branch, dowel, or ceiling hook close to the wall.
You can also tape the thread to the back of a frame or shelf.
Place cranes at different heights to create movement.
This craft is budget-friendly because each crane uses one small square of paper.
Use old book pages, gift wrap, or plain printer paper cut into squares.
For beginners, start with five cranes. Add more as you get comfortable folding.
This wall decor works well in bedrooms, nurseries, reading corners, and calm office spaces.
The cranes move gently with air and create soft shadows.
It feels delicate, peaceful, and handmade.
Store folded cranes in a box if you want to reuse them later.
22. Kraft Paper Wall Basket Art
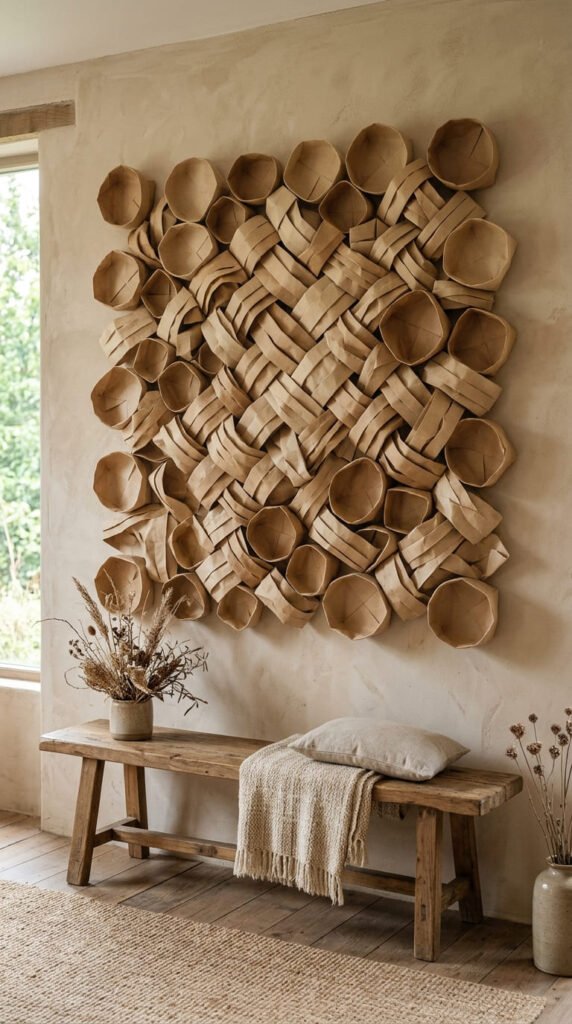
Kraft paper wall basket art gives a woven look without buying baskets.
Use brown kraft paper, paper bags, or packing paper.
Cut long strips and weave them over and under each other.
Glue the woven sheet onto cardboard.
Trim it into a circle, oval, or shallow basket shape.
Add a raised rim by rolling paper strips and gluing them around the edge.
Make three pieces in different sizes and hang them as a group.
This craft works well in boho, rustic, farmhouse, and neutral rooms.
It is very cheap if you reuse shopping bags or packing paper.
Use removable strips or small hooks for hanging.
For more detail, add cream or black paper strips into the weave.
Keep the shapes simple. The texture is the main feature.
This project is great for filling a wall above a bench, console, or reading chair.
It gives warm handmade style while staying light and renter-friendly.
23. Layered Paper Mountain Scene
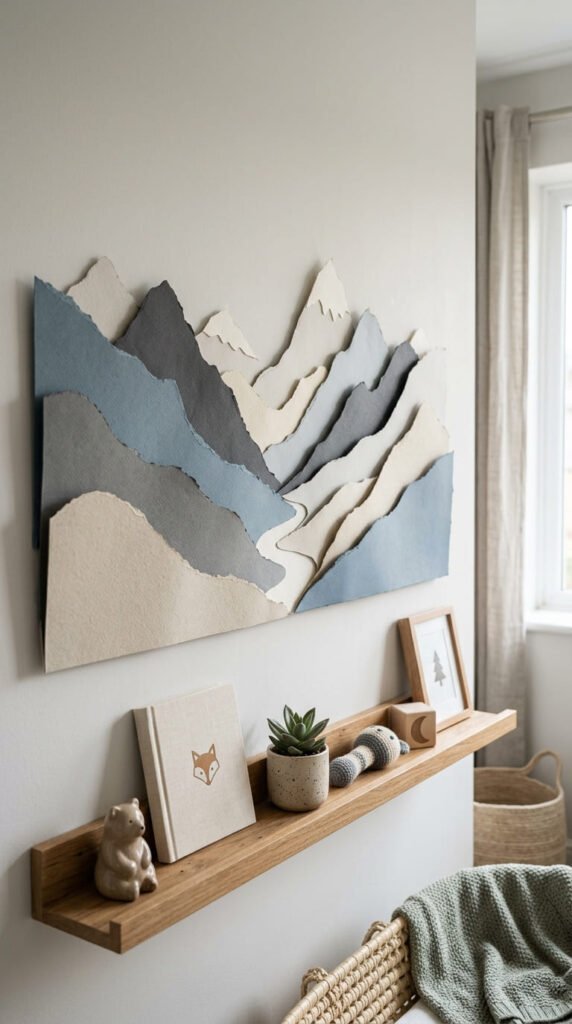
A layered paper mountain scene is a calm wall craft for bedrooms, nurseries, and playrooms.
Cut mountain shapes from cardstock in different heights.
Use soft colors like gray, muted blue, cream, beige, and dusty green.
Layer the mountains so some sit behind others.
Add paper clouds, a sun, moon, stars, or tiny trees.
Glue the scene onto poster board or directly inside a large frame.
Use foam tape behind a few layers for extra depth.
A budget-friendly version can use cardboard from boxes as the backing.
This decor looks nice above a crib, desk, reading nook, or bed.
Keep the color palette soft if you want an elegant style.
Older kids can help cut the mountains. Adults can handle the layout if clean lines matter.
This project is also easy to resize.
Make a small framed piece or a large wall panel.
It feels peaceful, handmade, and more personal than a printed poster.
24. Paper Floral Letter Wall Art
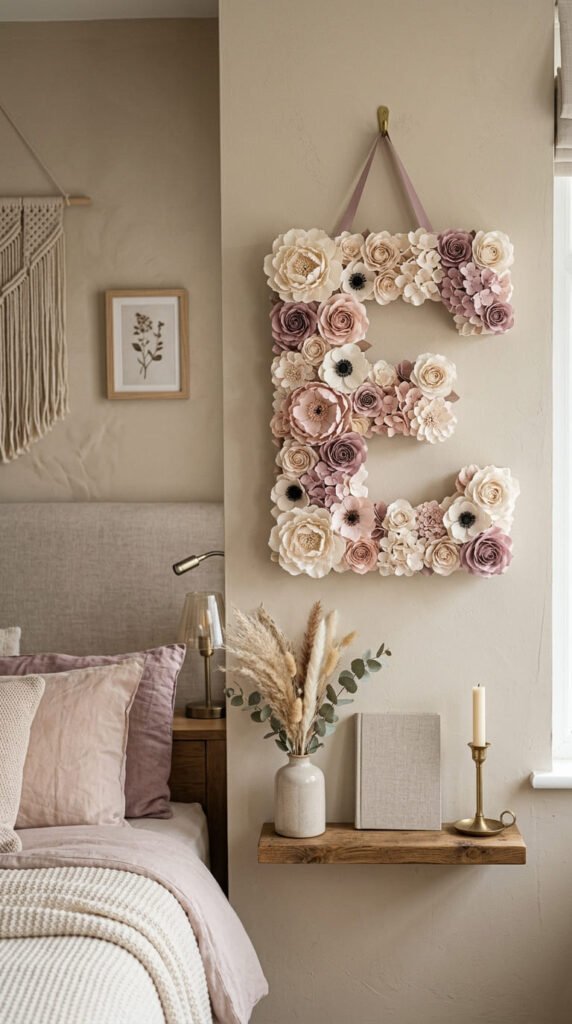
Paper floral letter wall art is a pretty way to personalize a room or party wall.
Start with a cardboard letter shape. You can buy one or cut it from a delivery box.
Cover the letter with plain paper or paint so the base looks neat.
Make small paper flowers from cardstock, tissue paper, or book pages.
Glue the largest flowers onto the letter first.
Fill gaps with mini flowers, leaves, and tiny buds.
Use a soft color palette for an elegant look. Cream, blush, mauve, and sage work well.
This craft is great for bedrooms, nurseries, weddings, birthdays, and craft rooms.
Make one letter for an initial or several letters for a short name.
If you rent, hang the letter with a removable hook instead of sticking flowers directly to the wall.
For a budget-friendly version, use paper scraps for the smallest flowers.
This project takes a little time, but the final piece feels personal and special.
It also makes a beautiful handmade gift.
Conclusion
Paper wall decor crafts make it easy to decorate a home with style while keeping costs low. Start with simple materials like cardstock, tissue paper, kraft paper, book pages, string, and removable wall tape. Choose one idea that fits your room, then build slowly with flowers, garlands, stars, leaves, geometric shapes, or framed paper art. These projects are lightweight, affordable, and easy to change whenever your room is ready for a new look.