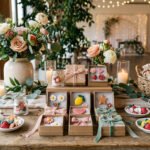
DIY clay magnet party favors are small, personal, and useful long after the celebration ends. Guests can place them on a fridge, locker, memo board, office cabinet, or magnetic photo frame, which makes them more practical than favors that get tossed in a drawer. Air-dry clay works well for no-bake batch-making, while polymer clay is great for extra detail and long-lasting pieces. With simple shapes, soft paint colors, flat backs, strong glue, and a clear sealer, you can make handmade party favors for weddings, birthdays, bridal showers, baby showers, housewarmings, and girls’ night events without spending a lot.
1. Blush Heart Clay Magnet Favors
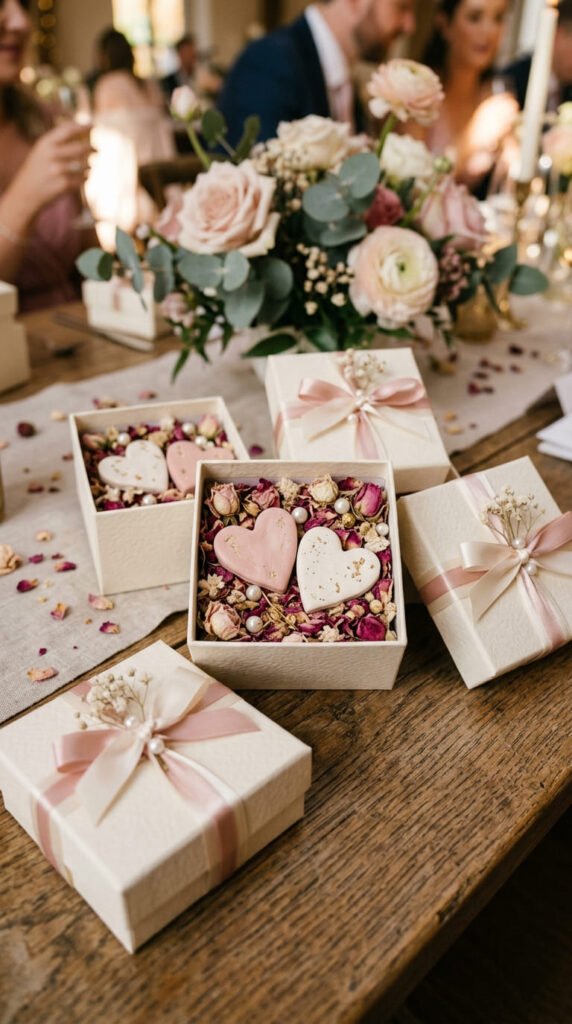
Blush heart magnets are one of the easiest clay party favors to make in large batches. They fit weddings, bridal showers, anniversaries, engagement parties, and romantic dinner events.
Roll air-dry clay into a flat sheet. Cut heart shapes with a small cutter, or shape them by hand with rounded tops and a pinched bottom.
Keep the backs flat. This helps the magnet sit cleanly on a fridge or board.
Paint the hearts in blush, ivory, champagne, dusty rose, or soft terracotta. Add a tiny gold edge if you want a more polished look.
For budget-friendly batching, use white clay for every heart and paint each one after drying. That saves money because you do not have to buy many clay colors.
Seal the front with matte or satin varnish. Glue a small magnet to the back and let it dry fully.
Package one heart in a tiny kraft box, organza bag, or folded paper sleeve. Guests can use it at home, so it feels like a real handmade keepsake.
2. Daisy Flower Clay Magnet Favors
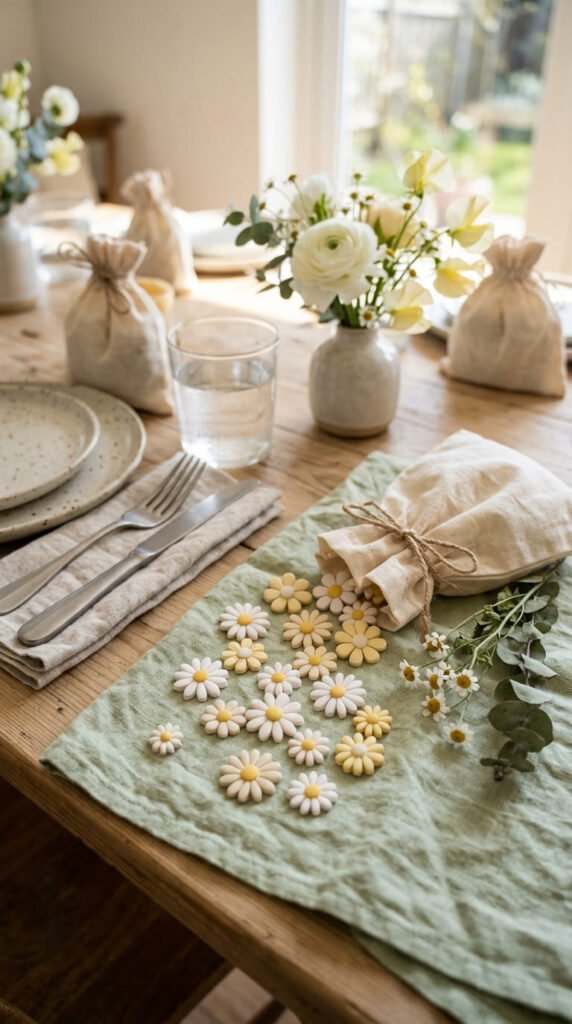
Daisy flower magnets are sweet, light, and friendly for beginner crafters. They work beautifully for spring birthdays, garden parties, baby showers, and bridal brunches.
Start with a small clay ball for the flower center. Roll several tiny balls for petals. Pinch each petal into a teardrop shape.
Arrange the petals around the center and press gently. Do not flatten them too much. A slight raised shape gives the flower charm.
Use a toothpick to draw one soft line down each petal. Press tiny dots into the center for texture.
For a low-cost version, make every flower with white air-dry clay. Paint the petals ivory or white after drying. Paint the centers pale yellow, muted gold, or soft brown.
Daisy magnets look lovely in sets. Give each guest one large daisy or two small flowers.
Attach the magnet to the flat back with strong glue. Let the glue dry before packaging.
Place the magnets in small bags with tissue paper or display them near each table setting for a pretty DIY clay magnet favor.
3. Rustic Pebble Magnet Favors
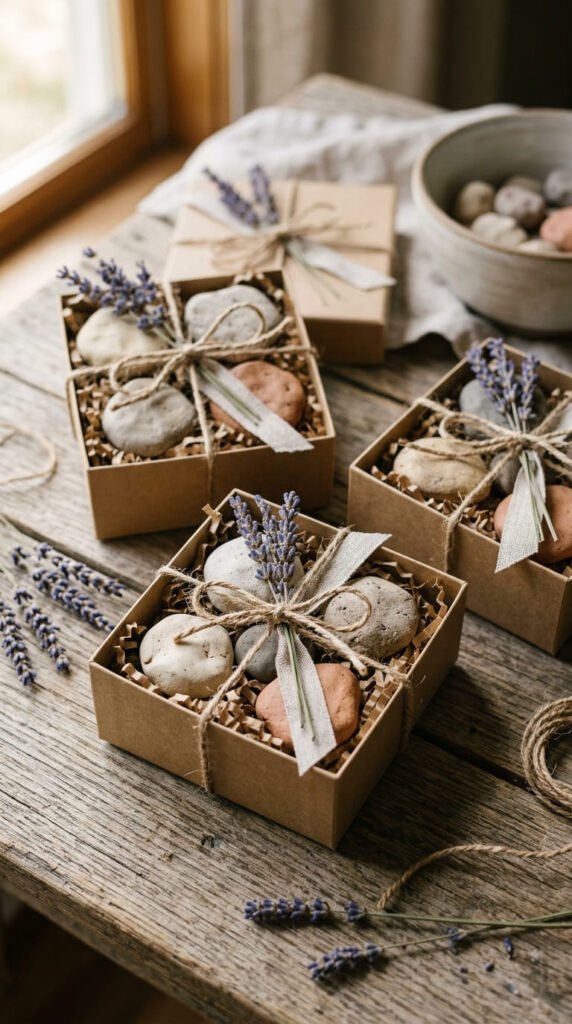
Rustic pebble magnets are perfect for outdoor weddings, farmhouse parties, fall birthdays, and housewarming favors. They look handmade in a calm, natural way.
Roll small balls of clay. Press each one into a soft pebble shape. Do not make them perfectly round. Uneven edges make them look more organic.
Use air-dry clay for no-bake batch-making. Pebbles are small, so one pack of clay can make many favors.
Add texture before drying. Press lace, fabric, dried leaves, or a fork lightly into the surface.
Paint the pebbles in earthy shades like beige, gray, taupe, cream, brown, or terracotta. A dry brush of white paint over the top can make the texture stand out.
Keep one side flat for the magnet. If a pebble is thick, use a stronger magnet.
Seal with matte varnish. It gives a soft stone-like finish.
For packaging, place three mini pebble magnets in one kraft box. Add tissue paper or a small fabric pouch. Guests can use them as fridge decor or office board accents.
4. Mini Donut Clay Magnet Favors
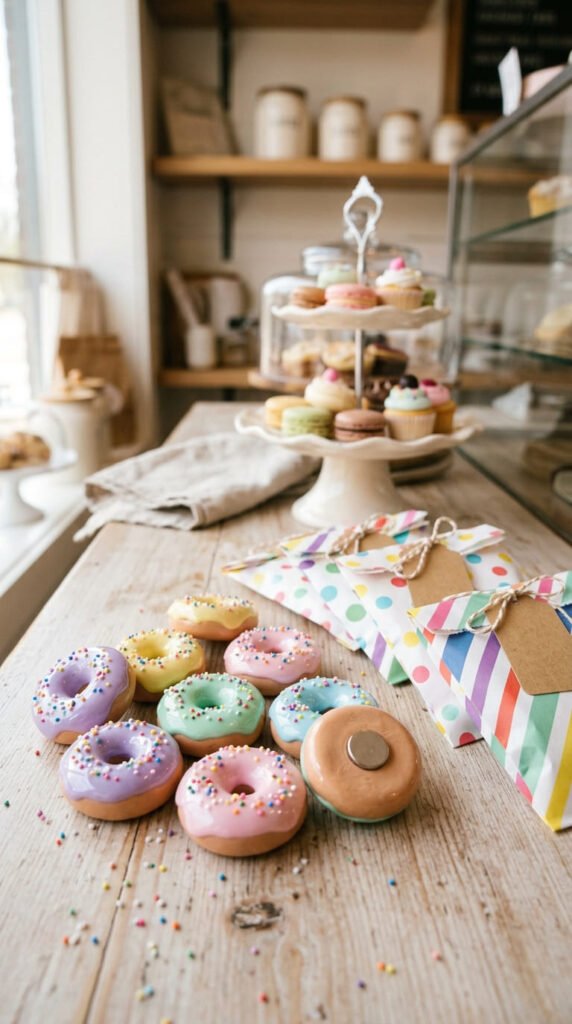
Mini donut magnets are fun for birthdays, kids’ parties, sleepovers, bakery-themed events, and girls’ night favors. They are small, colorful, and easy to repeat.
Roll tan clay into small balls. Flatten each one slightly. Use a straw, skewer, or pencil end to make the center hole.
Smooth the edges with your fingertip. This makes the donut look soft and bakery-like.
Add icing with colored clay or acrylic paint. Pink, chocolate, vanilla, mint, and lavender all look great. Add tiny sprinkles with clay scraps or paint dots.
This is a great batch project. Shape all donut bases first. Then paint all icing colors in groups. This saves time and helps the favors look consistent.
Use gloss sealer only on the icing. Leave the donut base satin or matte for a baked look.
Attach the magnet to the flat back after drying or baking.
Place two or three mini donuts in one favor bag. This makes the favor feel more generous without using much clay. These food clay magnet favors are cheerful and useful.
5. Initial Clay Magnet Favors
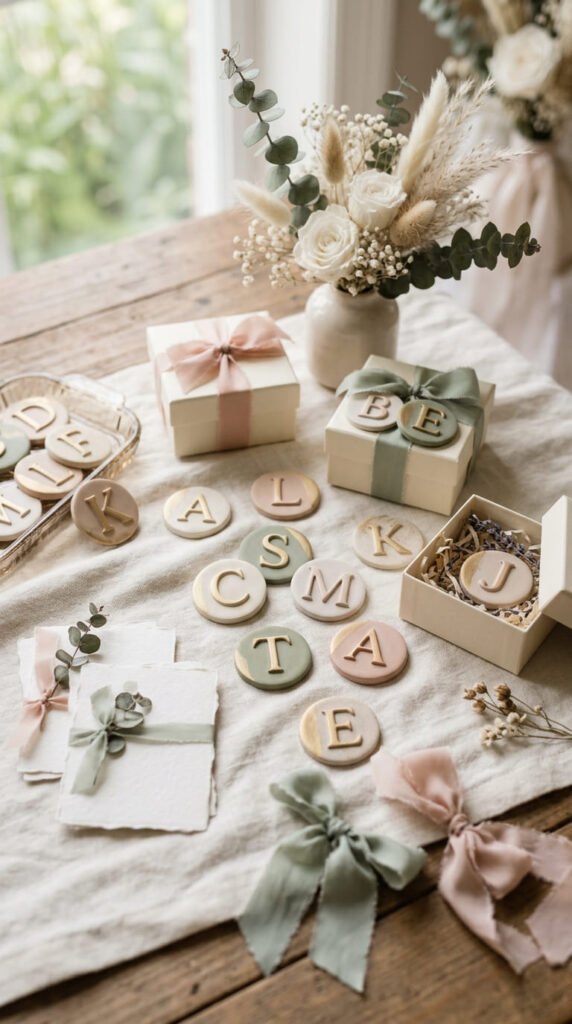
Initial magnets make favors feel personal without making the process too hard. They are great for weddings, graduations, baby showers, birthdays, and small dinner parties.
You can use alphabet cutters if you have them. For a cheaper method, cut round, oval, or arch bases from clay and paint the initial on top after drying.
Another option is to roll thin clay ropes and shape letters by hand. Keep the letters simple and thick enough so they do not break.
Use soft colors for the base. Cream, sage, blush, tan, dusty blue, and champagne all look lovely. Add a small gold dot, border, or edge for a dressed-up finish.
For large guest lists, use one shared initial. It can represent the couple, baby, graduate, or event theme.
Let the clay dry fully. Sand rough edges lightly if needed. Seal the front and glue a magnet to the back.
Package each initial magnet in a tiny pouch or paper sleeve. These favors feel custom and practical, which makes guests more likely to keep them.
6. Cupcake Clay Magnet Favors
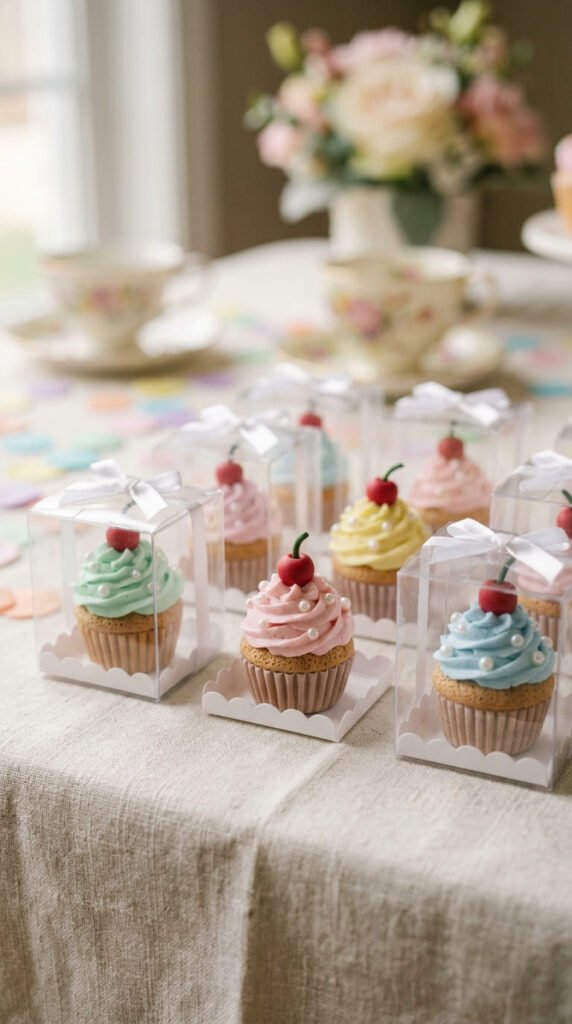
Cupcake magnets are a cute match for birthdays, tea parties, baking parties, and sweet shower themes. They look detailed, but each part is simple.
Start with a small clay cylinder for the cupcake base. Press vertical lines into the sides with a toothpick. This makes it look like a paper wrapper.
For frosting, roll a thin clay rope and coil it on top. Start wide at the bottom and make the coil smaller as it goes up.
Add a tiny cherry, heart, flower, or sprinkle detail on top. Use party colors for the frosting so the magnets match the table decor.
This favor uses very little clay. You can make many cupcakes from one pack.
Keep the back flat before curing. Thick cupcakes may become heavy, so keep each piece small.
Paint after drying if you want to save money on colored clay.
Seal the frosting with gloss and the wrapper with satin. Glue the magnet to the back.
Package one cupcake in a mini dessert-style box for a favor that feels special.
7. Moon and Star Clay Magnet Favors
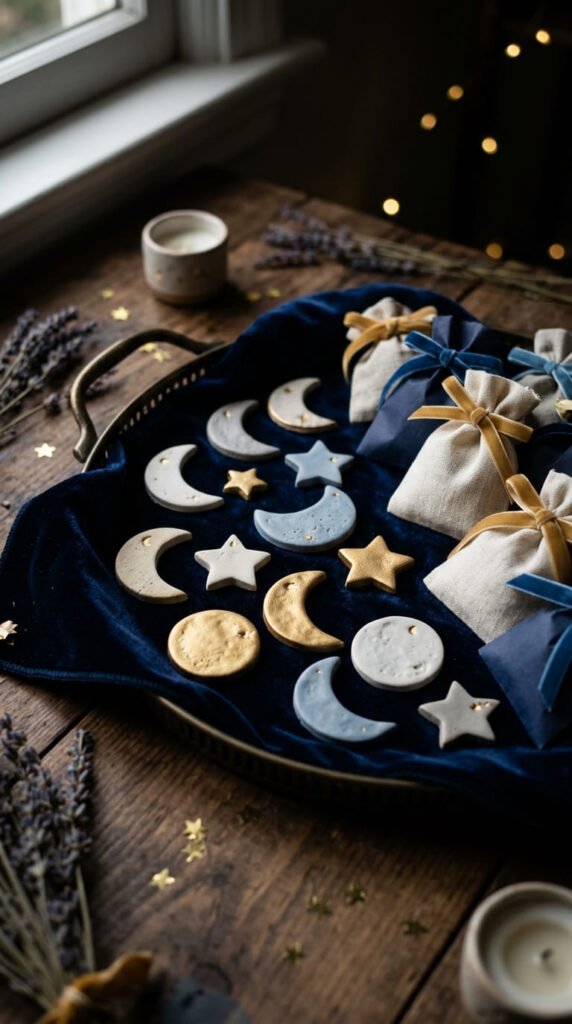
Moon and star magnets are lovely for baby showers, celestial birthdays, pajama parties, and nursery-themed events. They are flat, light, and easy to make in sets.
Roll clay into a thin sheet. Use a star cutter if you have one. If not, cut around a paper star template with a craft knife.
For crescent moons, cut a circle with a bottle cap. Use the same cap to cut away one side.
Smooth the edges before drying. Clean edges help the magnets look more polished.
Paint them in ivory, pale gray, dusty blue, champagne, or matte gold. A tiny dot pattern can create a soft night-sky feel.
These shapes are great for batch-making because one rolled sheet can create many favors. Keep them thin so they stay lightweight.
Seal with matte or satin varnish. Attach magnets to the flat backs after curing.
Give each guest one moon and one star in a small pouch. This little pair feels more complete than one single magnet and works well as party favor fridge decor.
8. Coffee Cup Clay Magnet Favors
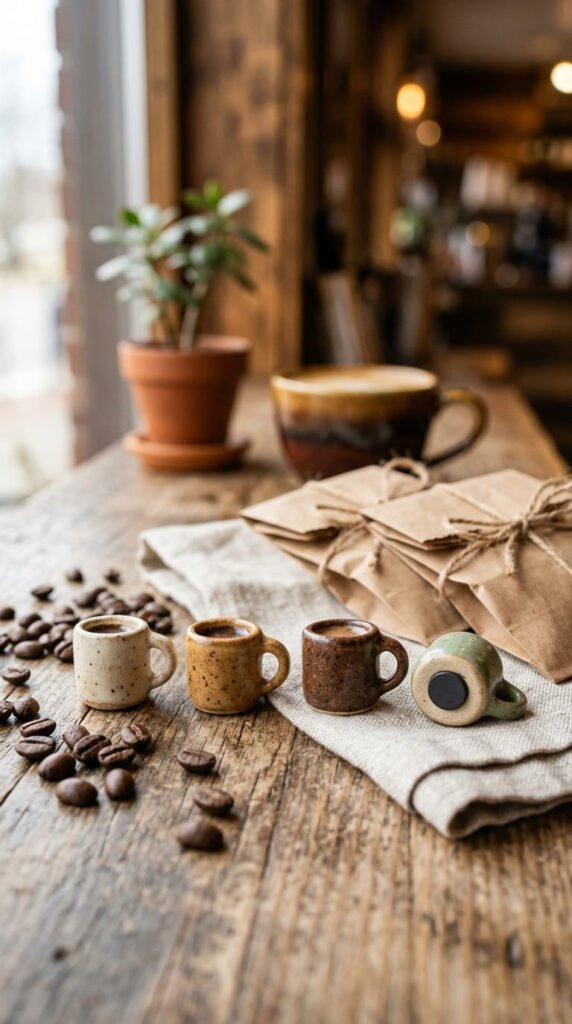
Coffee cup magnets are perfect for brunch parties, teacher appreciation events, book clubs, office parties, and cozy winter gatherings. They are practical and easy to personalize.
Make a flat cup shape instead of a full 3D mug. A flat design is lighter and easier to attach to a magnet.
Shape a rounded rectangle for the cup body. Add a tiny clay handle on one side. Add an oval or circle on top for the drink surface.
Paint the cup in cream, caramel, brown, black, sage, or dusty pink. Add a tiny latte heart or swirl with paint if you want extra detail.
For batching, use one paper template for every cup. Cut all bases first. Add handles next. Paint them in groups.
Seal with satin varnish. Add gloss only to the drink surface if you want a coffee-like shine.
Glue a magnet to the flat back and let it dry.
Package each one in a kraft bag with tissue paper. These favors feel warm, useful, and perfect for guests who love coffee.
9. Fruit Slice Clay Magnet Favors
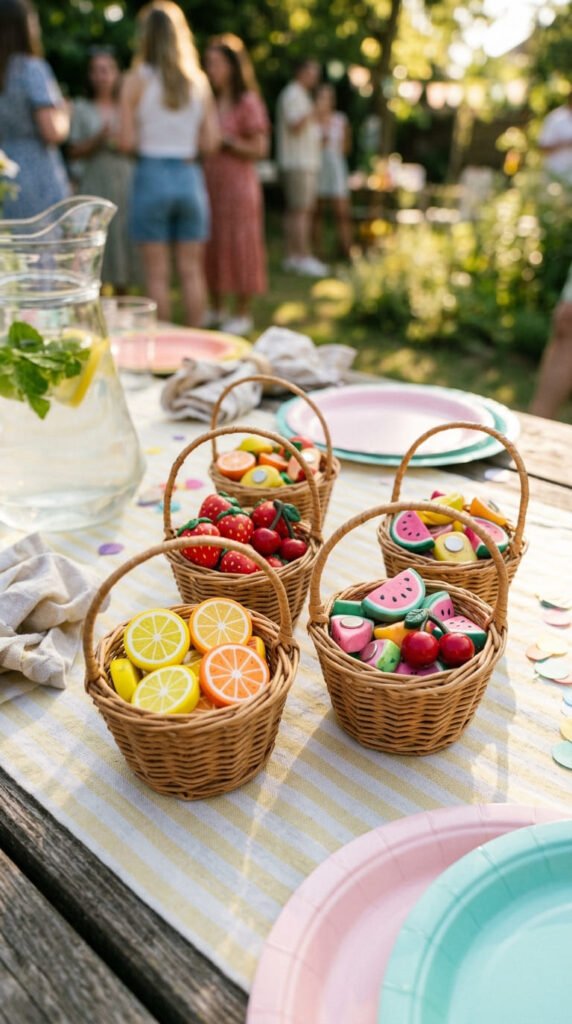
Fruit slice magnets are cheerful and great for summer birthdays, picnic parties, pool events, tropical showers, and kitchen-themed celebrations.
Start with simple shapes. A lemon can be a half-circle. An orange can be a small circle. A watermelon can be a triangle. A strawberry can be a teardrop.
Use white air-dry clay if you want the cheapest route. Paint the colors after drying instead of buying many clay shades.
Add tiny details with a toothpick. Mark citrus segments, strawberry seeds, cherry stems, or watermelon seeds. These details make the favors look more finished.
Fruit magnets look best with gloss sealer. It gives them a juicy, bright finish.
Keep every fruit shape flat on the back. This helps the magnet hold well.
Make small fruit bundles. Give each guest two or three fruit magnets instead of one larger piece.
Package them in tiny baskets, clear bags, or kraft sleeves. These fruit clay magnet favors feel bright, useful, and easy to match with colorful party decor.
10. Muted Rainbow Clay Magnet Favors
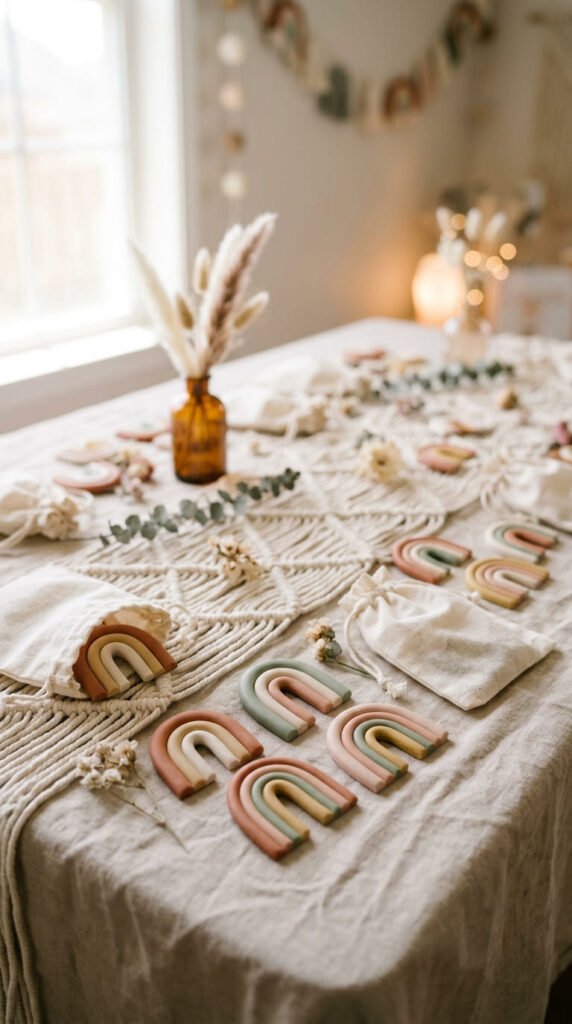
Muted rainbow magnets are sweet for baby showers, first birthdays, nursery parties, boho events, and soft pastel celebrations. They look modern when the colors are calm.
Roll thin clay ropes in three or four colors. Curve them into arches and press them together gently.
Trim the ends evenly with a craft knife. Press the back flat before drying or baking.
Try terracotta, cream, sage, dusty rose, pale mustard, or beige. These colors feel warmer and more stylish than bright primary shades.
This project is great for using leftover clay strips. Small scraps can turn into rainbow bands.
For batch-making, roll long ropes first. Cut them into equal lengths. Shape each rainbow in the same size.
Seal with matte varnish for a ceramic-style finish. Glue a magnet to the back after curing.
Place one rainbow in a muslin bag or small kraft box. You can also make sets of two sizes.
These favors work well for guests because they are cute, lightweight, and easy to place on a fridge or memo board.
11. Mini Clay Frame Magnet Favors
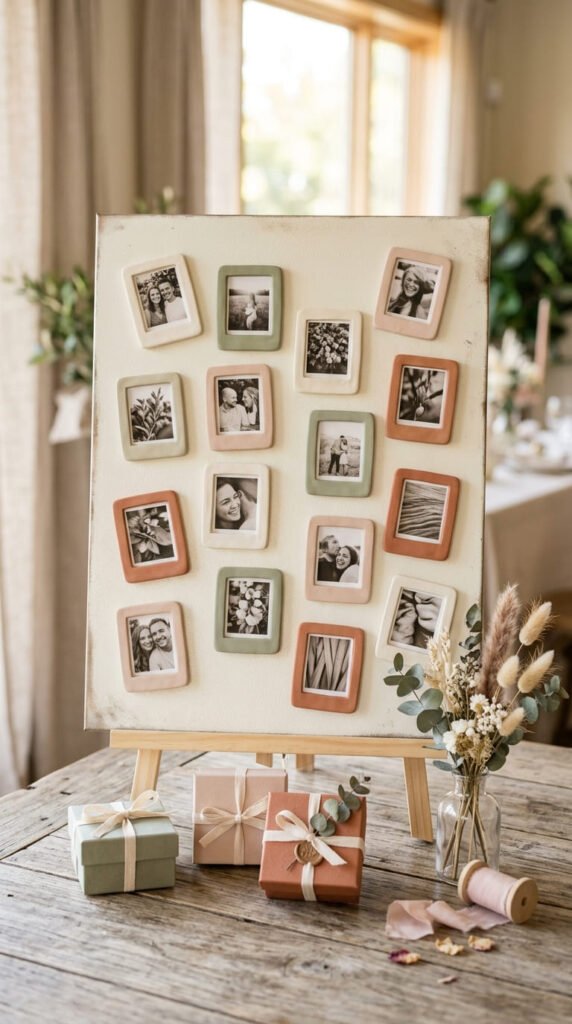
Mini clay frame magnets are useful favors because guests can use them to hold photos, cards, recipes, or small notes. They are great for weddings, family reunions, birthdays, and housewarming parties.
Roll clay flat. Cut a circle, arch, rectangle, or oval. Cut a smaller shape from the center to create a frame.
Smooth the inner and outer edges. This step makes the frame look more refined.
Paint the frames in colors that match your event. Cream, sage, blush, terracotta, dusty blue, and matte black all work well.
Add a pressed texture, tiny dots, or a thin painted border if the frame feels too plain. Keep the design simple.
Small frames can use one magnet. Larger frames may work better with two magnets on the back.
Seal the front after painting. Let it dry fully before attaching the magnet.
Place each frame magnet in a pouch or at a table setting. For extra meaning, pair it with a small photo card. Guests can use it long after the party.
12. Pizza Slice Clay Magnet Favors
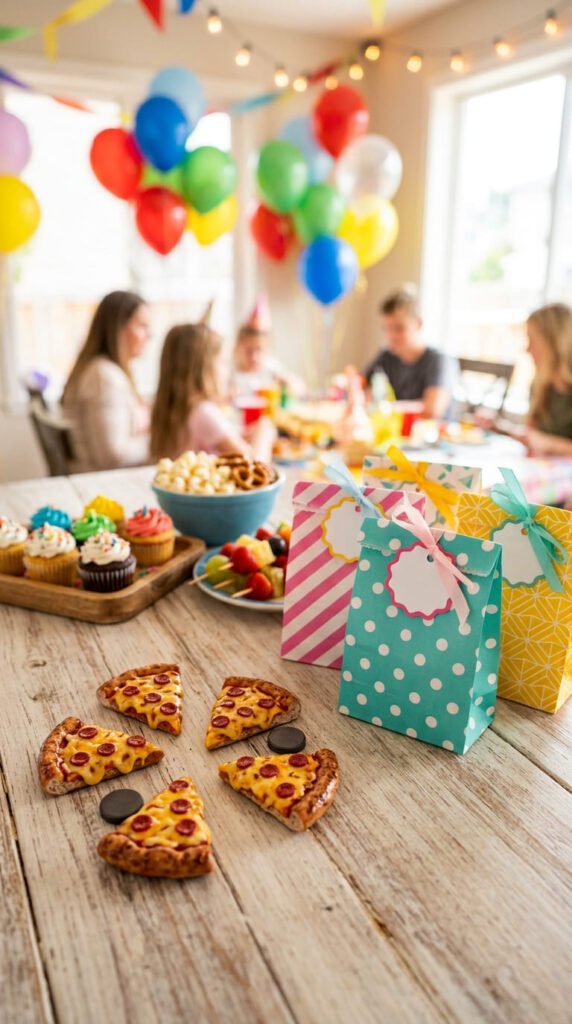
Pizza slice magnets are fun for kids’ birthdays, teen parties, movie nights, sleepovers, and casual food-themed gatherings. They are playful and easy to make in a batch.
Cut small triangles from tan clay. Add a rounded strip along the wide edge for the crust.
Add pale yellow clay for cheese. Add tiny red circles for pepperoni. You can also use green, black, or brown scraps for peppers, olives, and mushrooms.
Each slice starts with the same triangle, so the process is fast. Change the toppings to add variety.
Use a toothpick to add small marks to the crust. Brush on light brown paint after curing for a baked look.
Gloss sealer works well on the cheese. Keep the crust satin or matte.
Attach the magnet to the flat back with strong glue.
Give each guest two pizza slices in a small paper bag, or add one slice to a movie-night favor kit.
These food magnet party favors are low-cost, memorable, and great for guests who enjoy playful kitchen decor.
13. Seashell Clay Magnet Favors
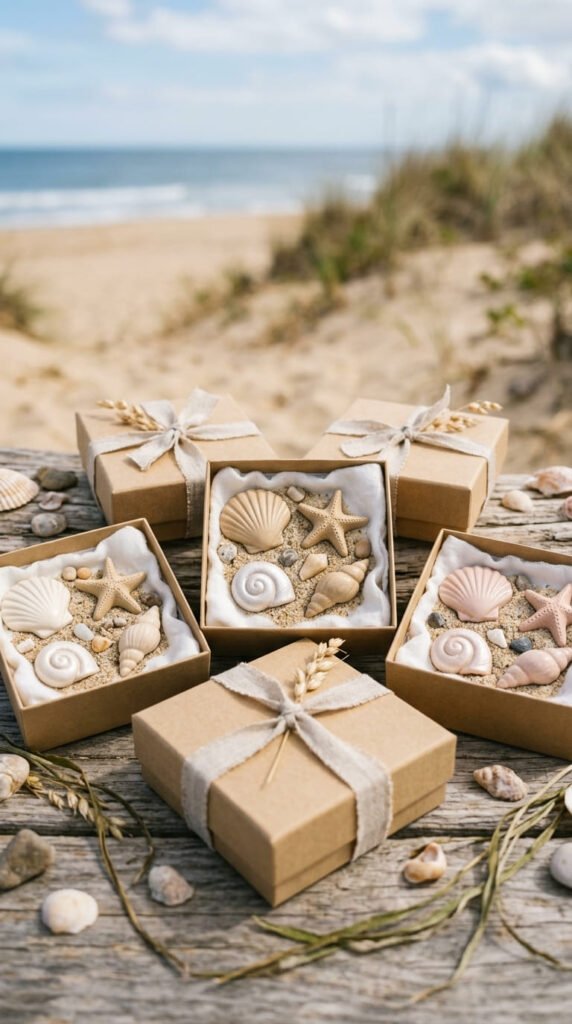
Seashell magnets are beautiful for beach weddings, mermaid parties, summer birthdays, coastal showers, and travel-themed events.
Start with a small fan shape. Press lines from the bottom outward with a toothpick to create shell ridges. You can also roll a thin clay rope into a spiral shell.
Use white air-dry clay for an affordable base. Paint the shells after drying in ivory, sand, pearl, pale blush, or beige.
Add a tiny shimmer detail if you want a coastal glow. Keep it light so the shell still looks soft and classy.
Press the back flat before drying. Shell shapes can get uneven, so check the back while the clay is still soft.
Seal with satin varnish. Gloss can also work if you want a polished shell look.
Attach a small magnet with strong glue. Let it dry fully before packaging.
Place each shell magnet in a small kraft box, muslin pouch, or clear favor bag with tissue paper. These favors fit seaside themes and make lovely after-party fridge accents.
14. Baby Onesie Clay Magnet Favors
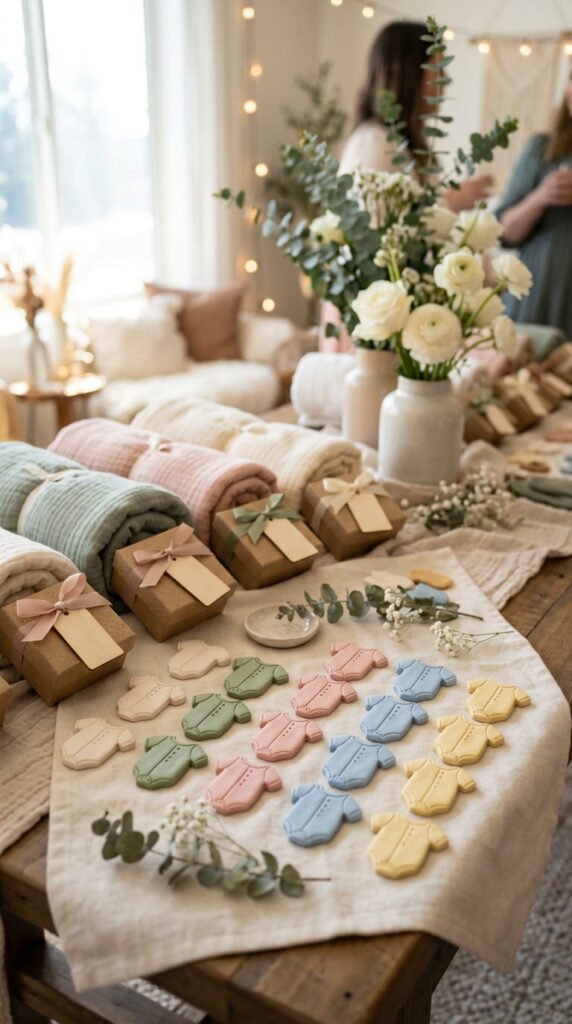
Baby onesie magnets are a sweet choice for baby showers, gender-neutral parties, and nursery-themed events. They are flat, simple, and easy to cut with a paper template.
Roll clay into a thin sheet. Draw a onesie shape on paper, cut it out, and place it over the clay. Cut around it with a craft knife.
Smooth the edges with your finger. Add tiny clay buttons, a pocket, or a small collar if you want extra detail.
Paint the onesies in cream, sage, powder blue, blush, pale yellow, or lavender. These colors look soft and party-ready.
For a cheaper method, make every onesie from white clay and paint the colors after drying.
Because the design is flat, one small magnet on the back usually works well. Keep the clay light and not too thick.
Seal the front after painting. Add the magnet after the sealer dries.
Place one onesie magnet in a small favor bag at each place setting. Guests will keep it as a sweet reminder of the baby shower.
15. Botanical Leaf Clay Magnet Favors
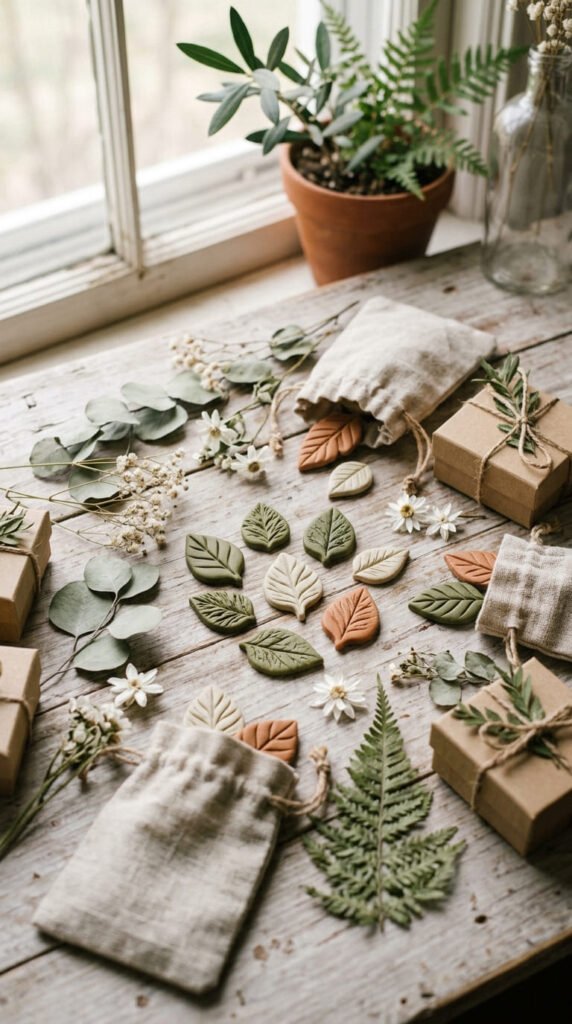
Botanical leaf magnets are perfect for garden parties, eco-themed events, fall birthdays, bridal showers, and rustic weddings. They look natural and cost very little to make.
Roll clay flat. Cut teardrop, oval, or long leaf shapes. Pinch one end slightly to create a leaf point.
Draw a center vein with a toothpick. Add smaller side lines if you want more detail.
You can also press a real leaf into the clay before cutting. This creates a natural texture without extra tools.
Paint the leaves in sage, olive, cream, terracotta, muted brown, or dusty green. These colors pair well with kraft packaging and dried flowers.
Make leaves in several sizes. Give each guest two or three mini leaf magnets for a fuller favor.
Air-dry clay can curl if it is too thin. Dry the pieces flat and flip them gently halfway through.
Seal with matte varnish. Attach magnets to the backs after the leaves harden.
Package with twine, paper sleeves, or linen pouches for a calm botanical look.
16. Animal Face Clay Magnet Favors
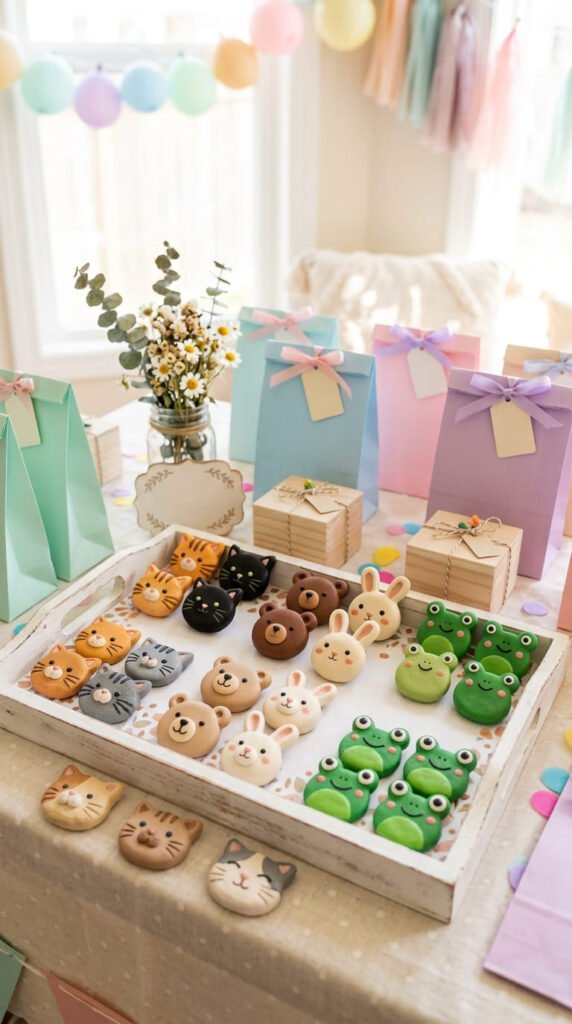
Animal face magnets are a fun pick for kids’ parties, baby showers, classroom events, and playful birthdays. They are simple because most animals start with a circle.
Shape a round face from clay. Add triangle ears for a cat, round ears for a bear, long oval ears for a bunny, or raised eyes for a frog.
Paint the faces in soft colors. Cream, tan, gray, pale pink, and sage green all look nice. Use tiny black paint dots for eyes and a small brush for cheeks.
This is a low-cost project because each magnet uses only a little clay. Make all the round faces first, then add ears and details in groups.
For a kid-friendly favor, make several animals and let guests choose one before leaving.
Keep the features flat. Thick noses or ears can make the magnet too heavy.
Seal with satin varnish. Glue a magnet to the back and let it dry.
These favors are playful, useful, and easy to match with animal party themes.
17. Mini Taco Clay Magnet Favors
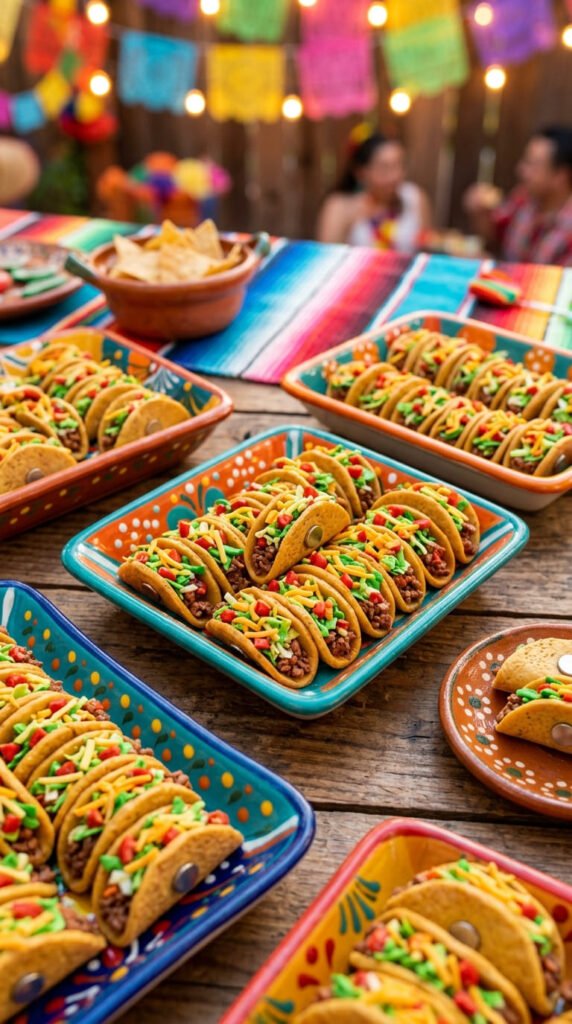
Mini taco magnets are great for fiesta parties, taco nights, summer birthdays, and casual dinner celebrations. They feel fun and handmade without being hard to shape.
Start with a small tan clay circle. Fold it gently in half to create a taco shell. Keep the bottom a little flat.
Add tiny scraps of brown, green, yellow, and red clay near the open edge. Brown can be filling, green can be lettuce, yellow can be cheese, and red can be tomato.
Use a toothpick to mark the shell. Add light brown paint after curing for a toasted look.
This is a great scrap-clay project. Tiny pieces that would normally be thrown away can become toppings.
For batching, make all shells first. Then add fillings in an assembly-line setup.
Keep the tacos small. Thick food magnets may feel heavy, so use a stronger magnet on the back.
Seal the toppings with gloss and the shell with satin.
Package one or two tacos in colorful favor bags. These are fun for guests who enjoy food-themed fridge decor.
18. Clay Bow Magnet Favors
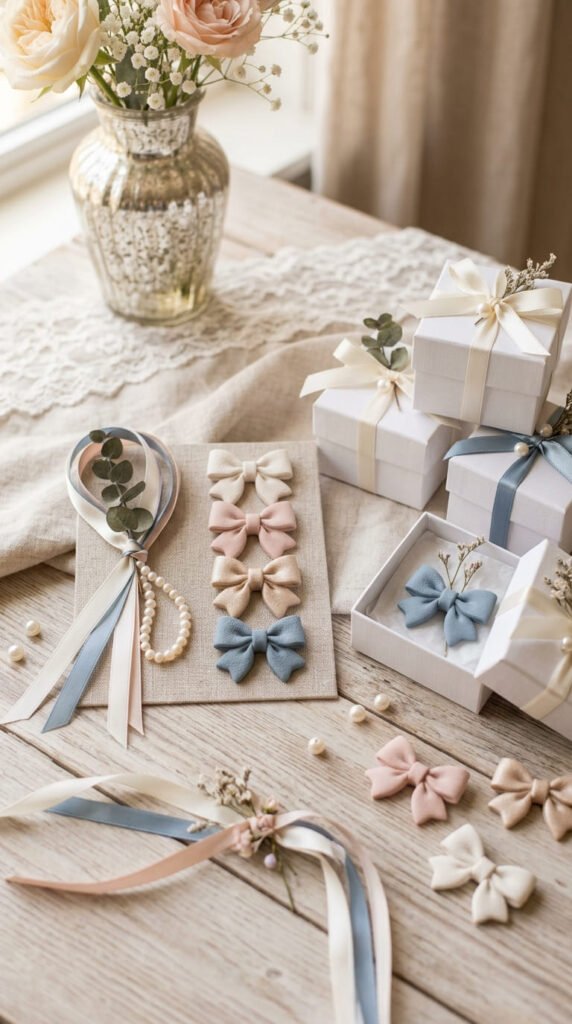
Clay bow magnets are lovely for bridal showers, baby showers, tea parties, birthday brunches, and feminine event themes. They look delicate but use basic shapes.
Roll two small ovals for the loops. Pinch one side of each oval and bring both pinched sides toward the center.
Add a small clay band in the middle to cover the join. You can add two short ribbon tails below or keep the bow simple.
Paint the bows in ivory, blush, champagne, lavender, dusty blue, or soft pink. Add a thin gold edge for a gift-wrap style.
For batch-making, shape all loops first. Then assemble the bows one by one. This keeps sizes close.
Keep each bow thin and light. Press the back flat before drying or baking.
Seal with satin varnish. Glue a magnet to the back after the bow hardens.
Place each bow in a tiny pouch or box. These favors work well for vanity boards, fridges, lockers, and office cabinets after the party.
19. Cake Slice Clay Magnet Favors
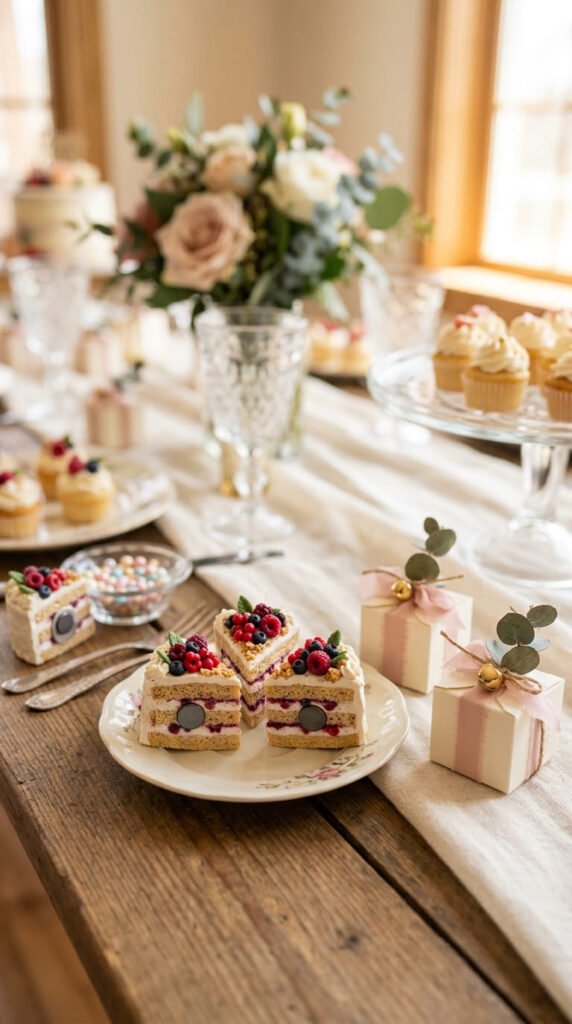
Cake slice magnets are a sweet fit for birthdays, anniversaries, bridal showers, dessert bars, and tea parties. They look detailed but start with triangle shapes.
Cut two small clay triangles for cake layers. Add a thin cream strip between them for frosting. Stack the pieces gently.
Add a tiny berry, frosting swirl, or sprinkle detail on top. Keep toppings small so the favor stays lightweight.
You can make several flavors from the same base. Paint chocolate, vanilla, strawberry, lemon, or red velvet colors after the clay dries.
For a budget-friendly batch, use one white clay pack and paint all flavors later. This keeps supplies simple.
Smooth the back before curing. Add a strong magnet after the piece hardens.
Seal berries or frosting with gloss. Leave the cake layers satin so they look soft.
Package each slice in a mini dessert box or small paper bag. These party favor magnets look fun on the table and practical on a fridge after the event.
20. Milestone Number Clay Magnet Favors
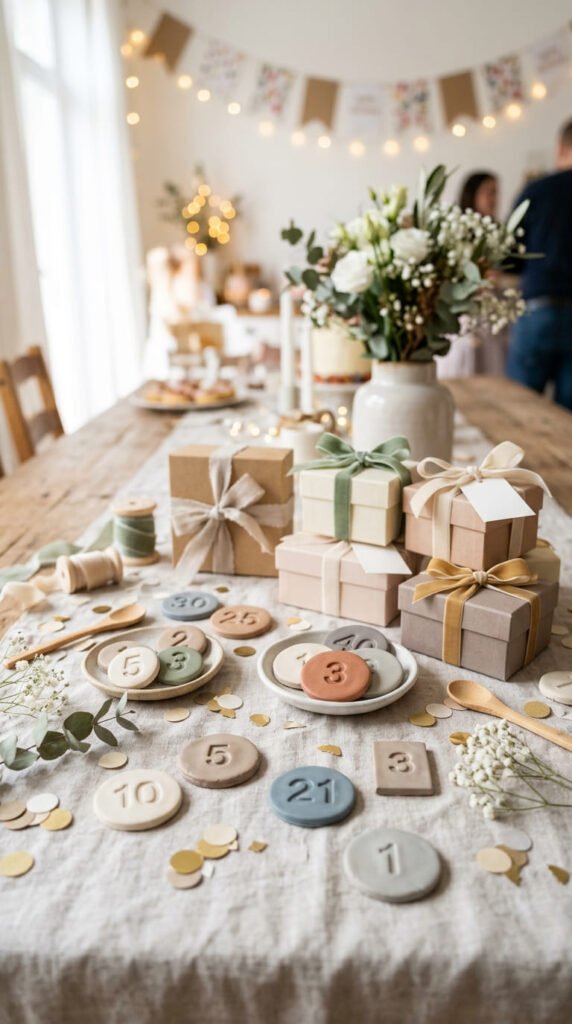
Milestone number magnets are great for birthdays, anniversaries, graduations, retirements, and reunion parties. They help mark the event in a simple way.
Use number cutters if you have them. If not, make small circle, square, or arch bases and paint the number on top after drying.
For a 1st birthday, 16th birthday, 30th birthday, 50th anniversary, or graduation year, the magnet feels tied to the celebration.
Keep the color palette limited. Cream and gold, black and white, blush and champagne, or sage and ivory all look polished.
For large guest lists, painted numbers are faster than clay numbers. Use one thin brush and work in batches.
Seal the front after painting. Attach a magnet to the back when everything is dry.
Package the favor in small bags or display them in a tray near the party exit.
Guests can use these on a fridge or office board and remember the event each time they see it.
21. Tiny Mushroom Clay Magnet Favors
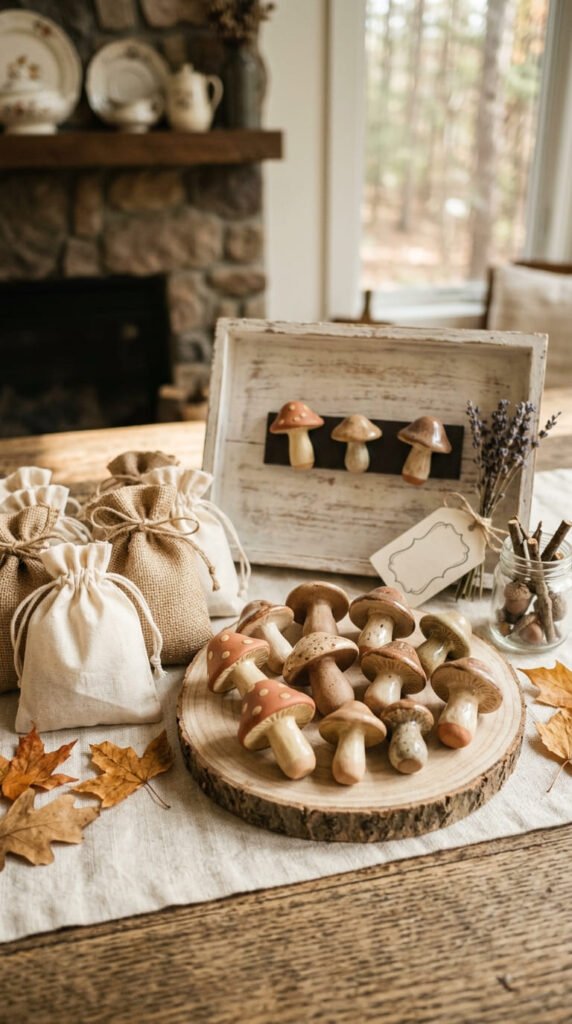
Tiny mushroom magnets are perfect for woodland parties, cottage-style showers, fall birthdays, fairy parties, and nature-inspired gatherings.
Shape a small cream stem. Add a rounded cap in terracotta, brown, beige, or muted red. Press the back flat while the clay is still soft.
Add tiny white spots with paint or clay dots. Use a toothpick to draw small lines under the cap for gills.
These magnets use tiny clay amounts, so they are perfect for scrap pieces. Make mushrooms in different heights and cap sizes for a handmade set.
Muted earthy colors usually look better than very bright shades. They give the favors a cozy, grown-up feel.
Seal with matte or satin varnish. Add the magnet to the back once the piece is fully hardened.
For each guest, package one mushroom alone or pair it with a small leaf magnet.
Use kraft boxes, linen bags, or tiny baskets for packaging. These favors feel warm, seasonal, and useful.
22. Tea Cup Clay Magnet Favors
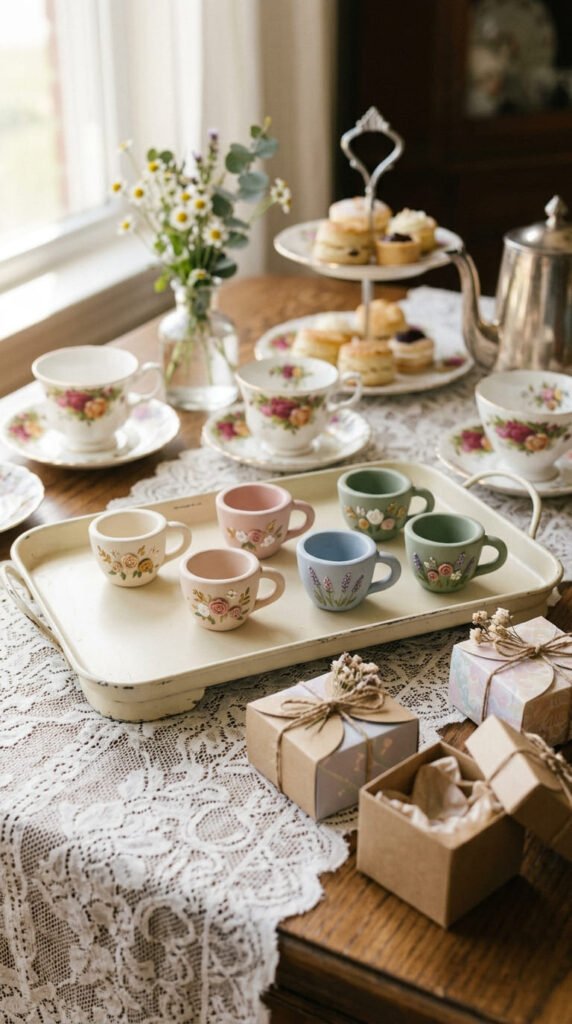
Tea cup magnets are a charming choice for tea parties, bridal showers, Mother’s Day events, garden brunches, and book club gatherings.
Make the cup as a flat front-view shape. This uses less clay and keeps the favor light.
Cut a small cup shape from rolled clay. Add a tiny handle on one side. Add a small oval at the top for the tea surface.
Paint the cup in ivory, blush, pale blue, sage, or cream. Add tiny floral dots, a thin rim, or a soft gold line.
Use one paper template for all cups. This helps the set look consistent while still allowing small painted differences.
Seal with satin varnish. Add gloss only to the tea surface if you want a gentle shine.
Glue the magnet to the flat back and let it dry fully.
Package one tea cup magnet with a tea bag, cookie, or small favor pouch. Guests can use it later on a fridge or magnetic board.
23. Balloon Clay Magnet Favors

Balloon magnets are cheerful for birthdays, baby showers, graduations, classroom parties, and kids’ events. They are easy to make because the shape is basic.
Roll clay into a small ball. Flatten it into an oval or teardrop. Pinch a tiny knot at the bottom.
Add a thin clay string if you want extra detail, or paint the string after drying. Keep the string short so it does not break.
Use colors from your party palette. Pastels work well for baby showers. Brighter shades work for kids’ birthdays. Cream and gold work nicely for milestone events.
For a more polished set, choose only three colors. This makes the favor display look organized.
Balloon magnets are flat and lightweight, so they are easy to attach to magnets.
Seal with satin varnish after painting. Glue magnets to the back.
Package two or three balloon magnets together. A small group feels festive and gives guests more ways to use them at home.
24. Terrazzo Clay Magnet Favors
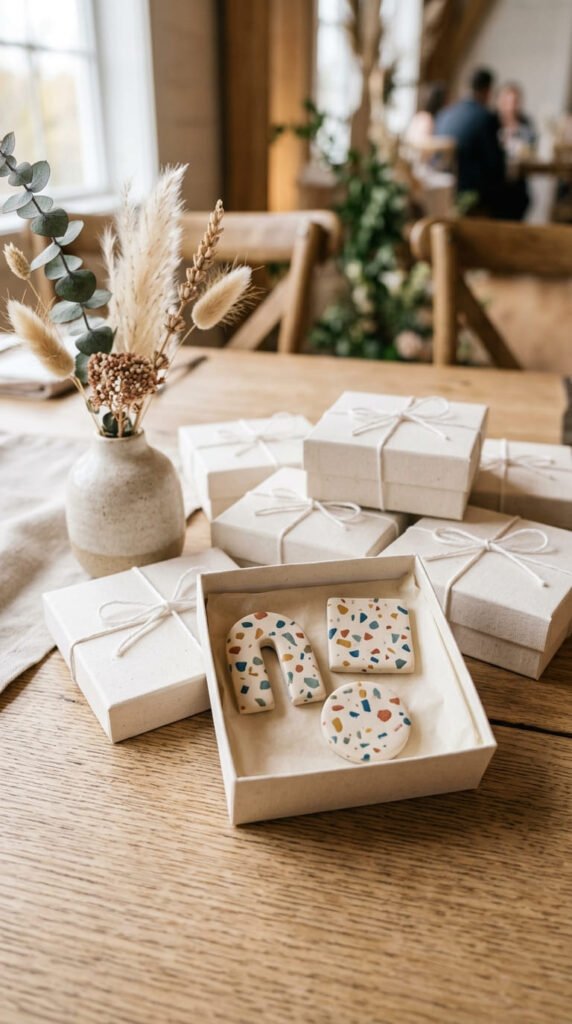
Terrazzo magnets are great for modern parties, adult birthdays, housewarmings, bridal showers, and minimalist celebrations. They look stylish while using leftover clay.
Start with a white or cream clay base. Add tiny pieces of colored clay on top. Press them gently into the surface.
Roll lightly so the chips sit flat. Cut circles, arches, squares, or ovals from the sheet.
Use colors that match your event. Blush and gold feel romantic. Sage and cream feel natural. Black, beige, and terracotta feel modern.
This is a smart budget project because scrap clay becomes decoration. Each magnet looks different, but matching colors keep the set together.
After drying or baking, sand rough spots lightly if needed. Add satin sealer for a smooth finish.
Attach magnets to the flat backs with strong glue.
Package two or three terrazzo magnets in one box. These favors feel adult, useful, and stylish enough for guests to keep on display.
25. Memory Tile Clay Magnet Favors
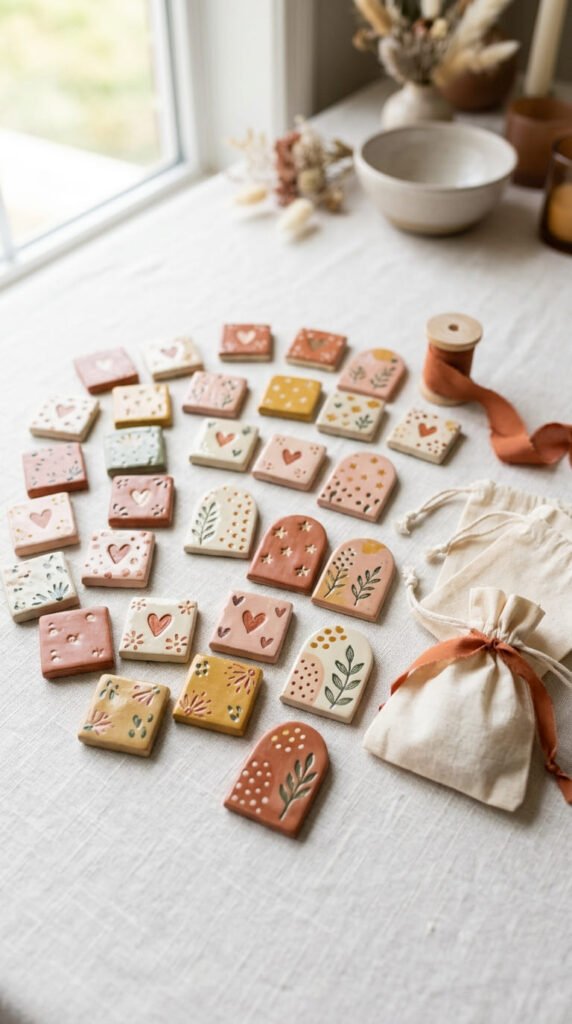
Memory tile magnets are simple clay tiles made to match the mood of your celebration. They work for weddings, birthdays, baby showers, housewarmings, family parties, and reunions.
Roll clay flat and cut small squares, rectangles, circles, or arches. Smooth the edges carefully before drying.
Keep the design visual. Add tiny hearts, flowers, dots, stars, leaves, or abstract lines. You can also press lace or fabric into the surface for texture.
Paint the tiles in your event colors. Use ivory and gold for weddings. Use pastels for baby showers. Use terracotta and sage for rustic events. Use soft brights for birthdays.
These are easy to make in batches because the base shape stays the same. Only the decoration changes.
Seal the front with matte or satin varnish. Attach a magnet to the back when the tile is fully dry.
Place each tile in a favor pouch or small box. Guests can use it as everyday fridge decor while remembering the party.
Conclusion
Clay magnet party favors are small, affordable, and practical enough for guests to keep using after the event. You can match them to almost any theme with simple shapes, soft colors, good sealer, and strong magnet backing. Hearts, flowers, pebbles, donuts, initials, rainbows, frames, food shapes, and memory tiles all work well because they are easy to make in batches and simple to package. Pick one idea that fits your event, make a test piece, then create a full set your guests will love taking home.