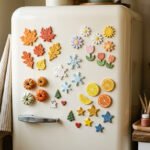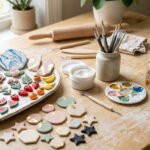
Clay magnets are a fun starter craft because they stay small, cost little, and turn plain clay into cute fridge decor. Beginners can shape circles, hearts, ovals, clouds, fruit, flowers, and tiny food without fancy tools. Air-dry clay works well for a no-bake project, while polymer clay gives a smoother finish after baking. The easiest projects usually start with simple forms, a little paint, strong glue, and flat magnet backs, which matches common beginner clay magnet search intent.
1. Chunky Rainbow Clay Magnets
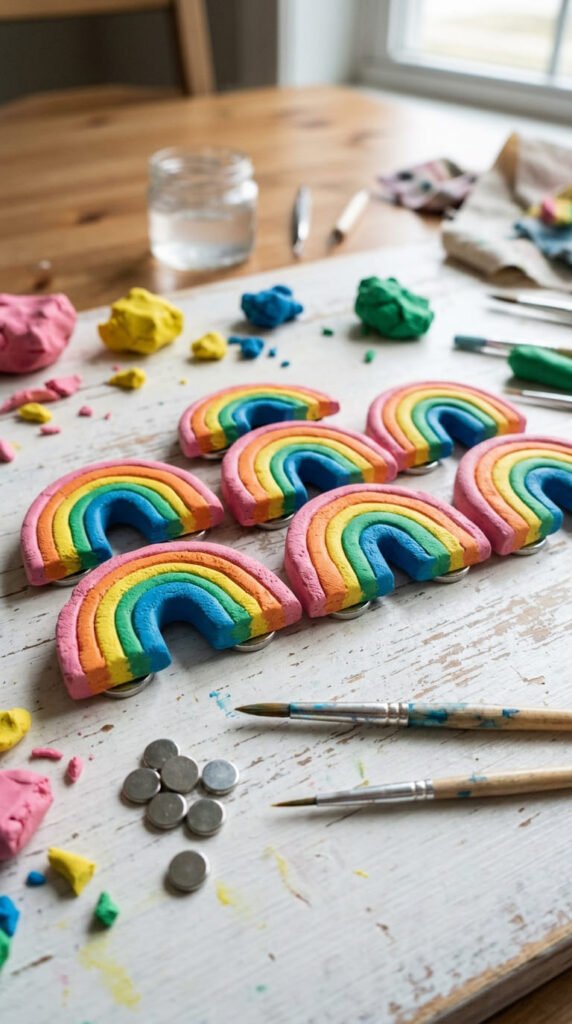
Chunky rainbow magnets are a happy first project because the shape is forgiving. Roll small clay ropes, curve them into arches, and press them together gently. Keep the rainbow thick so it feels sturdy after drying or baking.
Use air-dry clay for a no-bake version. Use polymer clay for a cleaner finish. A butter knife, toothpick, or old card can help trim the bottom edge flat.
Paint each arch with bright acrylic paint. Try classic rainbow colors or a softer set with peach, mint, lavender, and cream. Let each color dry before adding the next one so the edges stay neat.
Glue a small magnet to the back after the clay is fully dry. Strong craft glue works better than school glue.
These magnets look cute on a fridge, craft board, or locker. Make three at once in different sizes. It saves time and gives you a matching handmade set.
2. Mini Fruit Slice Clay Magnets
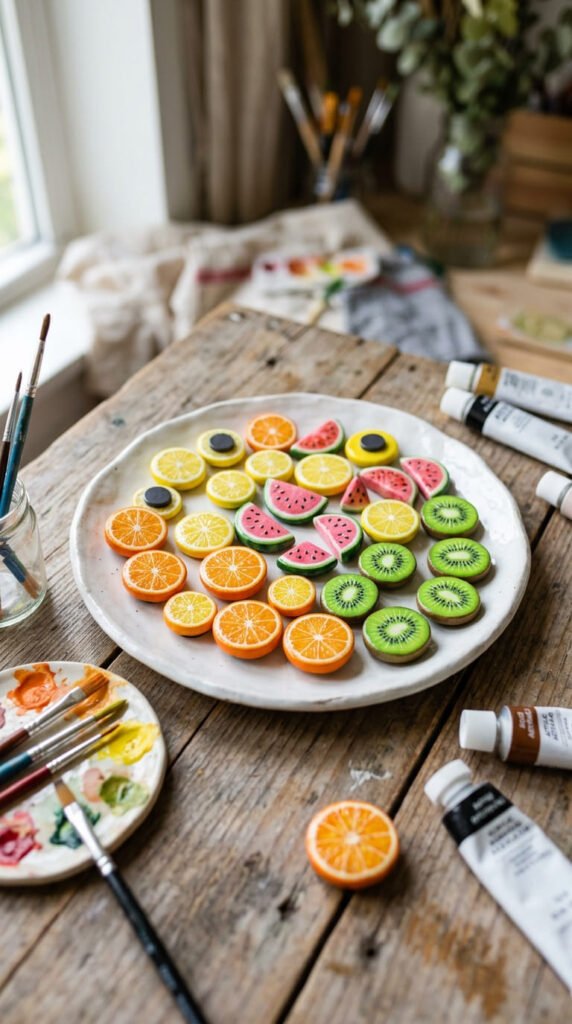
Mini fruit slice magnets are colorful, cheap, and easy to make in batches. Start with flat circles or half-circles. A bottle cap, small cookie cutter, or jar lid can help you get a clean round shape.
For oranges and lemons, cut a circle and mark small wedge lines with a toothpick. For watermelon, shape a half-circle and add a green rind. Kiwi magnets can start as green circles with tiny black seed dots.
Paint does most of the work here. Use white paint between fruit sections if you want a crisp design. Add seeds with the end of a toothpick instead of a tiny brush.
These magnets are great for summer decor, lunchbox notes, kitchen boards, and handmade party favors. They also use very little clay, so they are budget-friendly.
Make a mixed fruit set with six pieces. Glue magnets to the back once dry. Add a thin clear sealer for shine and longer wear.
3. Bold Flower Power Clay Magnets
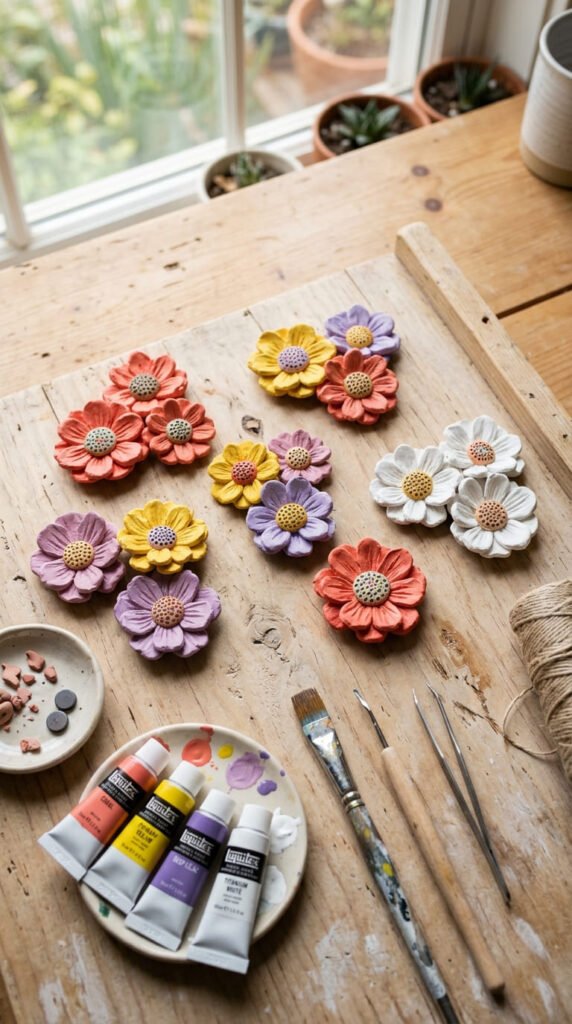
Flower magnets look bright even when the shapes are simple. Roll one small ball for the center. Then press small clay balls around it for petals. Flatten each petal with your finger. That is enough to make a pretty flower.
You can make daisies, sunflowers, or retro-style blooms. Large petals are easier for beginners than tiny ones. Keep the flower flat so it sits nicely against the fridge.
For a low-cost trick, use the cap of a marker to press a tiny circle pattern into the center. It gives the flower more detail without extra tools.
Paint the petals in one color or make every petal different. Yellow centers work with almost any shade. Try coral, pink, blue, white, or purple.
These magnets are perfect for spring craft days, teacher gifts, and cheerful kitchen decor. Make a set of five flowers in different sizes. Add magnets after the clay is fully dry, then seal with matte or gloss finish.
4. Tiny Breakfast Food Clay Magnets
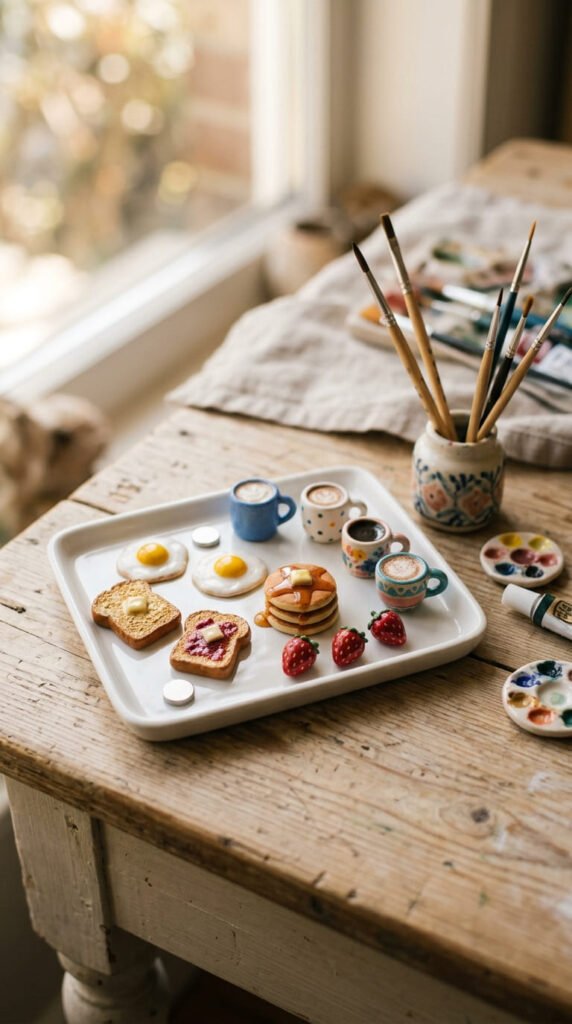
Tiny breakfast food magnets are cute because everyone recognizes them right away. Start with easy shapes. A fried egg is a flat white blob with a small yellow circle. Toast is a rounded square. Pancakes are stacked flat circles.
Keep each piece slightly thick so it does not crack. If you use air-dry clay, let the shapes dry on both sides. Flip them gently after several hours so the back dries too.
Paint is where breakfast magnets become fun. Add golden edges to toast. Add syrup lines to pancakes. Add tiny red dots to strawberries. A toothpick gives better control than a brush for small details.
These magnets make a playful fridge set for a kitchen. They also work well as small gifts for food lovers.
Do not overdo the size. Around one to two inches wide is easy to handle and light enough for small magnet backs. Glue one magnet behind each piece and let it set flat overnight.
5. Cute Animal Face Clay Magnets
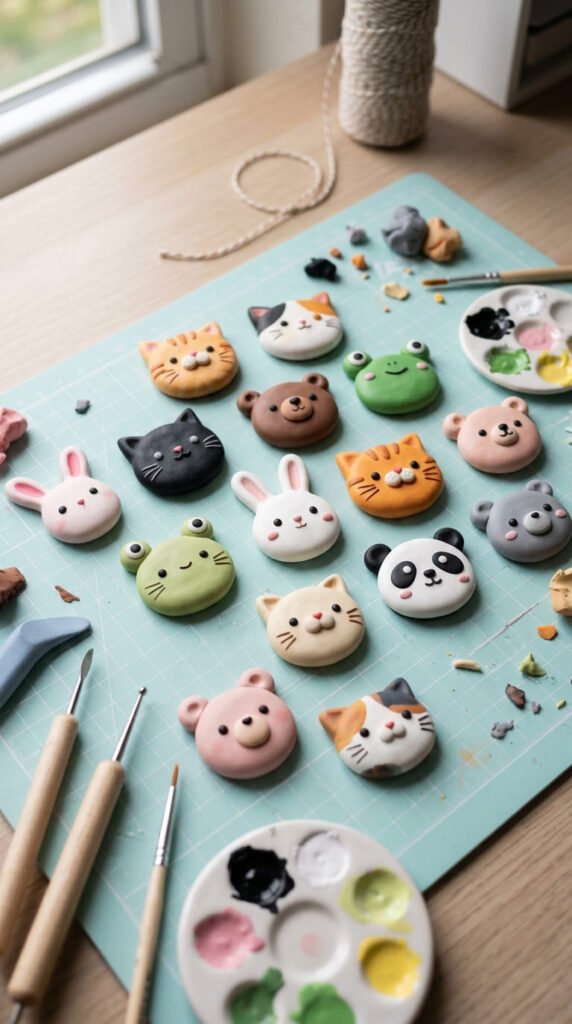
Animal face magnets are perfect for beginners because they use circles, ovals, and tiny dots. Start with a round base. Add ears, cheeks, or a small snout. Press each extra piece gently so it sticks to the main face.
Cats can have triangle ears. Bears can have round ears. Frogs can have two raised eye bumps. Pandas look cute with black patches around the eyes. Rabbits only take two long ovals for ears.
Let the clay dry fully before painting. Use a pencil to lightly mark the eyes and mouth first. Then paint over the marks with a fine brush or toothpick.
A simple face is better than a crowded one. Two dots for eyes, one dot for a nose, and a tiny mouth can look adorable.
These magnets are great for kids’ rooms, lockers, classroom boards, and handmade birthday favors. Make a small animal family with matching colors. Add a strong magnet back so the face stays flat and secure.
6. Abstract Color Block Clay Magnets
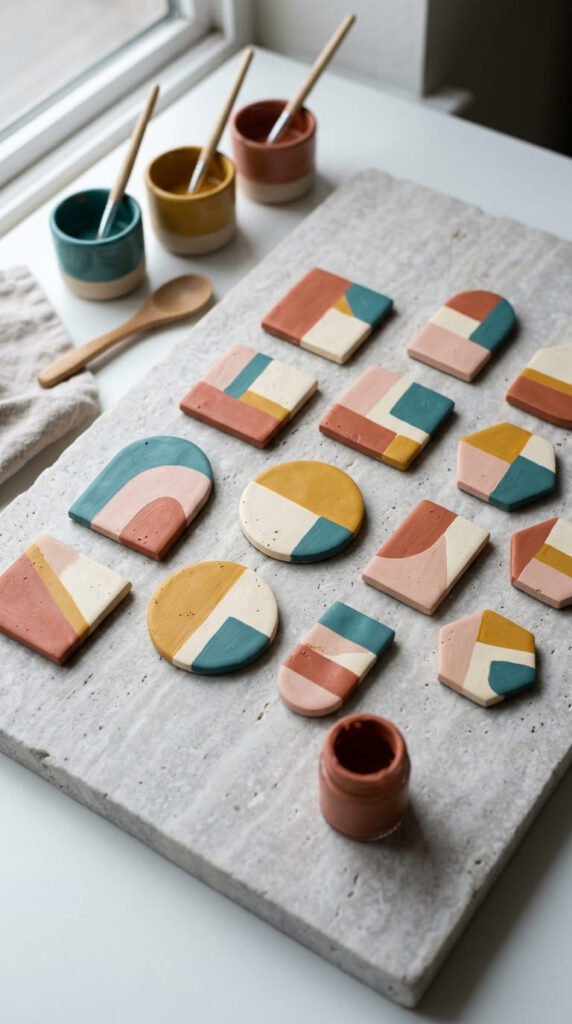
Abstract color block magnets are great when you want a stylish look without making tiny details. Cut clay into simple shapes like circles, arches, rectangles, and rounded squares. Smooth the edges with a damp fingertip if you use air-dry clay.
Once dry, divide each shape into two or three painted sections. Use painter’s tape for clean edges, or paint freehand for a softer handmade style. Try terracotta with cream, teal with blush, or mustard with white.
This idea works well with leftover clay because each piece can be a different size. You do not have to match anything perfectly. That makes the project relaxed and low-cost.
For a modern fridge set, make six shapes in the same color family. Add a clear matte sealer so the paint looks finished but not too shiny.
These magnets fit adult craft nights, dorm decor, home office boards, and handmade stocking gifts. They are also fast because the shapes are flat and easy to cut.
7. Smiley Face Clay Magnets
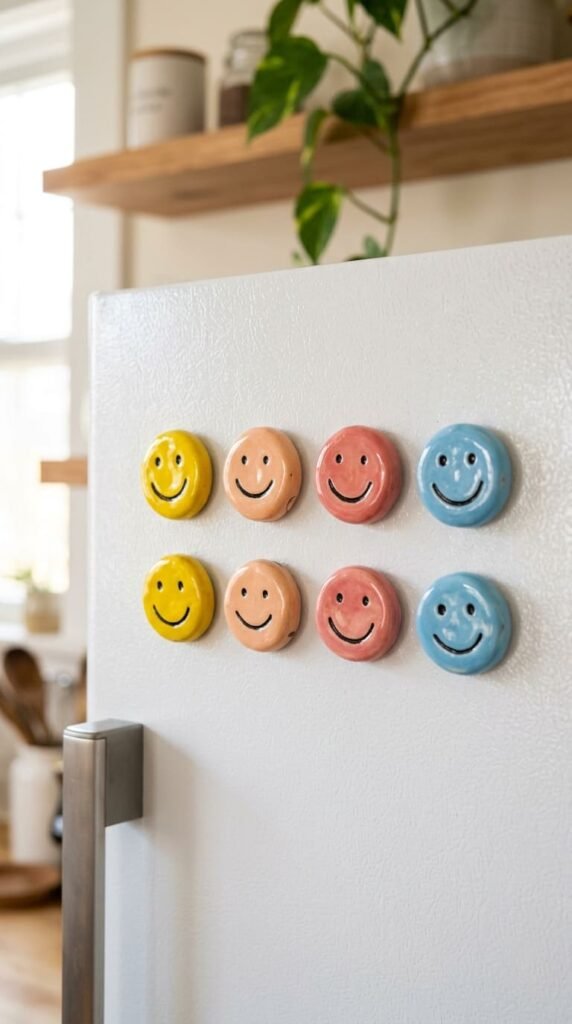
Smiley face magnets are simple, bold, and hard to mess up. Roll clay into small balls, flatten them into circles, and smooth the edges. You can make each one the same size or create a mixed set.
Paint the whole circle yellow for a classic look. For a trendier set, try peach, pink, sky blue, or lime. Once the base coat dries, add two dots for eyes and a curved smile.
A toothpick makes the smile easier. Dip it in paint and drag it gently across the surface. If the line looks uneven, let it dry and paint over that area with the base color.
These magnets are fun for mood boards, lockers, family message boards, and school craft projects. You can also make tiny smiley flowers by adding small petals around the circle.
Keep the back flat. A flat back helps the magnet glue well. Let the glue dry while the magnet is face down so it stays straight and strong.
8. Mini Mushroom Clay Magnets
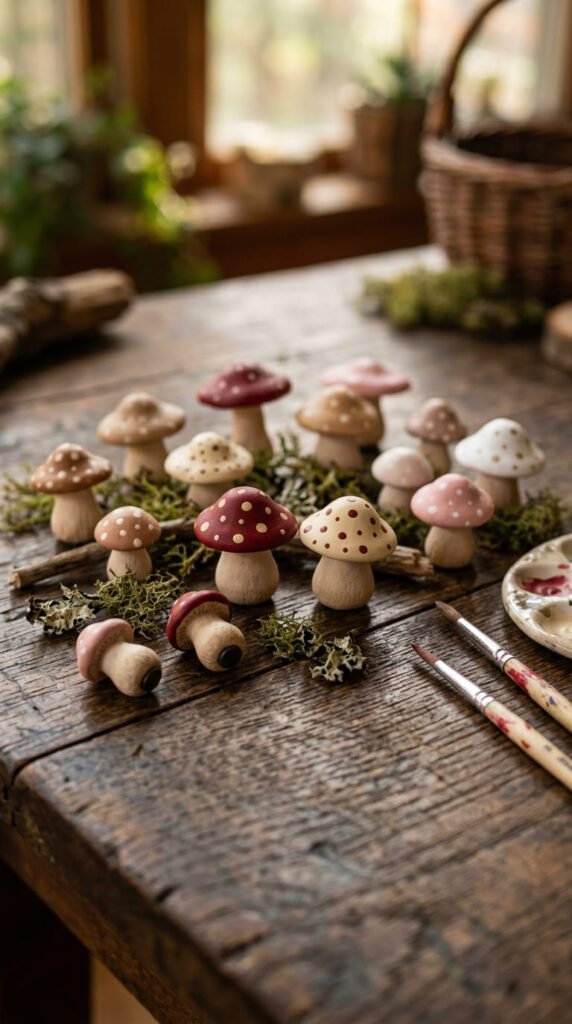
Mini mushroom magnets have a cozy handmade look and only take two main pieces. Shape a short stem from white or cream clay. Then add a rounded cap on top. Press the cap down gently so it sits well.
Make the cap wide enough to feel bold, but not too heavy. A flat back matters because the magnet has to sit against the fridge. You can lightly press the whole mushroom onto parchment paper to flatten the back.
Paint red caps with white spots for a classic cottage style. Try brown, blush, mustard, or sage for a softer woodland set. Add tiny lines to the stem with a toothpick.
These magnets look lovely on kitchen boards, garden room decor, or fall craft displays. They also make cute gifts for nature lovers.
If you want a batch, make three tall mushrooms and three short ones. Different heights make the set look more playful. Seal after painting so the dots stay bright.
9. Heart-Shaped Clay Magnets
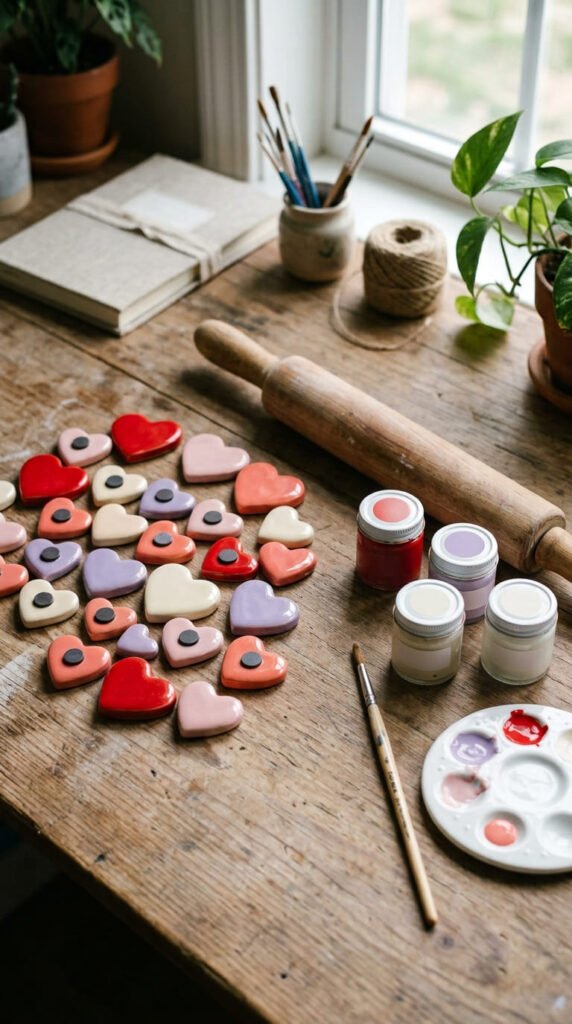
Heart-shaped clay magnets are sweet, easy, and useful for many occasions. Use a small heart cutter for the fastest version. If you do not have one, shape two small balls, press them together, and pull the bottom into a point.
Keep the hearts thick enough so the tips do not snap. Smooth cracks with a damp finger. Let them dry on a flat surface so the back stays even.
Paint them in red and pink for Valentine’s Day, or use cream, lavender, and peach for everyday fridge decor. Tiny dots, stripes, or scalloped edges can add detail without much skill.
These magnets make cute gift tags, party favors, classroom crafts, and wedding shower favors. You can pack them in small paper bags with a handwritten note beside the bag, not on the magnet.
For a budget set, make ten mini hearts from one clay block. Add small magnet backs with strong glue. Let the glue set fully before using them.
10. Star and Moon Clay Magnets
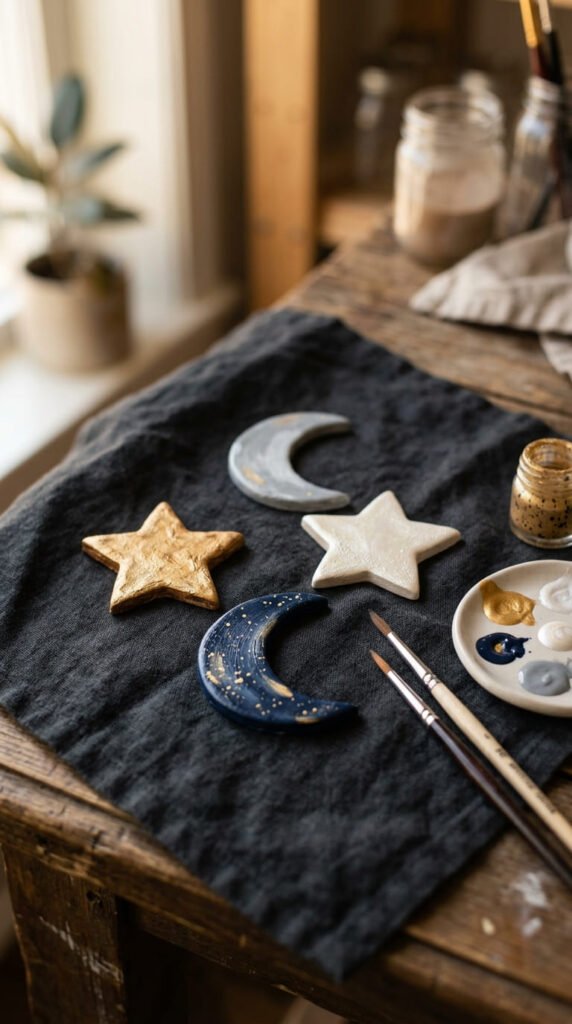
Star and moon magnets look magical but stay easy for beginners. Use small cutters if you have them. If not, draw a star and moon on paper, cut them out, and place them over rolled clay as a guide.
Stars can be tricky at the points, so make them thick and rounded. A crescent moon is easier if you cut one circle, then cut part of it away with another smaller circle.
Paint the set in gold, white, navy, silver, or pale gray. Add tiny paint dots around the edges for a sky-inspired look. Keep the dots uneven so they feel handmade.
These magnets work well for bedroom boards, nursery decor, Ramadan craft sets, Eid gift bags, or night-sky themed rooms. They also look nice in sets of three.
Let each piece dry flat. Thin points can curl if the clay is too wet. Press them gently under parchment with a light book while drying, then paint after they harden.
11. Donut Clay Magnets
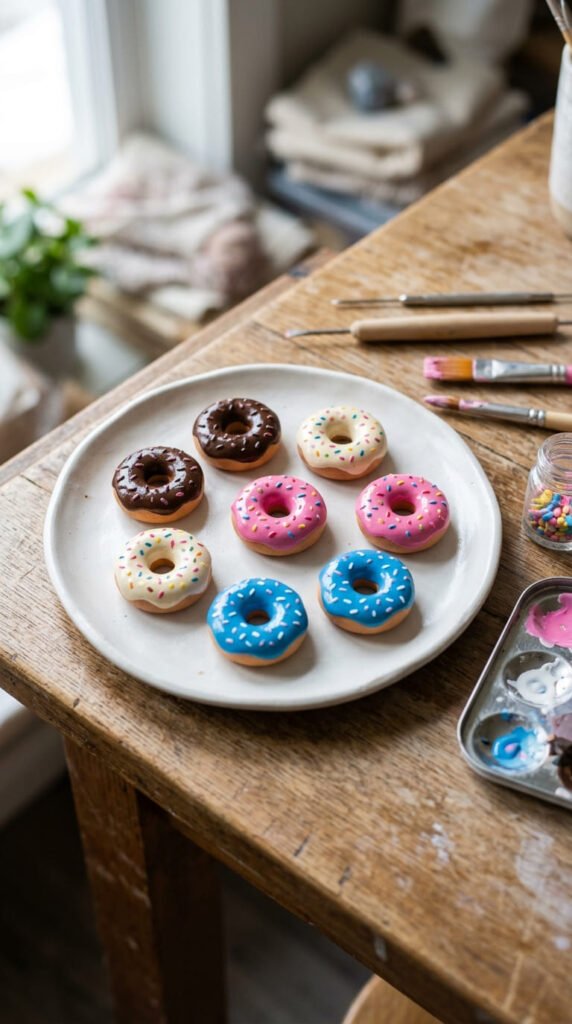
Donut magnets are a favorite beginner project because the shape is familiar and cute. Roll a small clay ball, flatten it slightly, and poke a hole through the center with a straw or pencil end. Smooth the hole so it looks round.
The icing can be another thin clay piece placed on top, or you can paint it after drying. Painting is easier for beginners. Use pink, chocolate brown, vanilla cream, or pastel blue.
Add sprinkles with tiny paint strokes. Use a toothpick instead of a brush for better control. You can also press small clay dots into the top before drying.
Donut magnets are great for kitchen decor, bakery-themed parties, or handmade gifts for sweet treat lovers. Make a set of six with different icing colors.
Keep the back plain and flat. Do not add icing on the back, since the magnet has to sit against it. Glue a magnet behind the thickest part and let it dry overnight.
12. Leaf Clay Magnets
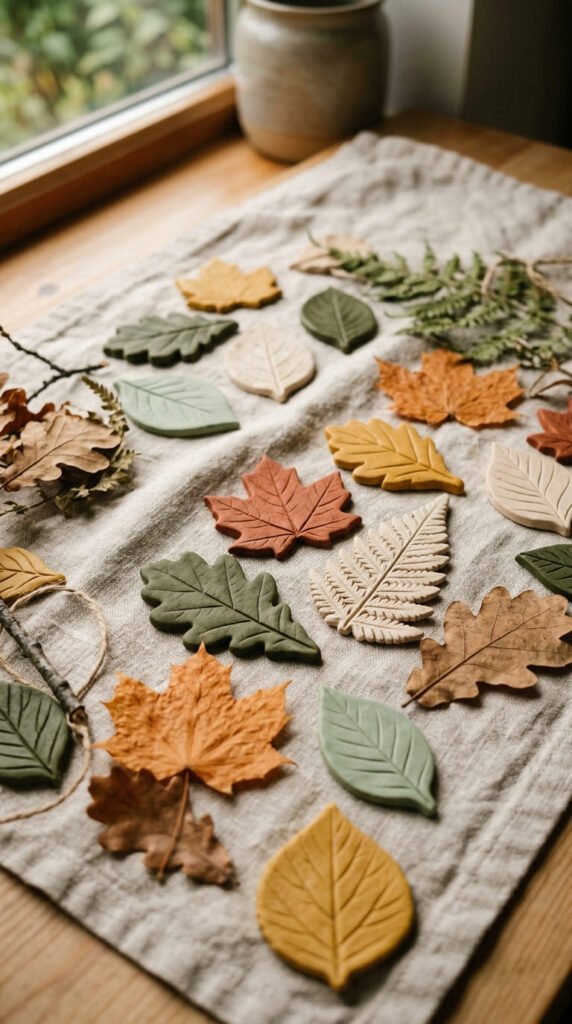
Leaf clay magnets are calm, natural, and beginner-friendly. Roll clay flat, place a real leaf on top, and press gently. Peel the leaf away to leave vein marks in the clay. Cut around the shape with a small knife.
This project is low-cost because real leaves become your pattern tool. Choose leaves with clear veins. Mint, basil, rose, and small garden leaves work nicely.
Let the clay dry fully before painting. Use green for a natural look, or paint fall colors like rust, mustard, brown, and cream. A dry brush can add soft texture over the vein lines.
Leaf magnets suit kitchens, garden rooms, office boards, and autumn craft sets. They also look pretty as handmade gifts for plant lovers.
Keep each leaf small and not too thin. Thin edges can curl or break. A clear sealer helps protect the paint. Glue the magnet to the widest area on the back for a stronger hold.
13. Mini House Clay Magnets
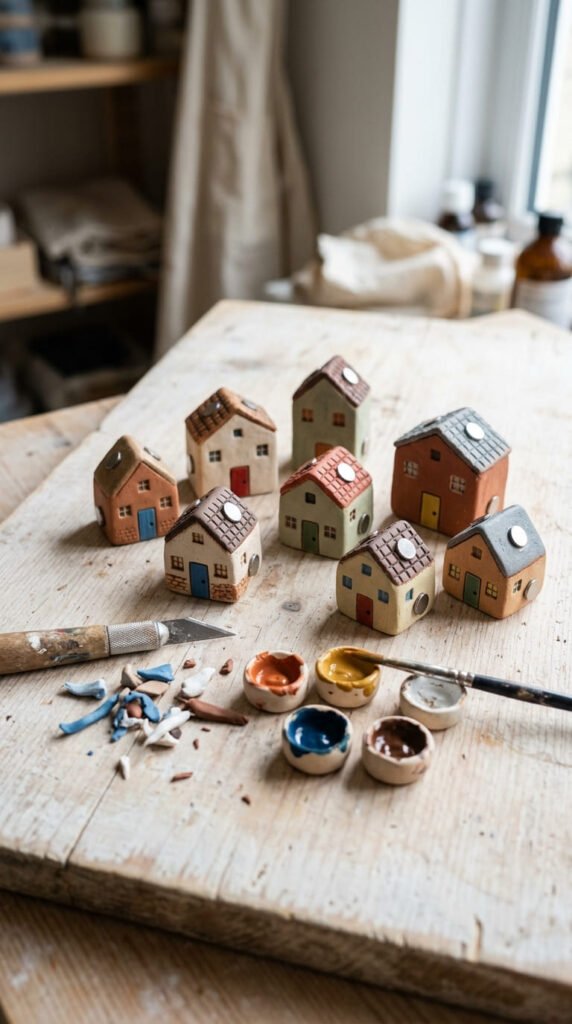
Mini house magnets are cute and easy because they start with a rectangle and triangle roof. Cut a small rectangle for the house body. Add a triangle on top, or cut the whole shape from one flat piece of clay.
Do not make the windows too detailed. Small squares and dots are enough. Use a toothpick to mark a door line before the clay dries. That tiny detail makes the house feel finished.
Paint the walls cream, pink, blue, sage, or terracotta. Paint the roof brown, gray, red, or black. A white trim line around the door can make the design stand out.
These magnets are lovely for new home gifts, real estate thank-you gifts, dorm decor, or family fridge boards. Make a tiny street with five houses in different colors.
For beginners, flat houses are easier than 3D ones. They dry faster, use less clay, and hold better on a fridge. Add one magnet back near the center so the house does not tilt.
14. Bow Clay Magnets
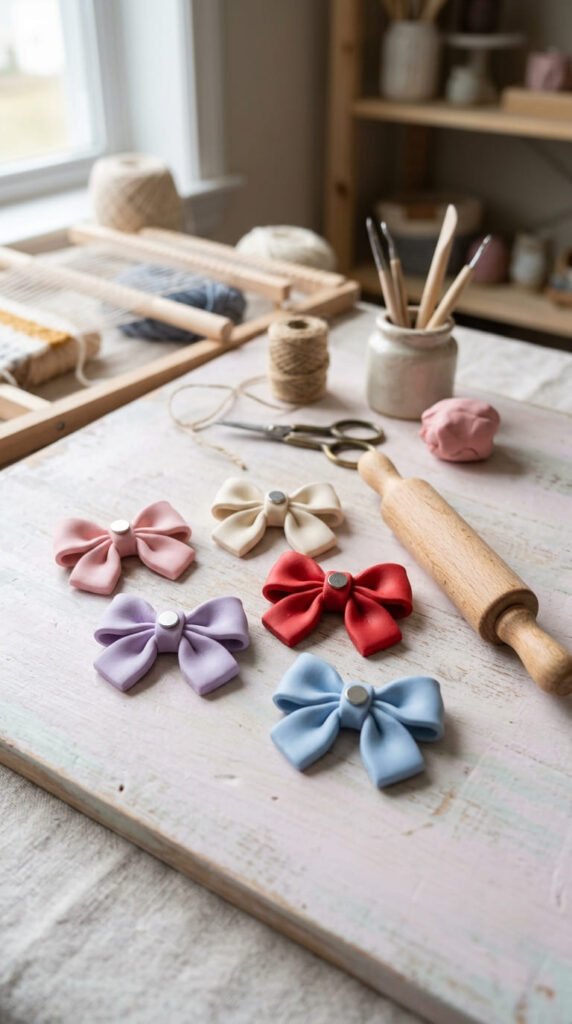
Bow clay magnets look sweet, feminine, and gift-ready. Start by making two small flattened ovals for the loops. Pinch one end of each oval toward the center. Add a small clay strip across the middle as the knot.
Keep the bow wide and flat. Thin loops can break, so beginner bows look better with rounded, chunky shapes. Press lightly so all parts attach well.
Paint bows in pink, cream, red, lavender, or powder blue. Add tiny white dots for a playful style. You can also leave air-dry clay white and paint only the center knot.
These magnets are great for vanity boards, baby shower favors, bridal shower gifts, and cute locker decor. They also pair well with heart and flower magnets in a gift set.
Make several bows at once. Once your fingers learn the shape, the next bow gets easier. Glue a magnet to the back center. Let it dry flat so the bow does not slide.
15. Cloud and Raindrop Clay Magnets
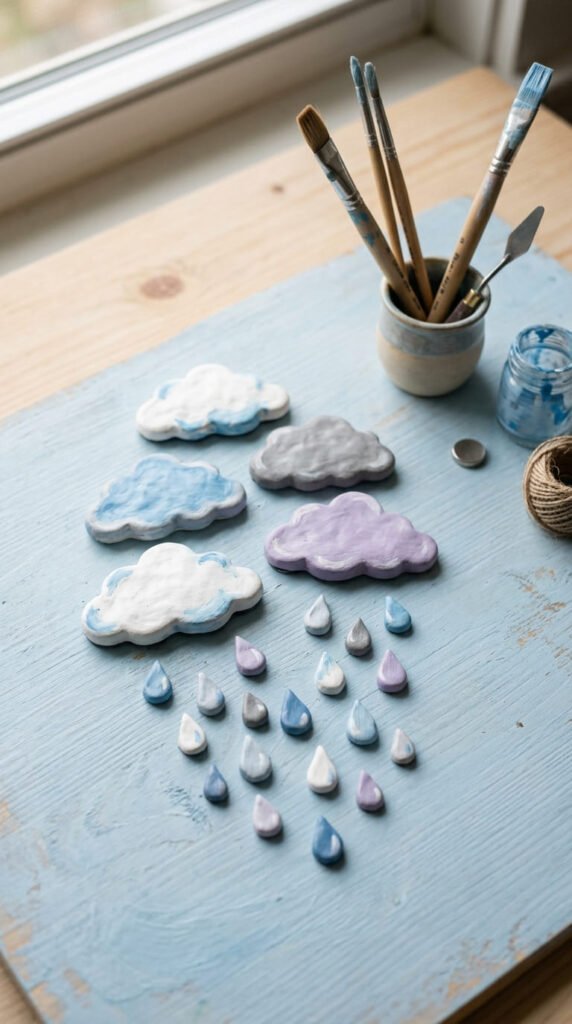
Cloud and raindrop magnets are perfect for beginners who like soft, cute designs. Start with a cloud by pressing three or four small clay balls together. Flatten the back and smooth the front with your finger.
Raindrops are even easier. Roll a small ball, pinch one end into a point, and flatten it a little. Make several drops in different sizes for a cute set.
Paint clouds white, cream, or pale gray. Paint raindrops blue, lavender, mint, or silver. You can add rosy cheeks to the cloud with a tiny bit of pink paint.
These magnets work well for nursery decor, school boards, weather charts, or soft pastel kitchen styling. They also make a sweet handmade gift for someone who likes calm colors.
The trick is keeping every piece lightweight. Small, flat shapes hold better than heavy thick ones. Add a magnet behind the cloud and behind each larger raindrop. Let glue cure before placing them on metal.
16. Initial Letter Clay Magnets
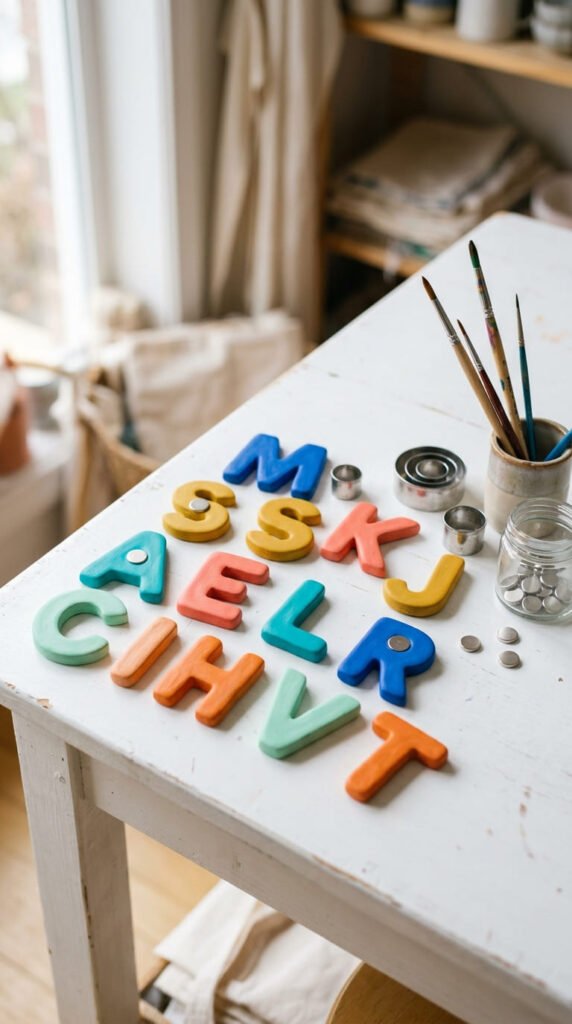
Initial letter magnets feel personal but stay easy. Use alphabet cutters if you have them. If not, roll clay into small ropes and shape one letter at a time. Keep the lines thick so the letter does not break.
Start with simple letters like C, O, L, T, or M. Letters with tiny gaps can be harder, so make them larger. Press the back flat before drying.
Paint each letter in a bold color. Try red, teal, mustard, lilac, or black and white. Add dots, stripes, or tiny flowers if the letter has enough space.
These magnets are great for kids’ names, classroom boards, family fridges, wedding favors, and handmade stocking gifts. You can make one large initial or a full name set.
For a budget project, make letters from leftover clay after another craft. Use a thin layer of sealer after painting. Glue small magnets on the widest parts so each letter sits straight.
17. Checkerboard Clay Magnets
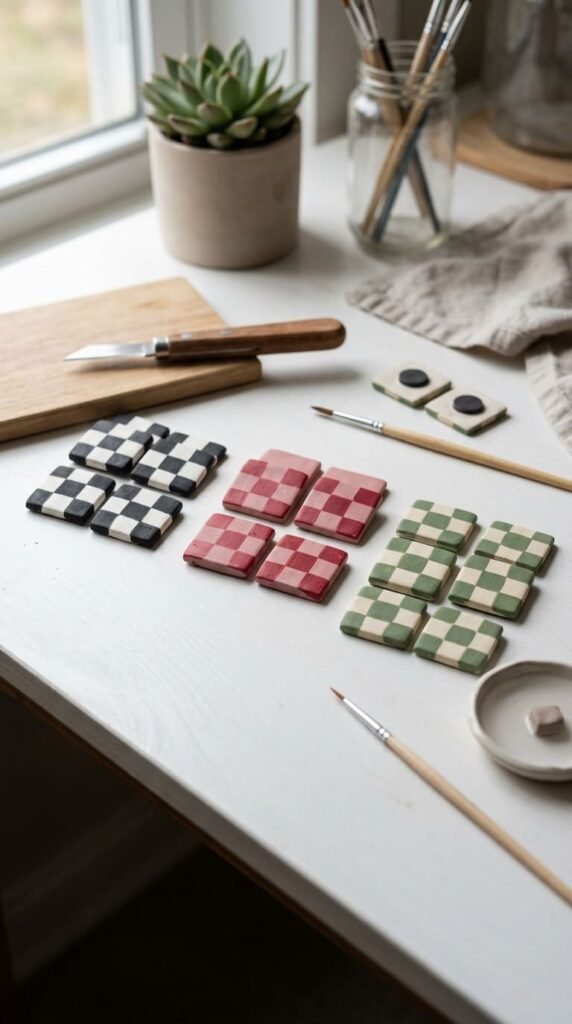
Checkerboard magnets look bold and trendy, but the base is only a square. Roll clay flat and cut equal squares with a craft knife, ruler edge, or old card. Rounded corners make them safer and cuter.
After drying, paint the base color first. Once it dries, add the checker pattern with a small brush. You can lightly mark the grid with pencil before painting. Do not stress over perfect squares. A handmade checkerboard has charm.
Try black and white for a classic style. Pink and red feel playful. Green and cream look softer. Blue and white can fit a coastal kitchen.
These magnets work well for dorm rooms, office boards, teen lockers, and modern fridge decor. Make a set of four for a small matching collection.
If painting the grid feels hard, use tiny clay squares in two colors before drying. Press them onto a flat backing piece. This takes more time, but the pattern looks raised and fun.
18. Tiny Cupcake Clay Magnets
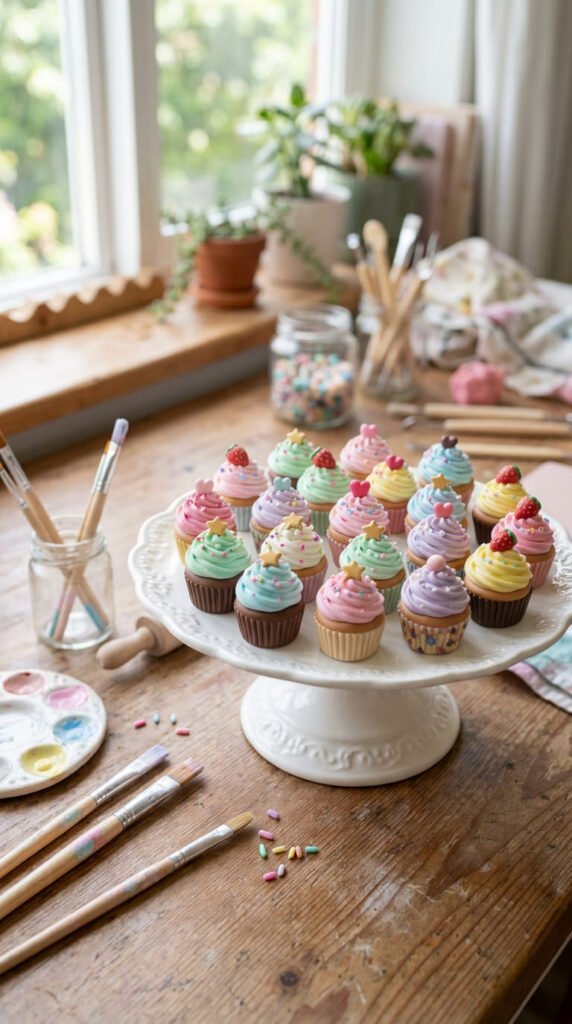
Tiny cupcake magnets are cute for parties and kitchen decor. Start with a small trapezoid shape for the wrapper. Add a rounded frosting mound on top. Keep both pieces flat on the back so the magnet can attach.
Use a toothpick to press vertical lines into the cupcake wrapper. This gives it that paper liner look without extra tools. The frosting can be a simple dome, swirl, or cloud-like shape.
Paint the wrapper brown, pink, blue, or cream. Paint the frosting white, chocolate, strawberry pink, or lavender. Add tiny sprinkles with a toothpick after the frosting color dries.
These magnets make sweet birthday favors, bakery display accents, or gifts for anyone who loves baking. They are small, light, and easy to repeat.
Make six cupcakes in one sitting. Change the frosting color on each one. Add a clear glossy coat for a candy-like finish. Glue the magnet to the widest part of the back so each cupcake hangs straight.
19. Seashell Clay Magnets
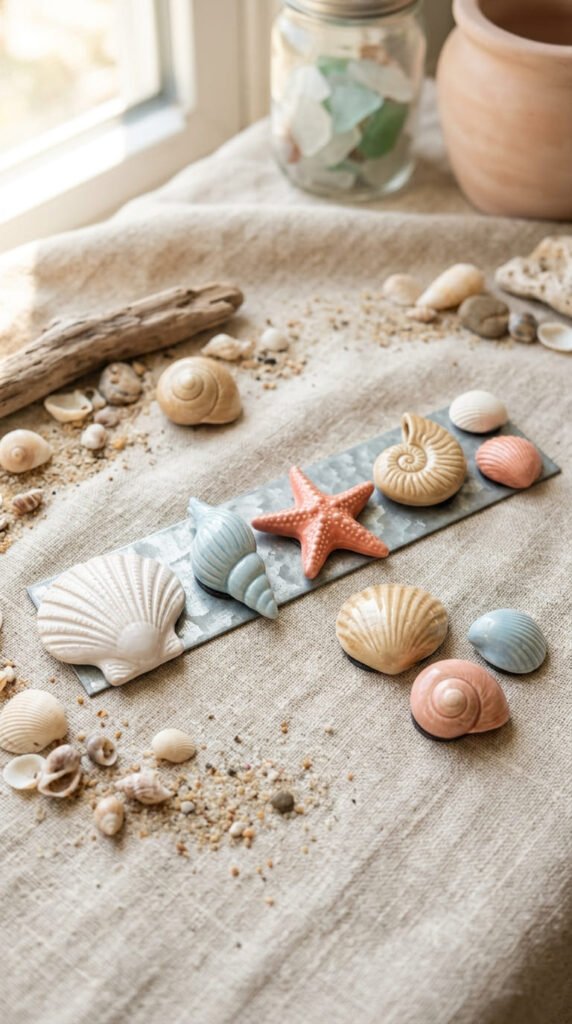
Seashell magnets look polished even with simple shapes. Start with a small oval or fan shape. Press lines from the bottom center toward the outer edge using a toothpick. These lines make the shell easy to recognize.
You can also press a real shell into soft clay to copy the texture. This is a great shortcut for beginners. Keep the shape flat on the back and slightly rounded on the front.
Paint shells in pearl white, sand, coral, pale blue, or soft pink. A little shimmer paint can make them look beachy. Use it lightly so the details still show.
These magnets are perfect for summer decor, vacation memory boards, beach house kitchens, and handmade gift sets. Pair them with starfish or wave-shaped magnets for a coastal theme.
Do not make the lines too deep. Deep cuts can crack as the clay dries. Gentle marks are enough. Seal the finished shell before adding the magnet back.
20. Mini Book Clay Magnets
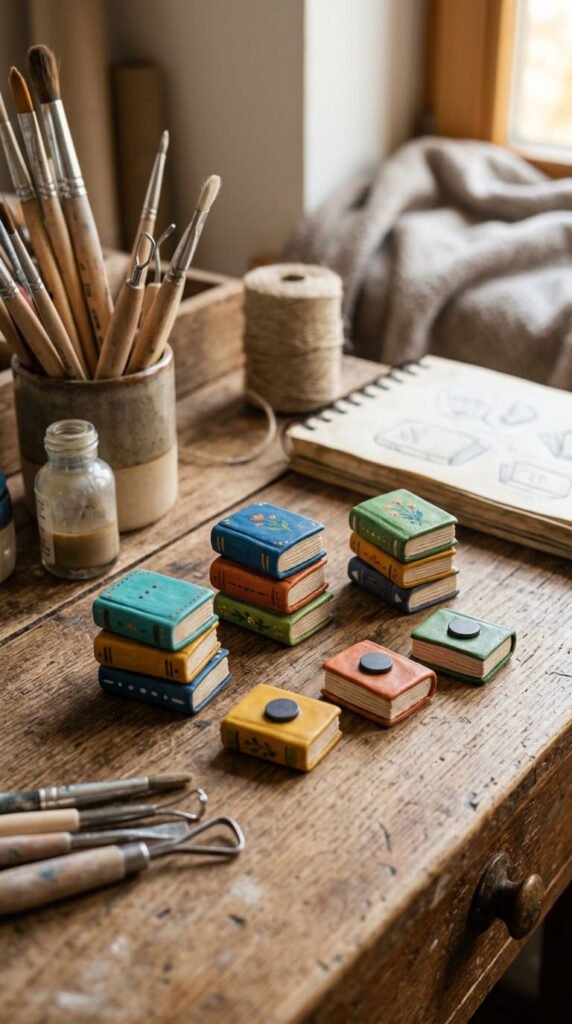
Mini book magnets are great for readers, teachers, students, and journal lovers. Start with a small rectangle of clay. Round the corners a little. Add shallow lines along one side to show pages.
You do not have to write anything on the cover. Use color, borders, dots, flowers, or simple shapes instead. This keeps the image clean and easy to paint.
Paint the cover red, navy, green, purple, or pink. Paint the page side cream or light beige. Add a thin darker line near the spine for depth. A toothpick works well for tiny page marks.
These magnets are perfect for classroom boards, study spaces, reading corners, and book club favors. Make a stack of three tiny books by layering thin rectangles before drying.
Keep the mini books flat and light. A thick book may slide down the fridge. Add one strong magnet to the back center. Let the glue dry fully before using it.
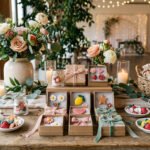
21. Handmade Gift Set Clay Magnets
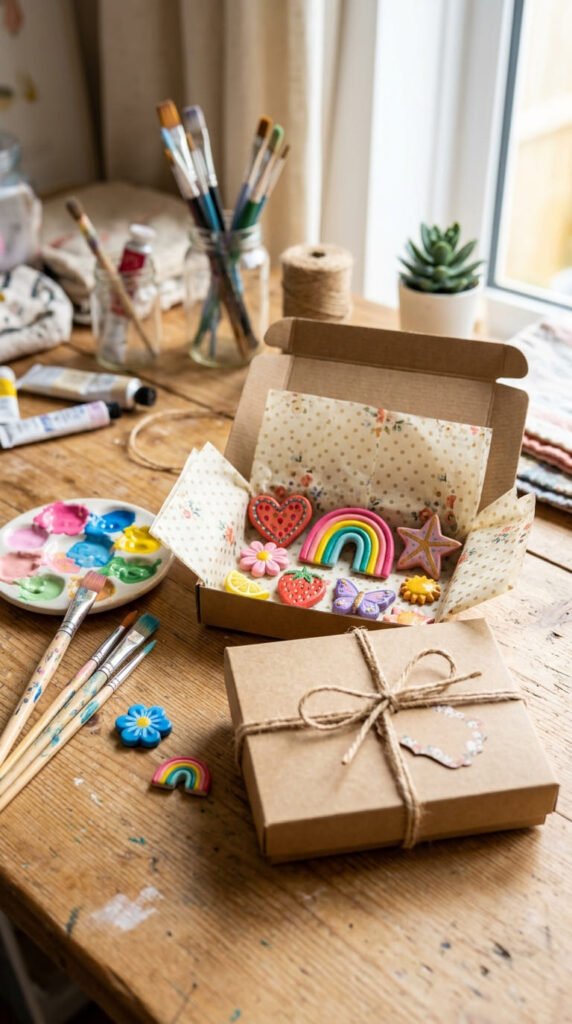
A handmade gift set is the easiest way to turn practice pieces into something special. Choose three to six small magnets that match by color or theme. For example, make a fruit set, flower set, breakfast set, or pastel sky set.
A gift set does not have to be perfect. Matching colors can make simple shapes feel planned. Use the same paint finish on every piece, such as matte or glossy, so the set looks neat.
For cheap packaging, use a small kraft box, tissue paper, or a folded cardstock backing. Place the magnets on a metal lid first to test the hold. Then pack them safely so they do not bump together.
Gift sets are great for birthdays, teacher gifts, craft fairs, party favors, and holiday baskets. They also help beginners practice without wasting clay.
Make one small batch first. Three to five magnets are enough for a starter gift. Once you feel confident, repeat the theme in more colors and shapes.
Conclusion
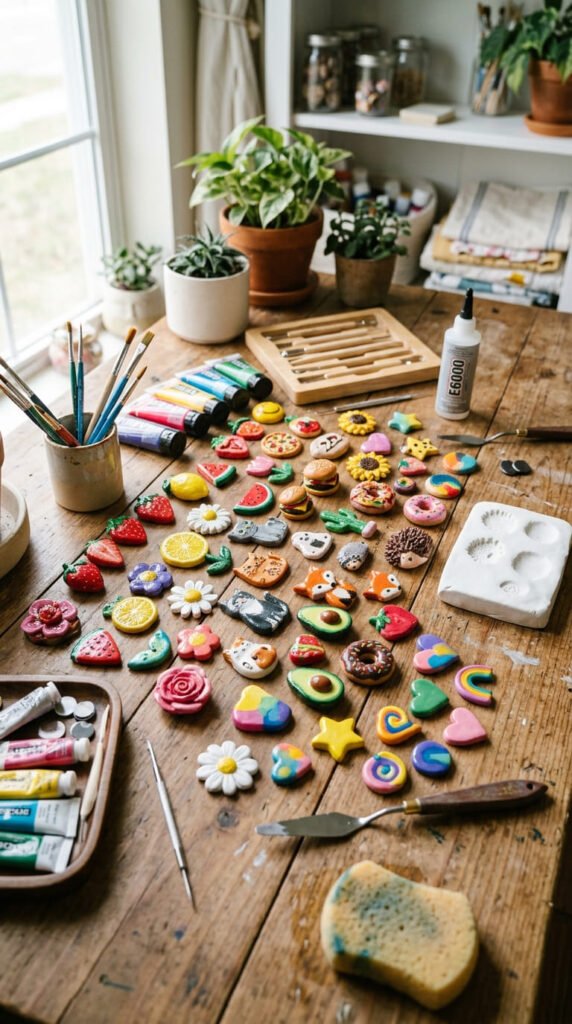
Clay magnets are small, affordable, and perfect for beginners who want pretty results without hard sculpting. Start with flat shapes, simple themes, and a few colors. Fruit slices, flowers, rainbows, hearts, clouds, tiny food, and animal faces all work well because they rely on basic forms. Pick one idea, make a small batch, let everything dry fully, paint with care, and attach strong magnet backs. By the end, you will have handmade pieces that brighten a fridge, decorate a board, or turn into sweet little gifts.