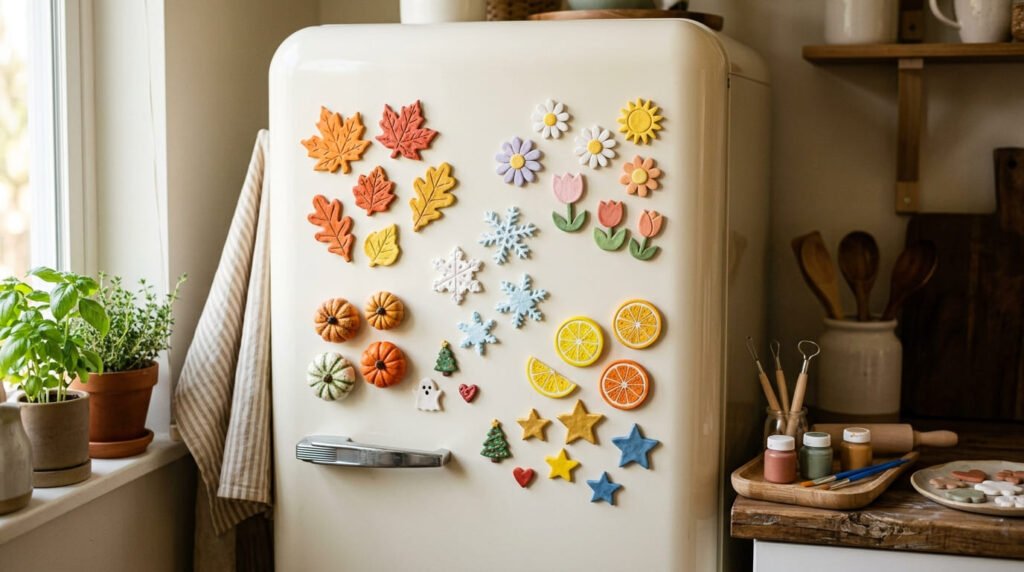
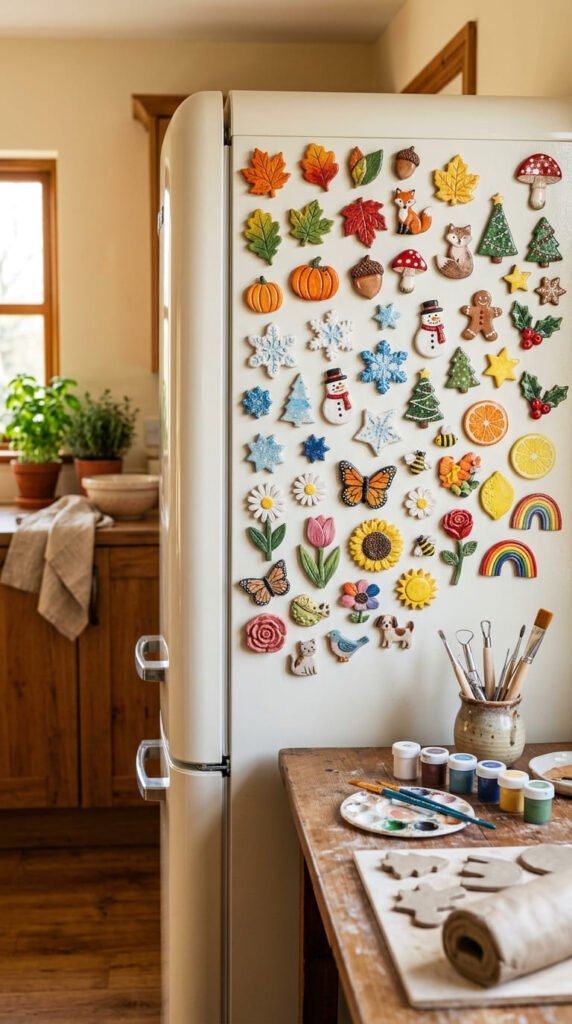
Seasonal clay magnets are one of the easiest ways to change your fridge decor without buying new home accessories every month. A small pack of air-dry clay or polymer clay can become autumn leaves, winter snowflakes, spring flowers, summer fruit, Halloween ghosts, Thanksgiving pumpkins, and Christmas ornaments. These DIY fridge magnets are affordable, beginner-friendly, and fun to make in sets. You can rotate them by season, gift them in tiny boxes, or use them as table favors for holidays and family gatherings. With simple shapes, soft paint colors, strong magnets, glue, and a clear sealer, your fridge can feel cozy all year long.
1. Autumn Leaf Clay Magnets
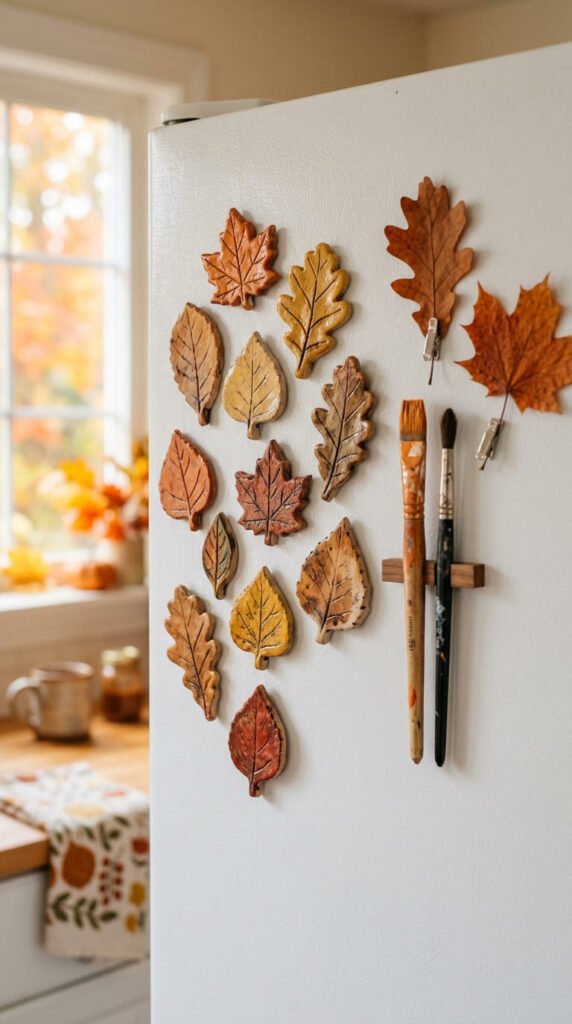
Autumn leaf magnets are a classic fall craft because the shape is simple and the colors do most of the work. Roll air-dry clay into a thin sheet, then cut leaf shapes with a cutter, paper template, or real leaf guide.
Use a toothpick to draw one center vein and small side veins. Keep the lines light so the clay does not tear.
Paint the leaves in burnt orange, mustard yellow, deep red, brown, and olive green. Add a little darker paint along the edges for a dried-leaf effect.
This is a budget-friendly project because each leaf uses very little clay. You can make a full fridge set from one small pack.
Let the leaves dry flat. Flip them gently so both sides dry well. Once dry, seal the front with matte or gloss varnish.
Glue magnets to the back. Use stronger magnets for larger leaves.
These look beautiful from September through Thanksgiving and also work as cozy table favors.
2. Mini Pumpkin Clay Magnets
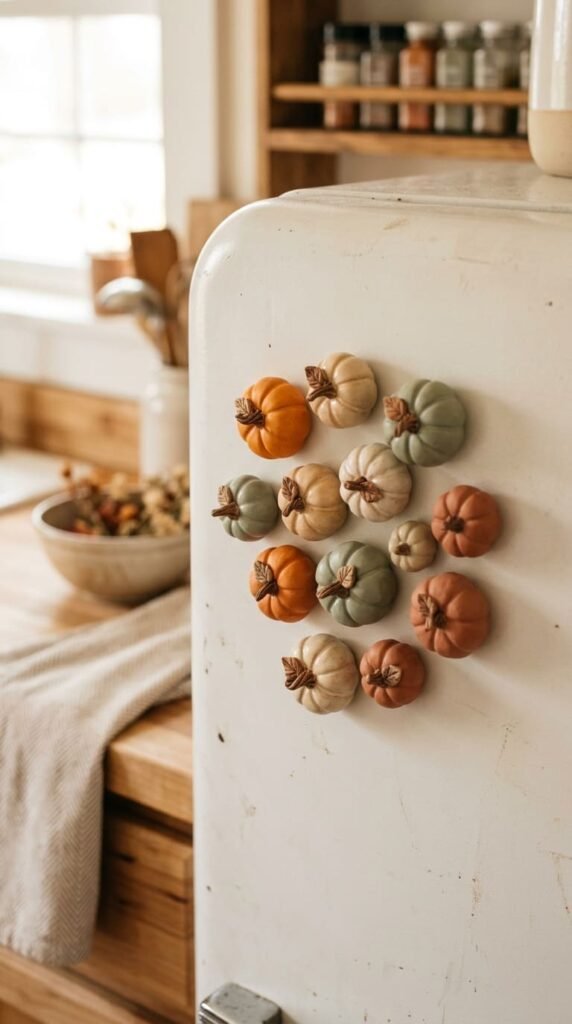
Mini pumpkin magnets are perfect for fall, Halloween, and Thanksgiving. They are also easy to make in batches for parties or family craft nights.
Roll a small clay ball and flatten it slightly. Use a toothpick or skewer to press curved lines from top to bottom. These grooves create the pumpkin shape.
Add a tiny brown stem on top. You can also add a small green leaf for extra detail.
Classic orange works well, but cream, sage, terracotta, and muted yellow look more grown-up. Use the colors that match your kitchen or fall table decor.
For a cheap method, make all pumpkins from white clay and paint them after drying. One paint set can create many shades.
Keep the back flat before the clay hardens. Pumpkins can get bulky, so avoid making them too thick.
After drying or baking, add soft brown shading in the grooves. Seal with satin varnish. Glue a magnet on the back and let it dry fully.
3. Cozy Acorn Clay Magnets
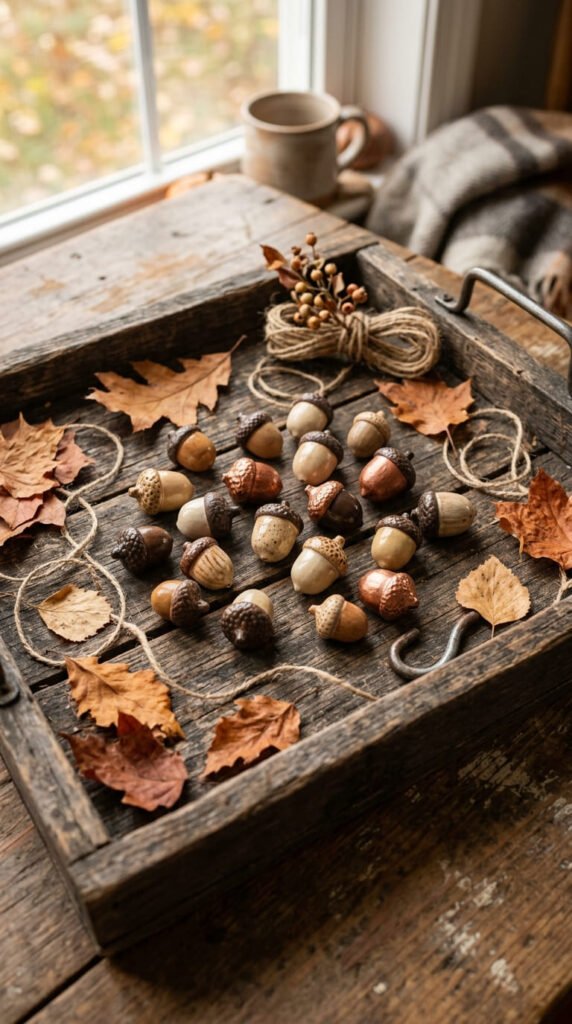
Acorn magnets are small, cute, and perfect for fall fridge decor. They pair well with leaves, pumpkins, mushrooms, and woodland animals.
Shape the bottom from tan clay into a small oval. Add a rounded brown cap on top. Use a toothpick to add tiny lines or dots to the cap.
Keep the shape flat on the back. A slightly rounded front with a flat back works best for fridge magnets.
For a high-end seasonal look, paint the acorns in tan, chocolate brown, cream, copper, and muted gold. Add a small touch of metallic paint on the cap if you want a warm holiday feel.
This idea is great for clay scraps. You only use tiny pieces, so it is low-cost and quick to repeat.
Make sets of three acorns for each fridge corner or gift pouch. They also make sweet Thanksgiving place-setting favors.
Seal with satin varnish. Add a small magnet to the back once everything is dry. Let the glue set before using them.
4. Friendly Ghost Clay Magnets
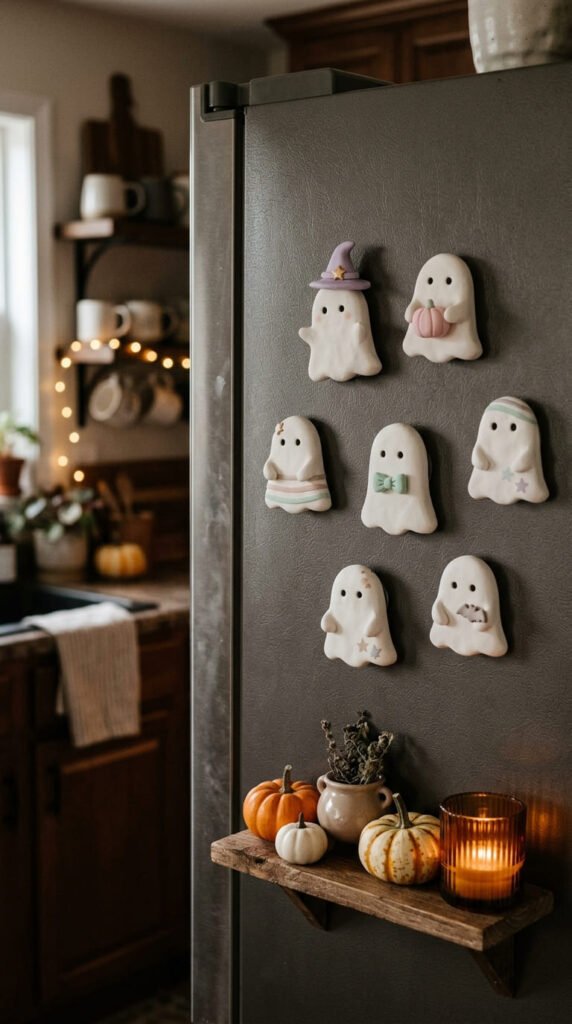
Friendly ghost magnets are a fun Halloween craft that still feels cute enough for family decor. Start with a small white clay oval and stretch the bottom into a wavy shape.
Use your fingers to round the top. Add two tiny black dots for eyes with paint or black clay.
Keep the design simple. A clean white ghost with soft edges looks better than one with too many details.
For a playful set, add tiny accessories like a bow, pumpkin, star, or witch hat. Use small clay scraps so the project stays affordable.
Air-dry clay works well here because ghosts are flat and easy to shape. Let them dry on parchment paper, then paint any details.
If you want a glossy candy-like look, add gloss sealer. For a softer decor style, use matte varnish.
Glue a magnet to the back after drying. These ghost magnets look great with pumpkins, bats, and moons for a simple Halloween fridge set.
5. Little Bat Clay Magnets
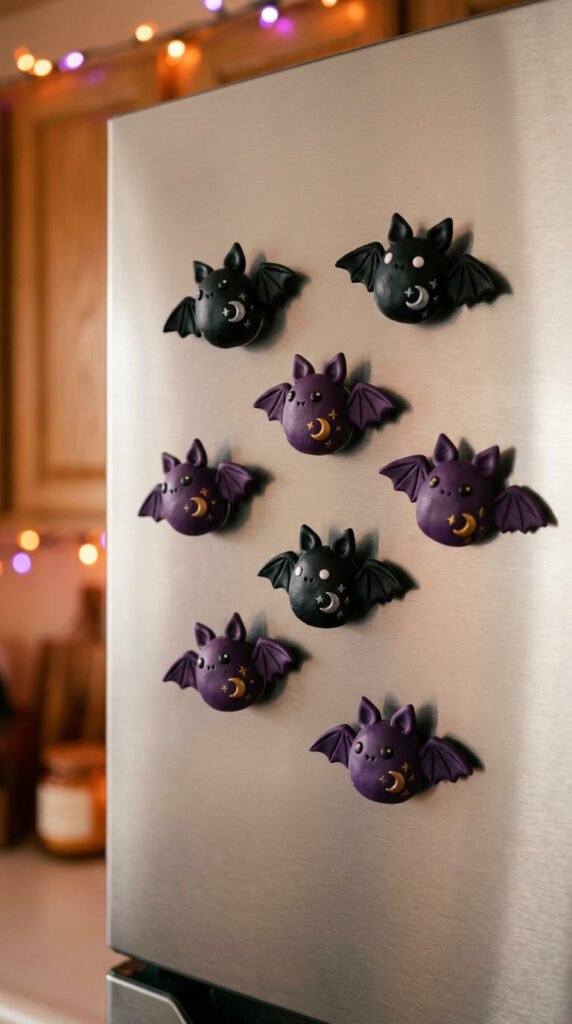
Bat magnets are great for Halloween without taking much time or clay. Start with a small black or dark gray oval for the body. Add two triangle ears and two wing shapes on each side.
If cutting wings feels tricky, draw a bat wing on paper first. Use it as a template over rolled clay. Cut with a craft knife or small blade.
Keep the wings thin but not fragile. If they are too thin, they may bend or snap.
Paint the bats black, charcoal, deep purple, or midnight blue. Add tiny white eyes or leave the face plain for a cleaner look.
For budget crafting, make several bats from one rolled clay sheet. Batch-cut all wings together so the set looks consistent.
Press the back flat before curing. Bat wings can lift, so dry them under a very light flat surface if needed.
Seal with matte varnish. A matte finish works well for Halloween shapes. Attach magnets with strong glue and pair them with moons or stars.
6. Thanksgiving Turkey Clay Magnets
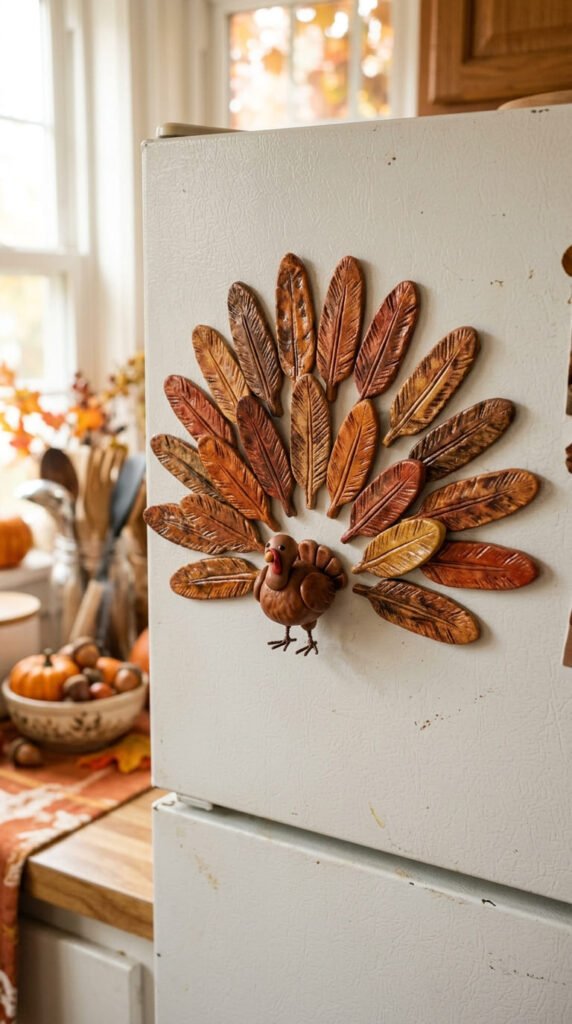
Turkey magnets make fun Thanksgiving fridge decor and can also work as take-home table favors. You can keep the design very simple.
Make a small brown oval for the body. Add a round head on top. For feathers, cut teardrop shapes from clay and place them behind the body.
Use fall colors like orange, red, mustard, tan, and brown. The colorful feathers make the turkey easy to recognize.
For a low-cost version, make the whole turkey from white air-dry clay and paint each part after drying. This saves money on colored clay.
Use a toothpick to add feather lines. Add small black eyes with paint. A tiny orange triangle can become the beak.
Keep the turkey small and flat. Large layered feathers may become heavy.
Seal the front with satin varnish. Attach one or two magnets to the back, depending on the size.
These are cute for Thanksgiving fridge decor, kids’ craft tables, or family dinner place settings that guests can take home.
7. Pumpkin Pie Slice Magnets
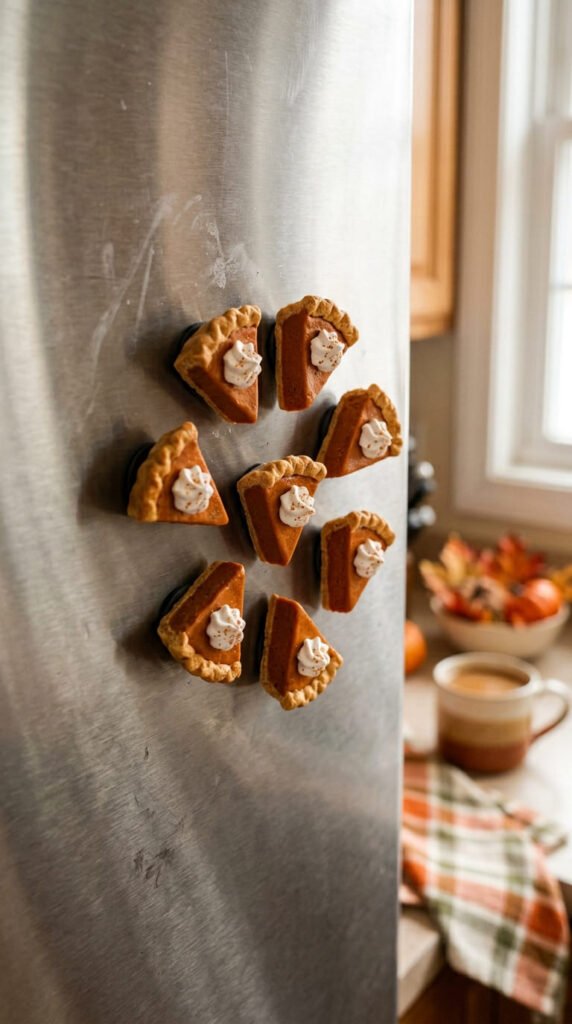
Pumpkin pie slice magnets feel cozy and perfect for autumn kitchens. Start with a small triangle of orange-brown clay for the filling.
Add a tan strip around the back edge for crust. Use a toothpick to make tiny crust marks. A small cream-colored clay swirl on top can look like whipped cream.
This design is small, so it uses very little clay. You can make a batch for Thanksgiving, fall birthdays, or holiday gift sets.
For a realistic finish, paint the crust with soft brown shading. Add a satin seal to the pie and a little gloss on the whipped cream.
If you only have white clay, shape the full slice first and paint the colors after drying.
Keep the back flat. Pie slices are naturally good for magnets because the shape can stay thin.
Package two pie magnets with tiny pumpkin magnets for a fall kitchen set. They also look cute near recipe cards on the fridge during baking season.
8. Winter Snowflake Clay Magnets
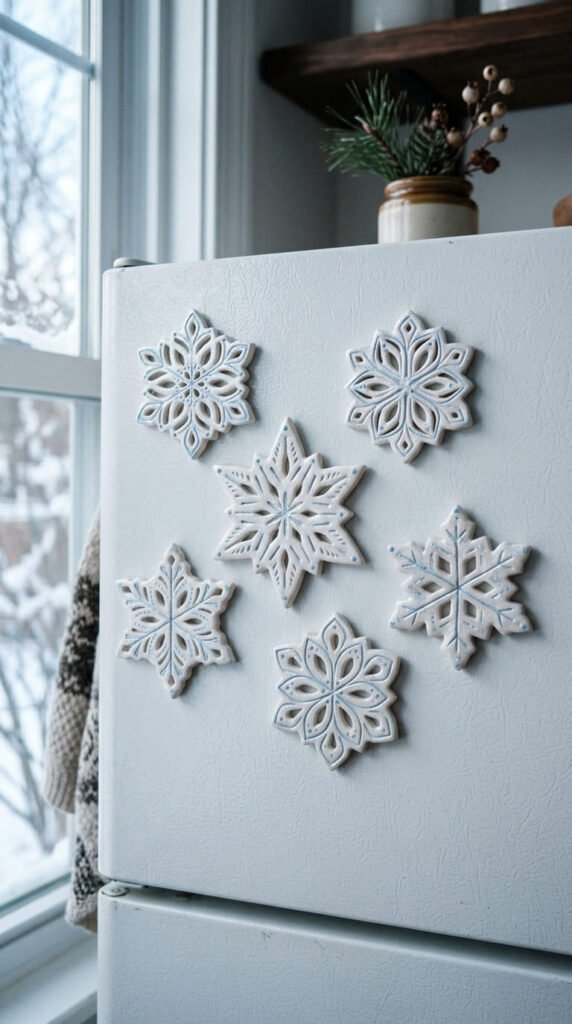
Snowflake magnets bring a soft winter feel to your fridge without heavy holiday colors. Roll white clay flat and cut snowflake shapes with a cutter.
If you do not have a snowflake cutter, make simple star shapes and add small branch lines with a toothpick. The design will still feel wintery.
Keep the clay thin enough to look delicate, but thick enough to hold its shape. Very thin points can break, so round the edges slightly.
Paint snowflakes white, pearl, silver, pale blue, or icy gray. Add a shimmer finish if you like a frosty look.
For a budget-friendly set, cut several snowflakes from one clay sheet. Use leftover clay to make mini dots or stars.
Let the pieces dry flat. Snowflakes can curl, so flip them gently during drying.
Seal with gloss or satin varnish. Add magnets to the flat backs.
These look lovely through December, January, and February. Pair them with mittens, mugs, and tiny trees for a winter fridge collection.
9. Cozy Mitten Clay Magnets
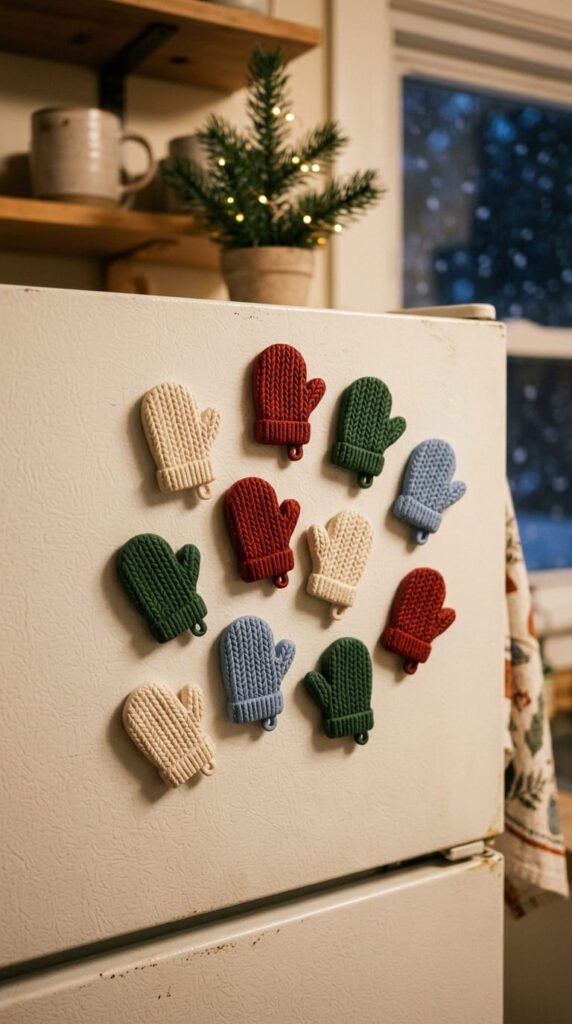
Mitten magnets are sweet for winter decor and handmade gift sets. They are also simple enough for beginners.
Roll clay flat and cut mitten shapes using a paper template. Make the thumb round and the cuff slightly wider.
Add texture with a toothpick, fork, or fabric press. Light lines can make the surface look like knit fabric.
Paint the mittens in cream, red, forest green, soft blue, or dusty pink. Add tiny dots or stripes near the cuff for detail.
This project works well in pairs. Make a left and right mitten for each set. Tie the visual set together by using matching colors.
For low-cost crafting, use one base clay and paint the designs later. You can make many mittens from one rolled sheet.
Keep the backs flat. Add magnets after the pieces dry or bake.
Seal with matte varnish for a soft fabric-style look. These magnets are perfect for winter fridge decor, teacher gifts, or stocking stuffer craft sets.
10. Christmas Tree Clay Magnets
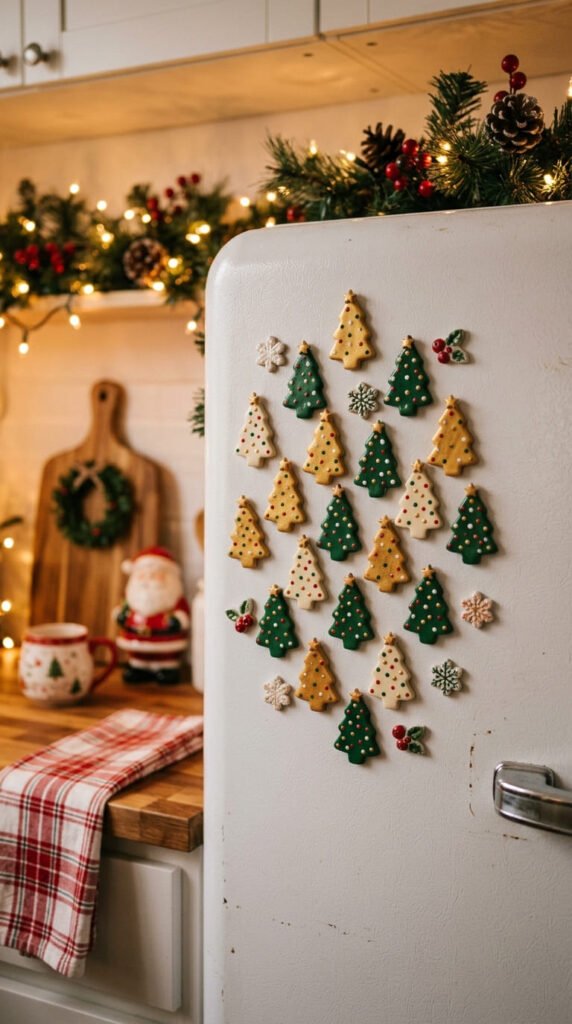
Christmas tree magnets are a holiday favorite because the shape is easy and instantly festive. Cut a triangle from green clay or shape one by hand.
Add a tiny brown trunk at the bottom and a small star on top. Use clay dots for ornaments or paint them after drying.
Keep the tree flat so the magnet holds well. A thick 3D tree may look cute, but it can slide if the magnet is weak.
Paint in classic green, deep forest, ivory, or even soft pink for a modern holiday style. Add gold dots or white snow details if you want a more decorated look.
This is a great batch craft. Cut many triangles at once, then decorate each tree in a different color style.
Seal with satin or gloss varnish. Gloss makes ornaments shine. Matte gives a softer handmade look.
Attach a magnet to the back once dry. These Christmas tree magnets work well as gifts, table favors, or seasonal fridge decor.
11. Gingerbread House Clay Magnets
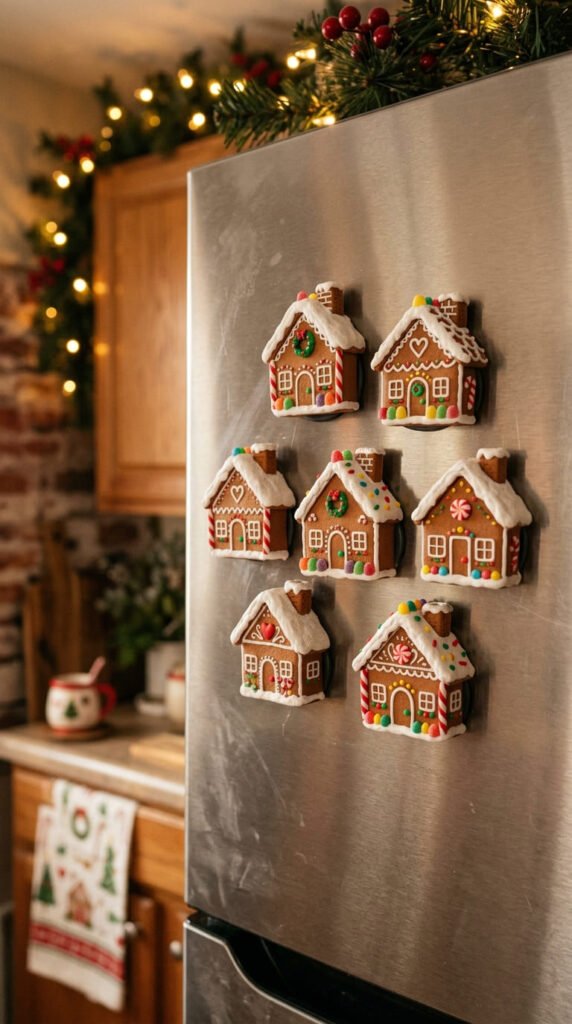
Gingerbread house magnets look detailed, but you can simplify the shape. Cut a small square for the house and add a triangle roof on top.
Use brown clay for the base or paint white clay after drying. Add white icing lines with paint or thin clay strips.
Small dots can become candy. Use red, green, pink, and white for a holiday look. Keep the decorations flat so the magnet does not get too heavy.
For batch-making, cut all house bases first. Then add roof pieces and decorate in groups. This keeps the project organized.
A toothpick helps with tiny windows, roof lines, and door marks. Since the image should have no words, keep all details visual.
Seal with satin varnish. Add gloss only on candy dots if you want them to shine.
Glue a magnet to the flat back. These look adorable on a fridge in December and also make sweet handmade gifts for neighbors or friends.
12. Candy Cane Clay Magnets
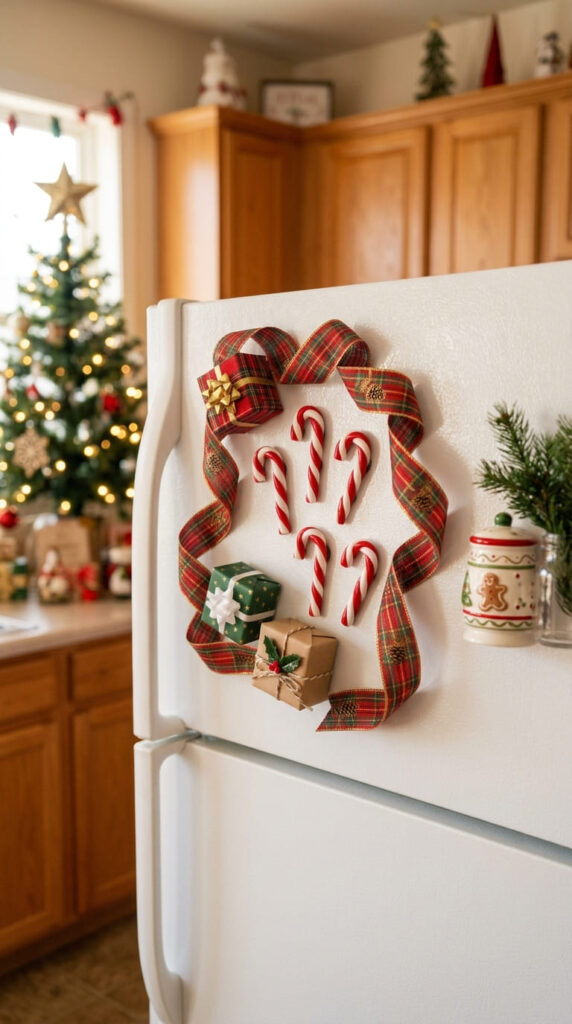
Candy cane magnets are simple, cheerful, and perfect for Christmas craft sets. Roll one thin rope of white clay and one thin rope of red clay.
Twist them together gently. Roll the twist lightly so it becomes smooth. Bend the top into a hook shape.
Keep the candy cane small and not too thick. Thin pieces look cute but can break, so aim for a balanced size.
If twisting clay feels hard, make a white candy cane first and paint red stripes after it dries. That method is easier for kids.
Seal with gloss varnish for a candy-like finish. Let it dry fully before adding the magnet.
Attach the magnet along the longest flat area on the back. If the candy cane is curved, use a small magnet near the center.
Make sets of three and package them in small gift boxes. These magnets are low-cost, fast to repeat, and perfect for holiday fridge decor or Christmas favor bags.
13. Valentine Heart Clay Magnets
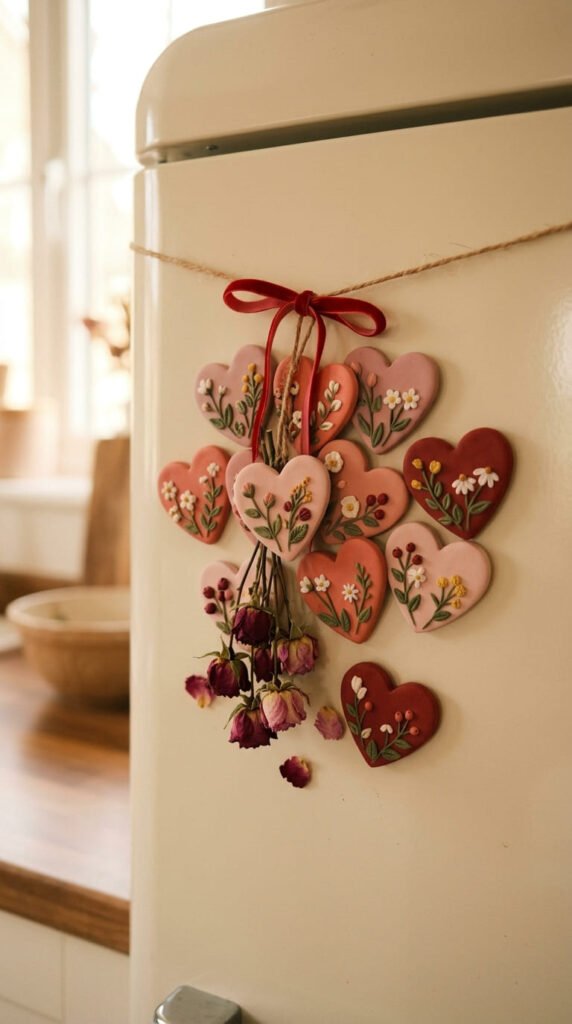
Valentine heart magnets are easy to make and lovely for February decor. Roll clay flat and cut heart shapes with a cutter or by hand.
For a simple handmade look, keep the hearts plain and paint them in blush, red, cream, berry, or dusty pink. Add small dots, flowers, or tiny clay bows.
You can also press lace into the clay before cutting. This creates a pretty texture without extra tools.
For budget-friendly gifts, make a full set from white air-dry clay and paint every heart later. Add gold edging to a few pieces for a more polished finish.
Keep the back flat before drying. Hearts are usually light, so one magnet works well.
Seal with satin varnish for a soft look, or gloss if you want bright color.
These magnets are sweet for Valentine gifts, classroom treats, bridal showers, and romantic fridge decor. Package two or three together in a tiny paper sleeve or pouch.
14. Shamrock Clay Magnets
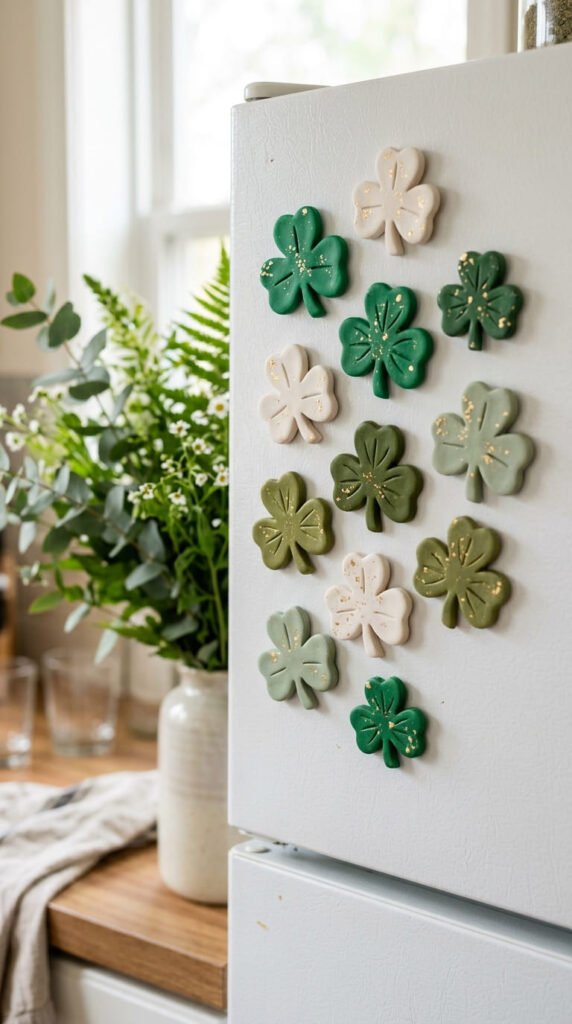
Shamrock magnets are a fun seasonal option for March and spring decor. They are also easy to shape without a cutter.
Make three or four tiny heart shapes from green clay. Press their points together in the center. Add a small stem at the bottom.
Use bright green for a playful style, or sage and cream for a softer decor look. Add a tiny gold dot in the middle if you want a festive touch.
If hand-shaping hearts feels tricky, cut small circles and pinch them into heart-like petals.
This project is great for using green clay scraps. Make a set of small shamrocks and pair them with rainbows or gold coin-style circles.
Keep the design flat. Raised layers can get heavy, so press the back gently before drying.
Seal with satin varnish. Add magnets to the backs once dry.
These clay magnets are nice for classroom crafts, family kitchens, seasonal displays, and small March gift bags.
15. Pastel Easter Egg Magnets
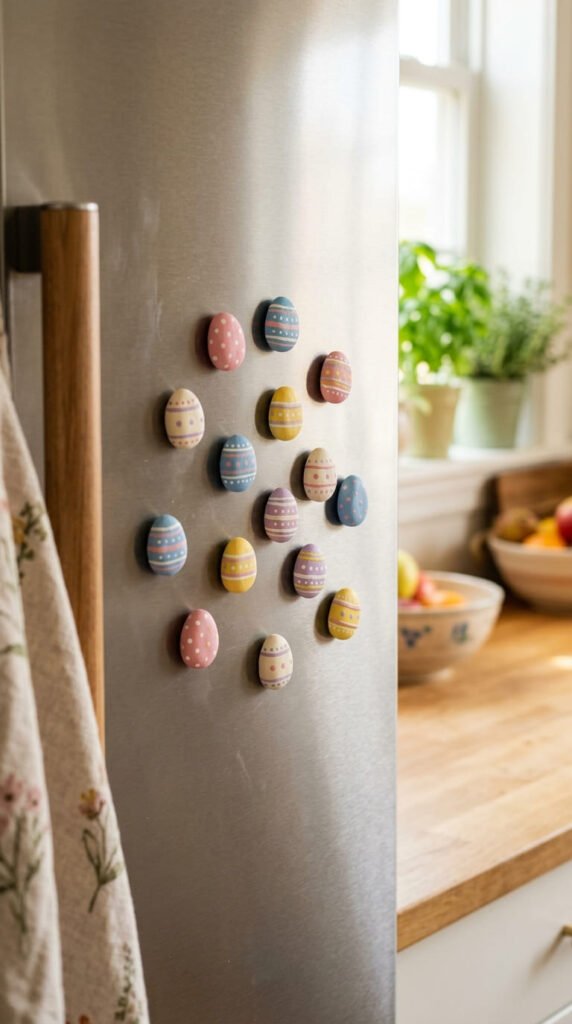
Pastel Easter egg magnets are colorful, simple, and fun for spring. Roll clay flat and cut oval egg shapes. You can use a cutter, paper template, or shape them by hand.
Paint the eggs in pastel pink, yellow, blue, mint, lavender, and cream. Add dots, stripes, waves, or tiny flowers.
Keep the patterns simple. A few clean details look better than crowded designs.
For kids, use air-dry clay and washable acrylic paint. For a smoother adult craft, use polymer clay and a satin sealer.
This is a great batch project because every egg starts with the same oval shape. Change only the colors and patterns.
Let the pieces dry flat so they do not curl. Add a magnet to the back after sealing.
Package three small egg magnets in a pouch for Easter baskets, spring party favors, or teacher gifts.
They also brighten up a fridge after winter and pair beautifully with bunny, flower, and carrot magnets.
16. Spring Bunny Clay Magnets
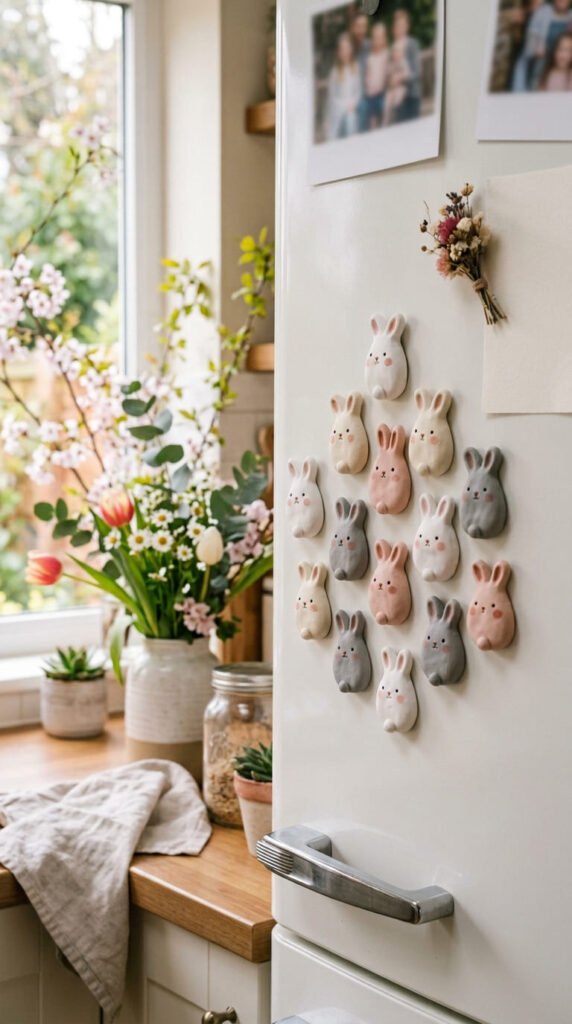
Spring bunny magnets are cute for Easter, baby showers, and nursery-style fridge decor. They start with simple round shapes.
Make a small oval for the face or body. Add two long clay ears at the top. Press the back flat before drying.
Use white, cream, blush, or soft gray clay. Add tiny black eyes with paint and a small pink nose. You can leave the face very simple for a clean look.
For extra seasonal detail, add a tiny bow, flower, or carrot. Keep add-ons small so the magnet stays light.
This project is affordable because each bunny uses only a little clay. Make a batch in one sitting and paint details the next day.
Seal with satin varnish. Gloss can work on the eyes and nose, but the body usually looks better with a soft finish.
Attach the magnet to the back after the sealer dries.
These magnets look sweet with pastel eggs, flowers, and carrot shapes for a full spring fridge set.
17. Spring Flower Clay Magnets
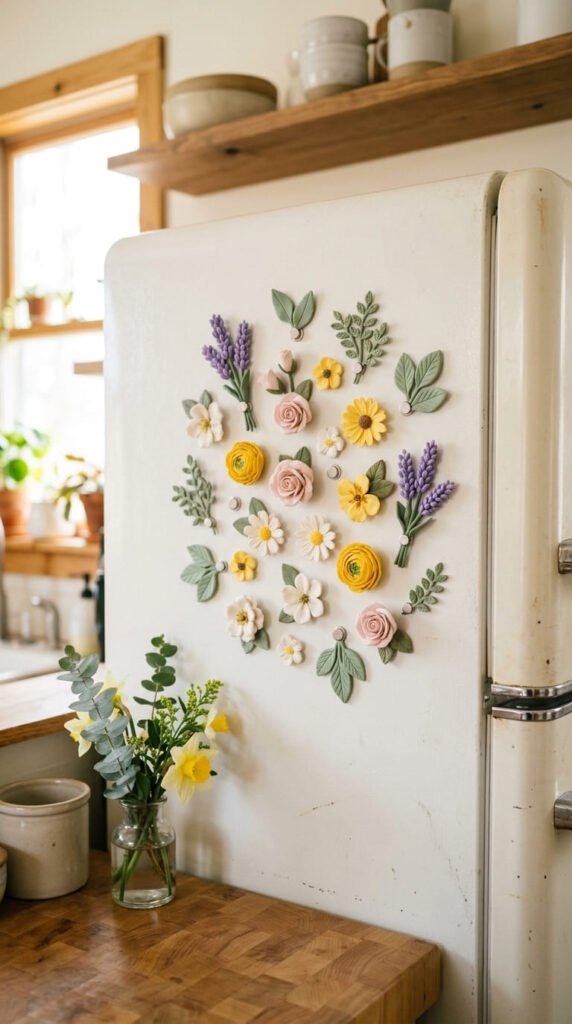
Spring flower magnets are a lovely way to refresh your fridge after colder months. Daisies, tulips, tiny roses, and simple five-petal flowers all work well.
For a beginner flower, roll five small clay balls and pinch them into petals. Arrange them around a small center. Press gently so everything connects.
Add one light line down each petal with a toothpick. This gives the flower shape without adding difficulty.
Paint in lavender, blush, ivory, yellow, peach, and sage. Soft color groups make the set feel more like decor.
For a budget-friendly batch, use one clay color and paint every flower later. This also helps you match your kitchen colors.
Keep flowers small and flat. Large raised petals may become too heavy for the magnet.
Seal with satin varnish. Add magnets to the backs after curing.
These flowers look great on their own or paired with butterflies, bunnies, and pastel eggs. They also make beautiful handmade spring gifts.
18. Summer Strawberry Clay Magnets
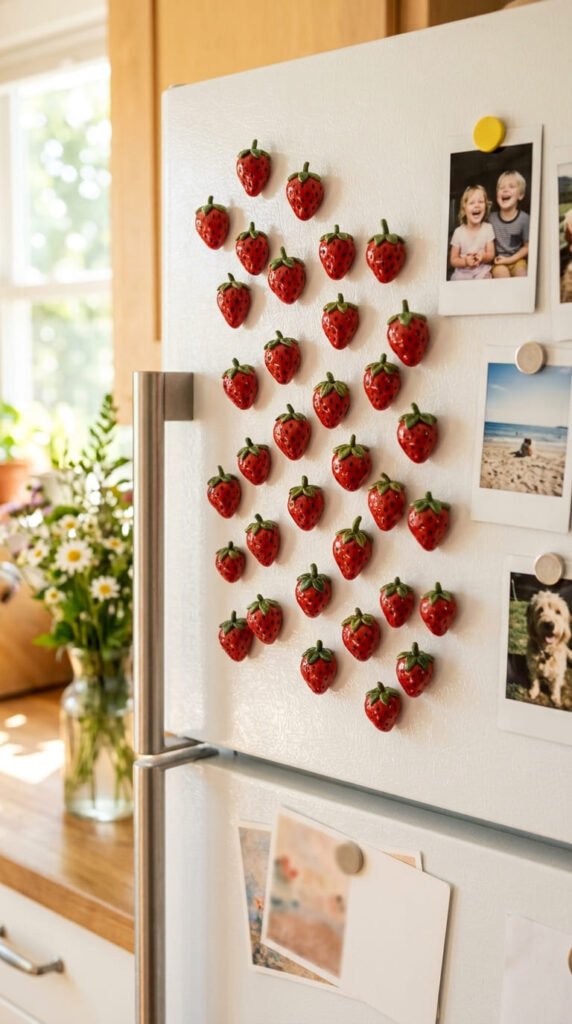
Strawberry magnets are perfect for summer fridge decor. They are small, bright, and easy to shape.
Roll red clay into a teardrop or heart shape. Add tiny seed marks with a toothpick. Place small green leaf pieces on top.
If you only have white air-dry clay, shape the strawberries first and paint them red after drying. Add seeds with yellow or white paint dots.
This craft uses tiny bits of clay, so it is perfect for scraps. Make strawberries in several sizes for a fruit basket look.
Gloss sealer makes strawberries look juicy. Add it after the paint dries.
Keep the back flat before curing. Use one small magnet for each strawberry.
Pair them with lemon slices, blueberries, watermelon, and popsicles for a summer fridge theme. These also work well as picnic party favors or handmade kitchen gifts.
To save time, make all red bases first, all leaf tops next, then paint seed details in one sitting.
19. Lemon Slice Clay Magnets
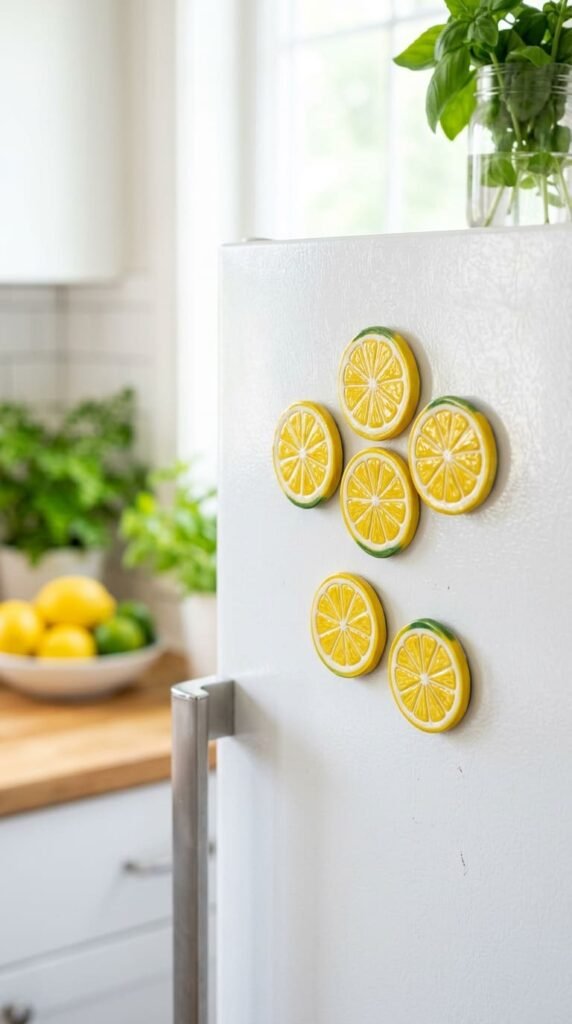
Lemon slice magnets add a bright summer look to any fridge. Start with a small yellow circle or half-circle. Add a thin white rind line around the edge.
Use a toothpick to draw segment lines from the center outward. Keep the lines light and clean.
If you want a cheaper version, cut the slices from white clay and paint them after drying. Yellow, white, and pale orange paint are enough.
Gloss sealer works beautifully on citrus magnets because it gives a juicy finish. Use a small brush and apply a thin coat.
Keep each lemon slice flat on the back. Thin shapes hold well and do not weigh down the magnet.
Make a full citrus set with lemons, oranges, limes, and grapefruit. Change only the paint colors while using the same circle shape.
These magnets are great for summer kitchens, lemonade stands, picnic parties, and handmade gift baskets.
Package three citrus pieces together for a small seasonal gift set.
20. Clay Popsicle Magnets
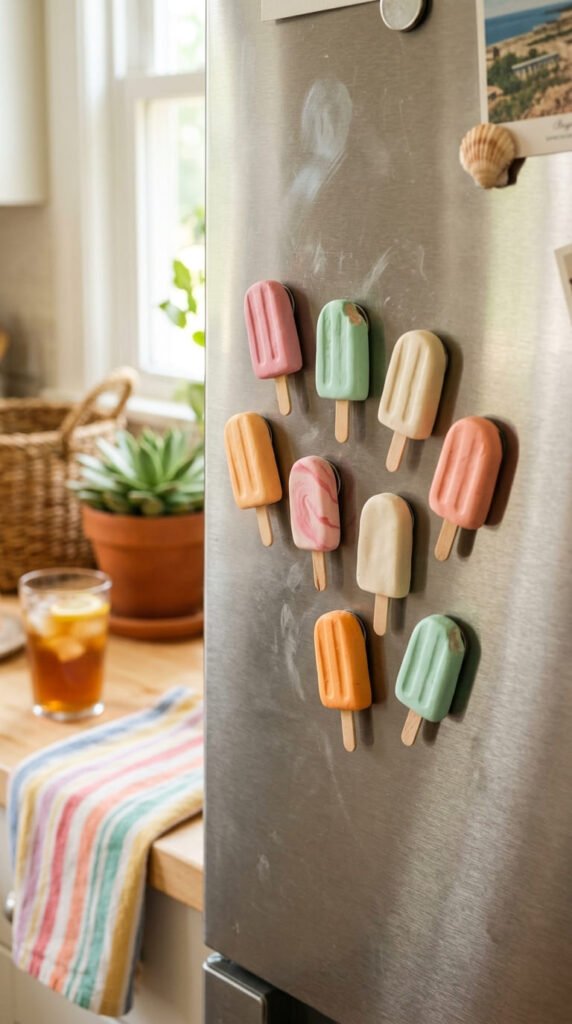
Popsicle magnets are fun for summer, kids’ parties, and bright kitchen decor. They are easy because the main shape is just a rounded rectangle.
Roll clay flat and cut small popsicle shapes. Round the top corners with your finger. Add a tiny tan stick at the bottom.
Paint the popsicles in coral, pink, orange, mint, cream, or berry shades. Add a white drip line or tiny fruit dots for extra detail.
This is a low-cost craft because each piece is small and flat. You can make many from one clay sheet.
For a colorful set, use three or four colors only. Matching colors make the group look more polished.
Seal with gloss varnish for an icy, sweet look. Leave the stick matte or satin so it looks more natural.
Attach magnets after the pieces are fully dry.
These popsicle magnets pair well with fruit slices, sunglasses, shells, and tiny sun shapes for a full summer fridge display.
21. Beach Seashell Clay Magnets
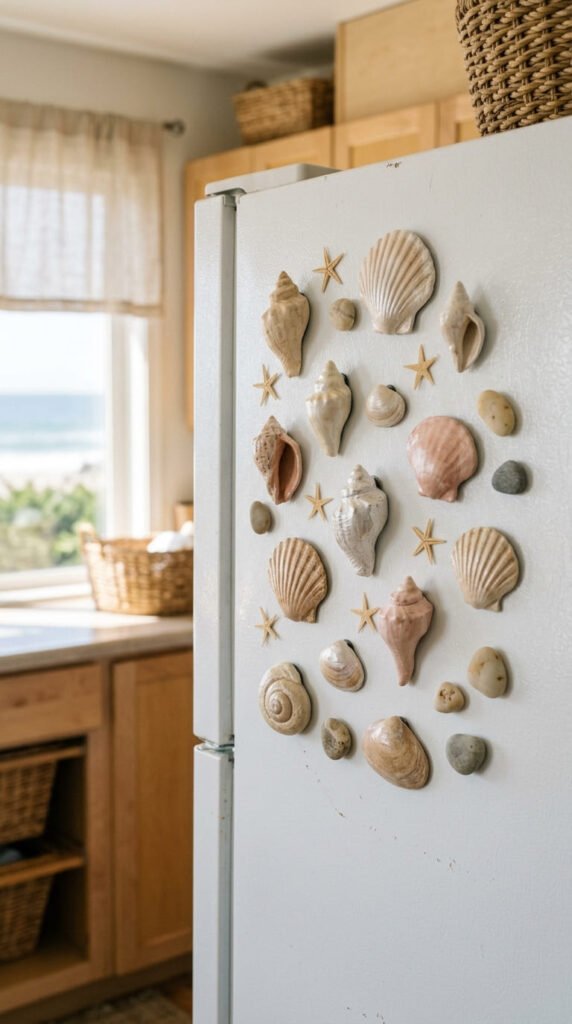
Seashell magnets are perfect for summer, beach homes, vacation memory boards, and coastal kitchen decor. They look elegant when painted in soft shades.
Shape a small fan from clay. Press lines from the base outward with a toothpick to create shell ridges. You can also make spiral shells from rolled clay ropes.
Use ivory, pearl, sand, pale blush, and soft beige paint. Add a tiny shimmer detail if you want a beachy glow.
This project is budget-friendly because shells use simple shapes and small clay amounts. You can make several shell styles from one pack.
Keep the backs flat before drying. Shell ridges can make pieces uneven, so check the back while the clay is soft.
Seal with satin varnish for a soft coastal finish. Gloss also works if you want a polished shell look.
Glue magnets to the backs after curing.
Pair shells with starfish, lemons, popsicles, and tiny suns for a relaxed summer fridge set.
22. Sunflower Clay Magnets
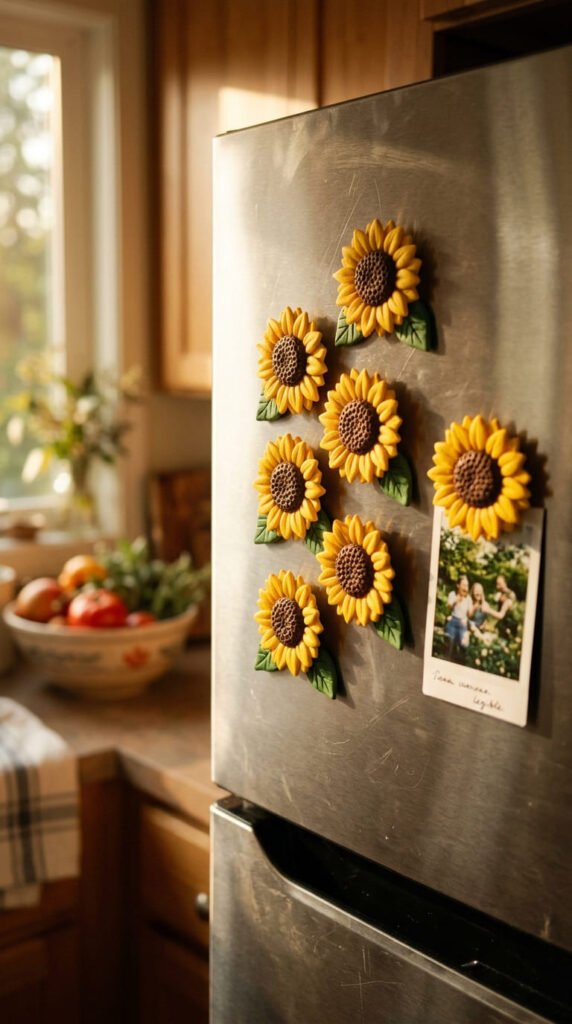
Sunflower magnets are a beautiful bridge between summer and fall. They bring warm color to the fridge without feeling too holiday-specific.
Start with a small brown circle for the center. Add yellow teardrop petals around it. Press each petal gently so it attaches to the center.
Use a toothpick to add dots to the brown center. This gives it a textured seed look.
Add one or two green leaves if you want a fuller design. Keep them small so the magnet stays lightweight.
Paint the petals golden yellow, mustard, or soft orange. Add darker brown shading to the center after curing.
This is a good project for batch-making because the petals use simple repeated shapes. Make all centers first, then add petals to each one.
Seal with satin varnish. Add gloss only to the center if you want a slight shine.
Attach a magnet to the flat back with strong glue. These sunflowers work for late summer, fall kitchens, teacher gifts, and handmade seasonal decor.
Conclusion
Seasonal clay magnets are a simple way to rotate your fridge decor all year without spending much. Start with easy shapes like leaves, pumpkins, ghosts, snowflakes, trees, hearts, eggs, flowers, fruit, shells, and sunflowers. Use air-dry clay for no-bake family crafting or polymer clay for a stronger finish. Paint each set in seasonal colors, seal the surface, and attach strong magnets to flat backs. Make one set for each season, store them in small labeled boxes, and switch your fridge display whenever your home is ready for a cozy new look.