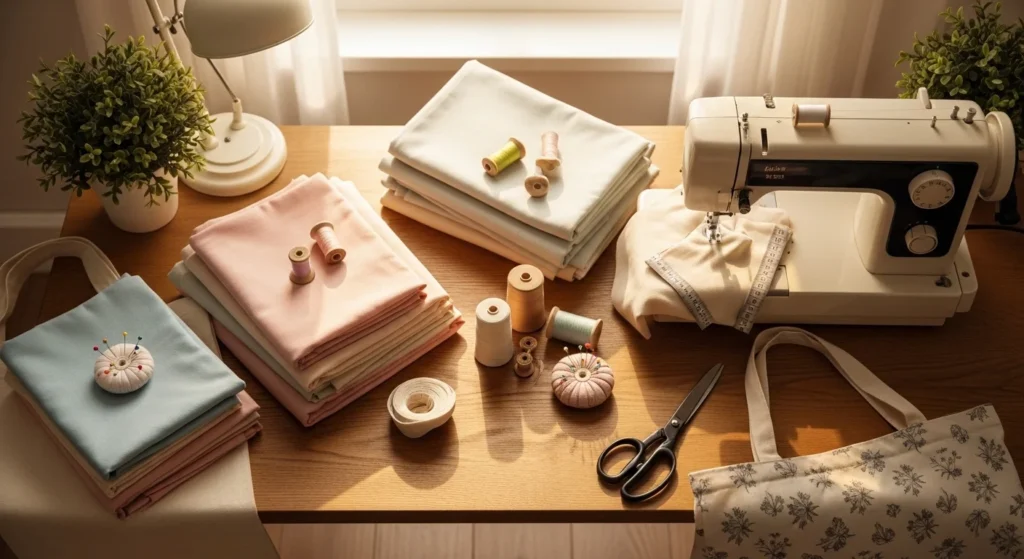
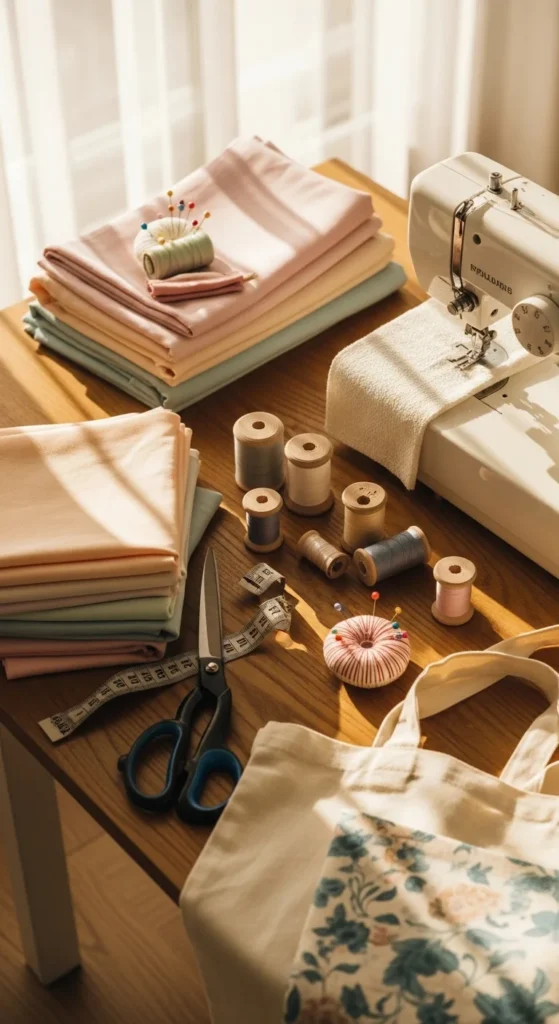
Sewing your own handmade items at home feels rewarding, calming, and surprisingly affordable. You don’t need fancy equipment or years of practice to start. A basic sewing machine, some thread, and scrap fabric can turn into pillows, tote bags, scrunchies, or kids’ toys. These beginner-friendly DIY sewing ideas focus on simple stitches, low-cost materials, and projects you can finish in an afternoon. Whether you want to refresh your home decor, gift something personal, or upcycle old clothes, these 27 ideas give you practical inspiration. Grab your fabric scraps, thread a needle, and get ready to make something useful with your own two hands.
1. No-Fuss Fabric Tote Bag
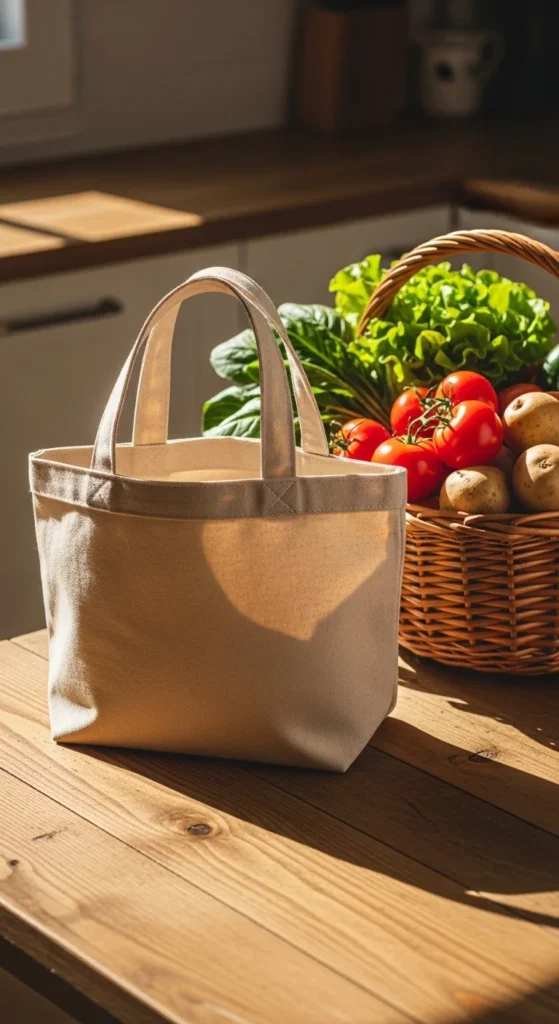
A simple tote bag is the perfect first sewing project. You only need two rectangles of sturdy cotton fabric and two strips for the handles. Cut your main fabric to about 15 by 17 inches. Sew the sides and bottom together with straight stitches.
Flip it inside out for a clean finish. Attach the handles to the top edge using a square stitch pattern for strength. Old curtains or thrifted bedsheets work great as fabric sources. Check thrift stores for fabric under three dollars per yard.
You can decorate your tote with iron-on patches or fabric paint. A plain tote also makes a thoughtful gift when filled with homemade goodies. Use leftover scraps to add a small inside pocket for keys.
Beginners often finish this project in under an hour. The straight seams help you practice machine control. Once you feel confident, try adding a button closure or a lining. Totes hold groceries, library books, or beach gear with ease. They replace plastic bags and last for years with basic care.
2. Cozy Throw Pillow Covers
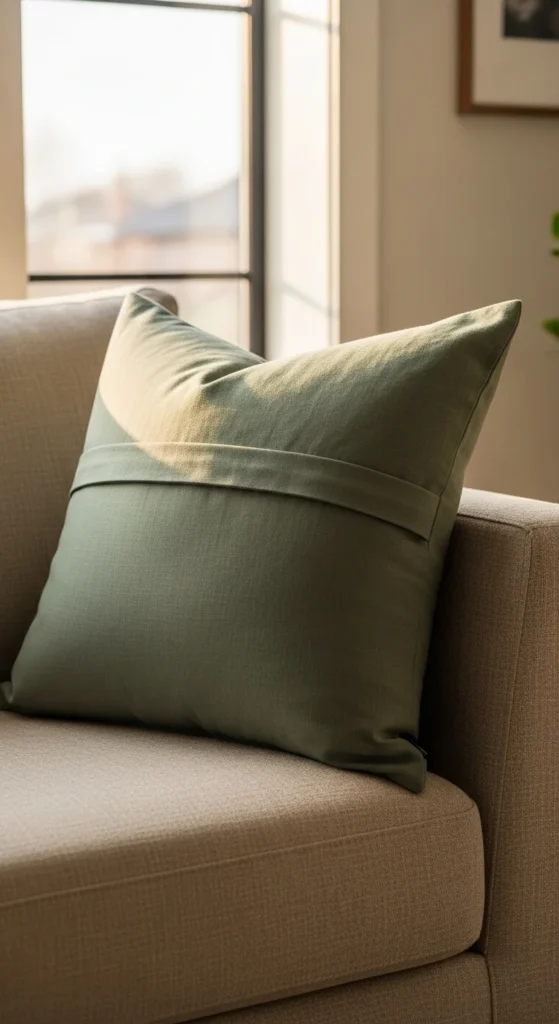
Pillow covers transform any room without major spending. Measure your existing pillow insert, then add an inch on each side for seam allowance. Cut one front piece and two back pieces for an envelope closure.
The envelope back means no zippers needed, which makes this ideal for beginners. Hem the inner edges of the back pieces first. Then layer everything together with right sides facing.
Sew around all four edges with a half-inch seam. Turn it right side out and slip your pillow inside. Linen, cotton canvas, or thrifted denim all work beautifully.
Budget tip: cut up old shirts or pants for free fabric. Mix and match patterns for a patchwork look. You can swap covers seasonally instead of buying new pillows. A set of four covers costs less than ten dollars in materials.
Try adding pom-pom trim or fabric tassels to the corners. Hand-embroider a single letter for a personal touch. Pillow covers also make charming housewarming gifts. The simple shapes build your confidence with straight lines.
3. Stretchy Hair Scrunchies
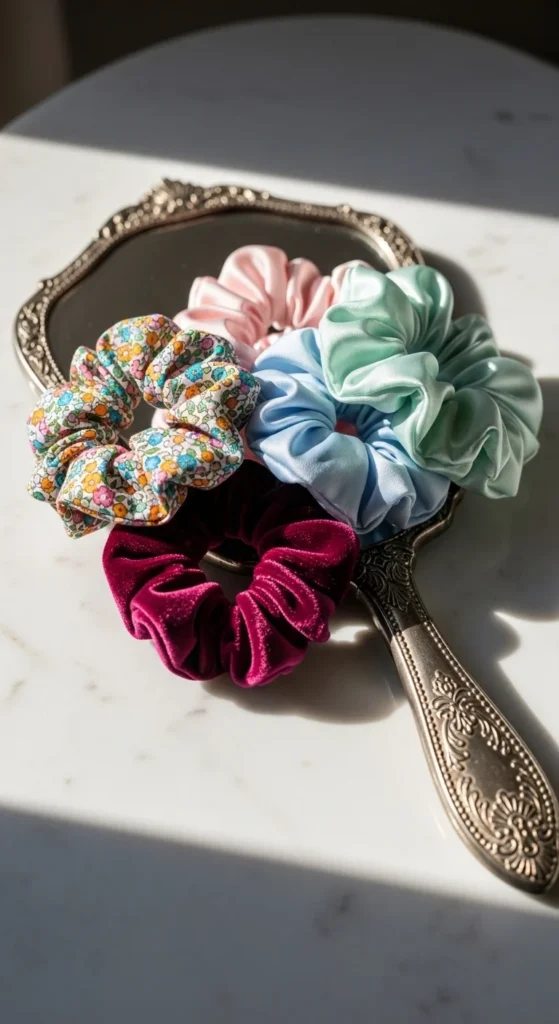
Scrunchies use tiny fabric scraps and take about ten minutes each. Cut a strip of fabric roughly 22 inches long and 4 inches wide. Fold it lengthwise with right sides together and sew along the long edge.
Turn the tube right side out using a safety pin. Thread elastic through the tube, knot the ends, and tuck them inside. Hand-stitch the opening closed.
Cotton, satin, and velvet all give different looks. Satin scrunchies are gentle on hair and reduce breakage overnight. They cost pennies to make compared to store-bought versions.
Use leftover fabric from larger projects. Old silk shirts make luxurious scrunchies for very little money. A single yard of fabric can produce a dozen or more.
Make matching sets for friends or sisters. Pair them with a handwritten note for thoughtful gifting. Kids love picking their own fabric prints. Try novelty cottons with cartoons, fruits, or animals.
This project teaches you how to handle elastic and curved sewing. The forgiving design hides small mistakes. You’ll have a wearable item to show off the same day.
4. Reusable Cloth Napkins
Cloth napkins replace paper ones and add charm to everyday meals. Cut squares of cotton or linen fabric to about 16 inches each. Hem all four edges with a simple double fold.
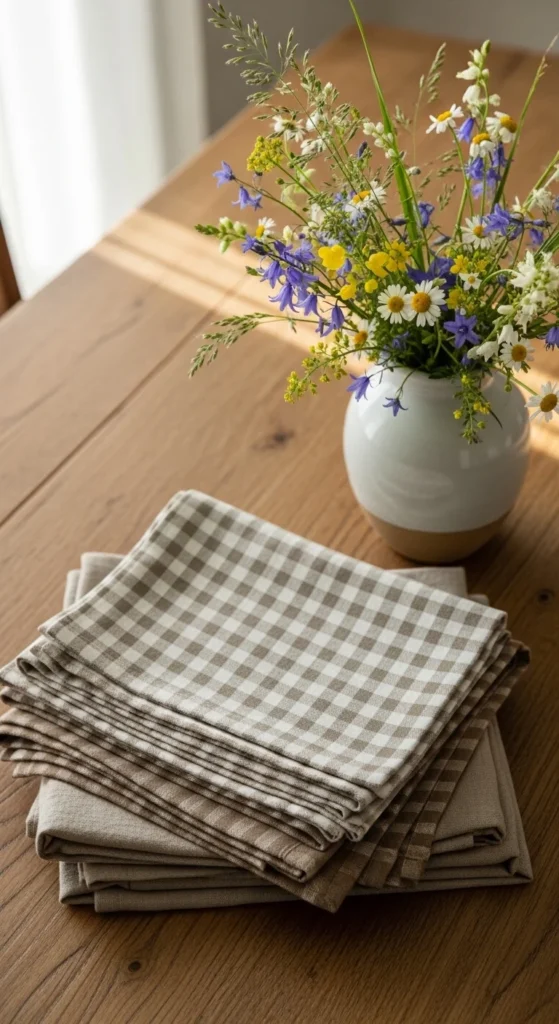
Use a hot iron to press your folds before stitching. This step keeps your edges crisp and professional looking. Sew close to the inner fold for a clean finish.
Thrifted tablecloths or pillowcases give you tons of free fabric. One twin sheet makes around eight large napkins. The total cost stays under five dollars for a full set.
Mix patterns for a relaxed bohemian table setting. Solid colors look elegant for dinner parties. Pair them with napkin rings made from twine or wooden beads.
These last for years with regular washing. They reduce paper waste and feel softer on your skin. Kids enjoy picking their own napkin at meals.
Sewing twelve napkins also gives you tons of straight-stitch practice. The mitered corner technique is worth learning here. It looks fancy but only takes a minute per corner. Roll them up with twine for housewarming gifts.
5. Drawstring Storage Bags

Drawstring bags organize toys, snacks, gifts, or shoes for travel. Cut two rectangles of fabric to your desired size. Fold the top edge down twice to create a casing for the cord.
Sew the casing first, leaving a small opening at each side seam. Then stitch the side and bottom seams together. Thread cotton cord or ribbon through the casing.
Muslin, calico, or old pillowcases all work for this project. The bags cost less than a dollar each in materials. Make them in different sizes for various uses.
Small ones hold jewelry while traveling. Medium sizes work for produce shopping at the market. Large ones store winter blankets or out-of-season clothes.
Stamp them with potato prints or fabric markers for decoration. Tie a wooden tag to the cord with a name or label. They make excellent reusable gift wrap that the recipient keeps.
This project teaches casing construction, a useful skill for waistbands later. The forgiving shape hides any wobbly stitches inside the seams. Make a stack of ten in an afternoon. Friends and family will request them for years.
6. Quilted Coasters
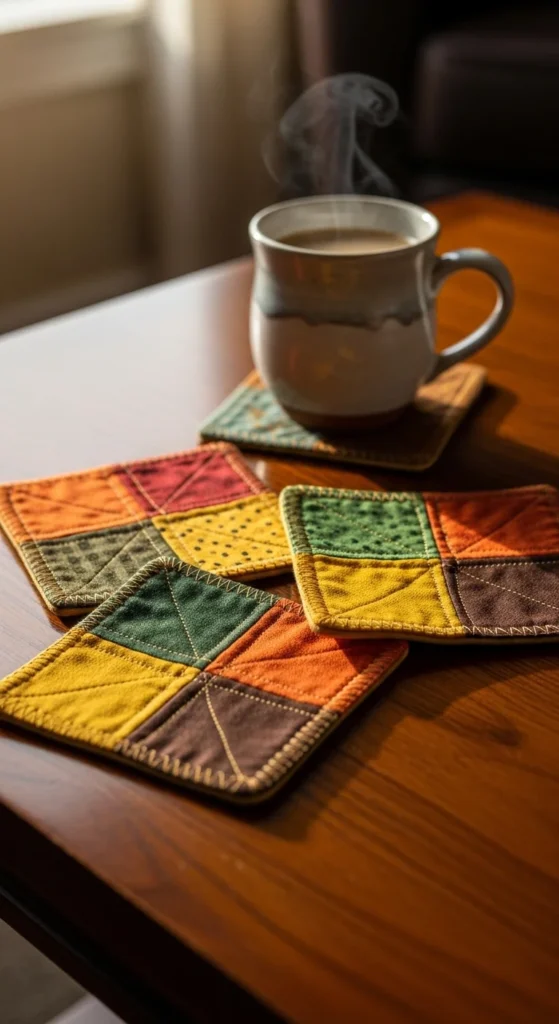
Quilted coasters use up the smallest fabric scraps in your stash. Cut squares of fabric, batting, and backing to about 4.5 inches each. Layer them and pin together carefully.
Sew straight lines or diagonals across the surface for the quilted look. Trim the edges, then sew binding around all four sides. The whole project takes about thirty minutes per coaster.
Old jeans, flannel shirts, or quilt scraps create rustic-looking coasters. Cotton batting from the craft store costs around three dollars and makes many sets. The materials per coaster cost under fifty cents.
Make matching sets of four or six for gifts. Pair them with a handmade mug for a thoughtful housewarming present. Different fabric combinations give each set personality.
Try patchwork designs by sewing small squares together first. This uses up tiny pieces you’d otherwise throw away. Kids can help pick fabric combinations.
Coasters protect tables from water rings and hot mugs. They wash easily and last for years. The small size makes this a great practice project for free-motion quilting later. You’ll feel like a pro after finishing your first set.
7. Apron with Pockets

A handmade apron protects clothes during cooking, baking, or crafting. Cut a rectangle for the body and add curved sides for the bib portion. Attach long straps for the neck and waist ties.
Sew large pockets across the front for utensils, phones, or recipe cards. Hem all raw edges twice for durability through many washes. Use sturdy cotton, denim, or canvas for long wear.
Old jeans or button-down shirts give you free heavy-duty fabric. The whole apron costs under five dollars when you upcycle. Add bias tape around the edges for a polished finish.
Personalize with embroidered names or fabric paint designs. Aprons make practical gifts for newlyweds, gardeners, or coffee shop owners. Match them to kitchen towel sets for a complete gift.
Kids’ aprons in smaller sizes encourage helping in the kitchen. Use bright, washable fabrics for messy little hands. A craft apron with extra pockets organizes scissors and pens.
This project introduces curved seams and binding. The straps require accurate measuring for a comfortable fit. Once you finish your first apron, you’ll want one for every hobby. They wash well and keep getting softer over time.
8. Felt Coin Purse
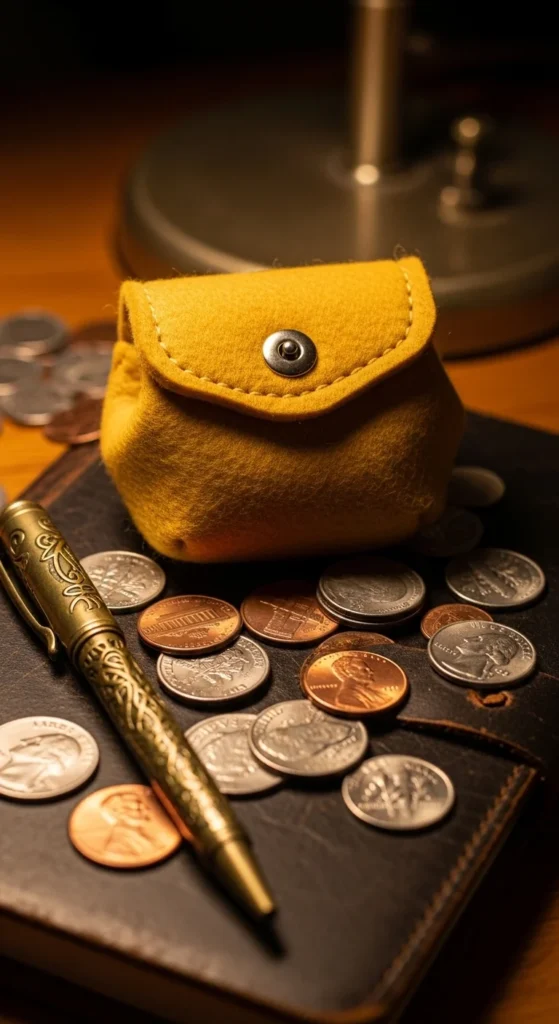
Felt coin purses are tiny, fast, and require no fancy tools. Cut two rectangles of stiff felt to about 4 by 6 inches. Round the bottom corners with scissors for a softer shape.
Sew the sides and bottom together using a blanket stitch by hand. Add a snap, button, or velcro closure at the top. Felt doesn’t fray, so you skip hemming entirely.
A single sheet of craft store felt costs about a dollar. You can make six purses from one large sheet. Use embroidery floss in a contrasting color for visible decorative stitching.
Decorate with sewn-on shapes, beads, or small buttons. Stitch a fabric flower or a felt heart to the front. Kids love picking their colors and learning hand-sewing on this project.
These work as gift card holders, earbud cases, or change holders. Tuck them into birthday cards instead of plain envelopes. The small size makes them perfect for using up scrap felt.
This project teaches basic hand stitches without a sewing machine. Beginners build patience and precision. The finished item feels professional despite the simple construction. Make a rainbow set for a colorful drawer organizer.
9. Baby Bibs
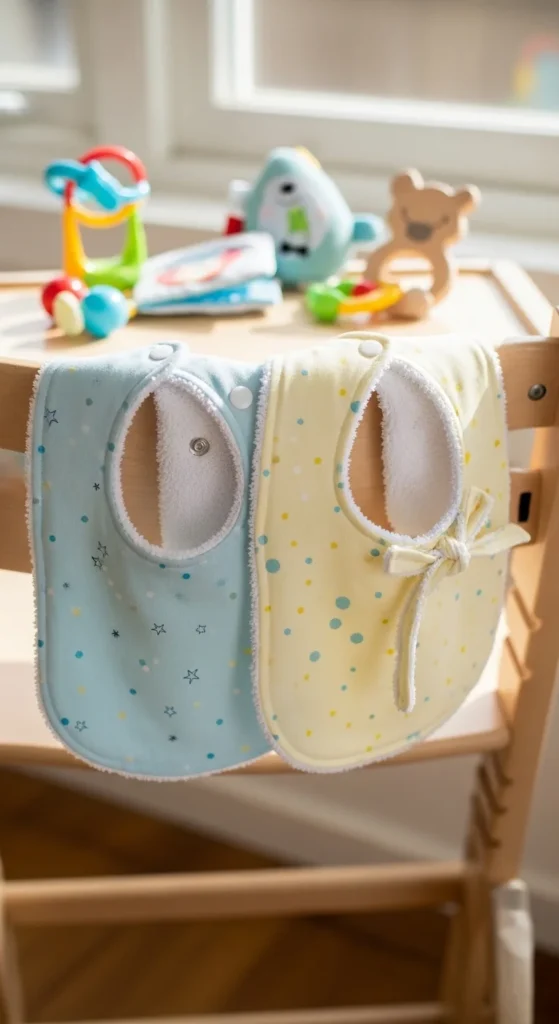
Baby bibs use small fabric pieces and make heartfelt baby shower gifts. Trace a bib shape onto cotton fabric and a soft terry backing. Cut both layers identically.
Sew them together with right sides facing, leaving a small opening. Turn it right side out, press flat, and topstitch around the edge. Add snaps or velcro at the neck for closure.
Old soft t-shirts or towels make excellent backing material. The fabric per bib costs under a dollar when you upcycle. A set of six bibs in fun prints delights new parents.
Choose washable cotton in cheerful prints or solid pastels. Avoid loose buttons or beads near baby’s mouth. Wash everything before gifting to remove any fabric finishes.
Make matching burp cloths in the same fabric for a complete set. Tie them with a ribbon and add a handwritten card. New parents always need more bibs than they expect.
This project introduces curves and topstitching. The small size means quick finishes that build confidence. Practice neat corners and even seam allowances here. Once you master the basic shape, try adding appliqued letters or animals for personalization.
10. Patchwork Blanket
A patchwork blanket sounds advanced but uses only simple squares. Cut fabric scraps into uniform 5-inch squares. Arrange them in a grid pattern that pleases your eye.
Sew squares into rows first, then sew rows together. Press each seam open as you go. Layer the patchwork top with batting and backing fabric.
Tie the layers together with yarn at each corner instead of quilting. This shortcut saves hours and looks rustic and charming. Bind the edges with strips of leftover fabric.
Old shirts, dresses, or thrifted sheets give you tons of free squares. A lap-sized blanket needs about 80 squares total. The whole project costs under fifteen dollars when you upcycle.
Memory blankets made from a loved one’s clothing become treasured keepsakes. Baby blankets from receiving cloths make sweet first birthday gifts. Each blanket tells a story through its fabric choices.
This project teaches grid sewing and basic quilting principles. Patchwork forgives small measurement errors better than precise patterns. Take your time with the layout for the best visual effect. The finished blanket gets used and loved for many years.
11. Hanging Wall Pocket Organizer
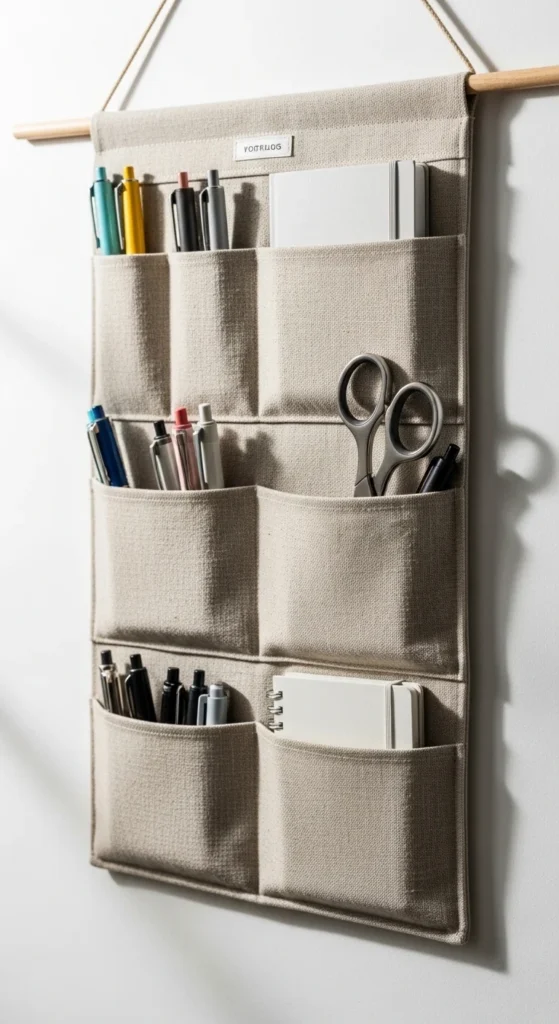
Wall pocket organizers hold mail, mail, art supplies, or bathroom essentials. Cut a backing rectangle to about 12 by 24 inches. Cut several smaller pockets in graduated sizes.
Hem the top edges of each pocket. Sew them onto the backing in rows from bottom to top. Add a wooden dowel or rod through a top casing for hanging.
Use canvas, denim, or upholstery scraps for sturdy pockets that hold weight. A trip to the thrift store can yield enough fabric for under five dollars. Old curtains often have plenty of yardage.
Hang one near the front door for keys, sunglasses, and mail. Another near a desk holds pens, notepads, and tape. Bathroom versions organize hair tools and skincare bottles.
Label each pocket with embroidery or a small fabric tag. Choose fabric that complements your room’s existing colors. The organizer adds storage without taking floor space.
This project teaches you to plan layouts and sew through multiple layers. The graduated pocket sizes help you practice consistent hemming. Once you make one, you’ll find spots for several around your home. They’re useful in cars, tents, and dorm rooms too.
12. Hot Pad and Trivet Set
Hot pads protect counters and tables from hot cookware. Cut two squares of cotton fabric and two layers of insulating batting. Sandwich the batting between the fabric squares.
Quilt the layers together with simple straight lines. Bind the edges with bias tape or strips of matching fabric. Add a fabric loop at one corner for hanging on a hook.
Insulating batting is key here, not regular cotton batting. The craft store sells it in packs for around five dollars. One pack makes several hot pads.
Use thick cotton or denim for the outer layers. Avoid synthetic fabrics that can melt under heat. Old jeans cut into squares give you free, durable fabric.
Make sets of four in coordinating prints for gift baskets. Pair them with a homemade jam or fresh bread for housewarming presents. Christmas-themed prints make charming holiday gifts.
This project introduces quilting through layers. The small size makes practice manageable. You’ll learn binding, loop attachment, and topstitching all in one project. Hot pads see daily use and last for years. They’re functional gifts people genuinely appreciate.
13. Eye Sleep Mask

Sleep masks block light for better rest at home or while traveling. Trace a mask shape onto soft fabric like satin or cotton. Cut two of the same shape, plus a layer of fleece for padding.
Layer the fleece between the fabric pieces. Sew around the edge with right sides together, leaving a small gap. Turn it right side out and slip in soft elastic at the sides.
Satin feels luxurious against the skin and helps prevent wrinkles. A scrap of satin from a thrifted shirt costs almost nothing. Cotton works well too and washes more easily.
Add a layer of lavender-scented fabric inside for a calming touch. Embroider initials on the front for personalization. Sleep masks make popular bridesmaid or new mom gifts.
Choose a comfortable elastic that doesn’t pinch behind the ears. Test the fit on yourself before gifting. Adjust the elastic length as needed for a snug but gentle hold.
This project teaches curved seams and elastic insertion. The small size finishes quickly, perfect for an evening project. Make several in different colors for travel kits or to match pajama sets.
14. Fabric Bookmark
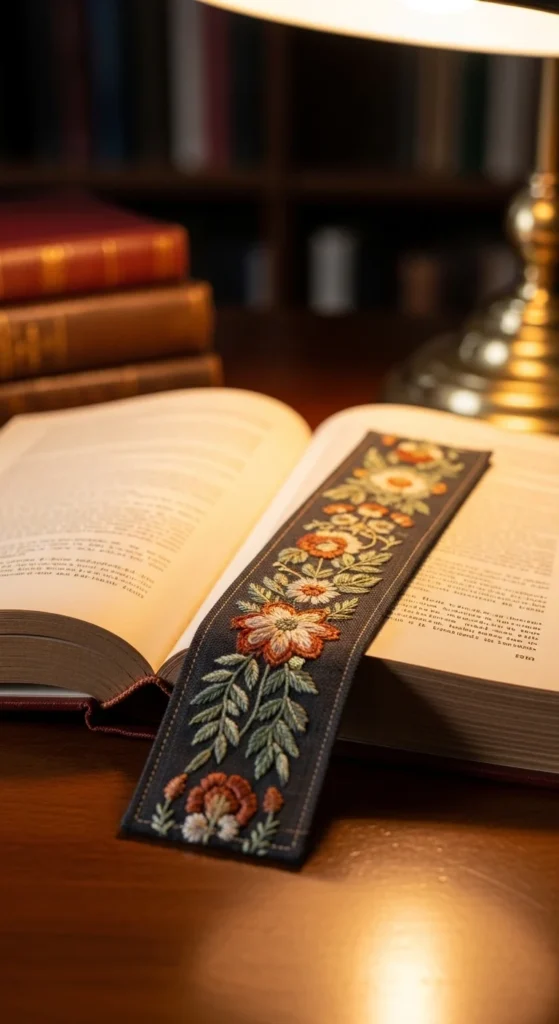
Fabric bookmarks use the tiniest scraps in beautiful ways. Cut two strips of fabric to about 2 by 8 inches. Layer them right sides together with a piece of stiff interfacing.
Sew around the edges, leaving a gap to turn it right side out. Press flat and topstitch around the edge. Add a tassel or pom-pom to one end for charm.
Interfacing keeps it stiff so it doesn’t crumple in books. A small package of fusible interfacing costs about three dollars and makes dozens. Embroider a small design or initial for a personal gift.
Match bookmark fabric to a friend’s favorite genre or color. Pair it with a paperback for a budget-friendly birthday gift. Teachers love receiving these from students.
Make a set in different prints for your own use. Tuck them into library books to find your spot quickly. They beat the flimsy paper bookmarks that come from stores.
This project teaches mitered ends and decorative topstitching. The small canvas lets you practice embroidery or fabric paint techniques. Finish ten bookmarks in an evening for hostess gifts at book club. Readers in your life will treasure them.
15. Drawstring Pouch for Jewelry
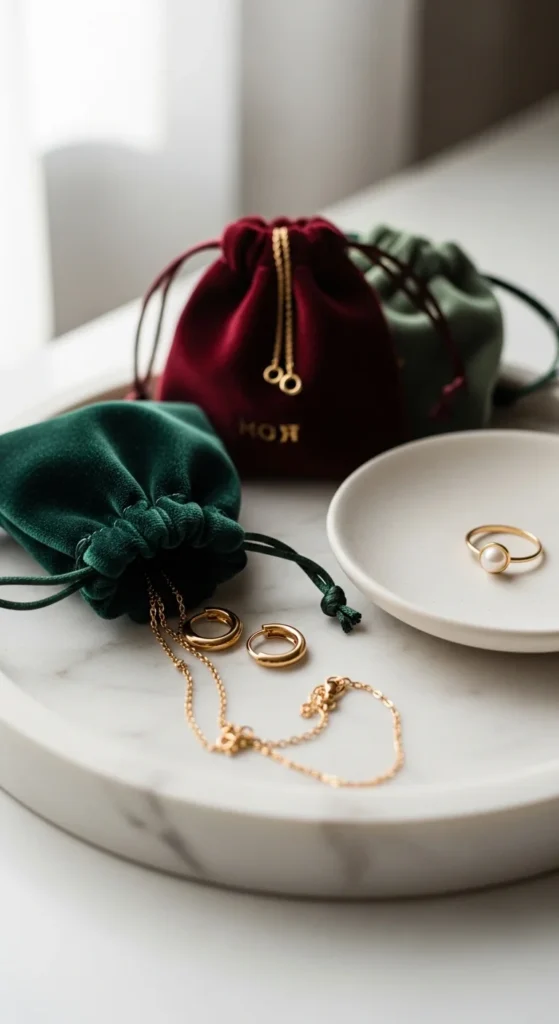
Tiny jewelry pouches protect rings, earrings, and necklaces from scratches. Cut two small rectangles of soft fabric to about 4 by 5 inches. Sew the side and bottom seams together.
Fold the top edge down to create a casing for the cord. Thread thin ribbon or cord through the casing. Knot the ends to prevent them from slipping back through.
Velvet, satin, or felt all work beautifully for jewelry pouches. A scrap of velvet from an old skirt makes a luxurious pouch. The cost stays well under a dollar per pouch.
Make sets in different sizes for a gift presentation. The smallest holds a ring, while larger ones fit necklaces. Tuck a piece of jewelry inside for an instant gift wrap solution.
Add an embroidered initial or a tiny appliqued shape. Use silk thread for a polished finish. These also organize your own jewelry inside larger bags or drawers.
This project introduces working with delicate fabrics. Velvet can be tricky to sew, so practice on scraps first. The small size makes mistakes less costly. Once you get the hang of it, make pouches as wedding favors or bridesmaid gifts.
16. Picnic Blanket
A waterproof-backed picnic blanket makes outdoor meals comfortable. Cut a large square of cheerful cotton fabric to about 60 by 60 inches. Cut a matching piece of waterproof or oilcloth backing.
Layer the two pieces with right sides together. Sew around the edges, leaving a gap to turn it right side out. Topstitch around the edge for a clean finish.
Old shower curtains or tarps make great waterproof backing. Thrift stores often have these for under three dollars. The cotton top fabric can be a thrifted bedsheet.
Add ribbon ties or a fabric strap so it rolls up neatly for transport. A handle attached to one corner makes carrying easy. Cheerful gingham or floral prints look classic.
Picnic blankets get used at parks, beaches, concerts, and backyard movies. The waterproof backing keeps you dry on damp grass. Pack snacks and a book for a relaxing afternoon.
This project teaches you to handle large fabric pieces. The straight seams stay manageable even at this size. A picnic blanket also makes a generous wedding or housewarming gift. Pair it with a wicker basket for the full presentation.
17. Headband or Hairband
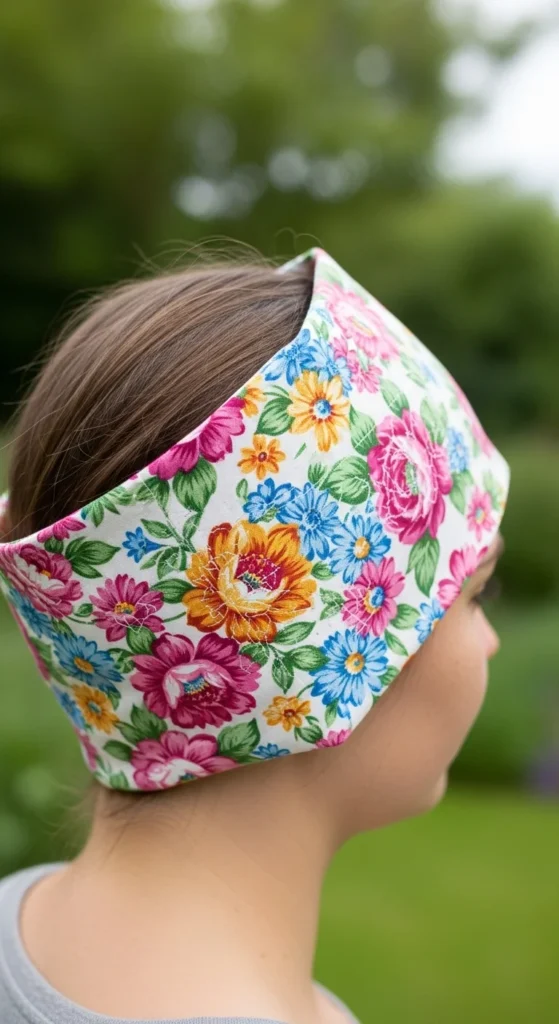
Fabric headbands hold back hair while looking adorable. Cut a long strip of fabric to about 4 by 20 inches. Add elastic at the back for a comfortable stretch fit.
Fold the strip lengthwise with right sides together. Sew along the long edge to form a tube. Turn it right side out using a safety pin.
Insert elastic at one end and sew it to secure. Pull the elastic through and attach it at the other end. The fabric covers most of the head with elastic only at the back.
Use cotton, jersey, or even old t-shirts for stretchy comfort. Each headband costs almost nothing in materials. A yard of fabric makes around six headbands.
Make twisted or knotted styles for variety. Add a small bow at the top or side for extra cuteness. Coordinate them with sundresses or workout outfits.
These are popular for kids, but adults love them too. Match siblings or friends with the same fabric for a cute photo. They also keep hair back while applying makeup or washing your face.
This project teaches you elastic insertion and tube turning. Both are useful skills for future projects. Headbands make quick, charming gifts in batches.
18. Reusable Snack Bags
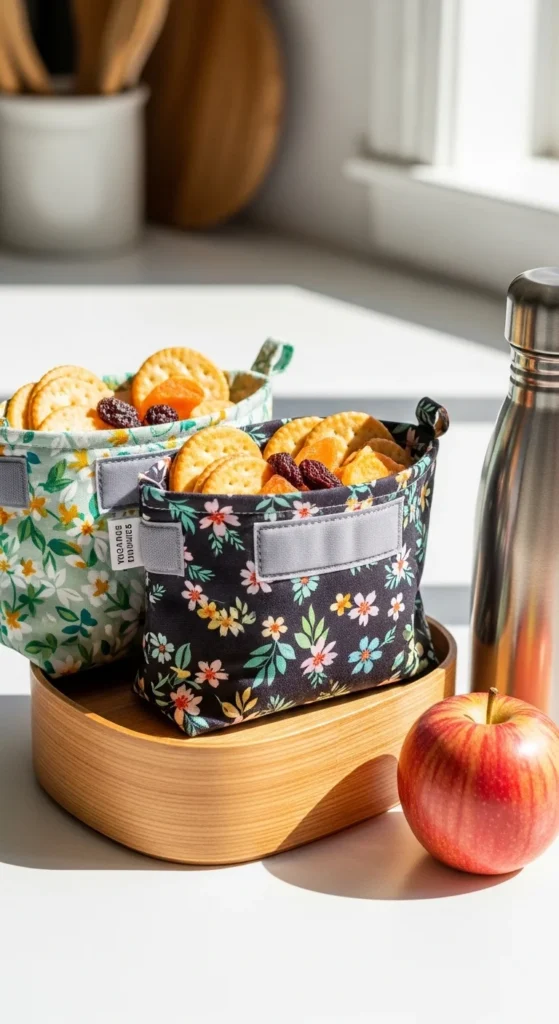
Reusable snack bags replace plastic baggies for school lunches. Cut two rectangles of food-safe fabric or laminated cotton. Add velcro or a snap at the top for closure.
Sew the side and bottom seams with the right sides together. Turn right side out for a clean exterior finish. The inner seams stay tucked away from food.
PUL fabric or food-grade laminated cotton works best. Both are sold at fabric stores for around eight dollars per yard. One yard makes ten or more snack bags.
Make different sizes for sandwiches, crackers, or trail mix. Use cute kids’ prints for school lunches. Adults love them for office snacks or hiking trips.
Wash them by hand or on a gentle machine cycle. They last for years and save money on disposable bags. Families with kids can make sets of fifteen in an afternoon.
These also make practical gifts paired with homemade granola bars. Tie a set together with twine for a zero-waste gift presentation. Eco-conscious friends appreciate the thought and effort.
This project teaches you to work with laminated fabrics. The technique transfers to lunch bags, raincoats, and other waterproof projects. Beginners often finish their first snack bag in twenty minutes.
19. Fabric Gift Bows
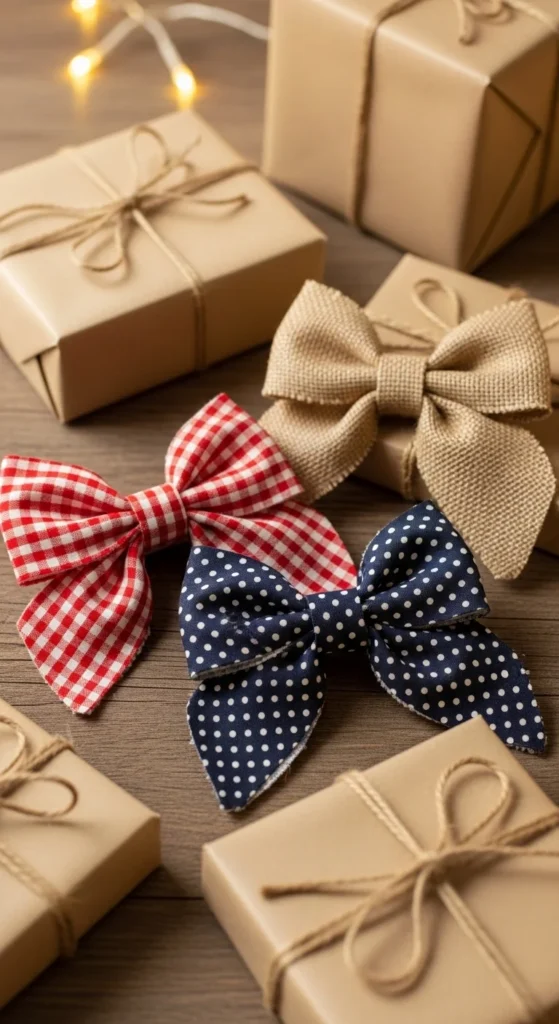
Fabric gift bows replace plastic ones and look more thoughtful. Cut a long strip of fabric and fold it into loops. Tie a small strip around the center to gather it into a bow shape.
Sew the center wrap securely with hand stitches. Trim the ends of the bow at angles for a tailored look. Attach with a safety pin or sewn-on clip.
Reuse them year after year unlike paper bows. A package of plastic bows costs three dollars and tears immediately. Fabric bows last for many holidays.
Use scraps of festive cotton, linen, or burlap. Christmas plaid, gingham, or solid colors all look great. Each bow uses about a foot of fabric strip.
Make a basket of mixed bows in seasonal colors. Pull from it whenever you wrap a gift. The recipient often keeps the bow for their own use.
Add embroidery or fabric paint for special touches. Holiday-themed bows on plain craft paper look polished. Pair them with twine instead of plastic ribbon for a complete look.
This project teaches you to manipulate fabric into shapes. The skill helps with hair bows, fabric flowers, and decorative trim. Make a dozen in an hour and stash them for the year.
20. Cat or Dog Toy
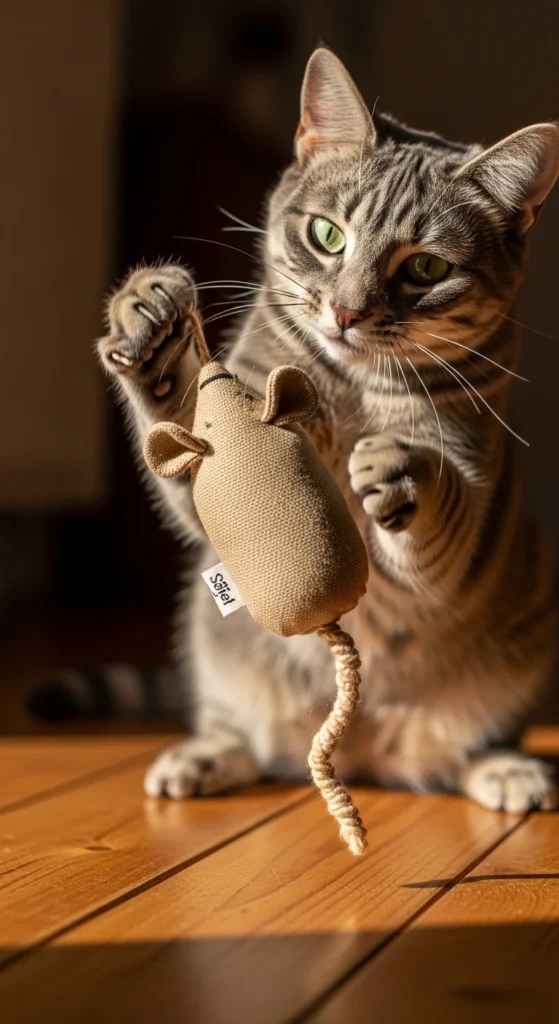
Pet toys made at home save money and use up scraps. For a cat toy, cut a small mouse shape from sturdy fabric. Sew the pieces together, leaving a gap for stuffing.
Fill with polyester stuffing and a pinch of catnip. Sew the gap closed and add a yarn tail. Cats go wild for the homemade scent and texture.
Old socks, denim, or canvas make durable pet toys. The whole project costs almost nothing in materials. Catnip is sold cheaply at pet stores for around three dollars.
For dogs, sew a tug toy from braided fabric strips. Twist or braid the strips together and knot the ends. Old t-shirts cut into strips work perfectly for this.
Avoid small pieces or buttons that pets could swallow. Use sturdy thread and double seams for chew-resistant durability. Replace toys when they show heavy wear.
These also make sweet gifts for friends with new pets. Tie a few toys together with twine in a small basket. New pet parents always need more toys than they realize.
This project teaches stuffing techniques and sewing through tougher fabrics. The simple shapes forgive small mistakes. Pets don’t care about perfect stitching at all.
21. Pencil Roll-Up Case

Pencil roll-ups organize art supplies, knitting needles, or makeup brushes. Cut a rectangle of canvas or denim to about 12 by 14 inches. Cut a smaller piece for the inner pocket section.
Sew elastic loops or pocket dividers across the inner piece. Layer it over the backing and stitch around the edges. Add a tie or button to keep it rolled up.
Heavy fabric like canvas holds shape well. Old jeans or thrifted upholstery scraps work great. The total material cost stays under three dollars per roll-up.
Customize the loops for whatever supplies you want to organize. Smaller loops for pencils, larger for brushes. Add a flap at the top to keep contents secure when rolled.
These travel well and make popular gifts for artists or students. Personalize with embroidered names or initials. Match the fabric to the recipient’s style or favorite color.
Handmade pencil rolls beat plastic cases for flexibility and charm. They roll up small to fit in backpacks or purses. Once you make one, you’ll want more for organizing other small items.
This project teaches you to plan layouts with multiple compartments. The skill helps with future organizers, tool rolls, and travel kits. Beginners often finish their first one in two hours.
22. Burp Cloth Set
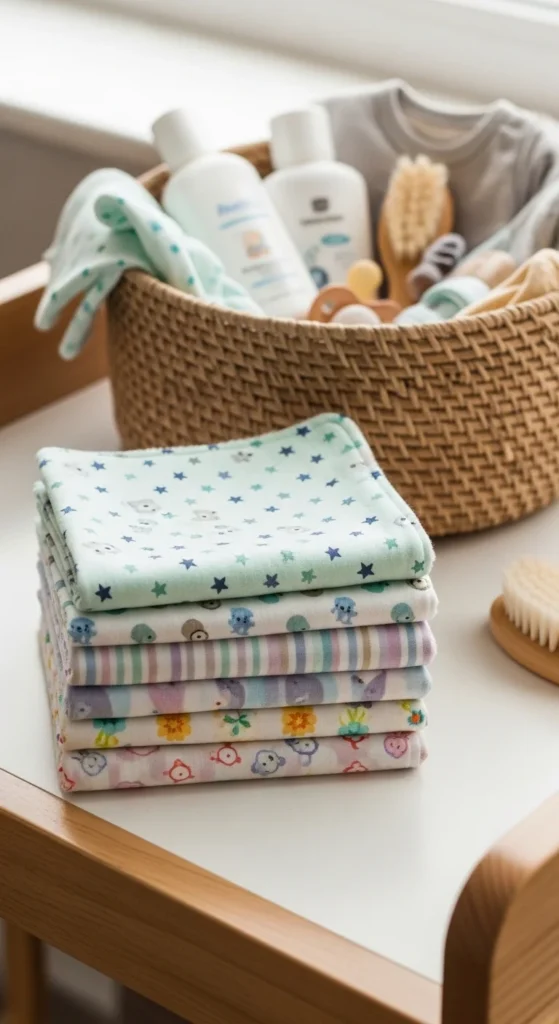
Burp cloths get heavy use with new babies, and handmade ones absorb better. Cut a curved or rectangular shape from soft flannel. Cut the same shape from terry cloth for absorbency.
Layer the two pieces with right sides together. Sew around the edge, leaving a small gap. Turn right side out, press flat, and topstitch all the way around.
Old soft towels work beautifully for the absorbent layer. Flannel scraps from baby blankets pair well with terry. Each cloth costs under two dollars when you upcycle.
Make sets of six in coordinating prints for new parent gifts. Tie them with ribbon and add a handwritten card. Veteran parents will tell you that you can never have too many burp cloths.
The curved shape fits over a parent’s shoulder securely. Topstitching reinforces the edges for many washes. Choose washable, baby-safe fabrics in cheerful prints.
This project teaches curves and topstitching at a simple level. The forgiving shape hides small wobbles in your seams. Burp cloths also make great gifts paired with a board book or pacifier clip. New parents will use them daily for the first year.
23. Yoga Mat Bag
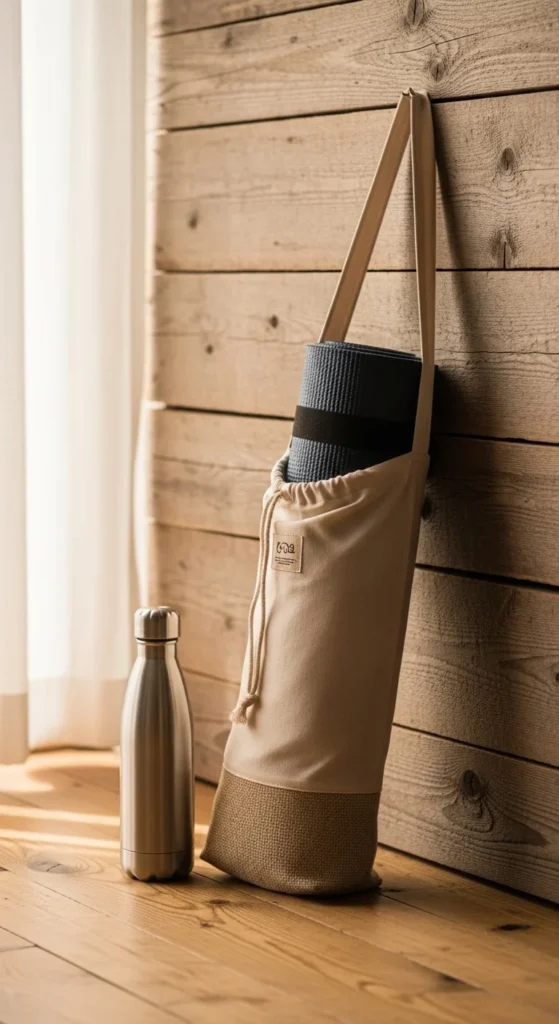
A yoga mat bag carries your mat without slipping or unrolling. Cut a long rectangle of fabric, sized to your rolled mat plus seam allowance. Add a drawstring closure at the top.
Sew a long strap at the side seams for over-the-shoulder carrying. Add a small zippered pocket for keys, phone, or studio cards. Reinforce the strap attachment points for durability.
Canvas, denim, or upholstery scraps work well for this project. A thrifted curtain panel often has enough yardage. The whole bag costs under five dollars in upcycled materials.
Personalize with embroidery or fabric paint of meaningful symbols. Match the bag to your mat color or yoga clothes. Studio students will admire the handmade detail.
Yoga mat bags also work for camping mats or beach mats. The simple tube design adapts to many sizes. Make one for a friend who just started a yoga practice.
This project teaches strap construction and drawstring closures. Both skills transfer to backpacks and tote bags. The size feels manageable but produces a real, useful item. Beginners finish it in about three hours of focused work.
24. Stuffed Animal Toy
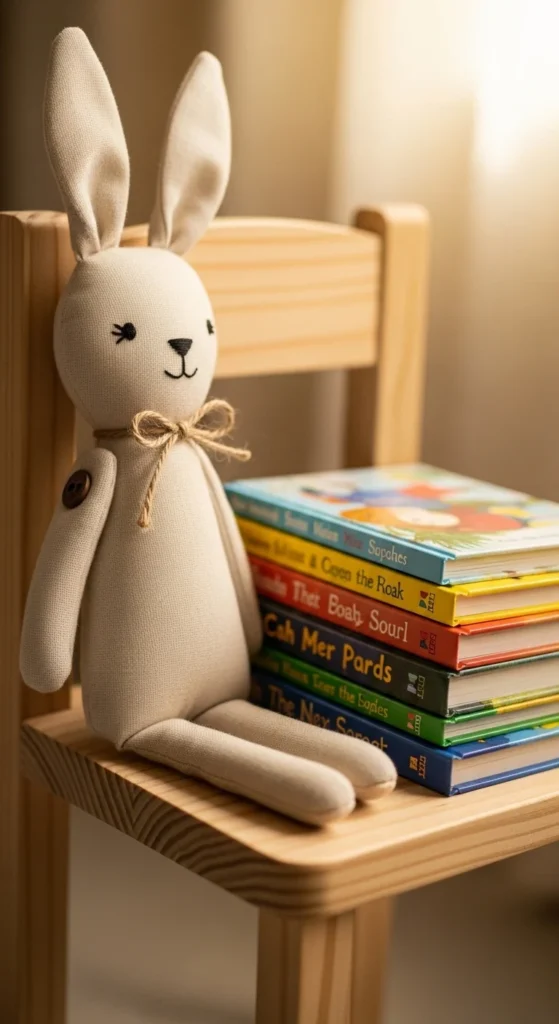
Simple stuffed animals make heartfelt gifts and use small fabric amounts. Find a basic pattern online for a bunny, bear, or fox. Cut the pieces from soft cotton or fleece.
Sew the body pieces together with right sides facing. Leave a gap to turn it right side out and add stuffing. Hand-stitch the gap closed and embroider the face.
Fleece, flannel, or cotton all work for stuffed animals. Old baby clothes turn into meaningful keepsake animals. The materials cost stays under three dollars per toy.
Embroider the eyes and nose instead of using buttons. Loose buttons pose choking hazards for young children. Yarn, embroidery floss, or felt cutouts work safely.
Make matching animals for sibling gifts. A series of forest creatures looks adorable in a nursery. Personalize with the child’s initial embroidered on the foot.
These become treasured childhood companions. Hand-sewn animals carry sentimental value that store-bought ones can’t match. Grandparents love making them for grandchildren.
This project teaches curves, hand stitching, and stuffing technique. The skills transfer to plushie patterns of any complexity. Start simple and work up to more detailed designs as you gain confidence.
25. Christmas Stocking
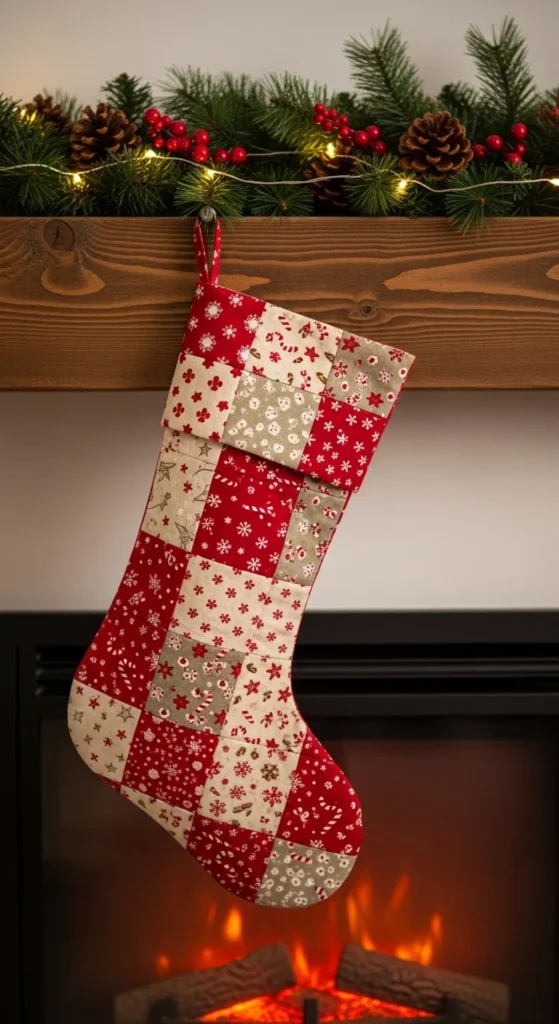
A handmade stocking starts a holiday tradition that lasts decades. Trace a stocking shape onto sturdy fabric like felt, wool, or cotton. Cut two pieces for the front and back.
Sew them together with right sides facing, then turn right side out. Add a fabric loop at the top for hanging. Embroider or applique a name across the cuff.
Felt stockings work great for beginners since the edges don’t fray. Wool from old sweaters adds rustic charm. Each stocking costs under five dollars in materials.
Decorate with appliqued snowflakes, stars, or initials. Add pom-poms or tassels at the toe for whimsy. Coordinate stockings for the whole family in different colors.
Children love seeing their own name on a special stocking each year. The stockings become heirloom pieces passed down through generations. Make them for new family members like babies or in-laws.
This project teaches applique and personalization techniques. The shape hides minor sewing errors inside the seams. A handmade stocking holds more meaning than any store-bought version. Start the tradition and add new ones as your family grows.
26. Tablet or Laptop Sleeve
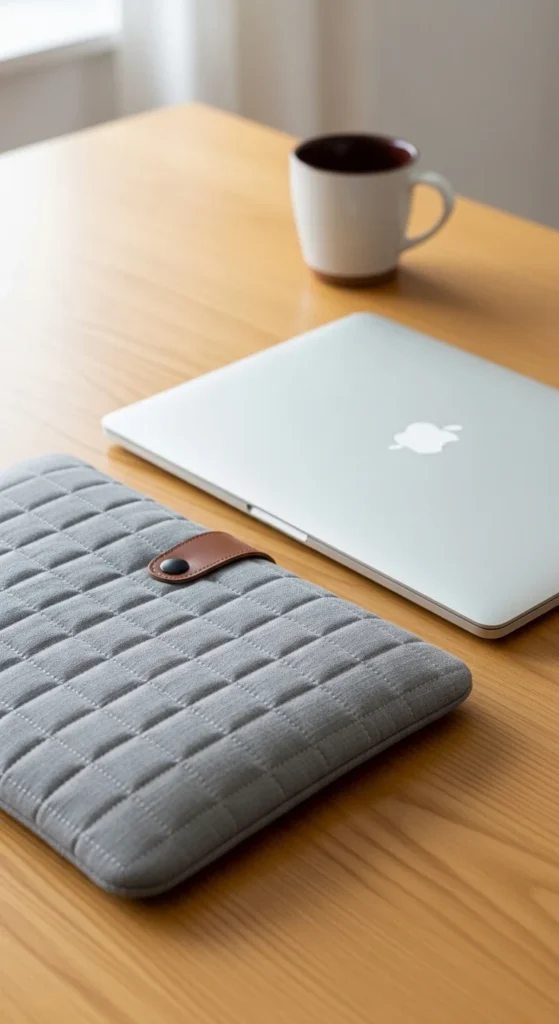
A padded sleeve protects your tablet or laptop without bulky cases. Measure your device and add an inch on all sides for padding. Cut two outer fabric pieces and two batting pieces.
Layer the batting between the fabric for cushioning. Sew the side and bottom seams. Add a flap at the top with a button or velcro closure.
Quilted cotton fabric looks polished and adds extra cushion. A pre-quilted yard from the fabric store costs around twelve dollars. You can quilt your own with batting and fabric.
Personalize with embroidery, applique, or fabric paint. Match the sleeve to your style or favorite color. Add a small zippered pocket for charging cords on the outside.
These make great gifts for college students or remote workers. Coordinate them with a coffee shop gift card for a thoughtful presentation. Sized for tablets, e-readers, or laptops.
Custom sleeves cost a fraction of store-bought ones. Yours fits your exact device perfectly. The handmade look beats the generic options at office stores.
This project teaches you to work with padding and create custom sizes. The skills transfer to camera bags, instrument cases, and other padded items. Beginners often finish in three to four hours.
27. Fabric Bunting or Garland
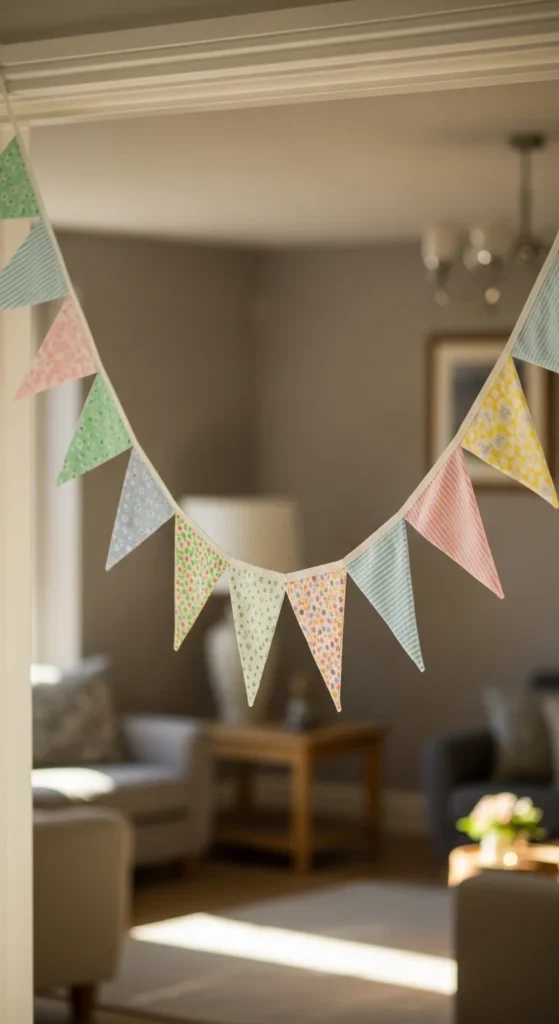
Fabric bunting decorates parties, nurseries, or porches with cheerful flags. Cut triangular flags from coordinating fabric scraps. Each flag should measure about 5 by 7 inches.
Sew bias tape or a long fabric strip along the tops of all flags. Space the flags evenly along the tape. Leave extra tape on each end for tying or hanging.
Mix and match fabric prints for a charming, eclectic look. Use scraps from previous projects to keep costs at zero. A 12-foot bunting uses about twenty flags.
Choose seasonal prints for holiday decorations. Pastels work for baby showers, while bright colors suit birthday parties. Burlap and cotton mix for a rustic country style.
Hang bunting on mantels, doorways, or party tables. They reuse for many events instead of single-use paper decorations. Roll them up between uses for easy storage.
Personalize with letter applique to spell names or words. A “BABY” bunting works for showers. “HAPPY BIRTHDAY” buntings reuse across many parties.
This project teaches you to handle multiple small pieces. The flags forgive uneven cuts since they all look similar. Make several buntings in different colors for various occasions. They store flat and last for years.
Conclusion
Sewing your own handmade items saves money, reduces waste, and gives you genuine pride in what you create. These 27 beginner-friendly projects use basic stitches, scrap fabric, and simple tools you likely already own. Start with smaller items like scrunchies or coasters to build your confidence. Then move on to bigger pieces like aprons, blankets, or laptop sleeves. Every finished project teaches you a new skill that carries forward to the next one. Pick one idea that excites you, gather your materials, and spend an afternoon creating something useful. Your handmade items become treasured gifts, daily-use staples, and the start of a hobby that grows richer with practice.


