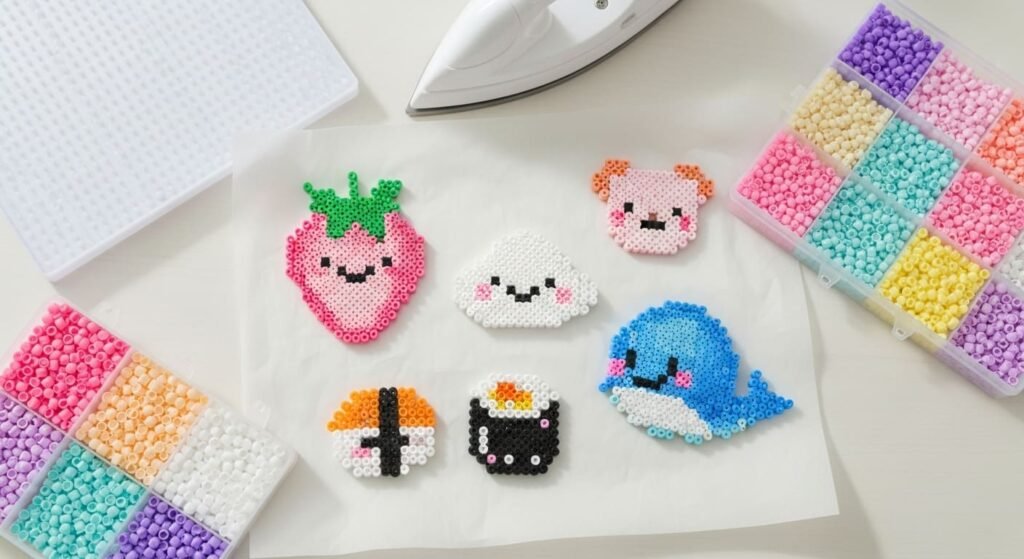
Cute perler bead designs turn simple fuse beads into tiny pieces of joy. Think mini sushi keychains, smiling fruit charms, pastel animal magnets, and Taylor Swift-style friendship bracelets. The kawaii aesthetic dominates this craft because it’s playful, giftable, and finishes in under 20 minutes. These 24 adorable perler bead ideas use cheerful color palettes, simple grid patterns, and beginner-friendly techniques. Whether you want gifts for best friends, charms for backpacks, or decorations for your desk, these designs hit the sweet spot between easy and irresistibly cute. Grab your pegboard, pick a pastel palette, and get ready to make something heart-meltingly precious.
1. Smiling Strawberry Charm
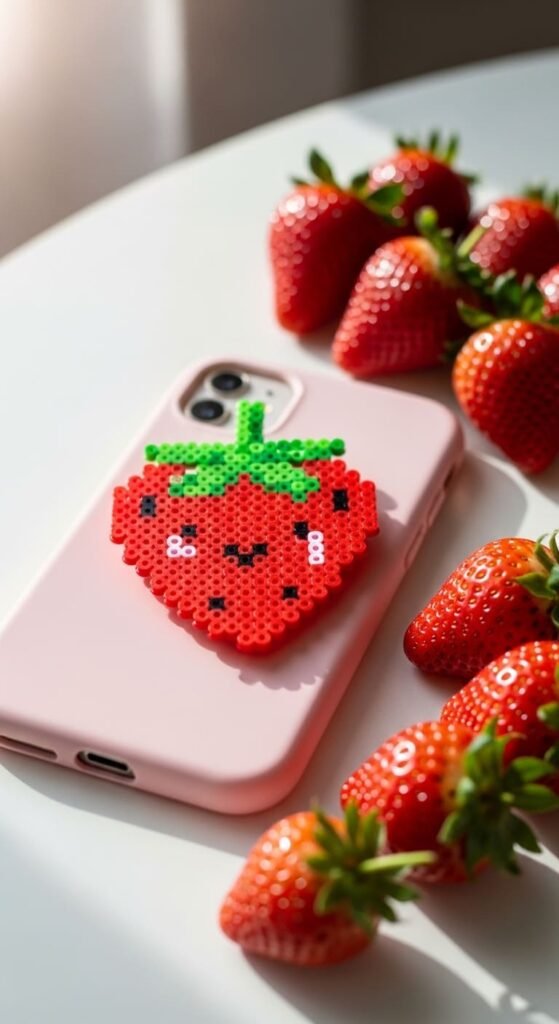
A smiling strawberry charm hits peak kawaii cuteness. Place red beads in a triangle shape with a rounded top. Add green beads at the top for the leafy crown.
Sprinkle tiny black or yellow beads across the red for seeds. Give it two black bead eyes and a small curved smile. The face transforms a regular fruit into kawaii art.
Iron carefully so the small face details stay visible. Each charm uses about 50 beads. Add a jump ring through a top hole and attach to a keychain.
Pair these with real strawberries for cute summer party favors. Tie one to a smoothie gift basket. Friends who love kawaii style will treasure them instantly.
A bag of red and green beads costs around six dollars total. That makes dozens of strawberry charms with leftovers. Mini jump rings come in packs for under three dollars.
Make a whole fruit family with smiling faces. Apples, oranges, lemons, and grapes all work. The matching kawaii style ties them together.
This project teaches you to add expressive faces to simple shapes. The technique transforms ordinary designs into adorable characters. Once you master kawaii faces, every shape becomes a friend.
2. Pastel Bear Face
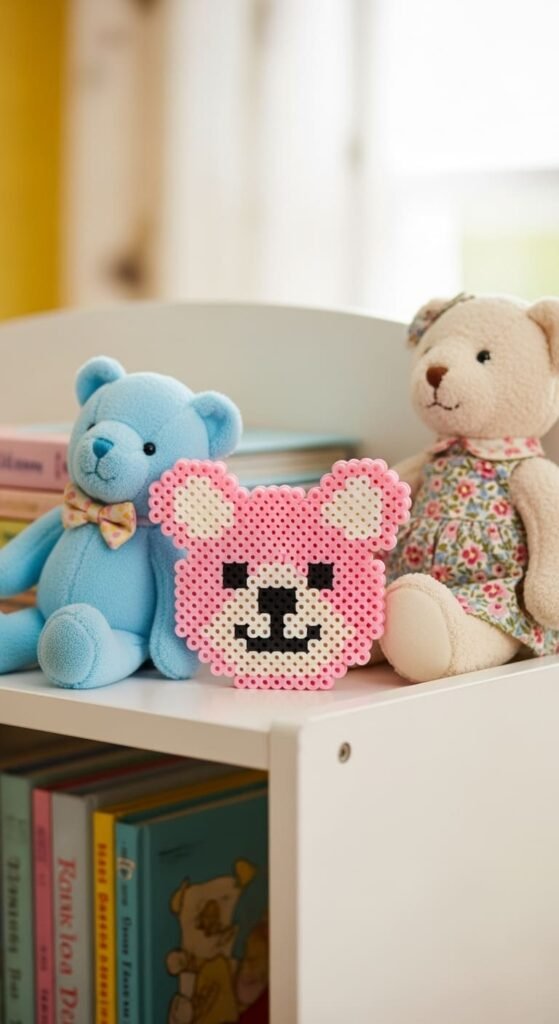
A pastel bear face brings instant cuteness to any project. Use soft pink, beige, or light brown beads for the round face. Add small rounded shapes on top for ears.
Place darker beads inside the ears for depth. Use black beads for eyes and a small triangle nose. Add a tiny curved mouth below the nose.
Pastel colors make designs feel softer and more kawaii. Light pink looks like a teddy bear, while pale brown feels classic. Mint green or lavender work for fantasy bears.
Each face uses about 60 beads. Iron the round shape carefully to keep the ears intact. The small details define the bear’s personality.
Make a whole bear family in different pastel shades. Display them as a set on a shelf or string them as garland. Kids enjoy lining them up like a bear parade.
Glue magnets on the back for fridge display. Pair with a stuffed animal gift for kids. The matching theme makes the gift feel coordinated.
This project teaches you to handle protruding shapes like ears. The skill helps with cats, mice, and rabbits using the same technique. Bears also work as backpack charms or zipper pulls for kids.
3. Mini Avocado Toast
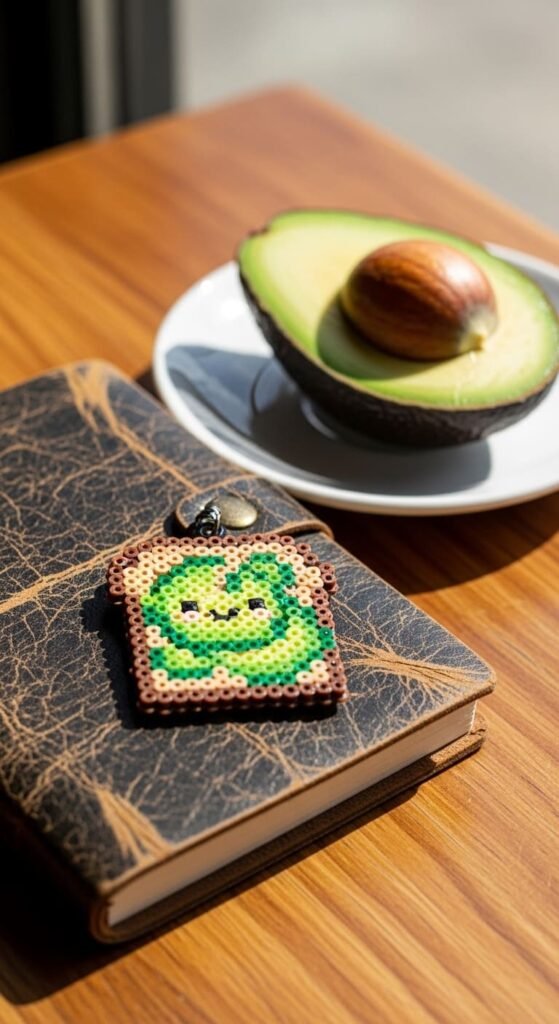
Avocado toast charms feel trendy and playful. Make a brown rectangle for the toast base. Pile green beads on top in an avocado shape.
Add a darker green stripe around the inside edge of the avocado. Place a small brown circle in the middle for the pit. Top with a tiny smiling face for kawaii flair.
Each charm uses about 60 beads. Iron the layered design carefully so the toast and avocado fuse together. The thicker toast base adds stability.
Make different versions like avocado with egg, with tomatoes, or plain. The variations keep the design feeling unique. Each one takes about 15 minutes total.
Attach jump rings for keychain or charm hardware. These pair perfectly with real toast or breakfast gift ideas. Brunch-loving friends will love the matching detail.
Make sets of breakfast foods for fun gift baskets. Pancakes, waffles, and coffee cups all work in similar style. The collection brings smiles to morning routines.
This project teaches you to layer different food elements. The skill helps with sandwiches, burgers, and other stacked designs. Avocado toast charms also work as pin-on accessories for tote bags or jackets.
4. Sushi Roll Charm
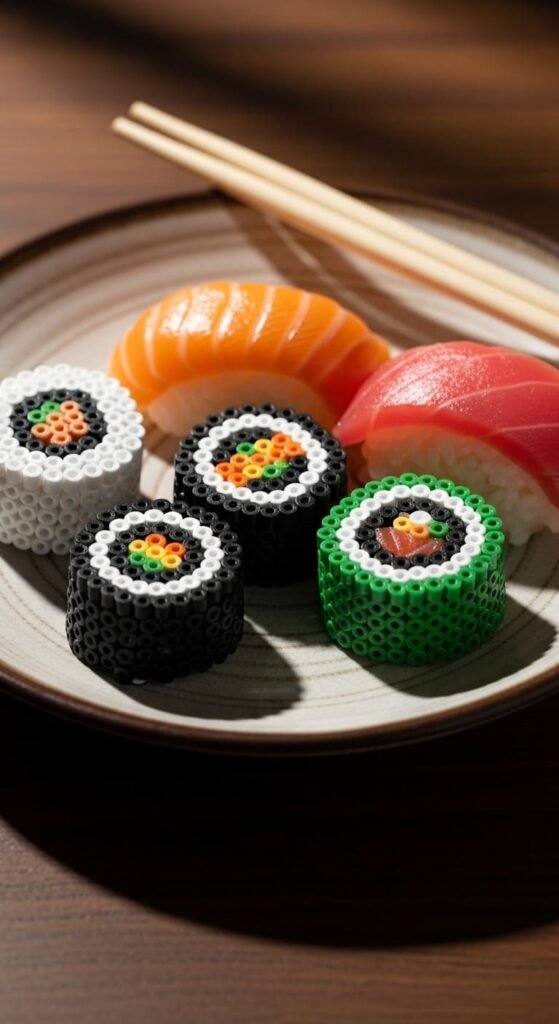
Sushi roll charms are tiny food art at its cutest. Make a black square or rectangle for the seaweed wrap. Add white beads inside for the rice center.
Place orange or pink beads in the very middle for salmon or tuna. Green beads work for cucumber or avocado fillings. Add tiny eyes and a smile for kawaii personality.
Each sushi roll uses about 40 beads. Iron carefully to keep the layered look defined. The black outline makes the design pop visually.
Make different sushi types with color swaps. Salmon nigiri uses orange on white. California rolls have green and orange centers. Each variety adds collection value.
Attach to phone charms, backpack zippers, or keychains. Pair with sushi gift cards or chopsticks for fun gift sets. Asian food lovers will appreciate the cute themed details.
Make a whole sushi platter with multiple rolls. Tie them together with twine for a charming gift bundle. The collection looks like edible art.
This project teaches you to make small, defined food shapes. The skill helps with all miniature kawaii foods. Sushi rolls also work as earrings or pendant necklaces for food-themed jewelry.
5. Sleepy Cloud with Stars
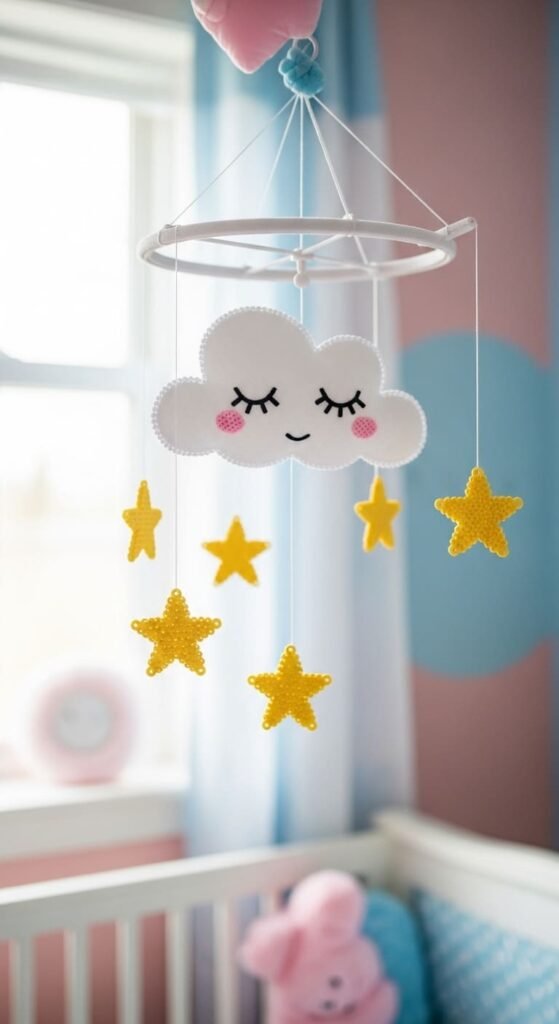
A sleepy cloud charm feels dreamy and gentle. Make a white fluffy cloud shape with bumpy edges. Add closed sleeping eyes shown as small curved lines.
Include tiny yellow or pink beads for star accents around the cloud. A small “Z” can show the cloud is dreaming. The peaceful expression melts hearts.
Each cloud uses about 50 beads. Iron evenly across the wide shape. The bumpy edges hide any minor placement issues.
Hang from clear thread for nursery mobiles or window decorations. Babies enjoy watching them sway gently. The soft theme suits any baby gift.
Pair sleepy clouds with rainbow magnets for sweet weather scenes. Make a set with sun, rainbow, and cloud designs. The collection tells a cheerful story.
Use as bedroom door hangers or bedside decorations. Kids love the gentle vibes for sleeping spaces. Each piece costs about a dollar in materials.
This project teaches you to add expressive eyes and minimal facial features. Less detail often looks more kawaii. The skill helps with any sleeping or peaceful character design. Sleepy clouds also work as sticker-style magnets or pin-on accessories.
6. Friendship Bracelet Beads
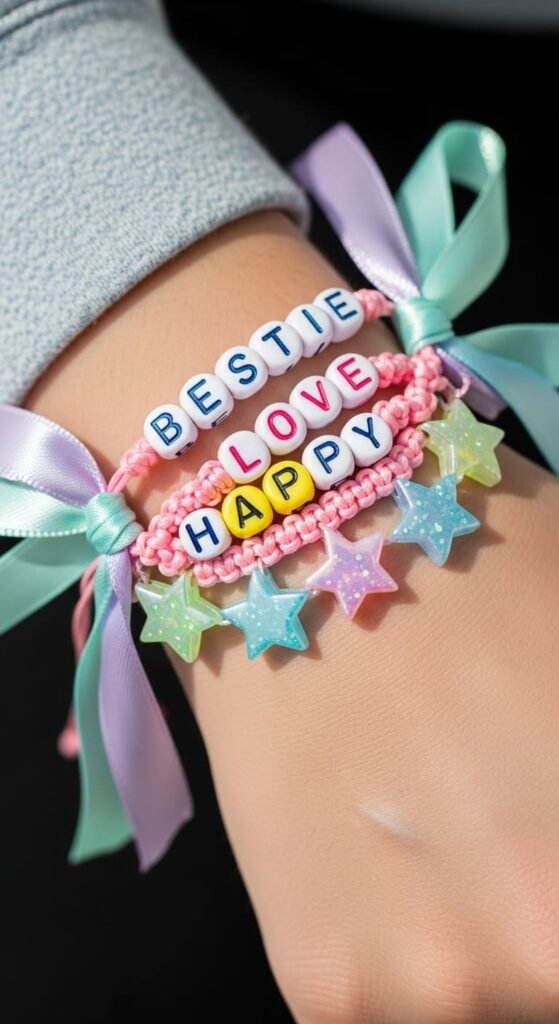
Friendship bracelet beads channel the Taylor Swift Eras tour vibe. Place letter beads on string instead of ironing them. No iron needed for this version.
Use the bead holes as natural threading points. Spell out names, song lyrics, or short words. Mix with star, heart, or flower-shaped beads for variety.
Each letter bead uses just 1 to 2 beads of plastic. The string adds personality through color choice. A spool of stretch cord costs around three dollars and makes many bracelets.
Try chunky stretch cord or thin elastic for different looks. Knot the ends securely so beads don’t slip off. Trim excess string close to the knot.
Make matching bracelets for friend groups. Each person gets the same word or coordinating words. The Swiftie aesthetic feels personal and meaningful.
Pair bracelet kits with concert tickets or fan merchandise. The matching detail feels intentional. Each bracelet costs under a dollar in materials.
This project teaches the heatless perler technique. The skill works for necklaces, anklets, and hair beads too. Beginners can craft jewelry without an iron, perfect for kids or apartments without ironing setups.
7. Tiny Crab Magnet
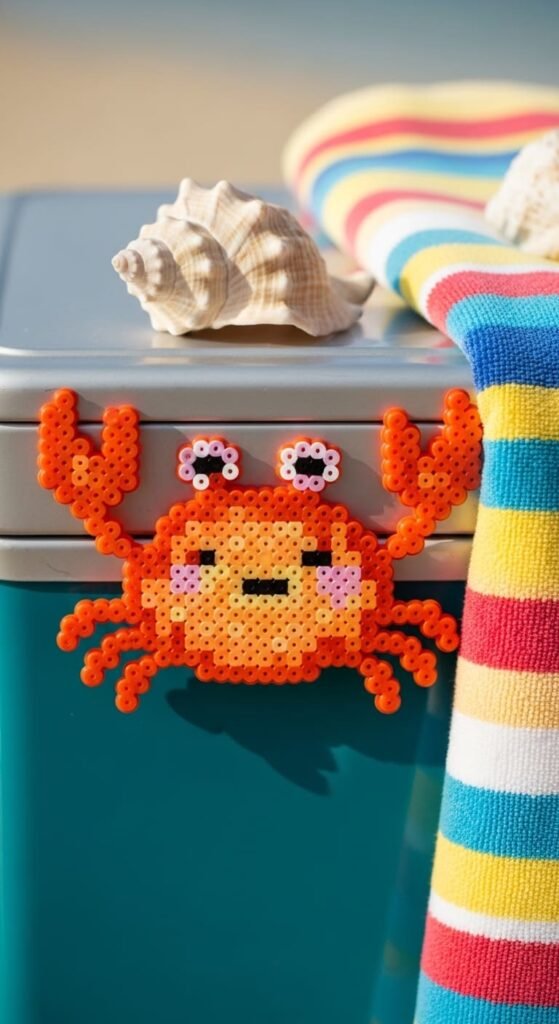
Smiling crab magnets bring summer beach vibes year-round. Use bright orange or red beads for the round body. Add smaller side beads for the four legs and two claws on top.
Add big round eyes with white and black beads. A small curved smile makes the crab feel friendly. The face transforms a sea creature into a beach friend.
Each crab uses about 60 beads. Iron carefully across the body and legs. The thin claws and legs need watchful ironing to prevent thinning.
Make the crab in pink, purple, or blue for fantasy versions. Bright colors fit the kawaii aesthetic better than realistic browns. Each color tells a different story.
Glue magnets on the back for fridge display. Pair with ocean-themed gifts like beach towels or sunscreen. The matching detail makes summer gift baskets feel cohesive.
Make a whole sea creature collection with crabs, fish, and seahorses. The matching kawaii style creates an underwater world. Display together for a beach-themed wall.
This project teaches you to handle creatures with multiple legs and limbs. The skill transfers to spiders, octopuses, or other multi-limbed designs. Crab magnets also work as pin-on accessories for beach bags.
8. Mini Donut Set
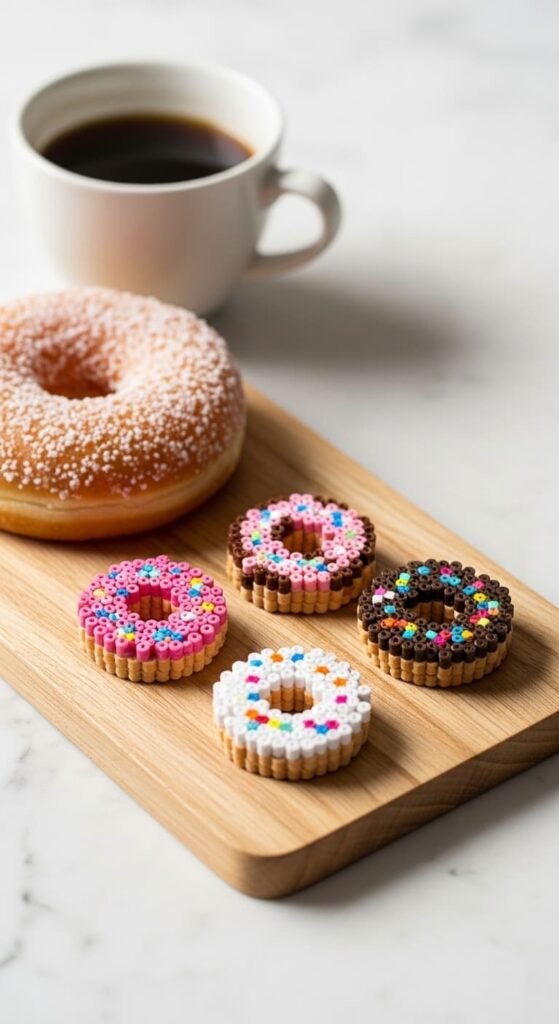
Mini donut charms come in countless flavors and colors. Make small circles with center holes. Top half the donut with frosting in your chosen flavor color.
Sprinkles add the cutest details with tiny multicolored beads scattered on top. Pink frosting with rainbow sprinkles screams kawaii. Chocolate brown with pastel sprinkles also looks adorable.
Each donut uses about 35 beads. Iron carefully around the center hole. The opening should stay clean and circular after fusing.
Make a baker’s dozen in different flavors. Strawberry pink, chocolate brown, vanilla white, lemon yellow, and mint green all work. Display them lined up like a bakery case.
Attach to keychains, earrings, or string them as garland. Donut-themed parties love these as place cards or favors. Each donut costs about thirty cents in materials.
Pair donut charms with coffee gift cards for cute treat gifts. Tie one to a homemade donut box. Donut lovers carry their favorite treat everywhere.
This project teaches you to create donut shapes with center holes. The skill helps with rings, life preservers, or other circular designs with empty centers. Mini donuts also work as pin-on accessories or pendant necklaces.
9. Smiley Rainbow
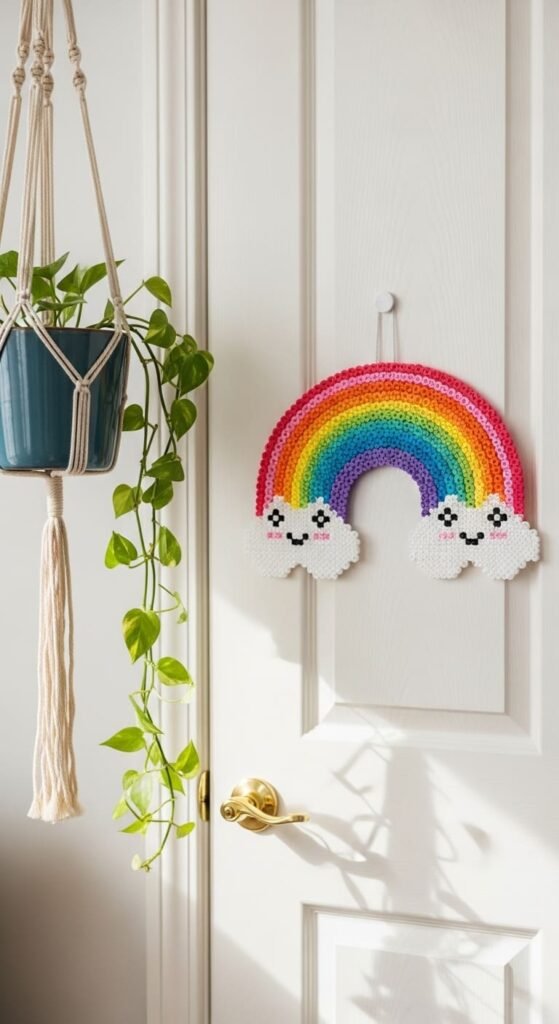
A rainbow with a smiling face takes kawaii to new heights. Make the classic arched rainbow with red, orange, yellow, green, blue, and purple rows. Add white clouds at each end of the arch.
Place a happy face on the rainbow’s middle. Two big eyes and a wide smile turn weather into a character. The kawaii face makes this design irresistibly cheerful.
Each rainbow uses about 80 beads. Iron evenly across the wide arch shape. The clouds at the ends fuse with the rainbow as one piece.
Glue to a fridge or display as wall art. Kids’ rooms love rainbow magic. The cheerful colors brighten any space immediately.
Pair rainbow magnets with weather-themed gifts. Kids learning weather concepts will love them. Tie one to a rain jacket gift for added charm.
Make smaller rainbow versions for keychains and pins. The same pattern works in mini scale for jewelry. Earrings made from tiny rainbows look adorable.
This project teaches you to combine multiple colors in arched patterns. The skill helps with sunsets, gradients, or any color sequence design. Smiley rainbows also work as backpack charms, hair clips, or pendant necklaces for cheerful styling.
10. Cute Cat Face
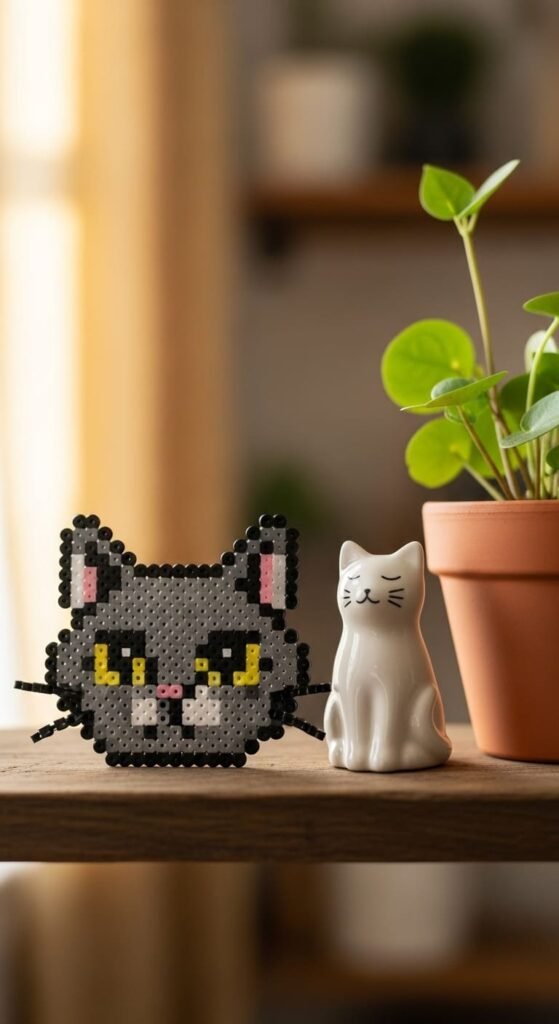
Cat face charms are kawaii classics. Use gray, white, black, or orange beads for the round face. Add pointy triangular ears at the top.
Place big round eyes for that anime cat look. Add a tiny pink triangle nose and curved whiskers. A small smile completes the friendly expression.
Each cat face uses about 60 beads. Iron carefully so the pointy ears stay defined. The thin ears need extra attention during ironing.
Make different cat colors for variety. Calico patterns mix orange and white. Tuxedo cats blend black and white. Each style fits different cat lover preferences.
Attach to keychains or backpack zippers for cat-loving friends. Make matching pairs for cat-loving best friend gifts. Cat parents always appreciate cat-themed accessories.
Pair cat charms with cat treats or toys for thoughtful gifts. Tie one to a cat-themed gift card. The matching detail makes the gift feel personal.
This project teaches you to handle pointy features like cat ears. The skill helps with foxes, mice, or other animals with similar shapes. Cat faces also work as magnets, pins, or pendant necklaces for cat enthusiasts.
11. Smiling Sun
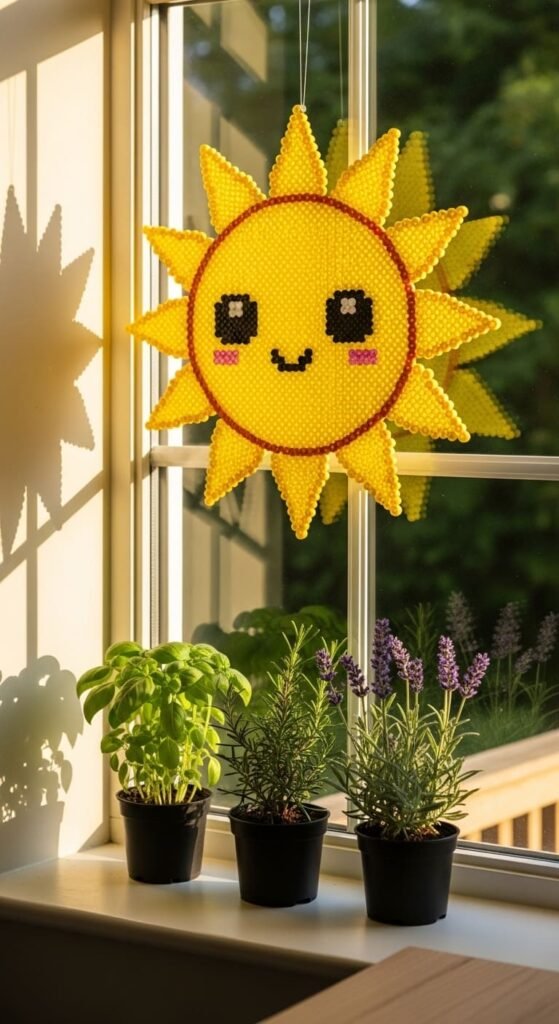
A smiling sun charm spreads joy in any room. Make a yellow circle for the sun’s face. Add pointy ray shapes around the edges.
Place big round eyes and a wide smile on the center face. Pink cheek dots add extra kawaii charm. The sunshine feels alive with personality.
Each sun uses about 70 beads. Iron carefully around the spiky ray shapes. Watch the thin points to prevent them from melting flat.
Make the sun in golden yellow, orange, or even pink for fantasy versions. Pastel suns suit baby rooms beautifully. Bright suns work for kitchens and offices.
Hang in windows as sun catchers. The sunlight passes between beads for a stained-glass effect. Each sun costs about a dollar in materials.
Pair sun charms with garden-themed gifts. Tie one to a watering can or seed packet. Gardeners and plant lovers will appreciate the sunny detail.
This project teaches you to handle radiating shapes with thin extensions. The skill helps with stars, sunbursts, or fireworks designs. Smiling suns also work as nursery decorations, magnets, or summer hat charms.
12. Pink Heart with Wings
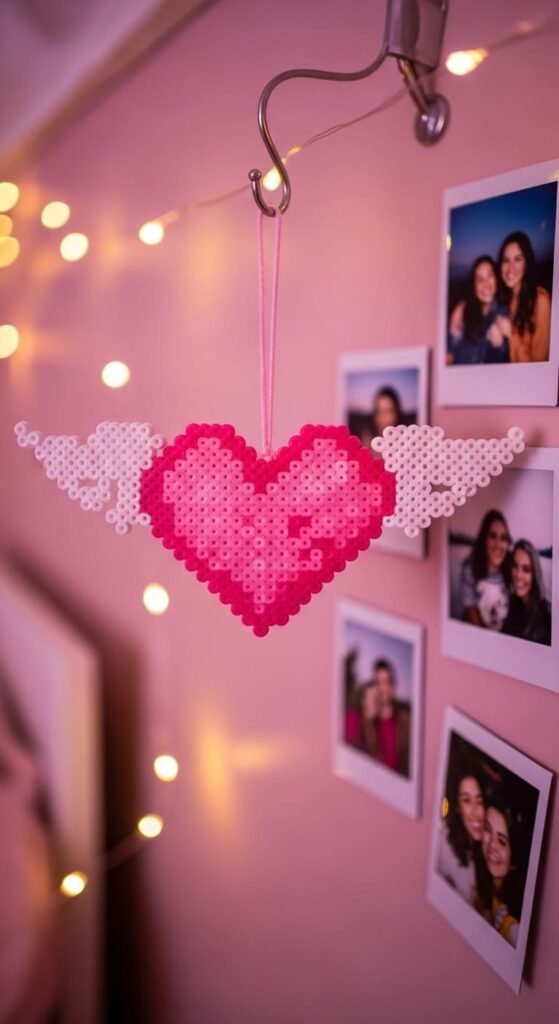
A winged heart feels romantic and angelic. Make a pink or red heart shape in the center. Add white feathered wings on each side.
Each wing extends out from the heart with a feathered edge. The wing detail adds movement to a simple heart. Use pearl white or light gray for the wings.
The full design uses about 80 beads. Iron carefully across the wide wingspan. The thin wing tips need watchful ironing.
Make the heart in different colors for variety. Red looks classic, pink feels sweet, lavender adds fantasy magic. Each color suits different gifting occasions.
Attach as pendant necklaces or key chain charms. Valentine’s Day gifts feel extra special with handmade winged hearts. Each one costs under a dollar.
Pair winged heart charms with love letters or romantic gifts. Tie one to a chocolate box or floral arrangement. The handmade element makes everything feel personal.
This project teaches you to make symmetric designs with detailed extensions. The skill helps with butterflies, fairy designs, or other winged characters. Winged hearts also work as wall decorations, hair clips, or backpack tags for sweet styling.
13. Mini Cupcake Charm
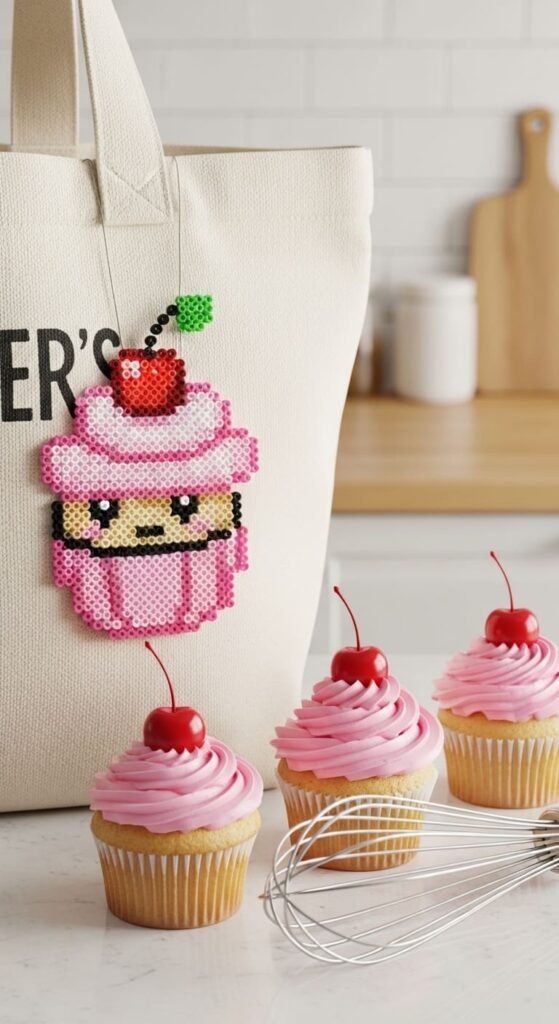
Cupcake charms feel like tiny celebration tokens. Make a brown or tan rectangle for the cupcake liner. Add fluffy frosting on top in pink, white, or chocolate.
Place a red bead on top for a cherry. Sprinkle tiny multicolored beads on the frosting. Add a kawaii face to the cupcake liner for ultimate cuteness.
Each cupcake uses about 50 beads. Iron carefully to fuse the liner and frosting together. The cherry adds a 3D feel even though it’s flat.
Make different flavors with frosting color changes. Chocolate brown, vanilla white, strawberry pink, and lemon yellow all work. Build a whole bakery collection.
Attach to keychains or magnets for bakery-themed gifts. Pair with real cupcakes or baking supplies for adorable presents. Birthday gifts feel extra sweet with cupcake charms attached.
Make sets for birthday party favors. Each guest takes home a personalized cupcake charm. The party theme feels cohesive and memorable.
This project teaches you to combine layered shapes with topping details. The skill helps with sundaes, cakes, or other layered desserts. Cupcake charms also work as earrings or pin-on accessories for fashion-loving bakers.
14. Tiny Boba Bear
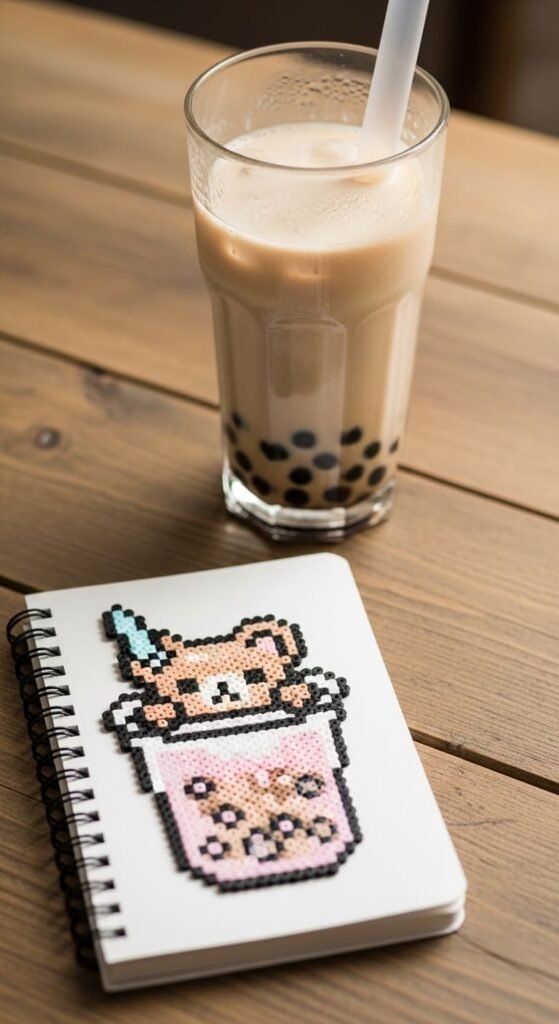
A boba bear combines two kawaii loves into one charm. Make a tall bubble tea cup shape with pastel pink or beige beads. Add tapioca pearls at the bottom in dark brown.
Place a tiny bear face peeking from the top of the cup. The bear’s ears poke up like the dome of a closed cup. Add eyes and a small smile to the bear’s face.
Each charm uses about 70 beads. Iron the layered design carefully. The bear and cup fuse as one solid piece.
Make different boba flavors with cup color changes. Brown for milk tea, green for matcha, pink for strawberry. Each flavor matches a different bear color.
Attach to phone charms, backpack zippers, or keychains. Boba lovers will adore the matching detail with their drinks. Pair with bubble tea gift cards for kawaii presents.
Make sets in different flavors for friend groups. Everyone gets their favorite boba flavor. The shared theme connects friends over a common love.
This project teaches you to combine character designs with object designs. The skill helps with food characters, animal cars, or other hybrid kawaii creations. Boba bears also work as desk decorations or pendant necklaces.
15. Pastel Mushroom
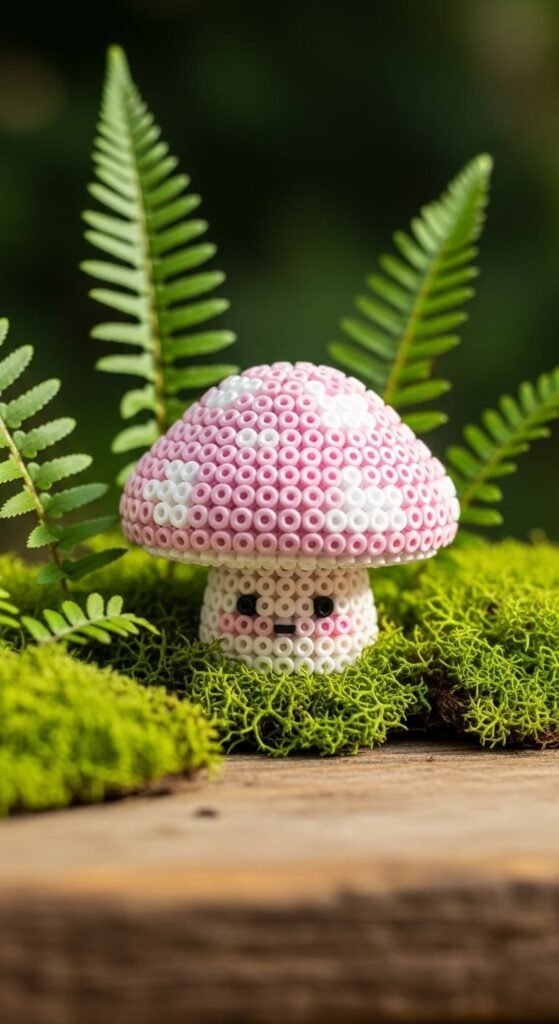
A pastel mushroom feels like fairy garden magic. Use soft pink, lavender, or mint green for the cap instead of classic red. Add white spots scattered across the cap.
Place a cream or beige stem below the cap. Add tiny eyes and a smile on the stem face. The kawaii face transforms a forest plant into a friend.
Each mushroom uses about 60 beads. Iron evenly across the cap and stem. The transition between cap and stem fuses naturally.
Make a whole mushroom forest in different pastel shades. Display together as a cute scene. The grouping looks like fairy tale woodland.
Pair mushroom charms with garden gifts or nature-themed presents. Tie one to a potted plant or seed packet. Plant lovers appreciate the whimsical detail.
Make smaller mushroom magnets for fridge groupings. Larger mushrooms work as desk decorations or wall art. The flexible scale fits many displays.
This project teaches you to add patterns within shapes through bead placement. The skill helps with polka dot designs, animal patterns, or any spotted or striped element. Pastel mushrooms also work as keychains, pins, or pendant necklaces for whimsical fashion.
16. Kawaii Egg Character
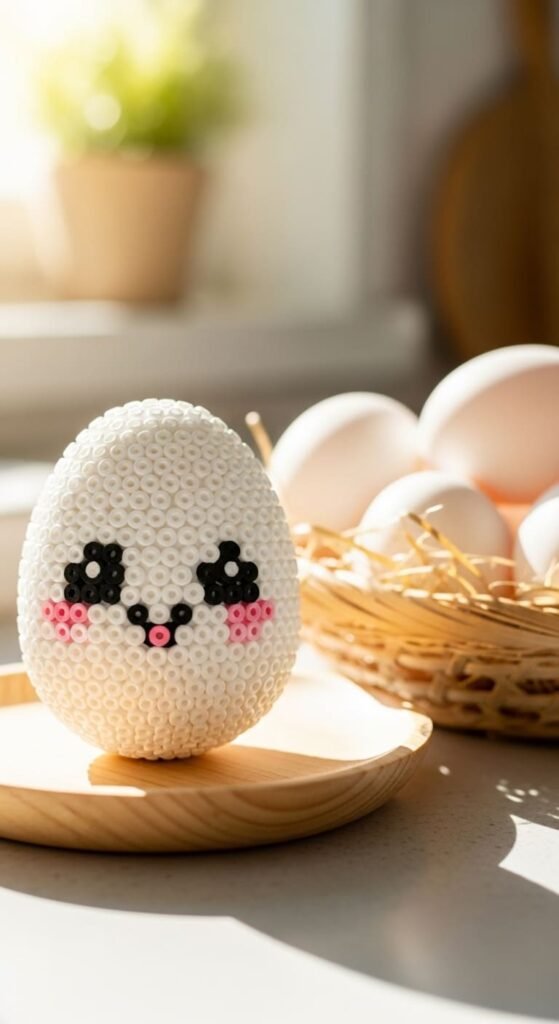
An egg character brings breakfast vibes to kawaii crafts. Make an egg-shaped oval with white or cream beads. Add a face with eyes, mouth, and pink cheek dots.
Make different expressions for variety. Sleepy eggs have closed eyes, happy eggs smile wide, surprised eggs have round mouths. Each expression tells a different story.
Each egg uses about 50 beads. Iron the simple oval shape evenly. The minimalist design lets the face be the star.
Make a whole egg family in matching style. Different expressions create personality differences. Display them like a cartoon cast on a shelf.
Pair with breakfast-themed gifts for cute morning presents. Tie one to a coffee mug or cereal box. Brunch-loving friends will laugh at the breakfast theme.
Make Easter versions with patterned designs across the shell. Polka dots, stripes, or pastel colors fit spring beautifully. The base egg shape adapts to many themes.
This project teaches you to convey emotion through simple face designs. The skill works for any character creation. Kawaii eggs also work as keychains, magnets, or pin-on accessories for foodie fashion.
17. Smiling Watermelon
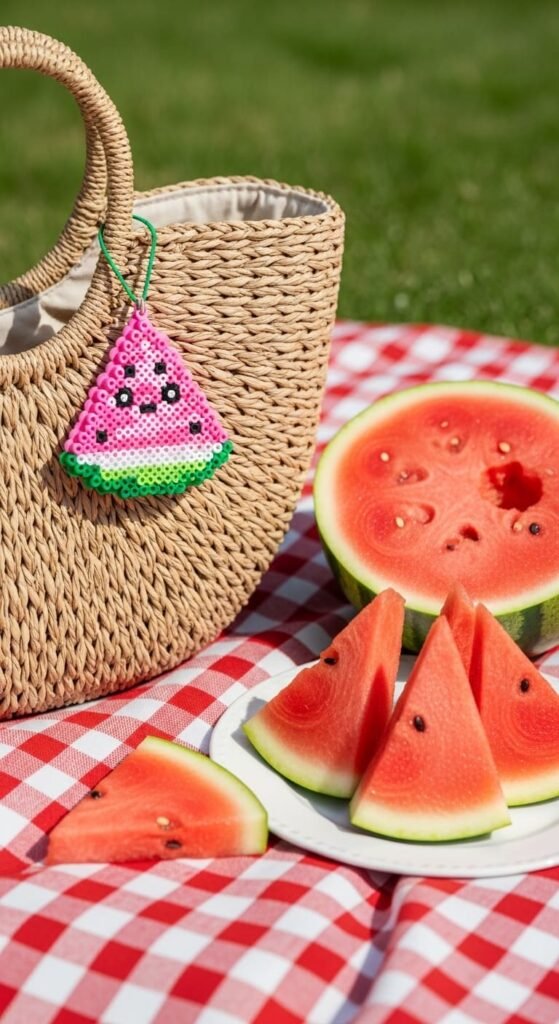
A smiling watermelon slice is summer kawaii at its best. Make a half-circle shape with pink fruit flesh inside green rind. Add black bead seeds scattered through the pink.
Place a kawaii face on the pink fruit center. Big eyes and a wide smile turn fruit into a friend. The smiling face makes summer feel even brighter.
Each slice uses about 80 beads. Iron the half-circle shape carefully. The straight bottom edge should stay flat after ironing.
Make smaller watermelon charms for keychains. Larger slices work as fridge magnets or coasters. The flexible scale fits many uses.
Pair with real watermelon at summer parties. Use as drink charms or decorative accents. The matching theme feels coordinated and cheerful.
Make a summer fruit collection with smiling pineapples, oranges, and lemons. Display them as a kawaii fruit basket. Each one shares the same friendly style.
This project teaches you to combine multiple bead colors with character details. The skill helps with any fruit, vegetable, or food character design. Smiling watermelons also work as backpack charms, pin-on accessories, or pendant necklaces for summer fashion.
18. Mini Burger Charm
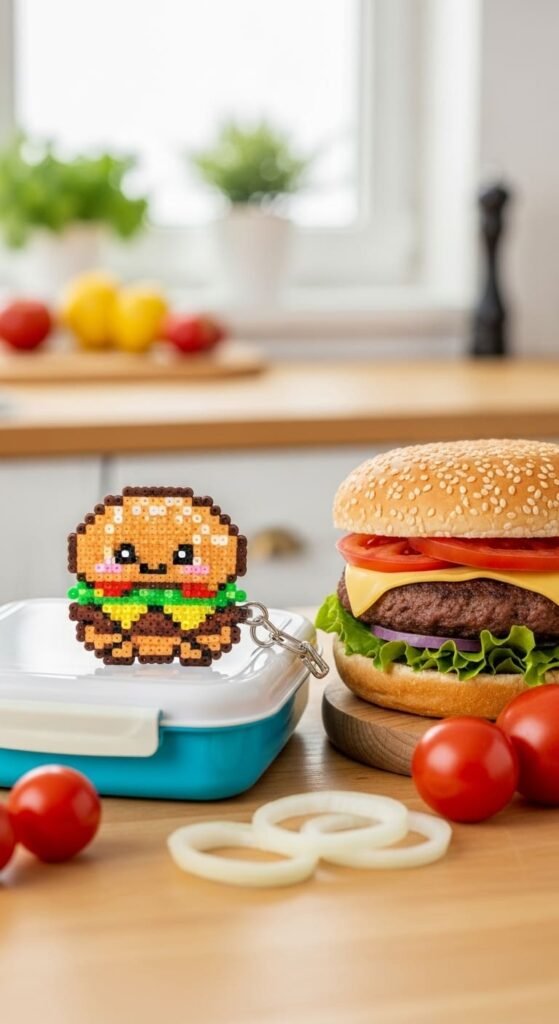
Burger charms make food cute and giftable. Make tan beads for the top and bottom buns. Layer brown for the patty, green for lettuce, red for tomato, and yellow for cheese.
Add a kawaii face on the top bun for cuteness. The layered design looks deliciously detailed. Each layer adds visual interest and authenticity.
Each burger uses about 70 beads. Iron the layered design carefully so all layers fuse together. The thicker design feels solid and substantial.
Make different burger styles with topping variations. Plain cheeseburger, veggie-loaded, or breakfast burger versions all work. The flexibility keeps the project interesting.
Attach to keychains or backpack zippers for foodie friends. Pair with burger gift cards or cookout supplies. The matching detail feels intentional and fun.
Make a whole fast food collection with fries, drinks, and burgers. The themed group makes a memorable gift basket. Each piece costs about a dollar in materials.
This project teaches you to layer multiple ingredients into one design. The skill helps with sandwiches, pizzas, or other layered foods. Mini burgers also work as pin-on accessories or pendant necklaces for casual fashion.
19. Bunny Face
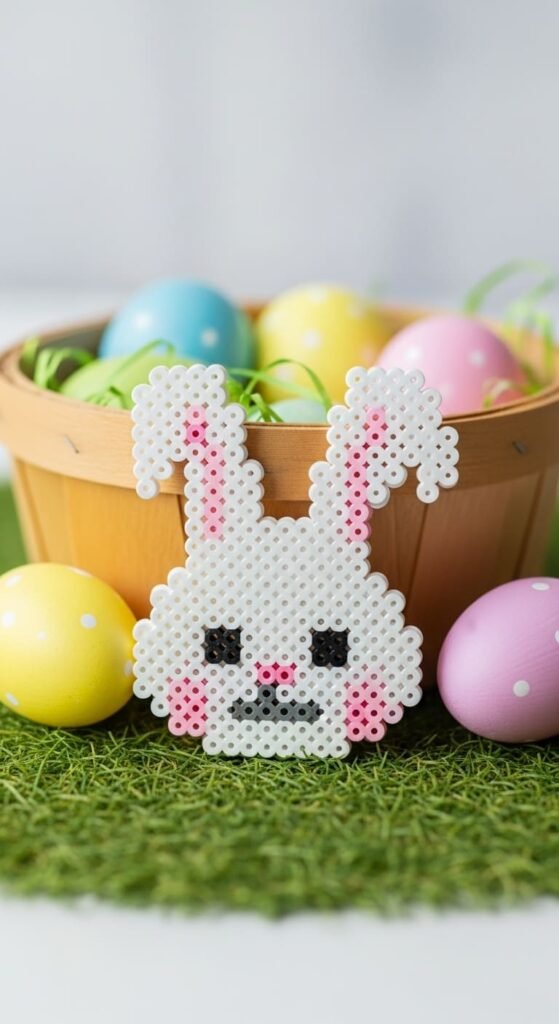
Bunny face charms work for Easter or year-round cuteness. Use white, gray, or beige beads for the round face. Add tall pointy ears with pink inside details.
Place small black eyes and a tiny pink Y-shaped nose. Add a small mouth below the nose. The long ears make this design distinctly bunny.
Each bunny uses about 70 beads. Iron carefully so the tall ears stay intact. The thinner ears need extra watchful ironing.
Make Easter versions with pastel colored bunnies. Light pink, mint green, or lavender feel spring-like. Traditional white bunnies work year-round.
Pair with Easter baskets, chocolate bunnies, or spring gifts. Tie a bunny charm to a real basket handle. The handmade detail makes Easter feel special.
Make a bunny family in coordinating colors. Mom, dad, and baby bunnies in matching styles. Display together for a sweet seasonal scene.
This project teaches you to handle long, thin extensions like bunny ears. The skill helps with rabbits, foxes, or any animal with prominent ears. Bunny faces also work as keychains, magnets, or hair clips for cute styling.
20. Kawaii Ghost
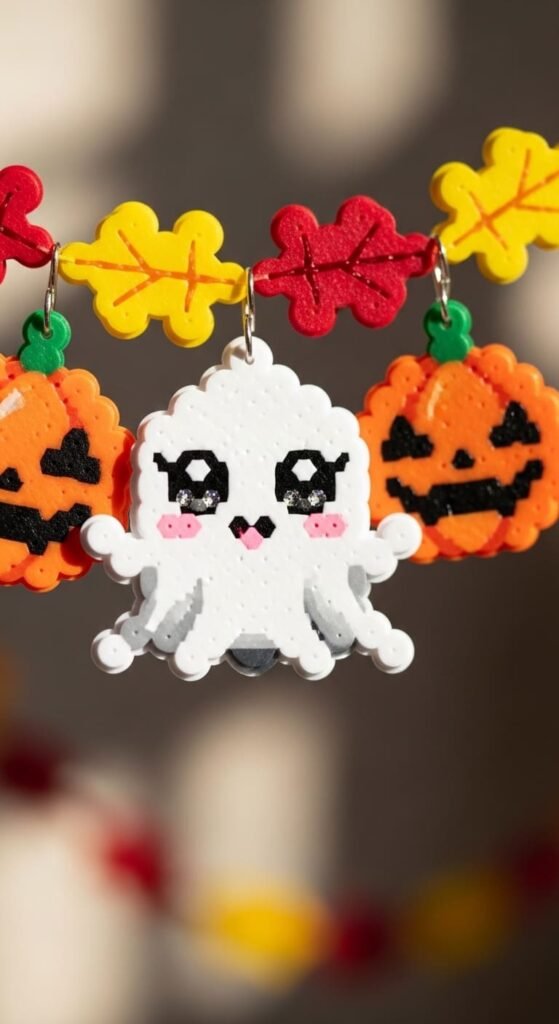
A kawaii ghost makes Halloween cute instead of scary. Make a white blob shape with a wavy bottom. Add big eyes, an O-shaped mouth, and pink cheek dots.
The friendly face turns spooky into sweet. Pink cheeks are key to the kawaii look. They make even ghosts feel approachable.
Each ghost uses about 50 beads. Iron carefully across the irregular shape. The wavy bottom adds character to the simple body.
Make ghost variations with different expressions. Some look surprised, others happy, others sleepy. Each personality adds variety to a collection.
Pair kawaii ghost charms with Halloween candy gifts. Tie one to a pumpkin spice latte gift card. The matching theme feels intentional and seasonal.
Make a Halloween collection with ghosts, pumpkins, and candy corn. All in cute kawaii style for cohesive design. The grouping feels like a kawaii Halloween party.
This project teaches you to make irregular character shapes with personality. The skill helps with creative monsters, blobs, or fantasy creatures. Kawaii ghosts also work as backpack charms, pins, or pendant necklaces for Halloween fashion.
21. Cherry Pair
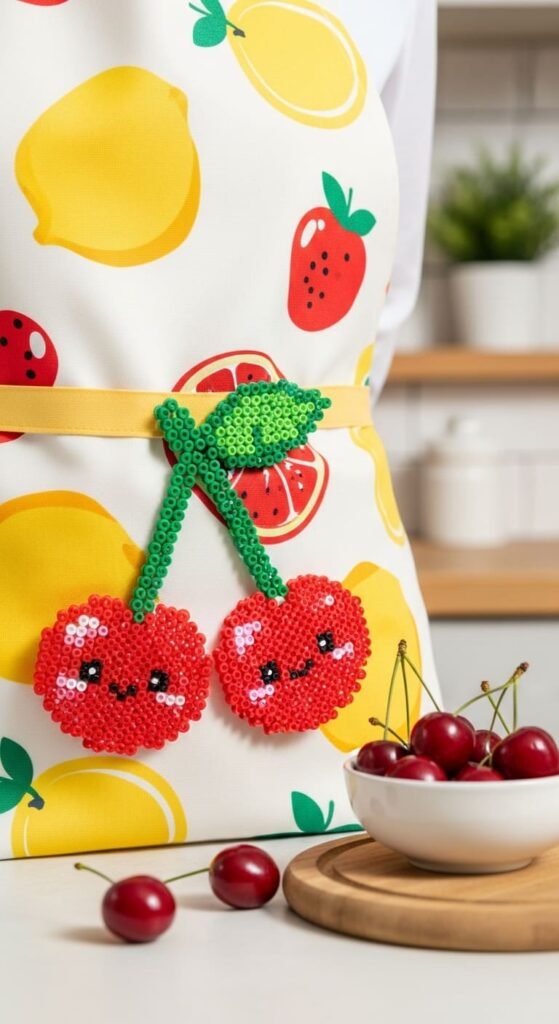
A pair of smiling cherries feels classic kawaii. Make two small red circles connected by green stems at the top. Add a tiny green leaf where the stems meet.
Place small kawaii faces on each cherry. Two eyes and a smile on each fruit. The pair design adds visual interest beyond a single cherry.
The full design uses about 50 beads. Iron carefully across the connected design. The thin stems need watchful ironing to prevent thinning.
Make cherries in slightly different shades for each twin. Or keep them identical for matching looks. Both options work beautifully.
Attach to keychains, hair clips, or earrings as a matching pair. Two-friend matching gifts feel especially sweet with cherry charms. Each pair represents friendship perfectly.
Pair cherry charms with real cherries or cherry-themed gifts. Tie to a baking gift basket or pie ingredient set. Cherry lovers will appreciate the matching detail.
This project teaches you to handle connected designs with multiple elements. The skill helps with grape clusters, berry bunches, or any fruit grouping. Cherry pairs also work as wall decor, magnets, or pin-on accessories for retro styling.
22. Smiling Pineapple
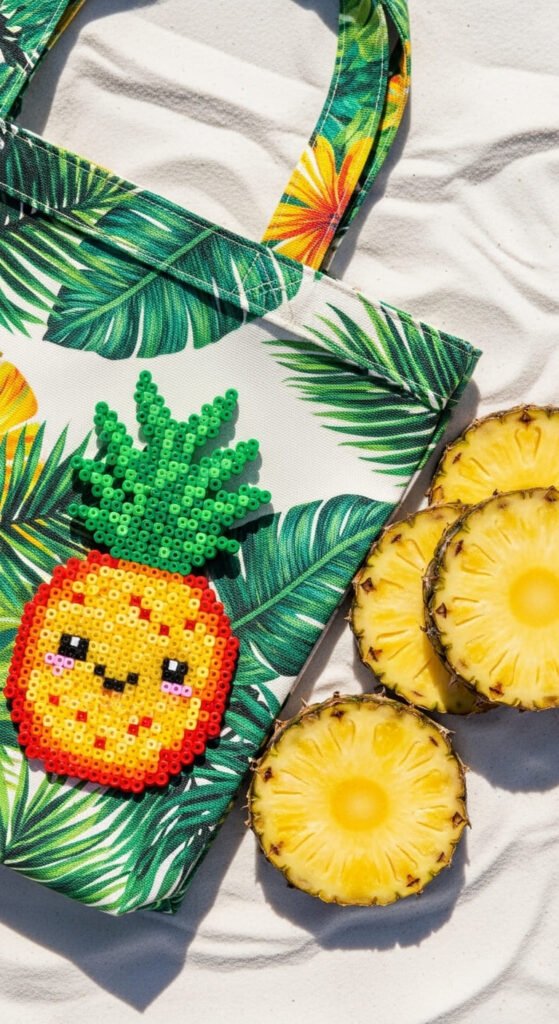
A smiling pineapple charm radiates tropical cheer. Make a yellow oval shape with crosshatch patterns. Add green spiky leaves at the top for the crown.
Place big round eyes and a wide smile on the front. The crosshatch pattern in the yellow body mimics pineapple texture. Skip it for simpler designs.
Each pineapple uses about 70 beads. Iron carefully across the body and spiky crown. The thin leaves need watchful ironing.
Make different sizes for various uses. Tiny pineapples work as earrings, medium ones as keychains, large ones as wall decor. The flexible scale fits many projects.
Pair pineapple charms with tropical-themed gifts. Tie one to a beach bag, sunscreen, or tropical drink mix. Summer party gifts feel coordinated with matching details.
Make a tropical collection with pineapples, palm trees, and coconuts. The matching kawaii style ties them together. Display as summer beach decor.
This project teaches you to add textured patterns within solid shapes. The skill helps with corn, pinecones, or any patterned organic shape. Smiling pineapples also work as backpack charms, magnets, or pin-on accessories for summer fashion.
23. Tiny Whale
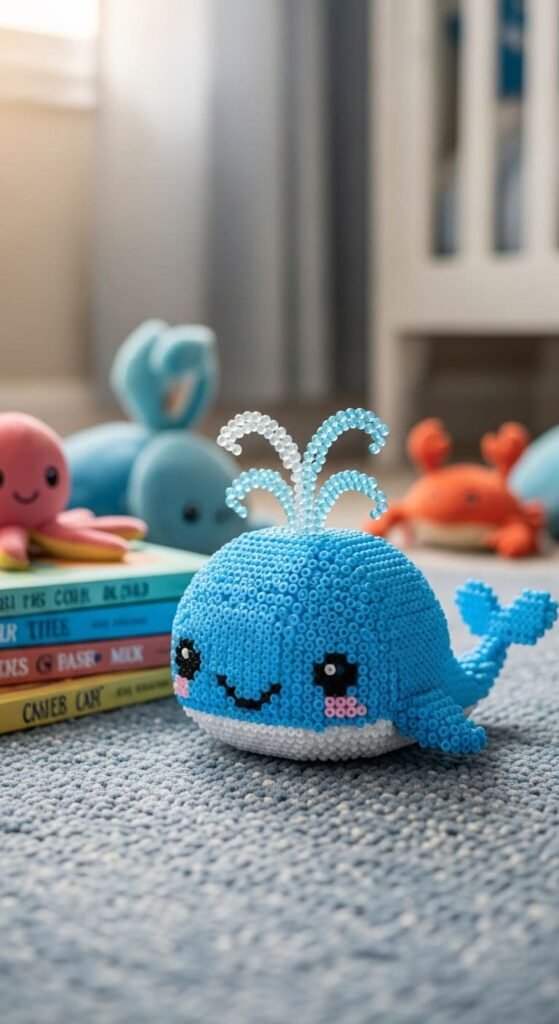
A cute whale charm makes ocean life adorable. Use baby blue or navy beads for the round whale body. Add a small tail fin at the back and a fin on the side.
Place a kawaii face on the whale’s body. Big eye, friendly smile, and a tiny water spout above the head. The water spout adds movement and life to the design.
Each whale uses about 60 beads. Iron carefully across the body and fins. The thin water spout droplets need watchful ironing.
Make different whale colors for variety. Pink, purple, or rainbow versions break from realistic blues. Each color tells a different fantasy story.
Pair whale charms with ocean-themed gifts. Tie to baby gifts for nursery themes. Beach trip gifts feel coordinated with whale matching detail.
Make a whole ocean collection with whales, dolphins, and starfish. All in matching kawaii style. The themed group works as wall decor or hanging mobiles.
This project teaches you to handle creature designs with multiple fins. The skill helps with fish, dolphins, or sea mammal designs. Tiny whales also work as keychains, magnets, or pendant necklaces for ocean lovers.
24. Kawaii Lemon
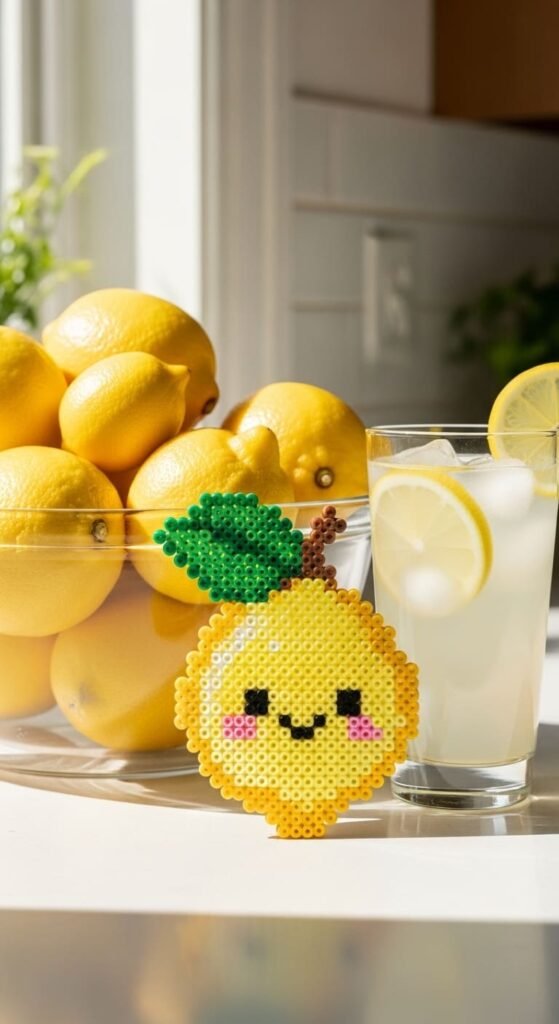
A smiling lemon charm pops with sunny color. Make a yellow oval or teardrop shape with rounded ends. Add a small green leaf at the top.
Place big round eyes and a happy smile on the lemon face. Pink cheek dots add extra kawaii charm. The bright yellow makes this design feel cheerful and energetic.
Each lemon uses about 50 beads. Iron carefully across the simple shape. The small leaf detail fuses easily with the main body.
Make a citrus collection with lemons, limes, and oranges. Each fruit gets its own color while sharing the same kawaii style. The matching set looks like cute fruit friends.
Pair lemon charms with kitchen gifts or lemonade stand themes. Tie to a real lemon-themed item like a candle or kitchen towel. The matching detail makes any kitchen gift feel personalized.
Make smaller lemon versions for earrings or pendant necklaces. The bright color stands out in jewelry. Larger lemons work as fridge magnets or wall decor.
This project teaches you to make simple fruit designs with character details. The skill helps with any round or teardrop-shaped fruit. Kawaii lemons also work as backpack charms, pins, or hair clips for sunny fashion.
Conclusion
Cute perler bead designs turn simple fuse beads into tiny treasures that brighten desks, bags, and gift baskets. These 24 kawaii ideas focus on the things people love most: smiling fruit, pastel animals, miniature foods, and trendy friendship bracelet beads. Each design finishes in 15 to 20 minutes and uses pennies worth of beads. Pick one cute project that matches your style and try it tonight. Pair finished charms with handwritten notes for the sweetest handmade gifts. Build a collection over time and display them on a magnetic board, hang them as garlands, or attach them to all your bags. The kawaii style turns ordinary craft time into adorable artistry that puts smiles on every face.


