Aesthetic paper crafts are perfect for pretty Pinterest projects because they turn simple paper into room decor, handmade gifts, photo props, journal accents, and desk details without a large budget. This topic fits readers who want easy paper flowers, butterfly wall art, paper garlands, rosettes, lanterns, origami pieces, and soft handmade decorations that photograph beautifully. Search interest around aesthetic paper crafts often centers on pretty, beginner-friendly, high-impact decor ideas using paper flowers, butterflies, garlands, lanterns, wall art, and decorative origami.
1. Pastel Paper Flower Bouquet
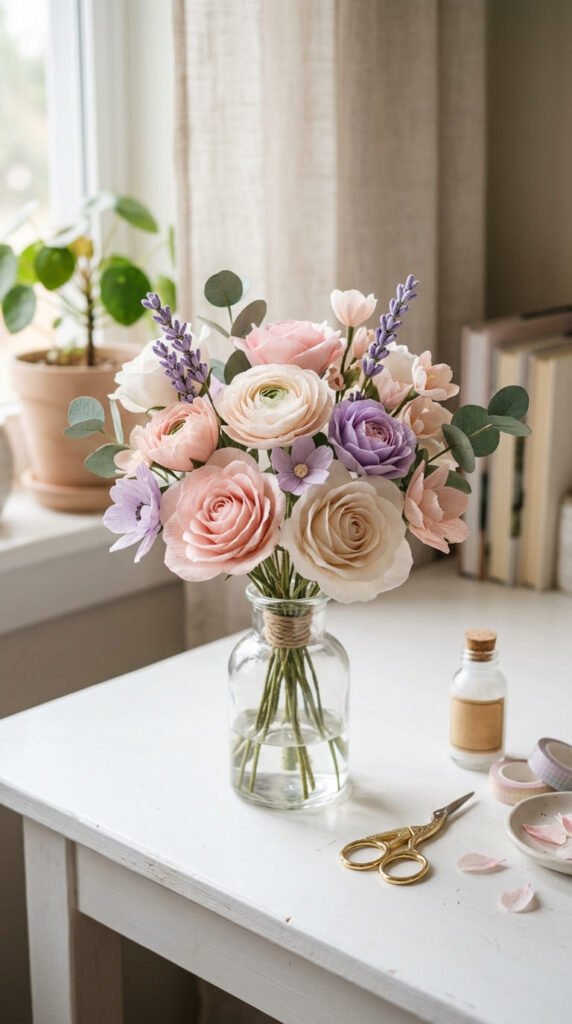
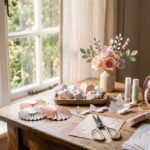
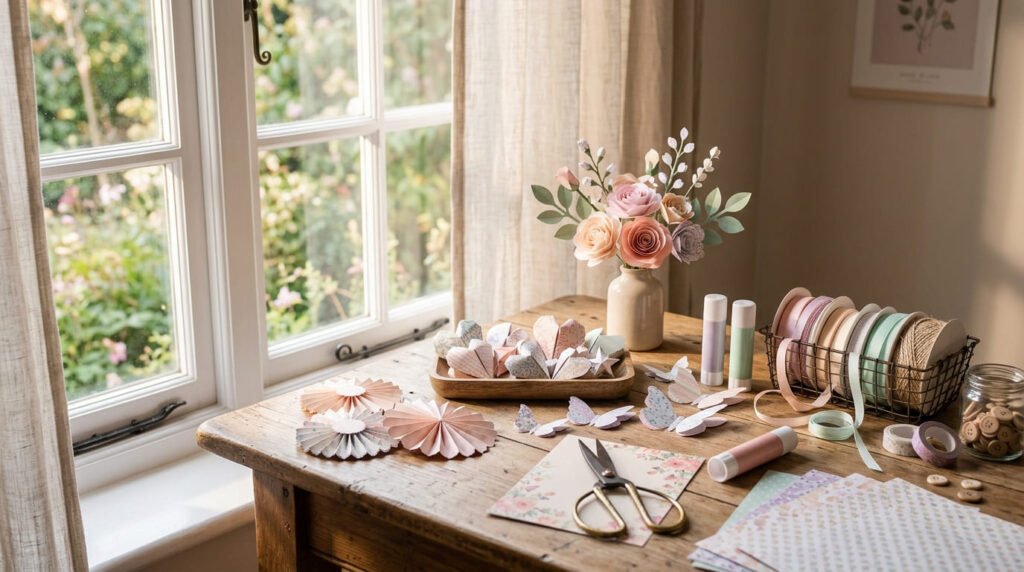
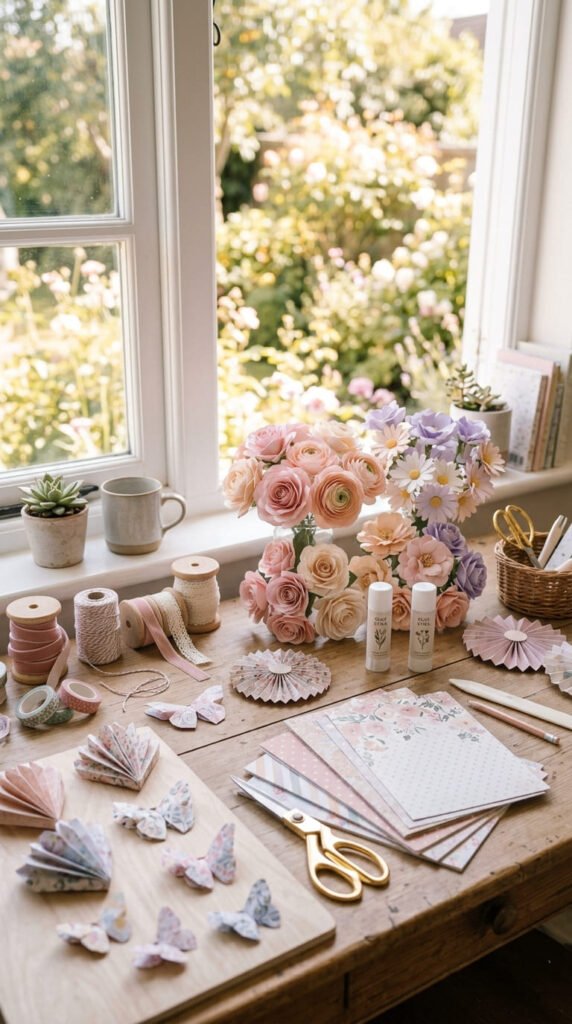
A pastel paper flower bouquet is one of the prettiest aesthetic paper crafts because it looks soft, handmade, and easy to style in photos. Use blush, cream, lavender, sage, or pale yellow paper. Cut petal shapes in three sizes, then curl the edges gently with a pencil.
Layer the petals around a small paper circle and glue them in place. Add a rolled green paper stem or tape the flower head to a wooden skewer wrapped in green paper. Make five to seven flowers for a small bouquet.
This craft works well for desks, shelves, bedside tables, party corners, and handmade gifts. It also lasts much longer than real flowers.
For a budget-friendly version, color plain printer paper with soft crayons or watercolor paint. Let it dry flat before cutting. You can also reuse pastel gift bags or wrapping paper.
Place the flowers in a jar, mug, or thrifted vase. Add paper leaves for a fuller display. The finished bouquet feels gentle, pretty, and photo-ready.
2. 3D Paper Butterfly Wall
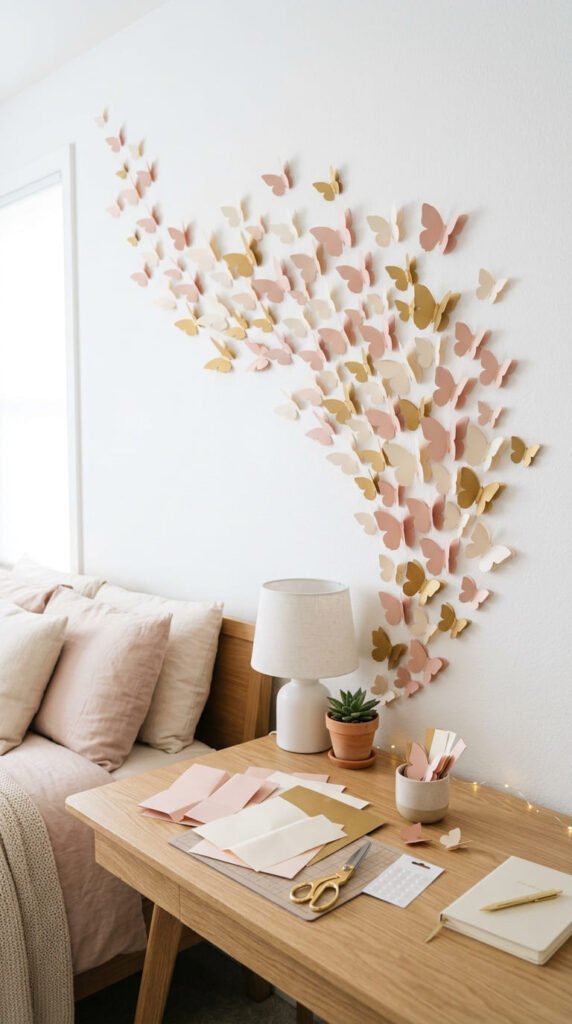
A 3D paper butterfly wall is perfect for a soft Pinterest-style room refresh. Fold colored paper in half, draw half a butterfly along the fold, and cut it out. Open the paper to reveal a balanced butterfly shape.
Fold the wings upward slightly so each butterfly lifts from the wall. Make butterflies in different sizes. Place larger ones near the bottom and smaller ones higher up for a flying effect.
Choose colors that match your room. Blush, ivory, gold, and beige feel calm. Black and white feel modern. Bright colors work well for a playful desk or craft corner.
Use removable glue dots or painter’s tape so the wall stays clean. This is great for rental rooms, dorms, and temporary backdrops.
For a budget idea, use magazine pages, old calendars, or wrapping paper scraps. Patterned paper makes each butterfly look detailed without extra drawing.
Style the butterflies around a mirror, headboard, shelf, or desk. The result feels light, graceful, and easy to photograph.
3. Soft Paper Heart Garland
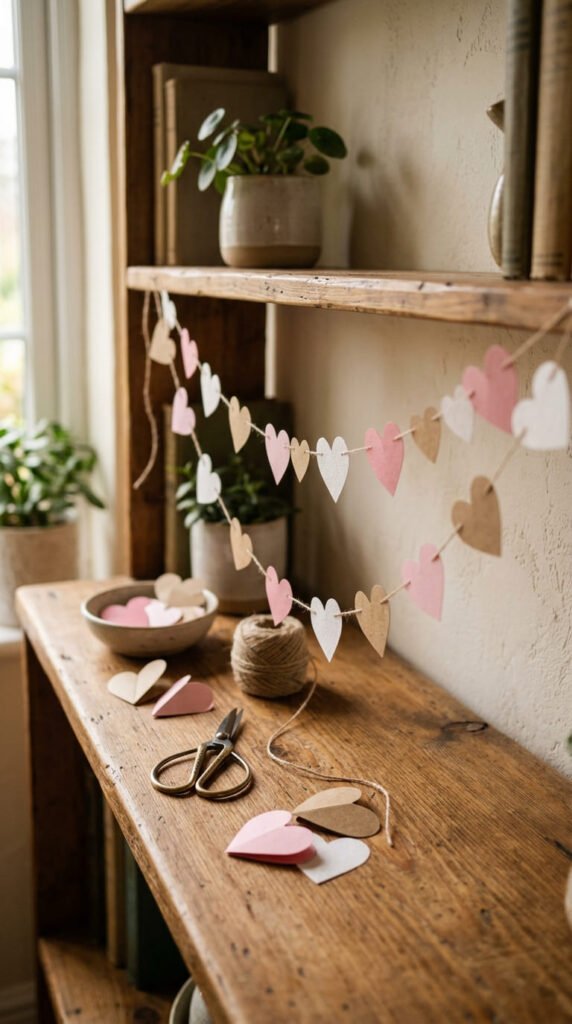
A soft paper heart garland is simple, sweet, and ideal for bedrooms, reading corners, parties, or handmade photo backdrops. Cut hearts from pink, white, cream, red, or kraft paper. Use one heart shape as a guide so the garland looks neat.
Fold each heart lightly down the center to add dimension. Punch small holes near the top and thread the hearts onto string, yarn, or twine. You can also tape the hearts to the back of the string if you do not have a hole punch.
This project is easy for beginners and does not require costly supplies. Cardstock works best, but printer paper can work for smaller garlands.
For a budget-friendly DIY example, cut hearts from old gift bags or leftover scrapbook paper. Mix plain and patterned hearts for a cute handmade style.
Hang the garland over a desk, mirror, window, bed, or bookshelf. It adds a romantic paper detail without making the room feel crowded. Save it flat in an envelope when not in use.
4. Folded Paper Fan Rosettes
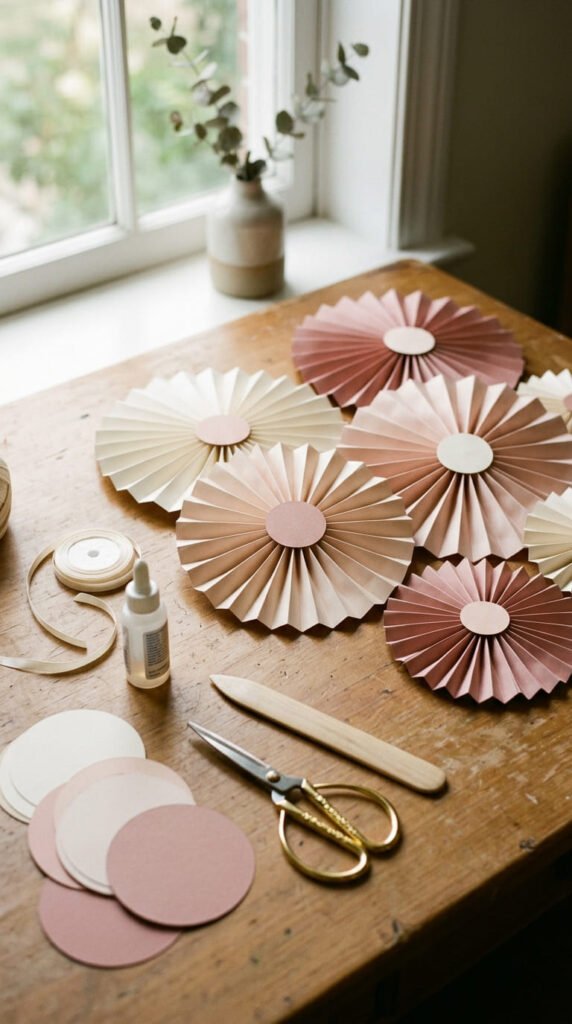
Folded paper fan rosettes are pretty, bold, and easy to make with basic paper. Start with rectangular sheets. Fold each sheet back and forth like an accordion. Press the folds firmly so the fan holds its shape.
Fold the pleated strip in half and glue the inner edges together. Make two or three folded fans, then glue them side by side to create a round rosette. Add a small paper circle in the center for a clean finish.
Use rosettes as wall decor, party backdrops, gift toppers, or photo props. Make them in different sizes for a fuller display.
For a budget-friendly option, use wrapping paper, old party bags, or colored printer paper. Choose two or three shades for a polished Pinterest look.
A realistic idea is to place five rosettes above a desk or dresser. Use cream, dusty pink, and tan paper. The layered circles add texture and make a plain wall feel styled without frames, nails, or expensive decor.
5. Vintage Book Page Flowers
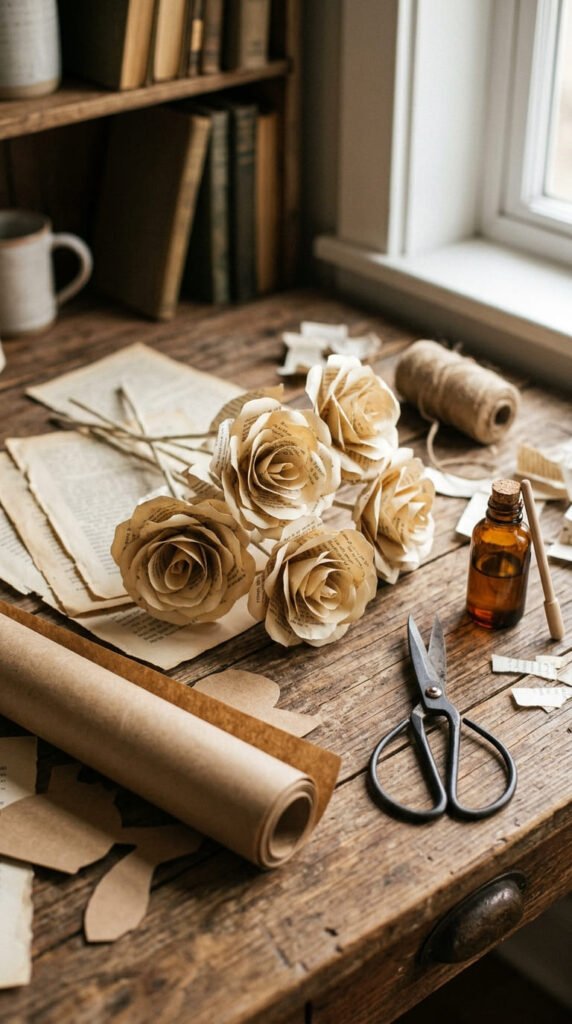
Vintage book page flowers are a beautiful way to make aesthetic paper crafts with old or damaged pages. Cut petal shapes from book pages, music sheets, or newspaper. Use only pages that are already damaged or no longer useful.
Layer the petals in circles and glue them at the center. Add a kraft paper circle, button, or rolled paper center. Curl the petal edges slightly with a pencil for a soft flower shape.
These flowers work well in jars, shadow boxes, wreaths, cards, and wall art. The printed paper creates texture without paint or extra decoration.
For a budget-friendly version, use old worksheets, junk mail, or brown paper bags. Add a little white or cream paper if you want a softer look.
A simple DIY example is a framed flower set. Make three book page flowers and glue them onto tan cardstock. Place the page inside a thrifted frame. It looks warm, handmade, and perfect for a reading nook or desk wall.
6. Aesthetic Paper Lanterns
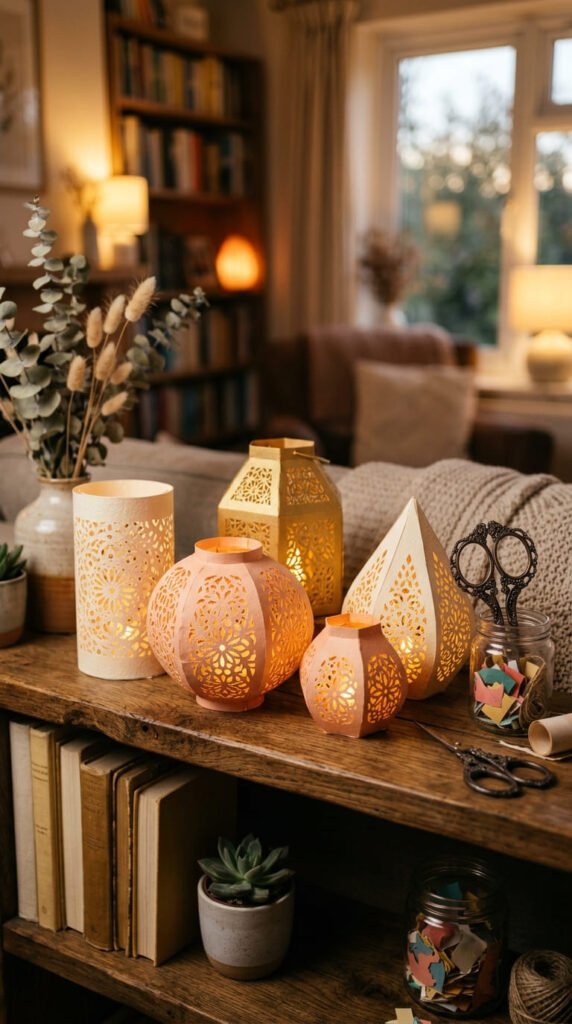
Aesthetic paper lanterns add a soft handmade detail to shelves, desks, party tables, and cozy corners. Fold a sheet of paper in half lengthwise. Cut short lines from the folded edge toward the open edge, leaving space at the top. Open the sheet, roll it into a cylinder, and tape the side.
Use cream, peach, gold, blush, or warm white paper for a soft look. Patterned paper also works well if you want a bolder style.
Place battery tealights nearby or inside only if the lantern is wide and stable. Do not use real candles with paper. Safety matters, especially for room decor.
For a budget-friendly version, use printer paper and add tiny cutout stars, hearts, or dots before rolling. When the light shines through, the lantern feels delicate.
Make three lanterns in different heights and place them on a shelf or side table. Add a small vase or book stack nearby. The result is calm, warm, and perfect for evening photos.
7. Paper Daisy Mirror Decor
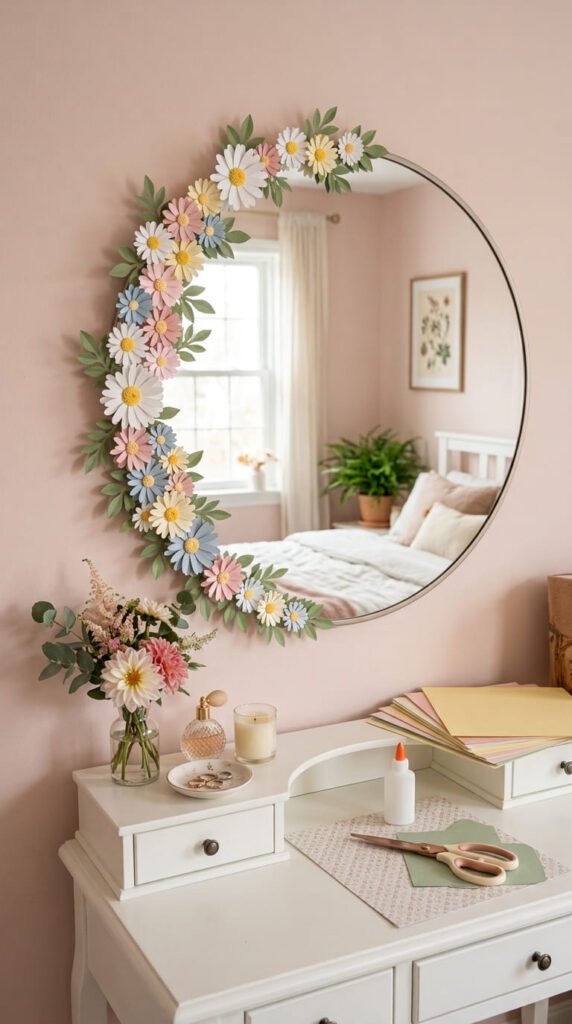
Paper daisy mirror decor is cute, bright, and easy to make with small paper scraps. Cut white oval petals and yellow circles for the centers. Glue five or six petals around each circle to make a daisy.
Add green paper leaves between the flowers. Arrange the daisies around one corner of a mirror or along the full frame. Use removable glue dots if you want the decor to be temporary.
This craft works well for vanity areas, bedrooms, dorm rooms, bathrooms, and kids’ rooms. White daisies feel clean and soft, while colored petals create a more playful style.
For a budget-friendly version, use plain printer paper for petals and color the centers with markers. You can also cut petals from old envelopes or paper bags painted white.
A realistic DIY example is to decorate only the top-left corner of a mirror. This uses fewer flowers but still looks pretty. Add five daisies and a few leaves. The mirror feels styled without buying a new frame.
8. Minimal Paper Moon Garland
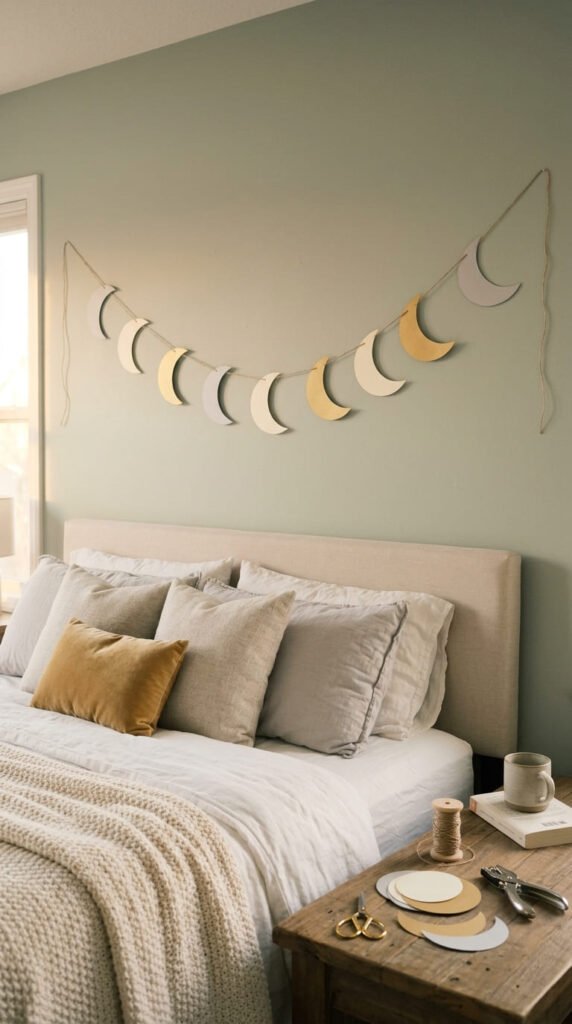
A minimal paper moon garland is perfect for bedrooms, nurseries, reading corners, and soft Pinterest room decor. Cut crescent moons from cream, gold, gray, or white cardstock. Make a few full circles too if you want a moon phase style.
Punch small holes at the top of each shape and thread them onto string. You can also tape the shapes to the back of the string for a cleaner front view.
Keep the spacing even for a calm look. Hang the garland above a bed, mirror, shelf, or desk. It adds a dreamy handmade touch without taking up surface space.
For a low-cost version, use cereal box cardboard covered with paper. This makes the moons stronger. Metallic gift wrap can create gold moons without buying specialty cardstock.
A simple DIY idea is to make seven moons in different phases. Hang them on a thin branch or straight string. The result feels peaceful, modern, and easy to match with many room styles.
9. Layered Paper Leaf Wall Art
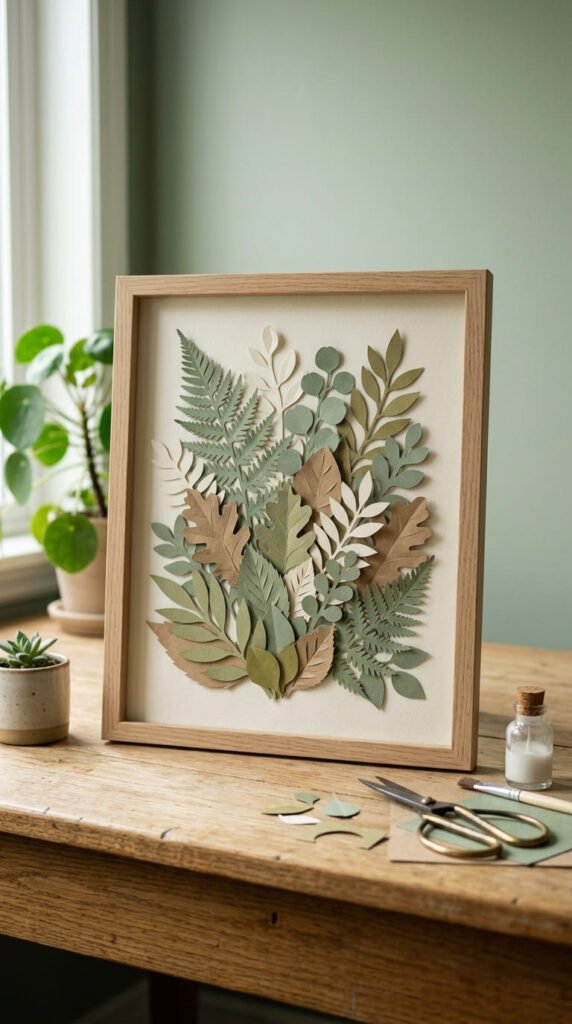
Layered paper leaf wall art is a lovely choice for anyone who likes soft botanical decor. Cut leaf shapes from sage, olive, cream, brown, or kraft paper. Fold each leaf down the center so it has a gentle raised shape.
Arrange the leaves on cardstock before gluing. Try a branch shape, wreath shape, or scattered leaf pattern. Keep the colors close together for a calm aesthetic.
Place the finished design inside a frame, shadow box, or cardboard border. It can work above a desk, bed, entry table, or bookshelf.
For a budget-friendly idea, use grocery bag paper, old folders, or recycled envelopes. Paint printer paper with green watercolor if you do not have colored paper.
A realistic project is a simple framed branch. Cut one brown paper stem and glue green leaves along each side. Add a few cream leaves for contrast. The finished piece looks clean and natural without costing much.
This is a good craft for small spaces because it gives you wall decor without cluttering the room.
10. Paper Crane Mobile
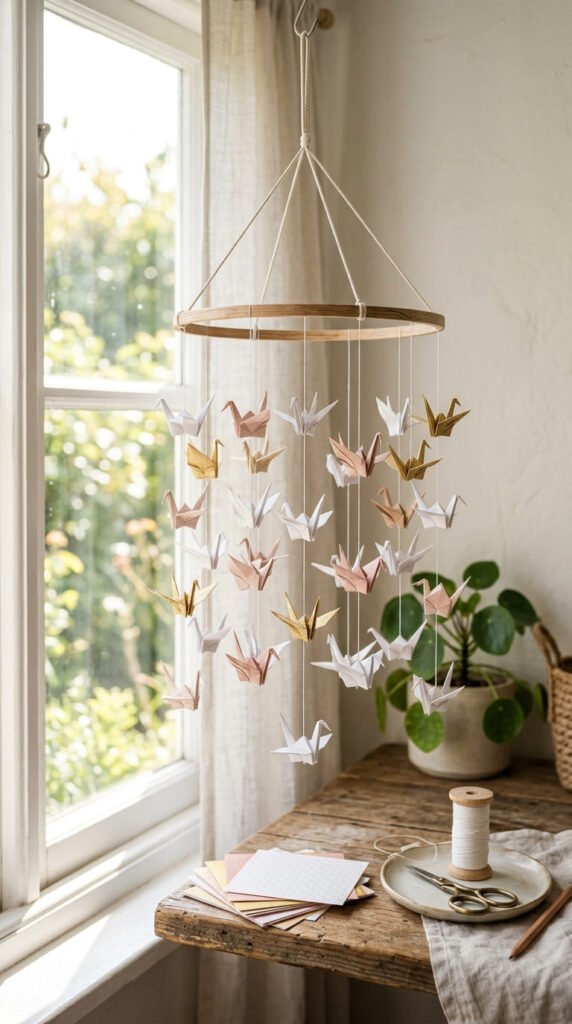
A paper crane mobile is a graceful craft for bedrooms, craft rooms, nurseries, or window corners. Fold several origami cranes from square paper. Use white, blush, gold, cream, or patterned paper for a soft aesthetic.
Tie each crane with thin string or thread. Attach the strings to a wooden hoop, branch, embroidery hoop, or cardboard ring. Hang the cranes at different heights so they move gently.
This project may take practice, so start with printer paper before using your prettiest paper. Once you learn the folds, the process becomes relaxing.
For a budget-friendly version, cut square sheets from old gift wrap or magazine pages. You can also use plain paper and add soft crayon shading before folding.
Hang the mobile near a window where it can catch light and move slightly. Keep it high enough that small children cannot pull it down. A paper crane mobile feels peaceful, handmade, and perfect for soft Pinterest-style room photos.
11. Torn Paper Mood Board

A torn paper mood board is a relaxing craft for desks, journals, dorm rooms, and creative corners. Gather magazine pages, colored paper, tissue paper, old envelopes, wrapping paper, and small scraps. Tear the pieces by hand for soft edges.
Choose a color palette before gluing. Try blush and cream, sage and tan, black and white, or lavender and gray. Arrange the paper pieces on cardstock until the layout feels balanced.
Glue each piece down slowly, overlapping edges slightly. Add paper flowers, tiny hearts, stars, or leaf shapes if you want more detail.
For a budget-friendly version, use junk mail, old catalogs, paper bags, and leftover craft scraps. This project is perfect for using small pieces that are too pretty to throw away.
Frame the finished board, place it in a journal, or tape it above a desk. It can act as room decor or creative inspiration. Torn paper gives the board texture without any special tools, making it easy and low-stress.
12. Paper Bow Gift Toppers

Paper bow gift toppers make simple gifts look polished and handmade. Cut paper strips in three sizes. Loop the longer strips into bow loops and glue the ends. Use a smaller strip around the center to hold the bow shape.
Patterned paper works beautifully for this craft. Old gift bags, wrapping paper, magazine pages, and scrapbook scraps can all become bows. Cardstock makes firmer bows, while thinner paper makes softer ones.
Use the finished bows on gift boxes, cards, party favors, envelopes, or scrapbook pages. Make them in matching colors for a birthday or holiday gift set.
For a budget-friendly idea, save leftover wrapping paper after birthdays. Cut clean pieces into strips and turn them into bows for later. This reduces waste and keeps your gift supplies ready.
A realistic DIY example is a kraft paper gift with a blush paper bow. Add a tiny paper flower beside it. The whole package looks pretty, personal, and Pinterest-friendly without buying expensive ribbon.
13. Mini Paper Photo Frames

Mini paper photo frames are cute for desks, journals, lockers, and memory boards. Cut a rectangle from cardstock, then cut a smaller rectangle from the center to create the frame opening. Glue the photo behind the opening.
Decorate the frame with tiny paper flowers, hearts, stars, leaves, or patterned strips. Keep the decorations small so they do not cover the photo.
For a standing frame, glue a folded cardstock triangle to the back as a support. For a journal frame, glue it flat onto a page. For a wall display, tape several frames in a grid.
This craft is budget-friendly because it uses scraps and small photo prints. You can also use magazine images or art prints instead of photos.
A simple DIY example is a pastel desk frame. Use cream cardstock, add two paper daisies at the corner, and place a small photo inside. It feels personal and soft without needing a store-bought frame.
Make a set of three in matching colors for a pretty shelf display.
14. Paper Feather Wall Hanging
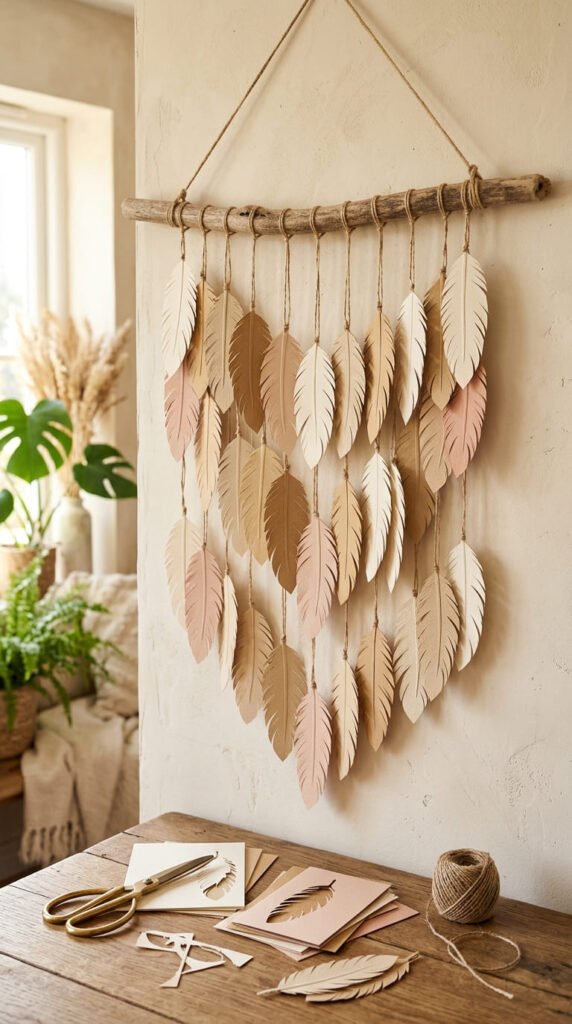
A paper feather wall hanging adds a soft boho touch to a room. Cut long feather shapes from cardstock, book pages, kraft paper, or pastel paper. Fold each feather down the center, then cut small angled slits along both sides.
Tie each feather to a piece of string. Attach the strings to a small branch, dowel, or cardboard strip. Hang the feathers at different lengths for a relaxed look.
Use cream, tan, blush, brown, or sage paper for a calm aesthetic. For a bolder style, use black and white paper or metallic accents.
For a budget-friendly version, use paper bags, old envelopes, or damaged book pages. A small branch from outside can replace a craft dowel.
Hang the finished piece above a bed, chair, desk, or hallway hook. It is light, easy to move, and simple to remake in new colors. Paper feathers give texture without heavy wall art, making them great for rentals, dorms, and small rooms.
15. Paper Star Confetti Tray
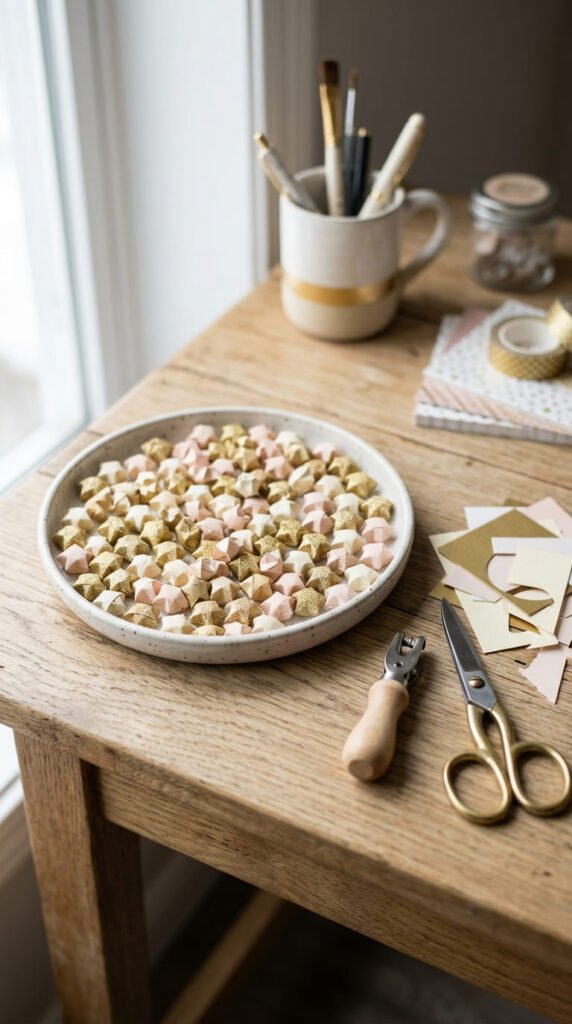
A paper star confetti tray is a tiny decor idea that looks cute on desks, party tables, shelves, and photo setups. Cut small stars from cardstock, metallic paper, old gift wrap, or painted printer paper. Use scissors or a star punch if you have one.
Place the stars in a shallow tray, bowl, or small dish. Add paper hearts, moons, circles, or flowers for more variety. Keep the colors limited so the tray looks styled instead of messy.
This craft is perfect for leftover scraps. Even tiny paper pieces can become confetti. It also works for birthday photos, flat lays, gift wrapping, and scrapbook accents.
For a budget-friendly version, use packaging paper, magazine pages, or old greeting cards. Cut around the prettiest parts and make small shapes.
A simple DIY idea is a cream tray with gold and blush stars. Place it near a candle jar, notebook, or vase. It adds a soft decorative detail and gives your desk a cute Pinterest-style finish.
16. Aesthetic Paper Bookmark Set
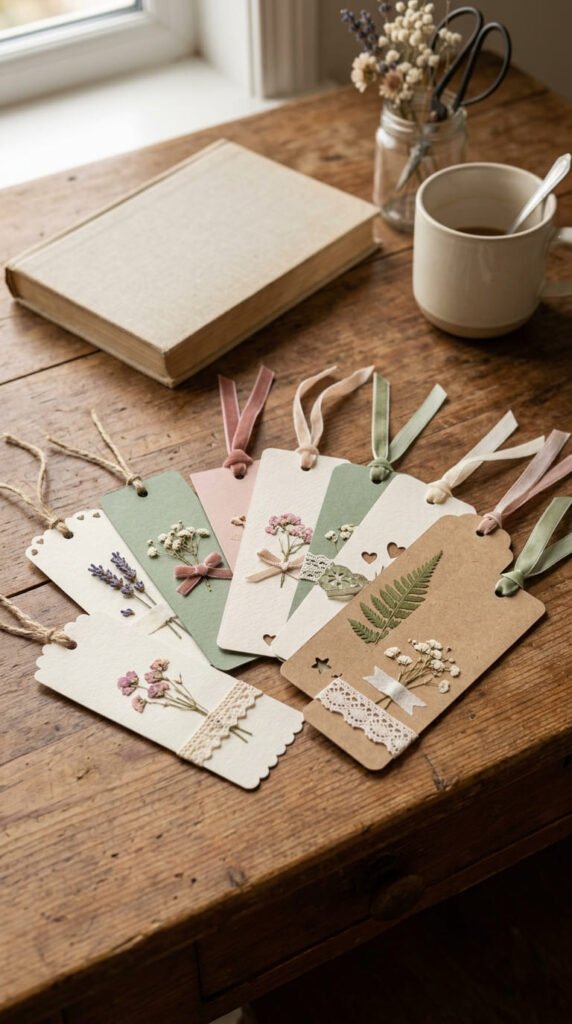
An aesthetic paper bookmark set is both pretty and useful. Cut long rectangles from cardstock, kraft paper, or thick scrapbook paper. Round the corners if you want a softer shape.
Decorate each bookmark with tiny paper flowers, layered circles, torn paper strips, stars, leaves, or soft marker lines. Punch a hole at the top and add yarn, ribbon, or twisted paper as a tassel.
Choose a color theme before starting. Cream, sage, and tan feel calm. Blush and lavender feel sweet. Black and white feel minimal.
For a budget-friendly version, cut bookmarks from cereal boxes and cover them with paper scraps. Old cards and gift bags also work well.
Make a set of four and tie them together with string. They can become a thoughtful handmade gift for readers, students, teachers, or journal lovers.
A realistic DIY example is a sage bookmark with a cream torn-paper strip and one small paper daisy. It looks clean, useful, and easy to make in one short craft session.
17. Paper Rose Desk Jar
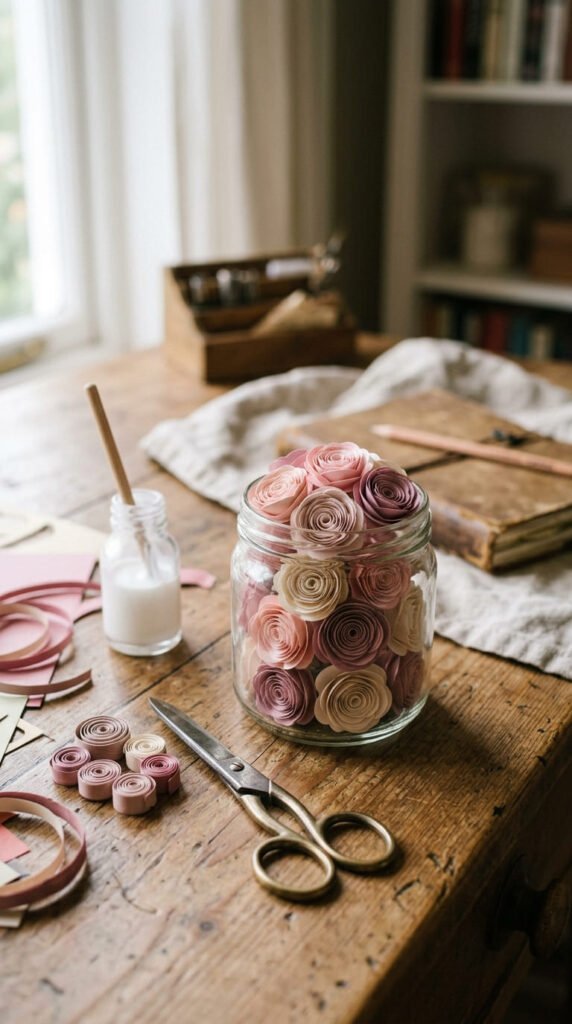
A paper rose desk jar adds a soft handmade detail to a workspace, vanity, or bedside table. Cut circles from colored paper, then cut each circle into a spiral. Roll the spiral from the outer edge toward the center. Let it loosen slightly, then glue the bottom.
Make several roses in colors that match your desk area. Blush, mauve, cream, and dusty pink work well for a romantic aesthetic. Sage and ivory feel softer and more natural.
Place the roses inside a small jar, mug, or glass bottle. Add paper leaves if you want extra detail. You can also glue the roses to sticks for taller stems.
For a budget-friendly version, use painted printer paper, old envelopes, or gift wrap scraps. One sheet can make several small roses.
A simple DIY idea is to fill a tiny jam jar with seven paper roses. Set it beside notebooks, candles, or makeup brushes. It adds color to your desk without water, mess, or upkeep.
18. Paper Cloud Wall Decor

Paper cloud wall decor is soft, dreamy, and perfect for bedrooms, nurseries, dorm rooms, or cozy corners. Cut cloud shapes from white cardstock or thick printer paper. Make several sizes so the wall display feels natural.
Add small paper stars, moons, raindrops, or hearts hanging from the clouds with string. You can also layer two cloud shapes together for a fuller 3D effect.
Use removable wall dots to attach the clouds. Place them above a bed, desk, reading chair, or crib area. Keep hanging pieces short and secure, especially in rooms for young children.
For a budget-friendly version, use cereal box cardboard covered with white paper. Cut stars from yellow scraps or metallic gift wrap.
A realistic DIY example is a cloud cluster over a study desk. Add three clouds and five tiny stars. The wall feels calm and pretty, but the project stays simple. Paper clouds also photograph well because their shapes are clean, soft, and easy to style.
19. Monochrome Paper Cutout Art
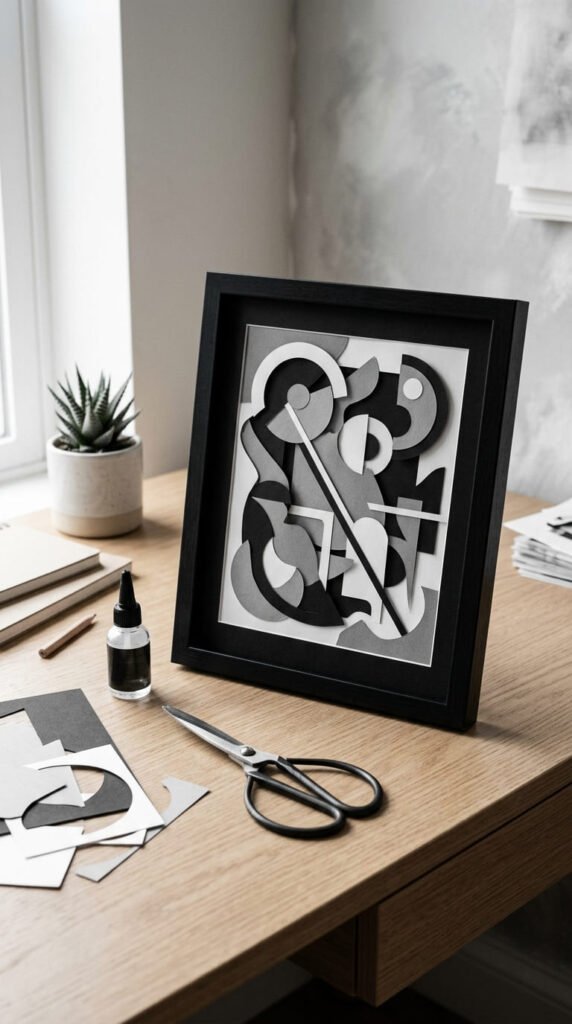
Monochrome paper cutout art is great for a minimal aesthetic. Use black, white, gray, cream, or tan paper. Cut simple shapes like arches, circles, leaves, waves, stars, faces, or abstract forms.
Arrange the shapes on a cardstock background before gluing. Keep space between the pieces so the design feels clean. You can make one large art piece or a set of three smaller pieces.
This craft works well for desks, living rooms, bedrooms, and dorm spaces. It feels grown-up without being hard to make.
For a budget-friendly version, use old folders, packaging paper, or magazine pages in neutral shades. A thrifted frame can make the finished art feel more polished.
A simple DIY example is a black paper leaf branch on cream cardstock. Frame it in a plain black frame or tape it to the wall with washi tape.
Monochrome cutout art is easy to match with many room styles. It is also simple to redo when you want a different shape or layout.
20. Paper Flower Candle Ring
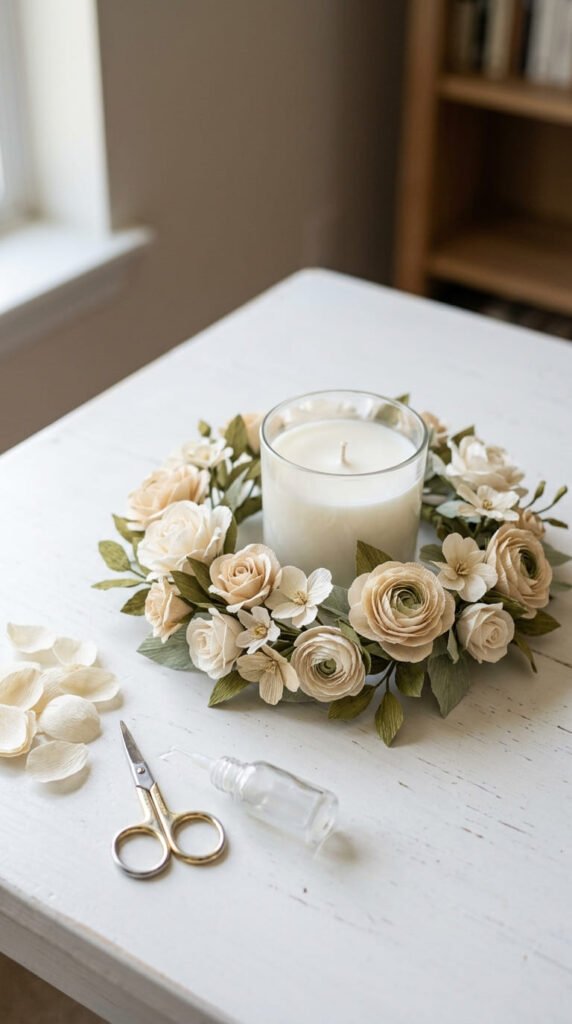
A paper flower candle ring is a pretty table accent for shelves, dinner tables, vanity trays, and party setups. Cut a cardboard ring as the base. Make small paper flowers and leaves, then glue them around the ring.
Use cream, blush, peach, sage, or lavender paper for a soft aesthetic. Keep the flowers small so the ring does not look too bulky. Add leaves between the flowers to fill empty spots.
Place the ring around a candle jar, vase, or small bowl. Never let paper touch a flame. Use unlit candles, battery candles, or jars with secure lids for display.
For a budget-friendly version, use cardboard from packaging and paper scraps from other crafts. Old gift bags can make beautiful flowers.
A realistic DIY idea is to place the ring around a battery candle on a bedside tray. Add a small book and a vase nearby. The result feels warm, handmade, and perfect for soft room photos.
21. Paper Scrap Collage Cards
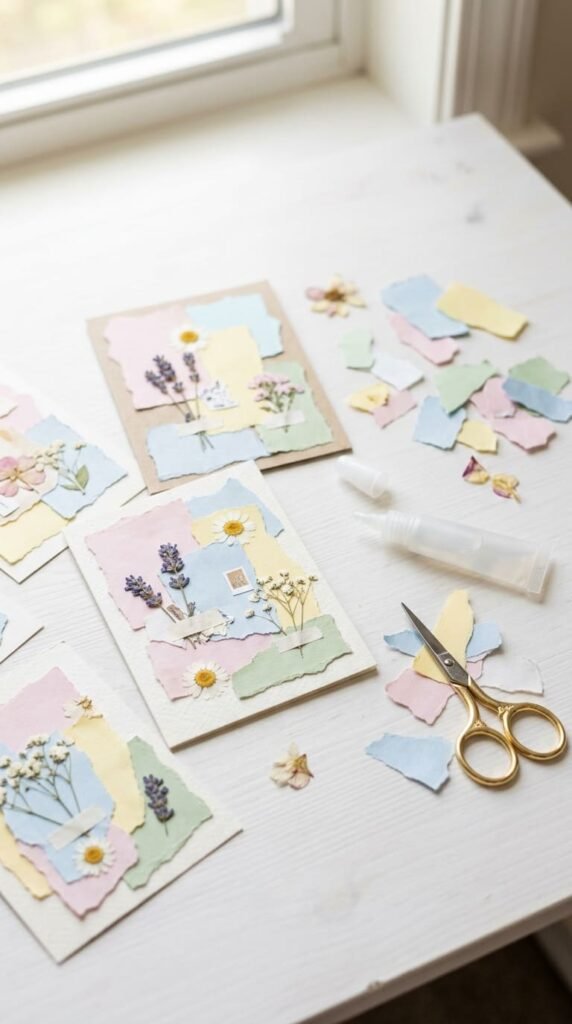
Paper scrap collage cards are perfect for using tiny pieces left from other projects. Start with folded cardstock as the card base. Gather small paper scraps in similar colors, such as blush, cream, tan, sage, or lavender.
Tear or cut the scraps into small shapes. Layer them onto the card front until the layout feels balanced. Add a small paper flower, heart, star, or leaf as the focal point.
This craft is easy because there is no strict pattern. Each card can be different. It works for birthdays, thank-you notes, journal pockets, gift tags, or wall mini art.
For a budget-friendly version, reuse wrapping paper, old envelopes, junk mail, paper bags, and magazine pages. Keep pretty scraps in a small box so they are ready for card-making days.
A simple DIY example is a cream card with torn blush paper, kraft strips, and one tiny daisy. It feels handmade and thoughtful without taking much time or money.
22. Paper Ribbon Wall Streamers
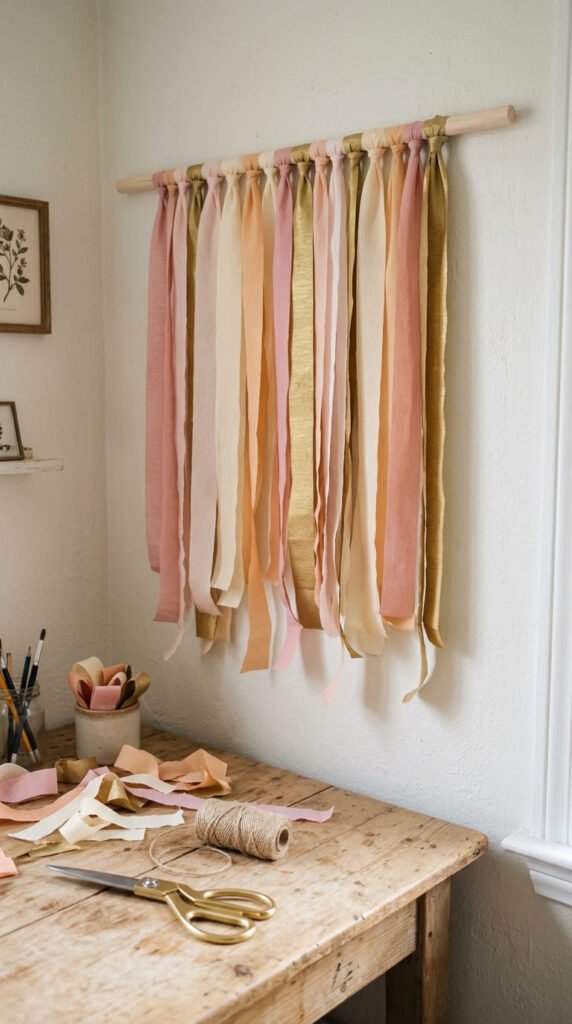
Paper ribbon wall streamers are easy, pretty, and great for party backdrops, dorm rooms, craft areas, or photo corners. Cut long strips from lightweight paper. Use matching colors like blush, cream, peach, gold, and tan for a soft Pinterest look.
Attach the strips to a dowel, string, branch, or cardboard strip. Let them hang at different lengths. Curl the ends slightly with scissors or leave them straight for a cleaner style.
This project is budget-friendly because it uses paper strips instead of fabric ribbon. Wrapping paper, magazine pages, and old gift bags work well.
For a realistic DIY setup, hang the streamers behind a desk or dessert table. Add a few paper flowers at the top for a fuller finish.
This craft is also easy to store. Remove the paper strips and keep them flat in a folder if you want to reuse them. Paper streamers add movement, color, and softness without costly decor supplies.
23. Paper Shadow Box Scene

A paper shadow box scene is a beautiful final project for anyone who wants a more display-worthy paper craft. Use a deep frame, small box, or cardboard frame as the base. Cut paper shapes for clouds, flowers, hills, stars, leaves, or butterflies.
Layer the shapes using small folded paper tabs or foam dots. This creates depth inside the frame. Keep the color palette simple so the scene looks calm and styled.
This craft can match many aesthetics. Use pastels for a sweet look, black and white for a modern look, or kraft paper for a vintage feel.
For a budget-friendly version, use a shoebox lid as the frame. Cover it with paper and build the scene inside. Old packaging can become the base, and scraps can become the details.
A simple DIY idea is a mini garden scene with paper hills, daisies, clouds, and butterflies. Place it on a shelf or desk. It feels personal, pretty, and perfect for Pinterest project photos.
Conclusion
Aesthetic paper crafts are an easy way to make pretty Pinterest projects with simple supplies, soft colors, and handmade detail. From paper flowers and butterflies to garlands, bookmarks, lanterns, wall art, and shadow boxes, each idea can be adjusted for your room, desk, journal, gift table, or photo setup. Pick one color palette, gather your paper scraps, and start with the project that feels easiest today.