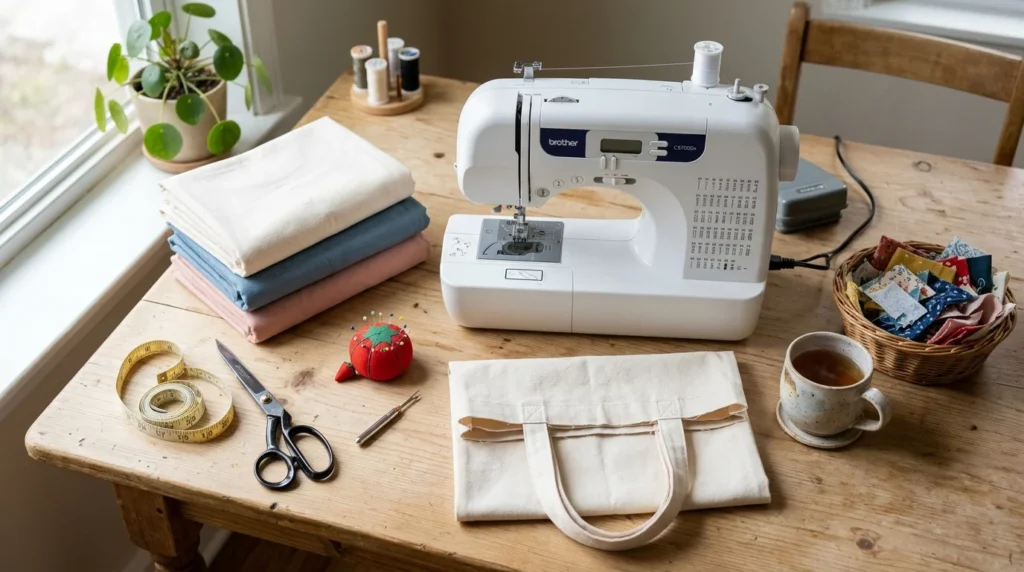

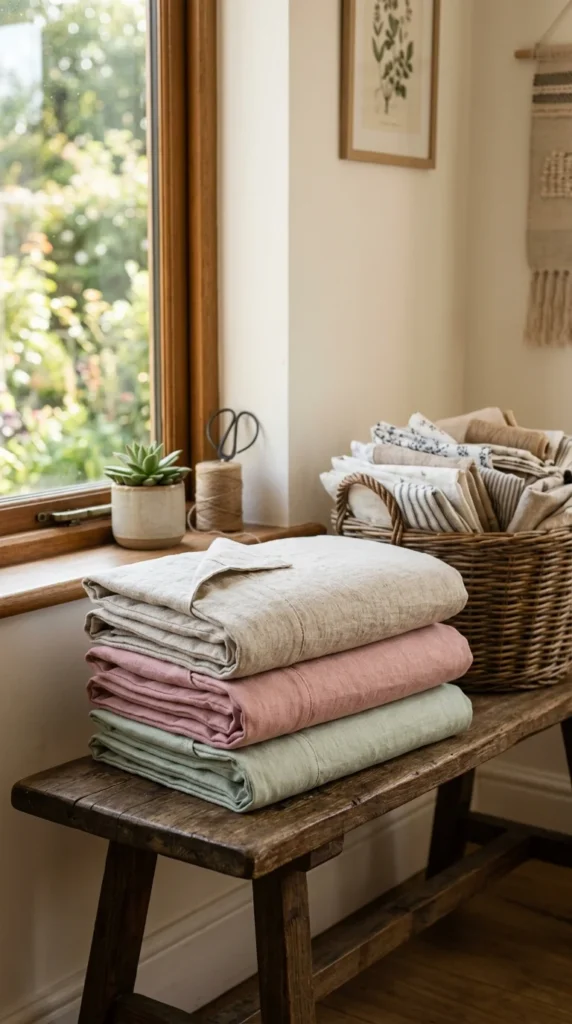
Sewing has quietly become one of the most loved screen-free hobbies, with around 30 million Americans now stitching at home and sewing classes filling faster than studios can offer them. For new sewists, the hardest part is picking the first project. This roundup gathers 24 simple beginner sewing projects you can finish without stress, mostly using straight stitches, cotton fabric, and fat quarters from your local craft store. Each one is forgiving, affordable, and quick enough to keep your motivation high while you build real skills on your machine.
1. Classic Burrito-Method Scrunchies
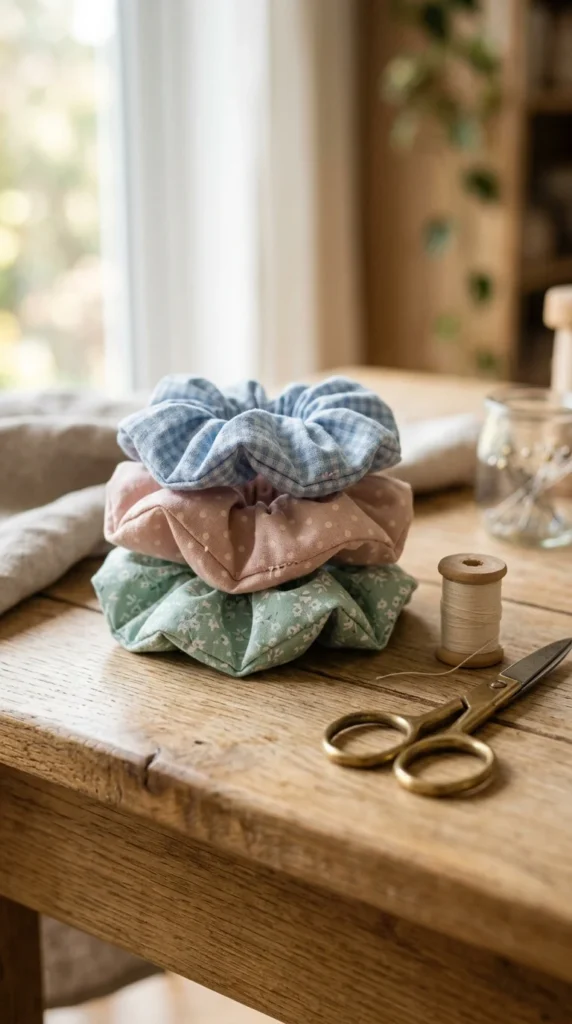
Scrunchies are the fastest first project for a new sewist. The burrito method keeps both ends hidden inside, so the seam disappears completely.
You only need a fabric strip about 4 inches wide and 18 inches long, plus a piece of elastic.
Fold the strip in half lengthwise. Sew the long edge. Turn it inside out. Thread the elastic through, stitch the ends together, then close the small gap.
The whole project takes around 10 minutes.
Budget tip: use fabric scraps from old shirts, pillowcases, or thrifted dresses. That keeps the cost close to zero.
Mix cotton, satin, and velvet for a set of five in coordinating prints. They make a quick handmade gift bundle or a small craft fair stall starter.
If your stitching wobbles, the gathered fabric hides it. Scrunchies are also a smart way to test your thread tension before starting bigger projects, since you can spot puckering right away on a small piece.
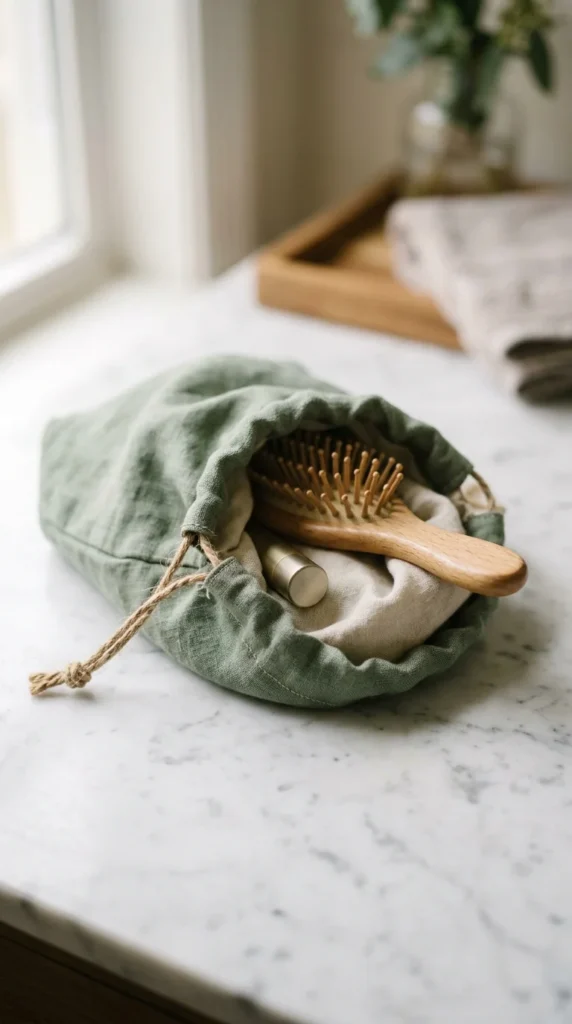
2. Envelope-Back Pillowcase
Most sewing teachers agree: start with a pillow. There is no fitting, no zipper, and no curves to worry about.
Measure your pillow form. Cut one front piece the same size, then two back pieces that overlap in the middle. That overlap forms the envelope opening.
Hem the inner edges of the back pieces. Lay everything right-sides together, sew around the outside, then turn it inside out.
You can finish a pillowcase in under 30 minutes.
Budget tip: thrifted flat sheets work beautifully. A queen sheet gives you enough fabric for four or five pillowcases.
Iron the seams before turning the pillowcase right-side out. Pressing as you sew is the single fastest way to make handmade items look store-bought.
Try seasonal prints, plain linens, or patchwork made from leftover scraps. Swap them every few months to refresh a room without buying new décor. It’s a no-zipper project that builds your confidence on straight stitching.
3. Lined Cotton Tote Bag
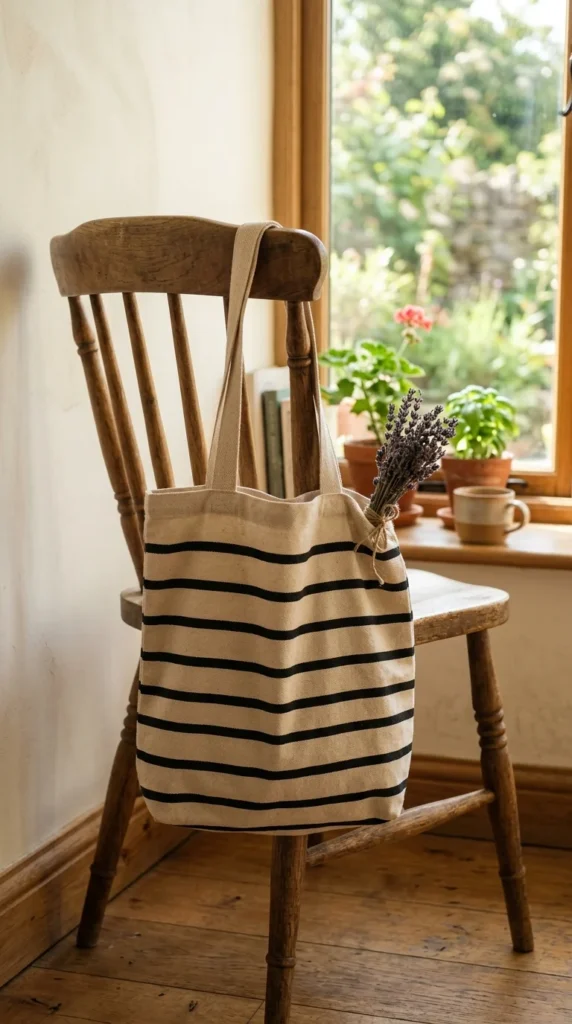
A lined tote bag uses only straight lines, no zippers, and no curves. It’s the project most beginners feel proudest of finishing.
Cut two outer rectangles of cotton, around 15 by 17 inches. Cut two lining pieces the same size. Add two handle strips, each about 22 inches long.
Sew the outer pieces together. Repeat with the lining. Slide the lining inside the outer bag, attach the handles, then topstitch around the top edge.
Budget tip: an old cotton bedsheet or a thrifted curtain gives you yards of fabric for almost nothing.
Add a small inside pocket to learn how to layer fabric and stitch neat corners. That single upgrade looks polished.
Totes work for groceries, the library, or your own sewing supplies. They are also one of the most popular items at small craft fairs because shoppers always carry them home.
Use a fat quarter for the lining if you want a fun print peek when the bag opens.
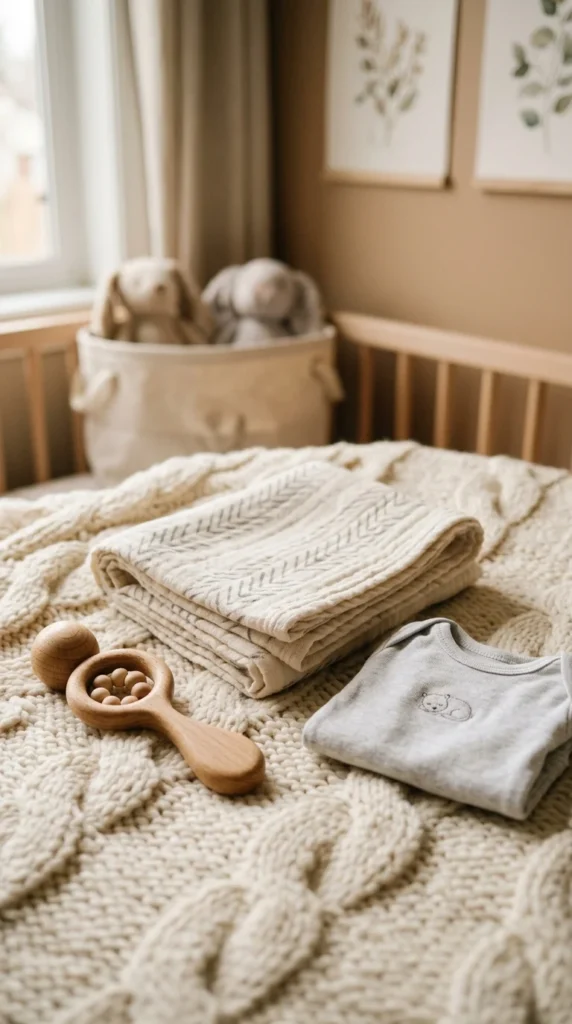
4. Soft Baby Bib
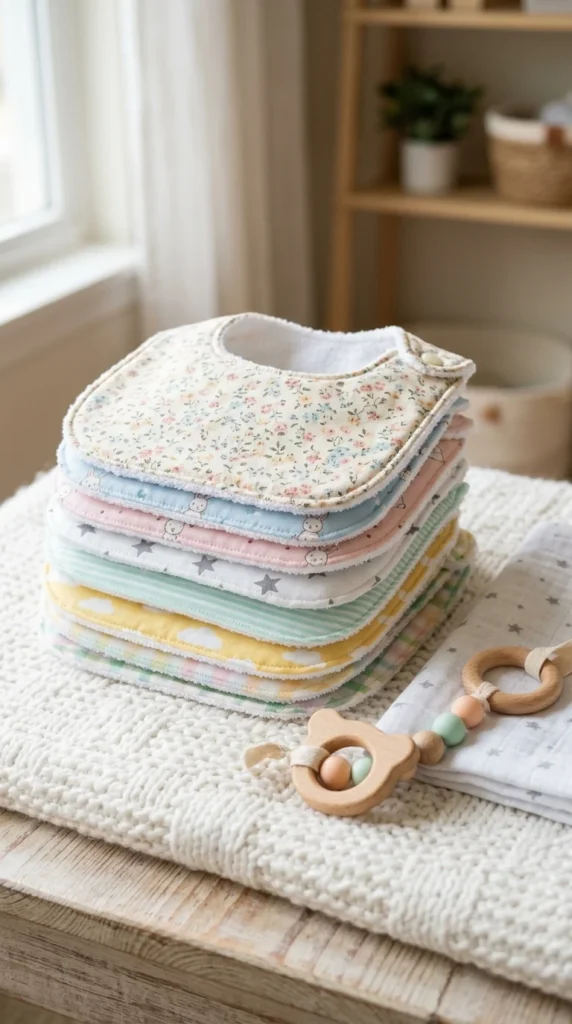
Baby bibs are simple, useful, and always appreciated at baby showers. Trace around a bib you already own, or print a free PDF pattern. Cut one cotton piece and one terry or flannel piece for the back.
Sew the two layers right-sides together, leave a small gap, turn it inside out, and topstitch all the way around.
Add a snap or a Velcro tab at the neck.
Budget tip: terry cloth from an old plain towel works perfectly as backing. One bath towel makes a dozen bibs.
Use playful prints like dinosaurs, fruit, or tiny animals. New parents love bibs that match outfits or seasons.
Make a set of five and tie them with twine. That single gift looks far more expensive than it actually costs to make.
Backstitch at the start and end of every seam. Bibs get pulled, washed, and tugged on daily, so reinforced seams keep them from coming apart after a few weeks of use.
5. Reversible Pet Bandana
Pet bandanas are quick, cheap, and almost impossible to mess up. Cut two triangles of cotton, each about 14 inches on the long side. Lay them right-sides together, sew around the edges, leave a small gap, turn inside out, and topstitch.
Slip a strip of fabric through the top fold for a tie.
Use scraps for these. A single fat quarter makes two or three.
Pet bandanas also work as a community project. Many shelters welcome donated bandanas because dogs wearing them get adopted faster. You can knock out ten in a single weekend.
Budget tip: sew holiday-themed bandanas in fall, Christmas, or summer prints. Pet owners snap them up at craft fairs.
For your own dog or cat, make a few in plaid, florals, or small motifs. They all look adorable on pets.
Many top sewing blogs offer free downloadable PDF patterns for over-the-collar bandanas if you want a more polished version.
6. Sock Animal for Kids
Sock animals turn one mismatched sock into a soft toy a child will treasure. Mouse, bear, and dinosaur versions all use the same basic shaping technique.
Take a single sock. Stuff the toe area with fiberfill or fabric scraps to form the head and body. Tie off the neck with thread. Cut the leftover cuff into ears, legs, or a tail.
Hand-stitch tiny features like eyes, a nose, and ears using leftover felt.
Budget tip: raid your odd-sock drawer. Every household has a pile of lonely socks waiting for a project like this.
Sock animals teach you hand sewing, simple shaping, and how to attach small details. All skills that transfer to bigger projects later.
These make heartfelt handmade gifts for kids, baby showers, or as comfort toys for children in shelters. Free patterns for sock mice, bears, and dinosaurs are easy to find online with photo tutorials at every step.
7. Lavender Eye Pillow
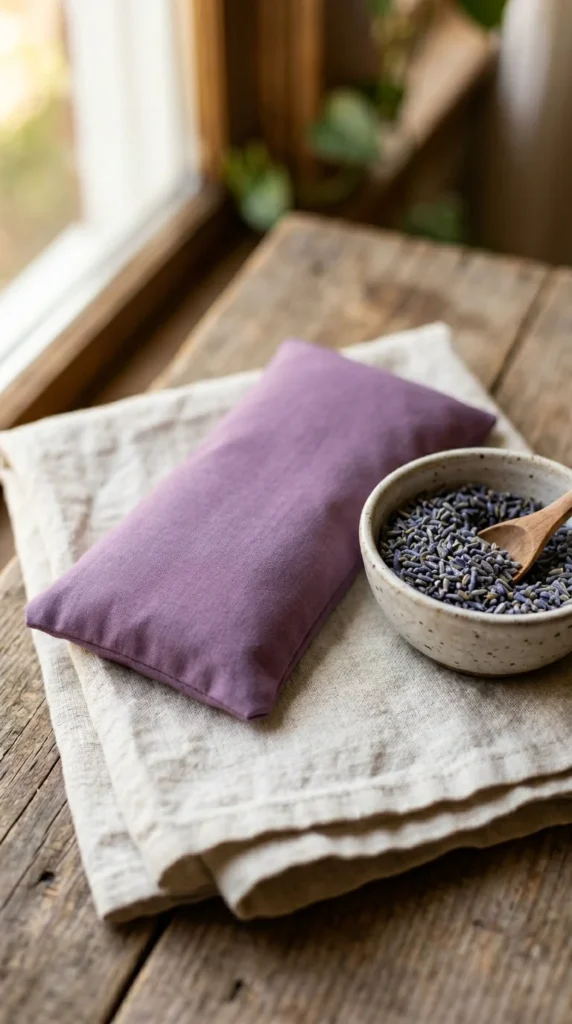
An eye pillow is a small handmade gift that feels far more special than it should. Cut two rectangles of soft cotton, around 4 by 9 inches. Sew three sides together, turn it inside out, fill with dried lavender mixed with rice or flaxseed, then stitch the last side closed.
It works as a warm or cool compress. Pop it in the freezer for headaches or microwave it for sore eyes.
Budget tip: buy dried lavender in bulk online. A small bag goes a long way. Dried rosemary or mint also work.
Use soft fabric like flannel so it feels nice against skin. Avoid scratchy textures.
Pair one with a candle or a cup of tea for a beautiful gift. Wrap it in tissue paper with a small tag and it instantly looks like a boutique product.
Make a few extras to keep on hand for last-minute birthdays. They store flat in a drawer and stay fresh for months.
8. Drawstring Gift Pouch
A drawstring pouch is the project you will use again and again. Cut two squares of fabric, about 8 by 10 inches. Hem the top edges. Create a small channel near the top for the drawstring.
Sew the sides and bottom, leaving the channels open at the corners. Thread a ribbon, cord, or shoelace through. Pull tight.
Use these as gift wrap, makeup pouches, jewelry bags, or travel bags for small items.
Budget tip: cut shoelaces from old sneakers or use leftover ribbon from gift wrapping. You probably already have what you need.
For weddings or baby showers, sew a batch of matching pouches as party favors. Fill them with chocolates, seeds, or small soaps.
The drawstring channel is also a great place to practice straight stitching. If your seams wobble a little, the fabric folds hide it well.
A set of three in different sizes makes a fast handmade gift for someone who travels often.
9. Cross-Back Apron
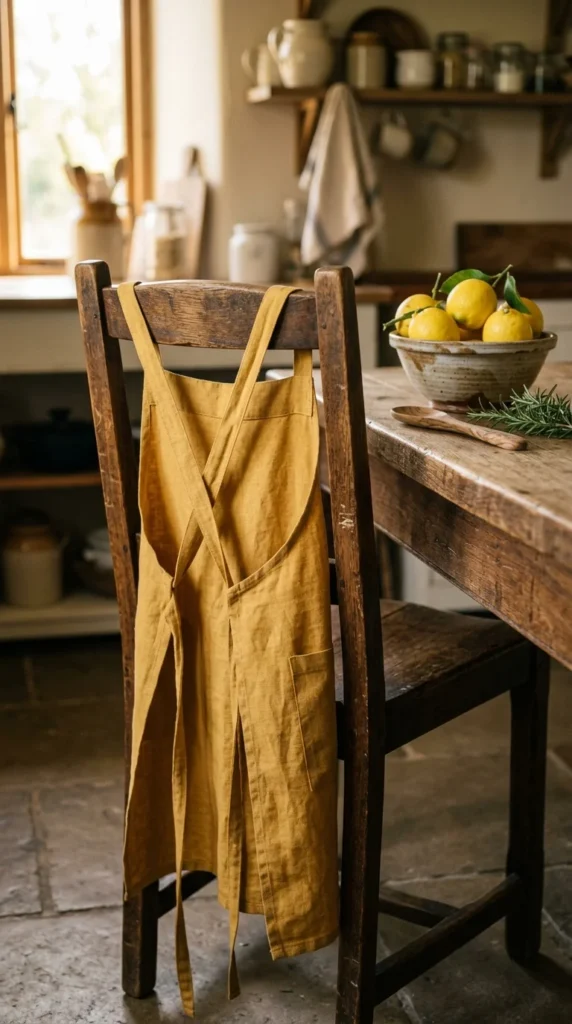
A cross-back apron is the first garment-making project most beginners try. The straps cross at the back, so there are no ties and no fiddly buttons.
Cut a front piece shaped like a wide bib that tapers into a skirt section. Add two long straps. Sew the straps to the top of the bib and the lower sides of the skirt, crossing them at the back.
Hem all the edges.
Budget tip: heavy cotton from an old tablecloth or curtain panel works beautifully. The thicker the fabric, the nicer the drape.
Cross-back aprons fit a wide range of body sizes without alteration, which makes them ideal beginner gifts.
Pair one with a wooden spoon or a packet of seeds and it feels like a thoughtful handmade present. They also sell well at craft fairs because shoppers love anything Japanese-style or minimalist.
Add a small front pocket for keys, snippers, or a phone if you want a more practical version.
10. Open-Wide Zipper Pouch
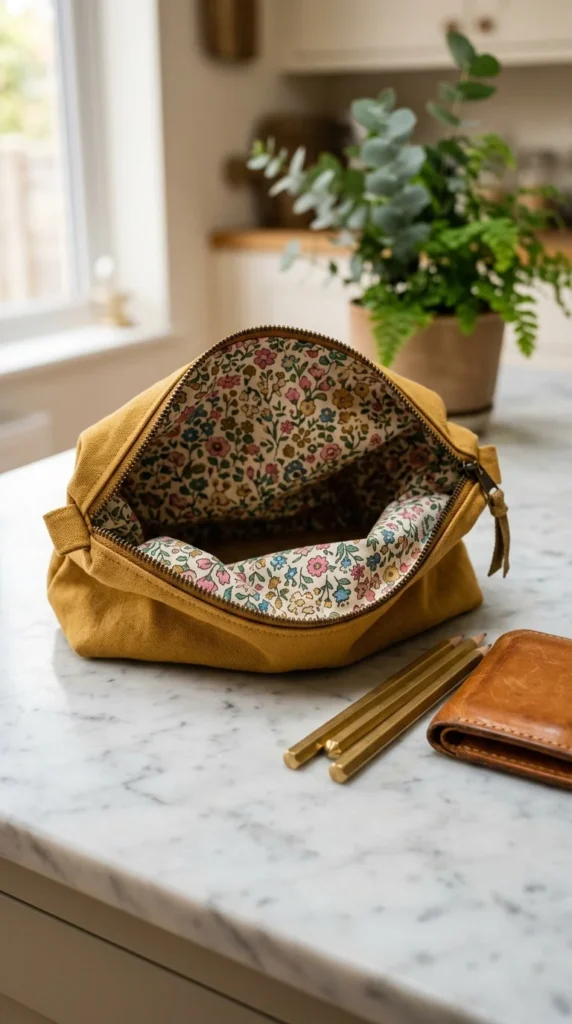
The open-wide zipper pouch is the first project that teaches you how to sew a zipper. Sounds scary, but it’s easier than it looks.
Cut two outer rectangles, two lining rectangles, and one zipper, all around 7 by 10 inches. Sandwich the zipper between an outer piece and a lining piece, then stitch along the zipper. Repeat on the other side.
Open the zipper halfway. Sew around all the edges with the outer and lining sides matched, leave a small gap in the lining, then turn it right-side out through the open zipper.
Budget tip: zippers come cheap in bulk online. One pack lasts through dozens of projects.
These pouches hold makeup, art supplies, sewing notions, or snacks. The wide opening makes them more useful than narrow zipper bags.
Try metallic zippers or rainbow zippers for a slightly premium look. Buyers love small upgrades like that at craft fairs.
11. Patchwork Pot Holder
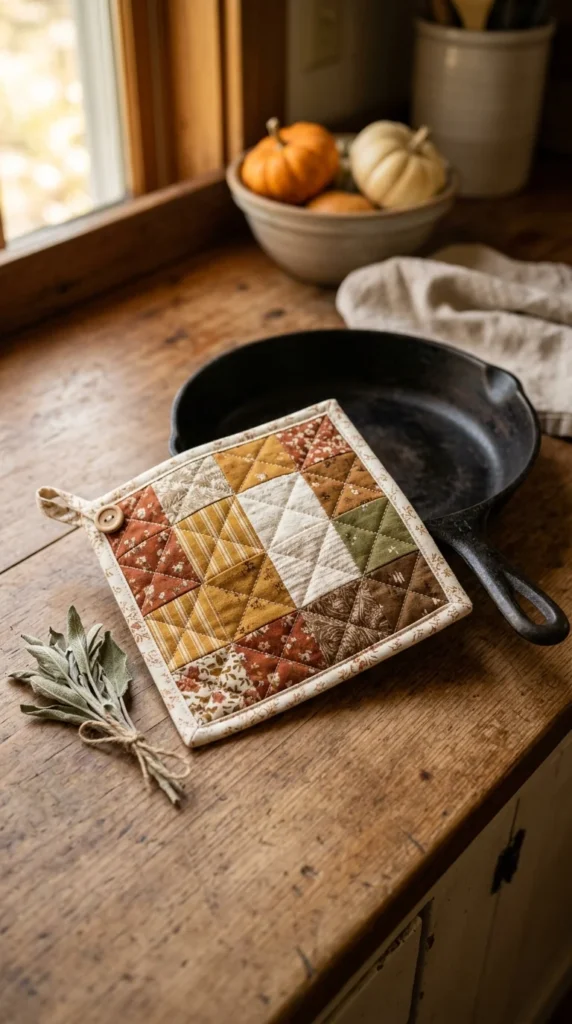
Pot holders are a smart way to use up small fabric scraps. Cut several squares, around 3 by 3 inches each, in coordinating prints. Sew them together in a grid to make a 9 by 9 inch patchwork square.
Layer the patchwork with insulated batting and a plain back fabric. Quilt simple straight lines across it. Bind the edges with a strip of cotton folded over.
This single project teaches you patchwork, basic quilting, and binding.
Budget tip: use scraps from earlier projects. Even tiny squares add up over time.
Make a matching pair as a housewarming gift. Pair them with a loaf of homemade bread and they feel like a heartfelt, useful present.
Use insulated batting if you cook often. It protects your hands from very hot pans.
Once you finish a pair, scale the same technique up for table runners, placemats, or even a small baby quilt. The skills transfer directly.
12. Burp Cloth Set
Burp cloths are fast, useful baby gifts. Cut two rectangles of soft fabric, around 9 by 16 inches. Use cotton on one side and absorbent muslin, flannel, or terry cloth on the other.
Sew them right-sides together, leave a small gap, turn inside out, and topstitch all the way around.
For extra absorbency, add a layer of cotton batting in the middle.
Budget tip: cut burp cloths from old soft towels or worn muslin swaddles. Babies don’t care about brand-new fabric.
Make a set of five in coordinating prints. Roll them up, tie with twine, and you have a beautiful baby shower gift.
The shape is forgiving, so wobbly stitches barely show. Burp cloths are a great early project to practice sewing gentle curves and topstitching. By the time you finish a set, you’ll feel much more confident on your machine and ready for the next step.
13. Reusable Makeup Pads
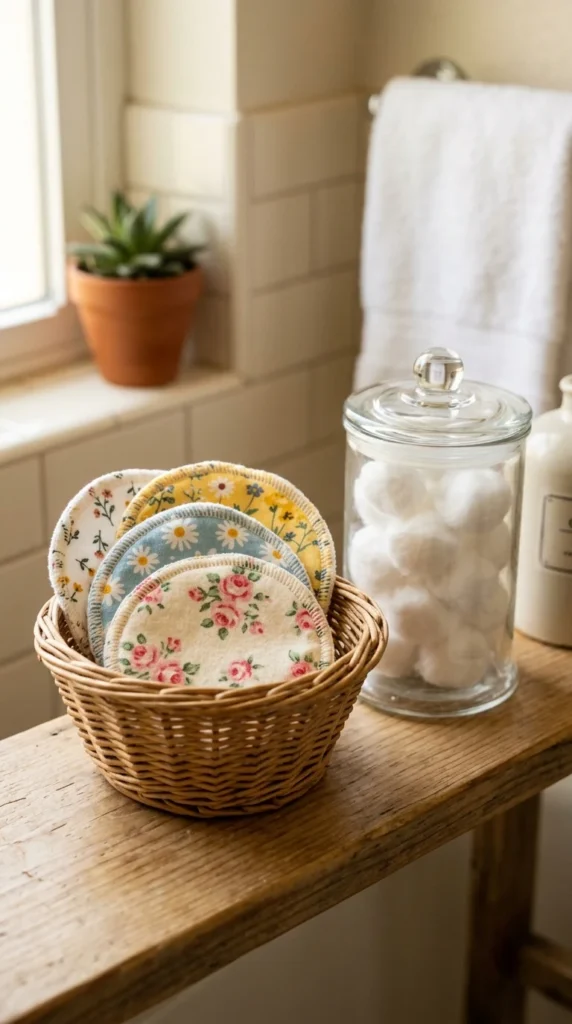
Reusable makeup pads are a small but satisfying eco-friendly project. Cut circles, about 4 inches across, from cotton flannel and soft terry cloth. One of each per pad.
Place them right-sides together. Sew around the edge with a zigzag stitch, following the curve slowly.
Make a matching drawstring pouch to hold the clean ones and a jar for used ones.
Budget tip: cut up an old plain towel for the terry side. One bath towel makes dozens of pads.
A set of ten pads replaces hundreds of disposable cotton rounds over a year. That saves money and reduces waste.
These are popular handmade gifts and a steady seller at small markets. People appreciate practical sustainable swaps that actually work in everyday routines.
For zero-waste packaging, tie them with twine and skip plastic completely. Add a small handwritten care card so the recipient knows to toss them in the wash with their towels.
14. Felt Llama Keyring
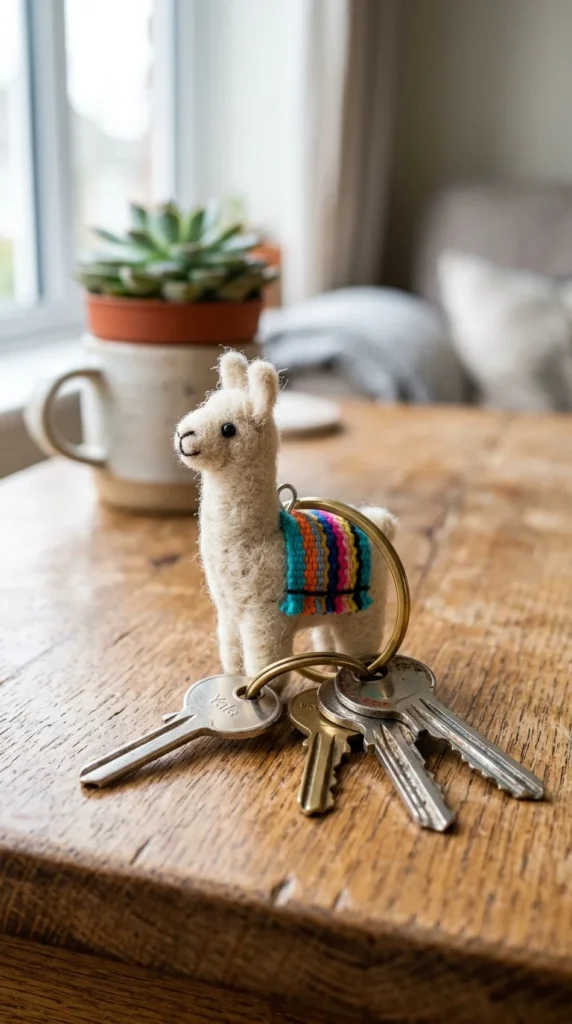
A felt llama keyring is a sweet hand-sewing project that uses almost no materials. You only need two small pieces of felt, embroidery thread, a small ring, and a tiny bit of stuffing.
Trace a llama shape, cut two identical pieces, and stitch them together with a simple blanket stitch around the edges. Leave a small gap to add stuffing, then close it up. Add a small loop at the top and slip on the key ring.
Decorate with a felt blanket, tiny beads for eyes, and embroidery floss tassels.
Budget tip: felt sheets cost almost nothing at craft stores or in Dollar Tree-style aisles. One pack of mixed colors makes a dozen keyrings.
This project is perfect for sewing with kids. The shapes are forgiving, and the stitching is slow enough to teach younger hands.
Try other animals once you finish the llama. Cats, bears, foxes, and bunnies all use the same method with different outlines.
15. Cozy Infinity Scarf
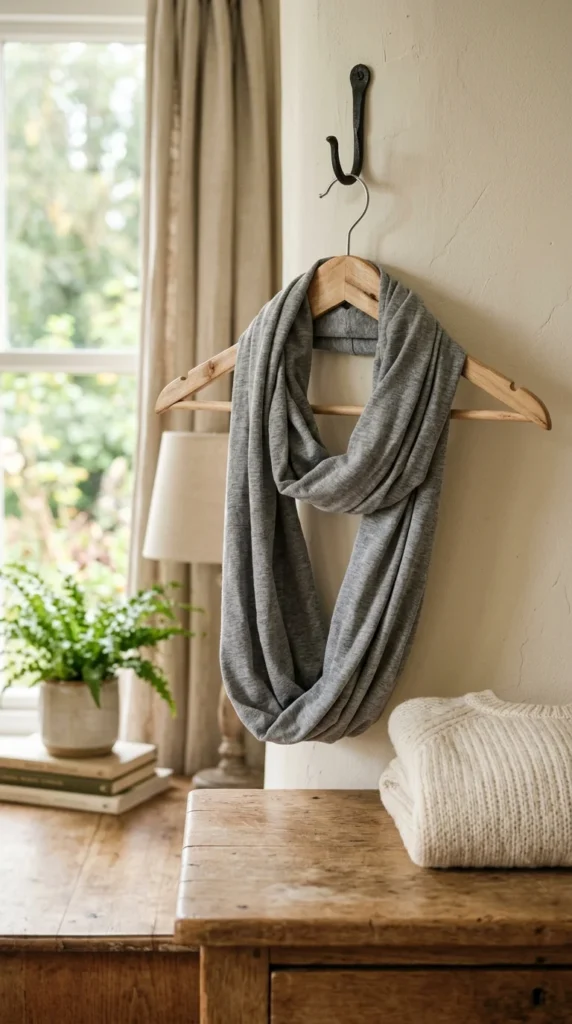
An infinity scarf is one of the few clothing items beginners can finish in under an hour. You need about 1.5 yards of soft knit fabric like jersey or fleece.
Fold the fabric in half lengthwise. Sew the long edge to form a tube. Turn it right-side out. Bring the two short ends together, tuck one inside the other, and sew them closed.
That circle becomes a scarf you can loop twice around your neck.
Budget tip: thrifted jersey skirts or oversized t-shirts give you stretchy fabric without buying anything new.
Knit fabric takes a little practice because it stretches. Use a ballpoint needle if you have one, and go slow. The wrong needle type is one of the most common beginner mistakes, so pairing it correctly makes a huge difference.
Make a few in neutral colors like grey, black, and cream. Add one bright print for a pop. They make solid winter gifts that feel premium even though the materials cost very little.
16. Quilted Fabric Coasters
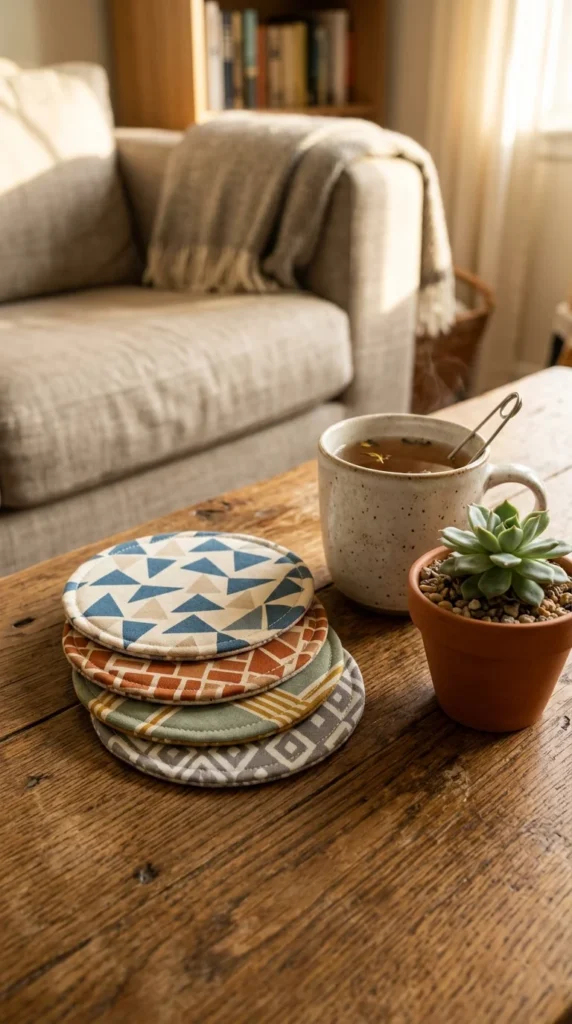
Fabric coasters are tiny, fast, and a smart use for the smallest leftover scraps. Cut two squares of cotton, about 5 by 5 inches, and one square of cotton batting the same size.
Layer batting between the two cotton squares with right sides facing out. Sew around the edges with a zigzag or a decorative stitch. Trim the edges with pinking shears for a clean finish.
You can finish a set of four in well under an hour.
Budget tip: mix prints within the same color family. Even mismatched scraps look intentional when the colors coordinate.
Make a matching set for housewarming gifts. Tie four coasters with twine and add a small handwritten tag.
For a slightly more advanced version, quilt diagonal lines across each coaster before binding the edges. The texture looks beautiful, and the layered fabric absorbs condensation from cold drinks better than a flat coaster.
17. Simple PJ Shorts
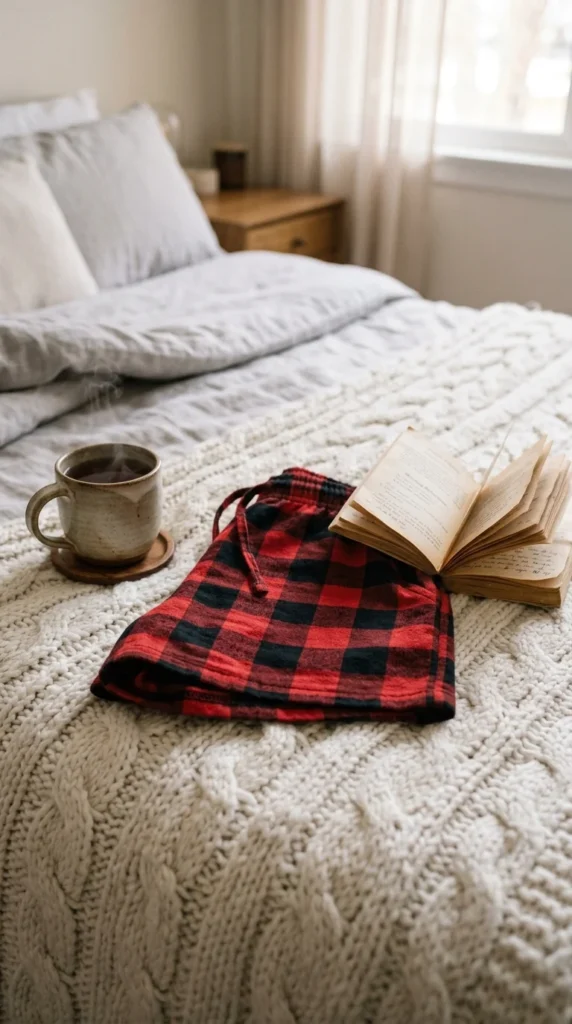
PJ shorts are a beginner-friendly garment project that uses an elastic waistband, so no zippers or buttons needed.
Use a pair of shorts you already own as a template. Trace around them onto folded fabric, adding an inch for seams and two inches at the top for the elastic channel.
Sew the side seams and inseam. Fold the top edge over to form a channel, thread elastic through, and stitch the gap closed.
Budget tip: soft flannel from a thrifted bedsheet works beautifully for PJ shorts. One sheet makes two or three pairs.
Make a set in coordinating prints for the whole family. Matching pajamas are a popular handmade Christmas tradition.
The waistband channel hides any messy stitching, which makes PJ shorts very forgiving for a first garment. Once you nail this pattern, scale up to full pajama pants using the same elastic-waist method.
18. Doorstop or Draft Excluder
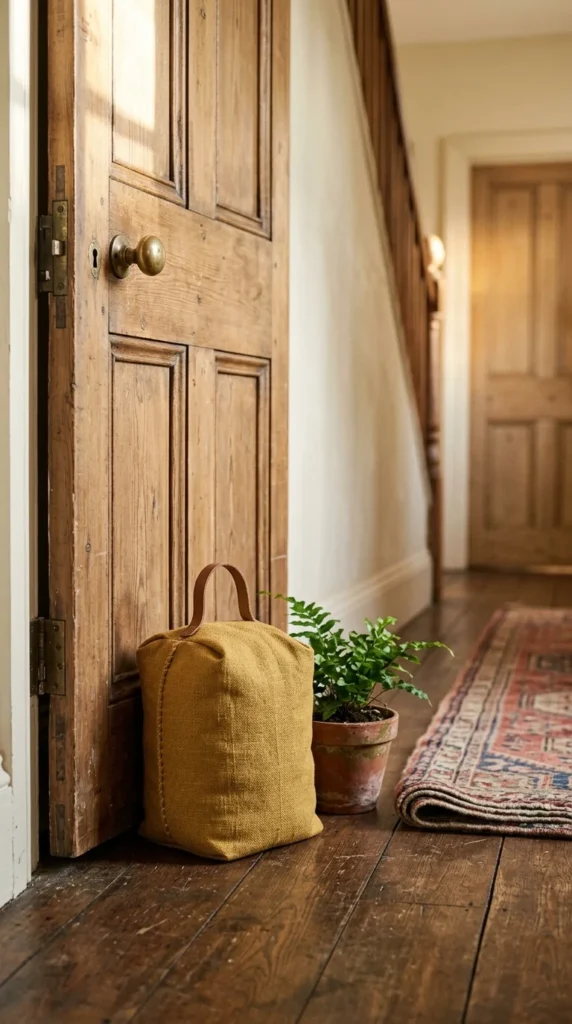
A fabric doorstop or draft excluder is a sturdy project that uses heavier fabric and teaches you how to sew straight lines under weight.
For a doorstop, cut a cube pattern from canvas, denim, or upholstery fabric. Sew five sides, fill with dried rice or sand inside an inner bag, then close the top.
For a draft excluder, sew a long tube about 30 inches by 8 inches. Fill with rice, sand, or fabric scraps. Stitch the ends closed.
Budget tip: denim from old jeans gives you the perfect weight for both projects. One pair of jeans makes a full draft excluder.
Add a small fabric handle to the doorstop so it’s easy to move between rooms.
These work beautifully as housewarming gifts or for older relatives who feel drafts under their doors in winter.
The heavy filling forgives uneven stitches because the fabric never stretches tight enough to show wobbles in the seams.
19. Fat Quarter Storage Basket
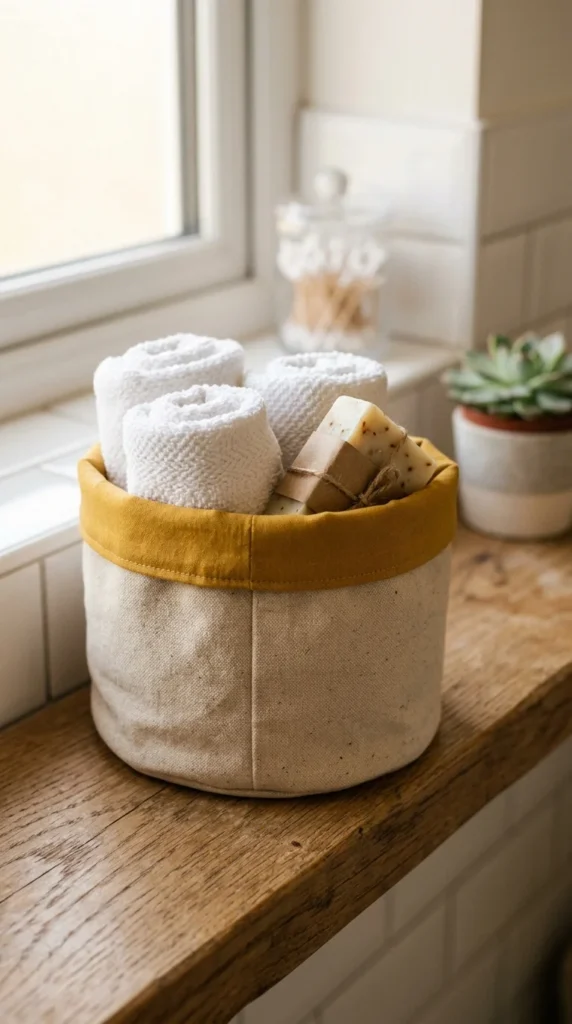
A fabric basket is one of the smartest ways to use a fat quarter. Cut a square base and four side panels from sturdy cotton canvas or denim. Cut a matching set in lining fabric.
Sew the outer panels together to form an open box. Do the same with the lining. Slide the lining inside the outer, fold the top edge over to form a cuff, and topstitch around the top.
Budget tip: use an old canvas tote or a pair of worn jeans for the outer fabric. Denim baskets look modern and they last for years.
Use the baskets for craft supplies, kids’ toys, bathroom storage, or sewing scraps. They fold flat when empty and stand up when filled.
Make a few in different sizes that nest inside each other. A large one for laundry sorting, a medium for toys, and a small one for desk clutter.
The same pattern works for all three. Just scale the measurements up or down depending on what you want to store inside.
20. Scrappy Fabric Bookmark
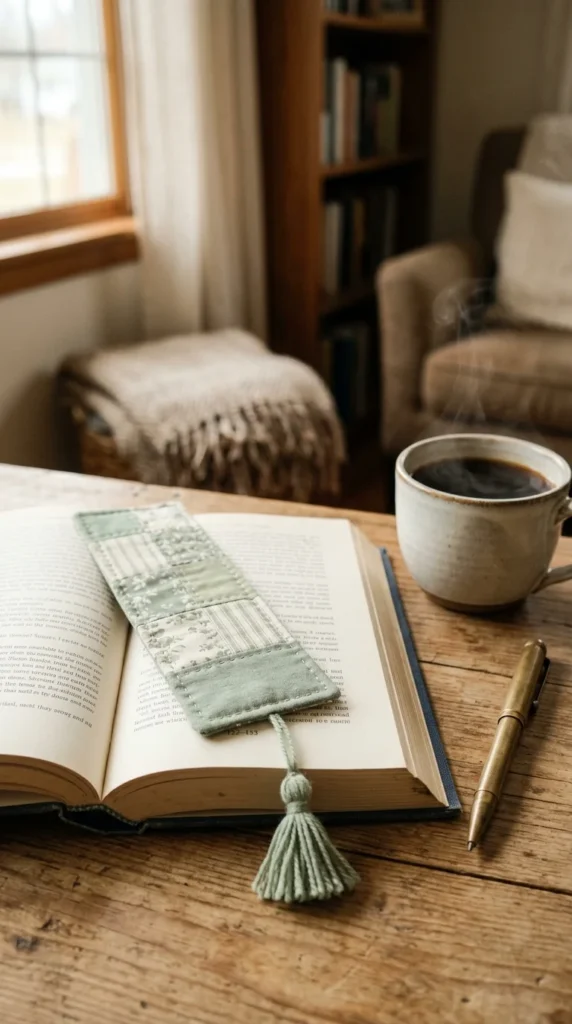
A fabric bookmark uses the tiniest leftover scraps from earlier projects. Cut a long strip of fabric, about 2 by 8 inches. Cut a backing strip the same size.
Sew them right-sides together, leave a small gap, turn inside out, and topstitch all the way around.
Add a small tassel or a button at one end if you want a more polished look.
Budget tip: use the strips you would normally throw away. Even a quarter inch wide piece works at the right scale.
For a patchwork version, sew several small fabric squares into a single strip first. This adds visual interest and uses even smaller scraps.
Bookmarks make instant handmade gifts for readers. Tuck one inside a thrifted book and you have a polished present for under a dollar.
They are also a great five-minute project for those evenings when you want to sew but don’t have time for anything bigger. The win is fast and the satisfaction lasts.
21. Padded Book Sleeve
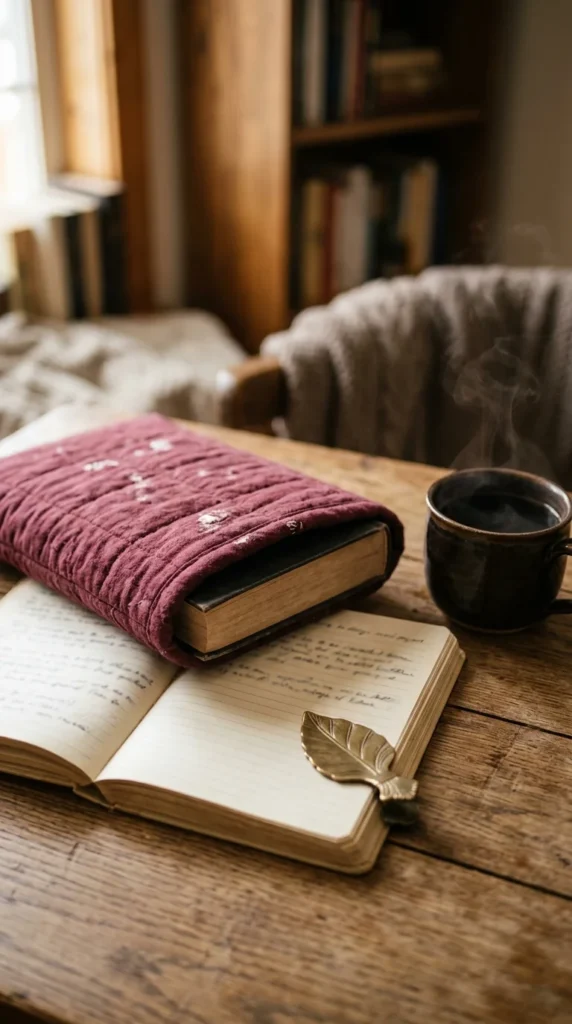
A padded book sleeve is a thoughtful gift for any reader. Cut two pieces of outer fabric and two pieces of cotton batting, sized about an inch larger than the book on all sides. Add two lining pieces in a soft cotton.
Layer outer fabric and batting, then quilt simple lines across each piece. Sew the lined sleeve together with the quilted outer pieces, leave a small gap, turn it inside out, and topstitch the top edge.
The result is a soft cover that protects books inside a bag.
Budget tip: use fabric scraps for the outer and an old pillowcase for the lining.
Personalize the front with a small fabric label or an iron-on patch with the recipient’s initial.
Readers love these because they keep paperbacks from getting bent corners or stained covers. They take about an hour to make and use very little fabric, which makes them perfect for using up small leftover prints.
22. Simple Linen Placemats
Placemats turn a regular dinner table into something that looks intentional. Cut rectangles of linen or cotton, about 14 by 18 inches. Fold the edges over twice and topstitch all the way around.
That is the entire project.
For a slightly fancier version, layer two pieces of fabric with cotton batting between them and quilt simple lines across the surface.
Budget tip: linen-look cotton from the clearance bin works perfectly. You can also cut placemats from a single thrifted tablecloth.
Make a set of four or six in the same fabric. Matching placemats instantly upgrade any dinner table.
Try seasonal versions. Soft cream for spring, terra cotta for autumn, deep green for winter. Swapping placemats is cheaper than redecorating, and they all store flat in a drawer.
These also make a popular wedding or housewarming gift, especially paired with matching fabric coasters in the same prints.
23. Burrito-Method Pillowcase
The burrito method pillowcase is one of the most viral beginner techniques on YouTube. The whole pillowcase comes out with all seams hidden inside, even though it sounds impossible while you’re rolling it up.
Cut three pieces: a main body, a contrasting cuff, and a small accent trim. Layer them with the cuff on top, accent in the middle, and pillowcase body underneath. Then roll the main body up like a burrito inside the cuff.
Sew the long edge, pull the body out from inside, and the cuff turns right-side out with the seam hidden.
Sew the side and bottom seams to finish.
Budget tip: use a fat quarter for the cuff and a flat sheet for the main body. One sheet makes three or four cases.
This technique looks magical when you finish it, which is why videos of it have racked up millions of views. It is also a perfect introduction to fabric folding tricks you’ll use in advanced sewing later.
24. Fabric Holiday Ornaments

Fabric ornaments are a sweet way to finish off your scrap stash. Cut two identical shapes from cotton fabric, such as a heart, star, or simple tree. Sew them right-sides together, leave a small gap, turn it inside out, and stuff with a little fiberfill.
Stitch the gap closed and add a small loop of twine at the top.
Budget tip: use leftover fabric from earlier projects, plus any worn-out clothes in festive colors. Old plaid shirts and red flannel are perfect.
Make a set of six or eight in coordinating prints. Tie them with twine in a small bundle for a charming homemade gift.
These also work as gift toppers instead of bows, drawer fresheners with a few drops of essential oil inside, or year-round décor. Hearts in pink for spring, stars in cream for summer, leaves for autumn, and snowflakes for winter.
They’re also a great hand-sewing project for kids learning the basics.
Conclusion
Stress-free sewing comes down to picking projects that match your skill level, using forgiving fabric like cotton, and choosing the right needle for the job. Every project in this list uses straight stitches, scraps you already own, or affordable supplies from places like Dollar Tree, Walmart, or thrift stores. Start with a scrunchie or a pillowcase to build confidence, then work your way up to lined tote bags, sock animals, zipper pouches, and eventually simple PJ shorts. Iron your seams, backstitch at the start and end of every line, and let your machine feed the fabric instead of pulling it. Pick one project this weekend, gather your supplies, thread your machine, and start stitching at your own pace.


