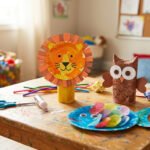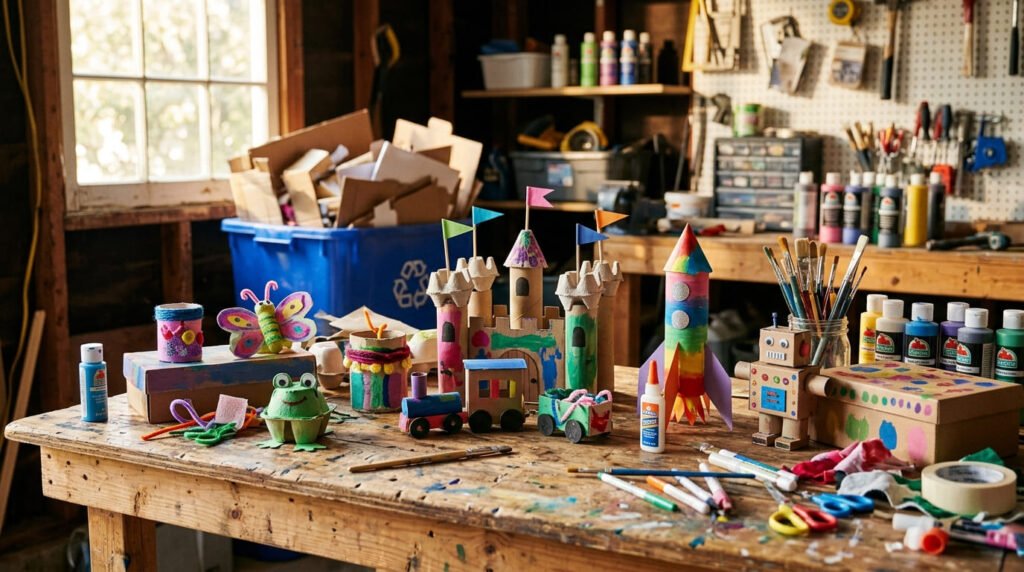
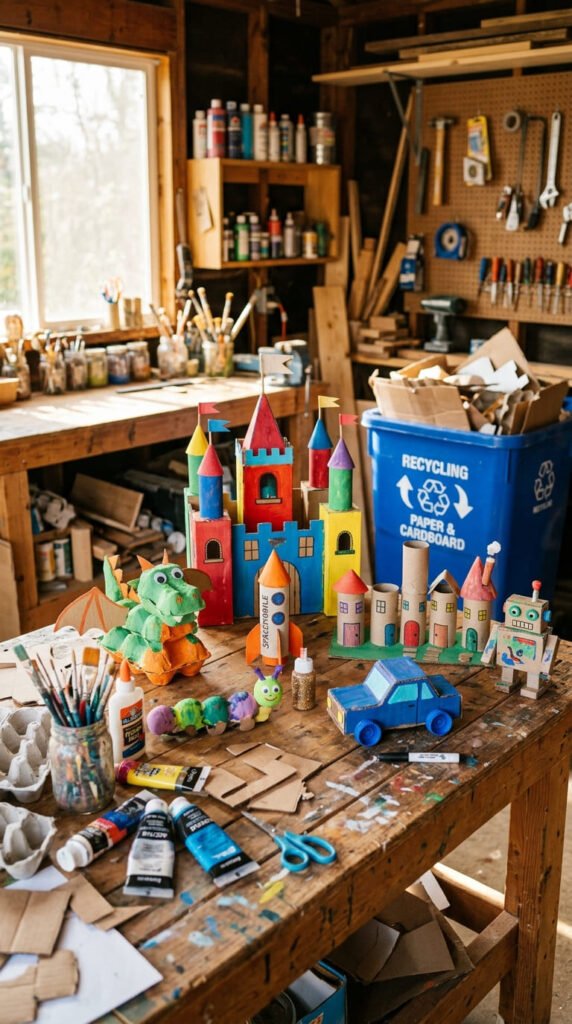
Before that empty cereal box or stack of bottle caps hits the recycling bin, it can become an afternoon of building, painting, and pretend play. Recycled crafts turn everyday trash into toys, games, and keepsakes without costing a dollar, while teaching kids a simple lesson about reuse along the way. Cardboard, toilet paper rolls, egg cartons, plastic bottles, and bottle caps are the real stars here, since they show up in almost every kitchen or recycling bin already. Each idea below comes with a clear material, a short build time, and a budget tip, so you can grab what’s on hand and start right away. Whether you’re filling a rainy afternoon, setting up a classroom center, or just trying to keep the recycling bin a little emptier, these 22+ crafts turn scraps into something worth keeping.
1. Cardboard Box Castle
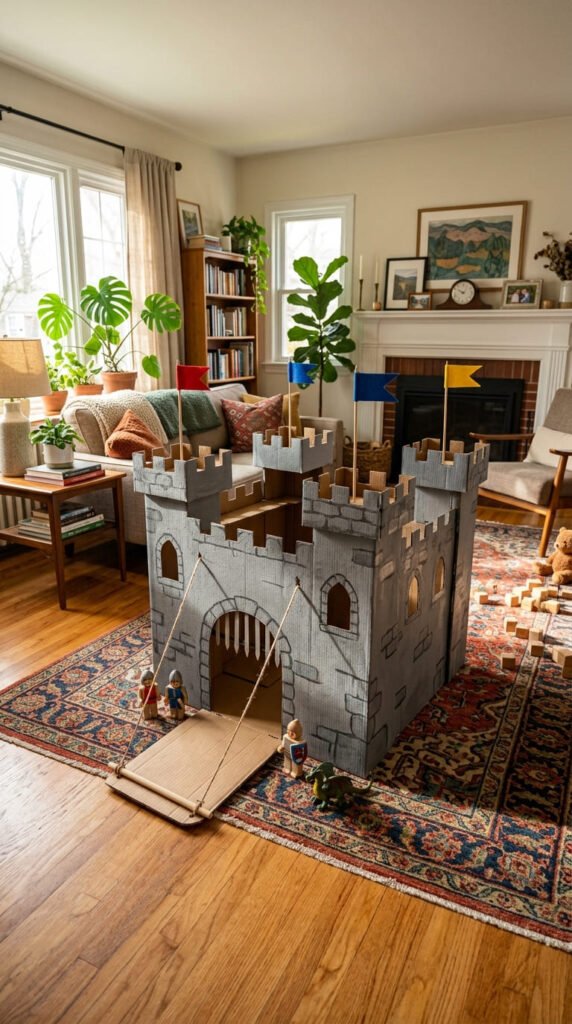
Save a big cardboard box from your next delivery instead of breaking it down for recycling right away. Cut simple turret shapes along the top edge, then let your kid paint the whole thing gray or tan for a stone look. Cut a rectangle flap for a drawdown drawbridge door. Budget tip: this costs nothing beyond paint you likely already own, since the box is the main material. Spread this project across two days if your child loses interest — cut and paint one day, decorate the next. Add paper flags on toothpicks for the top of each turret to finish the look. This is a strong pick for build-and-play crafts, since the castle becomes a toy for weeks after the paint dries. Store leftover cardboard scraps for a future drawbridge repair or a second smaller castle for action figures.
2. Toilet Paper Roll Binoculars
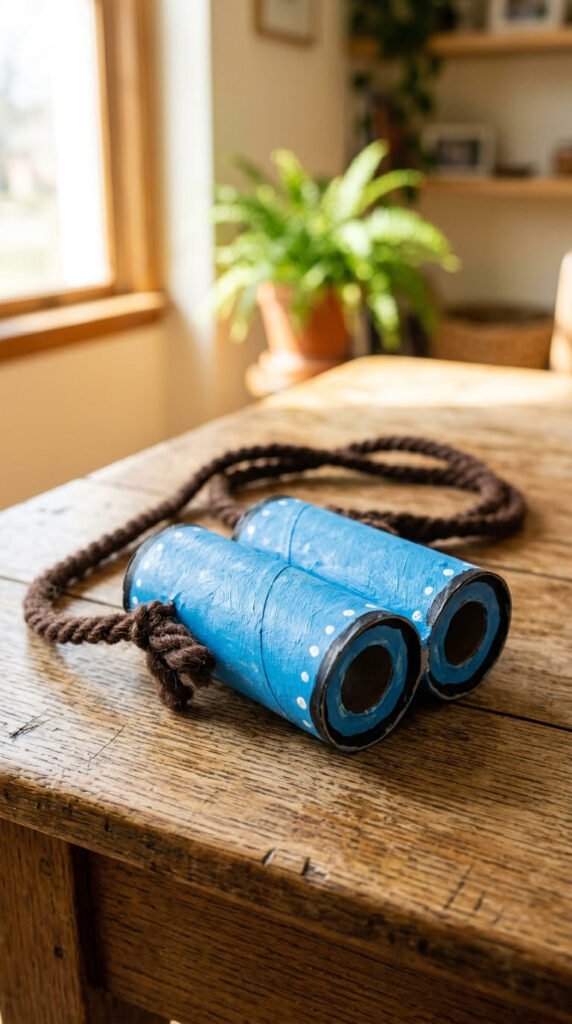
Glue two toilet paper rolls side by side, then let your kid paint them a bold color. Punch a small hole on each outer side and tie a length of yarn through both to make a neck strap. Budget tip: this uses only rolls, glue, and yarn scraps you already have, so it costs nothing. Once painted and dry, these binoculars turn into a prop for backyard bird watching or a pretend jungle expedition. Let your kid decorate with stickers or marker patterns for a personal touch. This craft pairs painting practice with a simple pretend-play payoff, so the ten minutes of building turns into an afternoon of outdoor exploring. If you don’t have yarn, a strip of ribbon or even string works just as well. Keep a few spare rolls on hand so a sibling or friend can make a matching pair for shared play.
3. Egg Carton Flowers
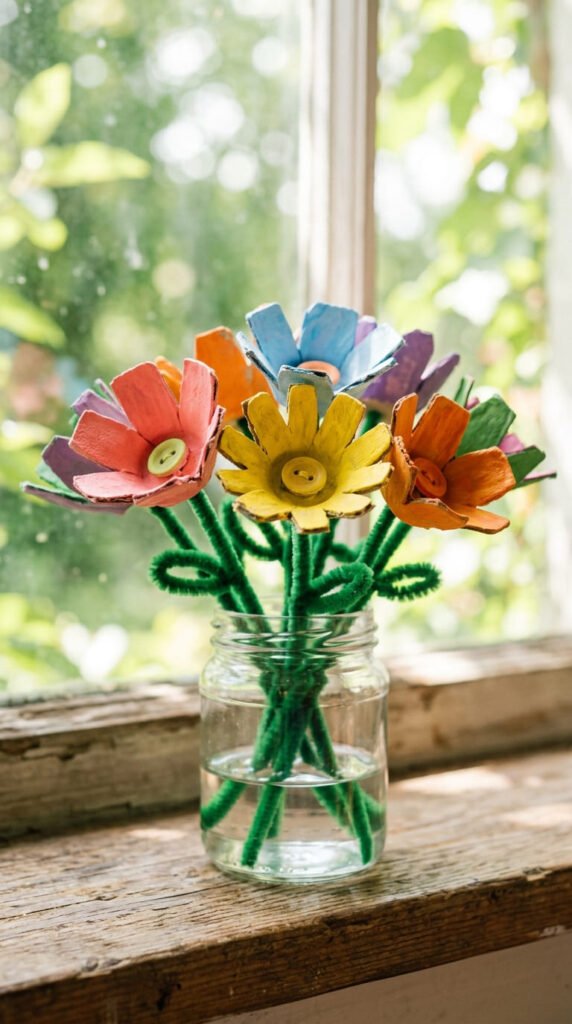
Cut individual cups from an egg carton, then trim the edges into rounded petal shapes. Paint each one a bright color and let it dry. Poke a small hole in the bottom and thread a pipe cleaner through to make a stem. Budget tip: egg cartons cost nothing since they’re already headed for the recycling bin, and one carton makes a small bouquet. This is a great low-mess project since the painting happens before assembly, keeping fingers cleaner than a wet-glue craft. Group several finished flowers into an old jar or cup for a simple centerpiece. This craft works well for spring or as a gift for grandparents. If pipe cleaners aren’t on hand, a straw or a rolled strip of green paper works as a stand-in stem. Let your kid mix and match petal colors for a wildflower look instead of a uniform bouquet.
4. Plastic Bottle Bowling Set
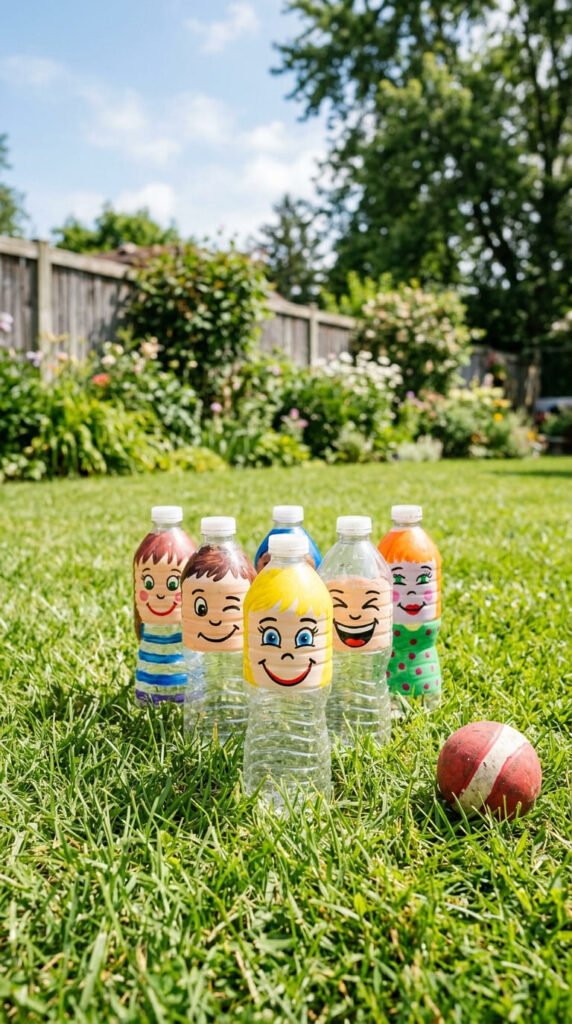
Rinse out six empty water bottles, then let your kid paint a face or pattern on each one. Once dry, add a splash of sand or a few pebbles to the bottom of each bottle for weight, so they don’t tip too easily. Set them up in a triangle on the grass and roll a small ball to knock them down. Budget tip: this game costs nothing beyond bottles you already have on hand, since sand or pebbles are free from the yard. This is a strong pick for a reusable recycled game, since it gets used again and again instead of sitting on a shelf after one afternoon. Let your kid help set the pins up between rounds for extra practice with counting and spacing. This craft doubles as an outdoor activity, so any spills or paint splatter land on grass instead of your floor.
5. Bottle Cap Mosaic Art
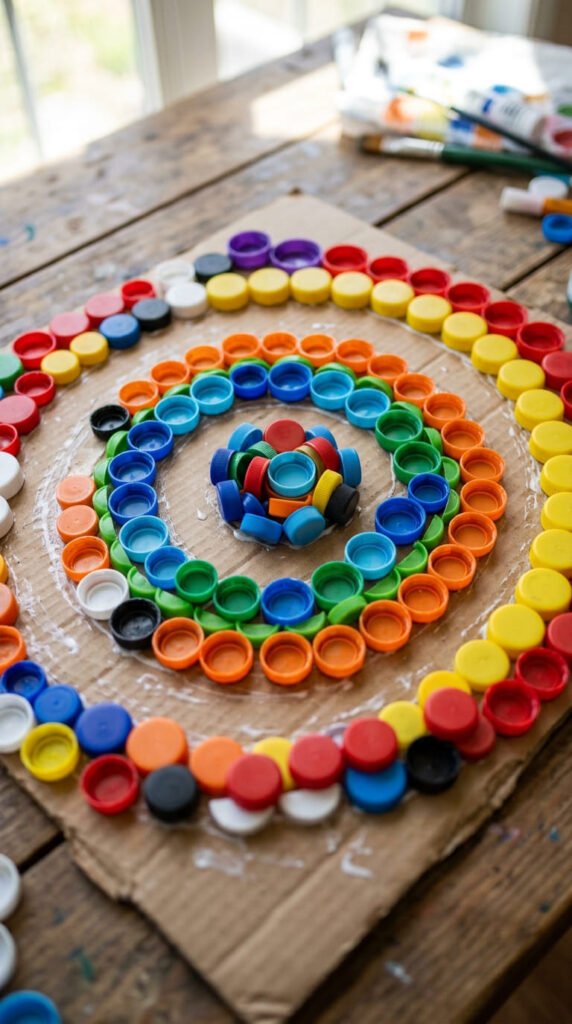
Start a bottle cap collection in a jar by the sink, saving caps from milk jugs, soda bottles, and juice containers. Once you have a good pile, sketch a simple shape on cardboard — a sun, a heart, a rainbow — and let your kid glue caps inside the outline. Budget tip: this craft is completely free since it only uses caps you’d otherwise toss. Sorting caps by color before gluing adds a light pre-craft activity, similar to a matching game. This project also works as a slow-build effort, since you can collect caps over a few weeks before starting. Once finished, hang the mosaic on a wall as bright, textured art unlike anything from a store. If your kid struggles with a glue bottle, a glue stick gives more control for placing small caps precisely inside the lines.
6. Cardboard Tube Snake
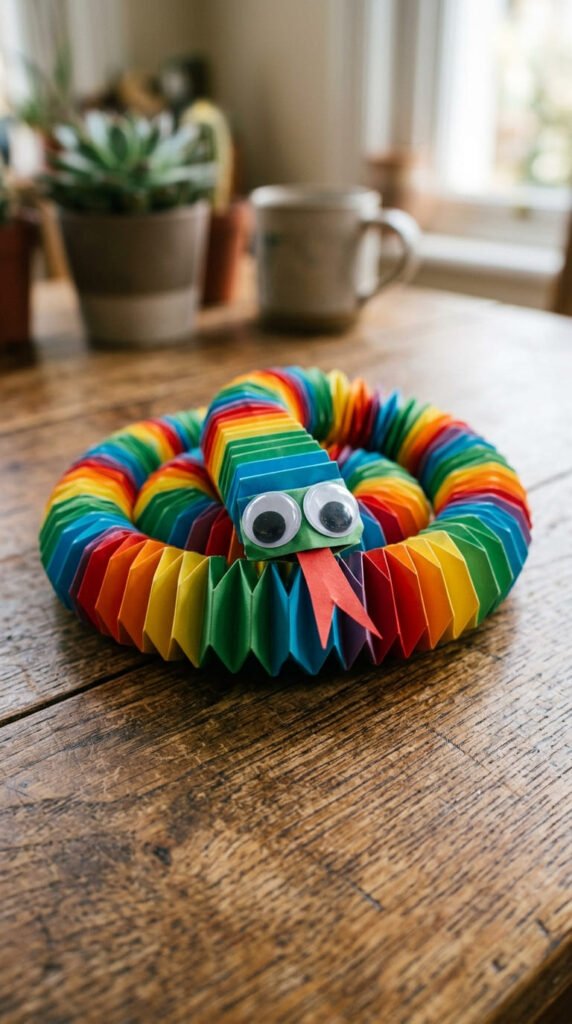
Cut a paper towel or toilet paper tube into a spiral, similar to slicing an apple peel in one long strip. Paint the strip a bright color, then glue on googly eyes and a small forked paper tongue at one end. Budget tip: this uses a single tube and a small amount of paint, so it costs next to nothing. Once it unravels into a coiled shape, the snake can stretch and bounce a little like a spring. This is a fun sensory craft since the finished snake has a springy, tactile quality kids like to play with. Talk about real snakes while you build — how they move, what colors they can be — for a light nature lesson. If your kid enjoys this one, save a few extra tubes to build a whole family of snakes in different colors and sizes for pretend play.
7. Cardboard City Buildings
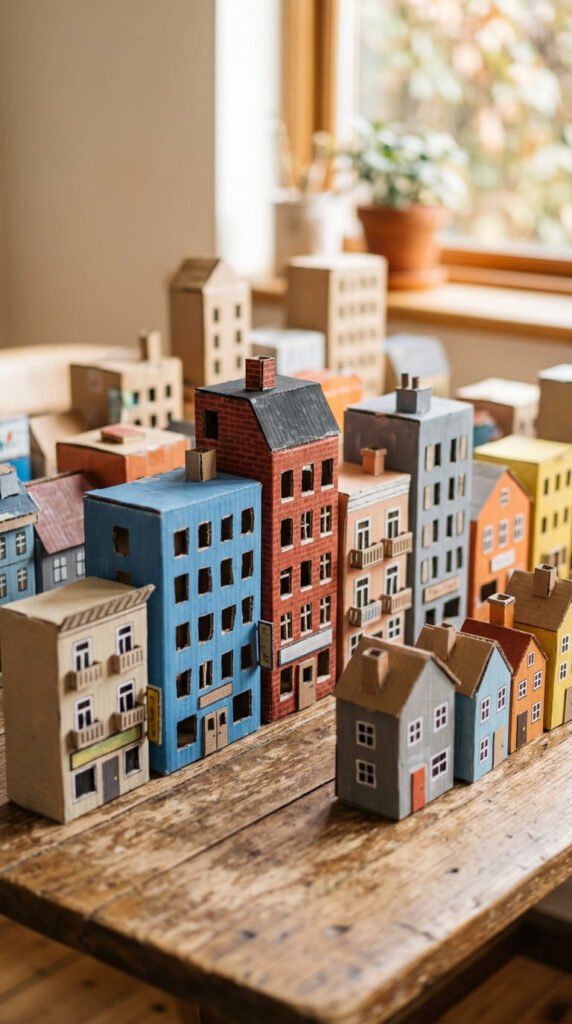
Save small boxes from cereal, snacks, or tea bags instead of flattening them for recycling. Let your kid paint each one a different color, then cut small window and door shapes once dry. Line the boxes up together to build a mini cardboard city on a tabletop or the floor. Budget tip: this project costs nothing beyond paint, since the boxes are already headed for the bin. Add small toy cars or figures to bring the city to life during pretend play. This is a strong pick for kids who like building and play-based crafts, since the payoff is a whole scene, not just a single object. Let your kid decide which building goes where, building basic spatial reasoning skills along the way. Save this city in a bin so new buildings can be added over time as more boxes come through your recycling.
8. Toilet Paper Roll Kazoo
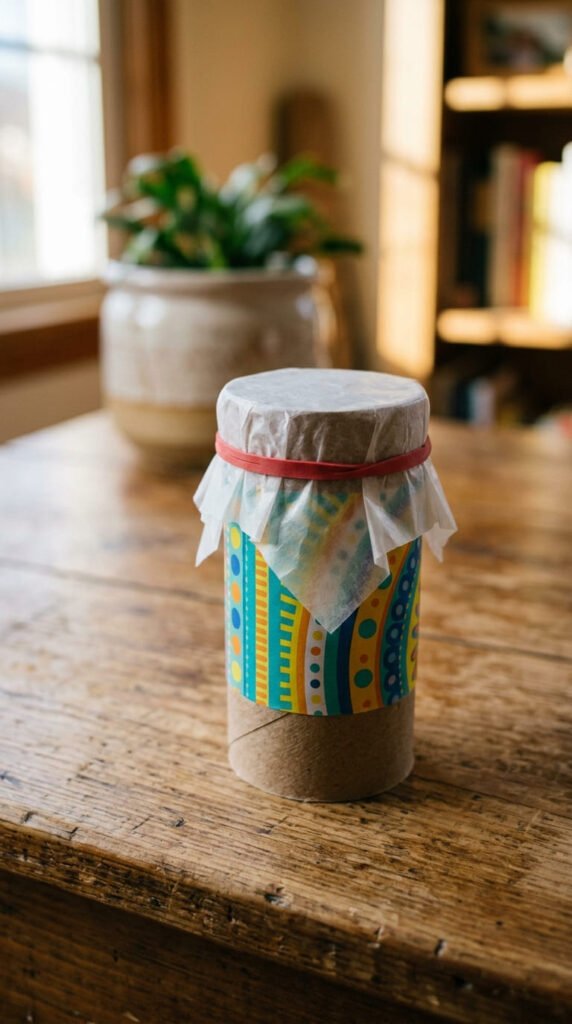
Cover a toilet paper roll with colorful paper or markers, then stretch a small square of wax paper over one end and secure it with a rubber band. Poke a small hole partway down the tube with a pencil. Hum into the open end to make a buzzing kazoo sound. Budget tip: wax paper and rubber bands are pantry staples, so this craft costs nothing extra. This is a fun sound-making craft, which adds a sensory payoff beyond a typical visual project. Let your kid decorate the tube however they like before assembly, since the decorating and the sound-testing become two separate rounds of fun. This is a good pick for kids who get bored with quiet, sit-down crafts, since it ends with noise and movement. Keep a few extra tubes on hand for a whole kazoo band with siblings or friends.
9. Egg Carton Caterpillar
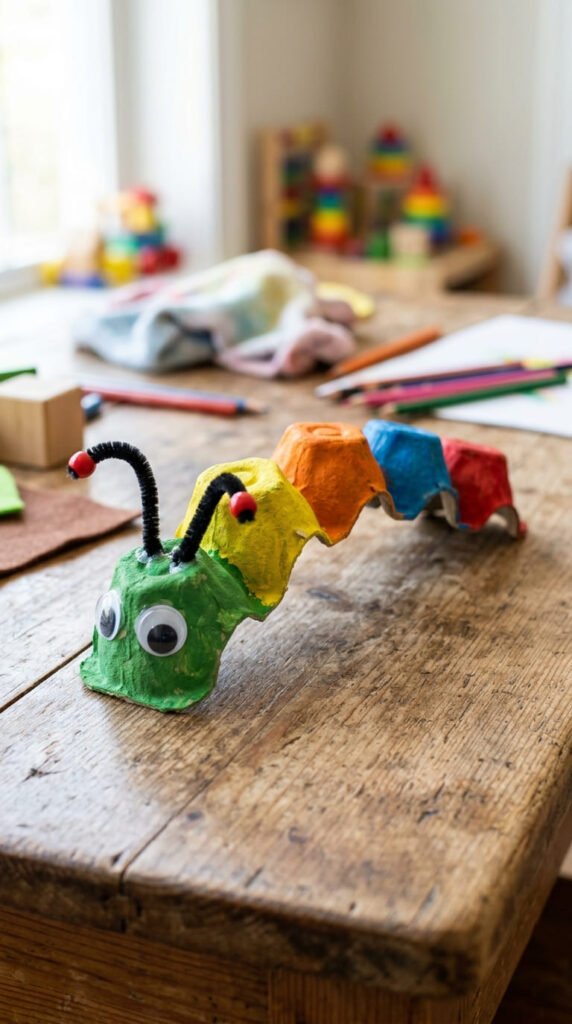
Cut a strip of four or five cups from an egg carton, then let your kid paint each one a different color. Once dry, glue on googly eyes and a pipe cleaner antenna at one end. Budget tip: this costs nothing beyond paint, since the carton is already recycling-bound. Painting each section a separate color adds a light pattern-practice element as your kid works down the strip. This craft pairs well with reading a caterpillar-themed storybook beforehand, giving the project a story connection. If painting feels slow for a wiggly kid, markers work just as well for a faster version. Once finished, the caterpillar can sit on a shelf or crawl across the table during pretend play. This is a good repeatable project, since a single carton often makes two or three caterpillars from different sections.
10. Plastic Bottle Bird Feeder
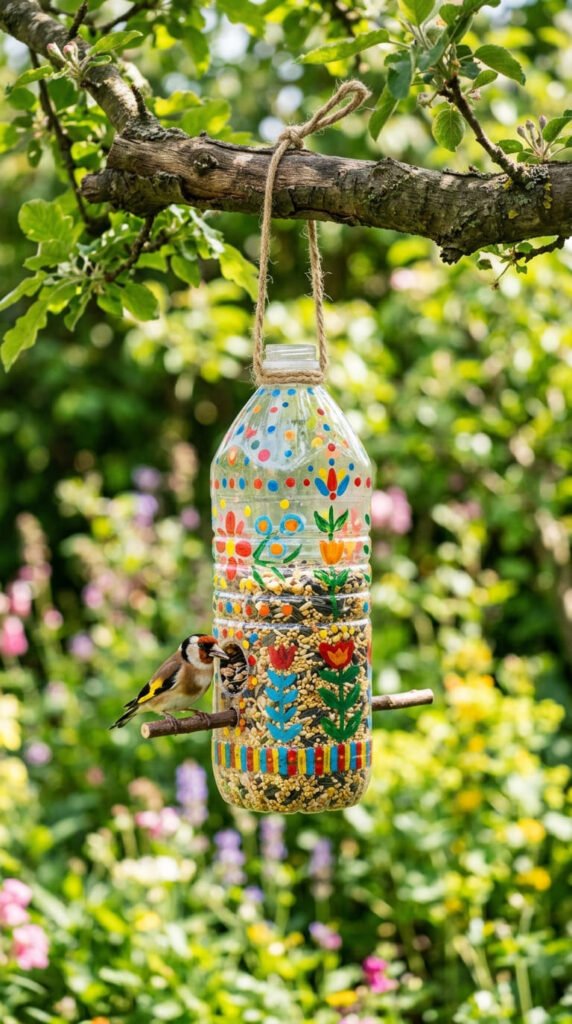
Cut two small holes on opposite sides of an empty plastic bottle, then push a wooden spoon or stick through both holes to make a perch. Cut a small feeding hole above each perch, then fill the bottle with birdseed through the top. Budget tip: birdseed is the only real cost here, and a small bag lasts for many feeders. Hang the finished feeder from a tree branch with string tied around the bottle’s neck. This project bridges recycled crafting with outdoor nature learning, since your kid gets to watch real birds visit their creation over the following days. Talk about what kinds of birds might stop by based on your area. This is a strong seasonal project for spring or fall, and it turns a single bottle into an activity that keeps paying off for weeks after it’s built.
11. Cardboard Box Toss Game
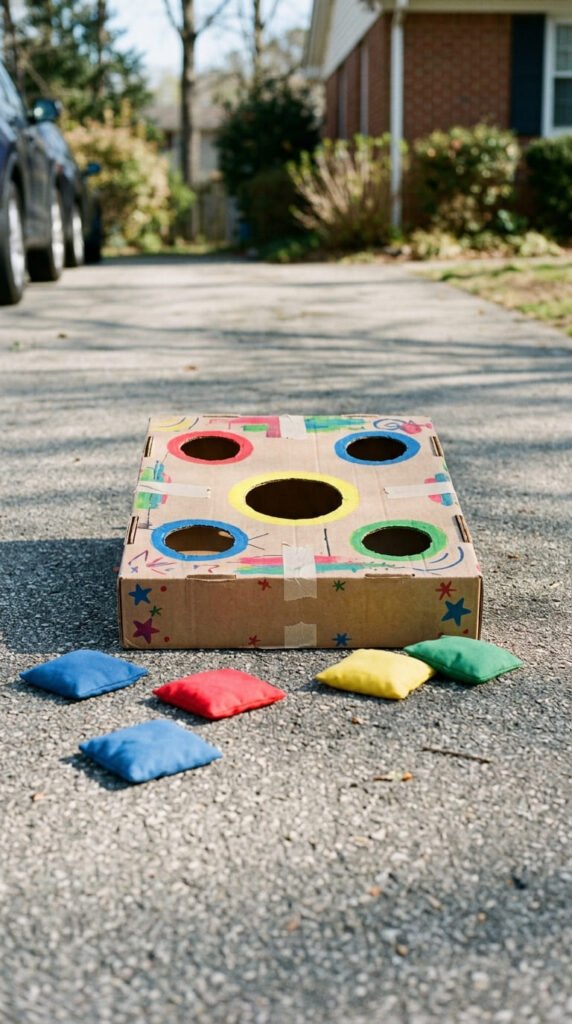
Cut three or four different-sized holes into the top of a sturdy cardboard box. Paint a number above each hole, with smaller holes worth more points. Toss beanbags, rolled-up socks, or soft balls into the holes to score. Budget tip: this game costs nothing if you already have a spare box and something soft to toss, since rolled socks work just as well as store-bought beanbags. This is a strong pick for a reusable game craft, since it holds up to repeat play far longer than a one-time art project. Let your kid help paint the numbers and holes, adding a bit of counting practice into the build itself. Set the game up outside or in a garage for the least mess. This project also makes a great party activity if you have a few kids taking turns keeping score.
12. Toilet Paper Roll Owl
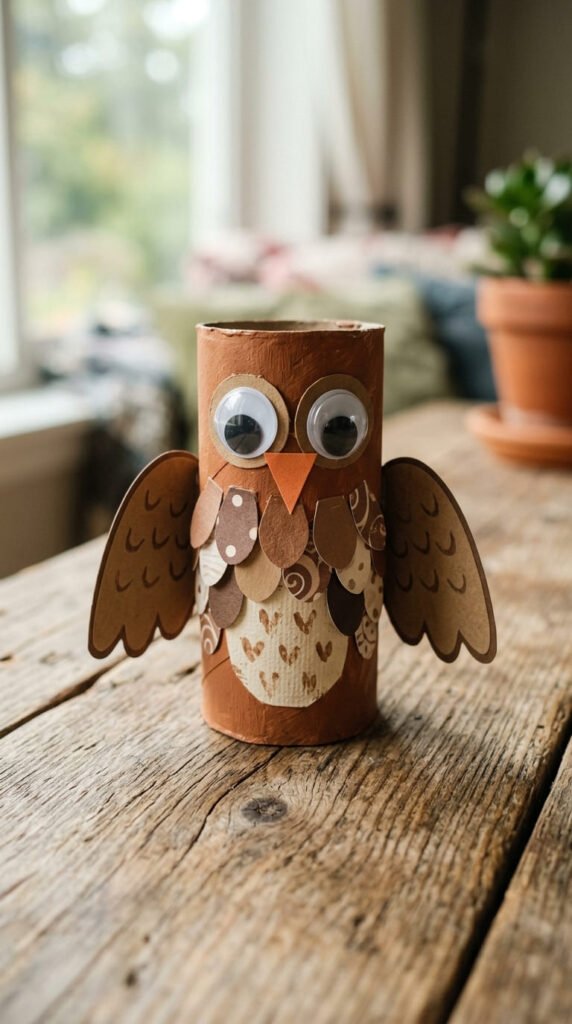
Paint a toilet paper roll brown or gray, then glue on two large googly eyes near the top. Cut small paper wing and beak shapes to glue onto the sides and front. Budget tip: this uses just paint, paper scraps, and a single tube, so it costs almost nothing. This craft is fast — about ten minutes — which makes it a good pick for a short attention span or a quick activity between errands. Once finished, the owl can perch on a shelf or become a character in pretend nature play. Talk about owls while you build — when they’re awake, what they eat — for a light animal-facts lesson. If you have extra rolls, make a whole family of owls in different sizes using paper towel tubes for a bigger “parent” owl next to smaller toilet paper roll “babies.”
13. Cork Sailboats
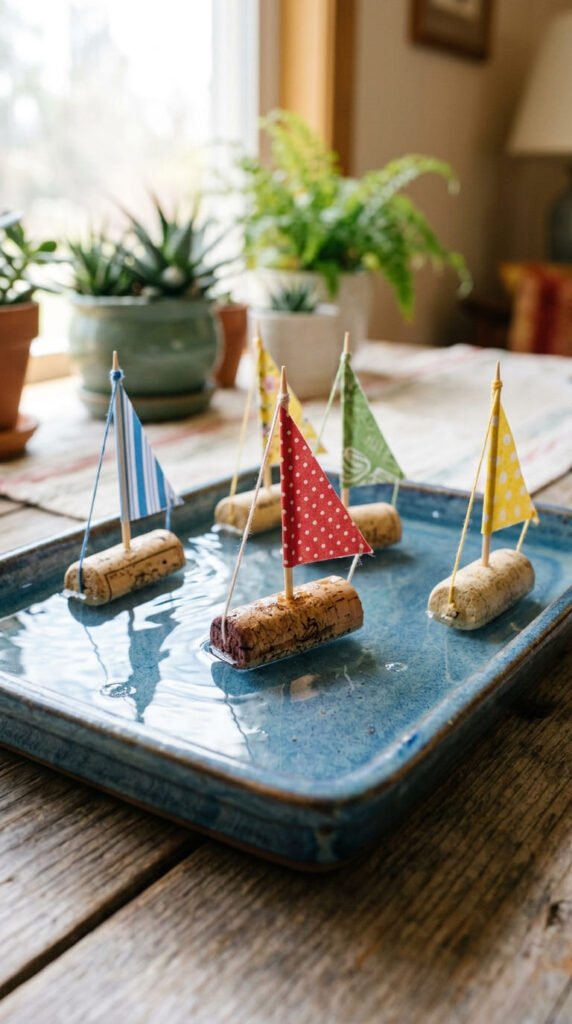
Save wine corks instead of tossing them, then push a toothpick through the center of each one. Cut a small triangle or rectangle of paper for a sail and thread it onto the toothpick. Budget tip: corks are often free if you ask a restaurant or family member to save them, so this craft costs nothing but paper. Float the finished boats in a shallow tray, sink, or bathtub and watch them bob around. This is a good pick for water-based play, adding a different kind of sensory fun beyond typical tabletop crafts. Let your kid decorate the sail with marker patterns before assembly. Race a few boats against each other by blowing on the sails to see whose moves fastest. This craft is quick to build but keeps paying off during bath time or backyard water play for weeks afterward.
14. Egg Carton Caterpillar Sorting Game
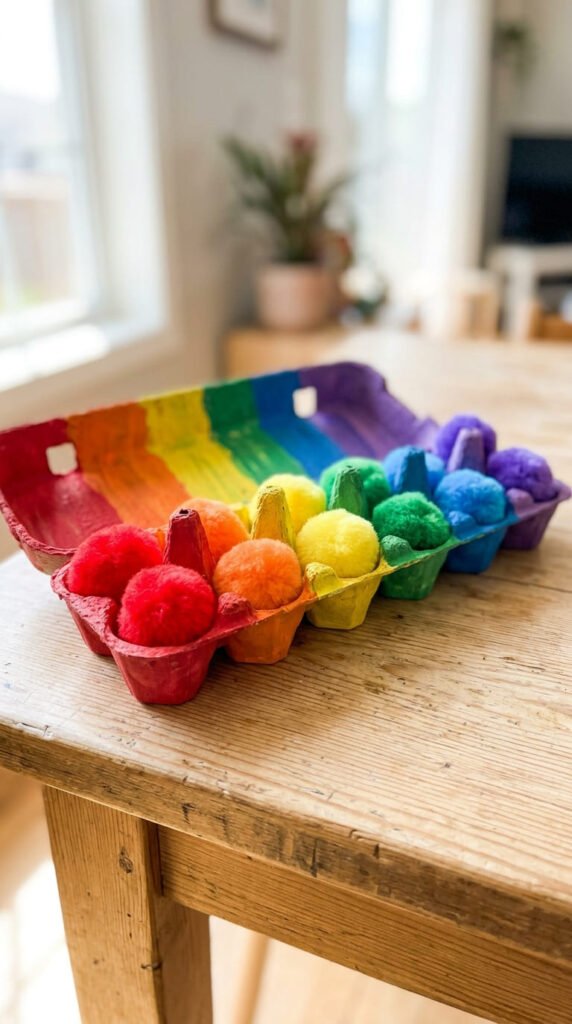
Paint each cup of an egg carton a different color, then give your kid a bowl of colorful pom poms or buttons to sort into the matching cups. Budget tip: this reuses a carton you already have and a bag of pom poms that lasts through dozens of sessions. This isn’t a keepsake craft, but it’s strong fine motor and sorting practice, since picking up small objects and matching colors builds both hand strength and early reasoning skills. Set this up as a quiet, independent activity once the carton is painted and dried. Rotate in different small objects — buttons, beads, or small blocks — to keep the game feeling new. This is a great one to keep in a bin for repeat use, since nothing gets glued down and the carton can be reset and reused for months.
15. Cardboard Rocket Ship
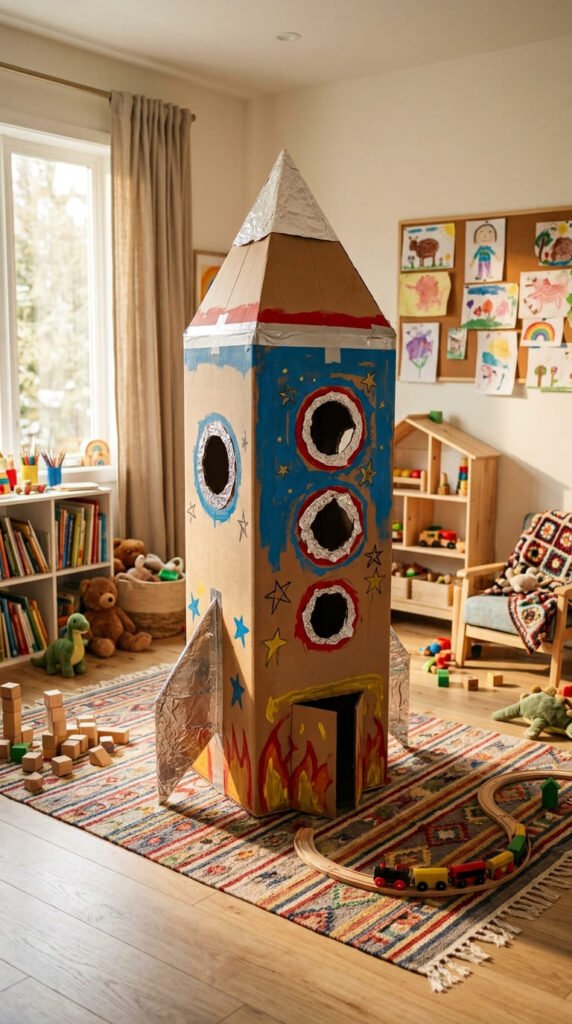
Stand a tall cardboard box upright and cut a round window near the top. Paint the body silver, white, or any color your kid wants, then add foil circles or bottle caps as buttons and dials near the window. Budget tip: this costs nothing beyond paint and any leftover foil in your kitchen drawer. Cut a small door flap on one side so your kid can climb in and out during pretend play. This project takes longer to finish than most on this list, but it turns into a reusable toy that lasts for weeks. Add a paper control panel taped to the inside with drawn buttons and switches for extra pretend-play detail. This is a good weekend project to spread across two days — building and painting one day, adding details the next.
16. Plastic Bottle Planters
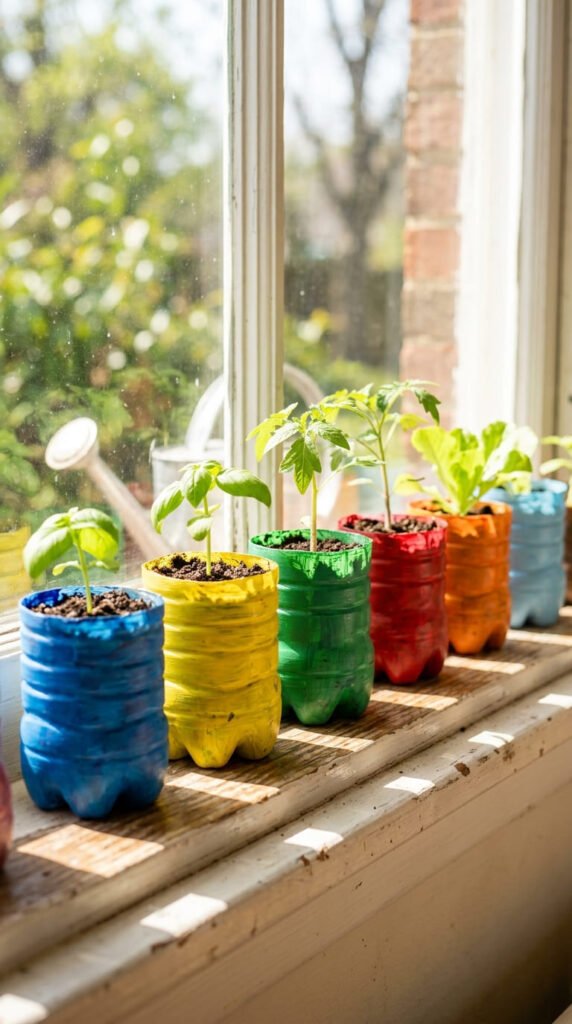
Cut an empty plastic bottle in half and use the bottom portion as a small planter. Let your kid paint the outside before adding soil and a seed or small seedling inside. Budget tip: a packet of seeds costs very little and can fill several bottle planters, making this one of the cheapest crafts on this list. Poke a few small drainage holes in the bottom before adding soil so water doesn’t pool. Line several finished planters along a sunny windowsill and let your kid check on them each day. This craft pairs perfectly with a lesson on plant growth, since your kid gets to watch real change happen over the following weeks. It’s a strong pick for turning a one-time craft into an ongoing routine, since watering and checking on the plant becomes a small daily task.
17. Cereal Box Puzzle
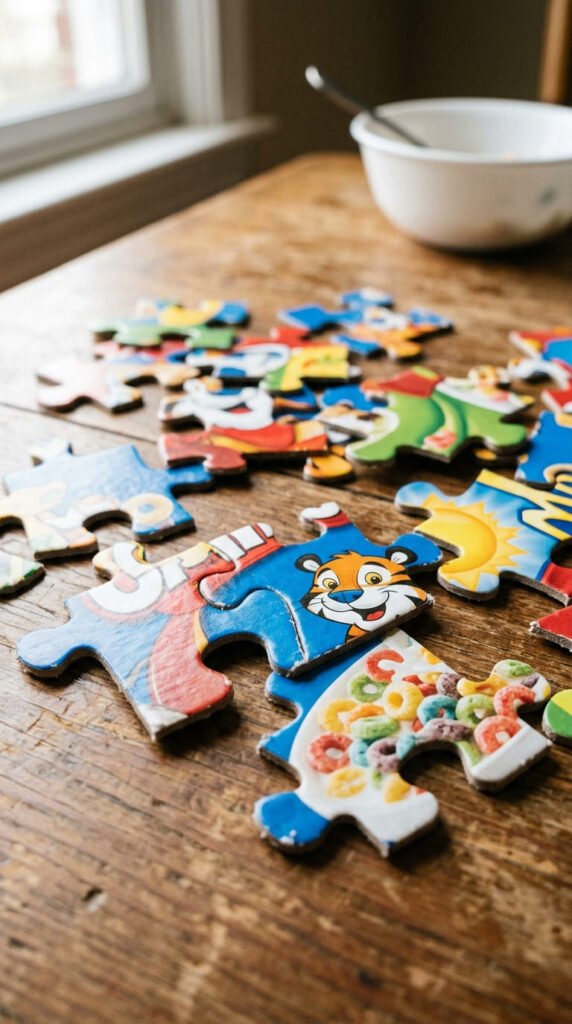
Cut the front panel off an empty cereal box, then use scissors to cut it into six or eight large, simple puzzle pieces. Mix them up and let your kid put the picture back together. Budget tip: this craft is completely free since it reuses packaging you already have on hand. Start with fewer, larger pieces for younger kids, and cut more pieces for an older kid who wants a bigger challenge. This is a great way to get a second use out of colorful packaging before it goes into the recycling bin. Store the pieces in a sandwich bag so the puzzle can be reused again later. Rotate through different cereal boxes or snack boxes to build a small collection of homemade puzzles, giving your kid a rotating set of quiet-time activities without spending anything extra.
18. Cardboard Marble Run
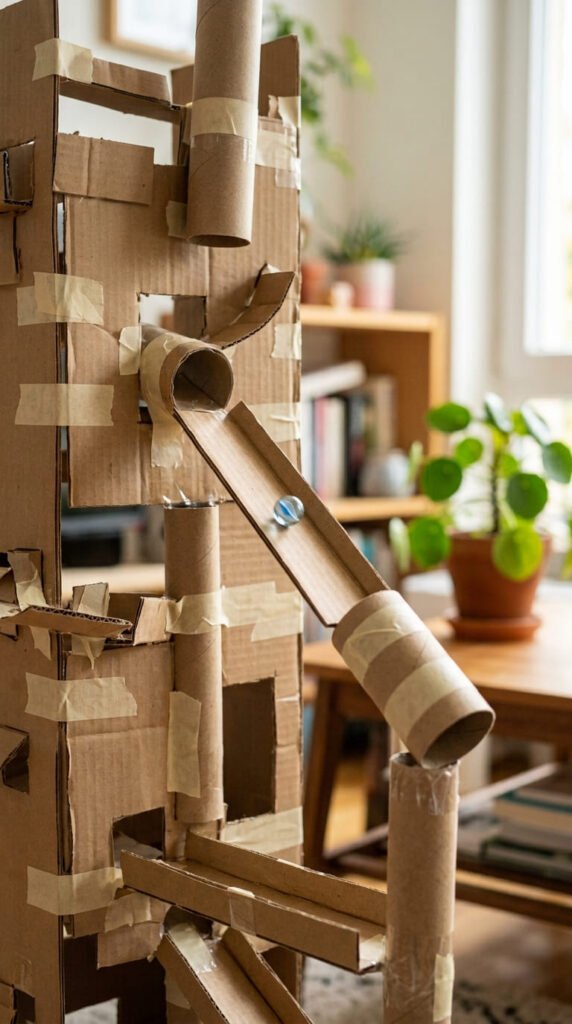
Tape flattened cardboard strips at angles onto a large piece of cardboard or a wall-mounted board to create ramps. Add toilet paper rolls as tunnels along the path. Drop a marble at the top and watch it wind its way down. Budget tip: this uses scrap cardboard and tubes you already have, plus tape, so it costs nothing extra. This is a strong STEM-style recycled craft, since your kid gets to test and adjust the ramps if the marble gets stuck or flies off the path. Let them experiment with different angles and rearrange the pieces as many times as they want. This project also builds patience and problem-solving, since the first design rarely works perfectly on the first try. Keep the marble run out for a few days so your kid can keep tweaking and improving it.
19. Toilet Paper Roll City Cars
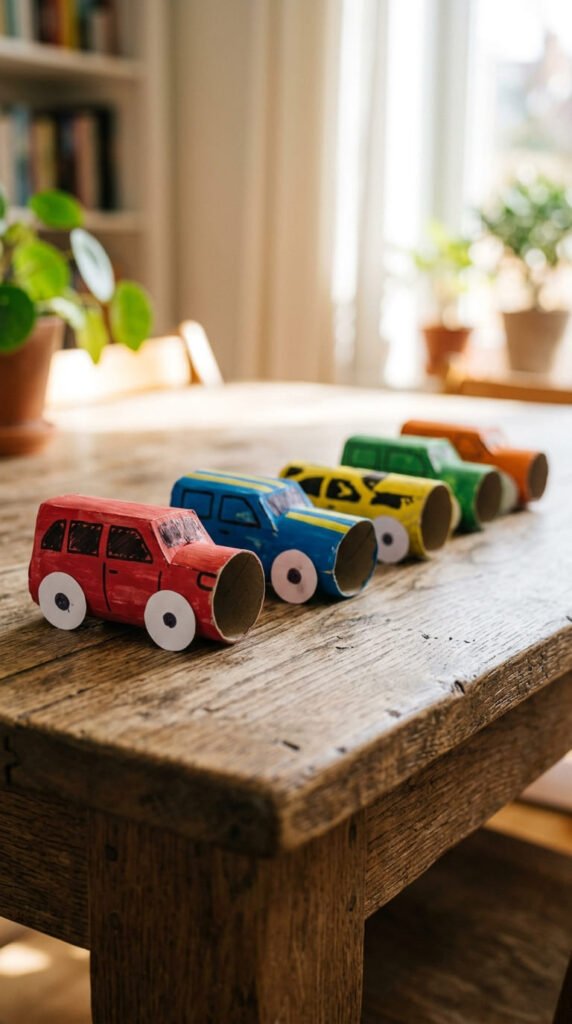
Flatten a toilet paper roll slightly, then paint it a bright color to look like a car body. Cut four small paper circles for wheels and glue them onto the sides. Budget tip: this uses just a tube, paint, and paper scraps, so the cost is close to zero. Pair this craft with the cardboard city buildings idea above for a full pretend-play town your kid can drive their new cars through. Let your kid pick unique colors for each car to build a small matching fleet. This is a fast craft, usually done in ten to fifteen minutes, which makes it easy to repeat and build a whole collection over several afternoons. Store finished cars in a shoebox garage so they’re easy to find again the next time your kid wants to set up a pretend road trip.
20. Newspaper Papier-Mâché Bowl
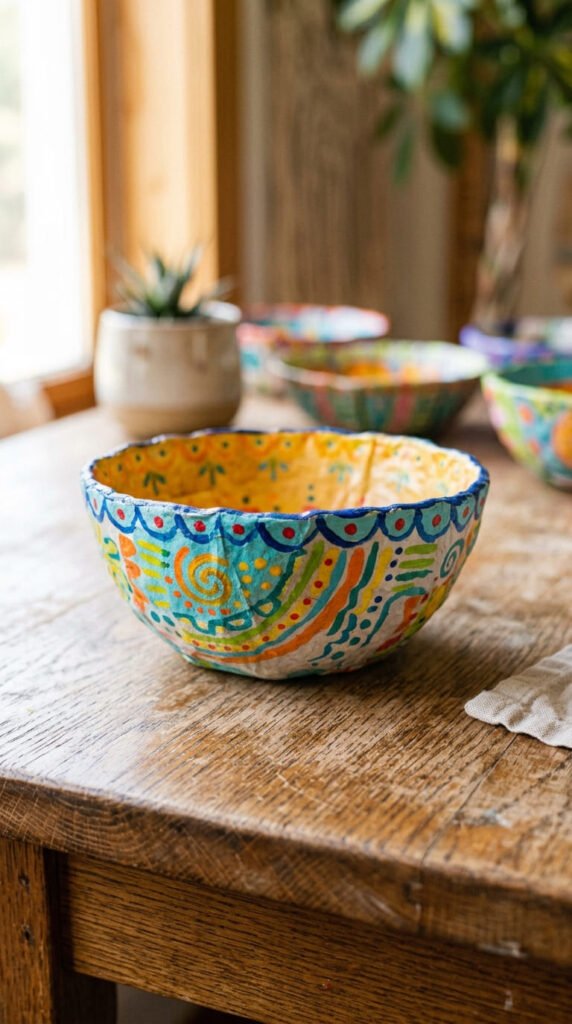
Tear old newspaper into strips, then dip each strip into a simple flour-and-water paste before layering it over a balloon or an upside-down bowl. Once dry after a day or two, pop the balloon or slide the shape off the bowl, then paint the finished shape. Budget tip: flour and water cost pennies, and newspaper is often free from a neighbor or a recycling pile. This is a longer project than most on this list, but the drying time means your kid can return to it over a few days instead of finishing everything in one sitting. Painting the dry shell becomes its own separate craft session. This is a good weekend project when you have more time than usual, and the finished bowl makes a nice catch-all for small toys or loose change on a dresser.
21. Milk Carton Bird House
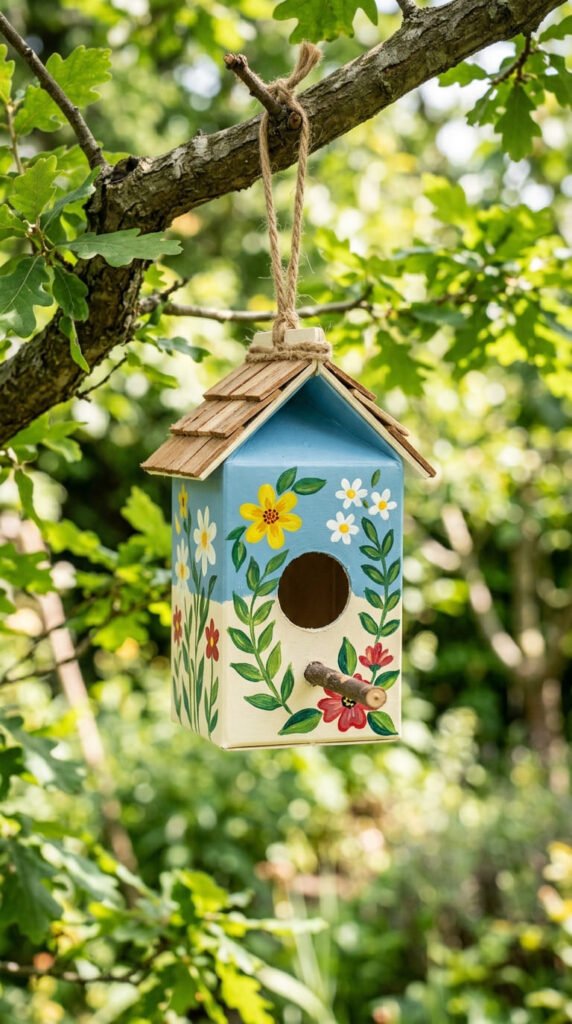
Rinse out an empty milk or juice carton, then cut a small round entrance hole on one side. Paint the outside and let your kid add roof details with extra cardboard scraps if they want a peaked-roof look. Budget tip: this craft is free since the carton is already headed for recycling, and paint is the only real cost. Punch a small hole near the top and thread string through to hang it from a tree branch or porch railing. This project pairs well with the bottle bird feeder idea above for a full backyard bird-watching setup. Talk about what kind of birds might use the house based on the size of the entrance hole. This is a rewarding project since your kid gets to check back on it outside for weeks, watching to see if any birds decide to visit their creation.
22. Bottle Cap Counting Caterpillar
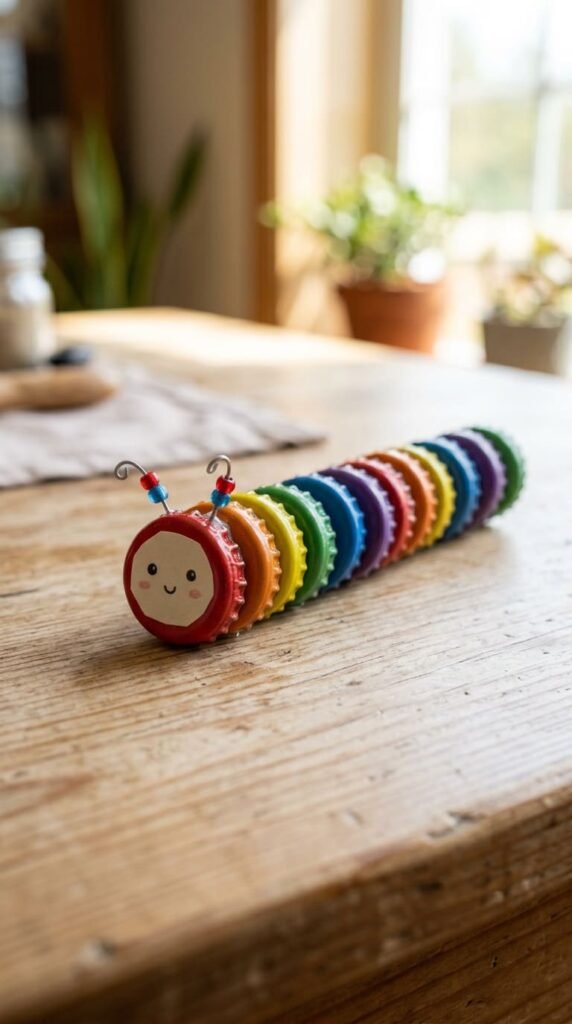
Glue a row of bottle caps in a curved line onto cardboard to form a caterpillar’s body. Add a paper face and pipe cleaner antennae to the first cap. Budget tip: this craft is completely free if you’ve been saving caps in a jar, since no new materials are needed. Count the caps out loud as you glue each one down for a light math lesson built right into the craft. Mix cap colors and sizes for a fun, uneven caterpillar look, or sort by color first for a more uniform design. This is a good project for using up odd caps that don’t match any other craft, since it doesn’t matter if the sizes vary slightly. Once finished, this piece works well as a wall hanging or a shelf display, and it’s a satisfying way to see a jar of saved caps turn into something your kid is proud of.
Conclusion
Twenty-two crafts, and every one of them starts in your recycling bin instead of a store aisle. That’s what makes recycled crafts worth returning to — the materials are already paid for, and the only real cost is a little time and maybe a bottle of paint. Sort a few boxes, rolls, and caps into a craft bin so you’re always ready when your kid needs something to do. Rotate through building projects like the cardboard castle, sensory projects like the papier-mâché bowl, and outdoor projects like the bird feeder to keep things interesting across the seasons. Each one carries a small lesson about reuse alongside the fun, so the trash pile shrinks a little while the craft pile grows. Start with whatever’s already sitting in your bin today, and let the next empty box become tomorrow’s project.