You spent hours shaping that little clay sculpture. Then the paint chips, fades, or turns blotchy after a few days. Painful, right? The good news is that lasting color is not about expensive supplies. It is about the right order: dry, sand, prime, paint, and seal.
Let the Clay Dry Before You Touch Paint
The biggest mistake beginners make is painting too early. Clay may feel dry on the outside while the inside is still holding moisture. When you paint too soon, that trapped moisture can cause peeling, bubbling, or cracks later.
For air-dry clay, let your sculpture sit in a cool, dry place. Give small pieces at least 24–48 hours. Thicker sculptures may take 2–4 days or more.
Avoid placing clay in strong sun. Fast drying can make the surface crack.
For polymer clay, cure it according to the package directions. Let it cool fully before adding paint.
Before painting, check:
- Does the piece feel room temperature, not cold?
- Are there no soft spots?
- Is the surface pale and dry-looking?
- Can you tap it gently without a damp feel?
If yes, you are ready for the next step.
Smooth the Surface With Fine Sandpaper
Paint sticks better to a clean, smooth surface. If your sculpture has rough edges, fingerprints, bumps, or dusty patches, sand them lightly.
Use fine-grit sandpaper. Do not press hard. Small circular motions work best.
Focus on:
- Edges
- Fingerprint marks
- Rough seams
- Lumpy areas
- Flat bases
After sanding, wipe the sculpture with a dry cloth or soft brush. Clay dust can mix with paint and create a chalky finish.
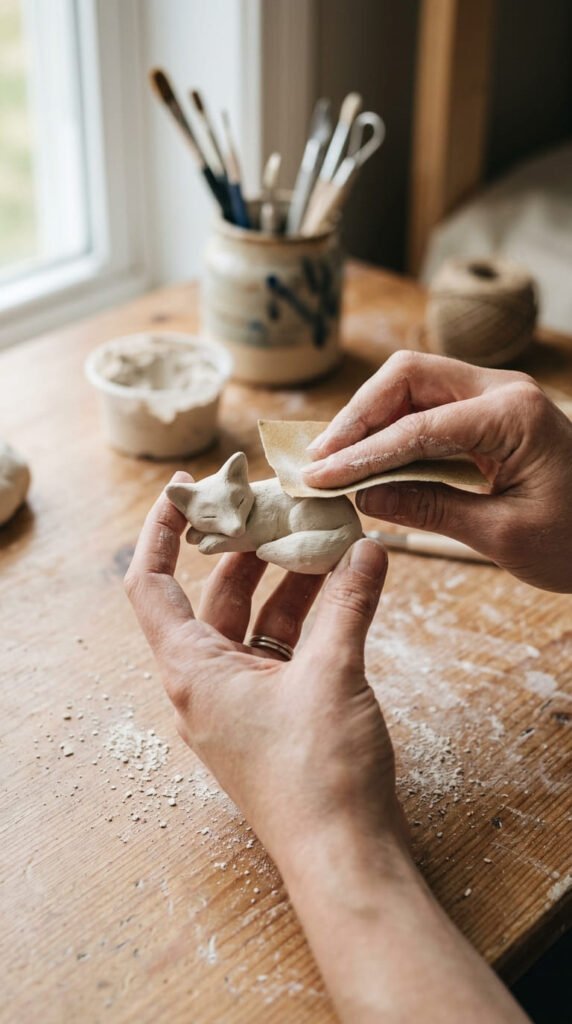
If your sculpture has tiny details, use a soft toothbrush to clean the grooves. Be gentle so you do not break thin parts.
This step may seem boring, but it changes the final look. Smooth clay gives cleaner color, sharper details, and a more polished handmade finish.
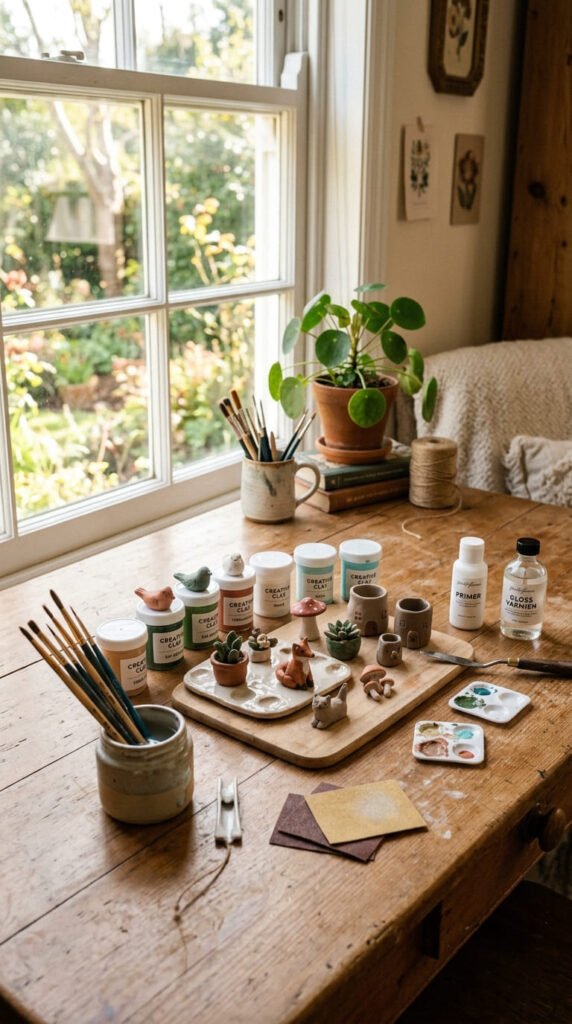
Prime the Clay for Better Color
Primer gives paint something to grip. It also helps the color look even instead of patchy.
You can use:
- White acrylic gesso
- Acrylic spray primer
- A thin layer of white acrylic paint
Gesso is a great choice for air-dry clay because it creates a clean base. Brush on a thin coat and let it dry fully. If the surface still looks uneven, add a second thin coat.
Do not overload the brush. Thick primer can hide sculpted details.
For tiny sculptures, use a small flat brush. For larger pieces, a soft wide brush saves time.
A white base makes bright colors pop. A gray base works well for stone, animal figures, fantasy pieces, or darker designs.
Let the primer dry before painting. Rushing this step can make the first paint layer drag, streak, or lift.
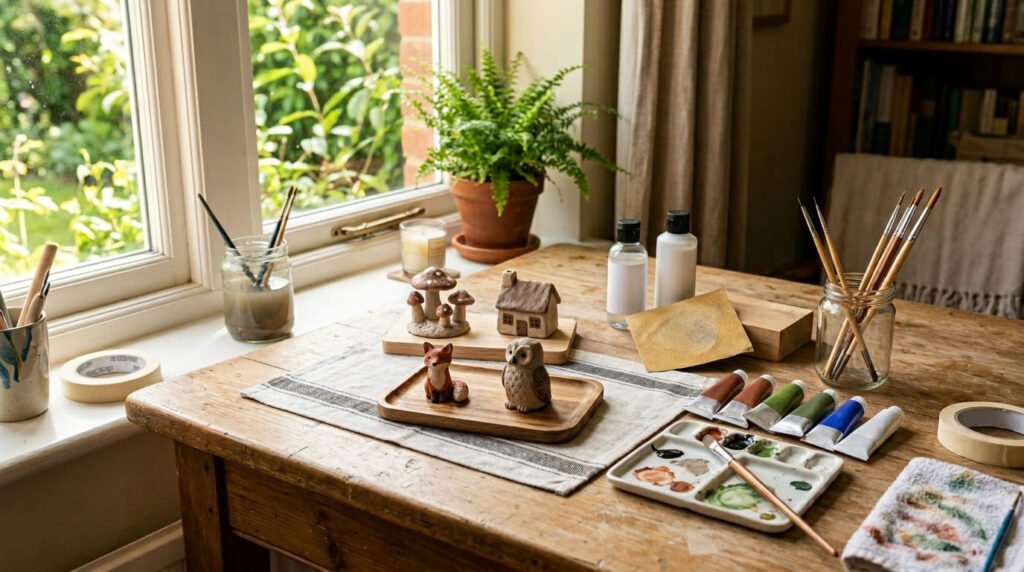
Use Acrylic Paint in Thin Layers
Acrylic paint is one of the easiest paints for clay sculptures. It dries fast, comes in many colors, and works well on both air-dry clay and polymer clay.
The trick is to paint in thin layers.
Start with a base coat. This is your main color. Let it dry before adding more.
Then add:
- A second coat for stronger color
- Lighter paint on raised areas
- Darker paint in grooves
- Tiny details with a fine brush
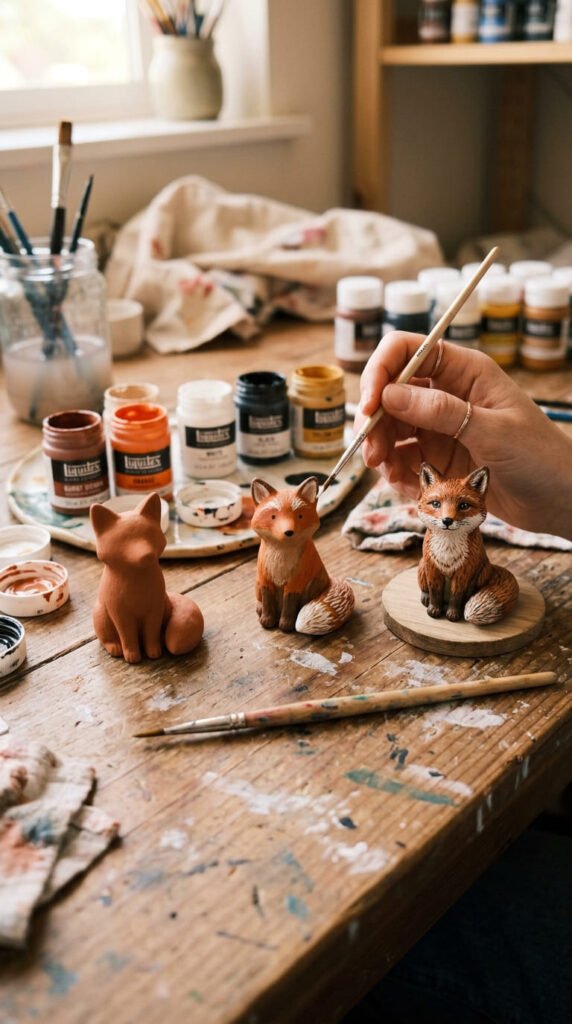
Do not try to cover everything in one thick coat. Thick paint can dry unevenly and peel more easily.
For smoother blending, add a tiny bit of water or acrylic medium. Do not make the paint too watery, especially on air-dry clay.
Let each layer dry before adding the next. A hair dryer on a low, gentle setting can help, but keep it moving.
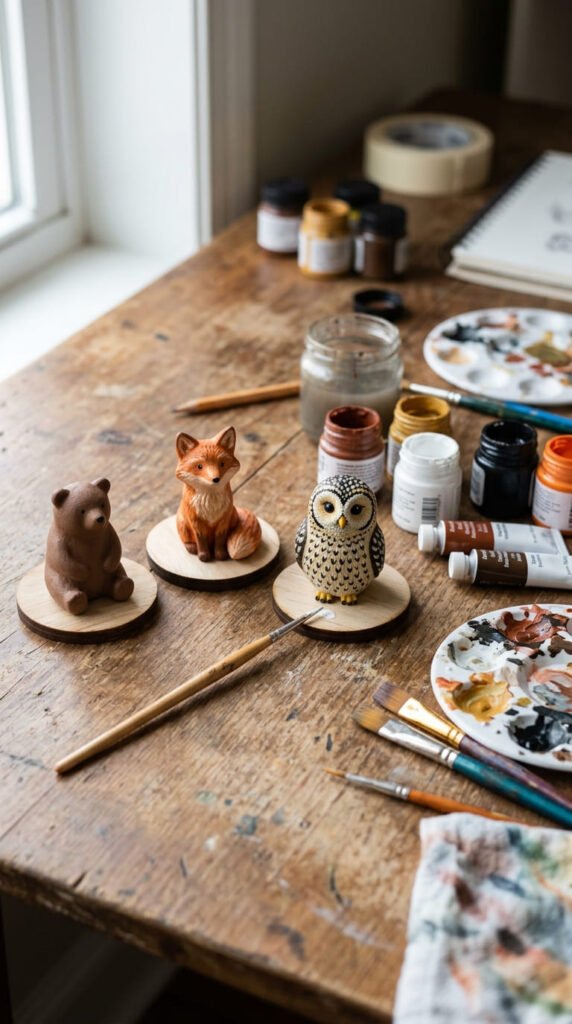
Add Depth With Dry Brushing and Washes
Flat color can make clay sculptures look plain. A few simple painting tricks can make them look more detailed.
Dry brushing is perfect for highlights. Dip your brush into a small amount of paint, wipe most of it off, then lightly sweep it over raised areas. It catches texture without covering the whole piece.
Use dry brushing on:
- Hair texture
- Fur lines
- Stone effects
- Flower petals
- Raised patterns
A color wash is great for shadows. Mix darker paint with water until it is thin. Brush it into creases and grooves, then wipe the high points with a cloth.
This makes details stand out fast.
Try this combo:
- Base color first
- Dark wash in low areas
- Dry brush light color on high areas
It works beautifully on clay faces, mini houses, mushrooms, ornaments, and fantasy sculptures.
Seal the Sculpture So the Paint Lasts
Sealant is the step that protects your work. It helps guard the paint from dust, handling, moisture, and fading.
Choose a finish:
- Matte for a soft handmade look
- Satin for a light natural shine
- Gloss for a shiny ceramic-style finish
Apply thin, even coats. Let each coat dry before adding another. Two to three light coats are better than one heavy coat.
If you use spray sealer, work in a ventilated area. Place the sculpture on cardboard and spray lightly from a distance. Rotate the piece so every side gets covered.
For air-dry clay, sealing is extra helpful because the material can react badly to water. Even sealed pieces should not be soaked or left outside in rain.
Keep Painted Clay Looking Beautiful
Even sealed clay sculptures need gentle care. Treat them like handmade art, not plastic toys.
To make the color last longer:
- Display pieces away from sinks and bathrooms
- Keep them out of harsh sunlight
- Dust with a soft dry cloth
- Avoid dropping or bending thin parts
- Repair chips quickly with paint and sealer
If a small chip appears, touch it up with matching acrylic paint. Once dry, add a little sealant over the repaired area.
For gifts, include a tiny care note. Tell the person to keep the sculpture dry and dust it gently.
That small detail helps your handmade piece stay beautiful for years.
Final Takeaway
Painting clay sculptures so the color lasts comes down to patience. Let the clay dry fully. Sand it smooth. Add primer. Paint in thin layers. Finish with sealant. When you follow these steps, your sculpture looks cleaner, stronger, and more gift-worthy.
Save this guide for your next clay project, and use it every time you want your handmade colors to stay bright, smooth, and beautiful.