Clay flower magnets are the kind of small handmade project that can look far more luxurious than they cost. A few simple petals, soft colors, and the right finish can turn basic clay into fridge decor that feels boutique, giftable, and perfect for Pinterest photos.
The best part? You do not need fancy tools. Air-dry clay, polymer clay, a toothpick, paint, glue, and small magnets are enough to create elegant floral pieces for your kitchen, office board, locker, or handmade gift sets.
Choose the Right Clay for Your Style
The clay you choose affects the final look and feel of your flower magnets.
For a soft, beginner-friendly project, air-dry clay is a great choice. It dries without an oven and works well for simple daisies, pressed flower designs, and flat floral shapes.
For more detailed petals, polymer clay is a strong option. It holds small details better and gives you more control when shaping roses, sunflowers, and layered flowers.
Here is a quick guide:
- Use air-dry clay for a no-bake craft.
- Use polymer clay for stronger, more detailed flowers.
- Use white clay if you plan to paint everything later.
- Use colored clay if you want faster results.
- Keep each flower lightweight so the magnet can hold it well.
For an expensive look, choose calm colors. Ivory, dusty pink, terracotta, sage green, champagne, soft yellow, and muted lavender look more refined than very bright shades.
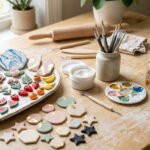
Gather Simple Supplies
You can make beautiful clay flower magnets with basic craft supplies. Most items are affordable, and some can already be found at home.
You will need:
- Air-dry clay or polymer clay
- Small round magnets
- Strong craft glue
- Acrylic paint
- Paintbrushes
- Toothpick or skewer
- Rolling pin or smooth bottle
- Craft knife or butter knife
- Clear varnish or sealer
- Optional gold paint or gold leaf flakes
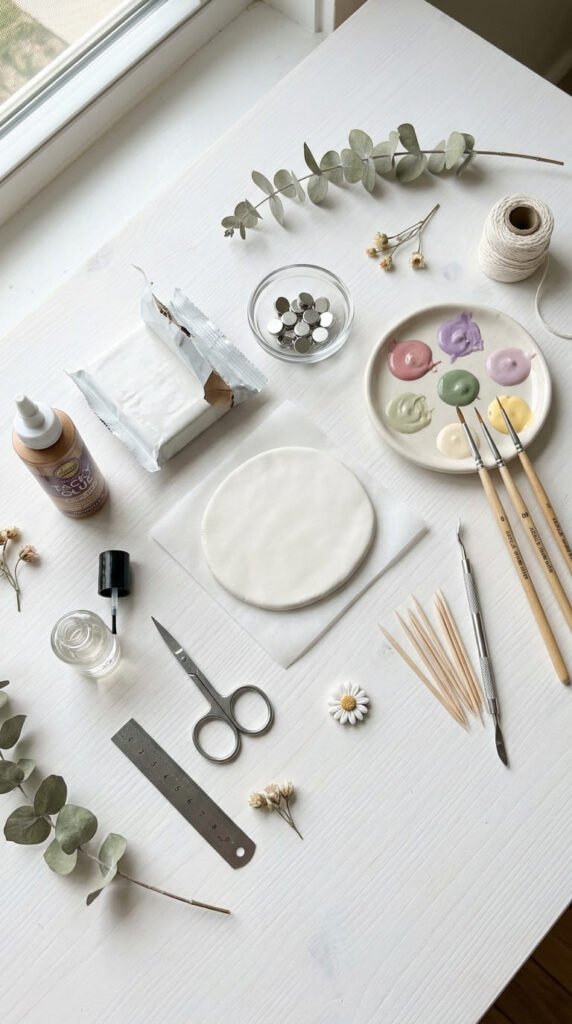
The key supply is the magnet. Choose small but strong magnets, especially if your flower has thick petals. Weak magnets may slide down the fridge once the clay and glue are added.
Also, use strong glue rather than school glue. The magnet backing should stay attached after daily use.
Shape a Simple Elegant Daisy
A daisy is one of the easiest clay flower magnets to make. It also looks clean and pretty when done in soft colors.
Start by rolling a small ball of clay for the flower center. Flatten it slightly. Then roll six to ten tiny balls for petals. Pinch each ball into a teardrop shape.
Place the pointed ends of the petals around the center. Press gently so they attach, but do not flatten them too much. A little raised shape makes the flower look handmade and delicate.
Use a toothpick to add a small line down each petal. Add tiny dots to the center for texture.
For a classy look, try:
- Ivory petals with a soft yellow center
- Dusty pink petals with a cream center
- White petals with a muted gold center
- Lavender petals with a pale green center
Let the flower dry fully if using air-dry clay. If using polymer clay, bake it according to the package directions.
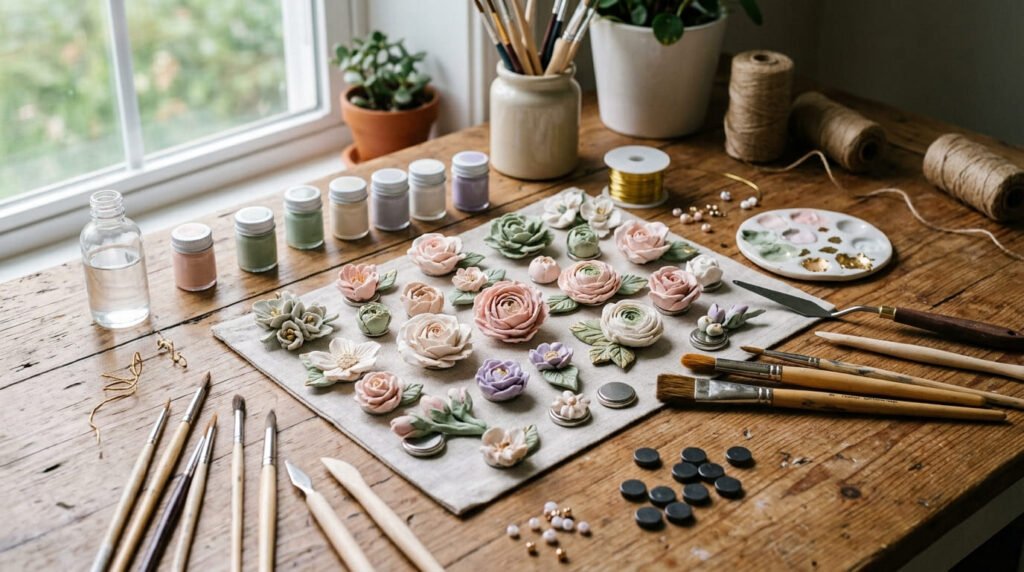
Make Layered Petals for a Richer Look
Layered petals make clay flower magnets look more expensive. The trick is to build depth without making the flower too heavy.
Start with a flat round base. Add larger petals around the edge first. Then add smaller petals above them, slightly closer to the center.
Do not line everything up perfectly. Real flowers have natural movement, so a slightly uneven layout looks better.
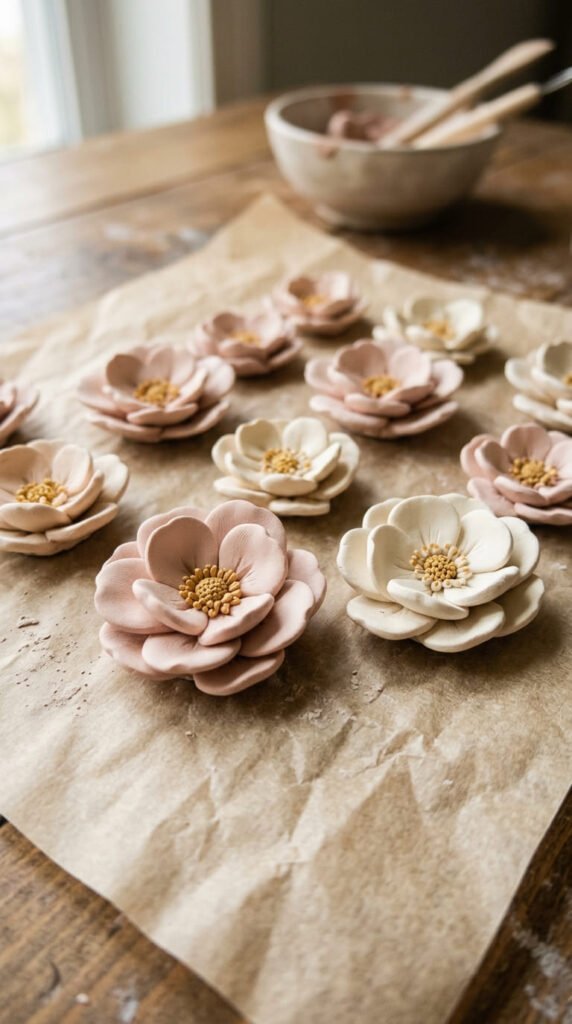
Use your fingertip to curl the petal edges slightly upward. This small detail adds dimension. A toothpick can help lift the edges without damaging the shape.
For a rose-style magnet, roll thin clay strips and coil them gently. Add small petals around the coil until it looks full. Keep the back flat so the magnet sits correctly.
Add Texture That Looks Handmade and Premium
Texture is what makes clay flowers feel special. It helps the petals look less flat and more realistic.
Use simple tools:
- Toothpick for petal veins
- Fork tip for center texture
- Sponge for soft surface marks
- Foil for organic texture
- Small brush for dry paint shading
Add tiny lines to petals before the clay dries or bakes. For centers, press small dots close together. Sunflowers look beautiful with a textured brown or gold center.
After the clay hardens, use paint to add depth. Brush a slightly darker shade near the petal base. Keep the tips lighter. This creates a soft shadow effect.
Gold paint can also make the magnets look expensive. Add only a tiny amount to the flower center or petal edges. Too much gold can look messy, but a light touch feels elegant.
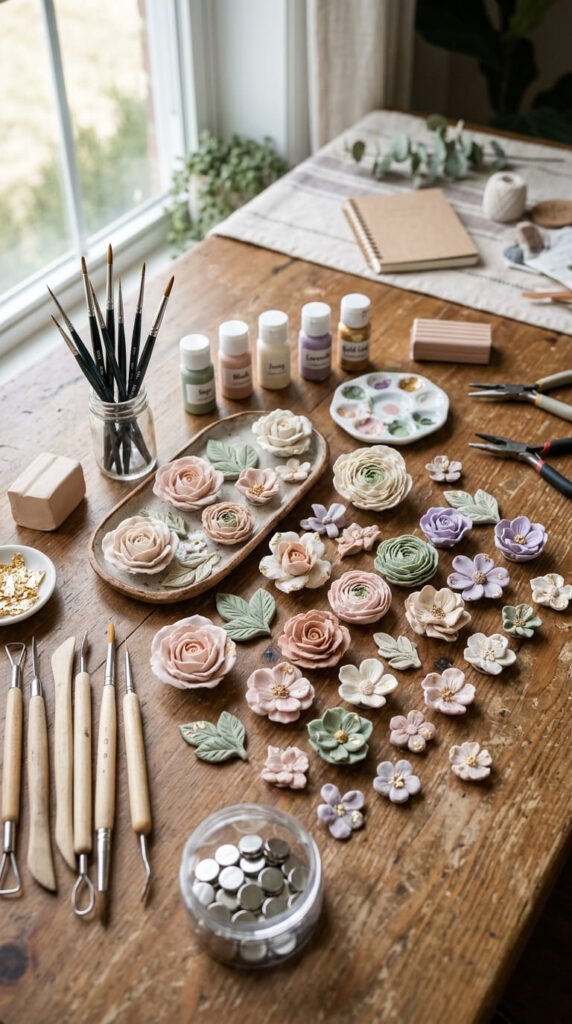
Paint With Soft, Expensive-Looking Colors
Paint can completely change the final result. For a high-end look, avoid harsh colors and choose soft, muted tones.
Try these color palettes:
- Ivory, champagne, and sage
- Blush pink, cream, and gold
- Terracotta, beige, and olive
- Lavender, white, and pale yellow
- Dusty blue, ivory, and silver
Paint in thin layers. Thick paint can hide petal details. Let each layer dry before adding another.
For extra depth, use a dry brush. Dip the brush in a small amount of paint, wipe most of it off, then lightly brush over the raised areas. This highlights texture without making the flower look painted-on.
Attach the Magnet Securely
The back of your flower should be flat before you add the magnet. If the back is uneven, sand it gently once the clay is dry.
Add a small amount of strong glue to the magnet. Press it onto the back of the flower and hold it for a few seconds. Then place the magnet face down while the glue dries.
Do not rush this step. Let the glue cure fully before using the magnet. Overnight drying is usually best.
If the flower is wide, one magnet may be enough. If it is larger or heavier, use two small magnets on the back for better hold.
Seal for a Polished Finish
A clear sealer protects your clay flower magnets and gives them a finished look. Choose the finish based on your style.
Use matte sealer for a soft ceramic look. Use satin sealer for a gentle handmade shine. Use gloss only if you want a polished, almost porcelain effect.
Apply a thin coat with a brush. Let it dry fully. Add a second coat if the magnet will be handled often.
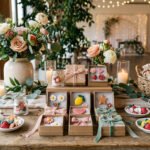
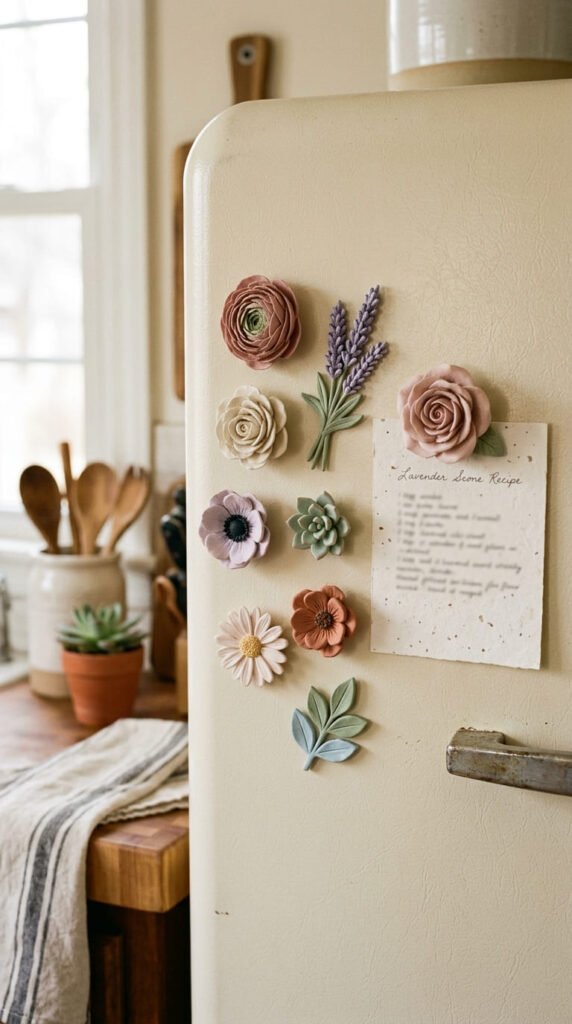
For a giftable look, place your flower magnets on a small card, wrap them in tissue paper, or display them in a tiny box. A set of three flowers in matching colors looks beautiful as a housewarming gift, bridal shower favor, or spring craft item.
Final Takeaway
Clay flower magnets are easy to make, affordable, and beautiful enough to feel like small handmade treasures. Start with simple daisies, try layered petals, add soft paint colors, and finish with a clean sealer. Once you make one set, you can create endless versions for gifts, fridge decor, office boards, or seasonal craft sales.
Save this idea for your next cozy craft day!