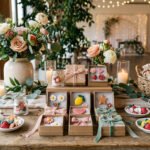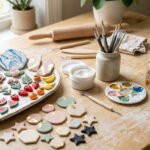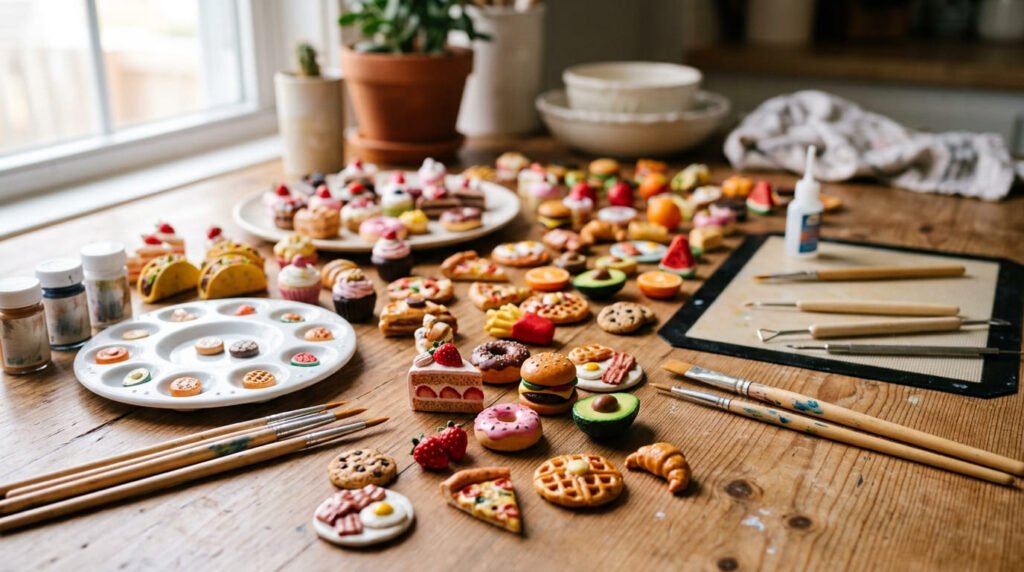
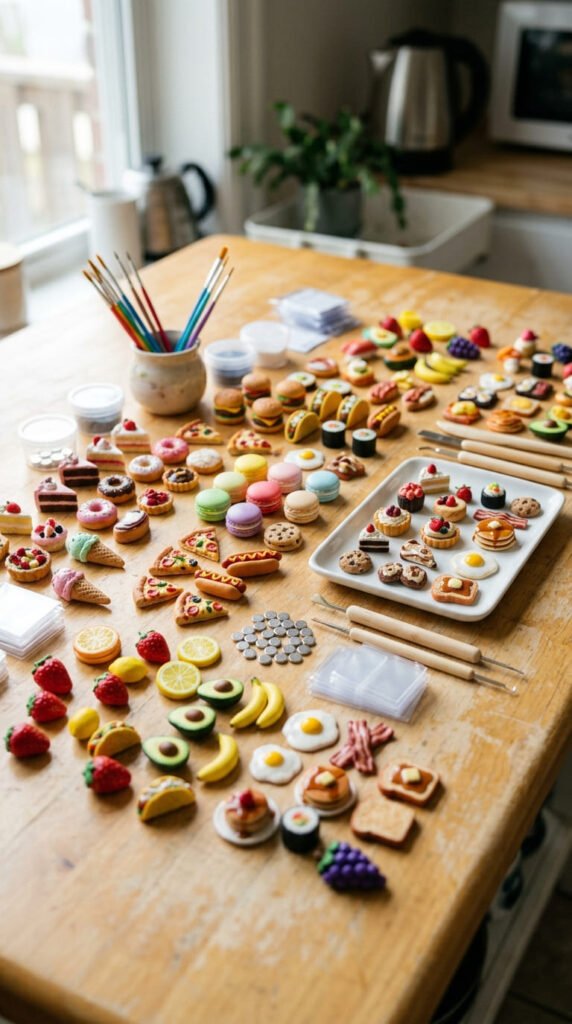
Clay food magnets are a fun way to turn tiny handmade pieces into cute fridge decor, locker accents, or small gifts. They are easy to start because most designs use basic shapes like circles, triangles, strips, and little balls. You can make mini donuts, pizza slices, fruit, waffles, sushi, cupcakes, and snacks with air-dry clay or polymer clay. These ideas are also budget-friendly because each magnet uses only a small amount of clay. Add paint, texture, gloss, and a strong magnet on the back, and your tiny food crafts can look almost good enough to eat.
1. Mini Donut Clay Magnets
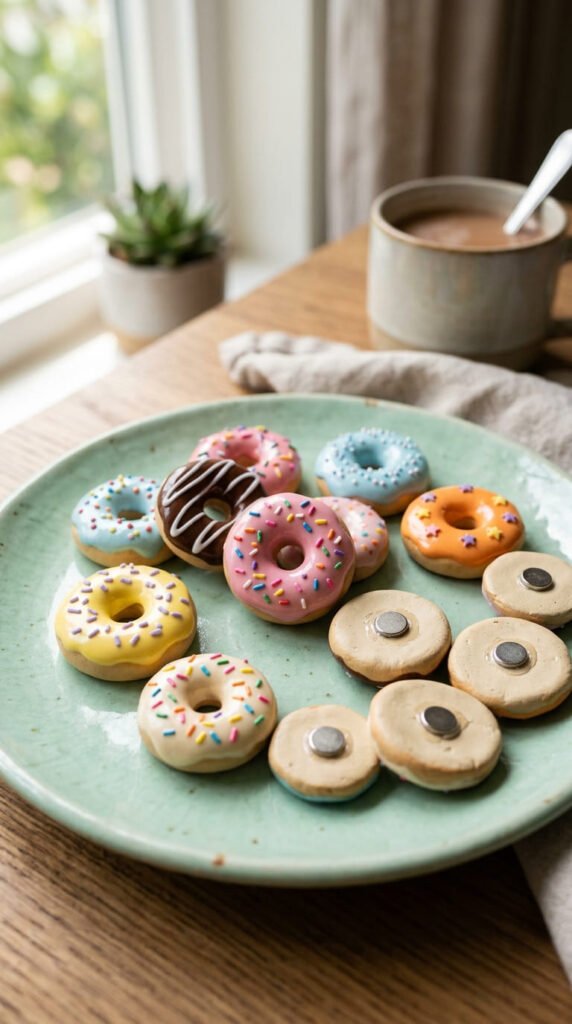
Mini donut magnets are one of the easiest clay food magnet ideas for beginners. The base shape is simple. Roll a small clay ball, flatten it gently, then make a hole in the center with a straw, pencil end, or skewer.
Keep the donut edges soft and rounded. That small detail makes the piece feel more like a real bakery treat.
For icing, add a thin clay layer on top or paint it after drying. Pink, chocolate brown, vanilla cream, and pastel blue work well. Add sprinkles with tiny clay strips or small paint dots.
This idea is great for using leftover clay. You can make a whole batch with different icing colors without buying many supplies.
Glue a small magnet to the flat back after the clay is dry or baked. Add a thin gloss seal on the top for a sweet shiny finish. These mini donuts look cute on a fridge, office board, or handmade gift set.
2. Tiny Pizza Slice Magnets
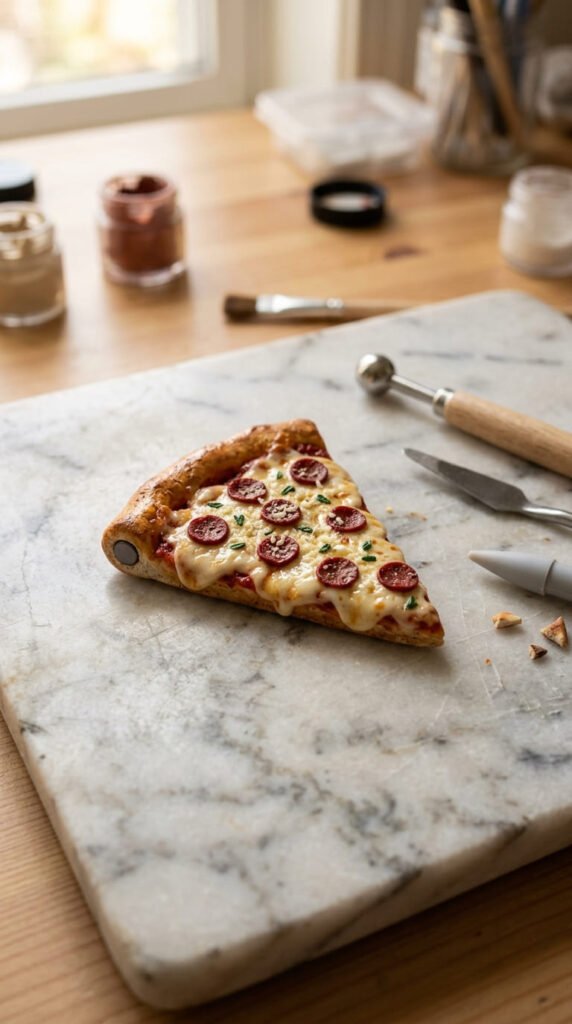
Tiny pizza slice magnets are playful, colorful, and easy to customize. Start with a small triangle of tan clay for the crust base. Add a rounded strip along the wide edge to make the pizza crust.
Use pale yellow clay for cheese. Let it sit unevenly over the triangle so it looks melted. Add tiny red circles for pepperoni, green bits for peppers, and brown dots for mushrooms or crispy baked spots.
You do not have to buy special cutters. A ruler edge, butter knife, or craft blade can shape the triangle. A toothpick can add texture to the crust.
This is a smart budget project because each topping uses only a pinch of clay. Make several slices at once and change the toppings for variety.
Before curing, flatten the back so the magnet sits well. After drying or baking, brush a little brown paint around the crust. Add satin or gloss seal to protect the paint and give the cheese a tasty shine.
3. Cute Sushi Roll Magnets
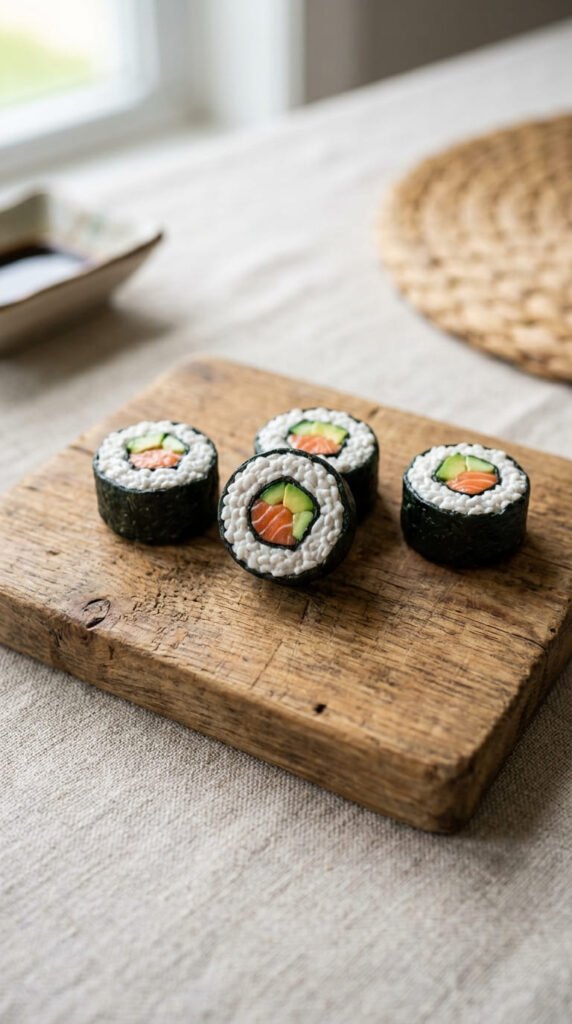
Cute sushi roll magnets look detailed, but they start with basic shapes. Roll white clay into a small cylinder. Wrap the outside with a thin strip of dark green or black clay for seaweed.
Slice the roll into small rounds with a clean blade. For the center, add tiny pieces of orange, green, and pale yellow clay. These can look like salmon, avocado, cucumber, or egg.
Press tiny dots into the white clay with a pin or toothpick to mimic rice. Keep the dots light so the roll stays neat.
This idea works well as a set. Make six or eight rolls and place them together as a matching fridge collection. You can also add a tiny soy sauce bowl or wasabi dot.
Use lightweight magnets because sushi rolls can get a little thick. Keep the back flat before curing. A clear seal protects the texture and keeps the colors bright. These are great for food lovers and handmade kitchen gifts.
4. Golden Waffle Magnets
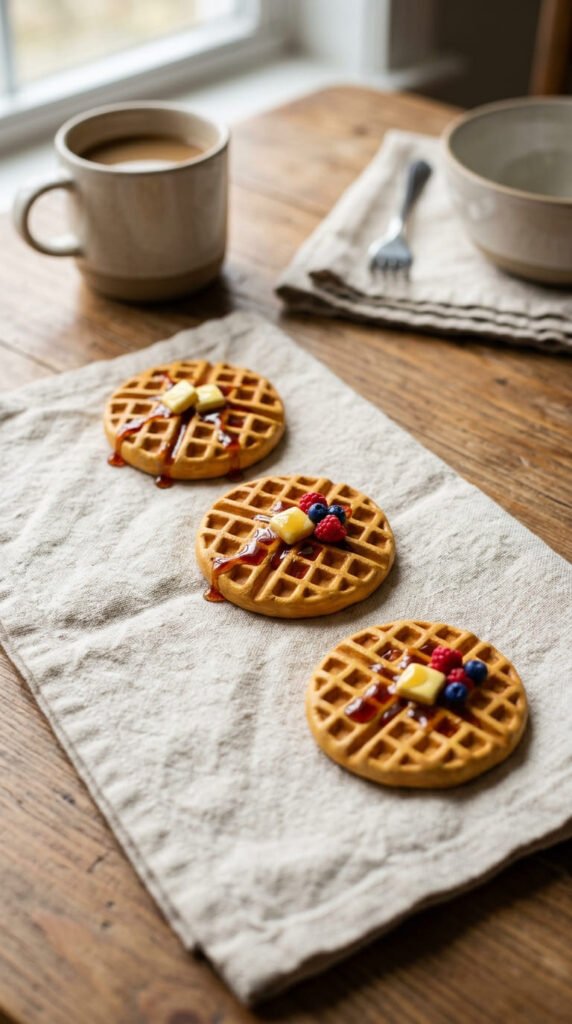
Golden waffle magnets bring a cozy breakfast feel to your fridge. Start with a small square or circle of tan clay. Press a grid into the top with a toothpick, ruler edge, or small stick.
Do not worry about perfect squares. Slightly uneven marks make the waffle look handmade and natural.
Add warm brown shading around the edges with acrylic paint or soft pastel after curing. This gives the waffle a toasted look. A tiny yellow clay square can become butter. Amber paint, gloss gel, or resin can create syrup drips.
Small red or blue clay dots can turn into berries. These tiny toppings make the magnet look more complete without much extra cost.
You can make a full breakfast set with waffles, eggs, toast, pancakes, and coffee cups. Keep the waffle back flat so the magnet attaches well. Use gloss only on the syrup if you want a realistic finish. Leave the waffle itself satin or matte for a soft baked texture.
5. Flaky Croissant Magnets
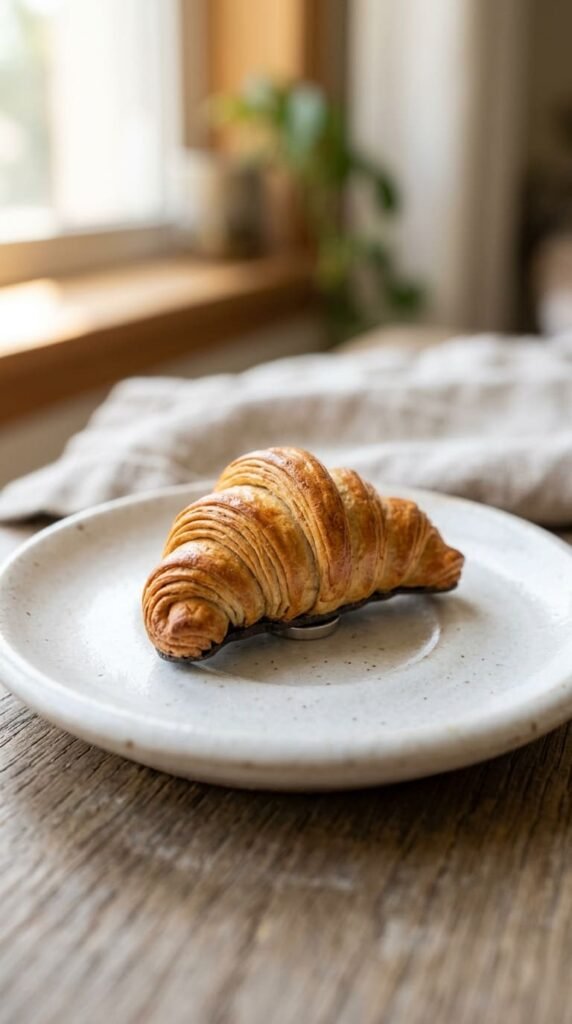
Flaky croissant magnets look fancy, but the shape is easy. Roll clay into a short tapered log. Bend it into a crescent shape, then press soft curved lines along the top.
Those curved lines create the flaky pastry layers. Tan clay works best for the base. After baking or drying, brush light brown paint along the ridges and ends. Keep the center lighter so it looks softly baked.
This idea is perfect for neutral kitchen decor. Croissants also pair well with coffee cup magnets, jam toast, butter pats, or tiny berries.
You can make these without molds. Your fingers and a toothpick are enough. For a budget-friendly batch, make several croissants from one small pack of tan clay and paint the details later.
Press the back flat before curing. This helps the magnet sit smoothly. Use a satin seal instead of heavy gloss, since croissants look better with a soft pastry finish. These magnets feel handmade, warm, and giftable.
6. Juicy Strawberry Magnets
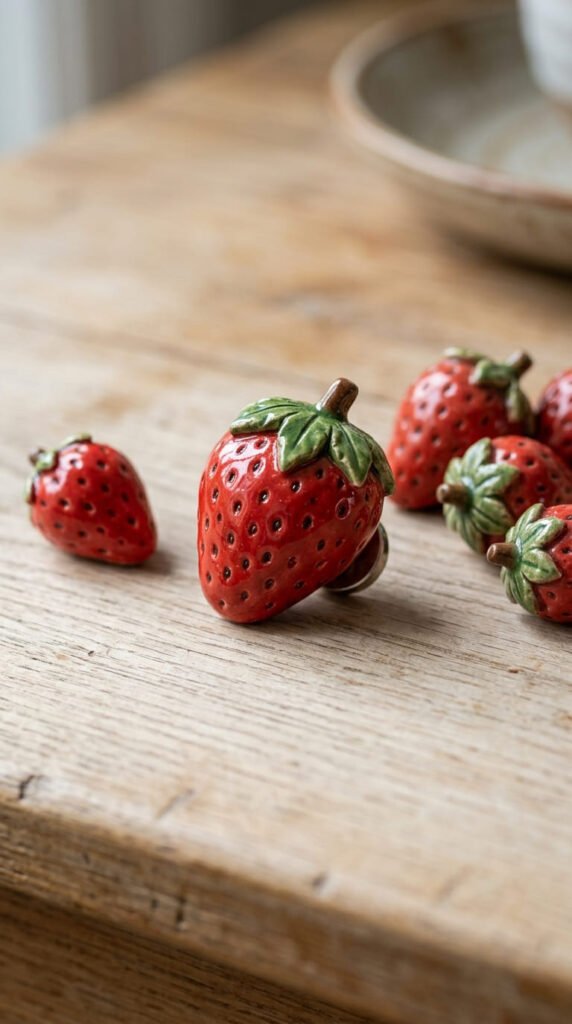
Juicy strawberry magnets are bright, simple, and cute enough for any kitchen. Shape red clay into a small heart or teardrop. Press tiny seed marks into the surface with a toothpick, needle tool, or pencil tip.
For the leafy top, pinch small green clay triangles and place them around the wider end. The leaves do not have to match perfectly. Uneven leaves make the strawberry feel more natural.
This project uses very little clay, so it is perfect for scraps. Make strawberries in different sizes for a cute fruit magnet set. You can pair them with lemons, cherries, blueberries, or watermelon slices.
If you only have white air-dry clay, paint the strawberry red after it dries. Add seeds with yellow or white paint dots.
After curing, add a thin gloss seal to make the strawberry look ripe and shiny. Keep the back flat before adding the magnet. These tiny fruit magnets work well for summer decor, handmade gift baskets, or market-style craft sets.
7. Avocado Toast Magnets
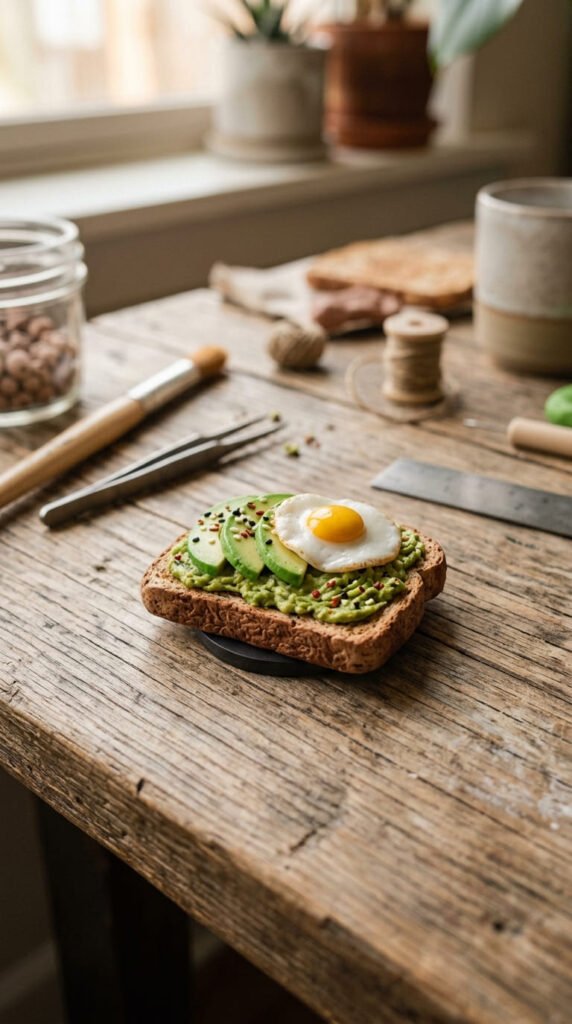
Avocado toast magnets are trendy, cute, and easy to personalize. Start with a small rectangle of tan clay for the bread. Round the corners slightly so it looks like toast.
Add texture by pressing foil, a toothbrush, or a sponge gently onto the clay. This creates a bread-like surface without special tools.
For the avocado layer, add green clay on top. You can make it smooth like sliced avocado or bumpy like mashed avocado. Add darker green dots for extra detail. A small white and yellow clay circle can become a fried egg.
This design is naturally flat, which makes magnet attachment simple. It also stays lightweight, so it can hold well on the fridge.
Use leftover clay for toppings. Add tiny red pepper flakes, black sesame dots, or a small lemon wedge. Seal the surface after painting. A satin finish works well because toast should not look too shiny. This magnet is perfect for brunch lovers and cute kitchen boards.
8. Mini Taco Magnets
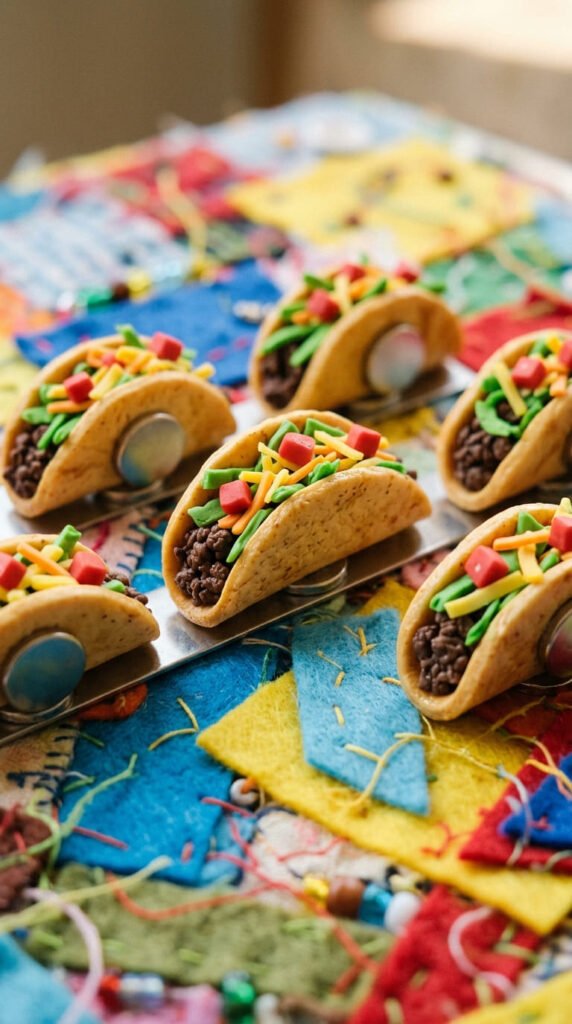
Mini taco magnets are fun because the toppings can be playful and messy. Start with a small circle of tan clay. Fold it gently in half to make the taco shell.
Keep the bottom a little flat so it can sit against the fridge. Add light texture marks on the shell with a toothpick.
For filling, use tiny scraps of brown, green, yellow, and red clay. Brown can look like beans or meat. Green strips can be lettuce. Yellow bits can be cheese. Red cubes can be tomato.
This is a perfect leftover-clay project. You only use tiny pieces for each topping. You can also paint some details after the clay dries if the pieces feel too small to shape.
Make three tacos for a cute matching set. Keep each taco thin enough so it does not get heavy. After curing, glue a strong magnet to the back. Add a light gloss over the toppings and a satin finish over the shell.
9. Sweet Cupcake Magnets
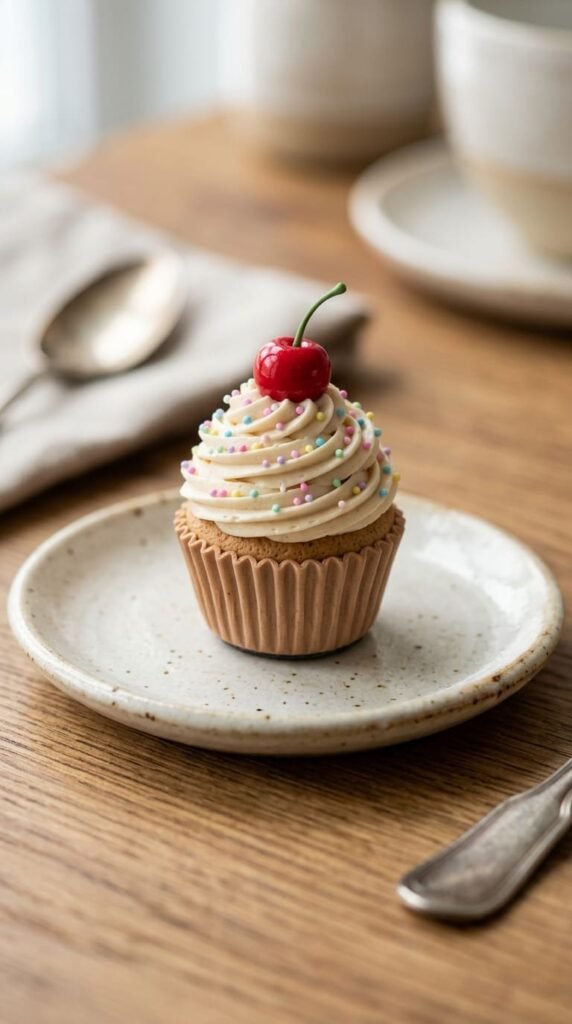
Sweet cupcake magnets are colorful and easy to style for birthdays, parties, or bakery-themed decor. Start with a small clay cylinder for the cake base. Press vertical lines around the sides with a toothpick to make the wrapper.
For frosting, roll a thin clay snake and coil it on top. Start wider at the bottom and make each coil smaller as you move upward. Add a tiny ball on top for a cherry.
Sprinkles can be made from tiny clay pieces or paint dots. Pink, vanilla, chocolate, and mint frosting all look cute. You can make many versions from the same base shape.
This project is budget-friendly because each cupcake is small. Make a set of six and change only the frosting colors.
Before curing, press the back flat. After baking or drying, glue on a magnet. Add gloss to the frosting and cherry, but leave the wrapper matte. This contrast makes the cupcake look more realistic and handmade.
[Image Prompt: A small clay cheeseburger magnet with sesame bun, lettuce edge, cheese slice, patty layer, and tomato detail on parchment paper, warm kitchen light, high-end camera close-up, no text or words in the image.]
10. Mini Cheeseburger Magnets
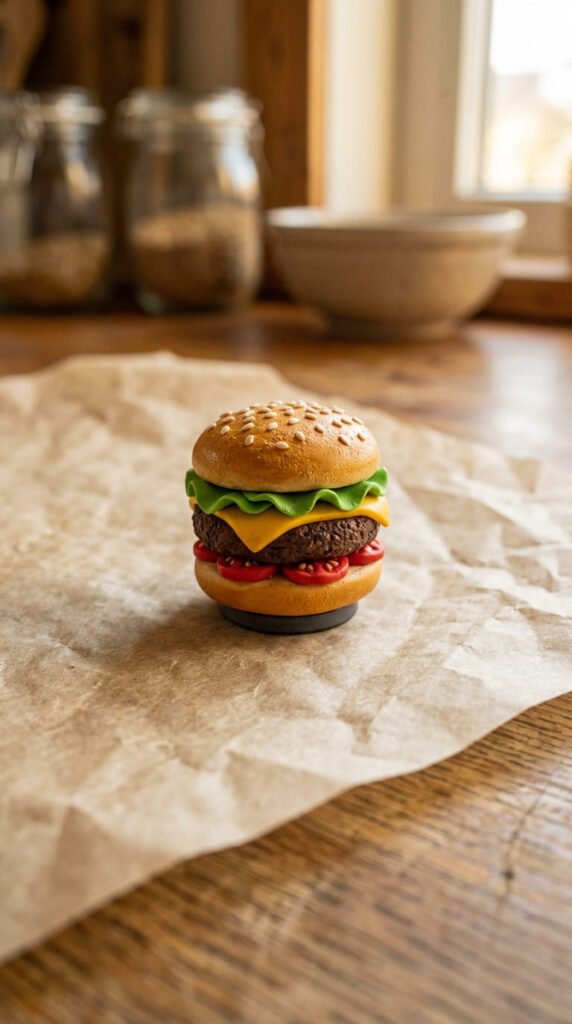
Mini cheeseburger magnets look detailed because of the layers, but each layer is simple. Make two small tan circles for the bun. Add a brown circle for the patty, a yellow square for cheese, a red circle for tomato, and a green wavy strip for lettuce.
Stack the pieces gently. Let some fillings show around the edges so the burger looks full. Add tiny cream dots on the top bun for sesame seeds.
This project is easy to batch. Make all the buns first, then all the patties, then stack everything together. This saves time and keeps the sizes close.
Because burgers can become thick, press the back flat before curing. Use a strong magnet after the piece hardens.
Add light brown paint around the bun edges for a toasted finish. A gloss seal can go on the cheese and tomato, while the bun can stay satin. This magnet is perfect for foodies, kids’ lockers, or playful kitchen decor.
11. Chocolate Chip Cookie Magnets
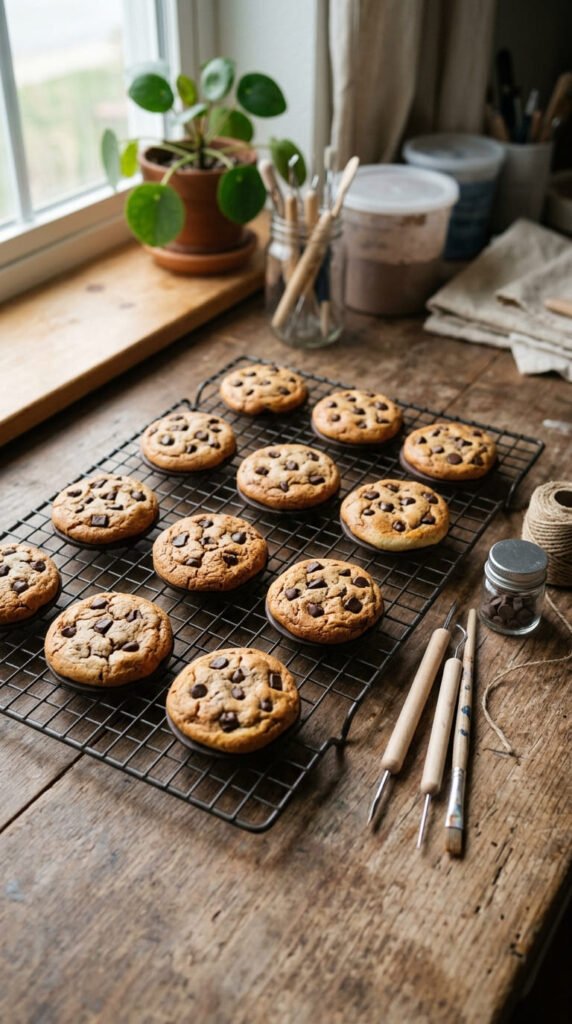
Chocolate chip cookie magnets are one of the most forgiving clay food crafts. Flatten small tan clay balls into uneven circles. Keep the edges slightly wobbly, just like real homemade cookies.
Add tiny dark brown clay bits for chocolate chips. Press them gently into the surface so they stay secure. Use a toothpick to draw small cracks and crumb marks.
This project is great for beginners because small mistakes can look like baked texture. If the cookie edge bends or cracks, it may look even more real.
Use simple tools from home. A bottle cap can help shape the cookie. Foil can add a crumbly surface. A toothpick can create cracks.
After curing, brush the edges with warm brown paint for a baked effect. Add a satin seal to protect the surface. You can also make bite-mark cookies by cutting out a small curve before drying. Pair them with milk cup magnets, cupcakes, or cinnamon rolls for a sweet dessert set.
12. Fried Egg Magnets
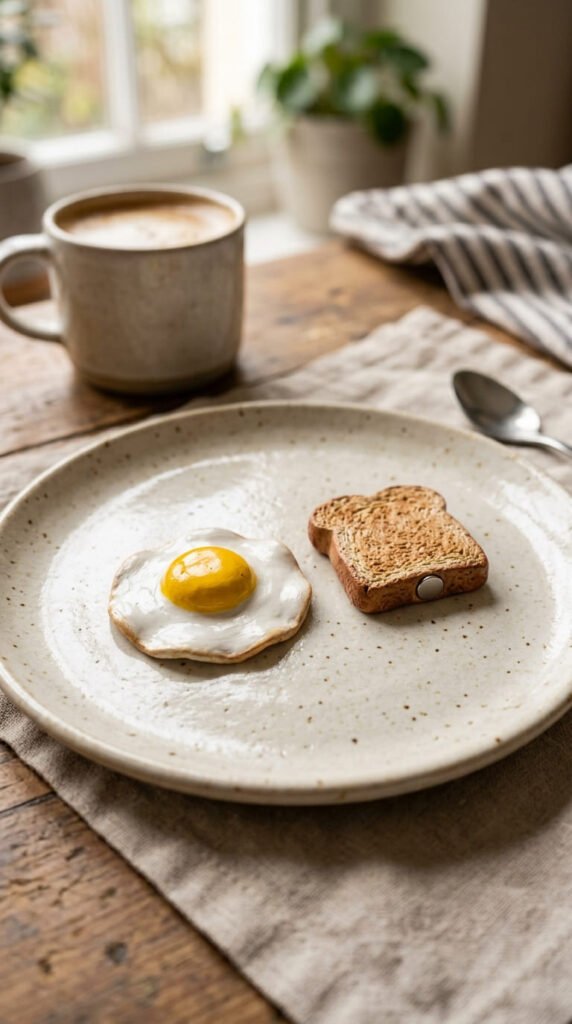
Fried egg magnets are quick, simple, and perfect for a breakfast magnet set. Start with a thin white clay blob. Let the edges stay uneven so it looks like a real egg white.
Add a small yellow clay circle in the center for the yolk. Press it down gently, but keep it raised. A rounded yolk makes the magnet look more realistic.
This design is great when you have only a few clay colors. White and yellow are enough. You can also make the egg from white air-dry clay and paint the yolk later.
Pair fried egg magnets with toast, waffles, pancakes, bacon strips, or coffee cups. Since the design is flat, it is easy to attach a magnet on the back.
For a realistic finish, use gloss only on the yolk. Leave the egg white matte or satin. This small finish change makes the yolk look shiny and soft. Use a thin magnet so the egg stays light and smooth on the fridge.
13. Watermelon Slice Magnets
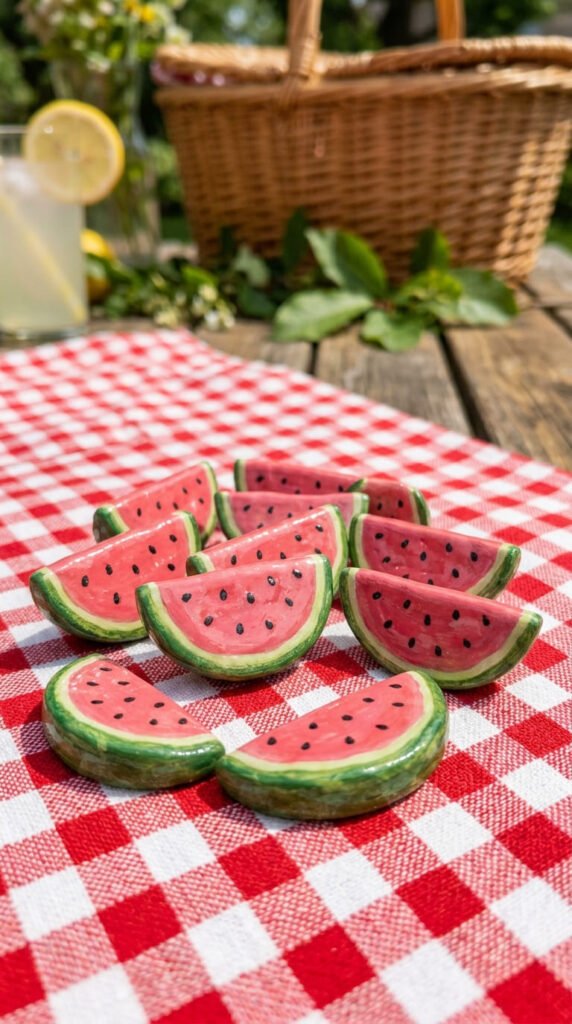
Watermelon slice magnets are bright, cheerful, and easy to shape. Start with a small triangle of pink clay. Add a thin white strip along the curved edge, then a green strip for the rind.
Press the layers together gently so they stay attached. Add tiny black clay seeds or black paint dots across the pink center. Place them randomly for a natural look.
This idea is perfect for summer fridge decor. It also works well in fruit sets with strawberries, lemons, oranges, and cherries.
You only use four colors: pink, green, white, and black. If you want to save money, use white clay for the whole shape and paint the colors after drying.
Keep the slice thin and flat so the magnet holds well. Add a gloss seal for a juicy finish. Let the glue dry fully before placing it on the fridge. These watermelon magnets are cute for parties, picnic baskets, or handmade summer gifts.
14. Soft Pretzel Magnets
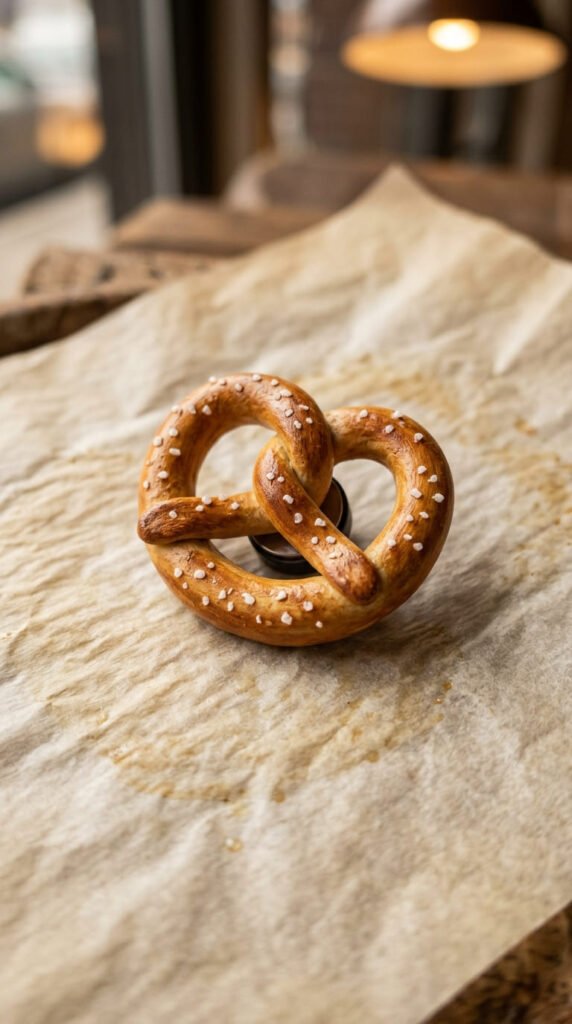
Soft pretzel magnets are fun because the twisted shape makes them easy to recognize. Roll tan clay into a thin rope. Form it into a U shape, cross the ends, then press them down to create the classic pretzel form.
Use a toothpick to smooth the joins. Keep the back as flat as possible because twisted pieces can sit unevenly.
Add tiny white clay dots or paint dots for salt. After curing, brush warm brown paint on the raised areas to create a baked look. Keep the center slightly lighter.
This project uses very little clay, so it is great for small scraps. You can make a snack set with pretzels, popcorn, pizza, fries, and hot dogs.
No mold is required. Your fingers and a toothpick can shape the entire piece. Make the pretzel small and thin so it does not become heavy. Add a satin seal for a soft bakery finish, then glue a magnet to the back.
15. Ice Cream Cone Magnets
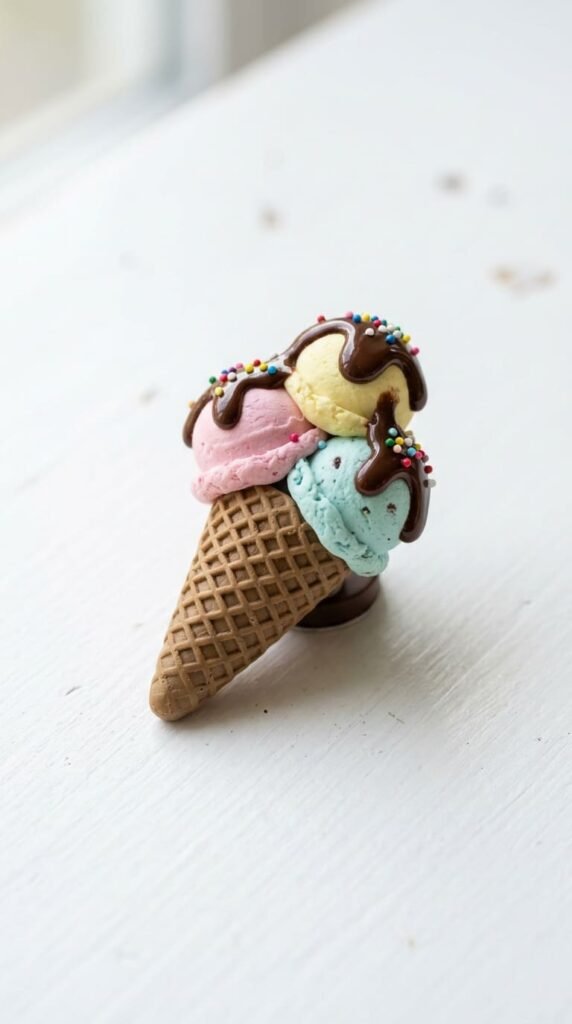
Ice cream cone magnets are colorful and easy to change for different styles. Start with a small tan triangle for the cone. Press diagonal lines into it with a toothpick, then add lines in the opposite direction to make a waffle pattern.
For the scoop, roll a clay ball and press it onto the top of the cone. Pink, mint green, vanilla, chocolate brown, or lavender all work well.
Add tiny drips down the side if you want a melting look. Sprinkles can be tiny clay bits or paint dots. A small cherry on top can make it extra cute.
This project is great for leftover clay because every scoop can be a different color. Keep the cone flat on the back before curing.
If the scoop is thick, use a strong magnet. Add gloss to the ice cream and leave the cone matte or satin. This makes the cone texture stand out while the scoop looks creamy and sweet.
16. Pastel Macaron Magnets
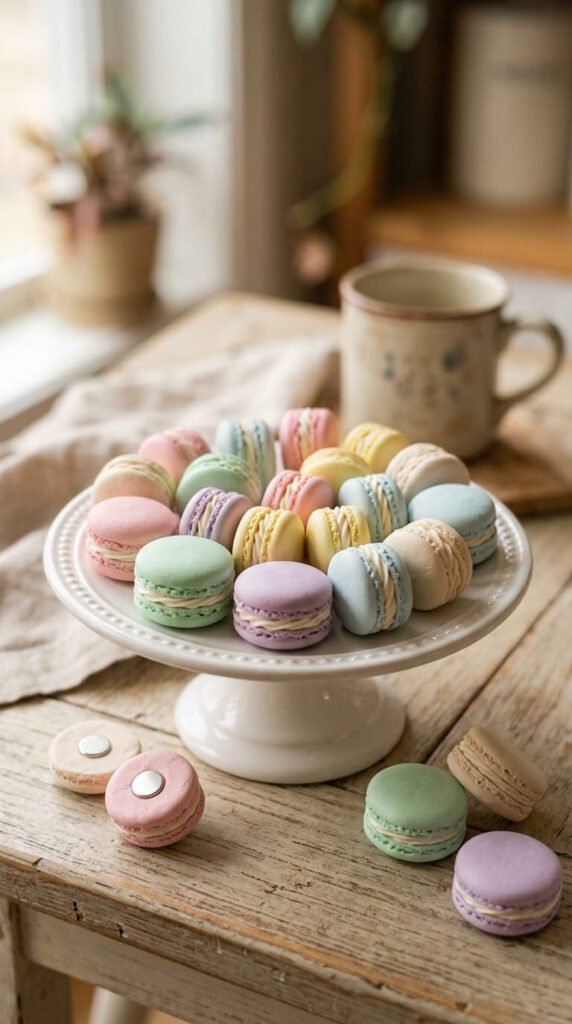
Pastel macaron magnets are simple, small, and pretty. Make two small clay circles in the same color. Add a thin cream-colored layer between them for the filling.
Press the stack lightly so it holds together, but keep the rounded cookie shape. Use a toothpick to add a rough edge around each cookie shell. This little detail makes the macaron look more realistic.
Soft pink, lavender, mint, pale yellow, and sky blue all work well. You can make a full pastel set from tiny bits of clay.
These magnets are great for gifts because they look clean and charming without many tools. Package three together for a dessert-themed fridge set.
Before curing, press one side gently on parchment paper so the back becomes flat. After drying or baking, glue on a magnet. Use a satin finish instead of heavy gloss. Too much shine can make the macaron look more like candy. Keep the finish soft and sweet.
17. Tiny Ramen Bowl Magnets
Tiny ramen bowl magnets are great for crafters who enjoy small details. Start with a shallow bowl shape in white, black, or red clay. Keep the back flat so it can attach to a magnet.
Add tan clay strands inside for noodles. Curl them loosely so they look like a real noodle pile. For toppings, use a half egg, green onion dots, carrot strips, and mushroom slices.
You do not have to make every topping perfect. At this size, simple shapes work well. A yellow dot with a white edge can read as an egg. Green dots can read as scallions.
This idea is perfect for using tiny scraps from other clay projects. A toothpick helps place the small pieces without squashing them.
Since ramen bowls can get thick, keep the bowl shallow. Add gloss to the broth area if you want a soup-like shine. Use a strong magnet and good craft glue after curing. This magnet makes a fun gift for noodle fans.
18. Pancake Stack Magnets
Pancake stack magnets look warm, cozy, and handmade. Roll three or four tan clay balls, flatten them into circles, then stack them. Keep each pancake slightly uneven so the stack looks natural.
Add a tiny yellow butter square on top. For syrup, use amber clay, brown paint, gloss gel, or a small amount of clear glaze tinted with paint. Let it drip down one side for a realistic touch.
Small red or blue clay dots can become berries. These details make the pancake stack look full without adding much cost.
This project is easy to scale. Make one thick stack as a statement magnet or several tiny stacks for a breakfast set. Pair them with eggs, waffles, toast, and coffee cups.
Before curing, flatten the back carefully. After the piece hardens, glue on a magnet. Add gloss only to the syrup. Leave the pancakes satin or matte so they still look soft and fluffy.
19. Lemon Slice Magnets
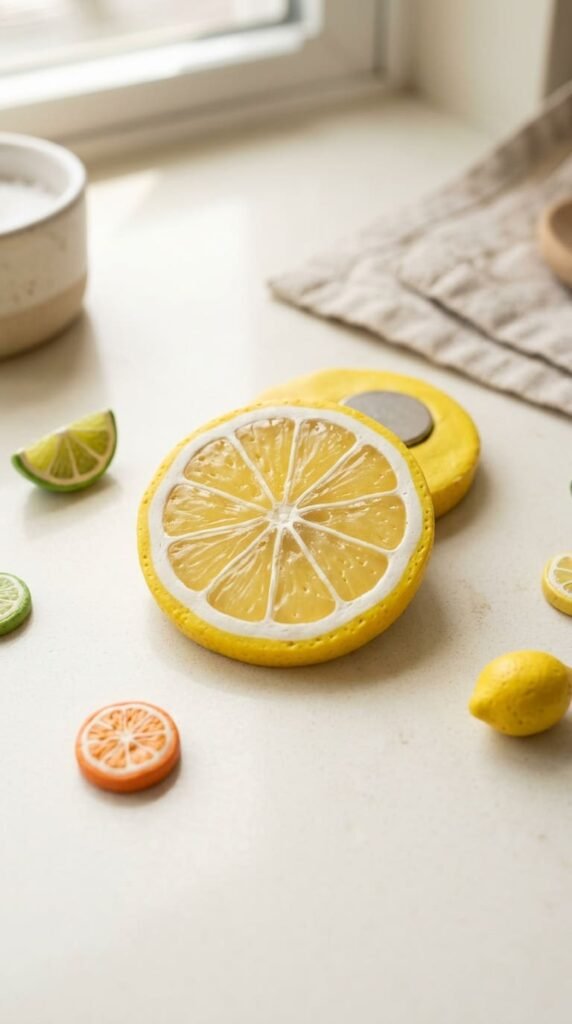
Lemon slice magnets are bright, clean, and easy to make. Start with a yellow clay circle. Add a thin white ring around the edge, then a yellow outer peel if you want extra detail.
You can keep the lemon round or cut it in half for a wedge. Use a toothpick to draw small segment lines from the center outward. Keep the marks light so the lemon stays neat.
This idea works with polymer clay or air-dry clay. If you only have white clay, paint the lemon after it dries. Thin layers of acrylic paint usually look cleaner than one thick coat.
Lemon magnets pair well with strawberries, oranges, limes, tea cups, and berry tarts. They also look lovely in a simple kitchen color theme.
Add a gloss seal for a juicy finish. Keep the back smooth before curing so the magnet attaches well. These little citrus pieces are perfect for summer crafts, handmade gifts, and fridge decor sets.
20. Cinnamon Roll Magnets

Cinnamon roll magnets are perfect for a cozy bakery-style set. Roll a thin strip of tan clay and a thinner strip of brown clay. Place them together, then coil them into a spiral.
Press the spiral lightly so it holds its shape. The brown line creates the cinnamon swirl. After curing, add a little brown paint inside the grooves for extra warmth.
For icing, use thin white clay strips, white acrylic paint, or thick craft glaze. Let the icing lines cross over the top in a relaxed way. Real icing is not perfect, so uneven lines look better.
This idea is great when you have tan and brown scraps left from cookies or bread magnets. Make several rolls in different sizes for a bakery bundle.
Keep each roll thin so it does not get too heavy. Flatten the back before curing. Use satin seal on the roll and gloss on the icing. This makes the icing stand out while the pastry keeps a soft baked look.
21. Tiny Sandwich Magnets
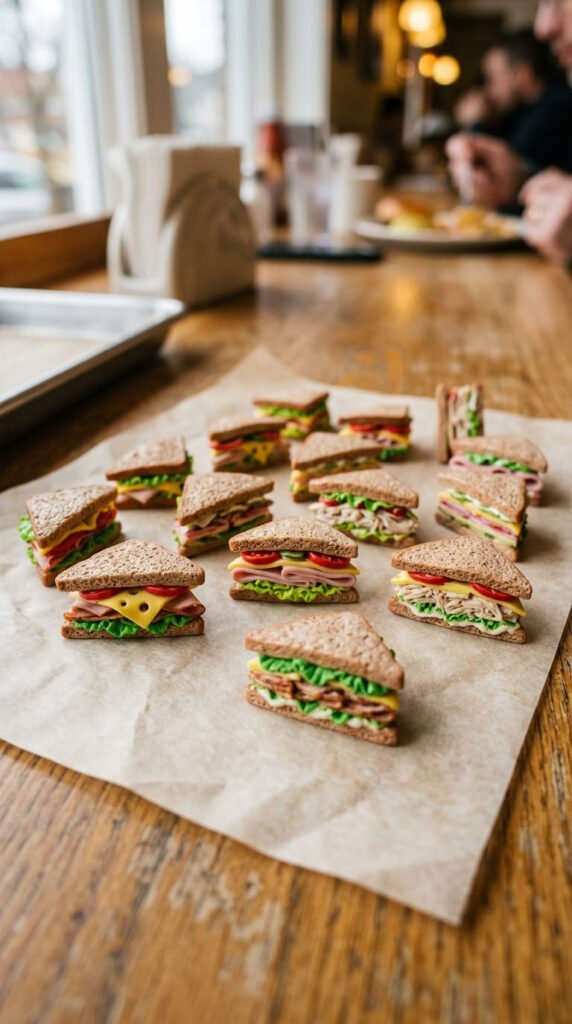
Tiny sandwich magnets are easy because they are built from flat layers. Start with two tan triangles or rectangles for bread. Add a yellow cheese slice, red tomato piece, green lettuce strip, and any filling color you like.
Layer the pieces so a little filling shows at the edge. This makes the sandwich easy to recognize without detailed sculpting.
This is a budget-friendly idea because it uses scraps and simple shapes. A craft blade, ruler edge, or clean kitchen knife can cut the pieces. If you only have white clay, shape the sandwich first and paint the colors after drying.
Add toast marks with brown paint or soft pastel. Tiny seed dots on the bread can make it look like deli-style bread.
Press the back flat before curing. After it hardens, glue on a magnet and add a satin seal. Sandwich magnets pair well with chips, fruit, soda cups, or cookies for a lunchbox-style fridge set.
Conclusion
Clay food magnets are small, affordable, and fun to make in batches. You can start with simple shapes, use leftover clay, and still create cute designs that feel giftable and fridge-ready. Donuts, pizza, waffles, fruit, sushi, cupcakes, cookies, and breakfast foods all work well because they are easy to recognize at a small size. Pick one idea, make a few test pieces, then change the colors, toppings, and finishes to create your own handmade clay food magnet collection.