A messy under-sink cabinet can slow down your entire routine. Bottles fall over, items disappear, and pipes make everything harder to arrange. The good news is that you don’t need a big budget or fancy tools to fix it. With a few smart ideas, you can turn that cluttered space into a simple, easy-to-use storage zone. These under sink bathroom storage ideas focus on real-life solutions—quick setups, low-cost materials, and practical layouts that actually work in small spaces.
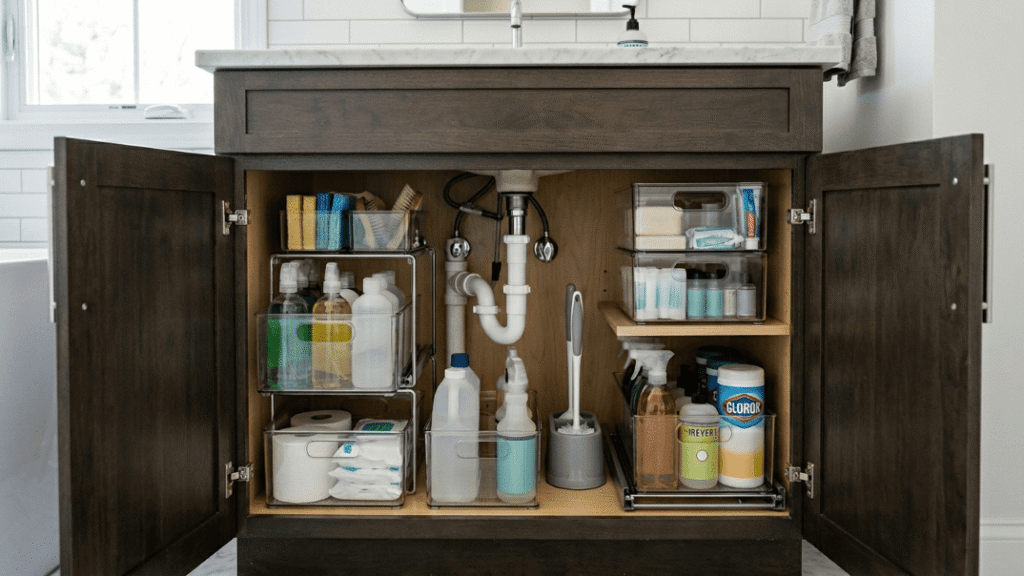
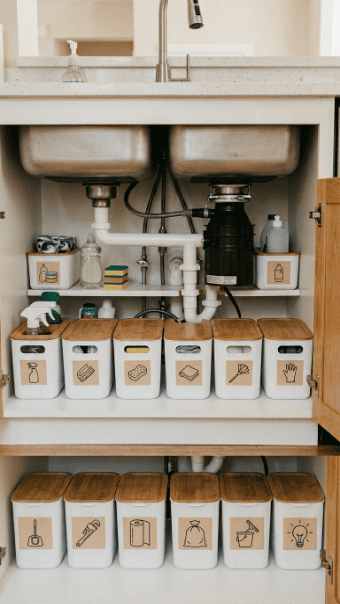
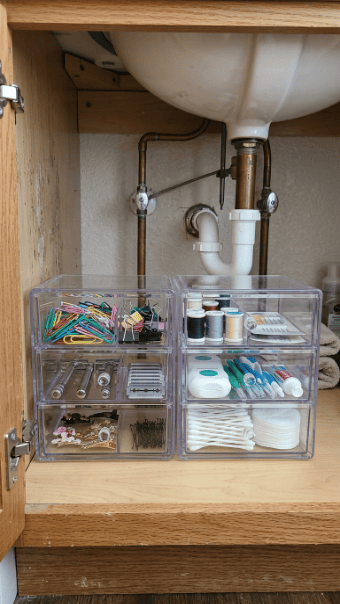
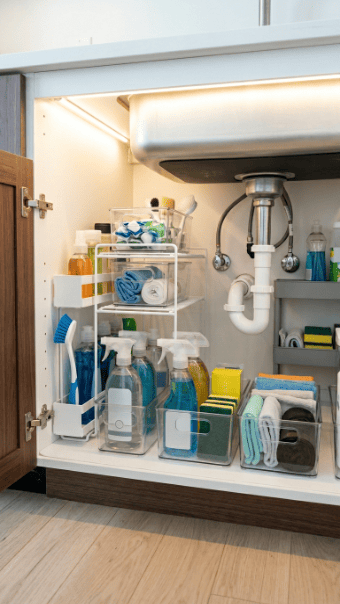
1. Use Stackable Clear Bins for Easy Sorting
Clear bins make everything visible at a glance. No more digging around. You can instantly see what you have.
Group items by category. For example, keep cleaning supplies in one bin and skincare in another. This saves time every morning.
Stackable bins work well in tight spaces. They help you use vertical room without blocking access.
Go for budget plastic bins from local stores. No need to spend a lot.
Add small labels if you share the bathroom. This keeps everyone on the same page.
Place frequently used items in the front. Less-used products can go behind or on top.
If space is limited, use narrow bins that fit around pipes.
This setup is simple. It keeps clutter under control and makes cleaning easier.
2. Install a Tension Rod for Hanging Bottles
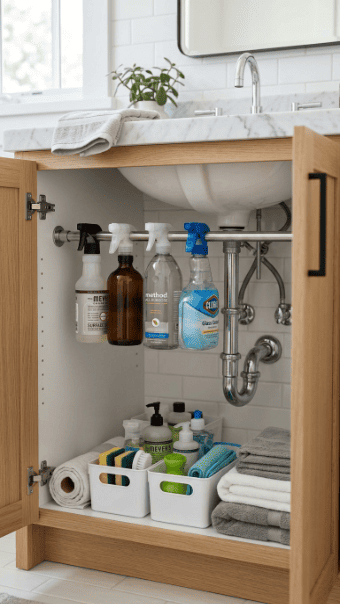
A tension rod is a quick fix that costs very little. You just place it across the cabinet.
Hang spray bottles by their handles. This frees up floor space instantly.
It also keeps bottles upright. No spills. No mess.
This idea works well for cleaning products you use often.
Below the rod, you can place bins or baskets.
No drilling is required. That makes it perfect for rented homes.
Adjust the rod height based on your cabinet size.
It’s a small change, but it makes a big difference in space and access.
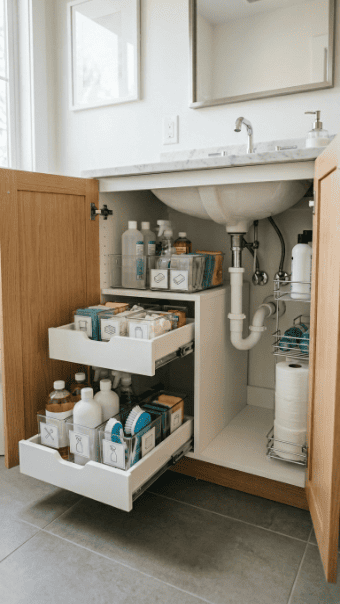
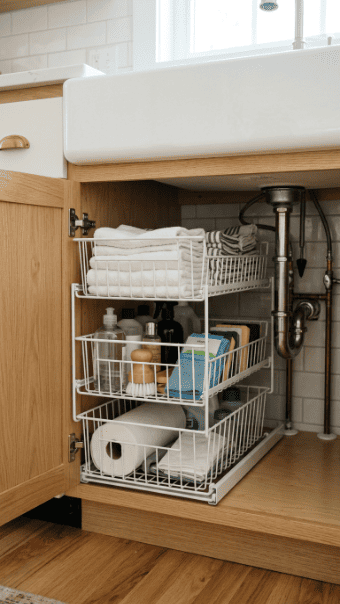
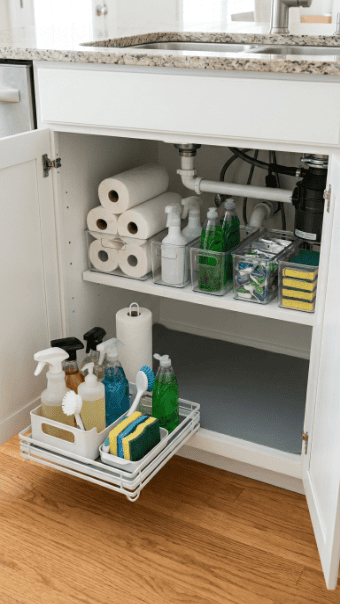
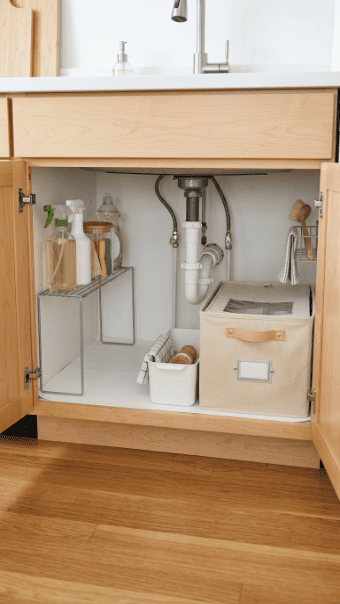
3. Add Pull-Out Drawers for Deep Cabinets
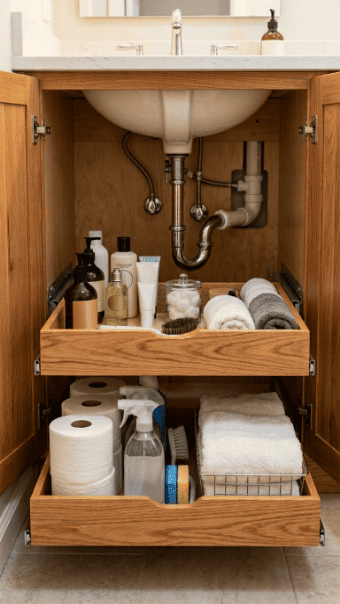
Deep cabinets can hide items at the back. Pull-out drawers fix that problem.
You can slide everything out in seconds. No bending or reaching.
Choose drawers with a cut-out design for pipes.
Plastic or metal options are affordable and easy to install.
Use one drawer for daily items and another for backups.
Keep heavier items at the bottom for stability.
This setup works especially well for busy households.
It keeps things visible and easy to grab.
4. Use Door-Mounted Storage for Extra Space
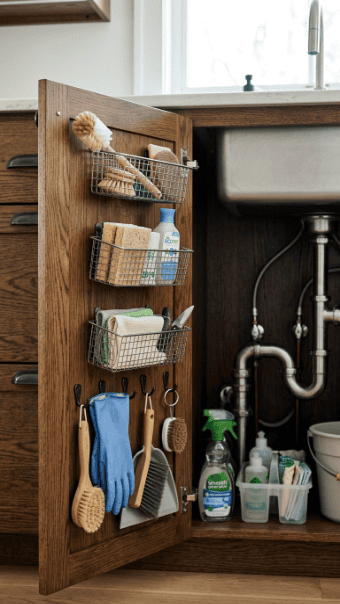
The cabinet door is often unused space. You can fix that easily.
Attach small baskets or adhesive hooks.
Store brushes, sponges, or hair tools here.
Keep it light. Avoid heavy items that strain the hinges.
This idea is renter-friendly if you use removable hooks.
It’s great for small bathrooms with limited space.
Everything stays within reach without cluttering the main area.
5. Create Zones for Better Organization
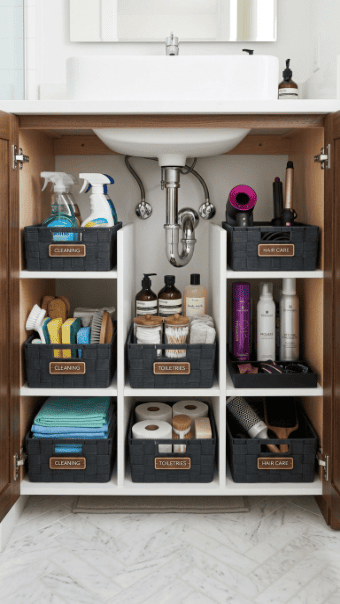
Zoning keeps things simple. Assign each section a purpose.
For example: cleaning, personal care, and extra supplies.
This avoids mixing unrelated items.
Use bins or baskets to define each zone.
It also makes cleaning faster. You know exactly where everything belongs.
Family members can follow the system easily.
Even a small cabinet can feel organized with proper zones.
6. Try a Lazy Susan for Small Items
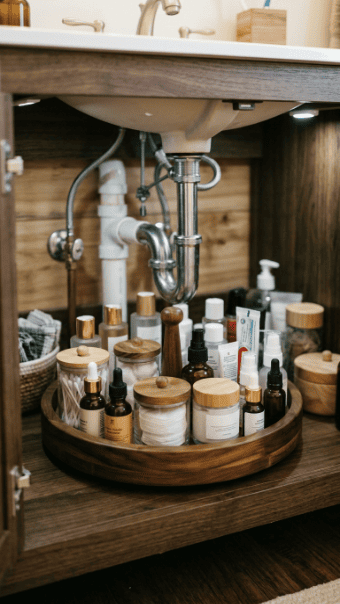
A rotating tray works well for small items.
You can spin it to reach things at the back.
It saves time and avoids clutter buildup.
Use it for skincare, medicines, or small bottles.
Choose a compact size that fits around pipes.
It’s a simple addition with big convenience.
7. Use Wire Baskets for Airflow
Wire baskets allow airflow. This helps prevent moisture buildup.
They are great for storing towels or cleaning cloths.
You can stack them or place them side by side.
They also add a clean, modern look.
Affordable options are easy to find.
8. Install U-Shaped Shelves Around Pipes

Pipes take up space. U-shaped shelves work around them.
They create usable storage without blocking plumbing.
You can place bins or small items on top.
This setup makes better use of awkward areas.
DIY versions can be made with simple materials.
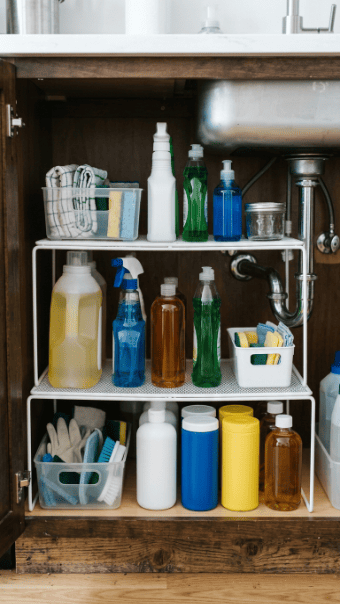
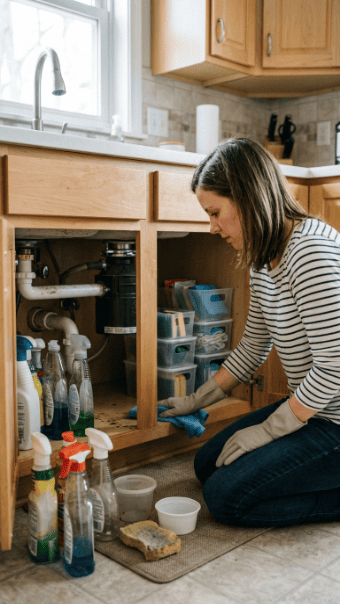
9. Keep a Cleaning Caddy Ready
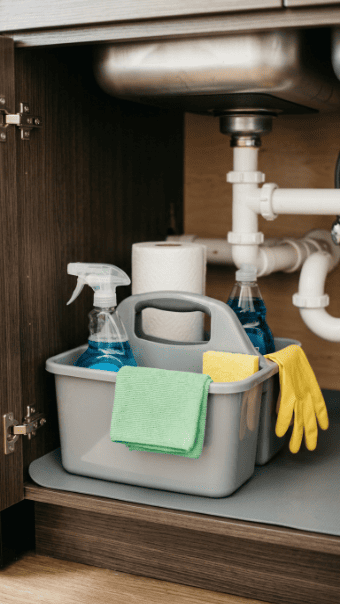
A caddy keeps cleaning supplies in one place.
You can grab it quickly when needed.
No searching. No wasted time.
Choose a lightweight plastic option.
Store it near the front for easy access.
10. Use Labels for Quick Access
Labels make a big difference.
They help you find things fast.
They also keep the system organized.
Use simple handwritten labels.
Even masking tape works fine.
11. Add Vertical Dividers for Tall Items
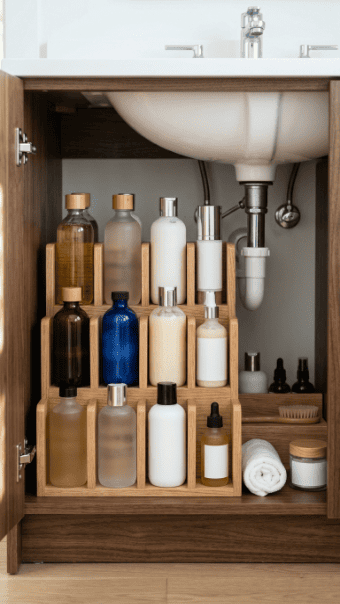
Tall bottles often fall over.
Dividers keep them upright.
They also save space.
You can make DIY dividers with cardboard or plastic sheets.
12. Store Backup Items at the Back
Keep daily items in front.
Store extra products at the back.
This avoids clutter.
Rotate items when needed.
13. Use Small Drawers for Tiny Items
Small items get lost easily.
Mini drawers keep them organized.
Use them for razors, clips, or travel items.
Affordable and easy to place.
14. Add a Shelf Riser for Double Storage
A shelf riser creates extra space.
You get two levels instead of one.
It’s perfect for small cabinets.
Place frequently used items on top.
15. Use Fabric Baskets for Soft Storage
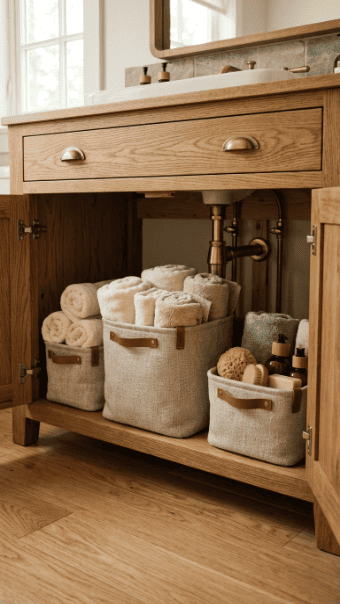
Fabric baskets are great for soft items.
They add a warm look.
Use them for towels or tissue packs.
Lightweight and easy to move.
16. Keep a Trash Bag Roll Handy
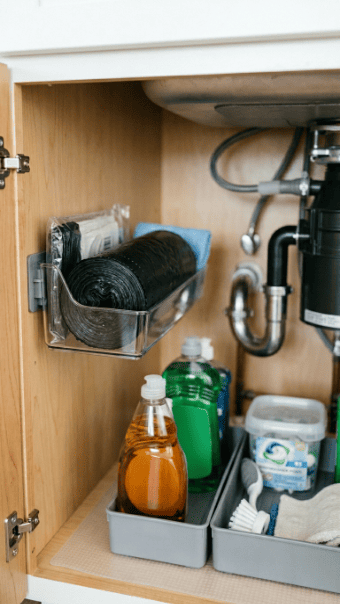
Store trash bags under the sink.
Keep them in a small bin.
Easy access when needed.
No more searching around.
17. Install LED Lights for Visibility
Lighting helps you see everything clearly.
Stick-on LED strips are easy to install.
Battery-powered options are budget-friendly.
It makes a big difference in dark cabinets.
18. Use Hooks for Hair Tools

Hooks can hold hair tools.
Keep cords tidy.
Avoid clutter in bins.
Use adhesive hooks for easy setup.
19. Rotate Seasonal Items Out
Don’t store everything at once.
Rotate items based on use.
Keep only what you need daily.
This keeps the space clean.
20. Use Narrow Rolling Carts Nearby
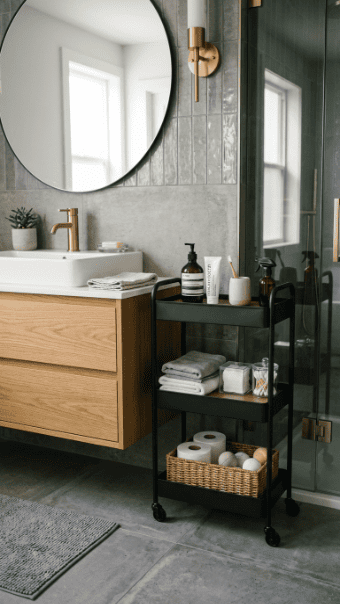
If space is tight, add a rolling cart nearby.
Store overflow items there.
Easy to move and access.
Budget-friendly solution.
21. Separate Cleaning and Personal Items
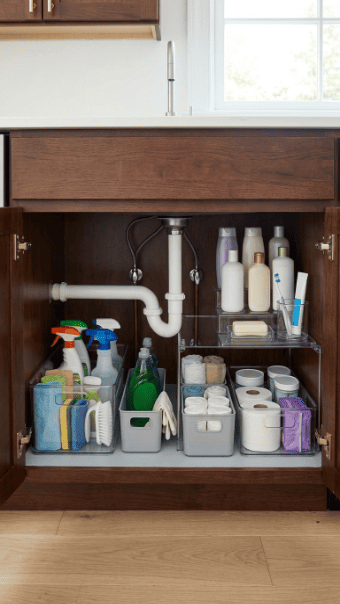
Keep cleaning supplies separate.
This improves safety.
Use different bins for each category.
Clear separation avoids confusion.
22. Use Waterproof Mats Underneath
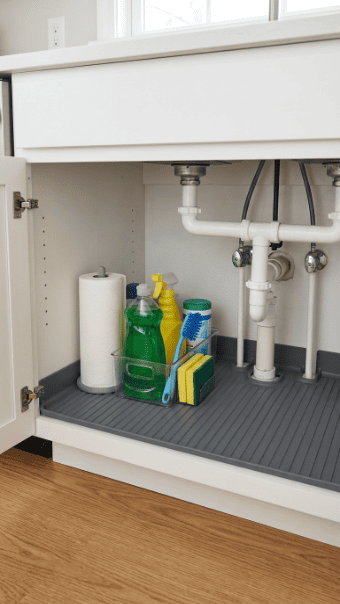
Leaks can happen.
A waterproof mat protects the cabinet.
Easy to clean.
Low-cost and useful.
23. Do a Monthly Quick Reset
Take a few minutes each month.
Remove unused items.
Wipe the space clean.
Put everything back in place.
This keeps the system working long-term.
Conclusion
A clean under-sink cabinet makes daily routines faster and less stressful. You don’t need expensive tools or a full renovation. Small changes like bins, hooks, and simple layouts can completely change how the space works. Start with one or two ideas, then build from there. Over time, you’ll have a setup that stays organized and easy to maintain.