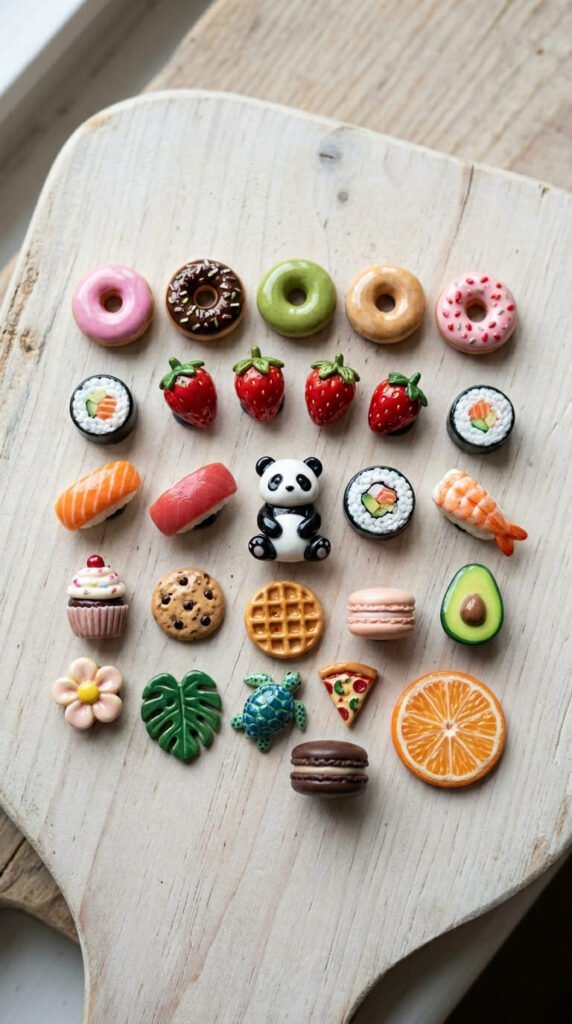
Tiny things are hard to resist. A magnet the size of a coin packs all the charm of a big sculpture into a fraction of the clay. That keeps the cost low and the cute factor high. Mini clay magnets stick to fridges, lockers, and whiteboards without crowding them. Most pieces here sit under one inch tall. You can sculpt six to eight in about fifteen minutes. Polymer clay holds fine detail and bakes hard in the oven. Air-dry clay skips the oven for an easy no-bake route. Either way, the back stays flat so the magnet sits flush. Mini food leads the pack, but tiny animals, plants, and objects pull just as many smiles. The ideas below run from a simple donut to a kawaii sea turtle. None of them are hard. Grab a small block of clay and let’s make a tiny world for your fridge.
1. Mini Donut
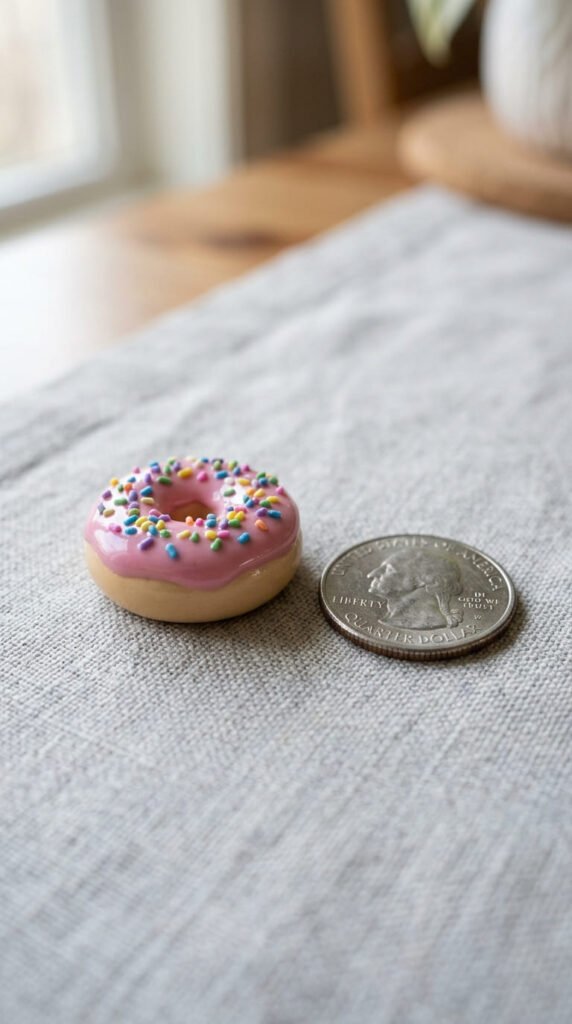
The mini donut is the classic first project. Roll a small tan ball. Flatten it a little. Poke a hole in the middle with a toothpick. That tiny ring is your donut. Roll a thin sheet of icing color. Pink, white, or brown all work. Drape it on top and press. Sprinkles bring it to life. Snip the tiniest bits of bright clay. Press them onto the icing. Keep the whole thing under an inch for that mini look. Bake by the packet, then cool fully. Press a flat magnet on the back with a small dot of super glue. Hold it for 20 seconds. Budget tip: one tan block makes a dozen donuts with room to spare. A small dot of glue stops messy spread. Score the back with a toothpick before gluing for a stronger grip. Kids can pick the icing color and add sprinkles. You handle the oven. Make a mixed box of pastel donuts. They look adorable on the fridge. Quick, cheap, and almost foolproof.
2. Tiny Strawberry
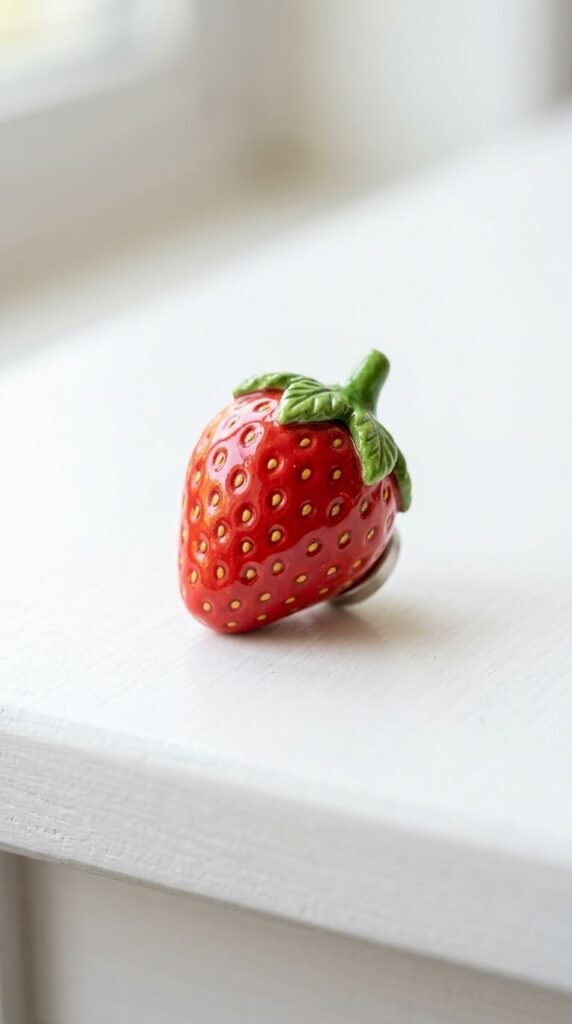
A strawberry is small, sweet, and quick. Roll a red ball. Pinch one end into a soft point. That gives the classic berry shape. Now add the seeds. Poke tiny dots all over with a toothpick. Or press in flecks of yellow clay. The seed dots make it a strawberry. Add a small green star on top for the leaves. Flatten a green bit and snip the edges into points. Keep it under an inch for the mini look. Bake and cool fully. Press a flat magnet on the back with a small dot of glue. Hold for 20 seconds. Budget tip: red and green scraps make many berries, so the cost stays tiny. Score the back first for a firmer bond. Want shine? A single coat of satin glaze makes the berry look juicy. Brush it on after baking. Kids love poking the seed dots. Make a little basket of berries for the fridge. Pair them with the donuts for a sweet set. Easy, bright, and done in minutes.
3. Salmon Sushi
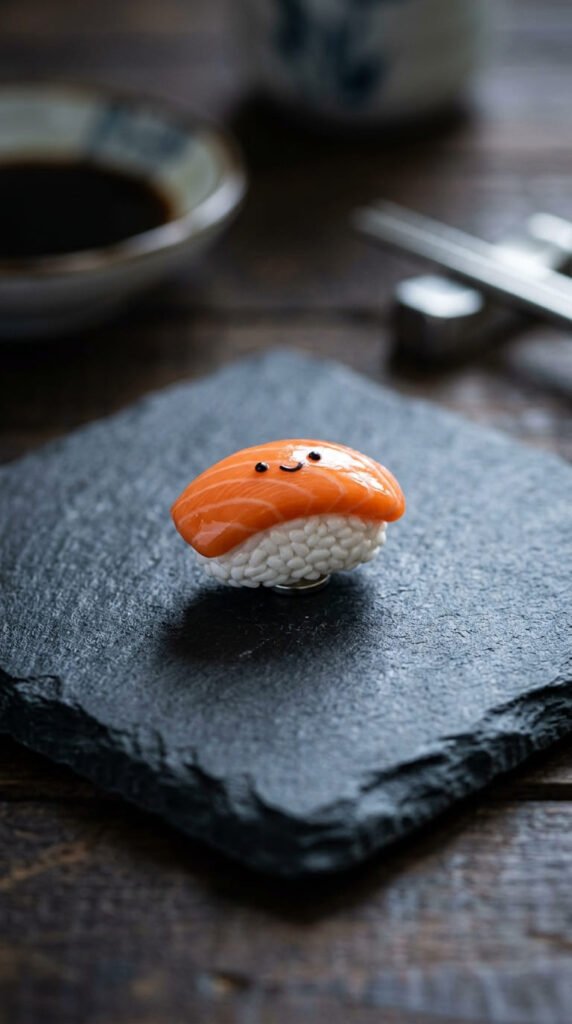
Sushi magnets are a viral favorite, and they are simpler than they look. Roll a small white oval for the rice. Press it flat on the bottom so it sits steady. Roll a thin orange strip for the salmon. Drape it over the rice and press. The orange top makes it salmon nigiri. Add tiny white lines on the salmon for that marbled look. Use a toothpick to draw them. For extra charm, give it a little face. Two dot eyes and a small smile turn it into a sushi friend. Keep it under an inch for the mini size. Bake and cool fully. Press a flat magnet on the back with a small dot of glue. Hold for 20 seconds. Budget tip: white and orange scraps make a whole sushi set. Faces turn plain food into a cute character. Make onigiri and wasabi to match. These look fun on the fridge and sell well at markets. Kids love the little faces. A tiny, trendy magnet for almost no cost.
4. Onigiri Rice Ball

Onigiri is the easiest sushi-style magnet. Roll a white ball. Press it into a rounded triangle. That is the rice ball shape. Add a black strip at the bottom for the seaweed wrap. Flatten a thin bit of black clay and press it on. The black strip makes it onigiri. Give it a tiny face for charm. Two dot eyes and a small smile do the trick. Keep the whole thing under an inch. Bake and cool fully. Press a flat magnet on the back with a small dot of glue. Hold for 20 seconds. Budget tip: white clay plus a black scrap makes many rice balls. Score the back with a toothpick for a stronger hold. A single satin glaze coat adds a soft sheen. Brush it on after baking. Kids find this one super easy to shape. The triangle is forgiving, so it always looks right. Make a little set of onigiri friends. They look sweet next to the salmon sushi. A calm, simple mini for any beginner.
5. Mini Pizza Slice
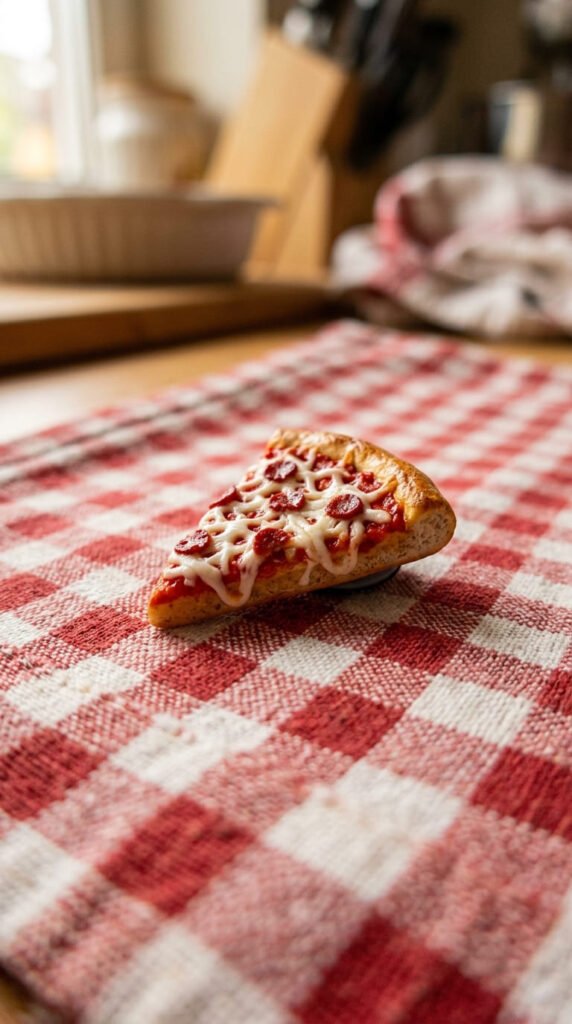
A mini pizza slice is silly and fun. Roll a tan triangle for the crust. Make the wide end a little puffy. Press a thin red layer on top for sauce. Add a white cheese layer over it. Drag a toothpick through for cheese strings. The toppings make it personal. Add tiny pepperoni dots or green pepper bits. There is no wrong topping. Keep it under an inch for the mini look. Bake and cool fully. Press a flat magnet on the back with a small dot of glue. Hold for 20 seconds. Budget tip: one slice uses almost no clay, so a whole pizza set is cheap. Score the back first for a firmer grip. Kids can pinch the crust and place the toppings. You roll the base. Make six tiny slices and arrange a full pizza on the fridge. A satin glaze adds a tasty shine. These look great on a kid’s locker too. Funny, cheap, and quick to make.
6. Mini Cupcake
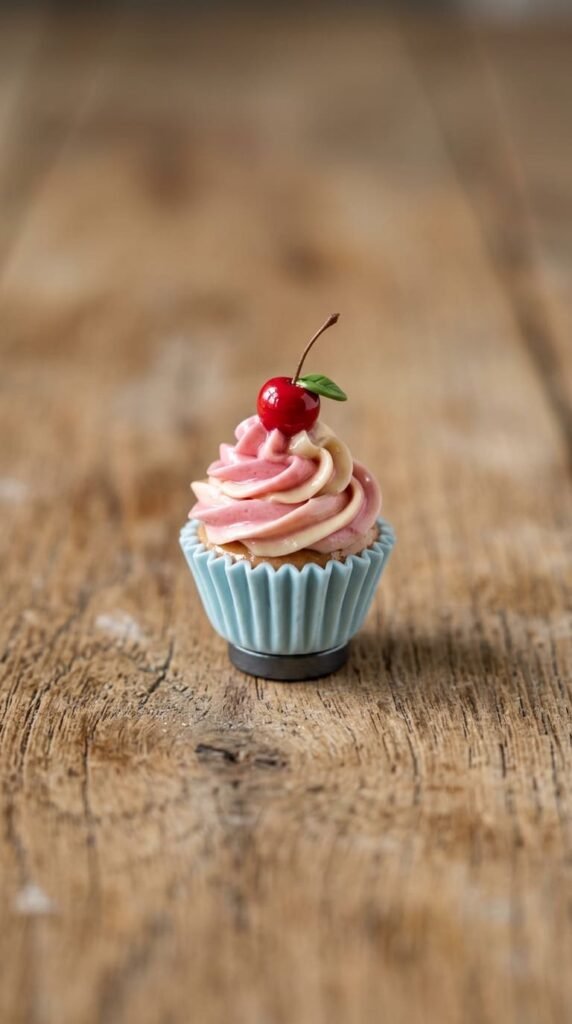
A mini cupcake looks fancy but stays simple. Roll a small ball for the base. Shape it like a tiny pot, wider at the top. Press lines down the side for the wrapper. Now the frosting. Roll a thin snake of clay. Coil it on top like soft-serve. The swirl is the fun part. Add a tiny red ball for the cherry. A few sprinkles finish it. Keep it under an inch for the mini look. For color on a budget, use scraps for the wrapper. Save bright clay for the frosting. Bake and cool fully. Press a flat magnet on the back with a small dot of glue. Hold for 20 seconds. Mix two frosting colors for a marble swirl. A clear coat makes the frosting look glossy. Brush it on after baking. Kids can do the swirl with their fingers. You handle the cherry and the oven. Make a batch in different colors for a bake-sale look. These cheer up any fridge. Tiny clay, big smiles.
7. Avocado Half
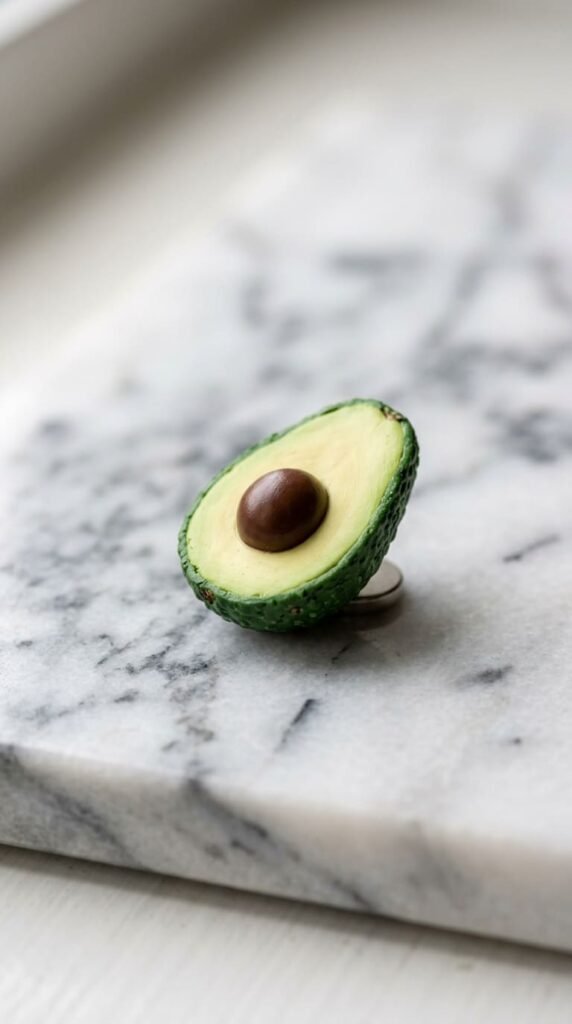
The avocado half is a trendy mini food. Roll a green ball. Press it into an oval. Add a lighter green or cream layer on top for the flesh. Press a round brown ball in the center for the pit. The brown pit makes it an avocado. Smooth the edges so the layers sit clean. Keep it under an inch for the mini size. Bake and cool fully. Press a flat magnet on the back with a small dot of glue. Hold for 20 seconds. Budget tip: green and brown scraps make many avocados. Layering colors is the whole trick here. No special tools required. A satin glaze adds a soft sheen if you like. Brush it on after baking. Give it a tiny face for a kawaii twist. Two dot eyes and a smile near the pit look cute. Kids love the simple shape. Make a few halves for a foodie friend. These suit a brunch-lover’s fridge. Calm, clean, and easy to nail.
8. Tiny Banana
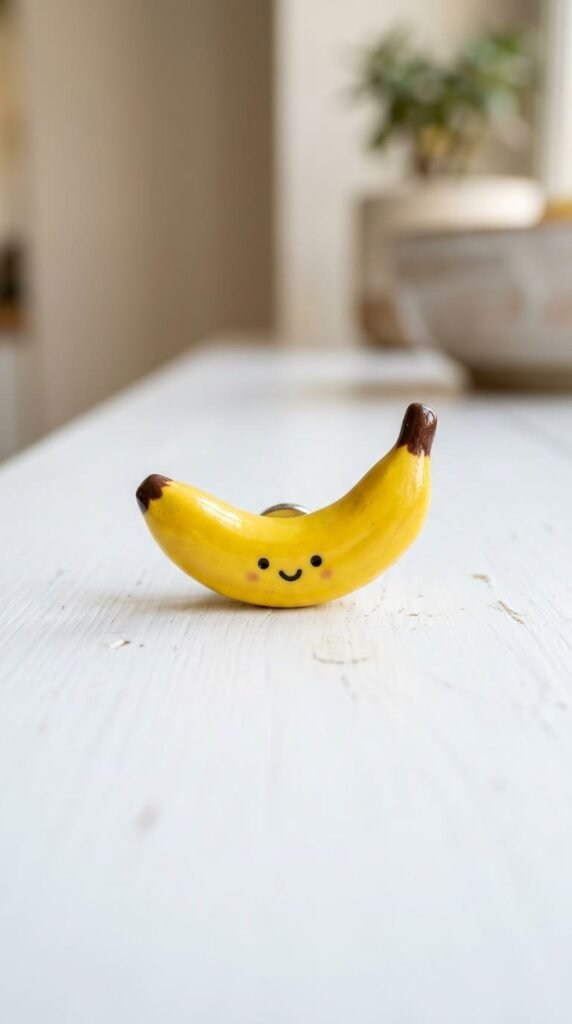
A banana is one of the quickest minis. Roll a yellow snake. Bend it into a gentle curve. Pinch the ends to points. The curve makes it a banana. Add tiny brown tips at each end. Press small dark spots for that ripe look. Keep it under an inch for the mini size. Give it a little face for charm. Two dot eyes and a smile turn it into a fruit friend. Bake and cool fully. Press a flat magnet on the back with a small dot of glue. Hold for 20 seconds. Budget tip: one yellow scrap makes a bunch of bananas. Press the back flat while soft so the magnet sits level. Score it with a toothpick for a stronger grip. Kids love the goofy face. Make a small bunch joined at the top for a fun set. These look bright and cheerful on the fridge. Pair them with the strawberry and avocado for a fruit basket. Simple shape, sweet result, almost free.
9. Cheesecake Slice
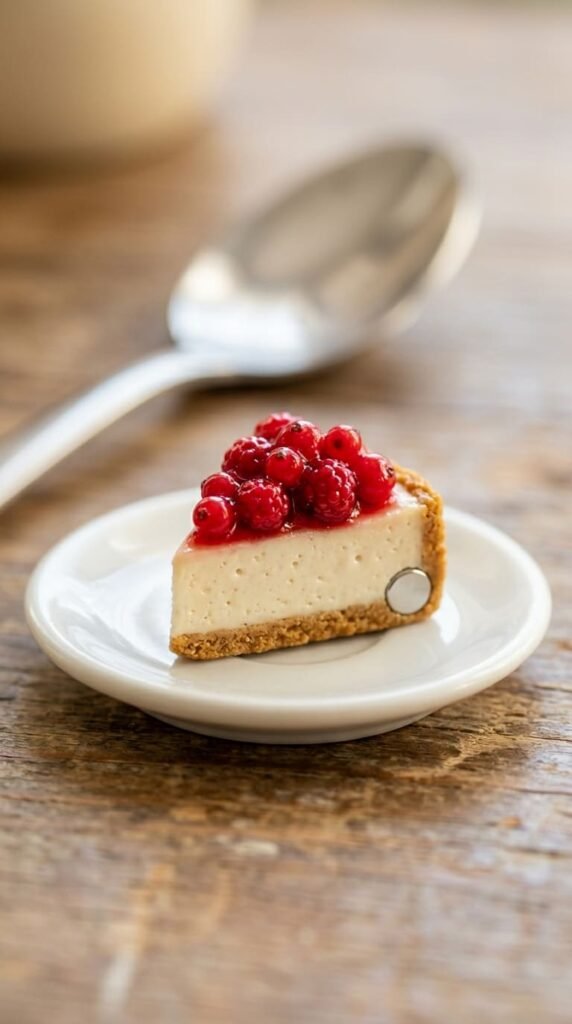
A cheesecake slice looks bakery-fancy but builds in layers. Roll a tan base for the crust. Press a cream-colored layer on top for the filling. Shape the whole thing into a wedge. The flat bottom is perfect for a magnet. Layers make it look like real cheesecake. Add tiny red berries on top. Roll little balls and press them on. A drizzle of red clay looks like sauce. Keep it under an inch for the mini look. Bake and cool fully. Press a flat magnet on the back with a small dot of glue. Hold for 20 seconds. Budget tip: tan and cream scraps make many slices. The flat bottom means the magnet sits flush. A clear coat makes the berries shine. Brush it on after baking. This one suits a slightly older crafter who likes detail. Make a few slices for a dessert set. These look great on a sweet-tooth’s fridge. Pair with the cupcake and donut. A pretty mini that feels store-bought.
10. Spaghetti and Meatballs
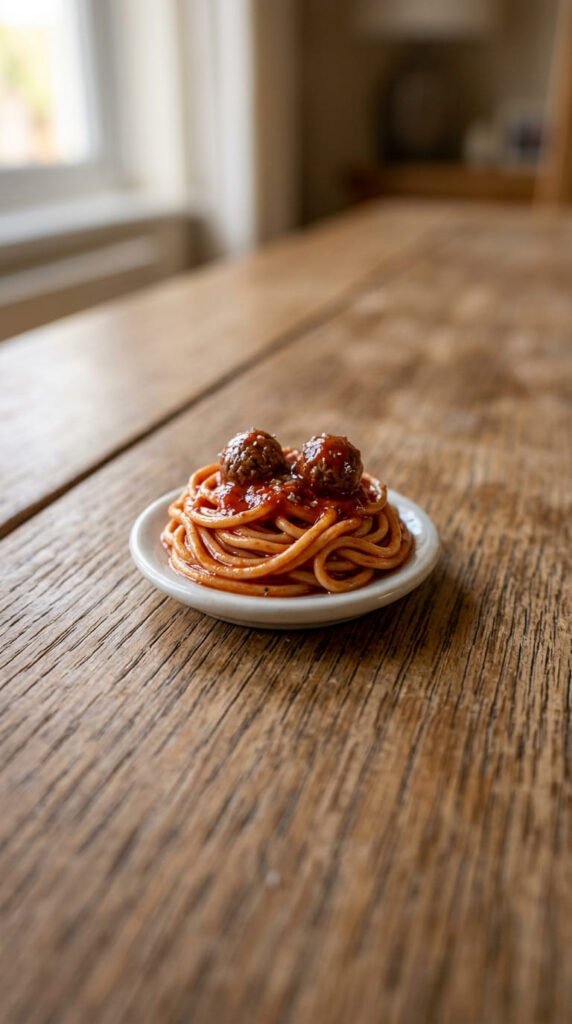
This one is for the pasta lovers. Roll a small white disc for the plate. Now make the spaghetti. Press pale yellow clay through a garlic press or tea strainer. Out come thin pasta strands. A garlic press makes instant spaghetti. Pile the strands on the plate. Add a red layer for the sauce. Roll two tiny brown balls for the meatballs. Place them on top. Keep the plate under an inch for the mini size. Bake and cool fully. Press a flat magnet on the back of the plate with a small dot of glue. Hold for 20 seconds. Budget tip: a cheap garlic press saves hours of rolling. The press turns clay into perfect noodles. Kids love squeezing the press. You handle the plating and oven. A clear coat makes the sauce glisten. Brush it on after baking. This mini wows people because it looks so detailed. Make one for a foodie friend. A tiny plate of dinner for the fridge.
11. Mini Charcuterie Board

A mini charcuterie board tests a few easy skills at once. Roll a flat tan slab for the board. Mark wood lines with a toothpick. Now fill it with tiny food. Press small squares of yellow clay for cheese. Roll thin tan discs for crackers. Add tiny green olives and red pepperoni dots. Lots of small bits make it look rich. Each piece is just a tiny ball or square. Keep the board under an inch for the mini look. Bake and cool fully. Press a flat magnet on the back with a small dot of glue. Hold for 20 seconds. Budget tip: this is a great way to use up color scraps. Every leftover bit becomes a tiny snack. A clear coat adds a tasty sheen. Brush it on after baking. This one suits a patient crafter who likes detail. Make one as a gift for a wine-and-cheese fan. It looks impressive for the effort. A tiny grazing board for the fridge. Fun and full of detail.
12. Kawaii Sea Turtle
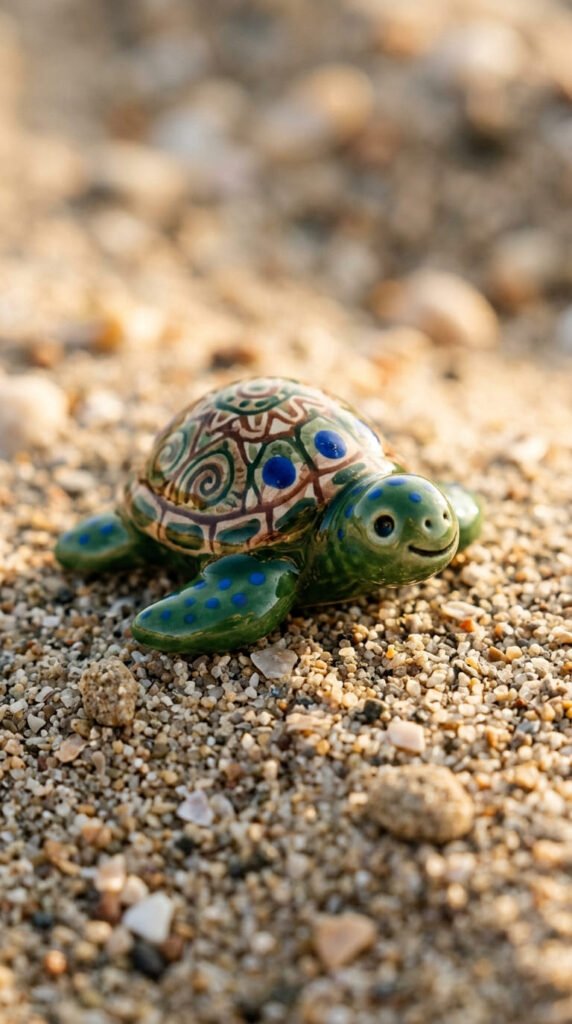
A kawaii sea turtle is calm and cute. Roll a green dome for the shell. Press a flatter green oval underneath for the body. Add four short flippers and a little head. The shell pattern sells the turtle. Press tiny blue spots on the dome for a kawaii look. Or draw hexagon lines with a toothpick. Two dot eyes and a smile finish the head. Keep it under an inch for the mini size. The flat belly is perfect for a magnet. Bake and cool fully. Press a flat magnet on the back with a small dot of glue. Hold for 20 seconds. Budget tip: green and blue scraps make many turtles. Blue spots turn a plain turtle into a kawaii one. Add a tiny flower on the shell for extra charm. A clear coat adds a soft shine. Brush it on after baking. Kids love pressing the spots. Make a small set for an ocean lover. Pair it with the whale shark below. A sweet sea friend that stands out.
13. Smiling Panda
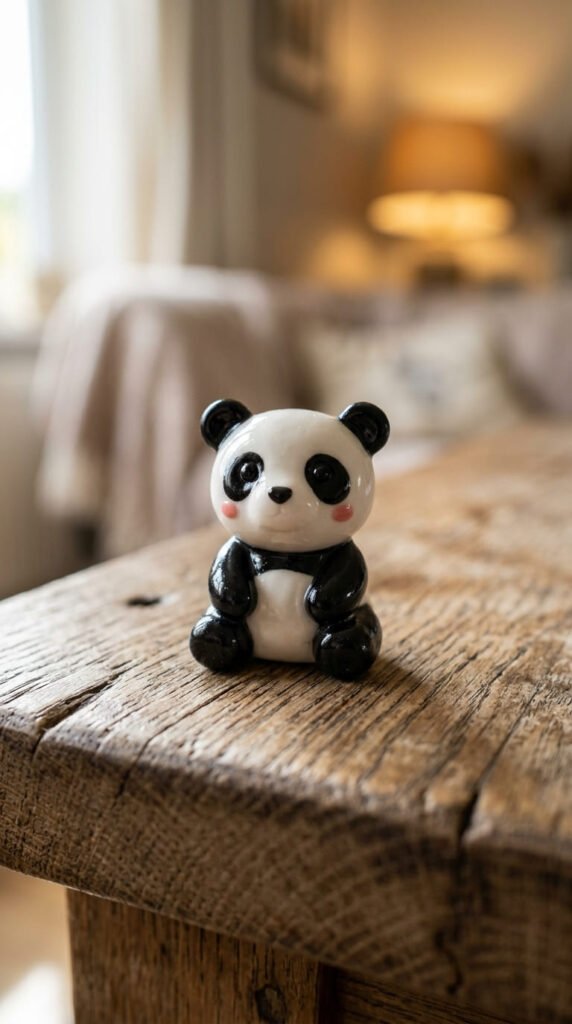
The panda is the friendliest mini animal. Roll a white ball for the head. Add a smaller white ball for the body. Two black balls become the ears on top. Black patches make it a panda. Press two black teardrops near the eyes. Add a white dot in each for life. A small nose and mouth finish the face. Pink cheeks add the cute factor. Dab pink chalk pastel with a cotton swab. Two black arms hug the sides. Keep it under an inch for the mini size. The flat back is perfect for a magnet. Bake and cool fully. Press a flat magnet on the back with a small dot of glue. Hold for 20 seconds. Budget tip: one black and one white block make many pandas. Press the back flat while soft for a level base. Kids can roll the balls and press the cheeks. You handle the fine eye patches. Make a tiny bamboo family. These look clean and sweet. A great first animal for any beginner.
14. Tiny Whale Shark
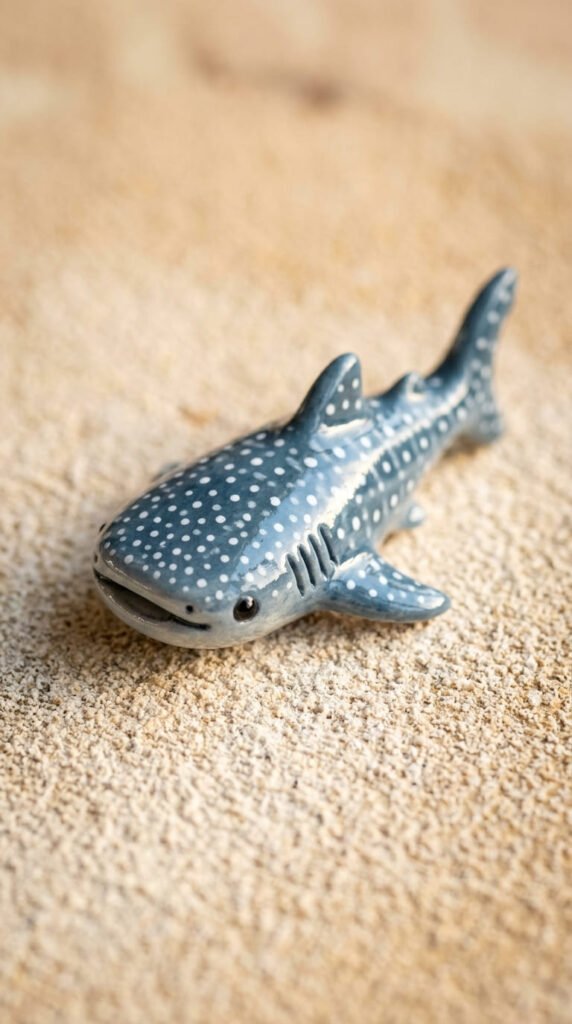
The whale shark is a rare mini that stands out. Roll a fat blue-gray body. Keep it plump and friendly. Add a wide flat mouth at the front. Two tiny eyes sit near the sides. Shape small fins and a tail. The white dots make it a whale shark. Dot tiny white spots all over the back. Use a toothpick dipped in white paint. Keep it under an inch for the mini size. Bake and cool fully. Add the spots after baking so they stay crisp. Press a flat magnet on the back with a small dot of glue. Hold for 20 seconds. Budget tip: mix blue, white, and a touch of black for that soft gray. You skip a new block. Loose, spaced-out dots always look right. Kids love placing the spots like a dot-to-dot game. Adults love that nobody else has one. Make it part of a sea set with the turtle. A big, gentle giant shrunk down for the fridge. Unique and easy.
15. Mini Sunflower
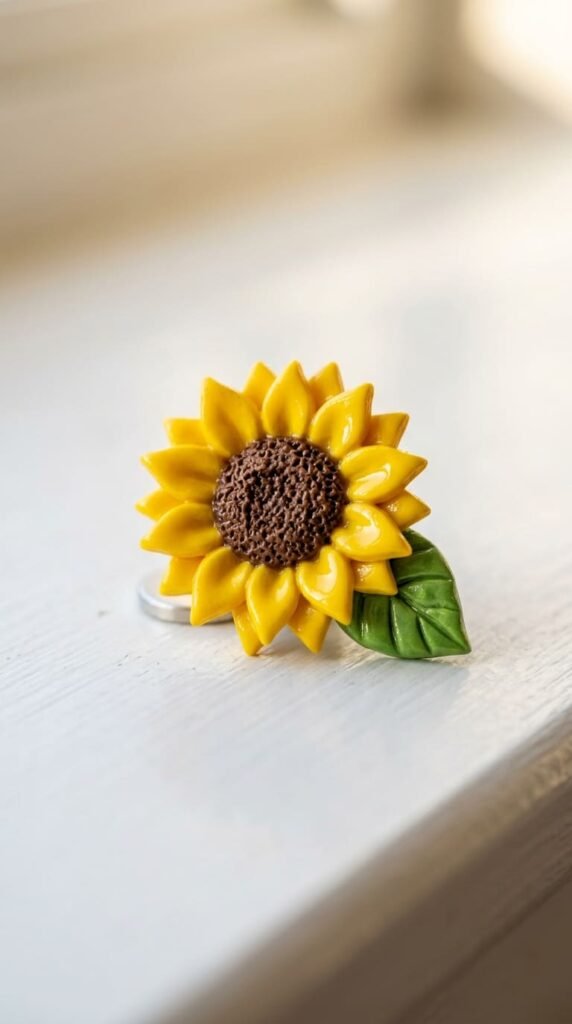
A sunflower comes together in a few steps. Roll a brown ball and flatten it for the center. Poke it all over with a toothpick for texture. The textured center makes it a sunflower. Now add petals. Roll tiny yellow teardrops. Press them in a ring around the brown center. Keep adding until the circle is full. Add a small green leaf at the side. Keep it under an inch for the mini size. Bake and cool fully. Press a flat magnet on the back with a small dot of glue. Hold for 20 seconds. Budget tip: yellow, brown, and green scraps make many flowers. A lines-and-dots tool speeds up the center texture. No tool? A toothpick works fine. A satin glaze adds a soft sheen. Brush it on after baking. Kids love placing each petal. Make a small bunch in different sizes. These look bright and happy on the fridge. Pair them with the potted plant below. A cheerful mini for any season.
16. Mini Potted Plant
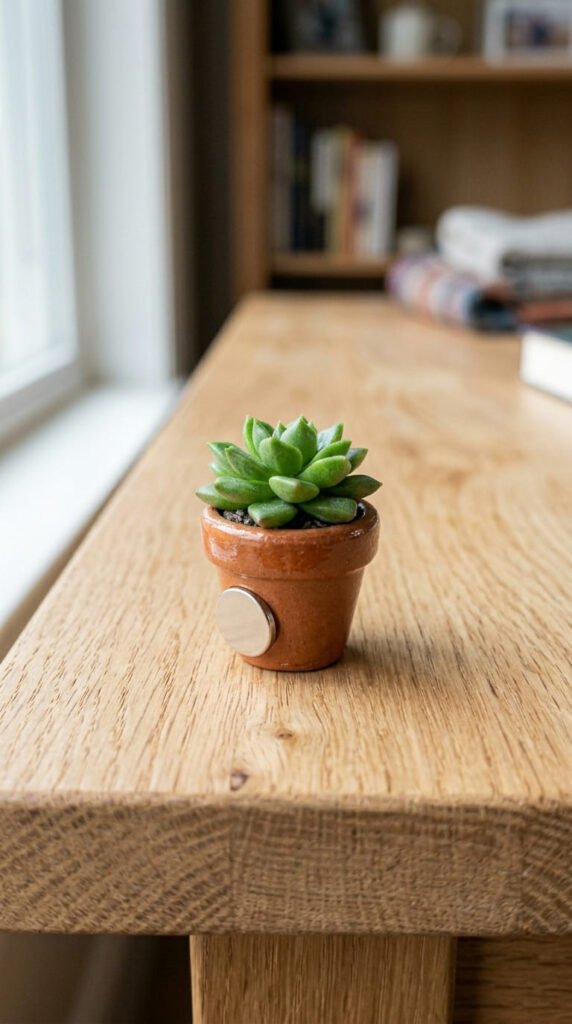
A tiny potted plant is sweet and simple. Roll an orange-brown ball for the pot. Press it into a small cup shape, wider at the top. Add a thin rim around the edge. The pot shape grounds the whole plant. Now add greenery. Roll tiny green teardrops for leaves. Press them into the top of the pot. Stack a few for a leafy look. Keep it under an inch for the mini size. Bake and cool fully. Press a flat magnet on the back with a small dot of glue. Hold for 20 seconds. Budget tip: brown and green scraps make a whole shelf of plants. Different leaf shapes make different plants. Try a tall snake plant or a round succulent. A satin glaze adds a soft shine. Brush it on after baking. Kids love building the little pot. Make a set of mini plants for a plant lover. These suit a kitchen or office fridge. A calm, green mini that never wilts. Easy and very cute.
17. Initial Letter
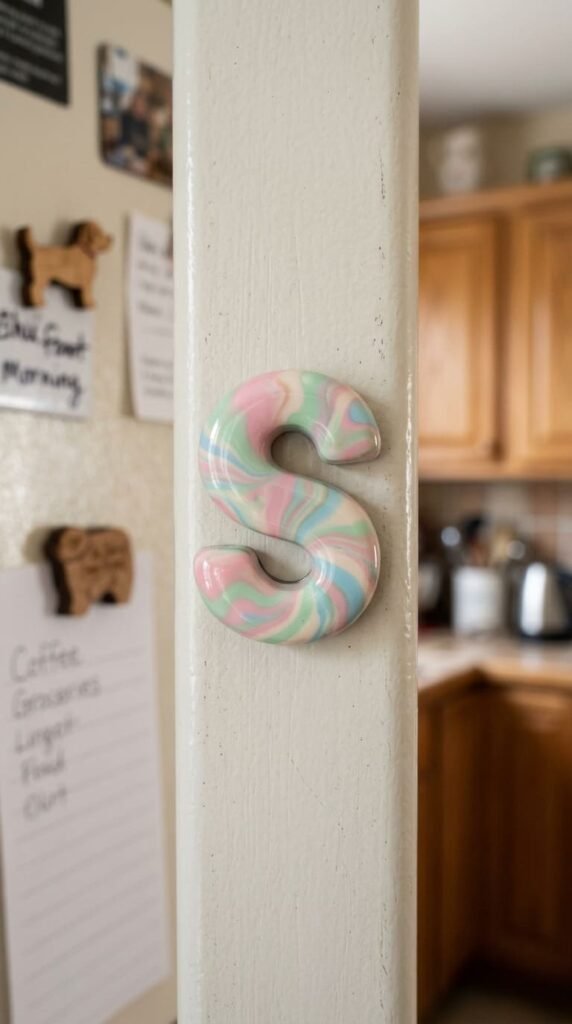
An initial magnet adds a personal touch. Roll a thin snake of clay. Bend it into a letter shape by hand. Or press a tiny letter cutter into a flat sheet. Cutters skip the hard shaping. Use a single initial for a clean look. Marble two colors for a pretty swirl. Twist them together, then shape the letter. Keep it under an inch for the mini size. Bake and cool fully. Press a flat magnet on the back with a small dot of glue. Hold for 20 seconds. Safety note: use a flat magnet, not a tiny strong one, around young kids. Small strong magnets are a choking risk. Budget tip: one batch makes a whole set of family initials. Spell out everyone’s first letter. A satin glaze adds a soft sheen. Brush it on after baking. These make thoughtful gifts. Make a set for a friend’s family. They look clean and modern on the fridge. A simple mini with real meaning.
18. Tiny Cookie
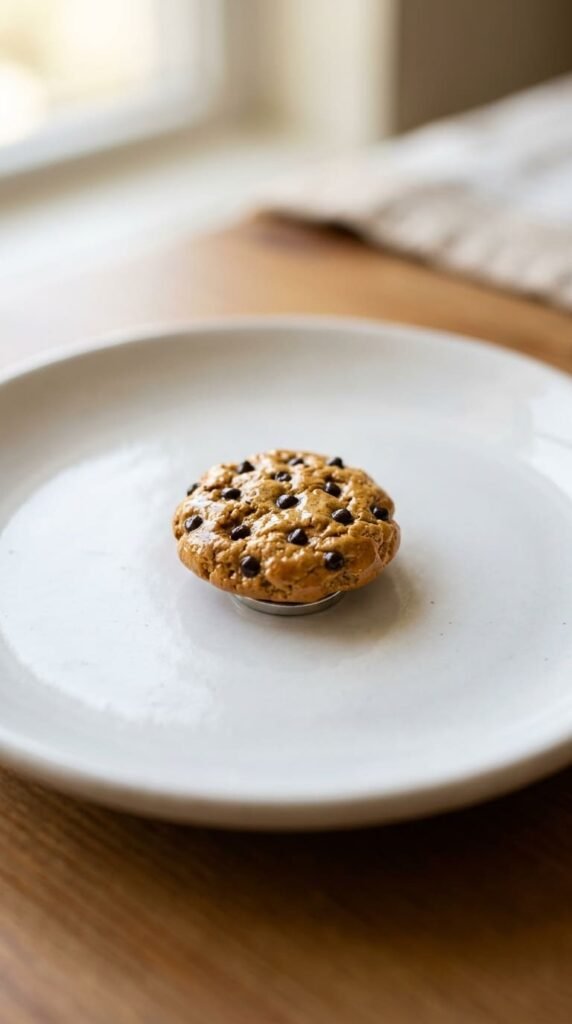
A tiny cookie is quick and warm-looking. Roll a tan ball. Flatten it into a small disc. Pinch the edges a little for that craggy bake look. Uneven edges make it look real. Add the chips. Press tiny bits of dark brown clay into the top. Scatter them like real chocolate chips. Keep it under an inch for the mini size. Bake and cool fully. Press a flat magnet on the back with a small dot of glue. Hold for 20 seconds. Budget tip: tan and brown scraps make a whole batch. A few chips poking out the side look best. Give it a tiny face for a kawaii twist. Two dot eyes and a smile turn it into a cookie friend. A clear coat adds a soft sheen. Brush it on after baking. Kids love pressing in the chips. Make a plate of cookies for the fridge. Pair them with the donut and cupcake. A cozy mini that looks good enough to eat. Fast and almost free.
19. Mini Camera
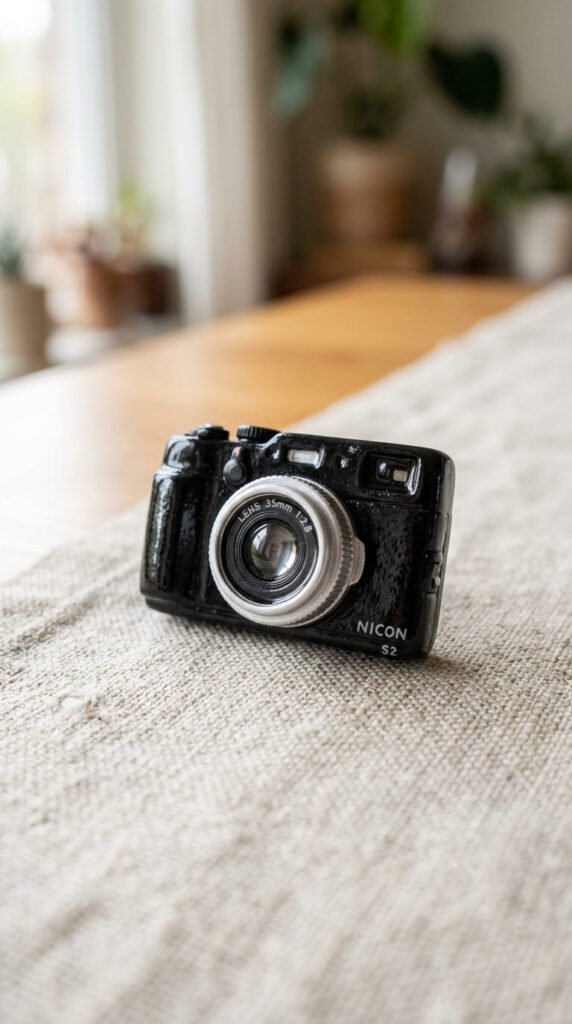
A mini camera is a fun object beyond food and animals. Roll a small black rectangle for the body. Press it flat and even. Add a round lens on the front. Stack two grey circles for that lens look. The round lens makes it a camera. Add a tiny button on top and a small flash square. Keep it under an inch for the mini size. Bake and cool fully. Press a flat magnet on the back with a small dot of glue. Hold for 20 seconds. Budget tip: black and grey scraps make a few cameras. Score the back with a toothpick for a firmer grip. Add a tiny strap from a thin clay snake for detail. A clear coat gives it a sleek shine. Brush it on after baking. This one suits a photography fan. Make one as a gift for a shutterbug friend. It looks neat and modern on the fridge. A simple object mini that feels different. Clean lines, quick build.
20. Tiny Book
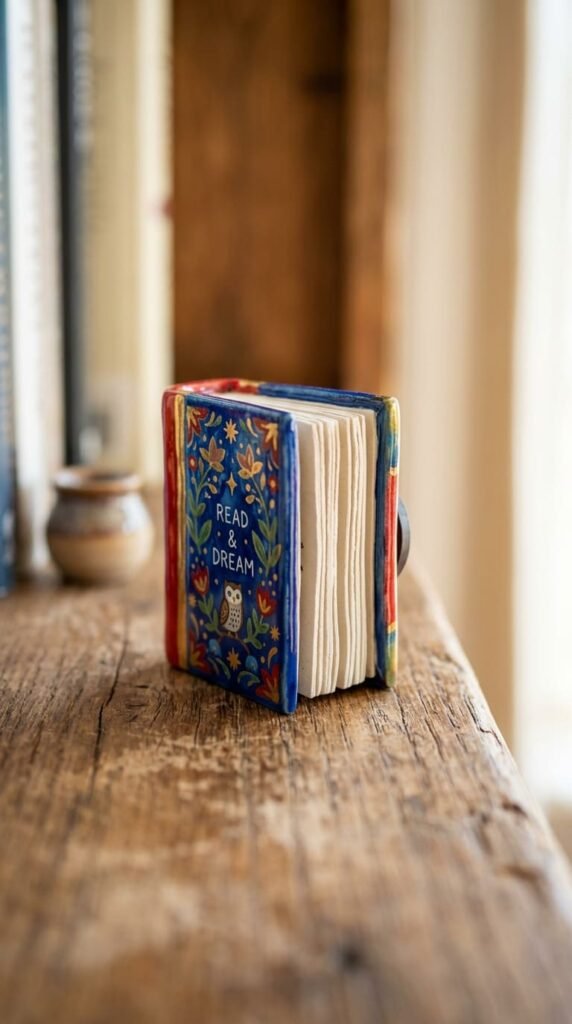
A tiny book is perfect for readers. Roll a small rectangle for the cover. Pick any bright color. Press a thinner white rectangle inside for the pages. The white edges make it a book. Use a toothpick to mark page lines along the side. Round the spine a little. Keep it under an inch for the mini size. Bake and cool fully. Press a flat magnet on the back with a small dot of glue. Hold for 20 seconds. Budget tip: scraps make a whole stack of books. Mark thin lines on the page edges for realism. Make a few in different cover colors. Stack two or three for a tiny book pile. A clear coat adds a soft shine. Brush it on after baking. This one suits a book lover or a teacher. Make a little library for the fridge. These also work as cute gift tags. Add a tiny clay bookmark ribbon for detail. A quiet, charming mini. Simple and sweet.
21. Clay Bow
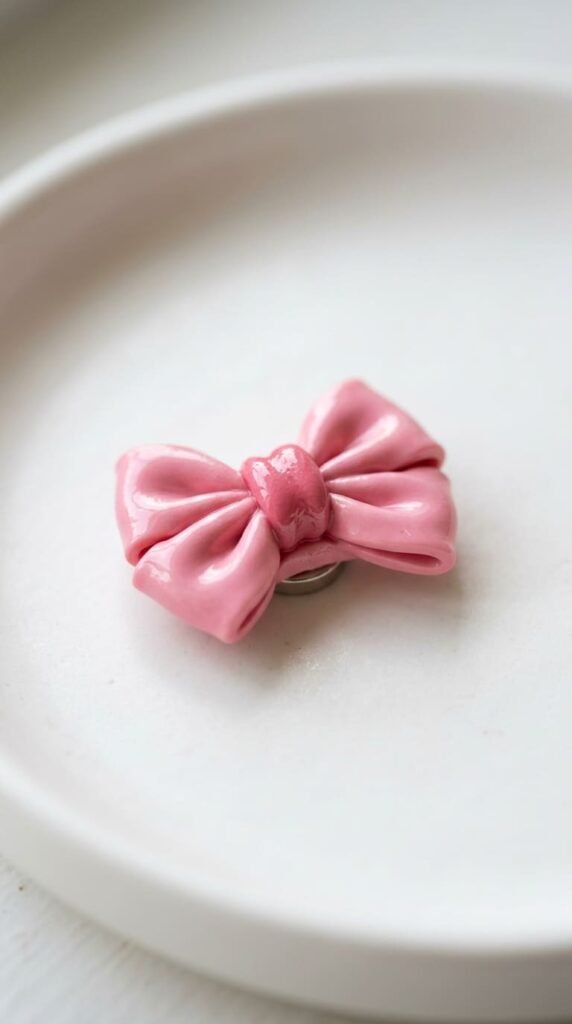
A clay bow turns a jewelry shape into a magnet. Roll a flat strip of clay. Pinch it in the middle to make two loops. The pinch in the middle makes the bow. Add a small band across the center knot. Fold the loops so they look soft. Pick a pretty color like pink or pastel blue. Keep it under an inch for the mini size. Bake and cool fully. Press a flat magnet on the back with a small dot of glue. Hold for 20 seconds. Budget tip: one scrap makes a few bows. The same bow works as a magnet, pin, or charm. That makes it a flexible little project. A satin glaze adds a soft sheen. Brush it on after baking. Kids love picking the color. Make a set in soft pastels for a girly fridge. These also dress up a plain gift box. A trendy, dainty mini. Quick to fold, sweet to look at.
22. Mini Cactus
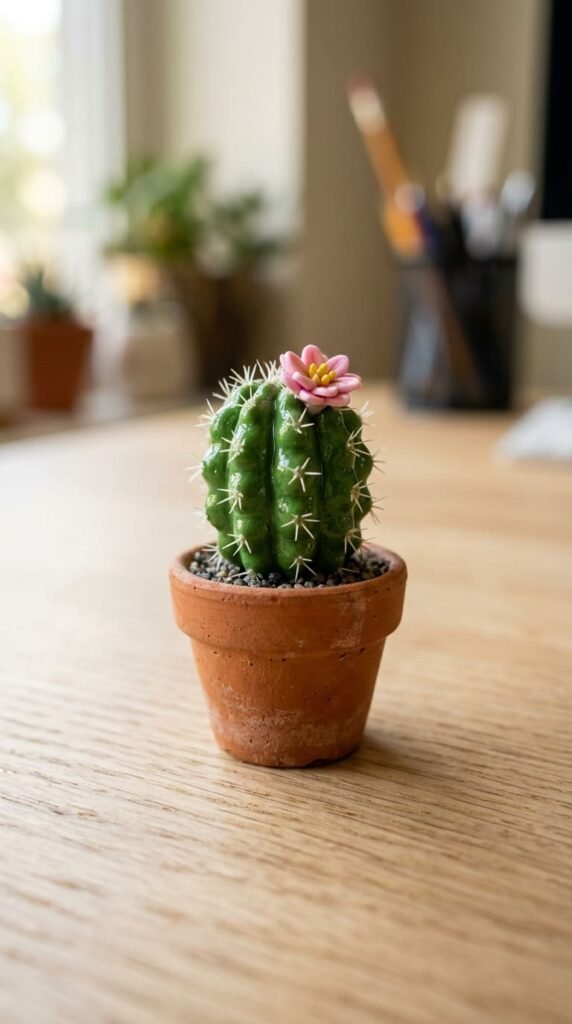
A mini cactus is cute and almost unkillable. Roll a small orange-brown pot. Press it into a little cup shape. Now make the cactus. Roll a green oval and set it in the pot. Add a smaller green arm on the side. Two stacked shapes make a classic cactus. Poke tiny dots with a toothpick for spines. Or press in flecks of white clay. Add a tiny pink flower on top for charm. Keep it under an inch for the mini size. Bake and cool fully. Press a flat magnet on the back with a small dot of glue. Hold for 20 seconds. Budget tip: green and brown scraps make a whole desert set. The toothpick spines add detail in seconds. A satin glaze gives it a soft shine. Brush it on after baking. Kids love poking the spines. Make a few cacti in different shapes. These suit a plant lover’s fridge. Pair them with the potted plant and sunflower. A charming green mini that lasts.
Conclusion
Mini clay magnets prove that small really can be mighty. A coin-sized piece uses pennies of clay but pulls just as many smiles as a big sculpture. You roll, shape, and press, all in under an inch. Then a small dot of glue and a flat magnet finish the job. The tiny size also means you can make six or eight in one short sitting. That makes mini magnets perfect for batch gifts, market sets, or a rainy afternoon with the kids. Start with the easy wins, like the donut, strawberry, or panda. Then work up to the sushi, cheesecake, or charcuterie board once your hands feel sure. Keep the backs flat, score them with a toothpick, and hold each magnet for twenty seconds for a grip that lasts. Group your minis into themed sets. A sushi tray, a fruit basket, a tiny garden, or an ocean crew all make charming gifts. Use up your color scraps so nothing goes to waste. Grab a small block of clay today. Sculpt your first tiny treasure. Then watch your fridge fill up with a whole miniature world you made by hand.