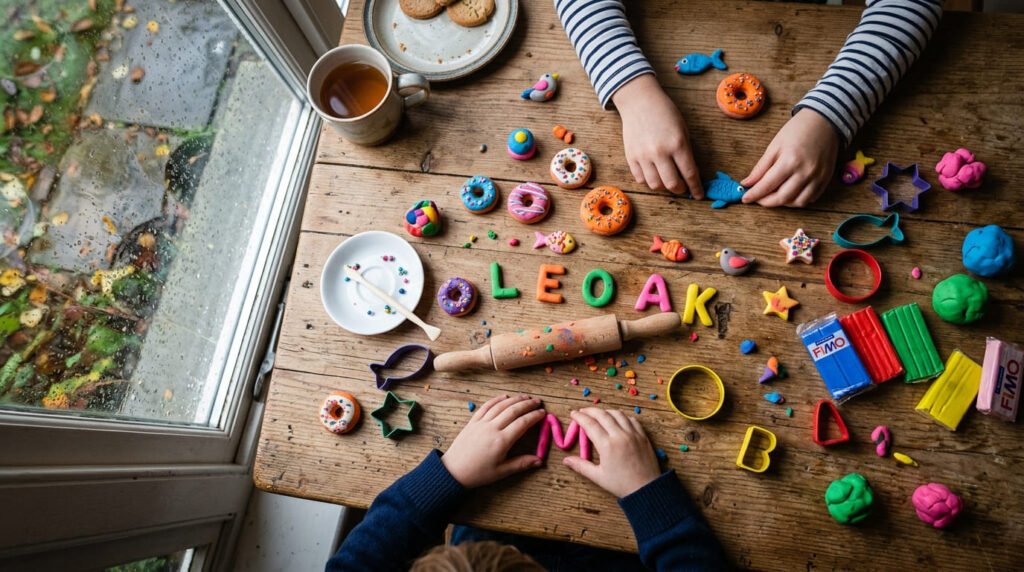
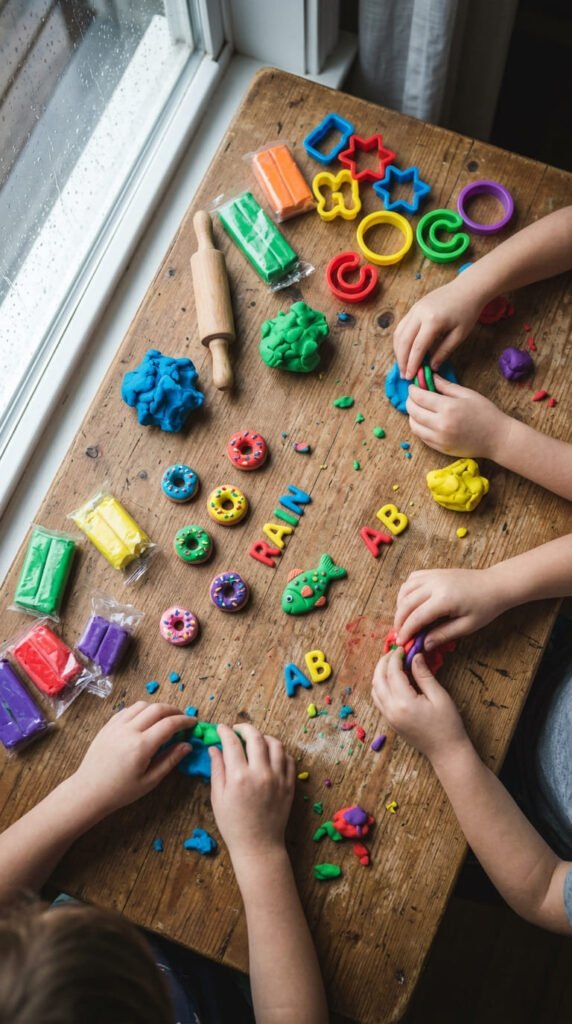
Rainy days and restless kids go together like glue and glitter. Clay magnets fix both. They are cheap, simple, and keep little hands busy for an hour or more. You roll. You shape. You bake or air-dry. Then you stick a magnet on the back. That is the whole craft. Polymer clay holds fine detail and bakes in the oven. Air-dry clay skips the oven, which suits younger kids. Either way, the fridge becomes a gallery of tiny food, animals, and letters. The ideas below sort from super easy to a little more involved. Some teach the ABCs. Some turn into a game. All of them are kind to your budget and your patience. Grab a block of clay and let’s chase away the rainy-day boredom.
1. Tiny Donut Magnets
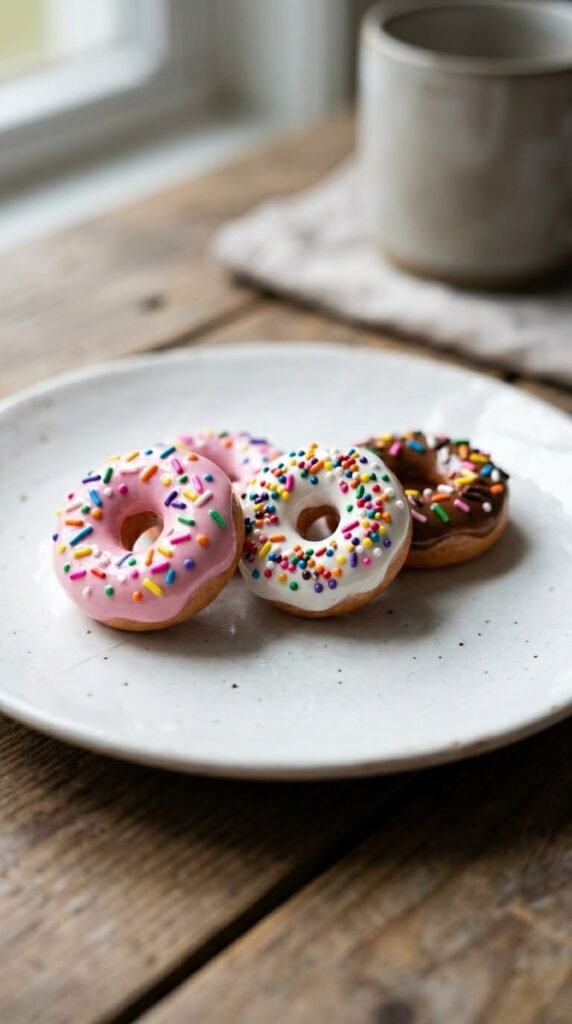
Mini food is the most loved kids’ project, and donuts lead the pack. Roll a small ball of tan clay. Flatten it a little. Poke a hole in the middle with a pencil. That is your donut base. Now roll a thin sheet of icing color. Pink, white, or brown all work. Drape it on top and press. Sprinkles make the magic. Snip tiny bits of bright clay and press them on the icing. Bake by the packet, usually around 130°C for 20 minutes, with an adult on oven duty. Let it cool fully before you glue. Press a flat magnet on the back with strong glue. Wait an hour for it to set. Budget tip: one tan block and a few scraps make a dozen donuts. Kids can do the whole thing with help on the oven. Let them pick the icing color. That small choice keeps them hooked. Make a box of mixed donuts for grandma. These also look great on a kid’s locker. Quick, cute, and almost free.
2. Cupcake Magnets
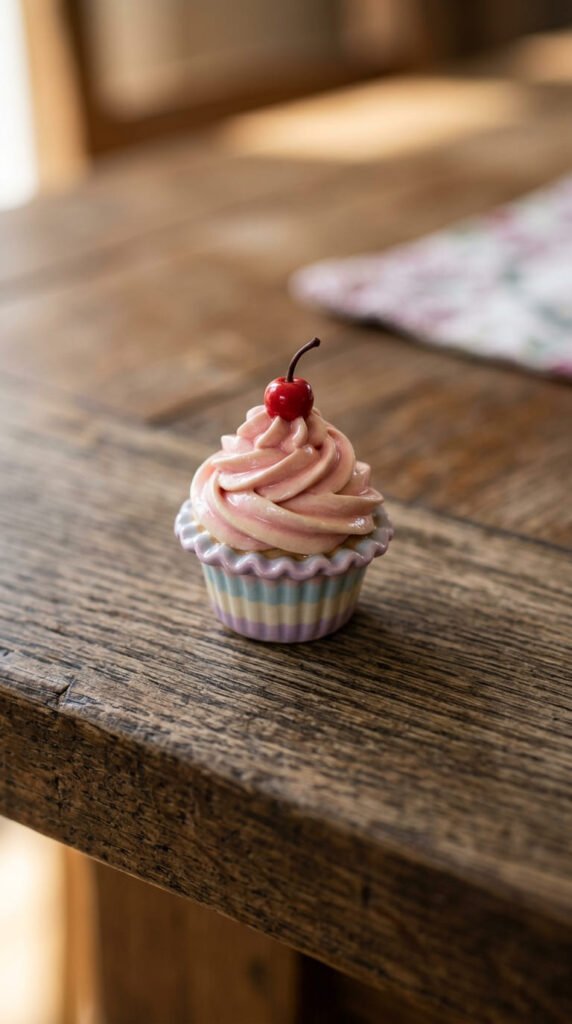
Cupcakes look fancy but stay simple for kids. Roll a small ball for the cupcake base. Shape it like a tiny pot, wider at the top. Press lines down the side for the wrapper. Now make the frosting. Roll a thin snake of clay. Coil it on top like soft-serve. The swirl is the fun part. Kids love stacking the coil higher and higher. Add a tiny red ball for the cherry. A few sprinkles finish it. For color on a budget, use leftover scraps for the wrapper. Save your bright clay for the frosting. Bake and cool fully before gluing. Press a flat magnet on the back. Let it set an hour. Want shine? A dab of clear gloss makes the frosting look real. Brush it on after baking. Kids can do the swirl with their fingers. You handle the cherry and the oven. Mix two frosting colors for a marble swirl. Make a batch in different colors for a bake-sale look. These cheer up any fridge. One small ball of clay, big smiles.
3. Pizza Slice Magnets
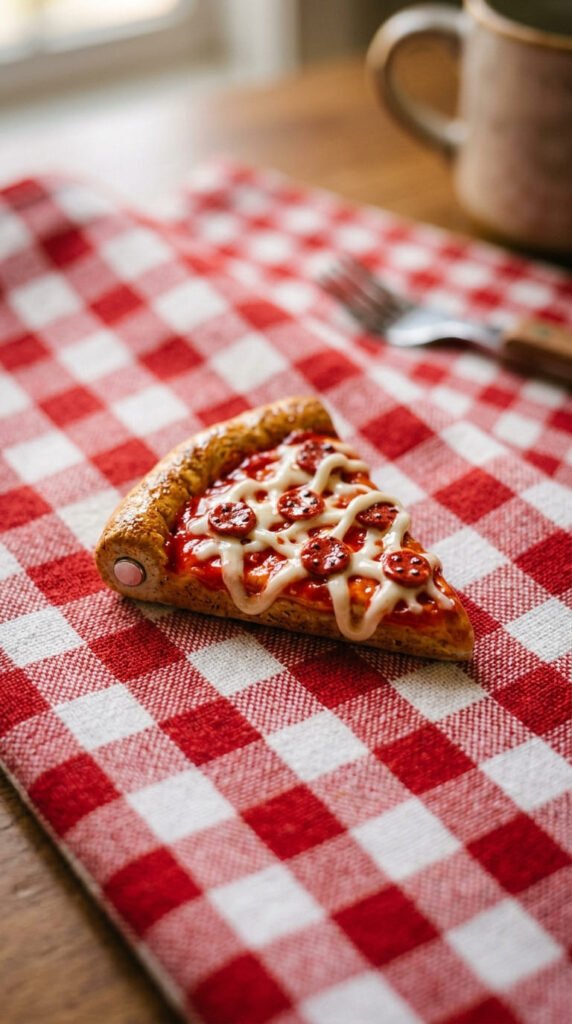
A pizza slice is silly, easy, and a kid favorite. Roll a tan triangle for the crust. Make the wide end a little puffy for the edge. Press a thin red layer on top for sauce. Now add a white cheese layer. Drag a toothpick through it for cheese strings. The toppings make it personal. Let kids add tiny pepperoni dots, green pepper bits, or mushroom shapes. There is no wrong topping. For color, red and tan are the base. A few scraps cover the rest. Bake and cool fully with an adult on oven duty. Press a flat magnet on the back. Wait an hour to set. Budget tip: one slice uses almost no clay, so a whole pizza set is cheap. Kids can pinch the crust and place toppings. You roll the base. Make six slices and arrange a full pizza on the fridge. These make a fun group craft for a rainy playdate. Add a “delivery box” from cardboard for play. Easy, funny, and full of flavor.
4. Cherry Pair Magnets
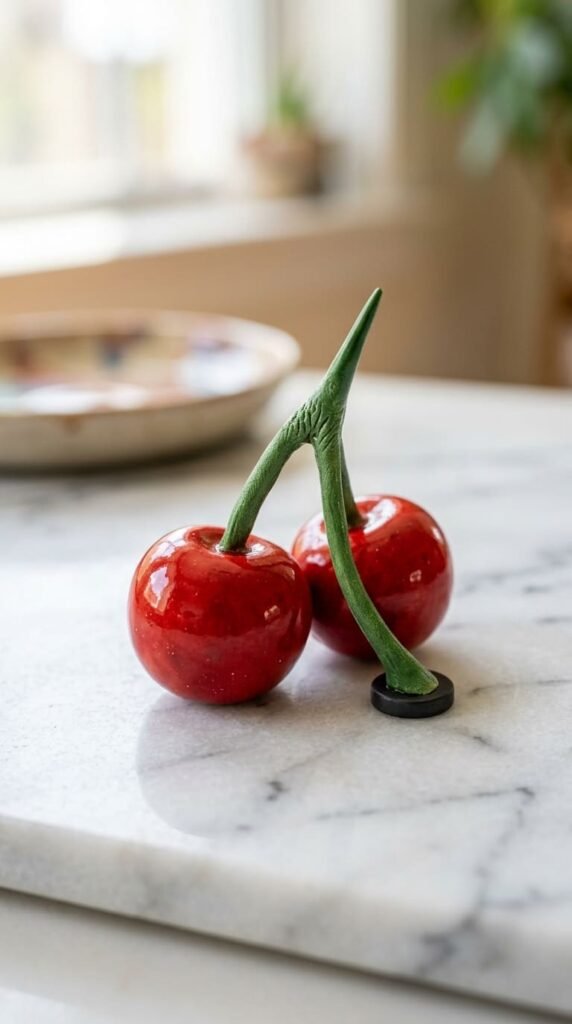
Cherries are the easiest mini food on this list. Roll two small red balls. That is most of the work done. Roll a thin green snake for the stem. Bend it into a V shape. Press one cherry on each end. Two balls and a stem, that is it. Add a tiny green leaf if you want. Press a toothpick line on each leaf for a vein. For shine, a clear gloss makes the cherries look juicy. Brush it on after baking. Bake and cool fully before gluing. Press a flat magnet on the back of the pair. Wait an hour to set. Budget tip: cherries use tiny bits of clay, so a red scrap goes a long way. This is a great first project for little kids. The shapes are simple and quick. Success on the first try keeps them crafting. Make a few pairs in red and dark purple. They look like real fruit on the fridge. Pair them with the cupcakes for a sweet set. Almost free, and done in minutes.
5. Alphabet Letter Magnets
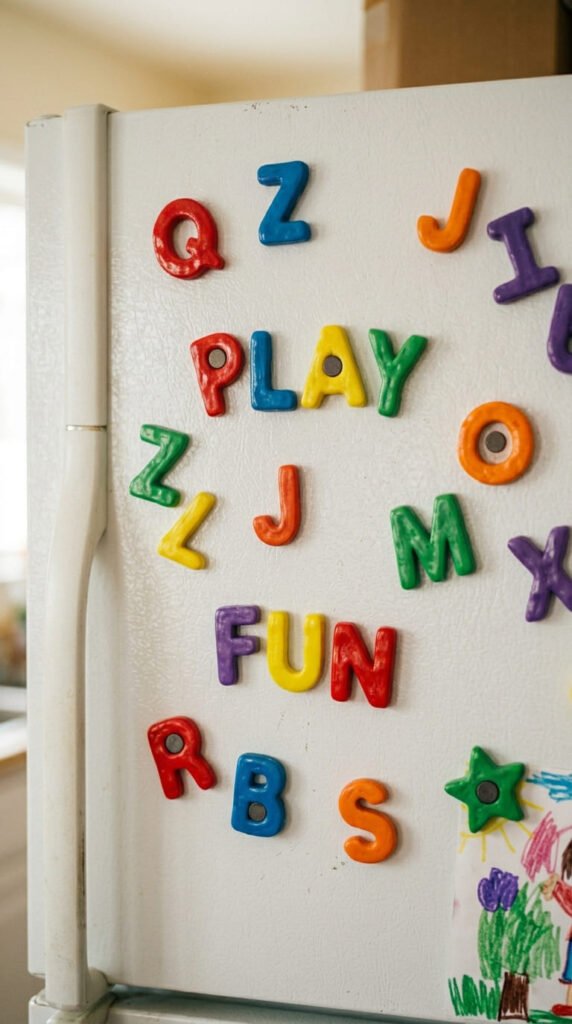
Letter magnets teach and play at the same time. Roll a flat sheet of clay. Press letter cookie cutters into it. Peel away the extra. You have clean letters in seconds. Cookie cutters skip the hard sculpting. No cutters? Roll thin snakes and bend them into letter shapes by hand. Use bright colors so each letter stands out. Spell a child’s name for a personal touch. Bake and cool fully with adult help. Press a flat magnet on the back of each letter. Use a strong glue and wait an hour. Safety note: skip tiny strong magnets for kids who still mouth objects. Small strong magnets are a choking hazard. Use bigger flat magnets to stay safe. Budget tip: one sheet of clay makes the whole alphabet. Kids learn their ABCs while they play on the fridge. Make a set as a surprise gift for a younger sibling. Paint white letters with acrylic for extra color. Add a satin glaze for a soft sheen. Learning and crafting in one rainy afternoon.
6. Magnet Fishing Game
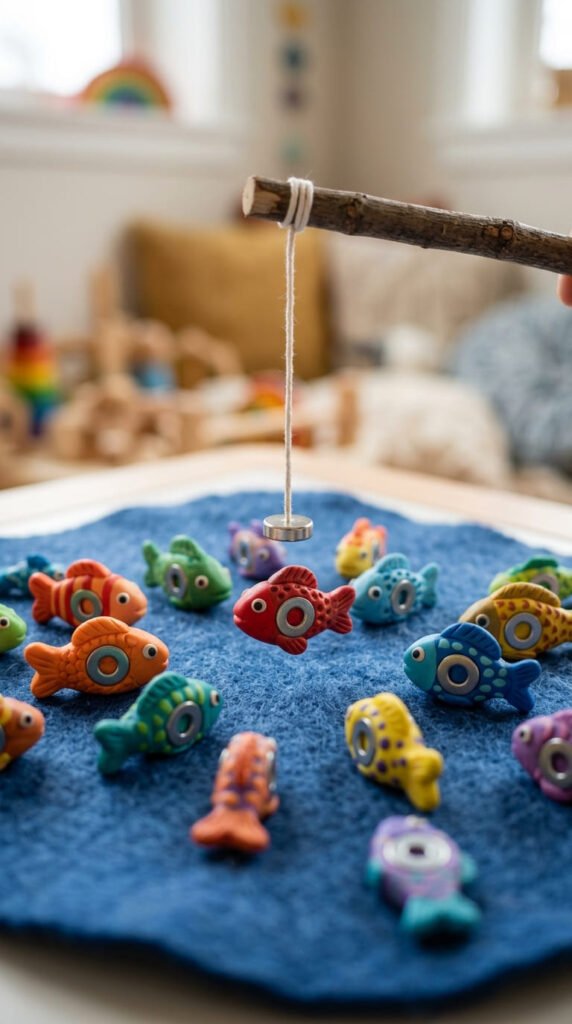
This one turns a craft into a game. Roll small clay fish in bright colors. Press a metal washer into each one before baking. The washer lets the fish get caught. Add eyes and fins with a toothpick. Bake and cool fully with adult help. Now make the rod. Tie string to a stick. Glue or tie a magnet to the string’s end. The magnet grabs the washer in each fish. Lay the fish on blue felt for a pretend pond. Kids “fish” by dangling the magnet over them. Budget tip: washers are cheap at any hardware shop. Scraps make the fish, so the cost stays low. Setup takes about five minutes before baking. Store the whole game in a mason jar or old box. That keeps the pieces from getting lost. Make fish in different sizes for a points game. Bigger fish, more points. This keeps kids busy long after the clay dries. A craft and a toy in one rainy day. Cheap fun that lasts.
7. Pressed Leaf Magnets
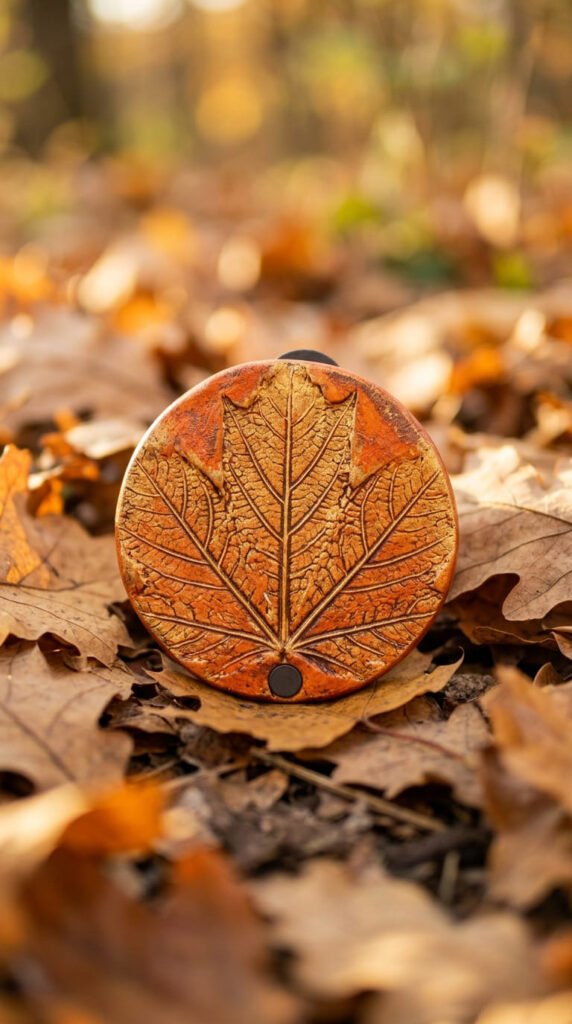
Pressed leaves bring nature indoors on a rainy day. Roll a flat sheet of clay. Press a real leaf onto it, vein side down. Push gently so the lines show. Peel the leaf away. The leaf leaves a perfect print. Cut around the shape with a butter knife. Air-dry clay works great here. Dry it 24 hours, then flip and dry the back. Paint the leaf in fall colors. Orange, gold, and red look lovely. A satin glaze adds a soft sheen. Stick a peel-and-stick magnet button on the back. No glue or oven required. Budget tip: leaves from the garden are free, and one sheet makes many prints. Kids can collect leaves between rain showers. Different leaves give different patterns. Try maple, oak, and feathery ferns. Make a set for the Thanksgiving table. These also work as little gift tags. The natural texture looks far fancier than the effort. A calm, mess-light craft for younger kids. Free materials, pretty result.
8. Stamped Pattern Discs
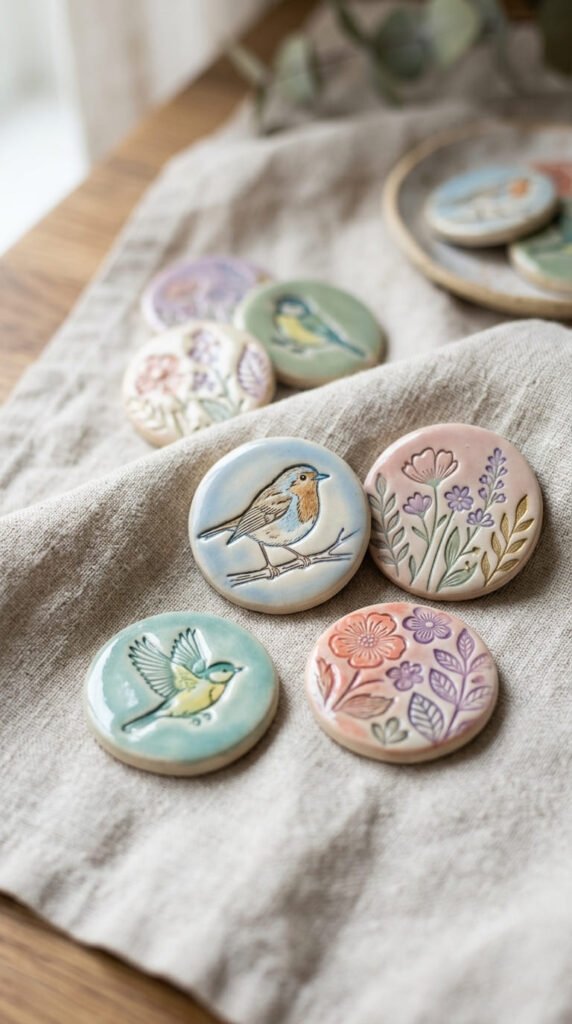
Stamps give instant detail with zero sculpting skill. Roll a flat sheet of clay. Press a small disc shape with a bottle cap or cutter. Now press a stamp into the center. Stamps add a pattern in one push. Bird, flower, and bumblebee stamps all look sweet. No stamps? Use a textured button, lace, or even a coin. Each gives a different print. This suits very young kids, around ages three to five. The pressing is easy and fun. Air-dry or bake, depending on your clay. Let it dry fully before handling so it does not crack. Paint the raised parts for a pop of color. Stick a magnet button on the back. Budget tip: household items make free stamps. Look around the kitchen for textures. A doily or a fork can make pretty patterns. Make a set of matching discs in pastel colors. They look clean and pro on the fridge. Kids love finding new things to stamp. A simple craft that feels like a treasure hunt.
9. Googly-Eye Monster Magnets
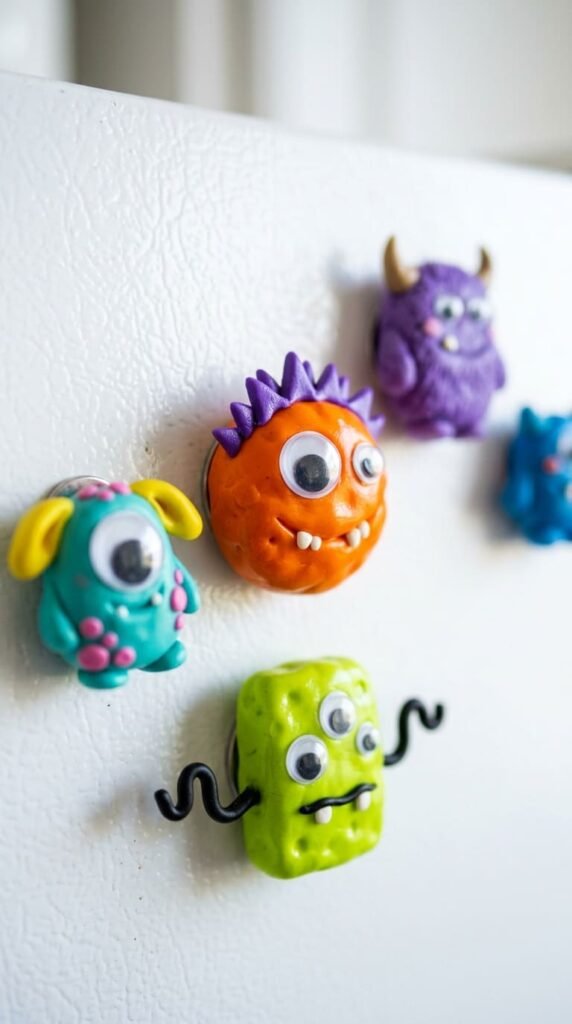
Monsters are pure silly fun with no rules. Roll any blob of bright clay. Lumpy, spiky, round, it all works. There is no wrong monster shape. Add arms, horns, or spikes if you like. Now press googly eyes into the soft clay. One eye, three eyes, or five, kids decide. Add a wide toothy grin with a toothpick. If your googly eyes are plastic, glue them on after baking instead. Bake or air-dry your clay first. For air-dry, let it dry fully before adding eyes. Stick a magnet on the back with strong glue. Wait an hour to set. Budget tip: a pack of googly eyes is cheap and makes dozens of monsters. Mismatched eyes look the funniest. Use up odd scraps of clay for the bodies. This is a great way to clear your color leftovers. Kids love naming each monster. Make a whole monster family for the fridge. Silly, cheap, and a guaranteed giggle. Perfect for a gloomy afternoon.
10. Rainbow Magnets
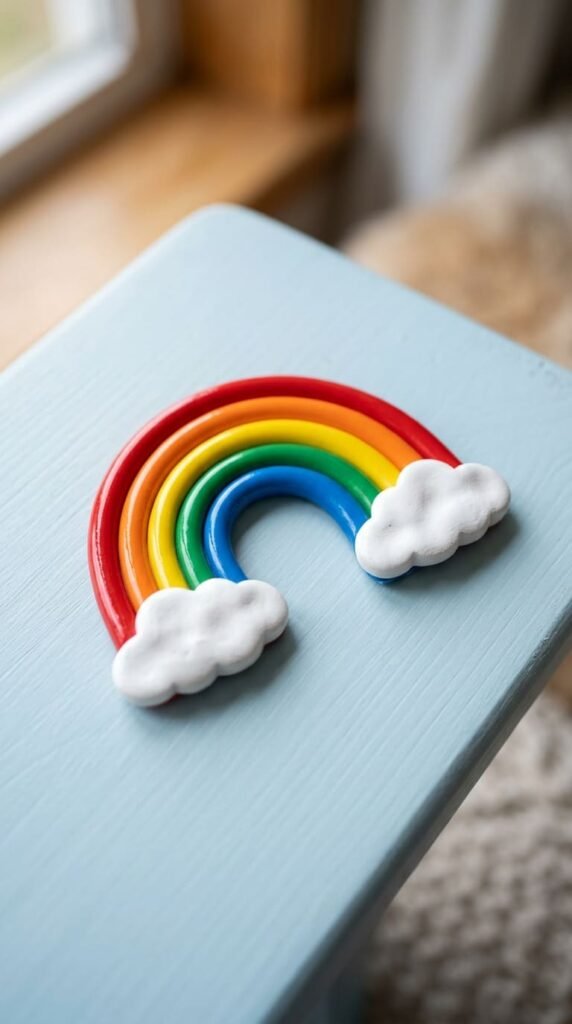
A rainbow fits a rainy day in the sweetest way. Roll thin snakes in each color. Red, orange, yellow, green, blue, and purple. Line them up and bend into an arch. Stacked snakes make the rainbow shape. Press them together gently so they stick. Add two white cloud puffs at the ends. Roll small white balls and pinch them flat. Bake or air-dry, then glue a magnet on the back. Wait an hour to set. Budget tip: you only use thin snakes, so a little of each color goes far. Kids love picking the color order. There is no wrong rainbow. Make a smaller version with just three colors to save clay. Add a tiny sun peeking from one cloud for extra cheer. These look bright and happy on the fridge. Make a few as cheer-up gifts for friends. The simple shape suits younger crafters. A rainbow after the rain feels just right. Cheap, colorful, and full of smiles.
11. Smiley Sun Magnets
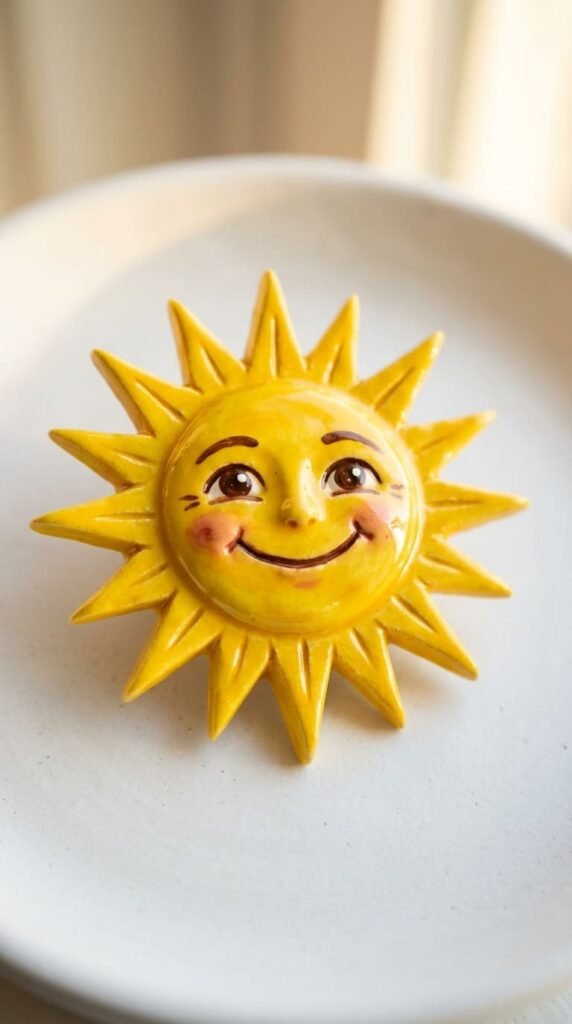
A smiling sun brings warmth to a gray day. Roll a yellow ball and flatten it into a circle. Pinch small triangle rays around the edge. The rays make it a sun. Press them out evenly for a clean shape. Add two dot eyes and a big curved smile. Pink cheeks finish the happy face. Dab pink chalk pastel with a cotton swab for the blush. For color, one yellow block makes many suns. Mix in a little orange for the rays for a two-tone look. Bake or air-dry your clay. Let it dry fully before gluing. Press a flat magnet on the back. Wait an hour to set. Budget tip: yellow scraps work great here, so save your offcuts. Kids love making the face big and goofy. A bigger smile looks happier. Make a sun and a rainbow as a matching pair. These brighten a kid’s room or the fridge. A cheerful craft to chase the clouds away. Simple shapes, sunny result.
12. Marbled Heart Magnets
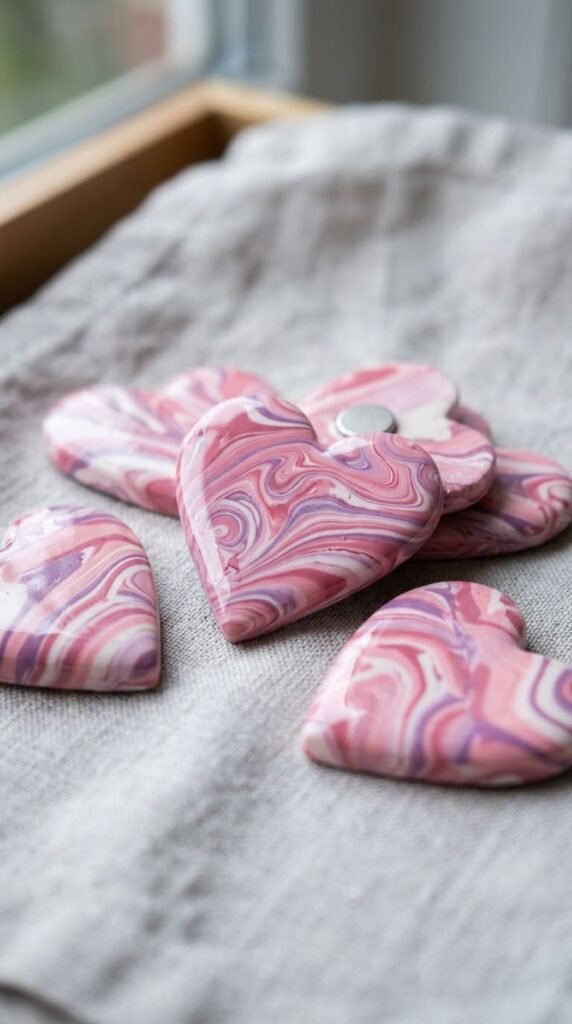
Marbled hearts look fancy but use a fun mixing trick. Take two or three clay colors. Twist them together like a candy cane. Fold and twist again. Twisting makes the marble swirl. Do not over-mix or the colors blend into one. Roll the twisted clay into a sheet. Press a heart cookie cutter into it. Each heart comes out with its own swirl. No cutter? Shape a heart by hand. Bake or air-dry, then glue a magnet on the back. Wait an hour to set. Budget tip: marbling is a great way to use up odd color scraps. Mix leftovers into pretty swirls. No two marbled hearts look the same. That makes each one feel special. Pink, white, and purple make a soft mix. Add a thin gloss for shine if you like. Kids around age seven and up enjoy the twisting. Make a set as a sweet gift for a friend. These look store-bought for almost no cost. A pretty craft from leftover clay.
13. Family Name Letters
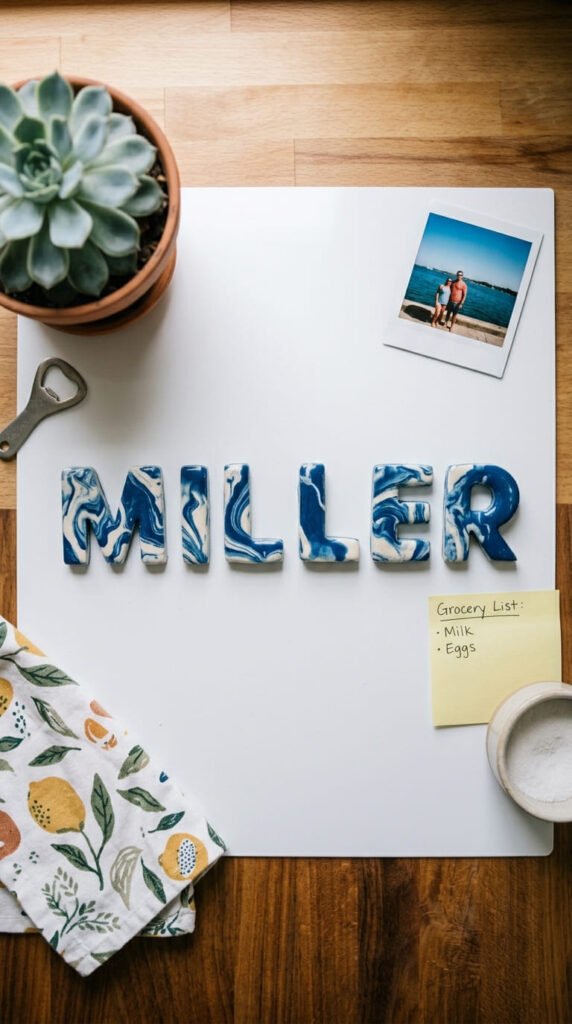
Spell out the family name for a magnet with meaning. Use the marbling trick from the hearts. Twist two colors together for a swirl. Roll it flat. Press letter cutters to spell the surname. Each letter gets its own marble pattern. Peel away the extra clay. No cutters? Roll snakes and bend them into letters by hand. Bake or air-dry, then glue a magnet on each letter. Use a strong glue and wait an hour. Safety note: use flat magnets, not tiny strong ones, around young kids. Small strong magnets are a choking risk. Budget tip: one batch of marbled clay spells a whole name. Pick colors that match the kitchen. Blue and white look clean and calm. Kids love seeing their family name on the fridge. This also makes a heartfelt gift for grandparents. Spell their name as a surprise. The marbled look feels custom and pricey, but costs pennies. A meaningful craft for a slow afternoon. Personal, pretty, and proud on the fridge.
14. Panda Magnets
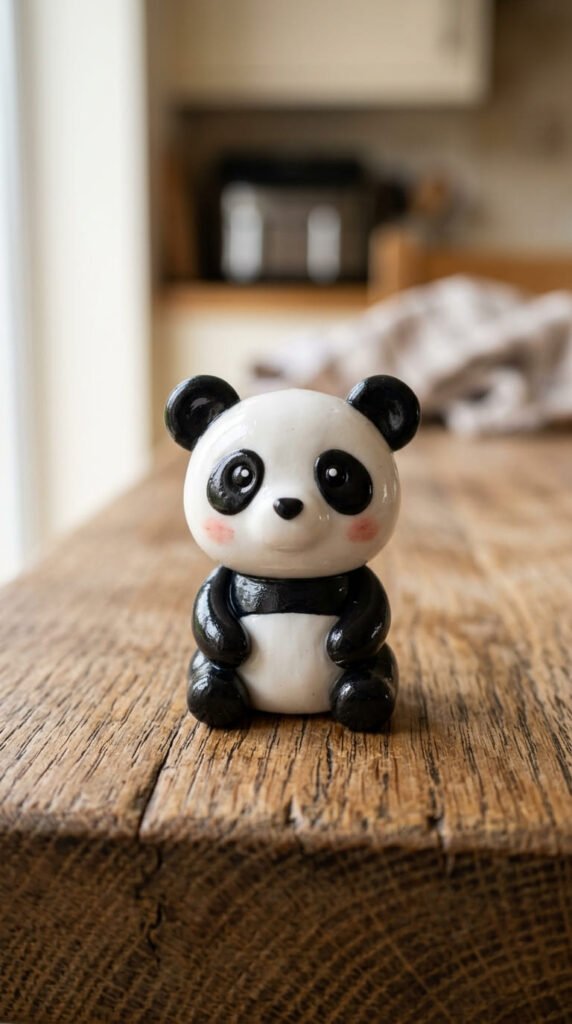
Pandas are the friendliest animal to start with. Roll a white ball for the head. Add a smaller white ball for the body. Two black balls become the ears on top. Black patches make it a panda. Press two black teardrops near the eyes. Add a white dot in each for life. A small nose and mouth finish the face. Pink cheeks add the cute factor. Dab pink chalk pastel with a cotton swab. Two black arms hug the sides. For color, one black and one white block make many pandas. Bake or air-dry, then glue a magnet on the back. Press the panda flat while soft for a level base. Flat backs stick best on the fridge. Wait an hour for the glue to set. Kids can roll the balls and press the cheeks. You handle the fine eye patches. Make a bamboo family of big and small pandas. These look clean and sweet on any fridge. A great first animal for little crafters. Cheap, cuddly, and quick.
15. Frog Magnets
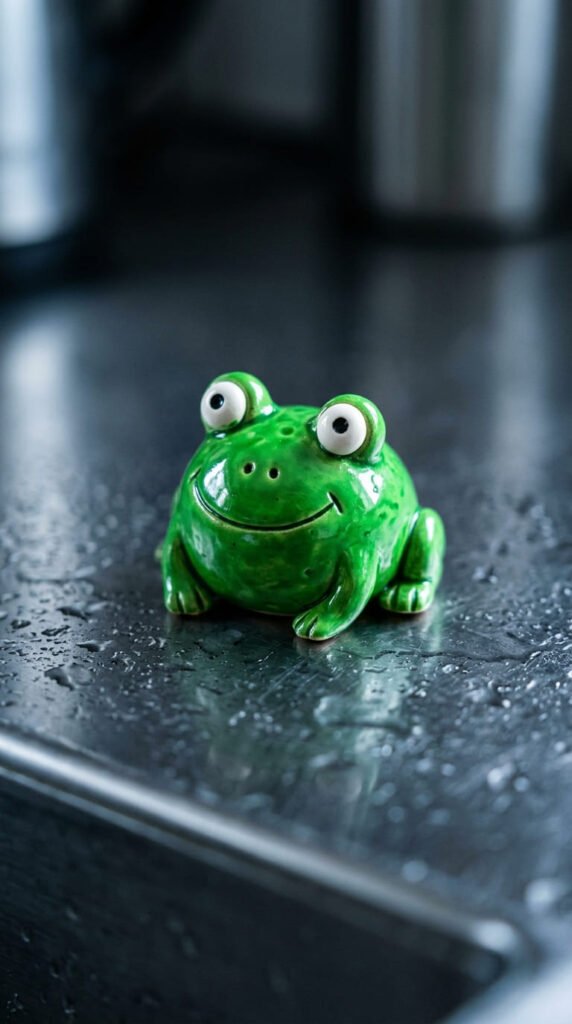
Frogs are silly, green, and almost foolproof. Roll a green ball for the body. Flatten the bottom so it sits. Add two small green balls on top for eyes. Eyes on top make it a frog. Press white circles and dark dots into each eye. Carve a wide smile with a toothpick. A big curve looks the happiest. Add two front legs and two folded back legs. For green on a budget, mix blue and yellow scraps. You skip buying a new block. Bake or air-dry, then glue a magnet on the back. Wait an hour to set. Want shine? A clear gloss makes the frog look wet and real. Brush it on after baking. Kids love the goofy bug eyes. Add a tiny red fly on its nose for a laugh. A lily pad base raises the cuteness. Roll a flat green circle for it to sit on. Make a few for a pretend pond. These always make people smile. A cheerful animal for a rainy craft. Quick and full of charm.
16. Little Pig Magnets

Pigs are round, pink, and full of personality. Roll a pink ball for the head. Add a bigger one for the body. The flat snout makes the pig. A round snout with two dots reads as a pig. Press a small pink circle on the face. Poke two nostril holes with a toothpick. Add two floppy triangle ears. Two dot eyes and a smile finish the face. Roll a thin tail and curl it on the back. For color, mix red and white scraps to get pink. That saves a block. Bake or air-dry, then glue a magnet on the back. Press the belly flat while soft for a steady base. Wait an hour to set. Kids love the curly tail and the snout. The snout is the easiest part to get right. Make a few pigs for a farm set. Add a cow and a sheep to match. These suit a kid’s room or classroom. A cheerful farm friend for the fridge. Cheap, round, and ready in minutes.
17. Ladybug Magnets
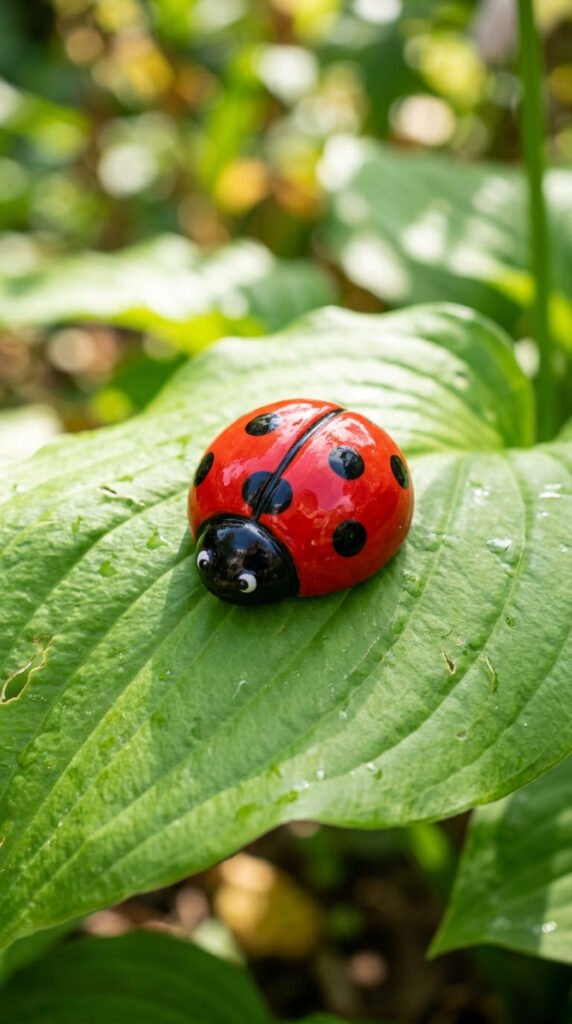
Ladybugs are tiny, bright, and beginner-friendly. Roll a red ball and flatten it into a dome. Add a small black head at one end. Press a line down the middle for the wings. Black dots make the ladybug. Press small black balls onto the red back. Two dot eyes sit on the head. A thin gloss coat makes the shell shine. Brush it on after baking. For color, red and black scraps cover it all. Bake or air-dry, then glue a magnet on the back. Wait an hour to set. Budget tip: ladybugs use tiny bits of clay, so they cost almost nothing. Kids love placing the spots. There is no wrong number of dots. Make a few in red and yellow for variety. Add a green leaf base for each one. These look great in a garden set with bees and flowers. A quick, cheerful bug for the fridge. Younger kids can do most of it. Simple shapes, sweet result, big smiles.
18. Pumpkin Magnets
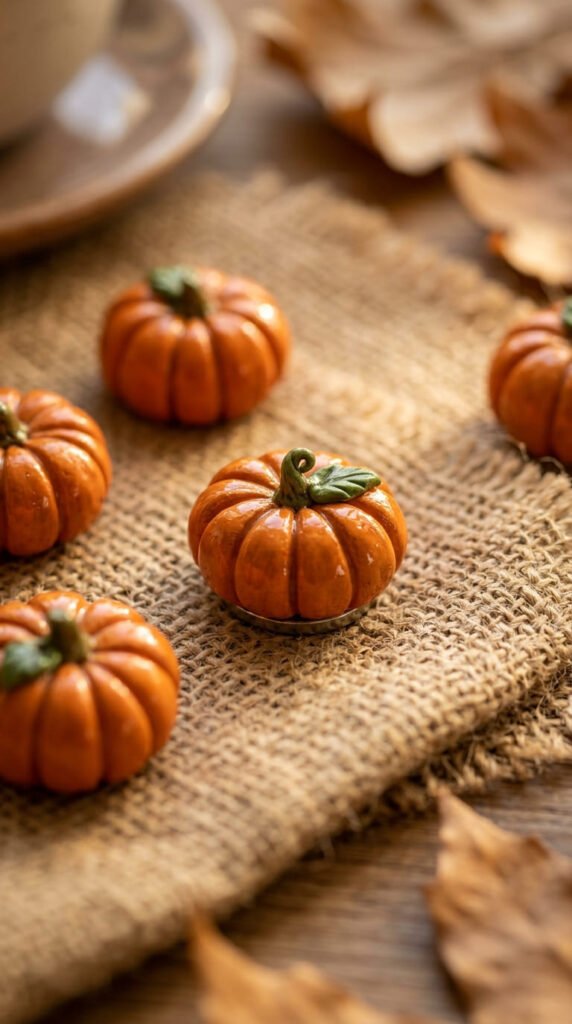
Pumpkins suit fall and a rainy October day. Roll an orange ball. Flatten it slightly into a squat shape. Press ridges down the sides with a toothpick. The ridges make it a pumpkin. Add a small brown or green stem on top. Pinch the stem to a point. For a jack-o’-lantern, carve a face with a toothpick. Two triangle eyes and a zigzag smile look classic. For color, one orange block makes many pumpkins. Mix in a little brown for a deeper shade. Bake or air-dry, then glue a magnet on the back. Wait an hour to set. Budget tip: orange scraps work fine, so save your offcuts. Kids love carving the silly faces. A goofy face beats a scary one for little kids. Make a patch of big and small pumpkins. Add a tiny green vine for detail. These make cute take-home gifts after a party. A seasonal craft that fits the rainy fall mood. Cheap, festive, and quick to make.
19. Snowman Magnets
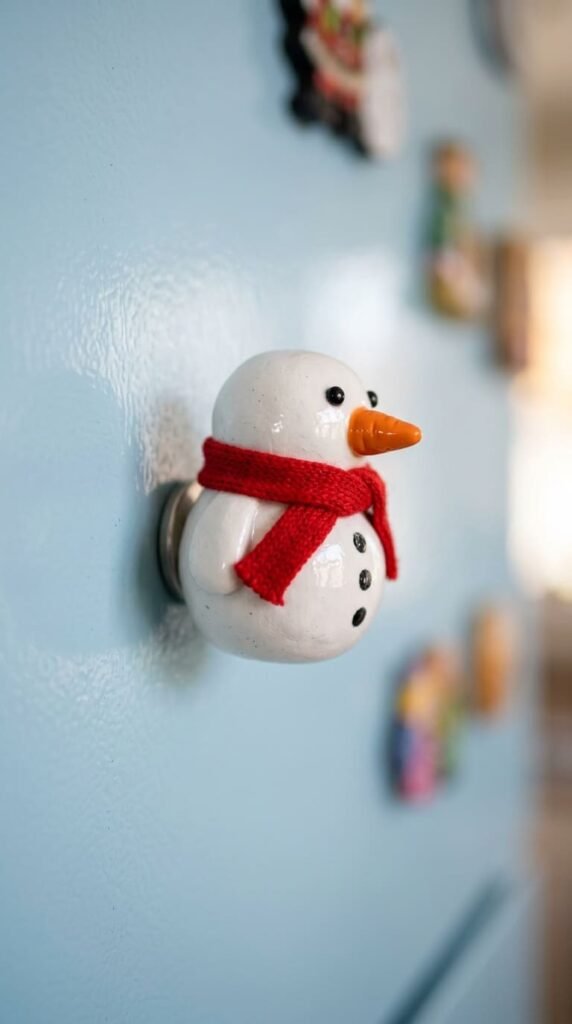
A snowman brings winter cheer to the fridge. Roll three white balls in different sizes. Stack them from big to small. Press them together gently. Three stacked balls make a snowman. Add a tiny orange carrot nose. Two dot eyes and a coal-dot smile finish the face. Press small black buttons down the front. A thin red scarf adds a pop of color. Roll two tiny twig arms from brown clay. For color, white clay is the base. A few scraps cover the rest. Bake or air-dry, then glue a magnet on the back. Press the bottom flat while soft for a steady base. Wait an hour to set. Budget tip: white scraps make many snowmen. Kids love stacking the balls. A wonky snowman looks even cuter. Add a tiny top hat for extra charm. Make a few as winter gifts. These look sweet from December on. A cozy craft for a cold, rainy day. Simple, festive, and fun for all ages.
20. Spring Flower Magnets

Flowers bring spring color to a rainy day. Roll small balls in bright petal colors. Flatten each into a teardrop petal. Arrange five or six in a circle. Petals around a center make the flower. Press a yellow ball in the middle. Poke it with a toothpick for texture. Add a green leaf or two at the side. For a daisy, use white petals and a yellow center. For color, scraps make lovely mixed petals. Bake or air-dry, then glue a magnet on the back. Wait an hour to set. Budget tip: flowers use small bits, so a little clay goes far. Kids love picking each petal color. Mismatched petals look like wildflowers. Make a small bunch in different shapes. Add a thin gloss for a dewy shine. These cheer up any fridge in seconds. Make a set as a gift for mom or a teacher. A simple craft that feels bright and happy. Cheap, colorful, and perfect after the rain.
21. Custom Pet Magnets
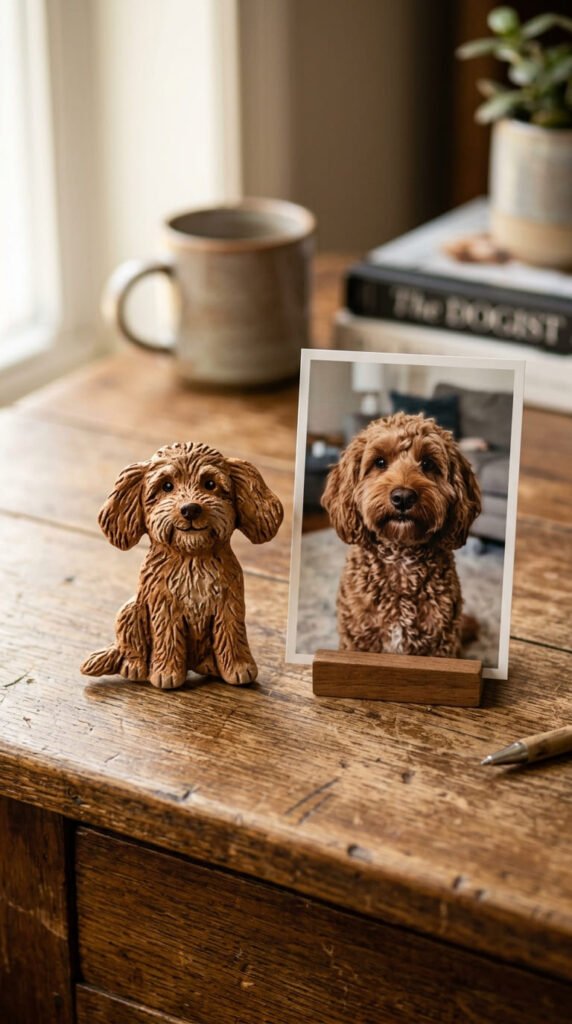
The most loved magnet is the family pet. Find a clear photo of your dog or cat. Match the clay colors to their fur. Roll a head and body in those shades. Add ears, a tail, and any markings. Markings make it look like your pet. A white chest patch or a spotted ear does a lot. Keep the face simple. Two dots and a small nose read as your pet. Drag a toothpick to mark fur direction. For color, mix scraps to match the coat. You rarely need a new block. Bake or air-dry, then paint tiny details like eye color. Glue a magnet on the back and wait an hour. This one means the most as a gift. A pet magnet becomes a little keepsake. Make one for a grandparent who loves the dog. It costs almost nothing but feels priceless. Older kids can sculpt with some help. Take your time on the markings. That is what makes people gasp when they see it.
22. Notepad Holder Magnets
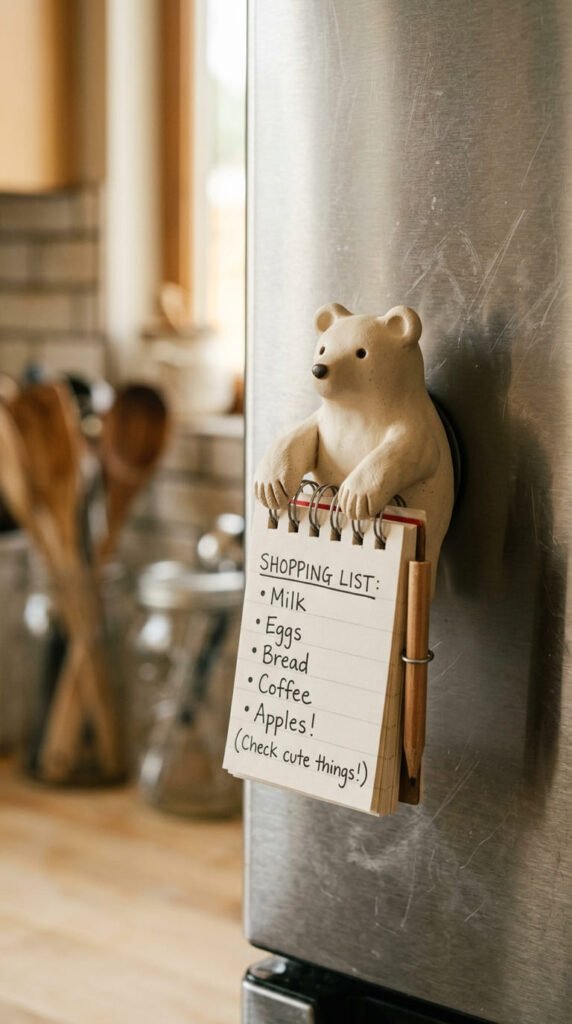
Make a magnet that does a real job. Shape a simple animal with both arms raised. The raised arms hold a notepad or a list. A working magnet earns its spot. Roll the body as normal. Press two arms up and slightly forward. Leave a small gap between the paws and body. A notepad slides into that gap. Use a strong magnet here since it holds weight. For color, any animal you like works. A cream cat or brown bear both look great. Bake or air-dry, then glue a strong magnet on the back. Let it cure a full hour before testing the grip. Budget tip: a mini notepad costs very little, and the holder uses scrap clay. Kids around age six and up can make these. A notepad magnet helps mom remember the shopping. Add a tiny pencil loop for extra use. Make a few in different animals. These make handy gifts that get used daily. A craft with a real purpose. Cute and helpful at once.
23. Foam Clay Cat Costumes
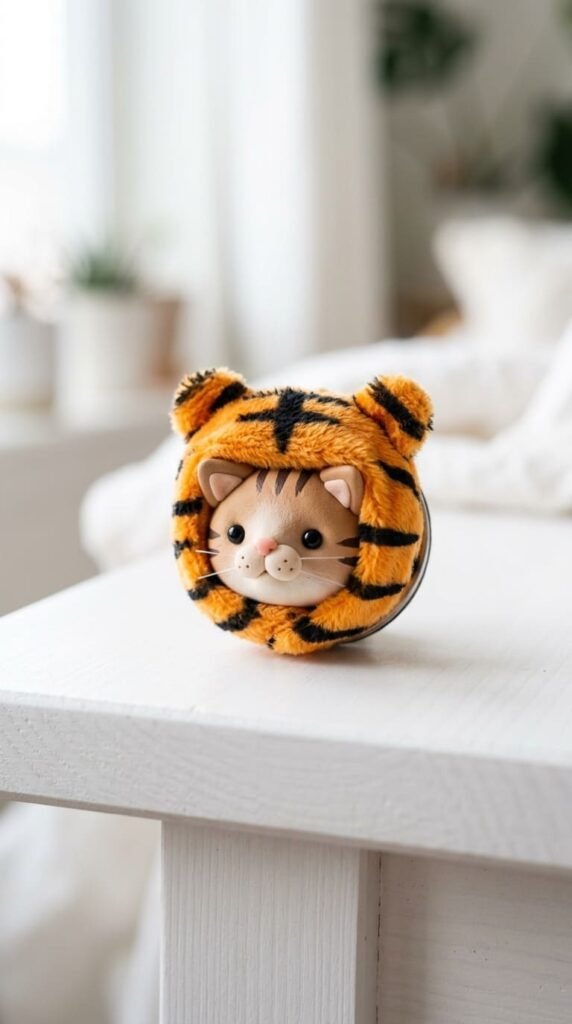
Foam clay is soft, light, and fun to squish. Shape a round cat head from white foam clay. Add two pointed ears and a little face. Now dress it up. A costume hood makes it special. Wrap an orange foam clay layer over the head for a tiger look. Add black stripes on top. Cut tiny holes for the cat ears to poke through. Foam clay dries on its own, so no oven required. Let it dry fully, usually overnight. Glue a magnet on the back once dry. Wait an hour to set. Budget tip: foam clay puffs up, so a small pack stretches far. Kids love the soft, marshmallow feel. Try a unicorn or bear costume too. Mix and match for a whole dressed-up crew. The light weight sticks well with a small magnet. These feel new and playful next to regular clay. A great rainy-day craft for soft little hands. Squishy, cute, and full of imagination.
24. Thumbprint Magnets
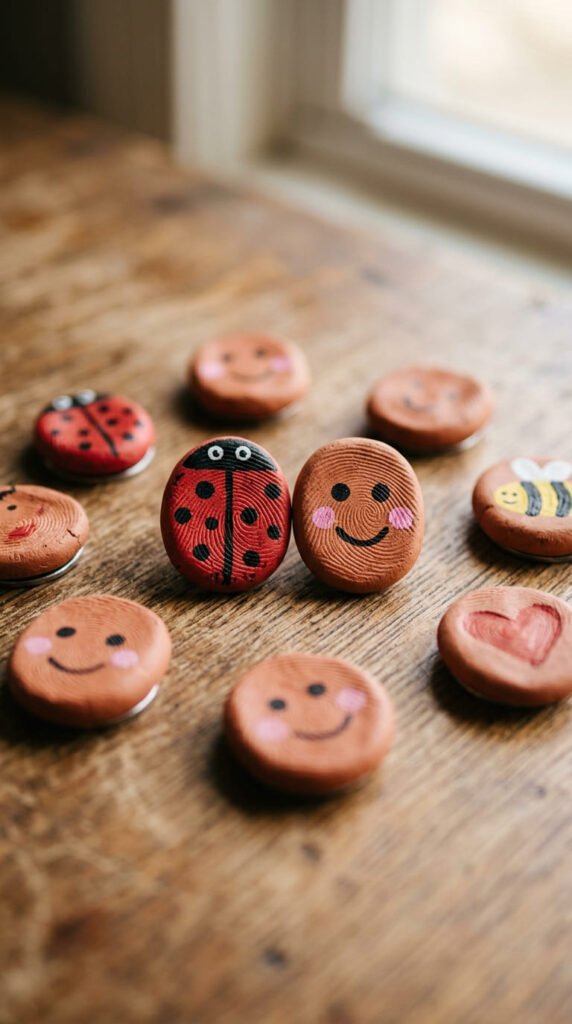
This one saves a keepsake of tiny hands. Roll a flat clay disc. Press a child’s thumb firmly into the center. The print stays in the soft clay. The thumbprint becomes the design. Turn it into a ladybug with painted dots. Or add a face for a little person. A heart shape around the print makes a sweet gift. Air-dry clay works great and skips the oven. Let it dry fully, then paint the details. Stick a magnet button on the back. No glue or oven required. Budget tip: this uses almost no clay and free little thumbs. Make one for each grandparent. A thumbprint magnet captures a moment in time. Date the back so you remember the age. Kids love seeing their own print turn into art. Make a set as a holiday gift from the kids. The personal touch beats anything store-bought. A calm, meaningful craft for the youngest crafters. Cheap, easy, and full of heart.
Conclusion
Rainy days do not have to mean bored kids and screen time. A few dollars of clay turns a gray afternoon into a craft session everyone remembers. You roll, shape, and press. The kids paint, stamp, and giggle. Then the fridge fills up with donuts, frogs, rainbows, and tiny thumbprints. The best part is how forgiving these projects are. Wonky snowmen and lumpy monsters only add to the charm. Air-dry clay keeps things safe for little ones with no oven involved. Cookie cutters and stamps help small hands win on the first try. And keepsake ideas like pet and thumbprint magnets become gifts that families hold onto for years. Start with one easy project, like cherries or a smiley sun, and build from there. Group them into sets for grandparents, teachers, or a younger sibling. Keep the strong magnets away from kids who still mouth toys, and let an adult handle the oven. Other than that, let the kids lead and make a happy mess. Grab a block of clay the next time the rain rolls in. Shape your first magnet together. Then watch a dull afternoon turn into a fridge full of handmade memories.