Learning to crochet feels easier once you see how few stitches you actually need. Most beginner projects lean on a small handful of moves you can practice in an afternoon. A blanket, a scarf, a cozy hat, even a little granny square all start with the same building blocks. Grab a 5mm hook and a ball of worsted weight yarn, and you can work through every stitch below. Here are 20 simple crochet stitches worth trying, ordered from the smallest to the more playful textured ones.
1. Chain Stitch (ch)
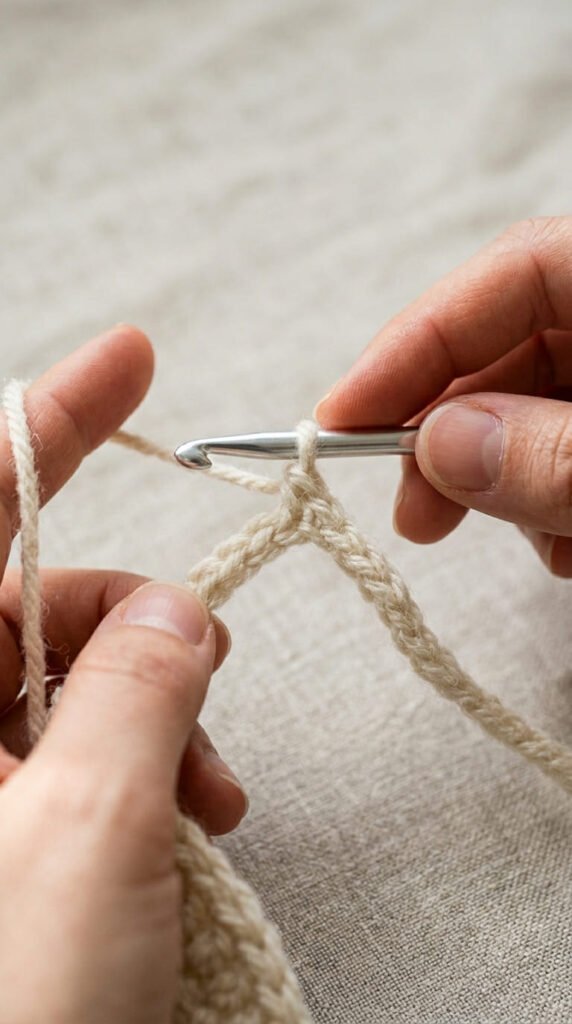
The chain is where every project begins. Think of it as the foundation under your stitches.
Start with a slip knot on your hook. Wrap the yarn over, then pull it through the loop. That’s one chain. Repeat until you have a row.
Keep your chains loose. Tight chains make the first row hard to work into. A relaxed grip helps a lot.
Practice a chain of 10 or 11 first. It’s short, quick, and lets you find your rhythm without wasting yarn.
Budget tip: use a cheap acrylic yarn for practice chains. Save the soft cotton for your real project once your hands feel steady.
2. Slip Stitch (sl st)
The slip stitch is the shortest stitch you’ll learn. It barely adds height, which makes it perfect for joining.
Insert your hook into a stitch. Yarn over. Pull the yarn through both the stitch and the loop on your hook in one motion. Done.
You’ll use this to close a round into a circle or to move across stitches without bulk.
It’s also great for neat edges. A row of slip stitches gives a tidy, finished border.
Try joining a chain into a ring with a slip stitch. That ring becomes the start of hats, coasters, and granny squares.
DIY idea: make a simple yarn ring keychain in five minutes using a chain and one slip stitch join.
3. Single Crochet (sc)
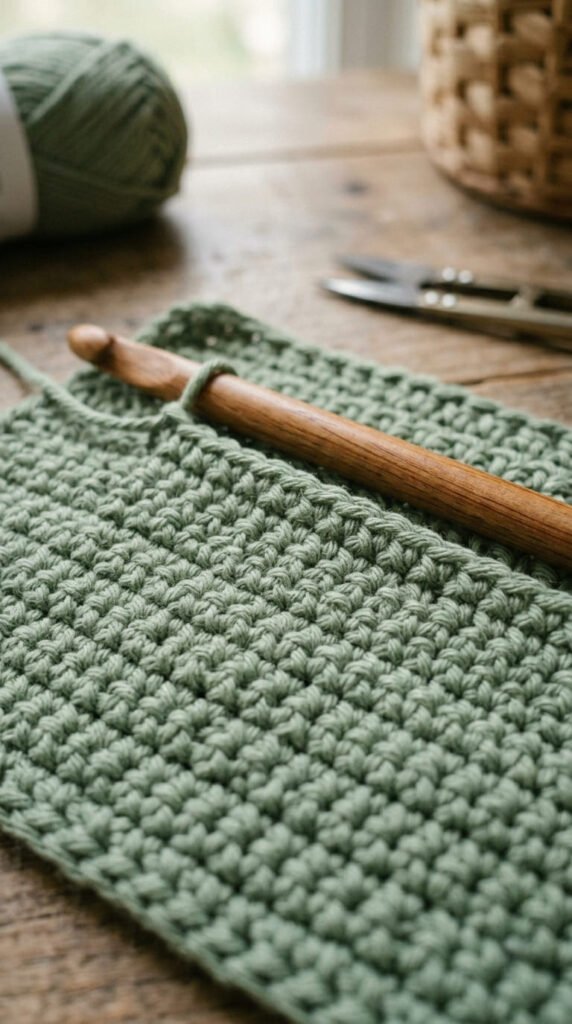
Single crochet is the workhorse of beginner projects. It makes a tight, sturdy fabric.
Insert your hook into the next stitch. Yarn over and pull up a loop. Now you have two loops on your hook. Yarn over again and pull through both.
That’s it. Short, simple, repeatable.
Use it for washcloths, coasters, and amigurumi toys. The tight stitch hides stuffing well.
Count the little V shapes along the top to track your stitch number. This habit saves you from lopsided rows.
Cheap project idea: a single crochet dishcloth uses one ball of cotton yarn and teaches you clean, even rows for under a couple of dollars.
4. Half Double Crochet (hdc)
Half double crochet sits between single and double crochet in height. It works up faster than single crochet but stays cozy and warm.
Yarn over first. Then insert your hook into the stitch. Yarn over again and pull up a loop. Now you have three loops on your hook. Yarn over once more and pull through all three.
This stitch is a favorite for hats and baby blankets. It’s warm without being stiff.
The extra third loop along the top is handy for ribbing later on.
Practice tip: work a small hdc square. It grows quickly, which keeps motivation high when you’re starting out.
5. Double Crochet (dc)
Double crochet is the most popular tall stitch. It builds fabric fast and looks light and open.
Yarn over. Insert your hook. Yarn over and pull up a loop. You now have three loops. Yarn over and pull through two. Yarn over and pull through the last two.
Tall stitches mean quicker projects. A double crochet scarf can come together in a weekend.
At the start of each row, a chain of three often stands in for your first double crochet.
Budget DIY: a striped double crochet scarf using leftover yarn scraps costs almost nothing and uses up your stash.
6. Treble Crochet (tr)

Treble crochet, sometimes called triple crochet, is the tallest of the basic stitches. It creates a loose, lacy fabric.
Yarn over twice before inserting your hook. Pull up a loop, then work off two loops at a time until one remains.
It takes a moment longer, but the height is worth it.
Use it for summer shawls and breathable wraps. The open gaps keep things light.
This stitch shows up often in lace patterns and decorative borders.
Try a quick treble crochet swatch to feel the rhythm of the extra wraps. Once it clicks, taller stitches stop feeling tricky.
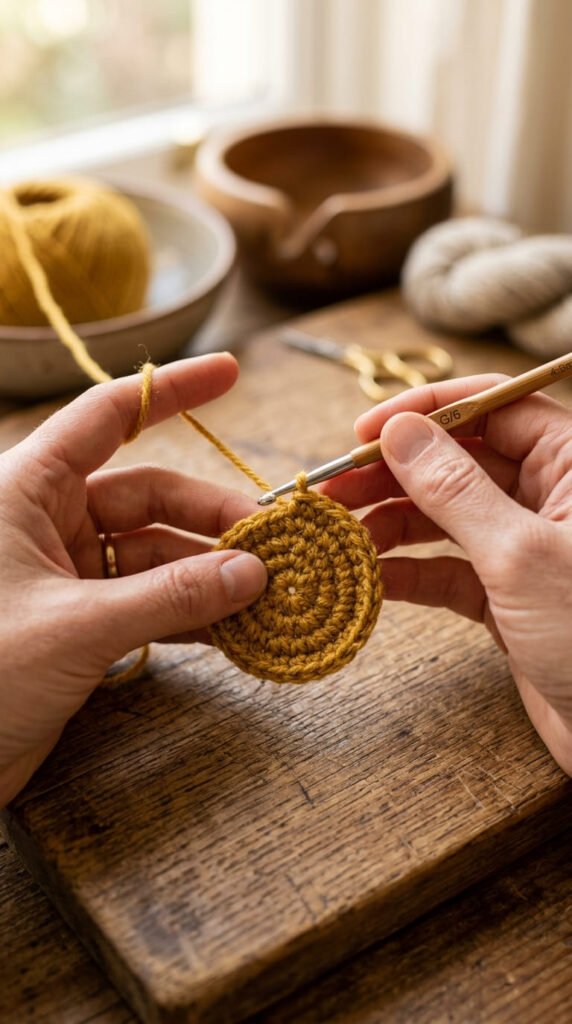
7. Increase (inc)
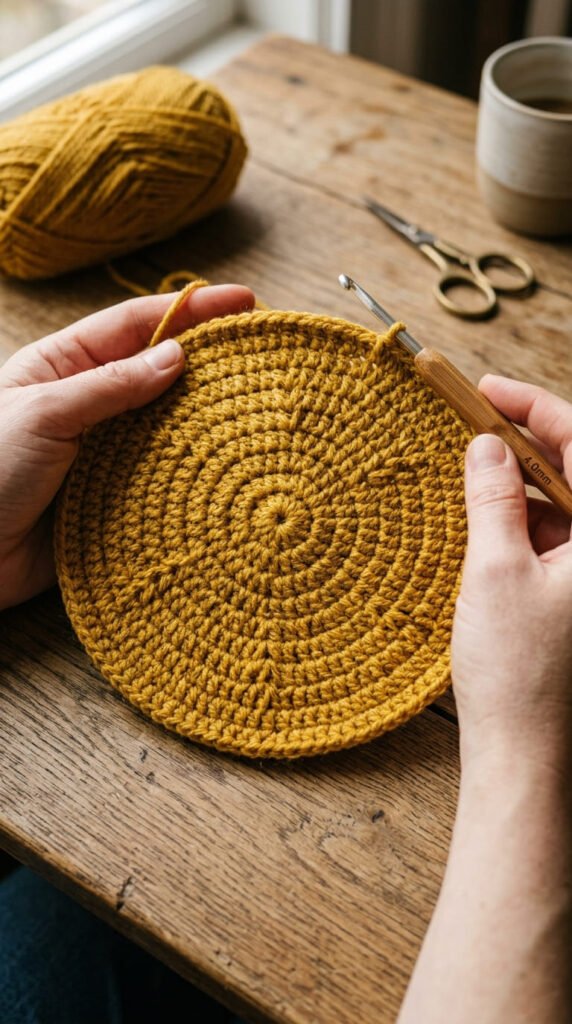
An increase adds stitches to make your fabric wider. It’s how flat circles and shaped pieces happen.
The simplest version: work two single crochets into the same stitch. That’s one increase.
This single move turns a flat row into a growing circle. Hats, baskets, and toys all rely on it.
Space your increases evenly so the fabric lies flat instead of ruffling.
DIY idea: a small crochet coaster starts with a ring and a few rounds of increases. It’s a fast, cheap way to practice shaping.
Count after each round. Even increases keep your circle smooth and even.
8. Decrease (sc2tog)

A decrease removes stitches so your fabric gets narrower. It’s the opposite of an increase.
The common form is “sc2tog,” which means single crochet two together. You work two stitches into one combined stitch.
Pull up a loop in the first stitch. Pull up a loop in the next. Then yarn over and pull through all loops at once.
This shapes the top of hats and the body of stuffed toys. It’s gentle and easy.
Pair it with increases to make rounded shapes like balls and bowls.
Practice swatch: make a small triangle by decreasing one stitch at the start of each row. It’s a quick win.
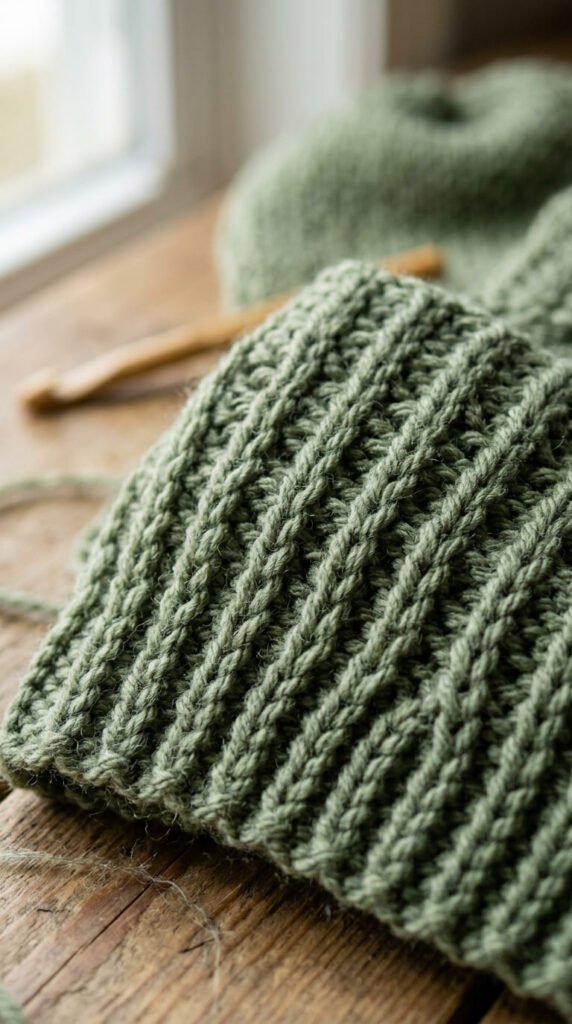
9. Back Loop Only (BLO)
Working in the back loop only changes the texture of any stitch. It adds stretch and soft ridges.
Normally you crochet under both top loops. For BLO, you skip the front loop and work only into the back one.
This creates a ribbed, springy fabric. It’s wonderful for hat brims and sweater cuffs.
The leftover front loops form neat horizontal lines along the surface.
Try a single crochet BLO band. Worked sideways, it makes a stretchy headband from one short ball of yarn.
Cheap idea: turn a leftover yarn scrap into a ribbed ear-warmer in an evening. It uses very little material.
10. Front Loop Only (FLO)
Front loop only is the mirror of BLO. You work into the front loop and leave the back one untouched.
The result is a softer, looser ridge with a subtle wave.
It’s lovely for textured scarves and decorative rows. The fabric feels relaxed and drapey.
The skipped back loops can even hold a second row of stitches later, which is how some 3D effects are made.
Mix FLO and BLO rows to see how different each one feels. It’s a fun, no-cost experiment with the same ball of yarn.
Practice swatch: alternate a normal row with an FLO row. The change in texture is easy to spot.
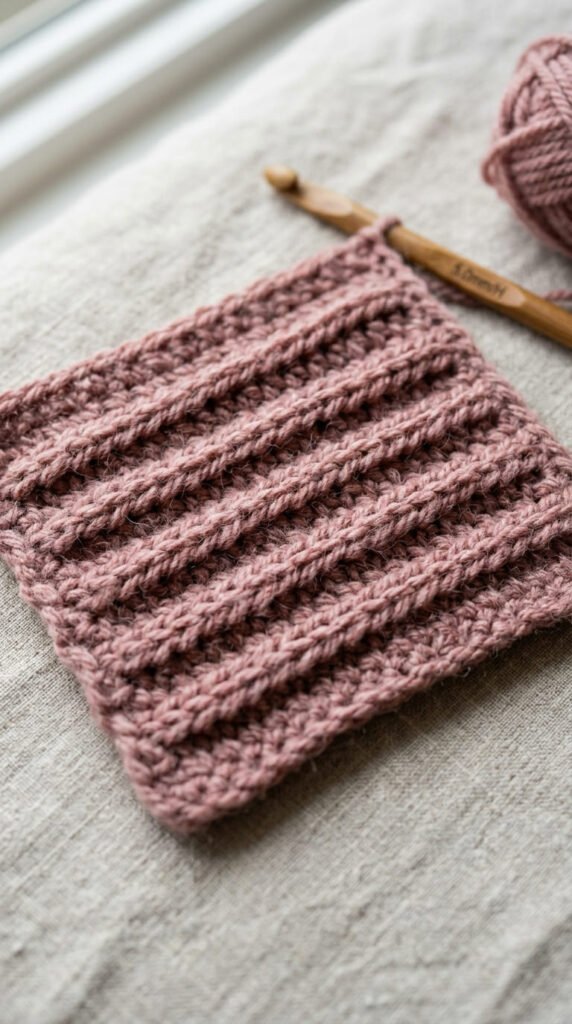
11. Front Post Double Crochet (FPdc)
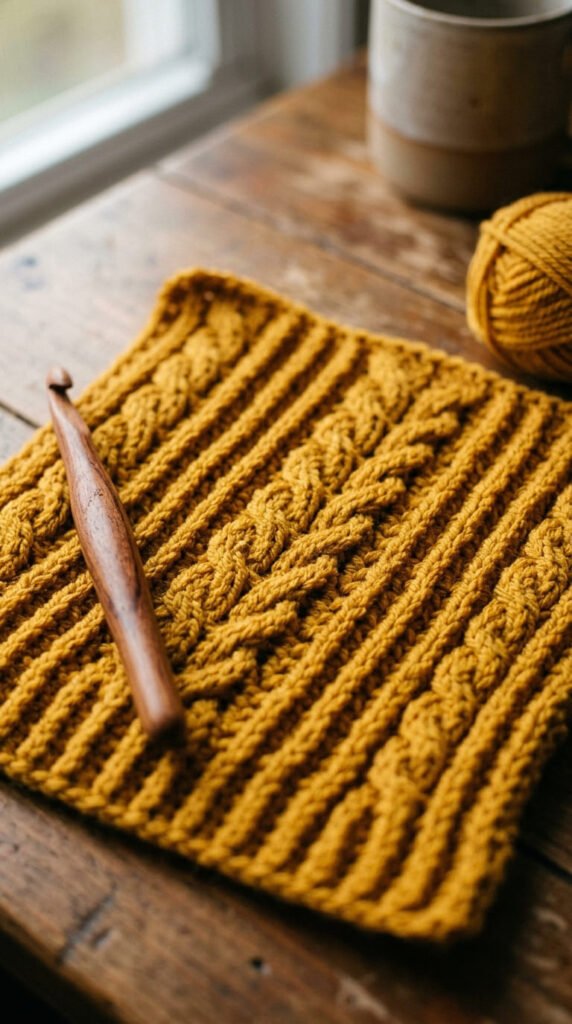
Front post stitches wrap around the body of a stitch instead of its top. They create raised, sweater-like ribbing.
For a front post double crochet, you insert your hook from front to back around the post of the stitch below, then complete a normal double crochet.
This makes cozy, defined ridges. It looks like knitting and feels thick and warm.
It’s the secret behind ribbed beanies and chunky cardigans.
Pair it with the back post version for full ribbing.
DIY idea: a textured cup cozy uses just a few post stitches and a small amount of yarn. It’s a quick, useful gift.
12. Back Post Double Crochet (BPdc)
Back post double crochet is the partner of the front post stitch. It pushes the stitch backward instead of forward.
You insert your hook from back to front around the post, then finish a double crochet as usual.
Alternating front and back post stitches makes true ribbing. That’s the stretchy, bumpy texture on hat brims.
The two stitches together give your work depth and bounce.
Don’t worry if the first few feel awkward. Your hook finds the rhythm after a row or two.
Practice tip: work one row of FPdc and BPdc across a small swatch. The ribbed look appears right away and feels rewarding.
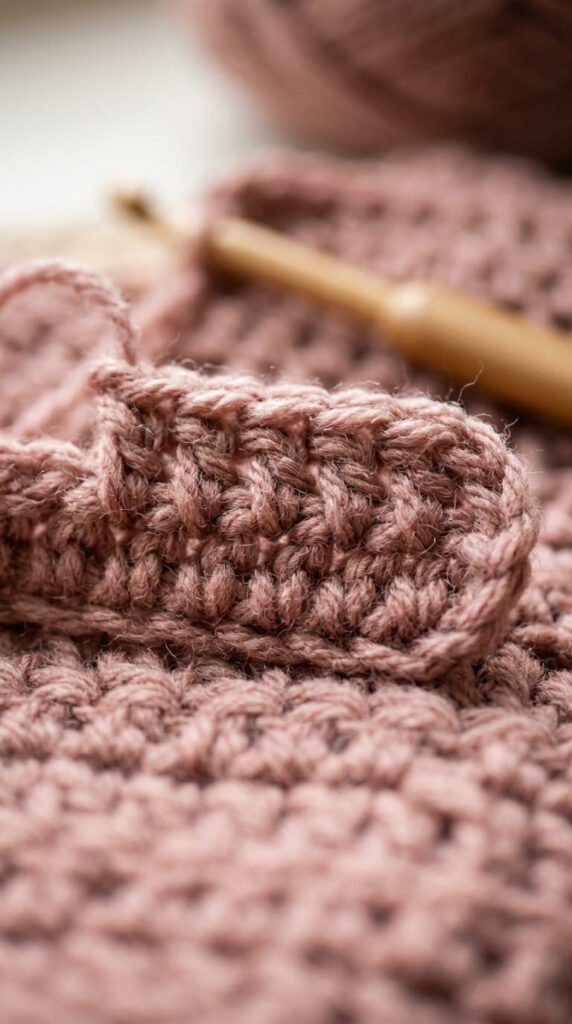
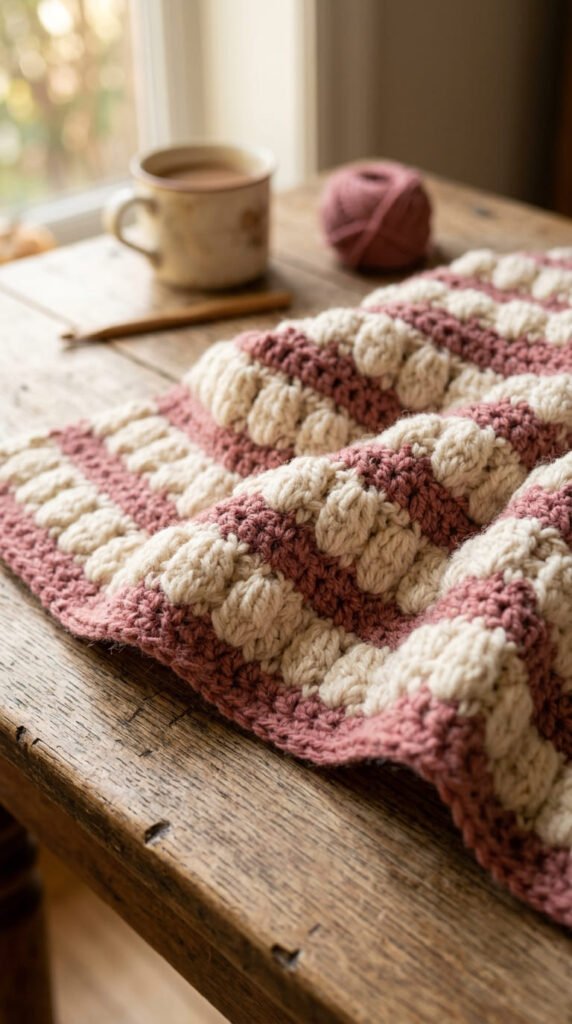
13. Puff Stitch
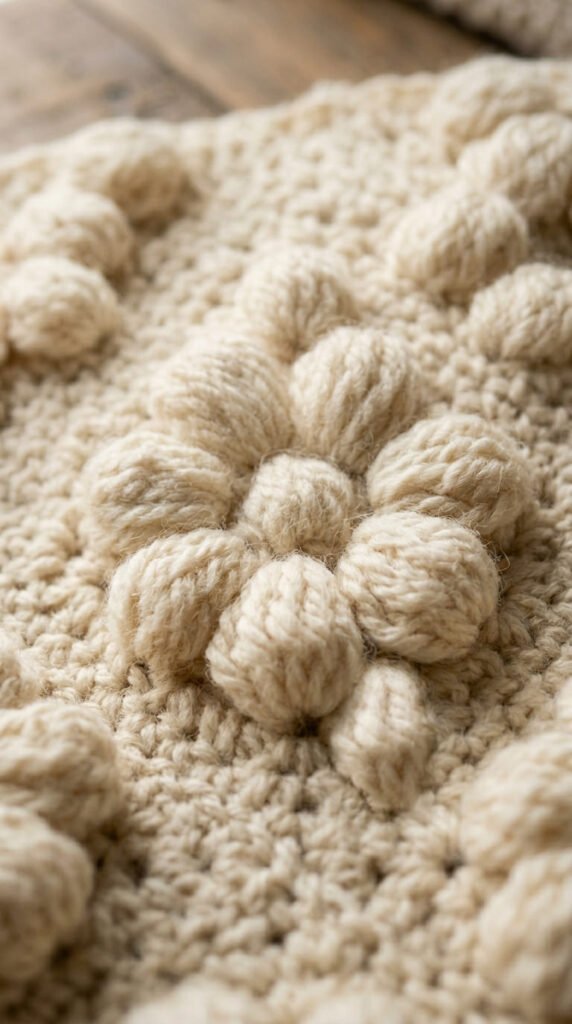
The puff stitch is soft, round, and full of texture. It looks like a little cushion sitting on your fabric.
You yarn over and pull up several tall loops in the same stitch without finishing them. Then you gather all the loops together at once.
The result is a plump, squishy bump. It adds warmth and a cozy feel.
Puff stitches are great for baby blankets and pillows.
Keep your loops the same height so each puff looks even.
DIY idea: a puff stitch coaster uses a small amount of yarn and shows off the texture. It’s a fun way to practice gathering loops.
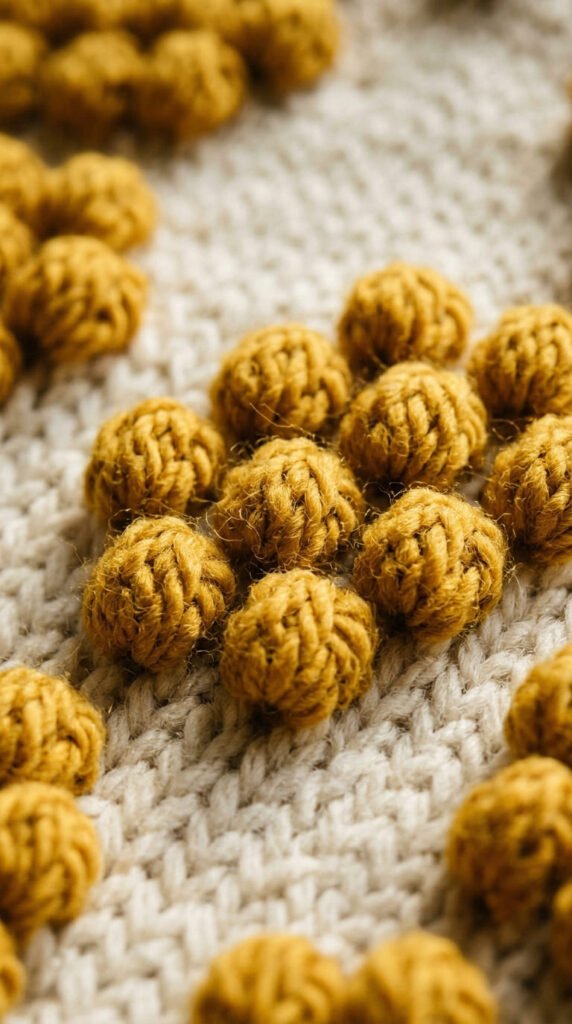
14. Bobble Stitch
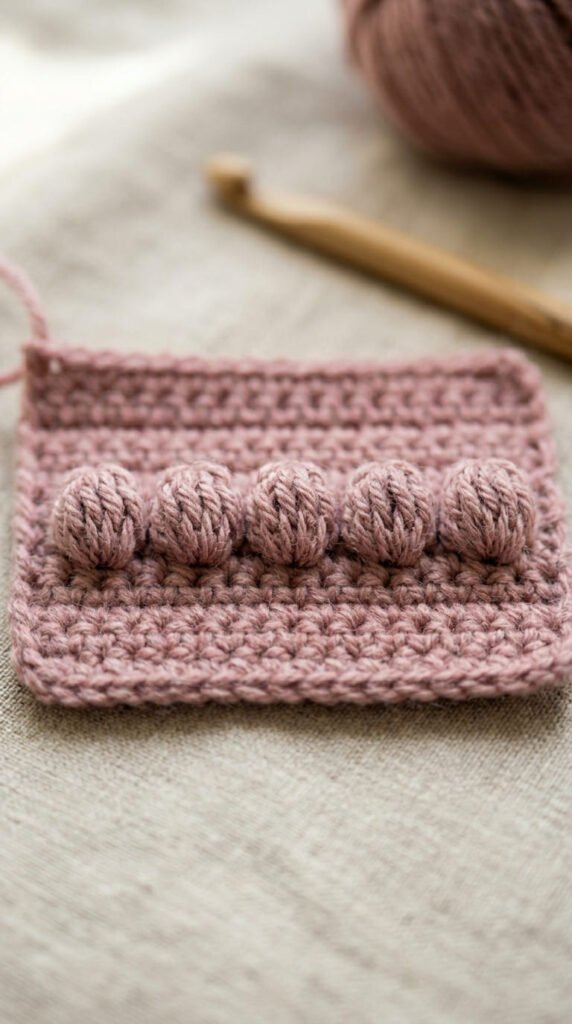
The bobble stitch is a close cousin of the puff. It forms a firm, rounded bump that pops off the surface.
You work several double crochets into one stitch, leaving the last loop of each on your hook. Then you pull through them all together.
Bobbles make playful, dotted patterns. Kids’ blankets and textured cushions love them.
Worked on the wrong side, they push forward and stand tall.
Space them out for polka dots, or cluster them for thick texture.
Cheap project: a bobble stitch washcloth uses one ball of cotton and turns a plain square into something with real character.
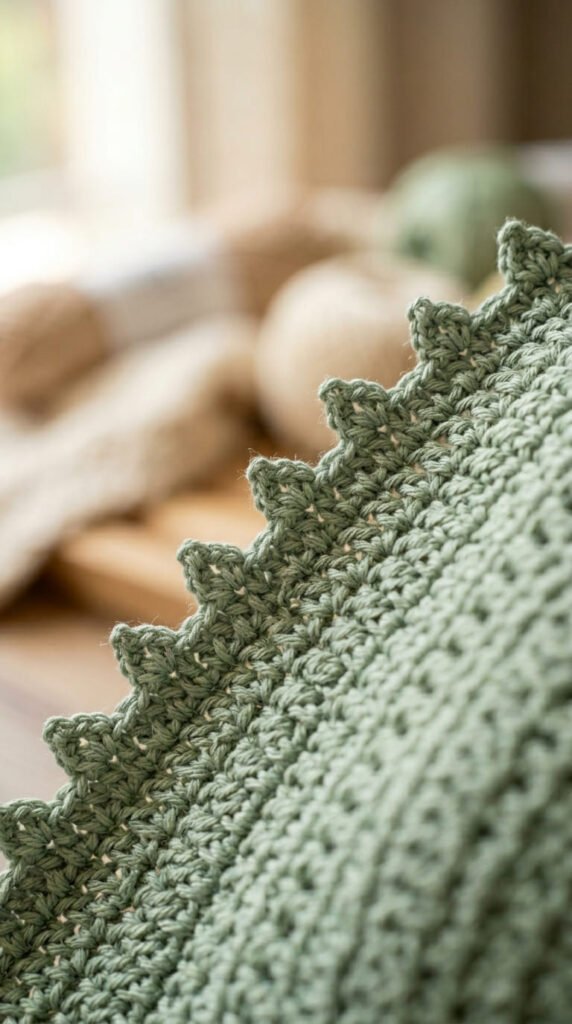
15. Shell Stitch

The shell stitch fans out like a seashell. It’s pretty, fast, and beginner-friendly.
You work several double crochets into the same stitch, which spreads them into a curved fan shape.
A row of shells creates a soft, scalloped edge. It looks fancy but uses only basic stitches.
Shells are popular for blanket borders and lacy shawls.
Once you space them evenly, the pattern almost works itself.
DIY idea: add a single row of shell stitches to the edge of a plain scarf. It dresses up a simple project without extra cost or new skills.
16. Popcorn Stitch
The popcorn stitch is bold and chunky. It pops up even more than a bobble.
You crochet a group of double crochets into one stitch, remove your hook, then reinsert it into the first stitch of the group and pull the last one closed.
This makes a tight, dimensional pop. It’s perfect for statement designs.
Popcorn stitches work well as decorative accents rather than whole rows.
Use them sparingly so your fabric stays flexible.
Practice swatch: scatter a few popcorn stitches across a plain square. They turn flat work into something with bounce and fun.
17. Picot Stitch
The picot stitch is a tiny decorative loop. It dots edges with little points.
You chain three, then slip stitch back into the base to make a small bump.
Picots are perfect for finishing borders. They add a delicate, handmade touch.
You’ll see them on doilies, baby clothes, and lacy trims.
They use almost no yarn, so they’re a thrifty way to add detail.
DIY idea: edge a plain washcloth or napkin with a row of picots. The tiny loops make a basic project look polished and gift-ready in minutes.
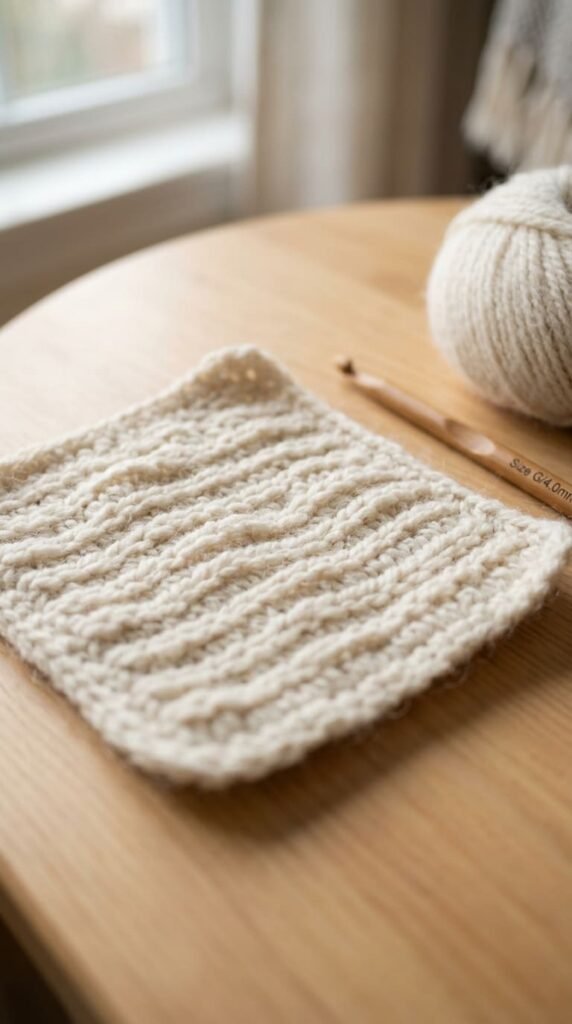
18. Prairie Stitch
The prairie stitch is a simple two-row repeat. It mixes half double crochet and single crochet for a pretty, woven look.
You work one row of half double crochets, then a row that combines short and tall stitches.
The repeat is easy to memorize. That makes it great for relaxed, mindless crocheting.
It creates soft texture without any fancy techniques.
Scarves and baby blankets suit this stitch well.
Budget idea: a prairie stitch scarf uses one or two balls of yarn. The simple repeat means you can work on it while watching TV without losing your place.
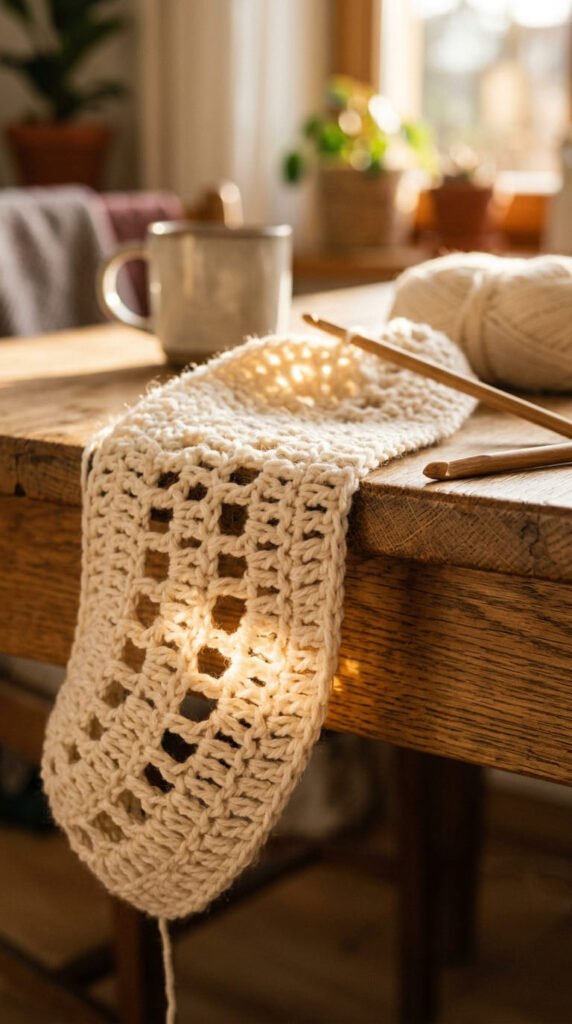
19. Moss Stitch (Linen Stitch)
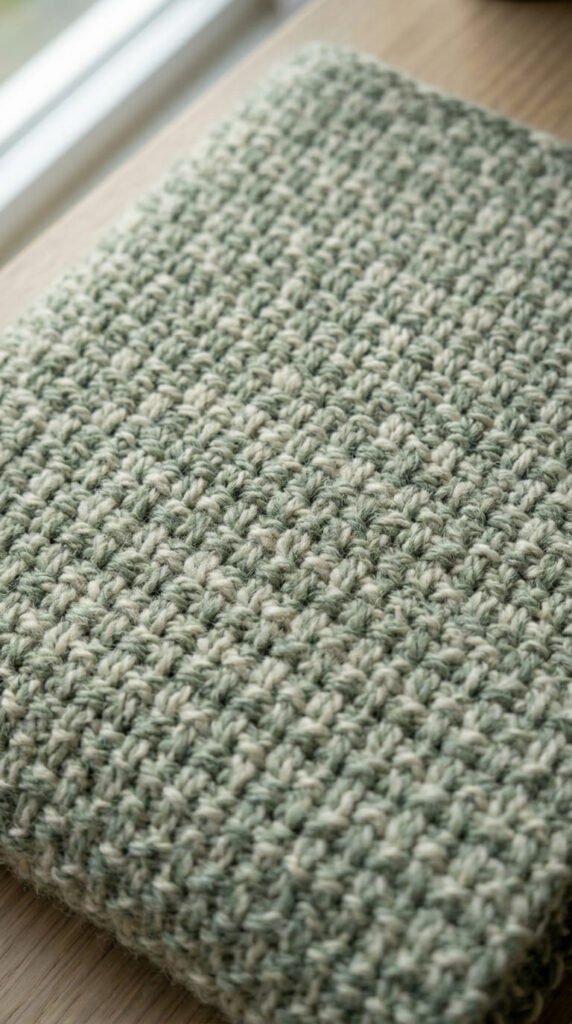
The moss stitch, also called the linen stitch, looks woven and modern. It mixes single crochets and chains.
You alternate a single crochet, a chain, then skip a space, across the row.
The fabric stays flat and tidy. It drapes beautifully for scarves and bags.
It also hides yarn changes well, which makes color stripes look clean.
The simple repeat is easy once you find the rhythm.
DIY idea: a moss stitch market bag uses sturdy cotton and a basic two-step pattern. It’s useful, washable, and cheap to make from one ball of yarn.
20. Granny Square Cluster
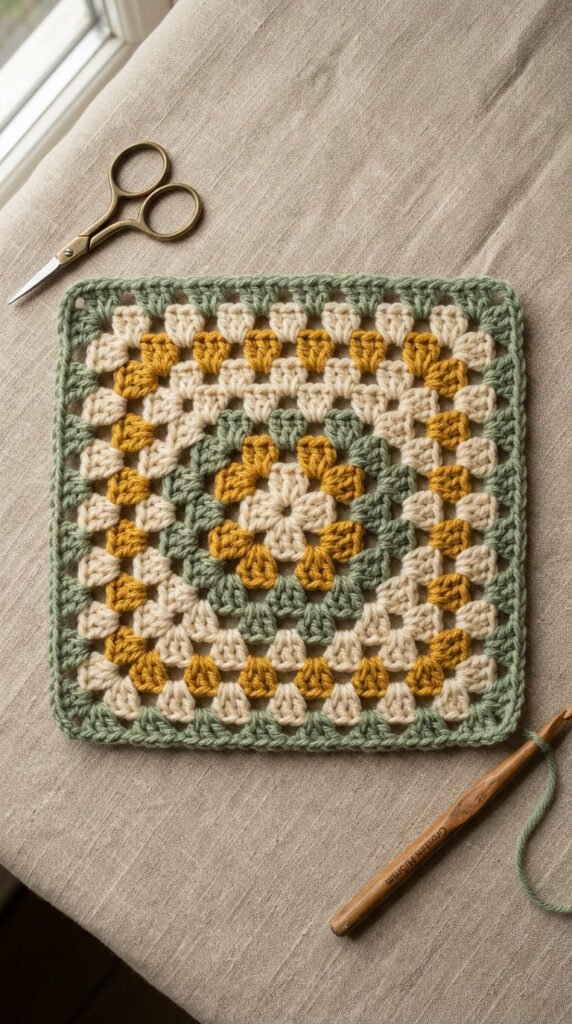
The granny square cluster is the heart of the famous granny square. It’s a small group of double crochets worked together with little gaps.
You crochet three double crochets, chain one, then repeat around a center ring, building outward in rounds.
This is the classic motif behind blankets and bags. It’s beginner-friendly and endlessly repeatable.
Each square uses small amounts of yarn, so leftovers find a home.
Join finished squares to make anything from coasters to full throws.
Thrifty project: turn odd scraps into a patchwork granny square blanket over time. One square a day adds up fast and costs next to nothing.
Conclusion
These 20 stitches cover almost everything a beginner runs into. Start small with the chain and slip stitch, work your way up through single and double crochet, then play with texture once your hands feel sure. Each stitch above pairs with a cheap, quick project, so you can practice while making something real. Pick one stitch today, grab a spare ball of yarn, and make a small swatch. Your skills grow one loop at a time, and the only way to get comfortable is to keep your hook moving. Save this list, work through it stitch by stitch, and soon you’ll read any beginner pattern with confidence.