Small clay sculptures are the perfect craft when you don’t have much room or much cash. They take a tiny lump of clay, a free afternoon, and almost no special tools. Polymer clay is the easiest to start with, but air dry clay works great too. Whether you want a cute desk decoration, a handmade gift, or a little shelf accent, there’s something here for you. Each idea is beginner-friendly, budget-conscious, and small enough to finish in one sitting. Grab some clay and let’s make 22 little things you’ll love.
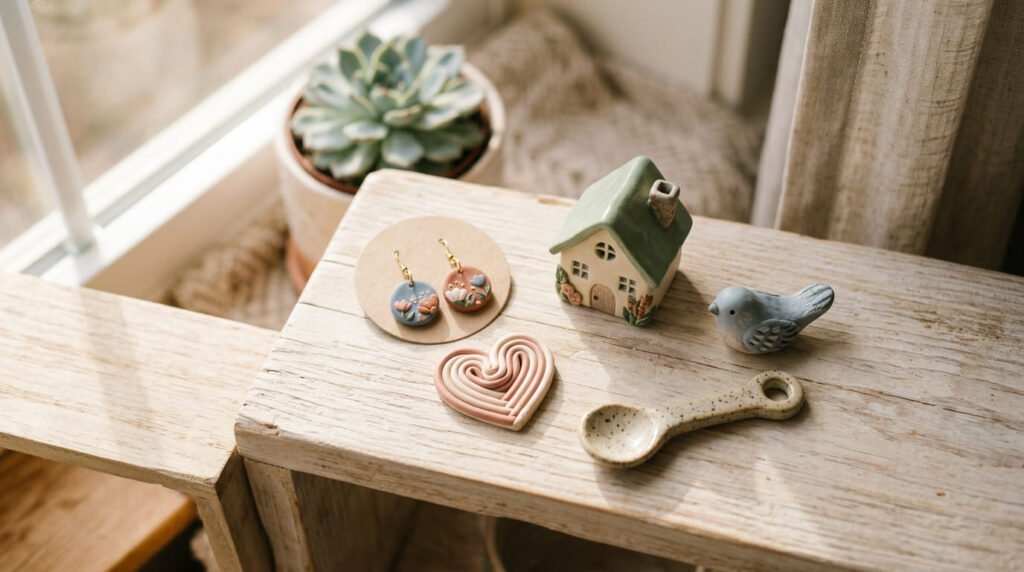
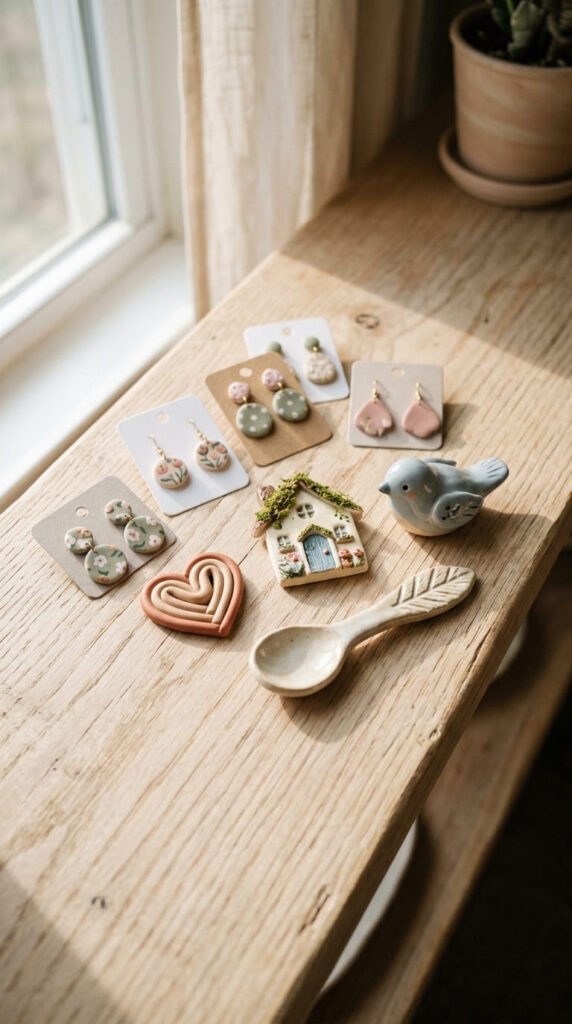
1. Custom Sculpted Earrings
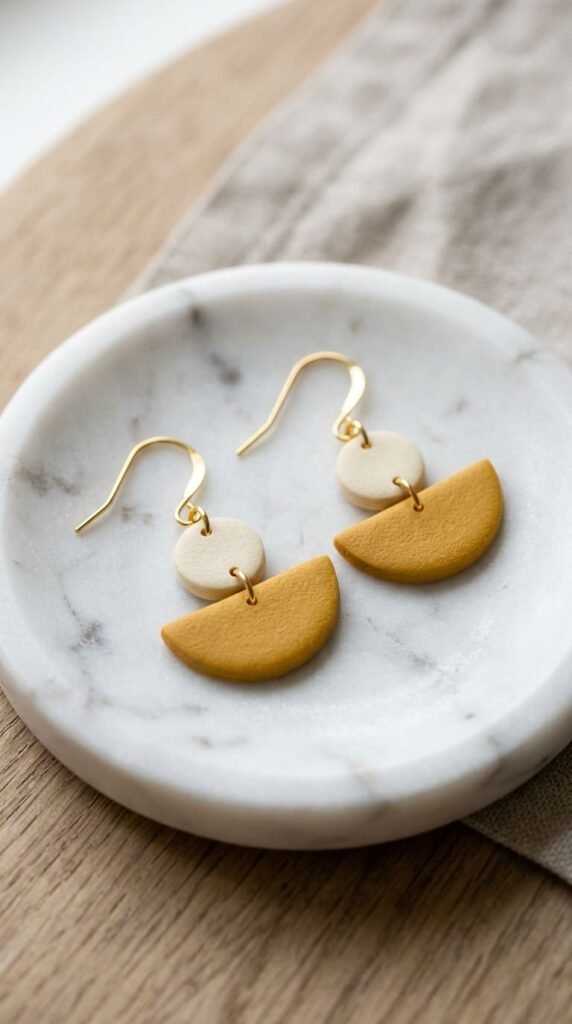
Earrings are the easiest small project to start with. They use barely any clay.
Roll the clay thin, about an eighth of an inch. Thinner means lighter on your ears.
Cut simple shapes. Circles, arcs, and triangles all look modern.
Poke a hole at the top before the clay dries or bakes. That’s where the hook attaches.
Budget tip: A pack of earring hooks costs a couple of dollars and makes dozens of pairs.
Once hardened, sand any rough edges smooth.
Hand-paint them, or leave the clay color natural with a clear seal.
Attach the hooks with a small jump ring.
Mix and match colors for a custom set. No two pairs have to look alike.
These also sell well at markets. A pair takes minutes to make and costs almost nothing in materials. Make a little collection and store them in a tiny dish on your dresser.
2. Alphabet Fridge Magnets
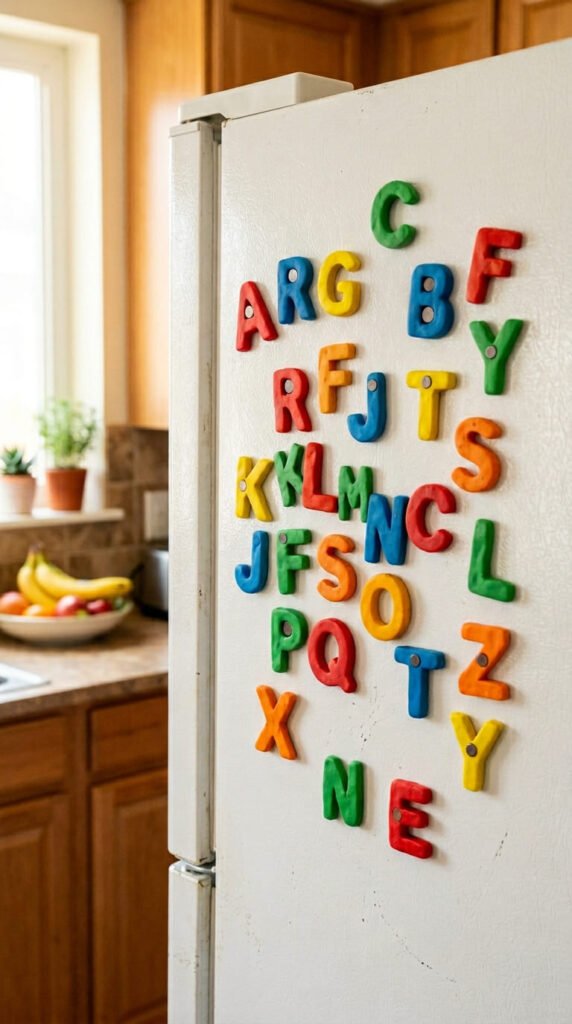
Letter magnets are functional and cute. Parents and teachers love them.
Roll out the clay flat. Cut letters freehand with a knife, or use small letter cutters.
Keep them chunky so they hold up over time.
Let them dry or bake, then paint each one a bright color.
Budget tip: Hot glue a small magnet disc to the back. A bag of craft magnets costs about two dollars.
Make sure the magnet is strong enough to hold the letter on the fridge.
Spell a kid’s name for a personal gift.
These double as a fun way to teach little ones their letters.
Keep the shapes simple and bold. Thin letters snap easily.
A full alphabet set looks playful on any fridge and costs almost nothing to make.
3. Coil Heart Decoration
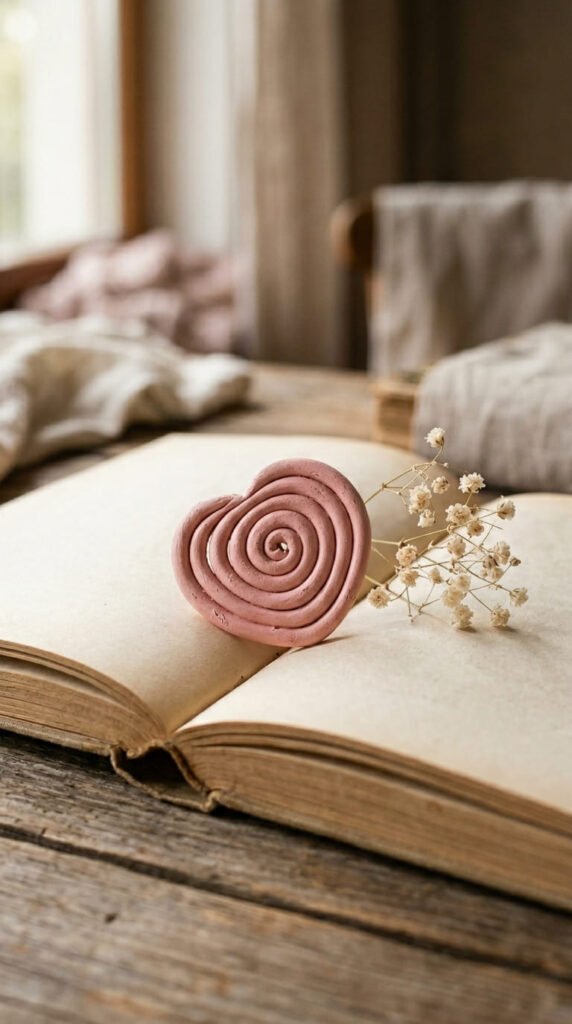
Coil hearts are quick, sweet, and great for all ages.
Roll a long, thin snake of clay. Think of a clay spaghetti strand.
Curl it into a heart shape. Start with two spirals at the top that meet in a point at the bottom.
Press the coils together gently so they stick.
Budget tip: One small piece of clay makes several hearts, so the cost is basically nothing.
Smooth the front if you like, or leave the coil texture for charm.
Let it dry flat so it stays even.
Paint it red, pink, or leave it natural.
Poke a hole at the top to hang it as an ornament.
These shine around Valentine’s Day. Make a batch as little love notes for friends and family. They take about five minutes each.
4. Tiny Fairy House
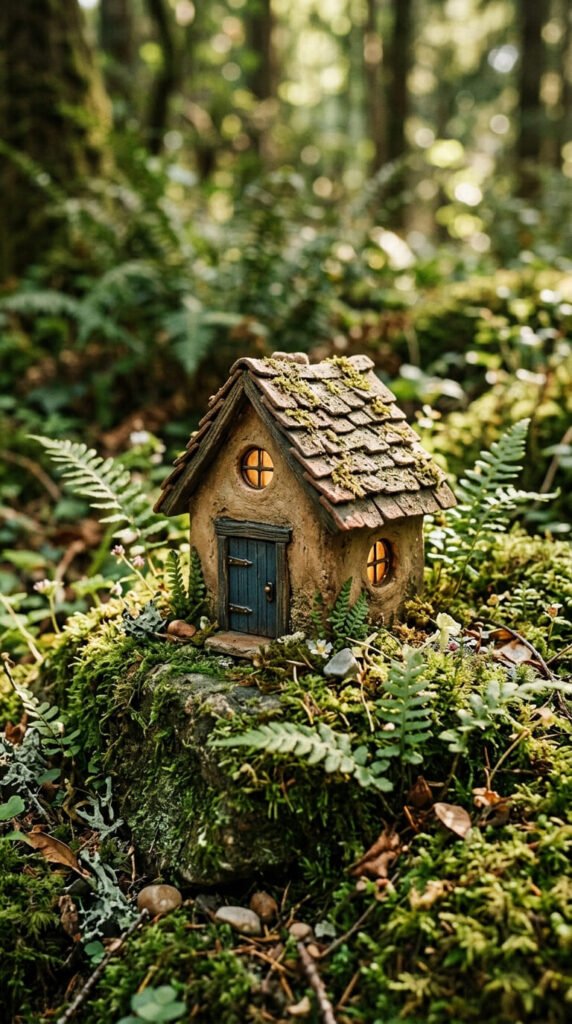
A tiny house is the dream project for fantasy lovers.
Shape a small block of clay into a little cottage. A cube with a triangle roof works perfectly.
Press a door and round windows with the tip of a knife.
Add texture to the roof by pressing lines or scale shapes.
Budget tip: Use a toothpick and a pencil tip as your only tools.
Keep it small enough to sit between books or on a windowsill.
Let it harden, then paint it in soft storybook colors.
Add a tiny chimney for extra charm.
Make a haunted version for Halloween or a snowy one for Christmas.
These look magical tucked among houseplants or on a shelf. Build a whole tiny village over a few sittings.
5. Clay-Covered Pen
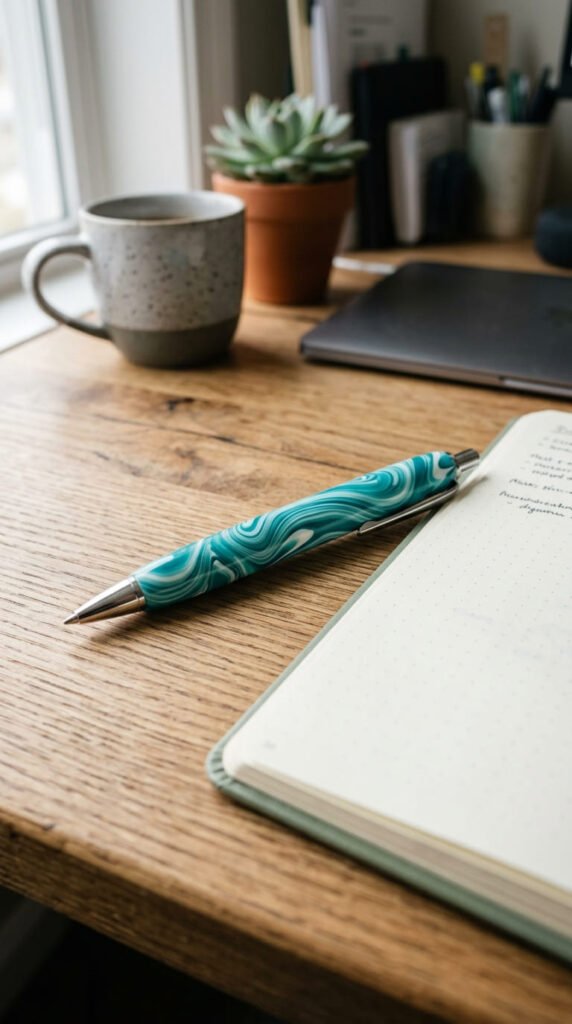
A decorated pen is a small desk accessory that feels custom.
Take a cheap plastic pen. Press a thin layer of clay around the barrel.
Smooth it with your fingers until it’s even.
Carve patterns into the soft clay. Swirls, dots, or stripes all work.
Important: For polymer clay, remove the ink cartridge before baking, since heat can damage it.
Budget tip: Use pens you already own. This costs only the clay.
Let it harden or bake per the clay instructions.
Slide the ink cartridge back in.
These make great little gifts for the office or for teachers.
Keep one on your desk for a handmade touch every time you write. A small project with a big personality.
6. Eclectic Ceramic Spoon
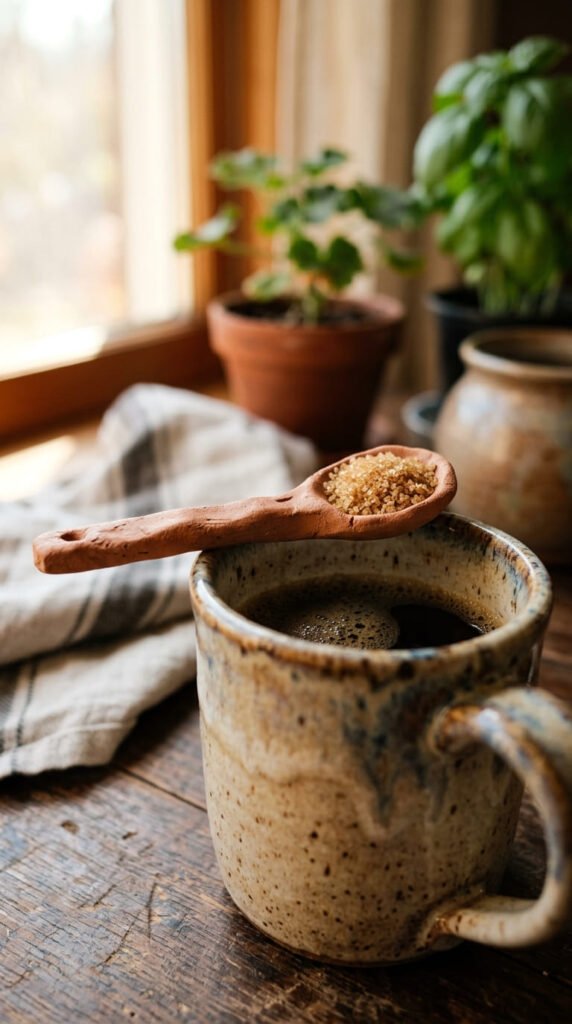
A handmade spoon has a funky cottage feel that store-bought can’t match.
Roll a small piece of clay into a short handle. Press a thumb into one end to form the bowl.
Keep the bowl shallow. It only needs to hold a small scoop.
Embrace the uneven, handmade look. That’s the whole charm.
Budget tip: This uses one small lump of clay and zero special tools.
Smooth it well so nothing sticks in rough spots.
Let it harden, then seal it so it resists moisture.
Use polymer or sealed clay for dry goods like sugar or tea, not soup.
Paint the handle a soft color, or leave it natural.
Rest it in a sugar jar or beside your tea station. A charming little detail that always gets noticed.
7. Dainty Clay Bird
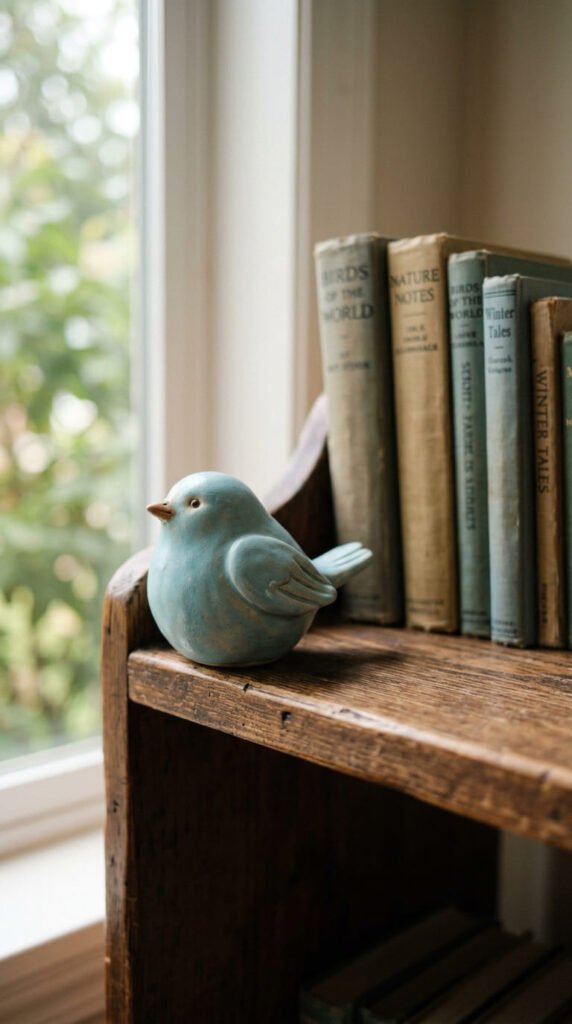
A little bird is a dainty knick-knack for any shelf.
Roll a ball of clay into a rounded body. Pinch one end into a tail.
Add a tiny beak by pressing on a small cone of clay.
Press two dots for eyes with a toothpick.
Budget tip: Make a whole flock from one block of clay.
Keep the shape simple and round. Cute beats realistic here.
Let it dry, then paint it. Go natural with browns and blues, or wild with bright colors.
Smooth the body with a damp finger before it hardens.
A clear seal gives it a nice finish.
Set it on a mantel, bookshelf, or windowsill.
These take ten minutes and look sweet in a little group of three. A perfect first animal sculpture.
8. Mini Trinket Bowl
A tiny bowl is the most useful small project you can make.
Roll a ball of clay. Press your thumb into the center.
Pinch the walls outward and up, turning as you go.
Keep the walls even so it dries without cracking.
Budget tip: This uses a single small lump and needs no tools at all.
Don’t worry about perfect. The handmade, fingerprinted look is the appeal.
Smooth the rim with a wet finger, or leave it raw.
Let it dry slowly to avoid cracks.
Paint the inside one color and leave the outside natural for contrast.
Use it to hold rings, studs, or paperclips.
It fits on a nightstand, desk, or bathroom shelf. Make a few in different sizes for a matching set. The easiest project on this list.
9. Sequined Rainbow Fish
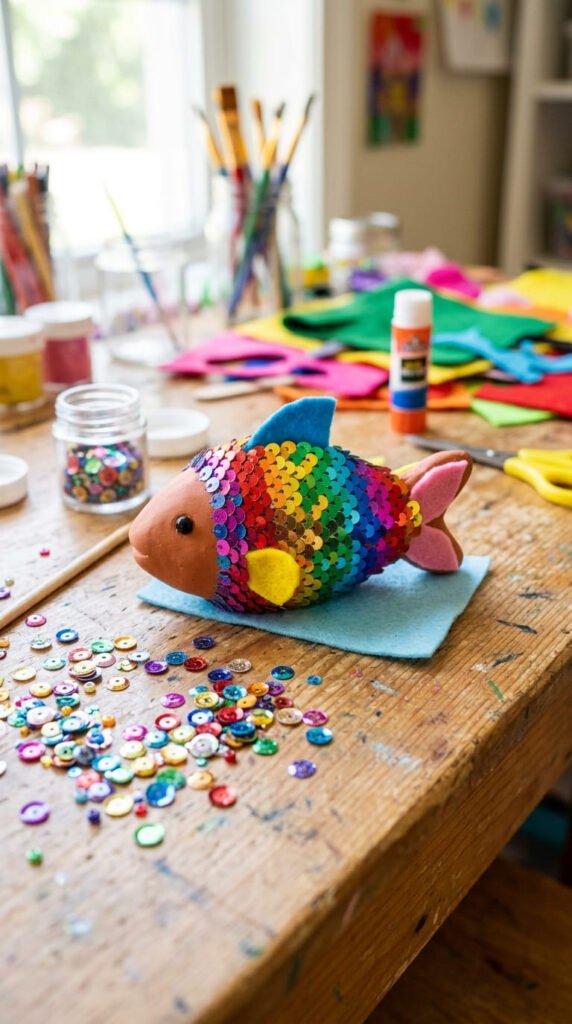
This is the top project for kids, and it keeps little hands busy.
Shape a small piece of clay into a simple fish. A flat oval with a triangle tail.
While the clay is still soft, press sequins into the body.
Overlap them in rows like real scales.
Budget tip: A jar of mixed sequins costs a couple of dollars and decorates many fish.
Arrange them in a rainbow pattern for the most fun.
Add a tiny eye with a single dark sequin or a dot of paint.
Let it dry without disturbing the scales.
The shimmer catches the light beautifully.
Kids can make these with very little help.
Great for a classroom craft or a rainy-day activity. The sequins make it feel special with almost no skill required.
10. Wooden Bead Necklace
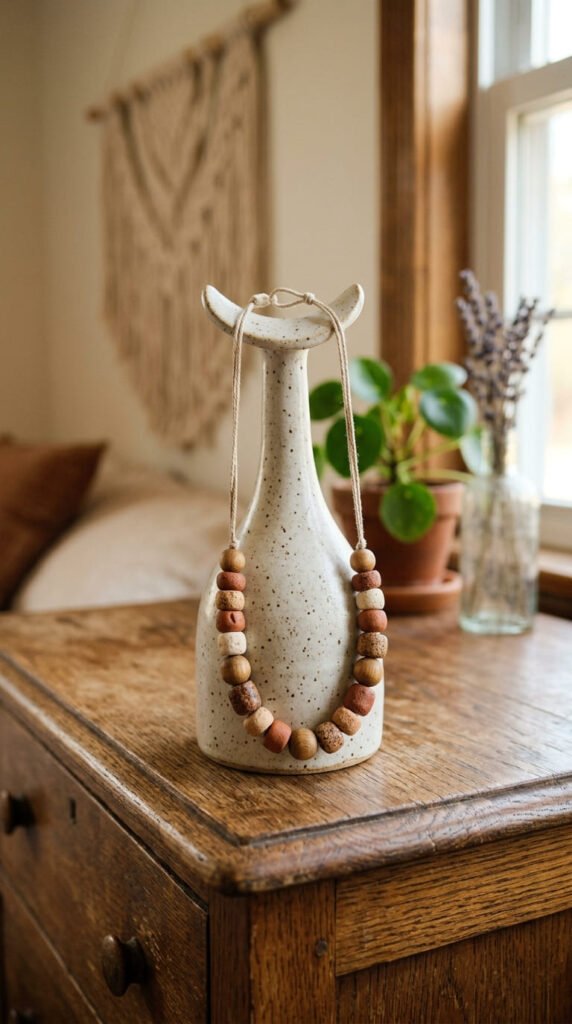
A bead necklace looks tricky but uses a clever shortcut.
Here’s the hack: shape your clay around wooden beads. The wood gives the bead its structure and a ready-made hole.
Press a thin layer of clay over each bead. Roll it smooth in your palms.
Add texture by pressing lines or dots.
Budget tip: A bag of wooden beads costs little and saves you from drilling holes.
Let them harden or bake.
Paint them or seal them natural.
String them on a cord, alternating clay and plain wooden beads.
Knot the ends to finish.
This makes a chic, earthy necklace that looks handmade in the best way.
Make matching sets for gifts. The wooden base means no broken beads and no fuss. A beginner-friendly jewelry win.
11. Carved Candle Holder
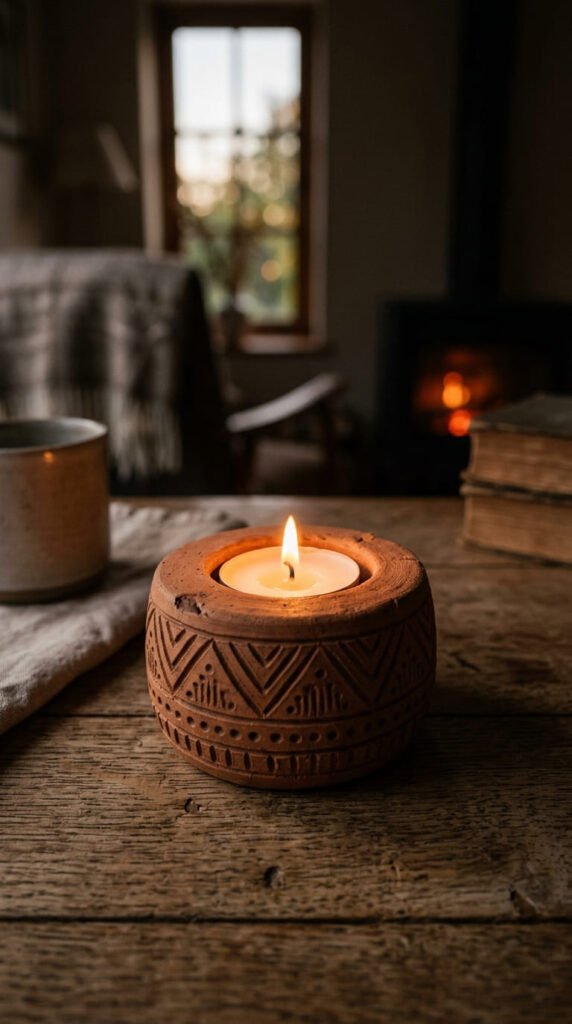
Candle holders can be as simple or fancy as you like.
For a simple one, press clay around a tea light to size the hollow. Remove the candle before drying.
For a fancier look, build it taller and carve patterns into the sides.
Keep the walls thick so it stays sturdy.
Important: Use battery tea lights, or real flames only in a metal cup. Clay is not flameproof.
Budget tip: A votive glass works as a mold, then slide it out.
Carve geometric lines or little dots with a toothpick.
Let it harden, then paint it earthy or leave it natural.
Smooth the rim with a wet sponge.
Set it on a shelf or dinner table.
The carved patterns glow beautifully when lit. A small project that adds instant cozy atmosphere to any tiny space.
12. Bookshelf Book Nook
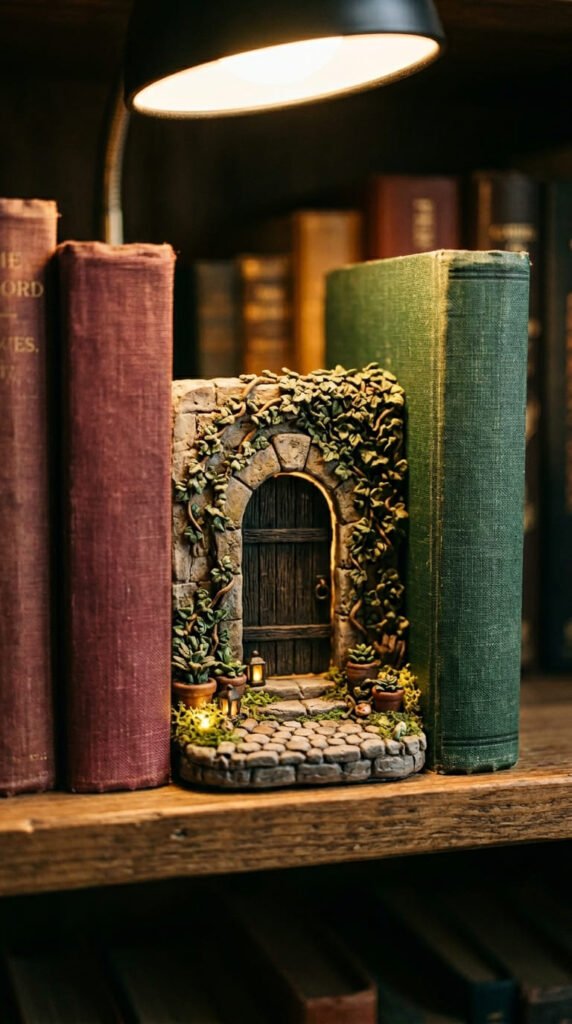
A book nook is an emerging trend that hides between your books.
It’s a small decor piece shaped to slot into a gap on your shelf.
Build a little scene. An arched doorway, a tiny window, or a vine-covered wall.
Keep it tall and narrow so it fits a book-sized space.
Budget tip: Use scraps from other projects to build the scene for free.
Press in details like bricks, leaves, or a little path.
Let it harden, then paint it like an enchanted forest entrance.
Add a touch of green for ivy.
Slot it between two books on your shelf.
It looks like a secret little world peeking out.
This is a charming way to decorate a bookcase without taking up real space. A creative project for fantasy and book lovers alike.
13. Espresso Mug Charm

A miniature mug is a tiny project that’s pure charm.
Roll a small ball of clay. Press your thumb in to hollow it out.
Pinch the walls thin and even.
Add a tiny handle from a small rolled coil. Attach it by pressing firmly.
Budget tip: Use leftover clay scraps. These are tiny.
Smooth the surface with a damp finger.
Let it dry, then paint a little flower or swirl on the side.
Seal it for a glossy finish.
These work as dollhouse pieces, shelf decor, or even tiny planters for air plants.
Make a set in different colors for a cute display.
A real mug is a bigger project, but this tiny version takes minutes. It adds a sweet handmade touch to a desk or windowsill.
14. Pinch Pot Planter for Succulents
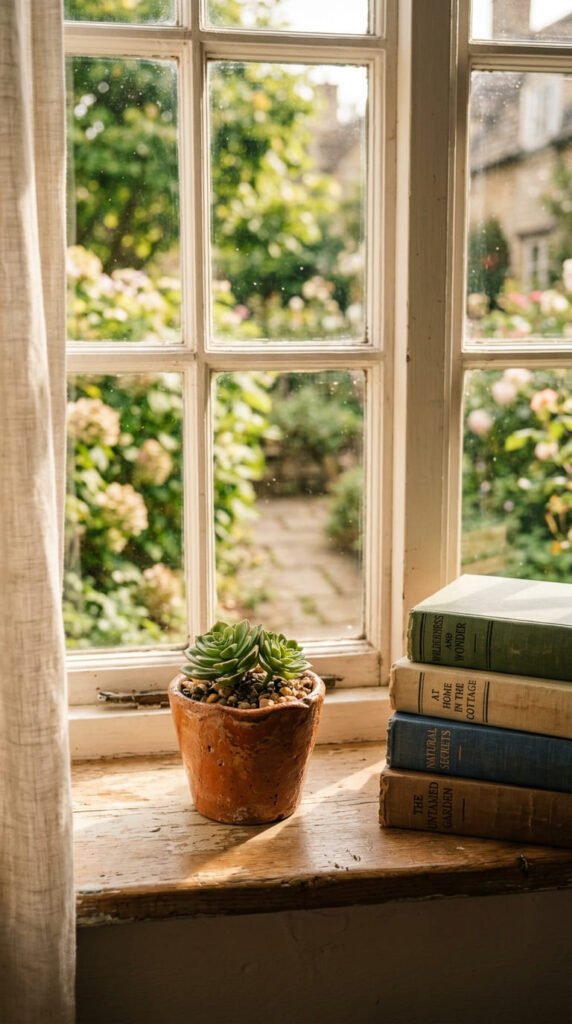
A tiny planter brings a little green to a small space.
Pinch a ball of clay into a small bowl shape. Keep the walls even.
Smooth the seams with a damp finger.
Important: Use it for faux plants only unless you seal it heavily. Clay softens with water.
Budget tip: A fake mini succulent from a dollar store finishes the look cheaply.
Let the pot dry slowly to avoid cracks.
Paint it terracotta for a classic look, or white for modern.
Add a little drainage detail for realism if you like.
Keep it small enough for a shelf or desk corner.
Group a few in different sizes for a cute cluster.
These take almost no clay and look adorable lined up on a windowsill. A perfect little decor piece for tight spaces.
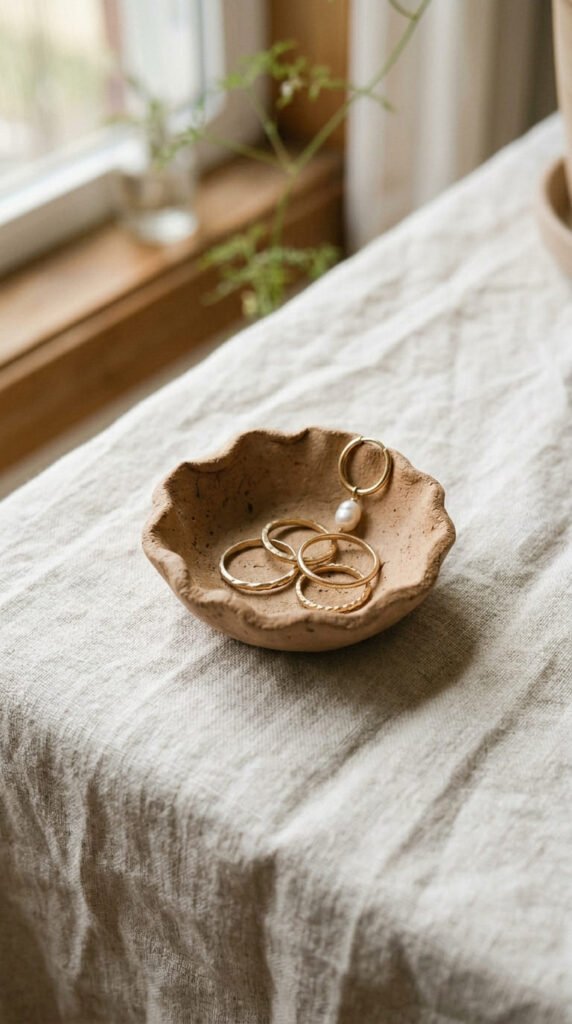
15. Textured Ring Dish
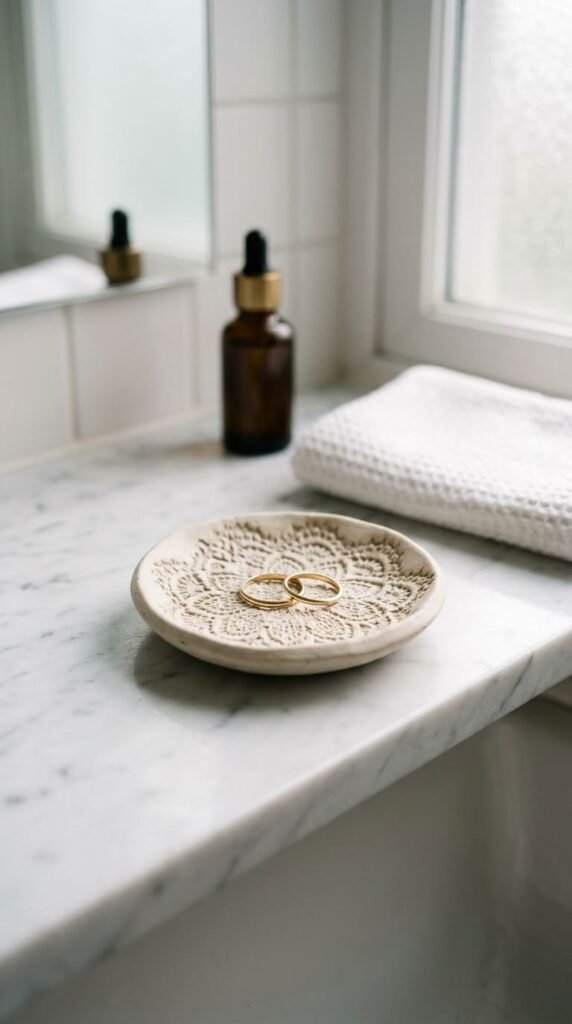
A textured dish adds pattern with almost no effort.
Roll a small flat circle of clay.
Press a piece of lace or textured fabric into the surface. Peel it off to reveal the imprint.
Gently lift the edges to form a shallow dish.
Budget tip: Use old lace, a doily, or even a leaf for free texture.
Let it dry flat so it stays level.
Paint it, or leave the texture raw and natural.
A swipe of gold across the raised pattern looks expensive.
Seal it so it wipes clean.
Keep it by the sink for rings or by the door for keys.
The texture turns a plain dish into something special.
This is a five-minute project that looks far fancier than the effort it took. A lovely little gift idea too.
16. Mini Animal Figurine
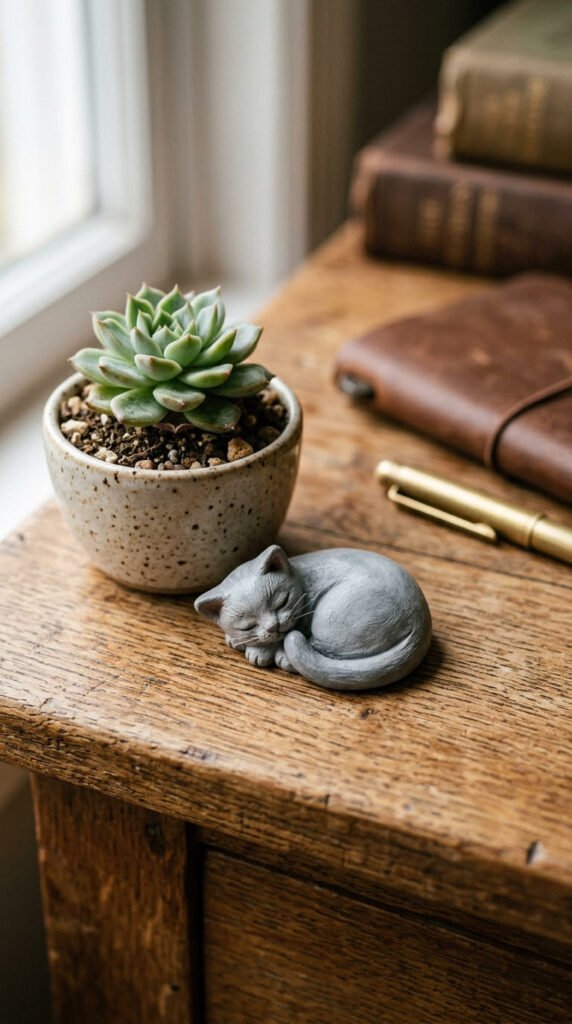
A tiny animal figurine is a satisfying little sculpt.
Pick a simple pose. A curled-up sleeping animal is the easiest.
Build from basic shapes. A rounded body, a small head, tiny ears.
Press the pieces together and smooth the seams.
Budget tip: A small lump of clay makes several. No tools beyond a toothpick.
Keep details soft and minimal for a cute look.
Add eyes with two small dots.
Let it harden, then paint it.
A clear seal protects the color.
Set it on a desk, shelf, or windowsill.
Cats, foxes, and bunnies all work well curled up.
These little figures take ten minutes and add personality to any corner. Make a tiny zoo over a few crafting sessions. A favorite for both kids and adults.
17. Geometric Pendant

A simple pendant turns a plain chain into a statement.
Roll a small slab of clay. Cut a clean geometric shape. A hexagon, diamond, or circle.
Keep it thin and light so it hangs well.
Poke a hole at the top before it hardens.
Budget tip: A length of chain from a craft store makes several necklaces cheaply.
Sand the edges smooth once dry.
Paint it a single modern color, or leave it natural.
A thin gold line around the edge looks polished.
Seal it so the color lasts.
Thread it onto a chain through a jump ring.
These layer well with other necklaces.
Make a set in matching tones for a chic, custom look. A small, lightweight project that wears beautifully and costs very little to make.
18. Incense Stick Holder
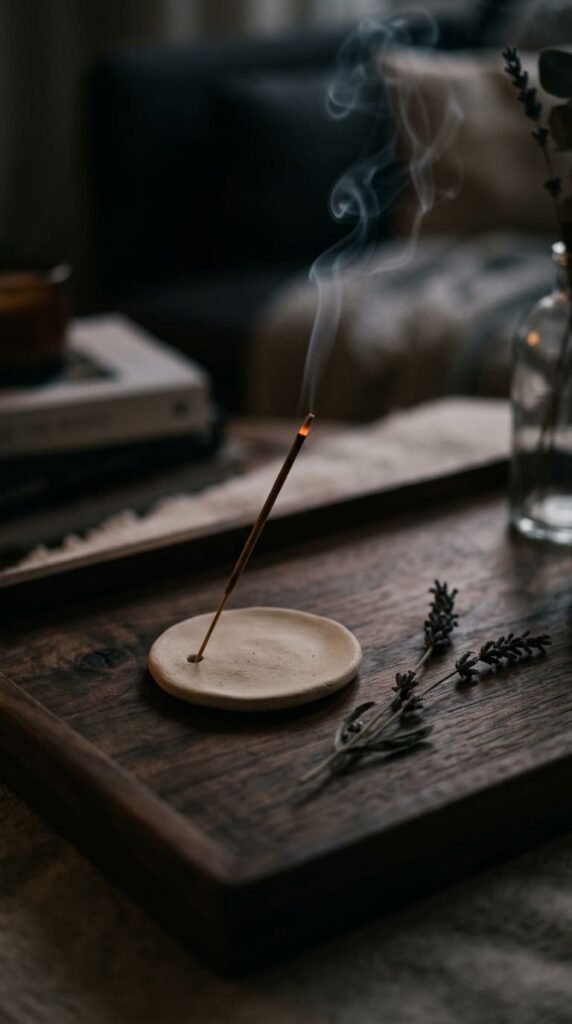
A little incense holder is small, useful, and calming.
Flatten a small disc or leaf shape of clay.
While soft, poke a single hole with a toothpick for the incense stick.
Tilt the hole slightly so ash falls onto the holder.
Budget tip: A toothpick is the only tool you need.
Smooth the edges with a damp finger.
Let it dry fully before using it.
Paint it a calm cream or deep navy.
Add a few tiny dots for decoration.
Seal it for a clean finish.
Set it on a shelf, desk, or bedside table.
These look great in a moon or star shape too.
A tiny project that adds a peaceful touch to your space. Make a couple as thoughtful, low-cost gifts for friends who love to unwind.
19. Marbled Trinket Box
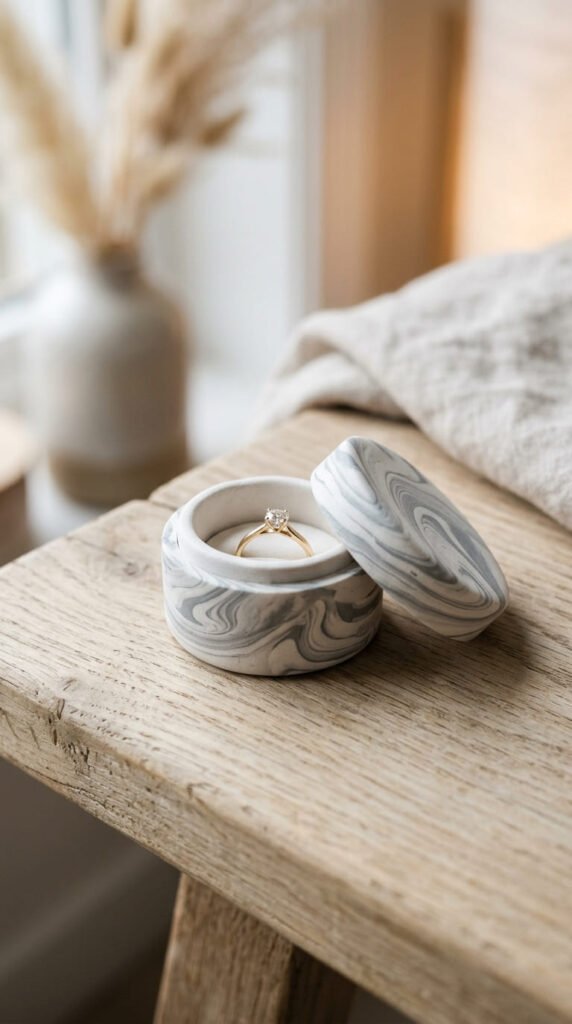
A tiny box with a lid is a charming little keeper for small treasures.
Make a small pinch pot for the base. Keep the walls even.
Roll a flat lid slightly wider than the opening.
For a marble look, twist together two colors of clay before shaping.
Budget tip: Mix leftover clay scraps to get the marbled effect for free.
Don’t over-twist, or the colors muddy.
Smooth the surfaces with a damp finger.
Let both pieces dry separately so the lid fits.
Seal it for a polished finish.
Use it to hold rings, studs, or tiny keepsakes.
Keep it on a dresser or desk.
The marbling makes each box one of a kind.
This takes a bit more time than a flat dish, but the lidded result feels special. A lovely handmade gift that looks far more expensive than it is.
20. Tiny Wall Hanging
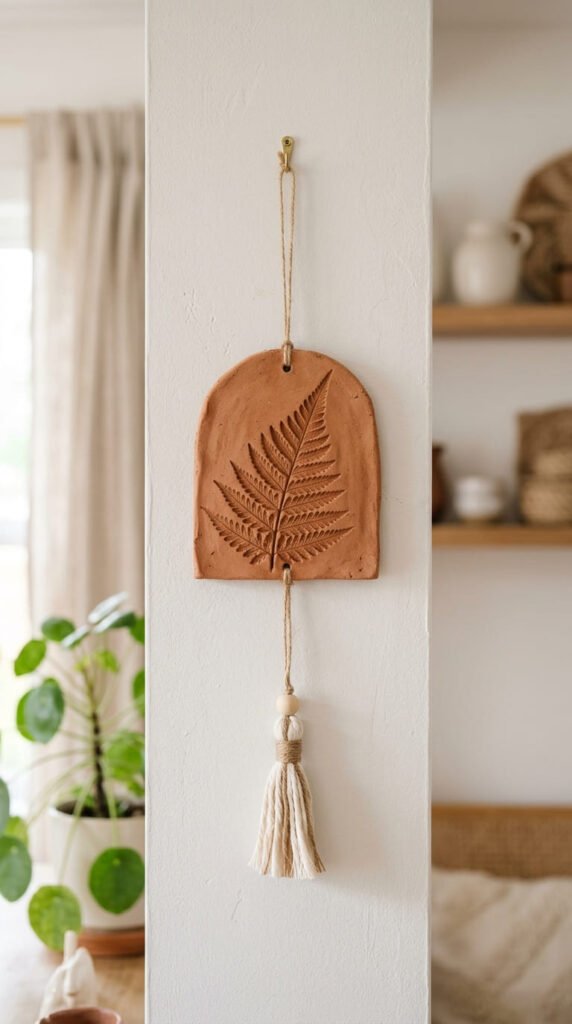
A small wall hanging adds art without taking up surface space.
Roll a flat slab of clay. Cut a simple shape like an arch or circle.
Press a leaf or fabric into it for texture.
Poke a hole at the top for hanging.
Budget tip: A leaf from outside makes a free, natural imprint.
Let it dry flat so it stays even.
Paint it a soft, neutral tone.
Thread a cord through the hole.
Add a little tassel at the bottom for a boho touch.
Hang it on a small nail.
This works great in a row of three at different heights.
Perfect for a tiny apartment wall or a cozy reading nook.
It takes up zero shelf space and adds a handmade, artsy feel. A simple project with a styled, gallery-wall result.
21. Mini Mushroom Decor
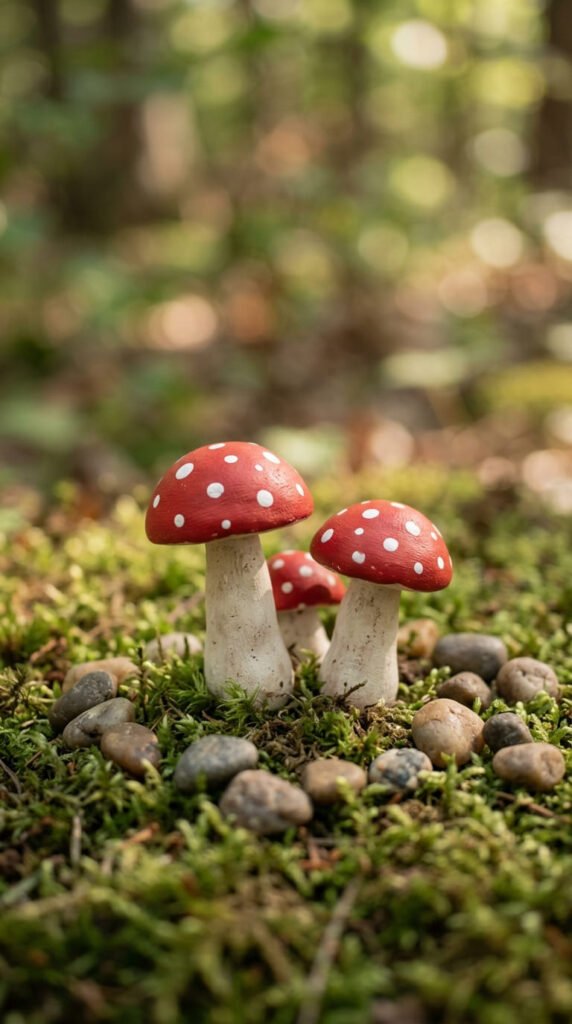
Tiny mushrooms are having a moment in home decor.
Roll a small ball for the cap and a short cylinder for the stem.
Press them together and smooth the seam.
Shape the cap into a gentle dome.
Budget tip: One small lump of clay makes a whole little patch.
Let them dry, then paint the classic red cap with white dots.
Or go soft and modern with cream and tan tones.
Seal them for a clean finish.
Make several in different sizes.
Cluster them together for the cutest look.
Set them on a shelf, in a plant pot, or on a windowsill.
These tiny mushrooms add instant cottagecore charm to any small space.
They take minutes each and cost almost nothing. A sweet little project that always makes people smile.
22. Stamped Clay Coaster
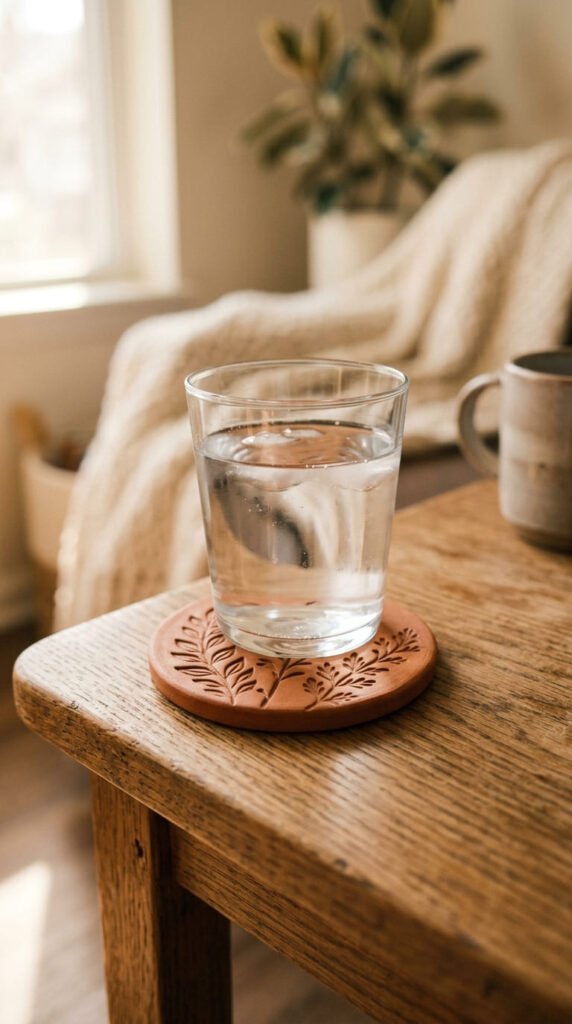
A single coaster is a small project with everyday use.
Roll a flat circle of clay, about a quarter inch thick.
Press a stamp, button, or textured object into the surface.
Smooth the edges so they’re rounded, not sharp.
Budget tip: Use a cookie stamp or a carved eraser you already own.
Let it dry flat so it stays level. Thicker pieces take a few days.
Paint it, or leave the stamped pattern natural.
Important: Seal both sides well, since coasters meet wet cups.
Make one for your desk or bedside table.
Or make a matching set as a gift.
The stamped pattern adds personality with no drawing skill required.
This is a useful little project that protects your surfaces and looks handmade-chic. A great way to use up leftover clay from bigger projects.
Conclusion
That’s 22 little clay projects you can shape and finish without a kiln, a big budget, or much space at all. Most use only a small lump of clay, a few cheap tools, and an afternoon of your time. Start with an easy win like a pinch pot bowl or coil heart, then work your way up to a marbled box or a book nook. These tiny pieces make wonderful gifts, sweet shelf decor, and fun projects for kids and adults alike. Pick one idea, grab your clay, and make something small today. Save this list and come back when you’re ready for your next tiny project.


