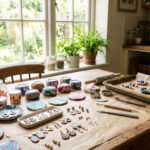
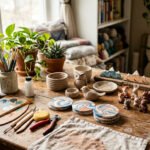
Blank walls can make a room feel unfinished, even when the furniture looks good. Clay wall art is a simple way to add shape, texture, and personality without buying expensive decor. With air-dry clay, polymer clay, twine, paint, ribbon, and basic tools, you can make bold wall hangings, textured tiles, mirror frames, planter pockets, and sculptural pieces that feel handmade yet polished. These clay wall art ideas work for bedrooms, entryways, craft rooms, nurseries, dorms, and cozy corners that could use more character.
1. Boho Moon Phase Clay Hanging
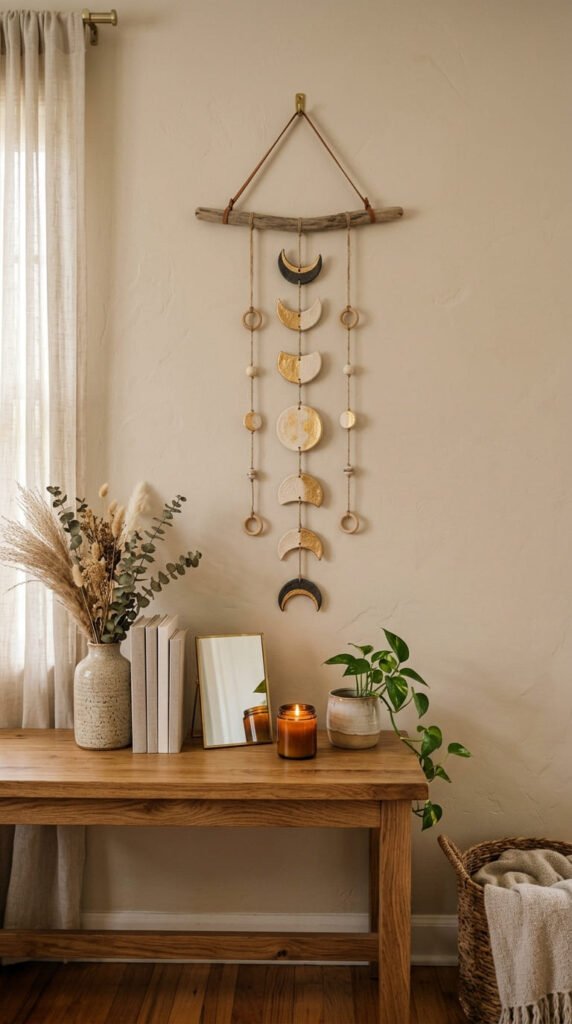
A boho moon phase clay hanging is one of the easiest ways to fill a narrow wall. Roll air-dry clay into an even slab. Cut circles with a cup or cookie cutter. Then cut some circles again to form crescent moons.
Make a small hole at the top of each piece before drying. This makes hanging much easier later.
Let the pieces dry flat so they do not curl. Sand the edges lightly. Paint them white, cream, black, bronze, or gold. Keep the colors simple for a more high-end look.
String the moons on twine, fishing line, or thin cord. Space them evenly from crescent to full moon and back again.
Budget tip: use bottle caps and drinking glasses as cutters. You do not have to buy special clay tools.
Hang the finished piece over a bed, desk, nursery shelf, or entry table. It adds movement to the wall without feeling too busy. For extra style, add wooden beads between each moon.
2. Sculptural Clay Sunburst
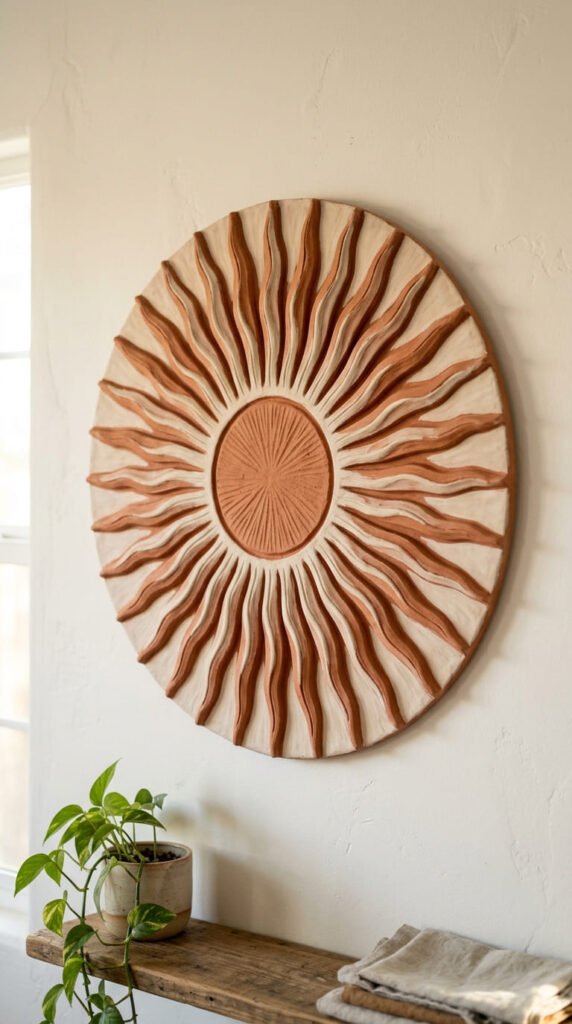
A sculptural clay sunburst makes a strong focal point for a plain wall. Start with a round clay center. Then roll thin clay pieces for rays. Make some rays long and some short so the shape feels lively.
Attach each ray to the center by scratching both surfaces and adding a little water. Press gently so the pieces bond well. Smooth the joins with a damp finger.
Let the full sunburst dry on parchment paper. Flip it once during drying if the back stays damp.
Paint the piece in terracotta, mustard, white, or matte black. A dry-brushed gold finish on the tips can make it feel more expensive.
Budget tip: make the sunburst in small sections if you do not have much clay. A 10-inch piece can still look bold above a nightstand or shelf.
Add a strong hanging loop to the back with glue after the clay dries. Keep the piece lightweight so it is easier to mount.
This design works well in boho, desert, earthy, or warm minimalist rooms.
3. Pressed Botanical Clay Tiles
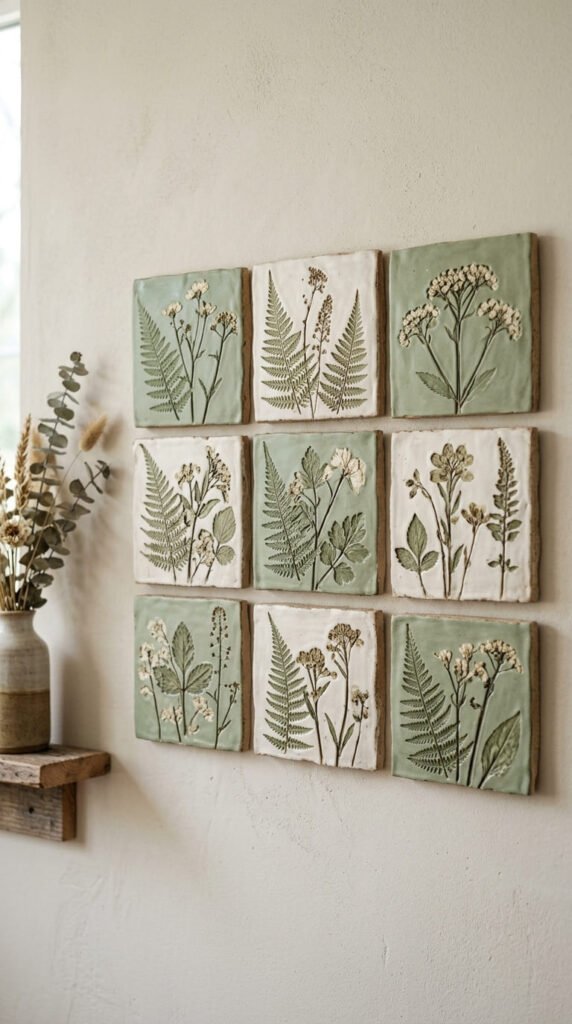
Pressed botanical clay tiles bring nature into your home without buying framed prints. Roll clay into flat rectangles, squares, or arches. Press leaves, fern fronds, herbs, or tiny flowers into the surface.
Peel the plant away slowly. The veins and stems leave a soft texture behind. Cut the edges clean with a knife or ruler.
Make a hole near the top of each tile, or glue a hanger to the back after drying.
Paint the tiles in soft white, beige, sage, brown, or clay pink. To make the texture stand out, brush darker paint into the imprint and wipe the top gently.
Budget tip: collect leaves from your garden, yard, or walk. Nature gives you free patterns.
Make three tiles in matching sizes for a tidy wall set. Or create a mixed gallery with different shapes.
These pieces look lovely in bedrooms, bathrooms, hallways, and reading corners. They also make thoughtful handmade gifts for plant lovers.
Keep the finish matte for a calm, natural style that looks like handmade ceramic art.
4. Clay Mirror Frame Makeover
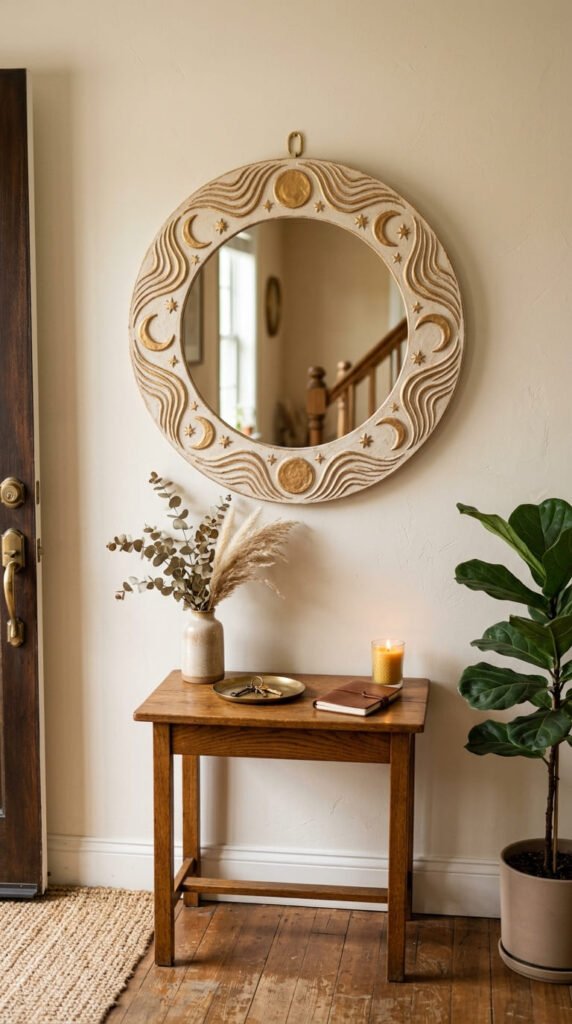
A clay mirror frame makeover turns a plain mirror into art. Start with an inexpensive round or oval mirror. Roll small clay pieces into moons, stars, flowers, waves, shells, or beads.
Arrange the pieces around the mirror before gluing. This helps you test the design without wasting supplies.
If using polymer clay, bake the pieces before attaching them. If using air-dry clay, let each piece dry fully first.
Paint everything in one color for a clean look. Cream, matte black, gold, terracotta, or pearl white all work well. You can also paint only the raised pieces and leave the mirror frame plain.
Budget tip: buy a basic mirror from a discount shop or thrift store. The clay details hide the plain frame and make it look handmade.
Use strong glue to attach each piece. Let the glue dry flat overnight.
This project works above vanities, hallway tables, dressers, and small bathroom walls. It adds texture while still keeping the mirror useful.
5. Mini Clay Planter Pockets
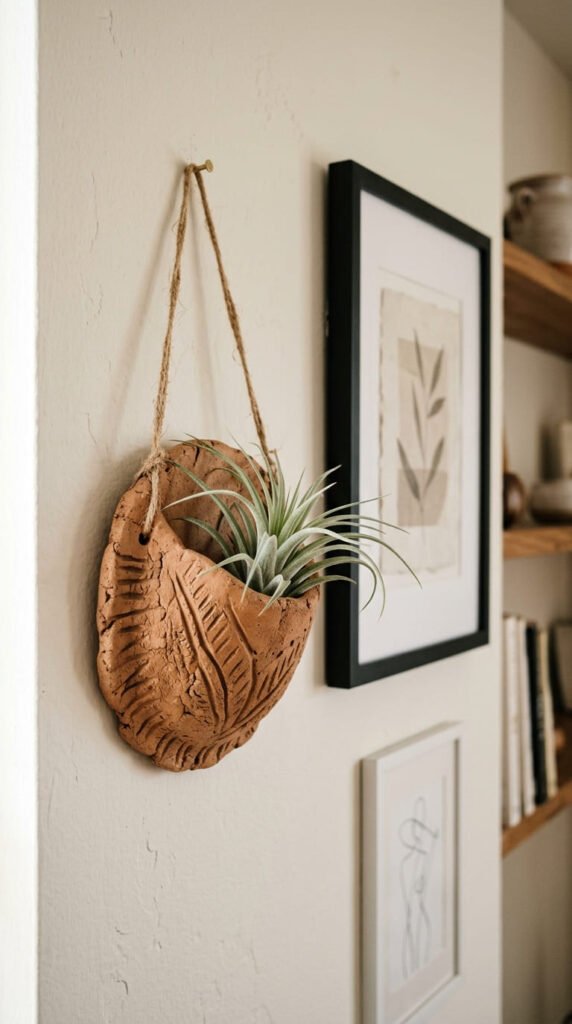
Mini clay planter pockets add living texture to blank walls. Roll clay into a rectangle, then curve the lower half forward to make a shallow pocket.
Seal the side edges by pressing them together. Smooth the seams with water. Add hand-carved grooves, dots, arches, or leaf marks on the front.
Make two small holes near the top for twine. Let the pocket dry with paper tucked inside so it keeps its curve.
Paint it in matte white, tan, rust, olive, or soft gray. Add an air plant or faux greenery. Air plants are a good match because they do not sit in wet soil.
Budget tip: make tiny pockets instead of one large one. Smaller pieces dry faster and use less clay.
Hang three pockets in a vertical row for a bold wall moment. Or place one beside framed art for a more subtle look.
These work in kitchens, bathrooms, plant corners, and desk areas. They feel decorative but still useful, which makes them great for small rooms.
6. Decorative Clay Wall Hooks
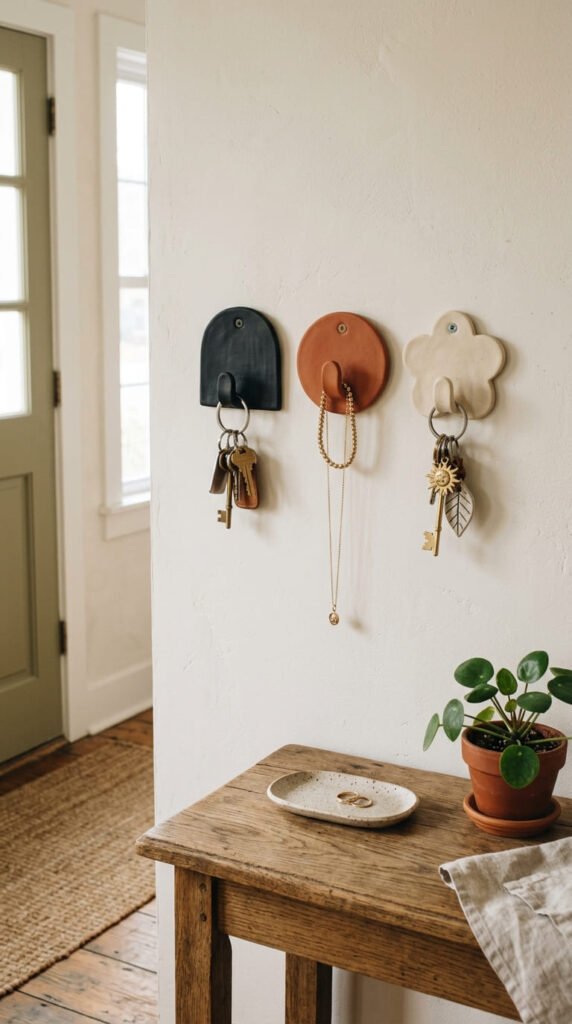
Decorative clay wall hooks are perfect for entryways, bedrooms, and craft rooms. Start with sturdy metal or wooden hooks. Then add clay shapes to the front for style.
Try circles, arches, flowers, moons, shells, or simple raised dots. Keep the clay part decorative only. The real hook should carry the weight.
Let the clay pieces dry or bake them before attaching. Paint them in a color palette that matches your room. Black and cream look clean. Terracotta and tan feel earthy. Sage and white feel soft.
Seal the clay since hooks get touched often.
Budget tip: update old hooks instead of buying new ones. Clay covers scratches and gives them a custom look.
Use these hooks for keys, light necklaces, hats, dog leashes, or small bags. Do not hang heavy coats on clay-covered pieces unless the base hook is strong.
Make a set of three or five for better wall balance. Even simple hooks look high-end when the shapes and colors repeat across the wall.
7. Clay Dream Catcher Wall Hanging
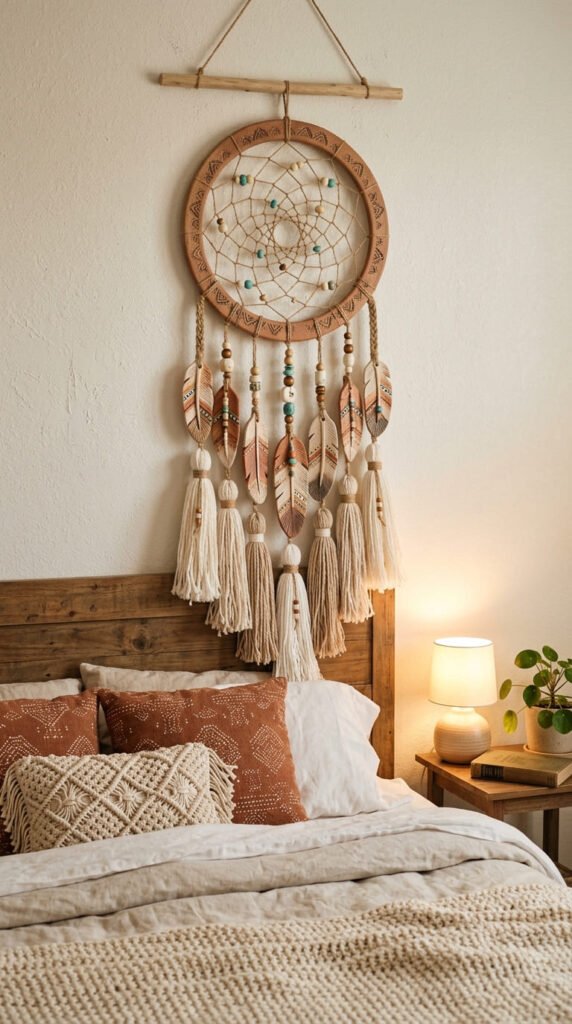
A clay dream catcher wall hanging gives a bedroom wall a soft, meaningful look. Shape a large clay ring first. Keep it even, but not too thin.
Add small clay charms such as feathers, stars, moons, leaves, or beads. Make holes in each charm before drying.
Once dry, paint the ring and charms in earthy colors. White, tan, copper, and soft brown all work well. You can also leave some pieces unpainted for a raw clay look.
Tie yarn, cord, or cotton tassels from the bottom. Add wooden beads if you like a boho style.
Budget tip: use yarn scraps, twine, or old necklace beads. This project works well with leftover supplies.
Hang it above a bed, reading chair, crib wall, or meditation corner. Keep it lightweight so it hangs safely.
For a cleaner design, use one main color and one accent color. Too many colors can make the piece feel busy. Simple details often look more expensive.
8. Handmade Clay Wall Clock

A handmade clay wall clock is both decor and a working piece. You can buy a simple clock movement kit online or reuse one from an old clock.
Roll clay into a circle, square, arch, or blob shape. Keep the slab even so the clock sits flat on the wall. Make a center hole for the clock hands before drying.
Add raised lines, dots, numbers, or abstract shapes around the face. Keep the design light so the hands can move freely.
After drying, paint the clock in a bold wall color. Try matte black, rust, ivory, olive, or soft blue. Install the clock kit once the paint and sealer are dry.
Budget tip: reuse a clock kit from a thrifted clock. You only replace the face.
This project looks great in kitchens, offices, studios, and living rooms. It also makes a fun gift for someone setting up a new home.
Keep the clay face thin and lightweight. A heavy clock is harder to mount safely.
9. 3D Clay Landscape Panel
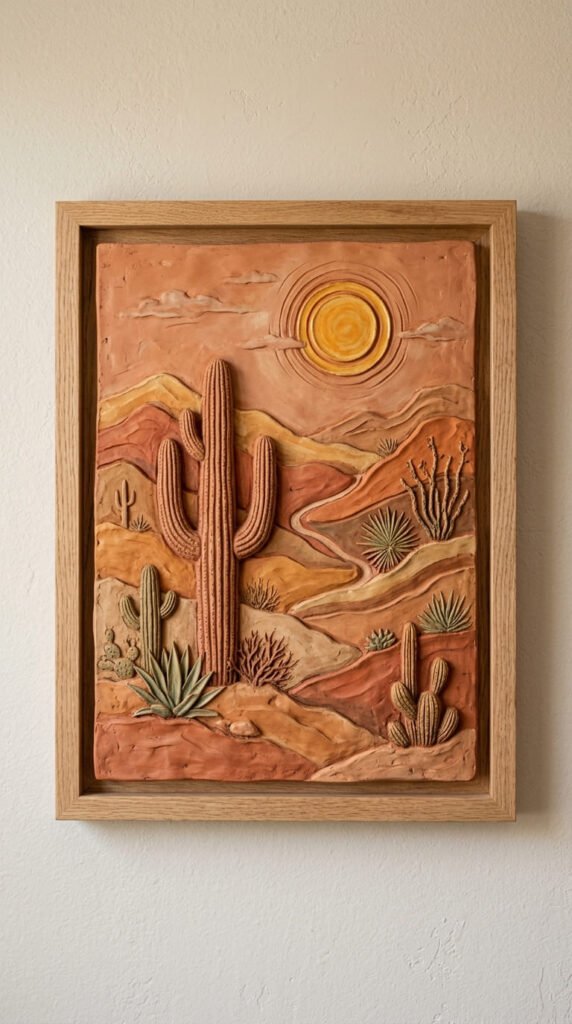
A 3D clay landscape panel gives your wall a gallery-style look. Start with a flat clay slab as the base. Cut it into a rectangle, square, arch, or circle.
Add raised shapes on top to create hills, mountains, waves, trees, sun, moon, or clouds. Keep the layers thin so the piece does not become too heavy.
Scratch the back of each added piece and the base where it will sit. Add a little water, then press the pieces together. This helps the layers stay attached.
Let the panel dry flat. Sand the edges once dry.
Paint in a limited palette. Terracotta, cream, clay brown, and warm yellow work well for desert scenes. Blue, white, and gray work well for ocean walls.
Budget tip: use a picture frame without glass to display the panel. The frame makes it look more finished.
Hang it alone as a statement piece, or make two smaller panels as a matching pair.
10. Faux Glass Clay Window Hanging
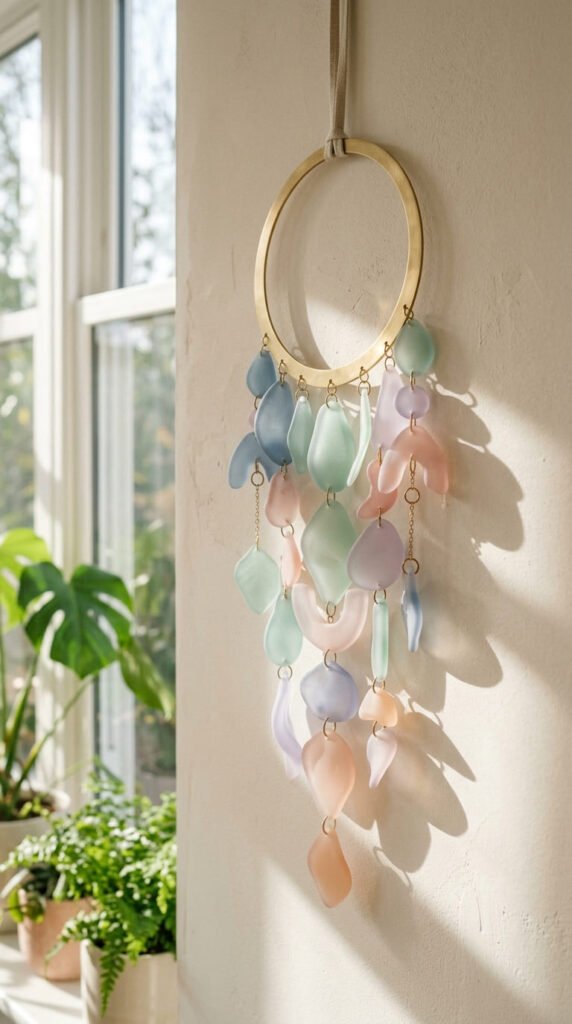
A faux glass clay window hanging works best near sunlight. Use translucent polymer clay or liquid polymer clay for a frosted glass effect.
Create simple shapes like circles, leaves, arches, flowers, or abstract blobs. Keep them thin so light can pass through.
After curing, connect the pieces with jump rings, wire, or clear fishing line. Add a metal hoop at the top for hanging.
Soft colors look beautiful near windows. Try pale pink, amber, smoky gray, mint, or milky white. The light will make the colors glow gently.
Budget tip: make small hanging pieces instead of one large panel. Small shapes use less clay and are easier to cure evenly.
Hang it in a kitchen window, bathroom window, sunroom, or cozy reading nook. It adds color without blocking too much light.
If you prefer air-dry clay, you can make a similar look with cutout shapes, but it will not have the same translucent glow. It will still create beautiful shadows.
11. Geometric Clay Wall Hanging
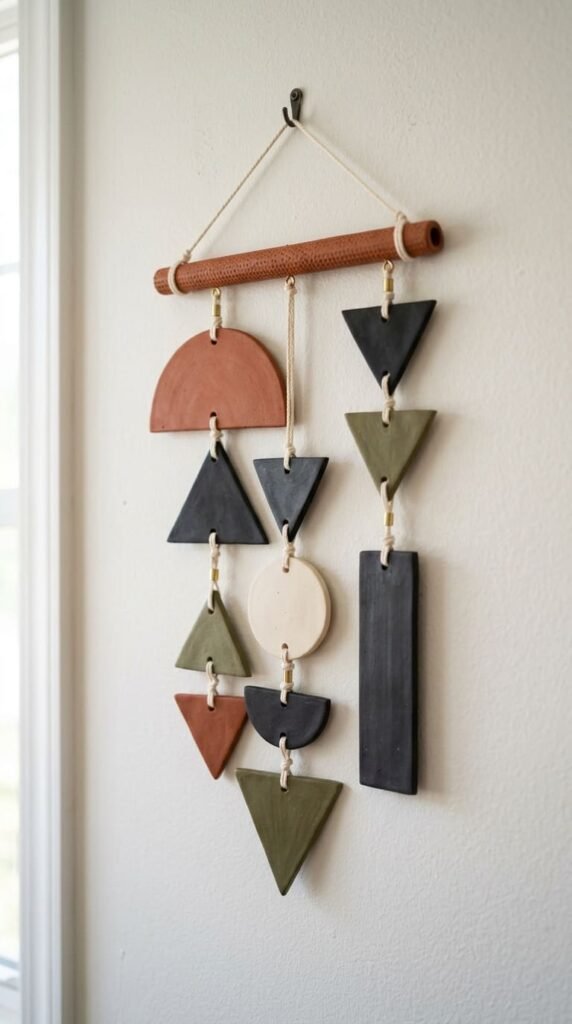
A geometric clay wall hanging is great for modern rooms. Cut circles, triangles, arches, rectangles, and half-moons from rolled clay.
Make holes at the top and bottom of each shape if you want to connect them in rows. Let all pieces dry flat.
Paint each shape in a strong color palette. Black, ivory, rust, olive, mustard, and clay brown work well together. Keep the finish matte for a cleaner look.
String the pieces with cotton cord, leather cord, or thin rope. You can hang them from a wooden dowel or a metal ring.
Budget tip: cut templates from cardboard before cutting clay. This keeps the shapes neat and saves material.
This wall hanging works above a sofa, desk, bed, or console table. It fills space without requiring a frame.
For a bolder design, mix large and small shapes. For a softer design, use one color family. Either way, the clean lines make the piece look polished.
12. Wall-Mounted Clay Shell Dish
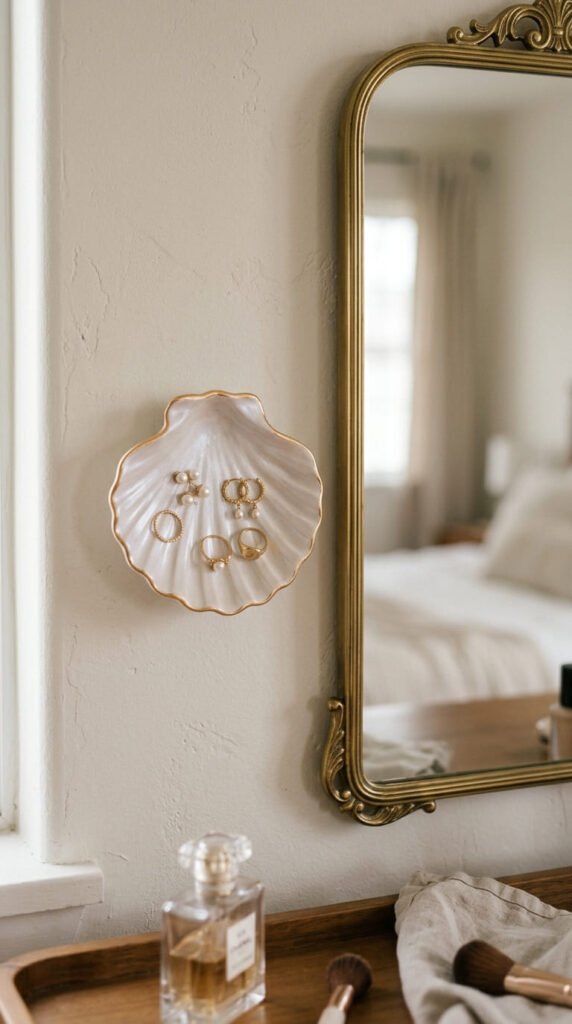
A wall-mounted clay shell dish is pretty and useful. Roll clay into an oval, then pinch one end slightly to make a shell shape.
Use a toothpick or clay tool to press curved lines from the narrow end toward the wide edge. Lift the edges a little so jewelry stays in place.
Let the dish dry over a small bowl or folded paper towel so it keeps a gentle curve.
Paint it pearl white, blush, cream, or soft gray. Add a thin gold edge for a delicate finish.
Attach it to the wall with a small bracket, strong adhesive strip, or a narrow shelf. It can hold rings, earrings, hair clips, or tiny charms.
Budget tip: use this idea beside a mirror instead of buying a jewelry organizer. It saves space and adds decor at the same time.
Make two or three small shell dishes for a vanity wall. Grouped together, they look like a handmade ceramic installation.
Seal well so the paint holds up during daily use.
13. Abstract Clay Tile Gallery
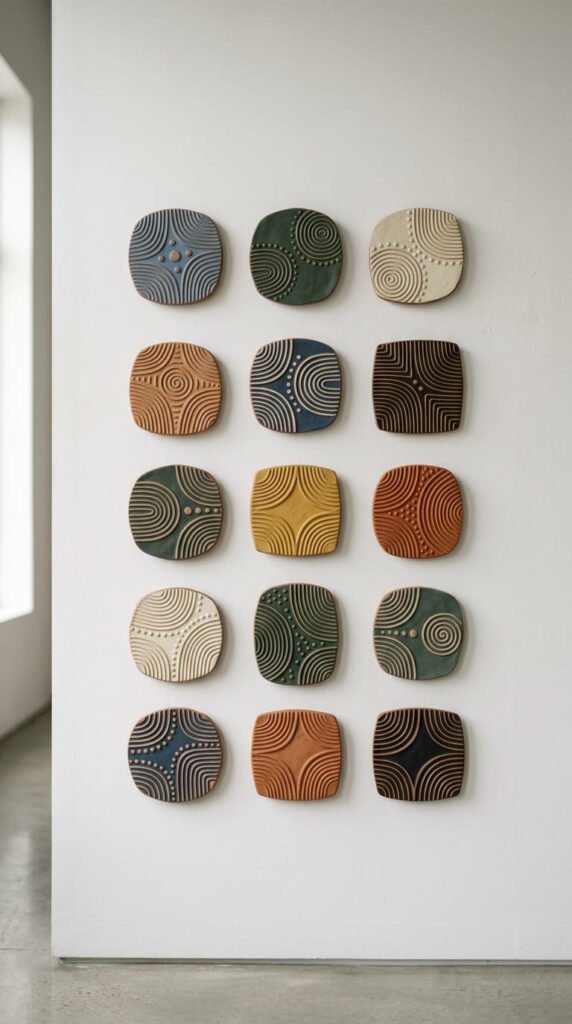
An abstract clay tile gallery lets you fill a larger wall one small piece at a time. Make several tiles in squares, arches, circles, or uneven shapes.
Add raised lines, dots, squiggles, waves, and small clay loops. Keep each tile different but use the same color palette so the wall feels connected.
Let the tiles dry flat. Sand rough edges and paint them in cream, black, terracotta, tan, or soft blue.
Plan the wall layout on the floor before hanging. Leave even spacing between tiles for a clean gallery look.
Budget tip: start with six tiles, then add more later. You can build the wall art slowly instead of spending a lot at once.
Use lightweight clay so the tiles are easy to mount. Small adhesive strips work for tiny pieces, but heavier tiles may require hooks.
This idea is great for renters because you can create impact without painting the wall. The shapes add texture, shadow, and a handmade feel.
14. Clay Rainbow Arch Hanging
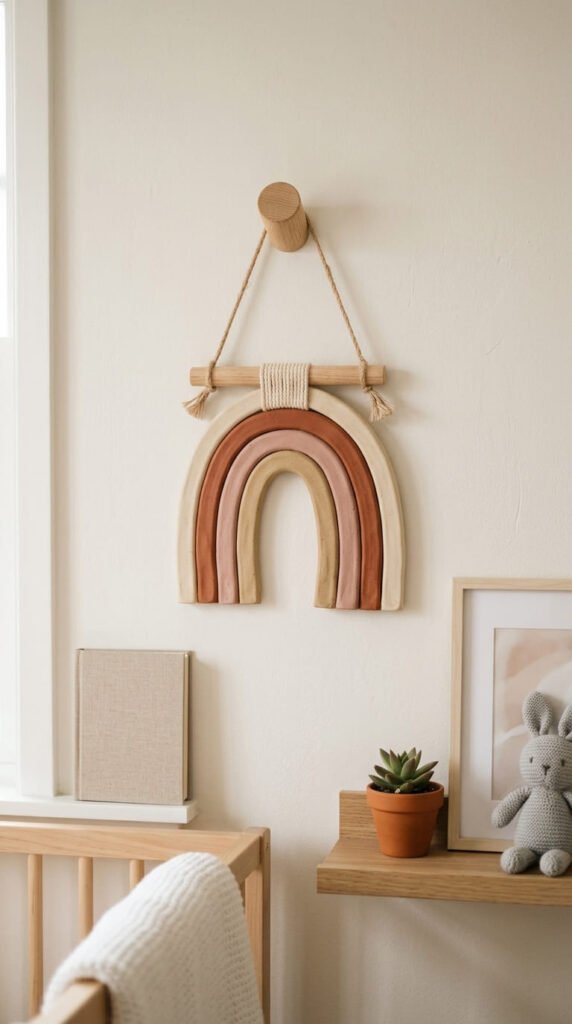
A clay rainbow arch hanging works beautifully in nurseries, bedrooms, craft rooms, and cozy corners. Roll clay into long strips. Curve each strip into an arch, making each one smaller than the last.
Layer the arches together. Scratch and dampen the touching sides before pressing. This helps them stay joined.
Make two holes at the top before drying. Let the whole piece dry flat.
Paint the arches in soft colors. Rust, tan, cream, blush, mustard, and sage look warm and calm. For a bolder wall, try black, white, blue, and gold.
Budget tip: use a printed arch shape or a bowl as a guide. This keeps the curves even without buying tools.
Add fringe, tassels, or wooden beads to the bottom if you want more texture. Or keep it plain for a simple sculptural look.
This project is easy to size up or down. A tiny arch fits a shelf wall. A larger one can fill the space above a crib or desk.
15. Coiled Clay Wreath
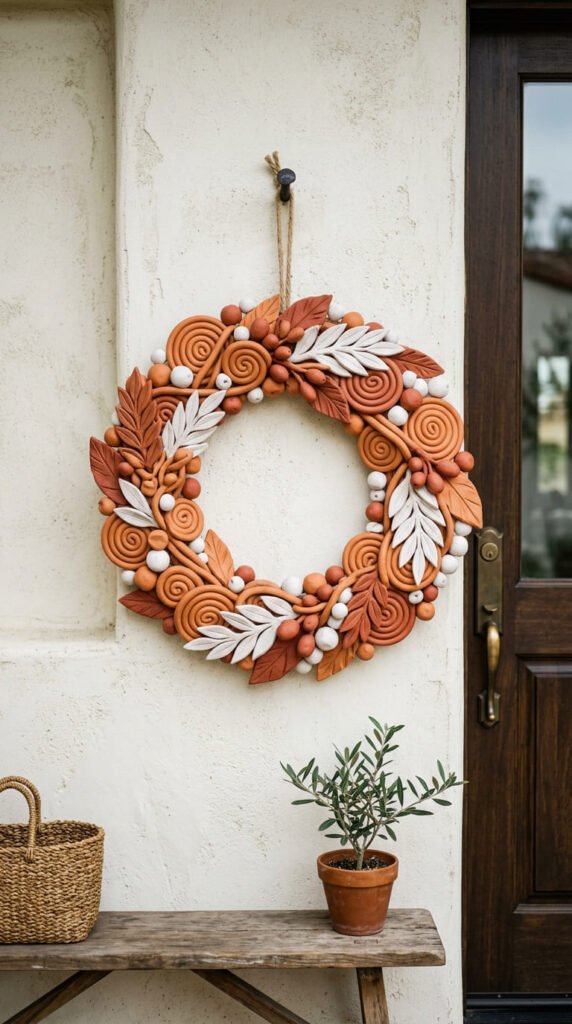
A coiled clay wreath has a handmade sculptural look. Start by rolling clay into long rope-like pieces. Keep them around the same thickness so the wreath looks balanced.
Shape the coils around a cardboard circle or plate. Layer them into a ring. Add leaves, beads, flowers, or small arches on top.
Scratch and dampen areas where pieces touch. Press gently to bond them.
Let the wreath dry flat. Because it has many parts, give it extra drying time before lifting.
Paint the entire wreath one color for a ceramic-style look. White, black, clay brown, or terracotta all work well. You can also dry brush the raised areas with a lighter color.
Budget tip: make a small wreath for an interior door or gallery wall. Large clay wreaths can get heavy fast.
Add a ribbon or hidden hanger to the back. Keep the hanging system strong but simple.
This piece works for seasonal decor, entryways, bedrooms, and handmade gifts. Change the colors for fall, winter, spring, or summer.
16. Embossed Clay Sphere Wall Art

Embossed clay sphere wall art is bold, simple, and very stylish. Make a flat backing shape first. A square, oval, circle, or arch works well.
Then roll small clay balls and cut them in half. Press the flat side onto the backing slab. Arrange them in rows, waves, circles, or random clusters.
Add smaller dots between larger half-spheres if you want more texture. Smooth the bases so each piece feels attached.
Let the panel dry flat. Sand the sides, but avoid sanding the raised dots too much.
Paint the whole piece one color. Matte cream, black, terracotta, or deep green can make the raised shapes stand out through shadow.
Budget tip: use this idea for one small statement panel instead of a huge piece. Texture gives it impact even at a smaller size.
Mount it in a shallow frame or hang it as-is. It looks great in hallways, offices, bedrooms, and living rooms.
This project is great if you like art that feels sculptural but not too detailed.
17. Seasonal Clay Wall Set
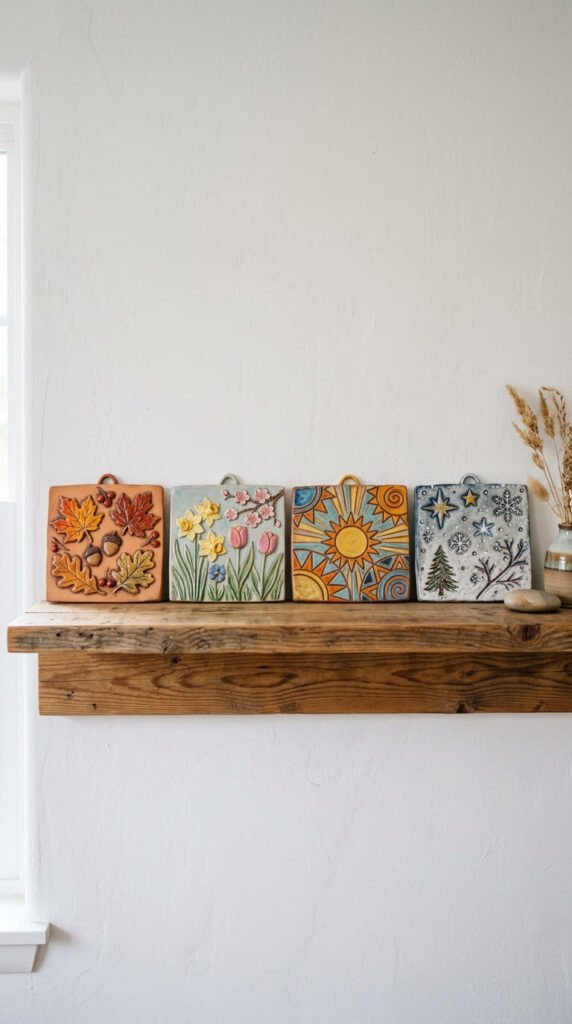
A seasonal clay wall set lets you swap decor during the year. Make small wall tiles or hanging shapes for each season.
For spring, use flowers, leaves, and soft colors. For summer, try suns, waves, fruit, or shells. For fall, press real leaves into the clay and paint with warm tones. For winter, make stars, houses, moons, and snow-like dots.
Keep all pieces the same size so they are easy to switch out. Add holes for hanging, or glue small loops to the back.
Budget tip: make one season at a time. You do not have to finish the full set in one day.
Store extra pieces in a small box with tissue paper between them.
This idea works well in entryways, kitchens, kids’ rooms, and mantel walls. It keeps your wall decor feeling updated without buying new prints every season.
Use the same twine, ribbon, or peg rail for every set. Only the clay pieces change, which saves money.
18. Clay Envelope Wall Pocket
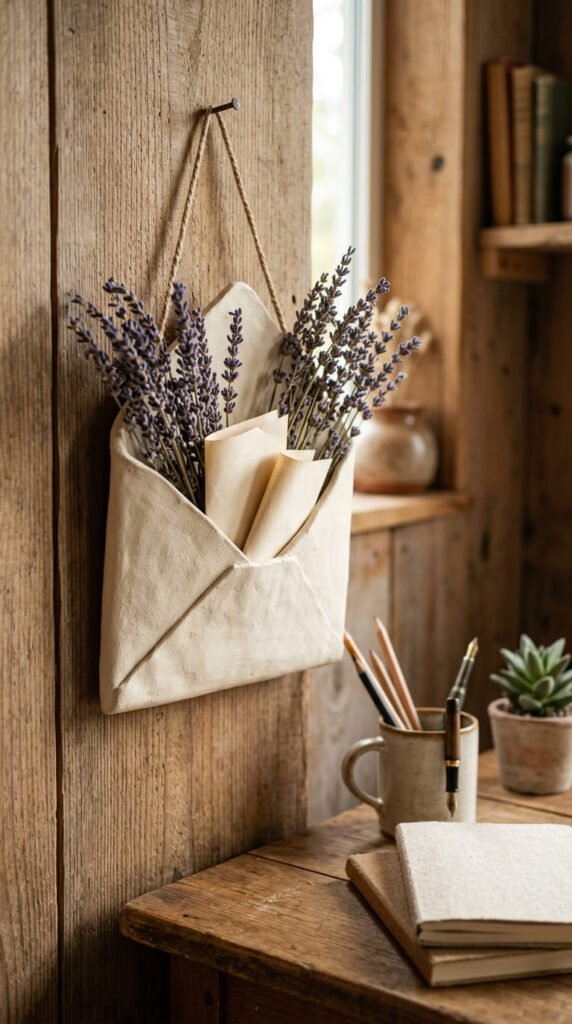
A clay envelope wall pocket is a sweet mix of wall art and storage. Roll clay into a rectangle for the back. Then add a folded triangle or curved flap shape on the front to create the pocket.
Seal the side edges well. Leave the top open. Add a small hole near the upper corners for hanging.
You can decorate the front with tiny flowers, stars, initials, or pressed lace. Keep the surface simple if you want a clean look.
Once dry, paint it cream, blush, soft blue, or clay brown. Add a matte sealer so it handles light use.
Use the pocket for dried flowers, small notes, affirmation cards, or tiny photos.
Budget tip: make it small. A lightweight pocket is easier to hang and less likely to pull away from the wall.
This project works near desks, beds, gallery walls, or entryways. It also makes a thoughtful gift for friends, teachers, or craft lovers.
Add dried lavender or baby’s breath before gifting. It makes the wall pocket feel finished and ready to hang.
19. Tiny House Clay Wall Plaque
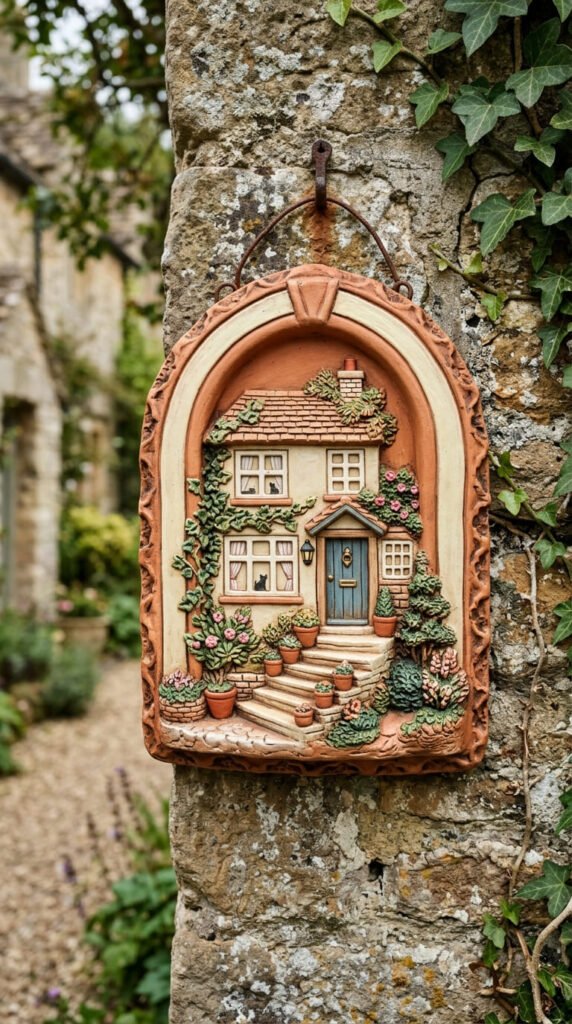
A tiny house clay wall plaque adds storybook charm to a blank wall. Start with an arch or rectangle slab as the base.
Add small clay pieces for a door, windows, roofline, steps, plants, shutters, and a tiny moon. Keep the details raised but not too thick.
Scratch and dampen the base before attaching each detail. Press gently and smooth the edges with a damp brush.
Let the plaque dry flat. Paint it in warm home colors: cream walls, terracotta roof, green plants, brown door, and soft yellow windows.
Budget tip: use a cardboard template for the arch. It keeps the shape neat and saves clay.
This wall plaque looks cute near an entryway, reading nook, kids’ room, or kitchen wall. You can make several small houses to create a village wall.
For a personal touch, match the door color to your real home or a loved one’s house.
Seal the piece and add a hanger to the back.
20. Oversized Clay Flower Wall Art

Oversized clay flower wall art can fill a wall with soft shape and color. Roll clay into petal shapes, then pinch one end of each petal so it looks slightly curved.
Make a round center piece. Attach the petals around it, or keep the petals separate and arrange them on the wall like a flower mural.
Let the pieces dry on curved paper or fabric so they do not sit perfectly flat. That gentle curve creates shadow on the wall.
Paint petals in blush, cream, mustard, rust, lilac, or deep red. Add a darker center for contrast.
Budget tip: make one large flower instead of many small flowers. One big piece can feel more dramatic and use less time.
This project works above a headboard, nursery dresser, vanity, or sofa.
Use lightweight clay and strong adhesive strips for smaller petals. For larger pieces, use proper wall hooks.
Keep the flower design simple. Smooth petals and thoughtful colors will make it look more like art and less like a kids’ craft.
21. Framed Flat Clay Object Art
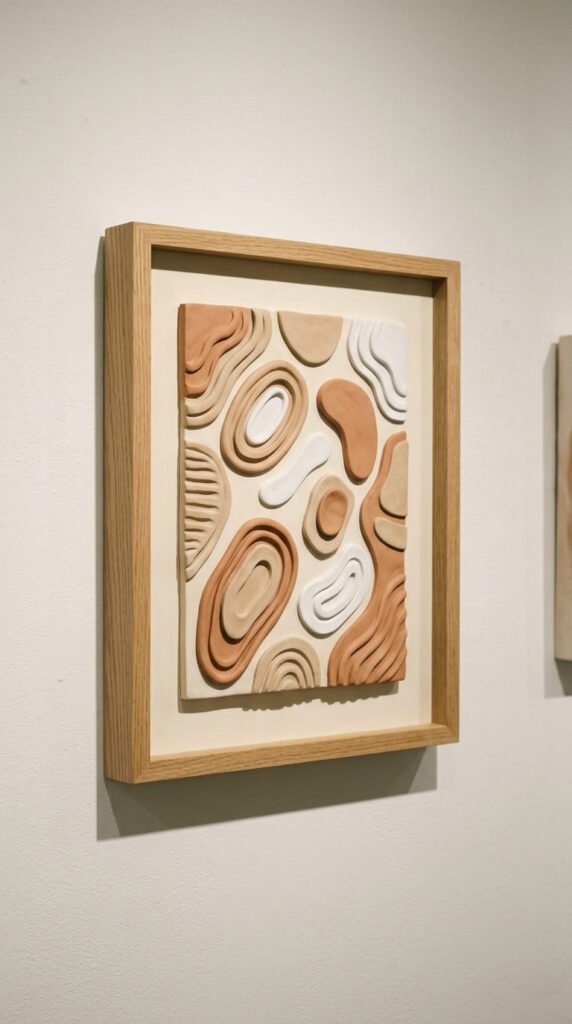
Framed flat clay object art is perfect if you want clay wall decor that looks neat and gallery-ready. Start with a thin clay slab. Cut abstract shapes, leaves, faces, arches, or small symbols.
Let the clay pieces dry flat. Sand the edges so they look clean.
Paint the background of a thrifted frame insert or canvas board. Then glue the clay shapes on top. This keeps the clay light and makes the artwork easier to hang.
Use a limited color palette. Cream, black, tan, rust, and olive look polished together. For a softer room, try blush, white, sand, and pale blue.
Budget tip: reuse old frames. Remove the glass so the raised clay can sit forward.
This project is great for renters, small apartments, office walls, and gallery walls. It gives you the clay texture without making a heavy piece.
Try a set of two matching frames for a balanced wall display. Keep the shapes simple, and let the shadows do the work.
Conclusion
Clay wall art can turn a blank wall into a handmade feature without a big budget. Start with easy projects like moon phases, botanical tiles, clay hooks, or small wall pockets. Then try bolder pieces like 3D landscapes, sunbursts, mirror frames, and oversized flowers. Use simple shapes, matte paint, sanded edges, and strong hanging methods for a clean finish. Pick one idea, gather your clay, and give your wall a piece that feels personal, bold, and made with care.