Making clay magnets as gifts is one of the most rewarding DIY projects you can pick up. They cost almost nothing to make, take just an afternoon, and feel genuinely personal in a way that store-bought gifts rarely do. Whether you use polymer clay that bakes in 15 minutes or air-dry clay that needs a couple of days, the process is simple enough for complete beginners. This list covers 21 creative ideas — from miniature food to personalized portraits — so you’ll find something that fits every person on your list.
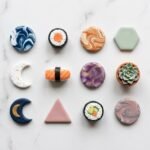
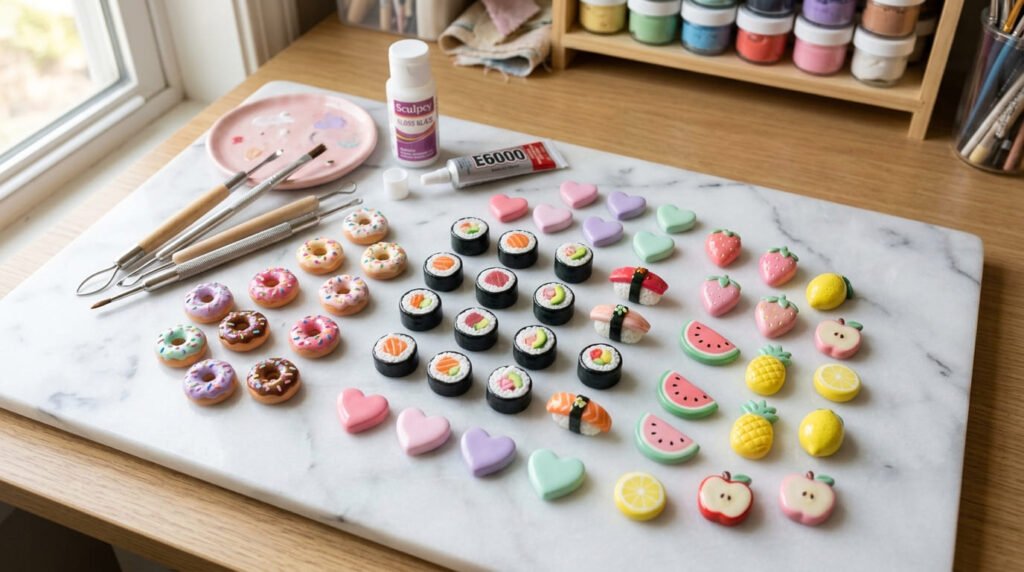
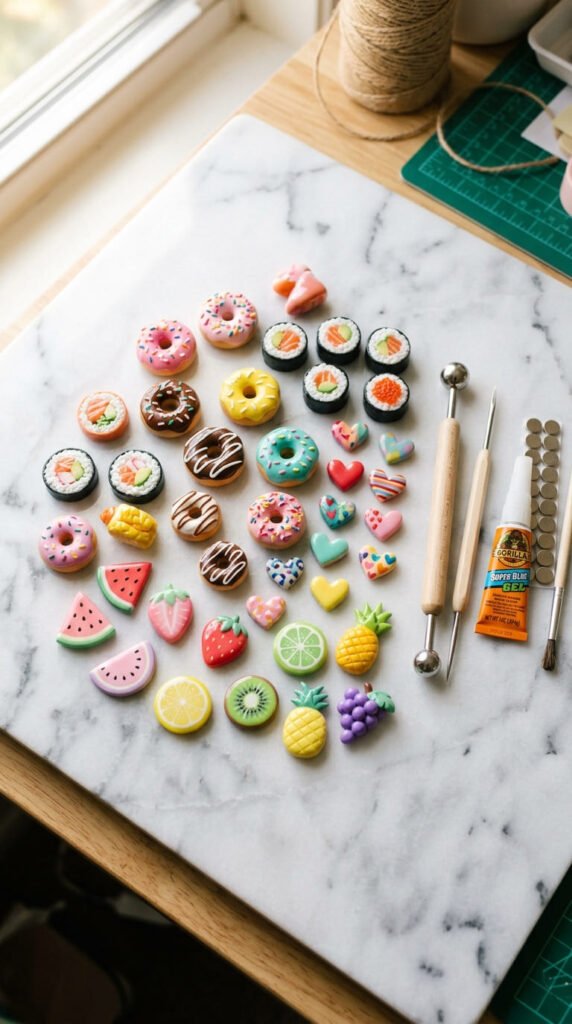
1. Mini Donut Magnets

Mini donut magnets are probably the most popular clay magnet design online, and for good reason.
They’re small, cute, and incredibly easy to shape — even if you’ve never touched clay before.
What you need: A small ball of polymer clay, acrylic paints, a toothpick, and super glue for the magnet back.
How to make them:
- Roll a small ball of clay, then poke a hole through the center with your finger or a pencil
- Flatten it slightly to get that classic donut shape
- Bake at 275°F (135°C) for 15 minutes
- Once cool, paint on icing and add tiny sprinkle dots with a toothpick
The trick is keeping the size small — about the diameter of a quarter works perfectly.
Use Sculpey or any standard polymer clay brand. Pink, white, and chocolate colors are crowd favorites.
Seal with Mod Podge for a glossy finish that protects the paint.
These make great gifts for bakers, foodies, or anyone with a fun kitchen. Make a set of 4–6 in different flavors and arrange them in a small gift box with tissue paper for a gift that feels thoughtful without spending much.
Budget tip: A single block of Sculpey costs around $2–3 and makes about 8–10 donuts.
2. Tiny Sushi Roll Magnets
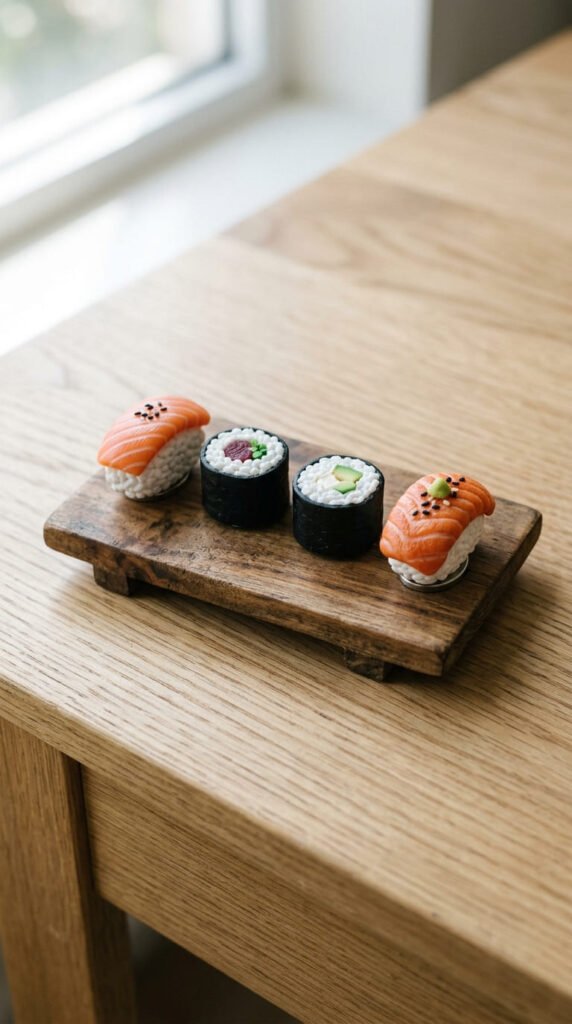
Sushi magnets are a step up from donuts in terms of detail, but still very beginner-friendly.
The shapes are mostly cylinders and rectangles, which are easy to roll out by hand.
Basic sushi shapes to try:
- Maki roll – roll black clay around a white cylinder, slice into rounds
- Nigiri – a small white oval with a flat piece of colored clay on top for the fish
- Tamago (egg) – a yellow rectangle with a thin black strip around it
The key is using contrasting colors to make each piece look realistic. White for rice, black for nori, pink or orange for salmon.
You don’t need sculpting tools. A butter knife and your fingers are enough.
Bake each piece at 275°F for 15–20 minutes, let cool completely, then glue disc magnets to the back with Gorilla Glue.
Wait a full 24 hours before sticking them on the fridge — this gives the glue time to fully set.
These are perfect gifts for people who love Japanese food, anime fans, or anyone who just appreciates something unique on their fridge.
Budget tip: Make a full “sushi platter” set of 6 pieces using just two $2 clay blocks.
3. Watermelon Slice Magnets
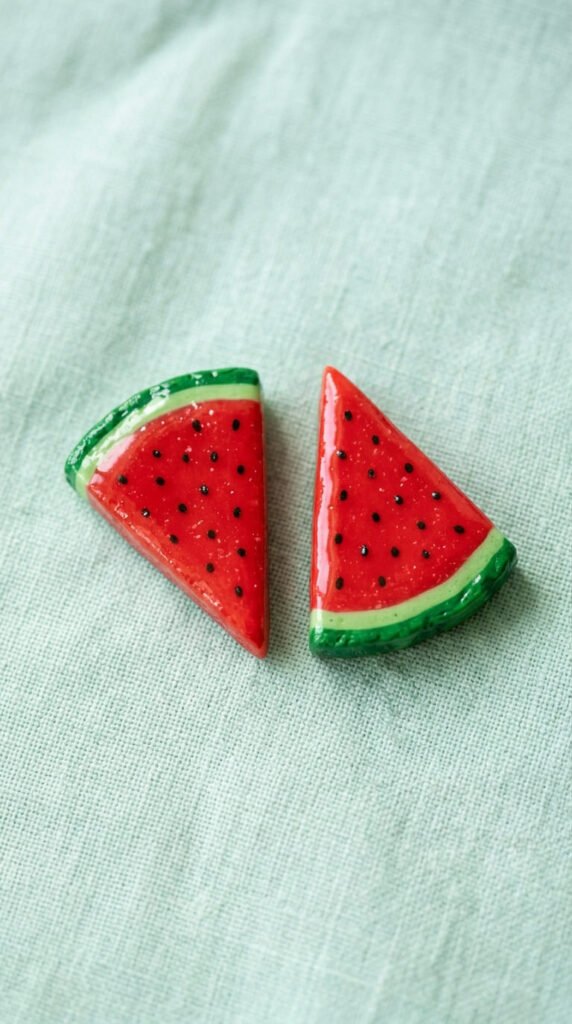
Watermelon slice magnets are bright, cheerful, and one of the easiest fruit designs to pull off.
The shape is just a triangle. That’s it.
Step-by-step:
- Mix a red or hot pink ball of clay for the inner flesh
- Wrap a thin layer of white clay around the flat edge, then a thin layer of green on the outside for the rind
- Flatten the whole thing into a half-circle, then cut into triangular slices
- Use a toothpick to add tiny black seed dots before baking
- Bake at 275°F for 15 minutes
The layering technique is what makes these look so satisfying. Once you slice through, you get a clean cross-section showing all three colors.
Paint isn’t even required here — the color comes from the clay itself.
After baking, seal with a gloss varnish or Mod Podge to make the colors pop.
These are great for summer gifts, birthday party favors, or as fridge decor for someone who loves tropical vibes.
You can make a whole “fruit platter” set by adding pineapple, strawberry, and orange slices to the mix.
Budget tip: Use leftover red and green clay scraps from other projects — nothing goes to waste.
4. Heart-Shaped Magnets for Valentine’s Day
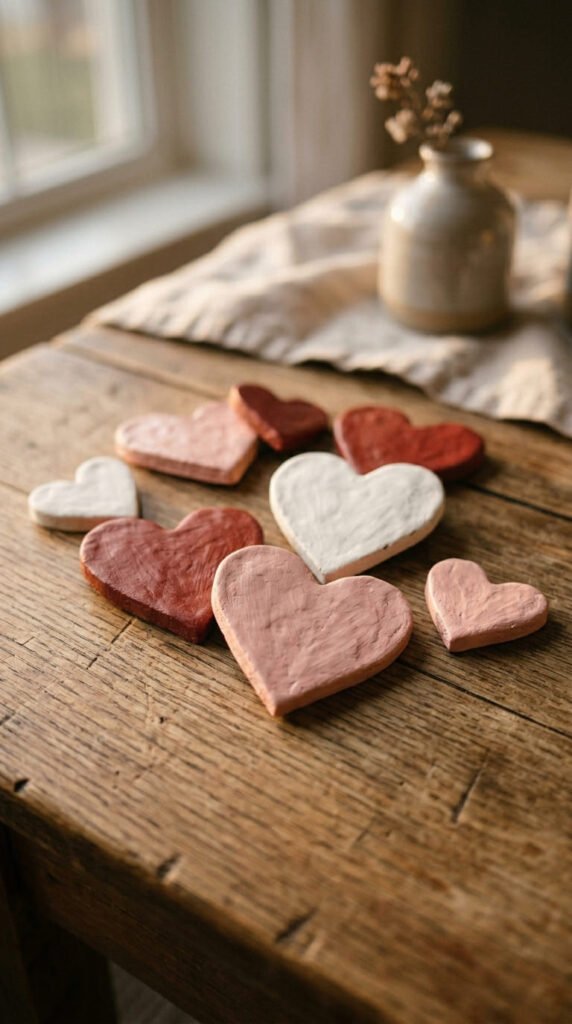
Heart magnets are the classic beginner design, and they work for almost every occasion — not just Valentine’s Day.
They’re the perfect starter project because the shape is forgiving. A slightly lopsided heart still looks charming.
Two ways to shape a heart:
- Method 1: Roll two equal balls, press them side by side, then pinch the bottom into a point
- Method 2: Roll a log of clay, fold it in half, and pinch the fold into a V-shape
Use air-dry clay if you want to skip the oven entirely. Just shape, let sit for 2–3 days, then paint.
For polymer clay, bake at 275°F for 15 minutes.
Acrylic paints work great on both types. Try deep red, blush pink, or even marble-effect white with thin grey veins drawn on with a fine brush.
Add a small stamp or letter press before baking to personalize with initials.
These work as Valentine’s gifts, anniversary gifts, or just a sweet gesture for a friend.
Gift idea: Make 5 hearts in a gradient of pinks and reds, attach them all to a small square of felt inside a box.
Budget tip: Air-dry clay is often the cheapest option — a bag under $5 makes dozens of hearts.
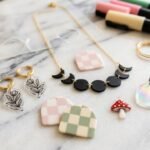
5. Personalized Initial Magnets
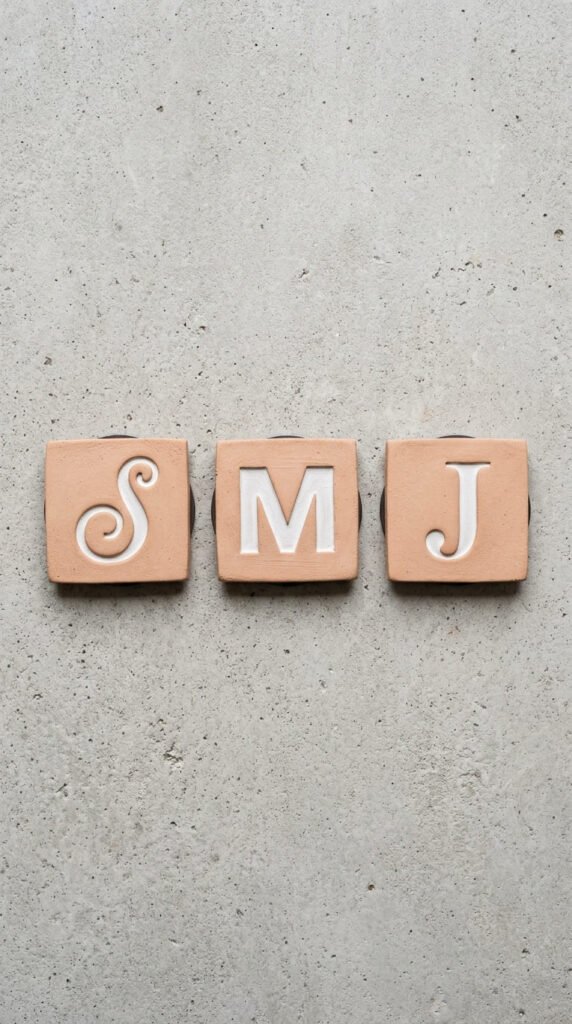
Personalized gifts always land well, and initial magnets are one of the easiest ways to add that personal touch.
All you need is a letter stamp set — the kind sold for about $5–8 at any craft store.
How to make them:
- Roll out a flat sheet of clay about 1/4 inch thick
- Use a cookie cutter or bottle cap to cut out a circle or square shape
- Press a letter stamp firmly into the center before baking
- Bake, cool, then paint the stamped letter with a contrasting color
- Seal and attach a magnet disc to the back
You can keep the clay its natural color or paint the whole tile a solid background color first, then highlight the letter in gold, white, or black.
These work well as locker magnets for teens, or as a small gift for a coworker’s new office.
Make a full name set — one letter per magnet — and give them as a collection.
Personalization ideas:
- First initial only
- Full name across 3–4 tiles
- Initials of a couple as a wedding gift
Budget tip: Alphabet stamp sets from dollar stores or online marketplaces cost very little and last forever.
6. Kawaii Animal Face Magnets
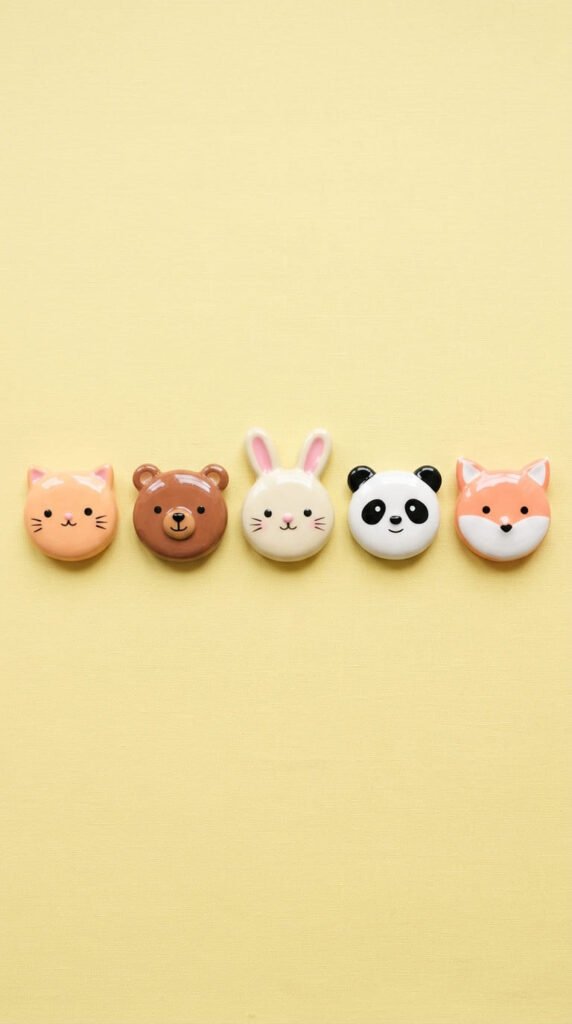
Kawaii-style animal magnets are one of the most searched clay magnet designs right now — and they’re genuinely fun to make.
The kawaii style keeps things simple: big round shapes, tiny dot eyes, minimal details. No sculpting experience needed.
Popular animal faces to try:
- Cat (pink triangles for ears, whisker dots)
- Panda (white circle, black eye patches)
- Bunny (round face, long ear tabs)
- Bear (round face, small half-circle ears)
- Fox (orange with a white muzzle and small ears)
All of these start with a round ball flattened into a disc. Add ears by pressing small clay pieces on top before baking.
Use a toothpick for the eyes and nose details.
After baking and cooling, add painted details — blush cheeks are a kawaii signature. Just dab a tiny bit of pink paint on each cheek.
These are ideal gifts for kids, teens, and anime lovers.
Make a full “animal squad” set of 5–6 faces packaged together for a cohesive gift.
Budget tip: Pastel polymer clay packs often come in multi-color sets for under $10 — enough for 20+ magnets.
7. Seasonal Leaf Magnets for Fall
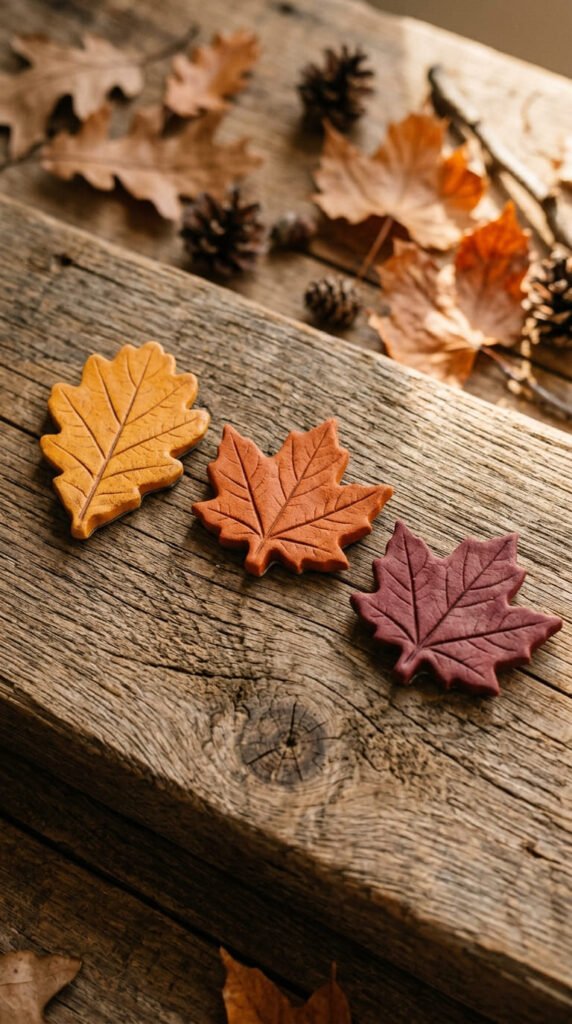
Fall-themed gifts feel personal and timely, and leaf-shaped clay magnets are the perfect autumn project.
Real leaves make the best molds — this is a zero-cost texture tool.
How to use a real leaf as a mold:
- Roll out a thin sheet of clay
- Press a real leaf firmly into the clay surface, vein-side down
- Lift it off carefully — it leaves a perfect vein impression
- Cut around the leaf shape with a small knife or scissors
- Bake as usual
The result is a magnet with incredibly realistic leaf texture, and it takes about 2 minutes of actual effort.
Use polymer clay in fall colors: burnt orange, dark red, golden yellow, deep brown.
Or use air-dry clay and paint the leaf after drying.
Mix multiple leaf shapes and sizes into a “fall foliage” gift set of 5–6 pieces.
These make great housewarming gifts in September and October, or hostess gifts for Thanksgiving.
Seal with a matte varnish to keep the natural look rather than a glossy finish.
Budget tip: Collect real leaves from your yard — they’re free and give results no stamp can match.
8. Moon Phase Magnet Set
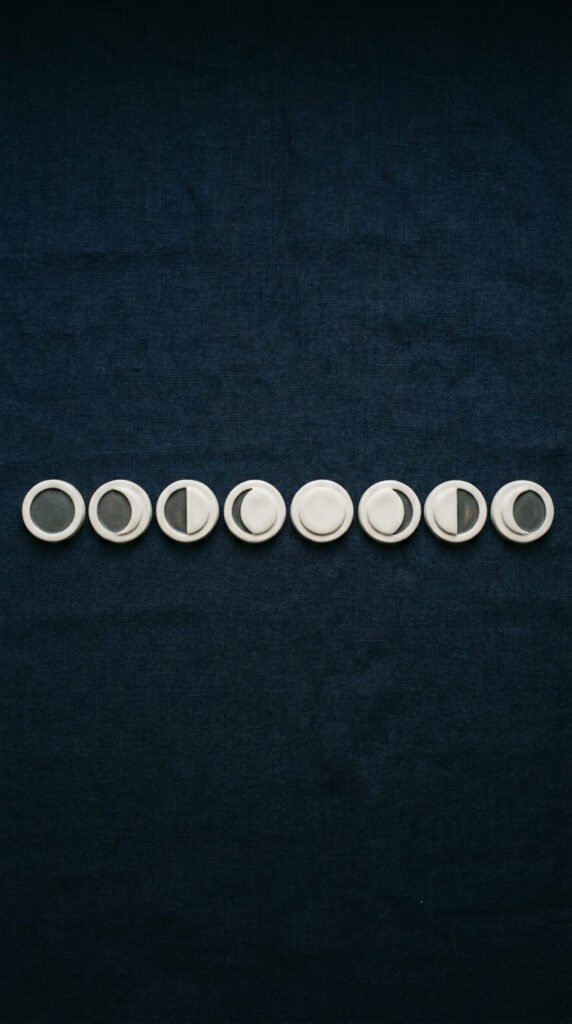
Moon phase magnets are one of the most under-covered ideas in this space, which makes them feel fresh and distinctive as a gift.
The shapes are simple — they’re all just partial circles. No sculpting required.
How to make the 8 moon phases:
- Roll out white clay and cut circles of the same size
- For crescent phases, cut a smaller circle out of one side before baking
- For gibbous phases, cut away a smaller section
- Bake all pieces together at 275°F for 15 minutes
You can paint each phase with pearlescent white or silver paint to give them a soft glow.
Display them as a horizontal row of all 8 phases — package them together as a complete set in a small kraft paper box.
These appeal to people who love astrology, astronomy, or minimalist home decor.
They work especially well as birthday gifts, since you can highlight the moon phase for someone’s birth date.
Use a small printout to label each phase inside the gift box for an extra thoughtful touch.
Budget tip: One block of white polymer clay is enough to make two full sets.
9. Pizza Slice Magnets
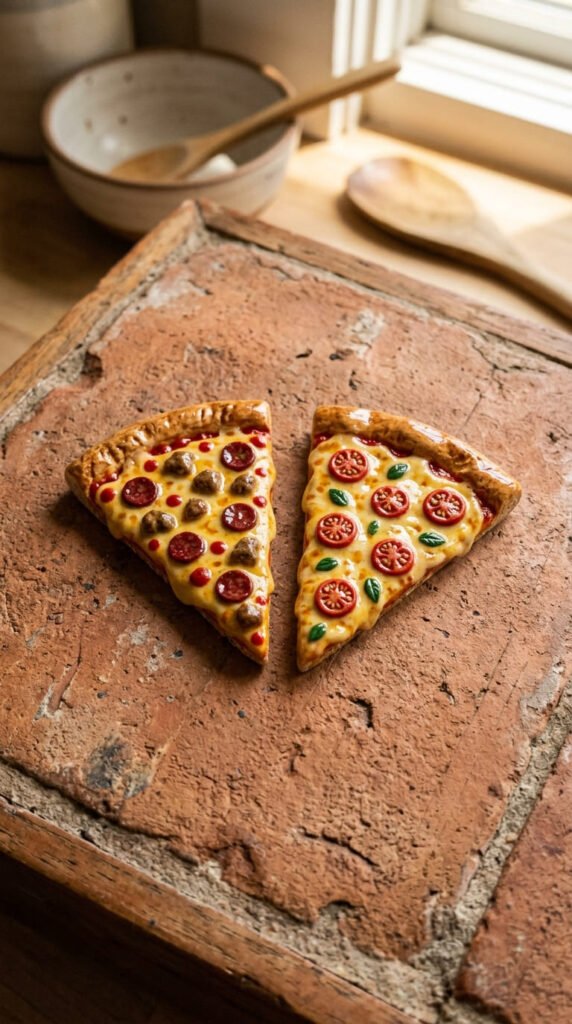
Pizza magnets are a crowd-pleaser and a fantastic gift for anyone who takes their food seriously (or not seriously at all).
The triangle shape is simple, and the toppings are where the fun begins.
Basic process:
- Start with a triangle of beige or tan clay for the crust
- Add a thin layer of red clay on top for the sauce
- Layer small blobs of yellow clay for cheese
- Add tiny topping pieces — red circles for pepperoni, green dots for basil, brown bits for sausage
- Bake at 275°F for 15–20 minutes
The layering approach is key — press each layer firmly so they bond during baking.
After baking, seal with a gloss finish to make the toppings look fresh and vibrant.
You can make different styles — margherita, pepperoni, veggie — and package them as a “pizza night” magnet set.
These are great fridge magnets for pizza lovers, Italian food fans, or anyone who just loves something playful in the kitchen.
Gifting idea: Box up 3 different pizza slices with a small hand-written note: “You deserve a slice.”
Budget tip: Use small clay scraps for toppings — you barely need any material per slice.
10. Motivational Quote Tile Magnets
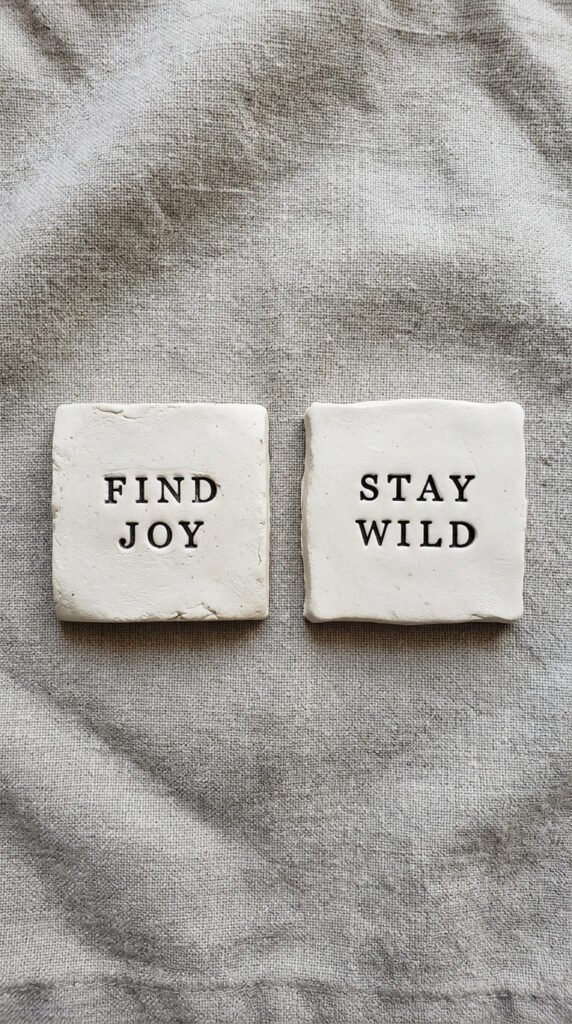
Quote tile magnets are a gift that keeps showing up on someone’s fridge as a daily reminder — which makes them one of the most meaningful things you can make.
You’ll need a letter stamp set and some patience, but the result is a polished, personal gift.
Best approach:
- Roll out a flat slab of clay, about 1/4 inch thick
- Cut into small rectangular or square tiles
- Use letter stamps to press your quote or phrase one character at a time
- Smooth any gaps carefully with your fingertip
- Bake, cool, then seal
Keep phrases short — 3–5 words max work best on a small tile.
Ideas: “You’ve got this,” “Make today count,” “Be kind,” or even a short inside joke between you and the recipient.
Use black acrylic paint to highlight the stamped letters after baking — brush on paint, then wipe off the surface so the paint only stays inside the stamped impressions.
These work for coworkers, friends going through a tough time, or as part of a larger gift set.
Budget tip: Dollar-store alphabet stamps work just as well as premium sets for this project.
11. Geometric Minimalist Magnets
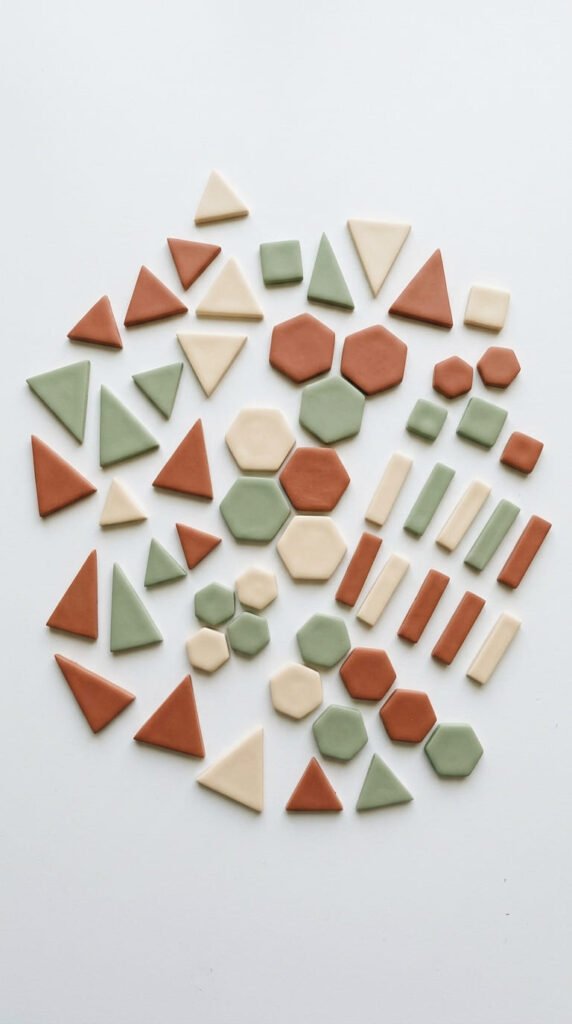
Minimalist magnets are having a moment in home decor, and geometric clay shapes fit right into that aesthetic.
These are actually easier to make than organic shapes because the edges are clean and symmetrical.
Tools that help:
- Small cookie cutters in triangle, hexagon, and circle shapes
- A ruler and craft knife for perfect rectangles
- A smooth rolling pin to get even thickness
Roll your clay to a consistent 1/4 inch thickness, cut your shapes, and bake.
Color choices matter most here. Stick to:
- Muted terracotta
- Sage green
- Dusty rose
- Off-white or cream
These colors feel intentional and match current interior design trends.
You can leave the surface completely smooth, or add subtle texture with a piece of fabric pressed in before baking.
Arrange a set of 6–8 different shapes in complementary colors for a gift that looks like something from a boutique home store.
These are ideal for people who love Scandinavian or earthy home aesthetics — think the person who has plants everywhere and neutral tones.
Budget tip: Muted colors are easy to achieve by mixing a small amount of brown or grey into any bright color.
12. Succulent and Cactus Magnets
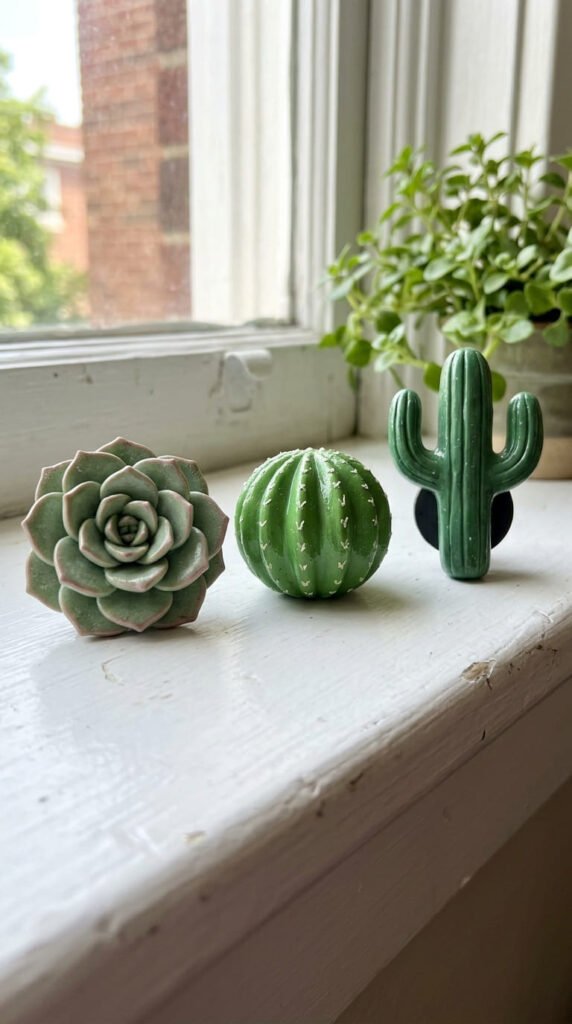
Succulent and cactus magnets are perfect for plant lovers — and they’re easier to sculpt than you’d expect.
The shapes are repetitive and symmetrical, which actually makes them forgiving for beginners.
Succulent rosette method:
- Roll small teardrop-shaped petals out of green clay
- Arrange them in a circular pattern around a center bud
- Press gently to fuse them together
- Bake as a flat disc
Cactus method:
- Roll a cylinder for the body
- Add smaller cylinders for arms
- Press tiny white clay dots on the surface for spines
- Bake, then paint with two shades of green for depth
After baking, seal with a gloss finish to bring the colors to life.
These make thoughtful gifts for plant parents, apartment dwellers who can’t keep real plants, or anyone who loves the desert aesthetic.
Package 3–4 different plants together in a small wooden box with a little soil and pebbles for presentation.
Budget tip: Mix different shades of green from just two clay colors — lime and dark green — by blending in different ratios.
13. Rainbow and Cloud Magnets
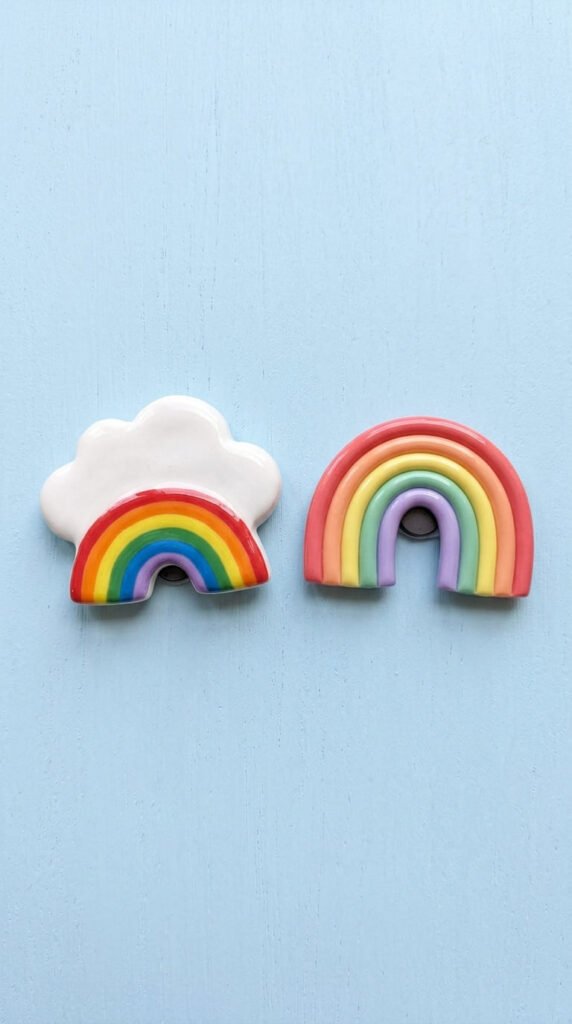
Rainbow and cloud magnets feel joyful and childlike in the best way — and they appeal to people of all ages.
The shapes are simple arcs and puffy blobs, both very easy to form by hand.
Cloud magnet:
- Roll several small balls of white clay in different sizes
- Press them together in a cluster, blending the edges slightly
- Flatten the bottom to create a flat surface for the magnet
- Bake and seal
Rainbow magnet:
- Roll thin logs of clay in ROYGBV colors
- Curve each one into a gentle arch, layering from biggest to smallest
- Press them together on a flat backing piece
- Bake as a unit
For the most polished look, use pastel versions of rainbow colors rather than bright primaries — dusty pink, soft yellow, muted lilac.
These are great gifts for kids, new parents, or anyone who brightens a room just by being in it.
They also work as nursery decor gifts — a set of rainbow and cloud magnets is sweet on a baby’s first fridge.
Budget tip: Keep leftover clay scraps from other projects for the rainbow colors — you only need small amounts of each.
14. Vintage Key Magnets
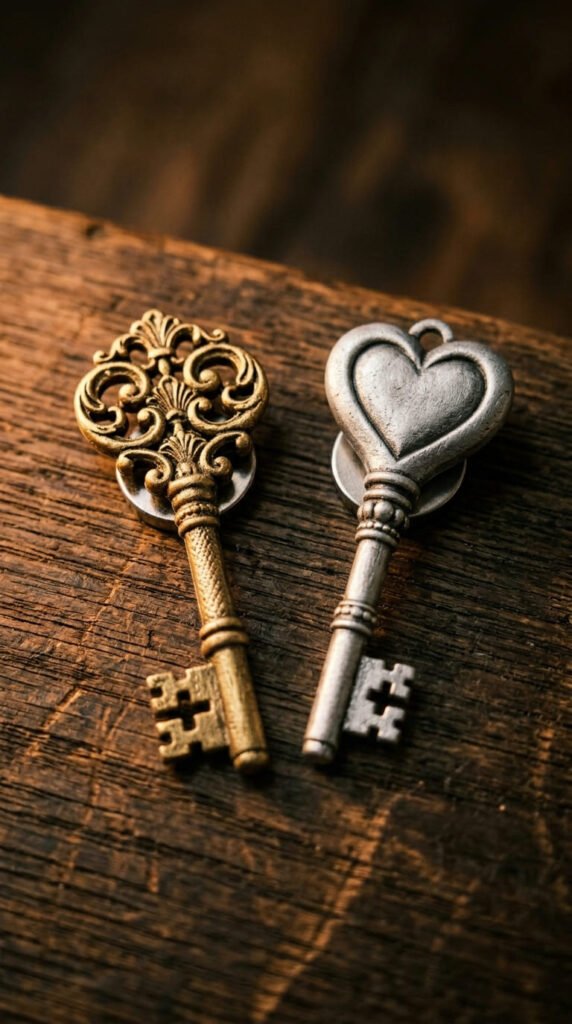
Vintage key magnets are one of the most under-covered designs in the clay magnet space, which makes them a truly unique gift.
They look complex but are actually straightforward to make.
Basic method:
- Shape the shaft (the straight bit) from a thin clay log
- Add a bow (the top part) using a small circle or decorative shape
- Add small clay details — scrollwork, hearts, or diamond shapes — pressed on top
- Flatten everything to about 1/4 inch thickness before baking
After baking, paint with metallic acrylic paint — gold, bronze, or antique silver all work beautifully.
Use a dry-brush technique to highlight the raised details: dip your brush in paint, wipe most of it off, then lightly drag it across the surface.
Seal with a matte varnish to keep the antique look rather than a shiny finish.
These are perfect gifts for history lovers, interior design fans, or anyone who collects vintage objects.
They also work well as housewarming gifts — a symbolic “key to the home.”
Budget tip: Paint is doing the heavy lifting here, so basic tan or grey clay works just fine as the base.
15. Wedding Favor Magnets
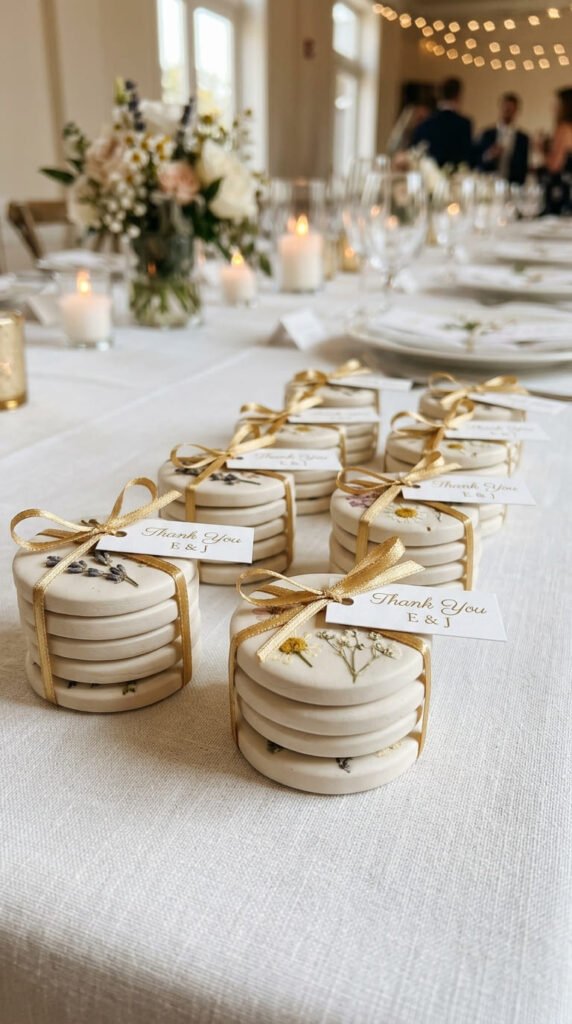
Clay magnets are one of the most popular DIY wedding favor options — and for good reason. They’re affordable, personal, and actually useful.
The key is keeping the design simple so you can make 30, 50, or 100 of them without burning out.
Best designs for wedding favors:
- Simple circle with pressed flower texture
- Heart shape with the couple’s initials stamped in
- Small rectangle with the wedding date pressed in
For large quantities, use a cookie cutter to make identical shapes quickly and efficiently.
Air-dry clay is often better for weddings because you can make large batches without worrying about oven space.
Roll out the clay, cut all the shapes at once, let dry for 2–3 days, then paint and seal in batches.
Use white, ivory, or blush pink as base colors for a classic wedding feel.
Package each magnet in a small glassine envelope or tie with ribbon before the event.
Important tip: Attach magnets before packaging. Give glue at least 24 hours to fully cure.
Budget tip: Air-dry clay in bulk bags costs far less per unit than polymer clay — great for high-volume projects.
16. Iridescent Gemstone Magnets
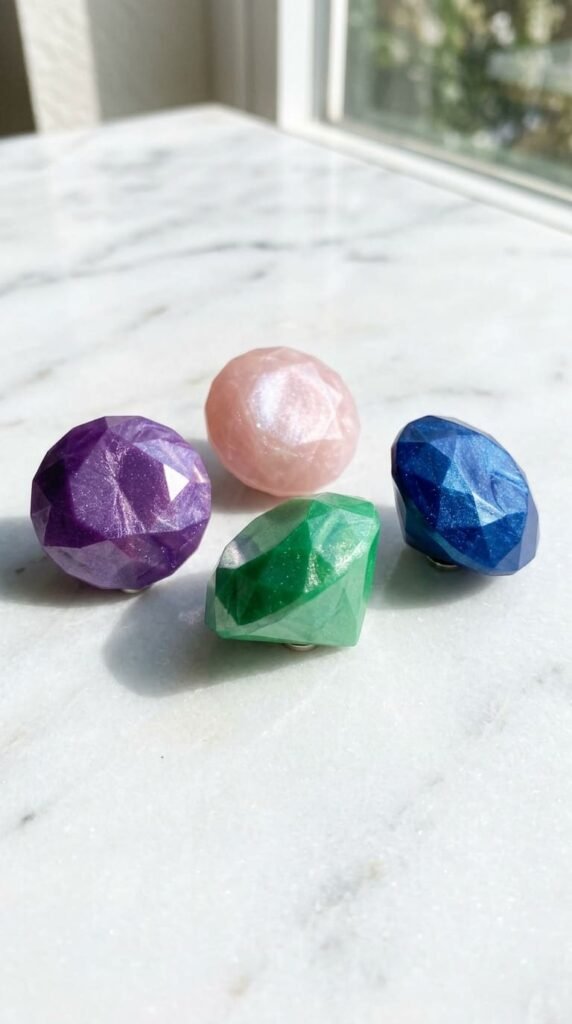
Gemstone magnets look expensive and luxurious, but they’re made with basic polymer clay and some clever painting.
The faceted surface is the key detail — and it’s easier to create than it looks.
Method:
- Form a rough gemstone shape (irregular hexagon or octagon works well) by hand
- Use a flat tool or the edge of a ruler to press flat faces into the surface, creating angular planes
- Bake and cool completely
The painting step is where the magic happens:
- Base coat with a solid color (purple, blue, green)
- While still slightly wet, add a touch of metallic or pearlescent paint in a lighter shade
- Dry-brush the raised edges with silver or gold to simulate light catching the facets
Seal with a high-gloss finish to complete the gem effect.
These are beautiful gifts for anyone who loves crystals, jewelry, or maximalist aesthetics.
Package a set of 4–6 different “gemstones” — ruby, sapphire, emerald, amethyst — in a small velvet pouch for an elevated presentation.
Budget tip: Pearl-finish paint from craft stores costs about $3–4 and transforms even basic clay into something special.
17. Tiny Travel Souvenir Magnets
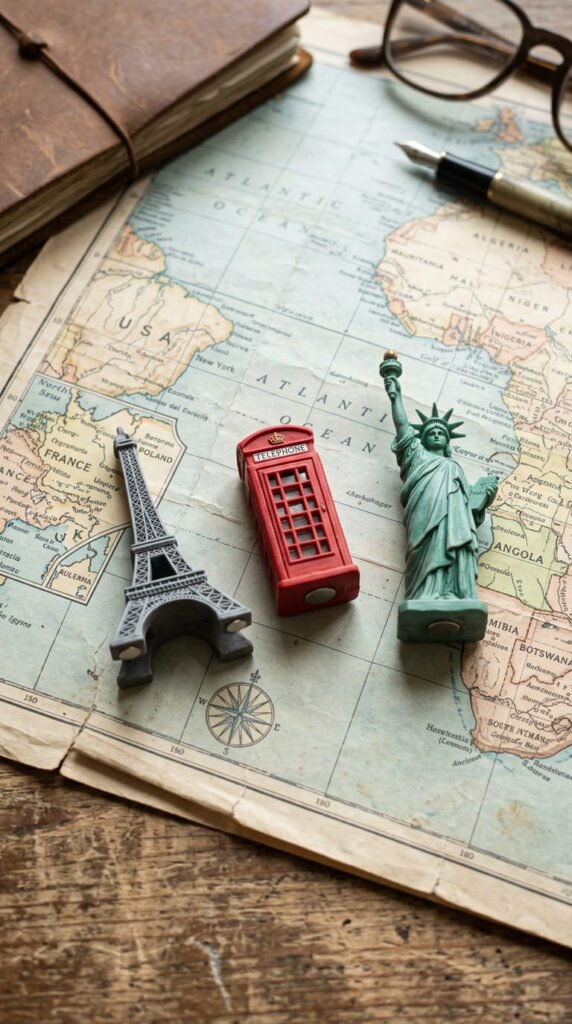
Travel souvenir magnets are one of the most emerging and under-covered uses for clay magnets.
Instead of buying cheap tourist magnets, make a custom version of a landmark that means something to you and the person you’re gifting it to.
Great landmarks to try:
- Eiffel Tower (tall thin triangle with lattice texture scored in)
- Cactus for a Southwestern trip
- Mountain silhouette
- Famous bridge outline
- State or country shape cut from flat clay
The trick is simplifying the shape into its most recognizable form. You don’t need perfect detail — just enough to identify it.
Score texture details (the Eiffel Tower’s lattice, bridge cables, mountain ridges) with a toothpick before baking.
After baking, paint in the appropriate colors and seal.
These make incredibly meaningful gifts when they represent a place you traveled together, or a place the recipient is from.
They also work as a DIY alternative to the tourist shop for your own fridge at home.
Budget tip: Use a single neutral clay color and rely on paint for the final look — you only need one block of clay for several landmarks.
18. Flower Bouquet Magnets

Flower magnets are a timeless gift, and the bouquet format — multiple flowers clustered together as one magnet — makes them look more finished than a single bloom.
Simple flower construction:
- Roll 5 small teardrop shapes for petals
- Arrange them in a circle around a small ball center
- Flatten gently so the whole piece sits flush
- Add 1–2 small leaf shapes on the sides
- Bake together as a single unit
Mix flower types in one bouquet — a rose, a daisy, and a small wildflower together look much more interesting than three of the same.
Color ideas:
- Classic: pink, white, and yellow
- Modern: terracotta, dusty mauve, sage green
- Bold: bright red, orange, and purple
After baking, add fine paint details — light streaks on petals, a pop of contrasting center color.
These are great gifts for Mother’s Day, birthdays, or teacher appreciation gifts.
Make a set of 3 bouquets in different color families and package them together.
Budget tip: Flower shapes are small — use tiny clay scraps that are too small for other projects.
19. Cute Food Character Magnets
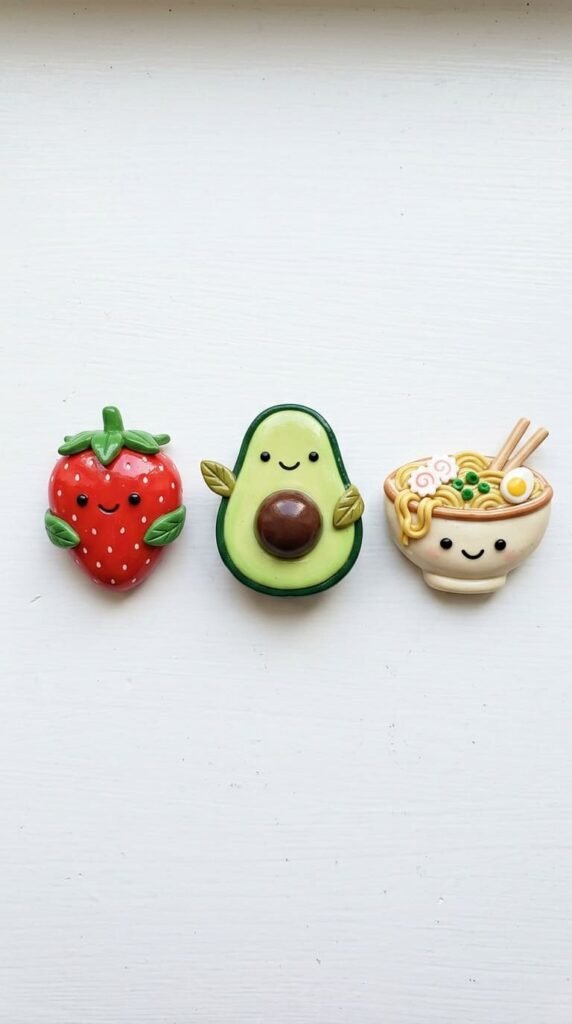
Food characters are kawaii-style magnets taken one step further — they’re food with faces, which sounds ridiculous and is exactly what makes them so charming.
Almost any food shape can become a character with two dot eyes and a small curved mouth.
Easy food characters to try:
- Avocado with a smiling pit
- Strawberry with leaf arms raised up
- Ramen bowl with wavy noodle hair
- Taco with pepper arms
- Lemon slice with sunglasses
The character details are minimal — two small black dots for eyes and a thin curve of clay or paint for the mouth is all you need.
Make the food shape first, bake it, then add painted face details after cooling.
Or add tiny unbaked clay details before baking — small dot eyes made from black clay stay in place after baking without painting.
These are fantastic gifts for foodies, people who love kawaii aesthetics, and kids.
A set of 3–4 matching food characters packaged in a small box is a complete and affordable gift that feels genuinely creative.
Budget tip: Faces require almost no extra clay — use the back of a pencil to make eye dots in black clay.
20. Caricature Portrait Magnets
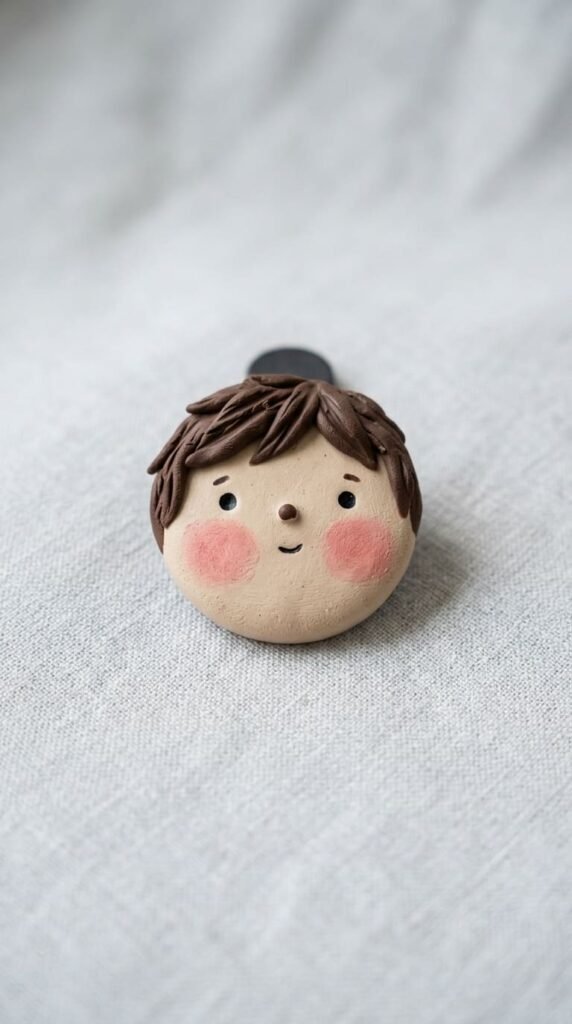
Portrait magnets are one of the most personal gifts you can make, and they don’t require artistic talent — just a willingness to keep it simple.
The key is not trying to be realistic. Go for a simple, stylized face.
Basic portrait method:
- Start with a round disc of skin-tone clay (mix pink, white, and a tiny bit of brown)
- Add a small ball for the nose
- Shape hair by pressing flat pieces of the right color around the top and sides
- Add tiny ear shapes on the sides
- Bake, then paint facial features after cooling
Painted details are easier to control than sculpted ones for a beginner. Use a fine brush for eyes, eyebrows, and a small lip color.
Add blush cheeks with a light pink dab to give the face warmth.
You can match hair color, skin tone, and even add glasses or accessories.
These are unforgettable gifts — imagine handing someone a tiny clay version of themselves.
They work for birthdays, Valentine’s Day, friendship gifts, or just because.
Budget tip: Skin-tone clay is easy to mix from white + a tiny amount of brown + a tiny bit of red. No special clay required.
21. Foam Clay Alternative Magnets
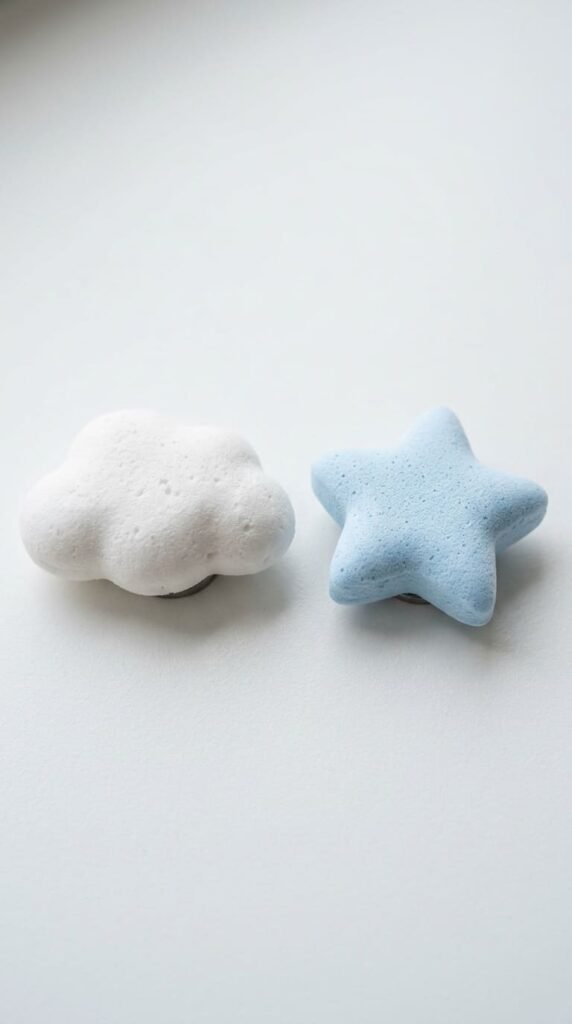
Foam clay is a material most people have never heard of, and that’s exactly what makes these magnets so interesting as a gift conversation piece.
Unlike polymer clay, foam clay doesn’t need baking and dries completely lightweight with a soft, almost spongy texture.
How it works:
- Foam clay air-dries in 12–24 hours depending on thickness
- It’s much lighter than polymer clay — perfect for detailed 3D shapes that would be heavy otherwise
- It doesn’t crack easily as it dries, making it more forgiving
Best shapes for foam clay:
- Puffy clouds
- 3D stars or hearts with raised centers
- Fluffy animal shapes
- Thick flower petals with natural texture
You can mix colors directly or paint after drying — foam clay takes acrylic paint well.
The finished texture has a matte, soft finish that looks different from standard clay magnets — making them stand out as a unique gift.
Attach disc magnets with super glue after the foam clay is fully dry.
These are great projects for crafting with kids because there’s no oven involved and the material is very safe and easy to work with.
Budget tip: Foam clay is available online and in hobby stores for around $5–8 per pack, making multiple magnets per pack.
Conclusion
Clay magnet gifts are proof that the most thoughtful presents don’t come from a store.
With just a few dollars in materials and an afternoon of your time, you can make something genuinely personal — whether that’s a set of tiny sushi rolls for a foodie friend, a moon phase collection for someone who loves the night sky, or a simple initial tile for a coworker.
The ideas in this list run from truly beginner-friendly (hearts, watermelon slices) to slightly more involved (portrait magnets, gemstones), so there’s a starting point no matter your experience level.
Start with one design that excites you. Make a small batch. See how it feels.
You’ll likely find that the process is just as enjoyable as the gifting — and that the person on the receiving end reacts the way people always do when they receive something truly handmade: with a smile that tells you it was worth every minute.