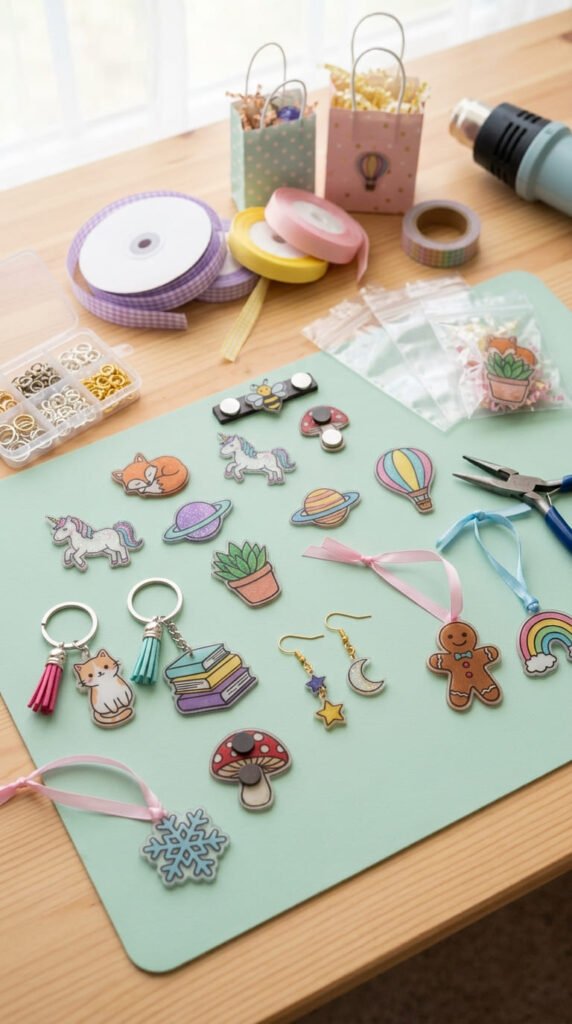
Shrinky Dink plastic sheets look simple, but tiny mistakes can lead to curled pieces, dark colors, tiny holes, or charms that do not sit flat. The good news? Once you know the right steps, the process becomes easy, fun, and surprisingly addictive.
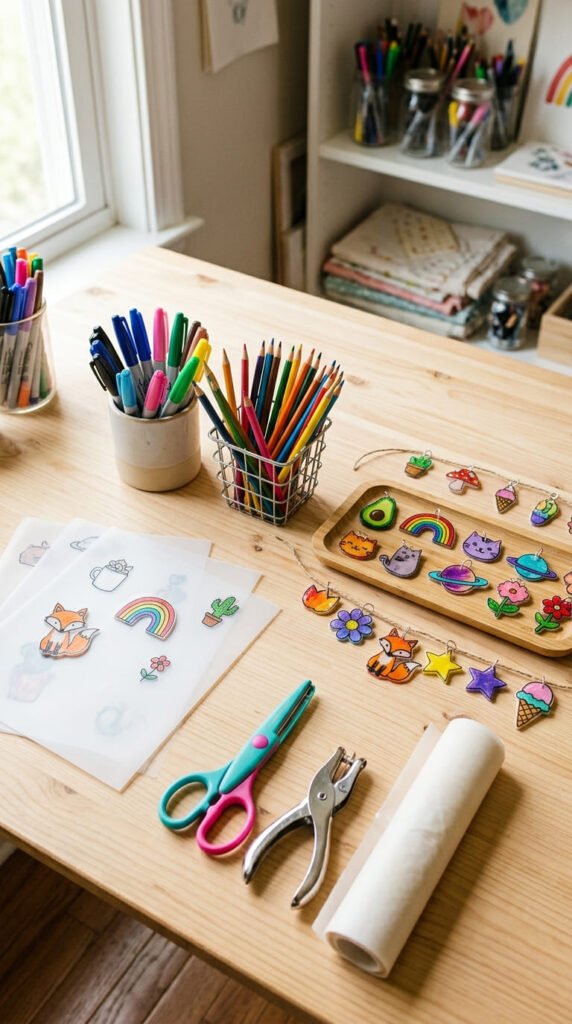
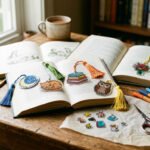
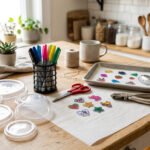
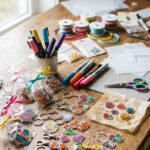
Whether you are making keychains, earrings, magnets, ornaments, party favors, or backpack charms, the secret is planning before the plastic ever goes into the oven. Here is how to use Shrinky Dink plastic sheets for clean, colorful, and long-lasting results every time.
Start With the Right Side of the Sheet
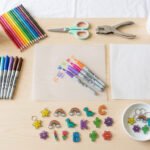
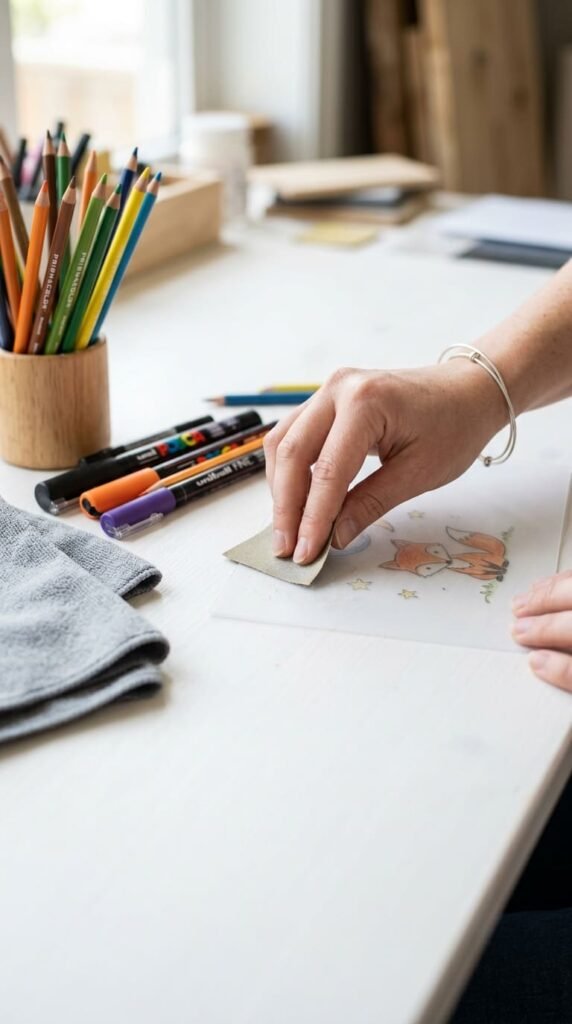
Before drawing, check your Shrinky Dink sheet. Some sheets are smooth and clear. Others have a rough or frosted side. This matters because different coloring tools work better on different surfaces.
Use this quick guide:
- Permanent markers: Best on smooth or clear sheets
- Colored pencils: Best on rough or sanded sheets
- Paint pens: Good for bold details
- Crayons: Avoid them because they can melt badly
If your sheet is too smooth for colored pencils, lightly rub one side with fine sandpaper. Wipe away dust before coloring. This gives the pencil something to grip.
Draw Your Design Three Times Larger
Shrinky Dink plastic shrinks a lot in the oven. A good rule is to draw your design about three times larger than the finished size you want. A large flower, heart, or animal will turn into a small thick charm.
This is especially important for:
- Earrings
- Keychains
- Bracelet charms
- Gift tags
- Ornaments
- Zipper pulls
Keep your design simple. Tiny details can disappear after shrinking. Bold outlines, large shapes, and clear color blocks work best.
Also remember that colors get darker after baking. If you want a soft pink, pale blue, or light yellow, use a lighter shade than you think you need. Dark marker colors can become very intense once the plastic shrinks.
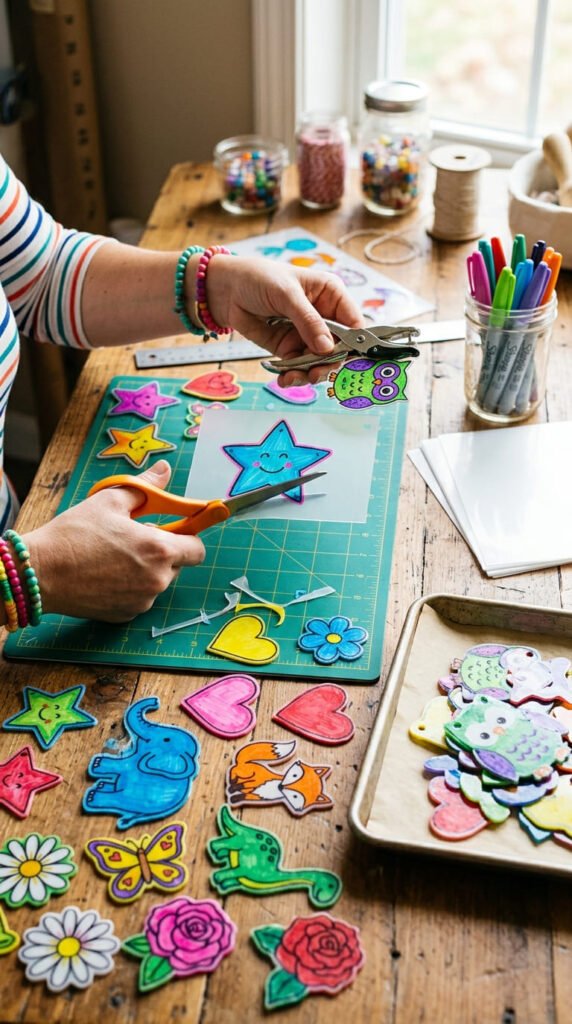
Cut Smooth Edges and Punch Holes Early
After your design is fully dry, cut around it carefully. Leave a small border around the artwork so the edges stay strong. Sharp corners can become pokey after shrinking, so round them with scissors.
If your finished piece will hang from anything, punch the hole before baking. The hole shrinks too. A normal hole punch may look too large at first, but it usually becomes a good charm-sized opening after baking.
Punch holes for:
- Key rings
- Ball chains
- Necklaces
- Ribbon ornaments
- Bracelet charms
- Backpack clips
Place the hole away from the edge. If it is too close, the charm may crack or break after shrinking.
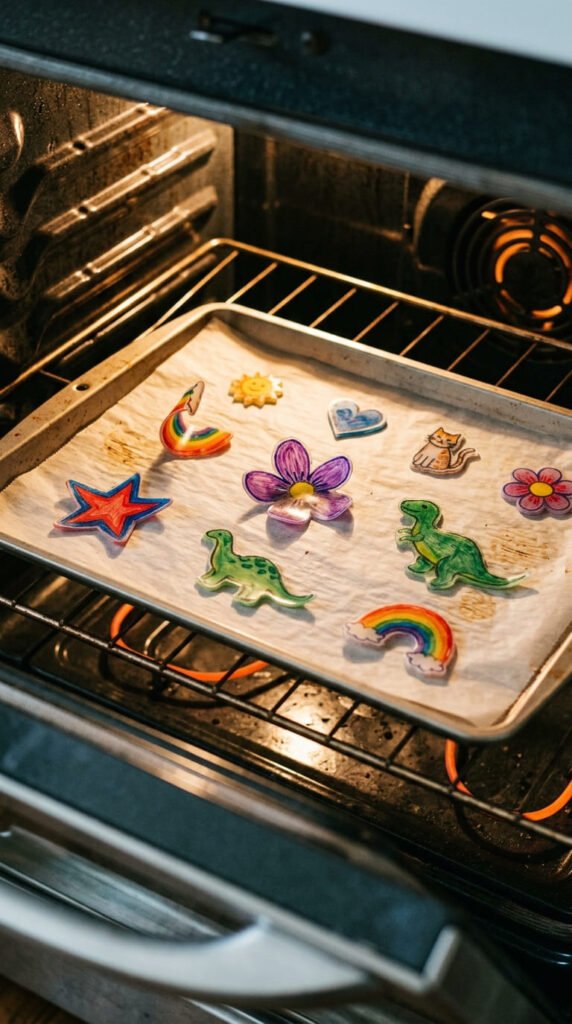
Bake on Parchment Paper
Preheat your oven according to the package directions. Many Shrinky Dink projects bake around 325°F, though some sheets may call for a slightly different temperature. Always check your sheet instructions first.
Line your baking tray with parchment paper. This keeps the plastic from sticking to the tray. Place each piece with space around it because the plastic will curl and move as it shrinks.
For extra help with curling, you can place another piece of parchment paper lightly over the designs. This can keep small pieces from folding into themselves.
Bake for about 2–3 minutes, or until the pieces curl, shrink, and flatten back down. The curling stage looks dramatic, but it is normal. Do not pull the pieces out too early. Wait until they flatten or mostly flatten.
Flatten While Warm
Once the pieces have shrunk, carefully remove the tray using oven mitts. The plastic will be hot, so an adult should handle this step.
If a piece is not perfectly flat, press it gently while it is still warm. Use a flat spatula, another sheet of parchment paper, or the bottom of a flat pan. Hold it down for a few seconds.
Do not press too hard. The goal is to flatten the charm, not bend or scratch it.
Let the pieces cool before touching them. Once cool, they become firm and thick. If a charm still looks slightly warped, you can warm it again for a short time and press it flat.
Seal for Longer Wear
Shrinky Dink pieces can scratch, especially if they are used as keychains or jewelry. A clear sealant helps protect the color.
Good sealing options include:
- Gloss Mod Podge
- Clear acrylic spray
- Clear craft sealer
- Resin-style glaze for advanced crafters
Brush or spray the colored side after the piece cools. Let it dry fully before adding hardware. This step makes a big difference for pieces that will be handled often.
Use jump rings, ball chains, ribbon, magnets, or earring hooks to finish your project. For party favors, place each finished charm in a small bag with ribbon. For gifts, attach charms to cards, gift tags, or mini boxes.
Common Mistakes to Avoid
A few simple fixes can save your project from frustration.
Avoid these mistakes:
- Drawing designs too small
- Forgetting to punch holes before baking
- Using colors that are too dark
- Cutting sharp corners
- Taking pieces out during the curling stage
- Baking directly on a bare tray
- Handling pieces before they cool
- Skipping sealant on jewelry or keychains
If you are making Shrinky Dinks with kids, prep the shapes first and let them focus on coloring. Keep an adult in charge of the oven, hot tray, and hardware.
Final Takeaway
Perfect Shrinky Dink results come from simple prep: draw big, color lightly, round the edges, punch holes early, bake on parchment, wait for the curl-and-flatten stage, then seal the finished piece. Once you learn these basics, you can make charms, gifts, party favors, ornaments, and accessories with confidence.
Save this guide for your next craft day and try a small test piece before making your full batch!