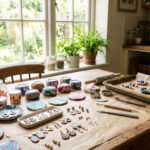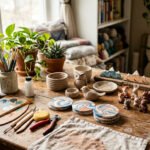
There is something almost magical about a sculpture small enough to balance on your fingertip. Miniature clay art has taken over craft feeds for a reason: the pieces are tiny, quick, and far easier than they look. Most start with a small block of polymer clay, a few cheap tools, and a toaster oven. No kiln, no drying for days, no fancy studio. This list gives you 23 unique miniature clay sculpture ideas you can finish in an afternoon. From kawaii food charms to cottagecore houses, each one comes with simple steps and budget tips. Grab a couple of clay colors and a toothpick, and let’s make something tiny and wonderful.
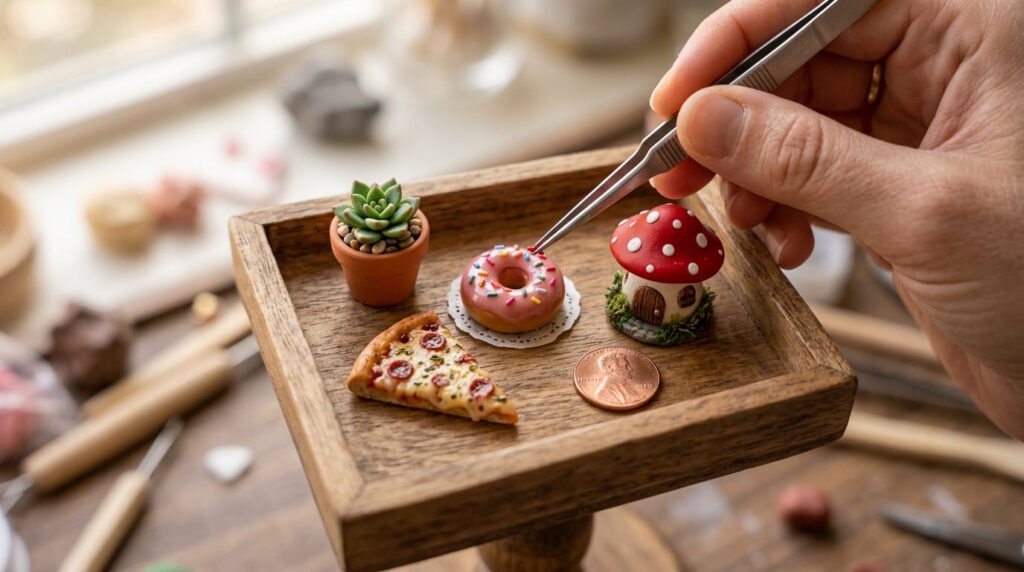
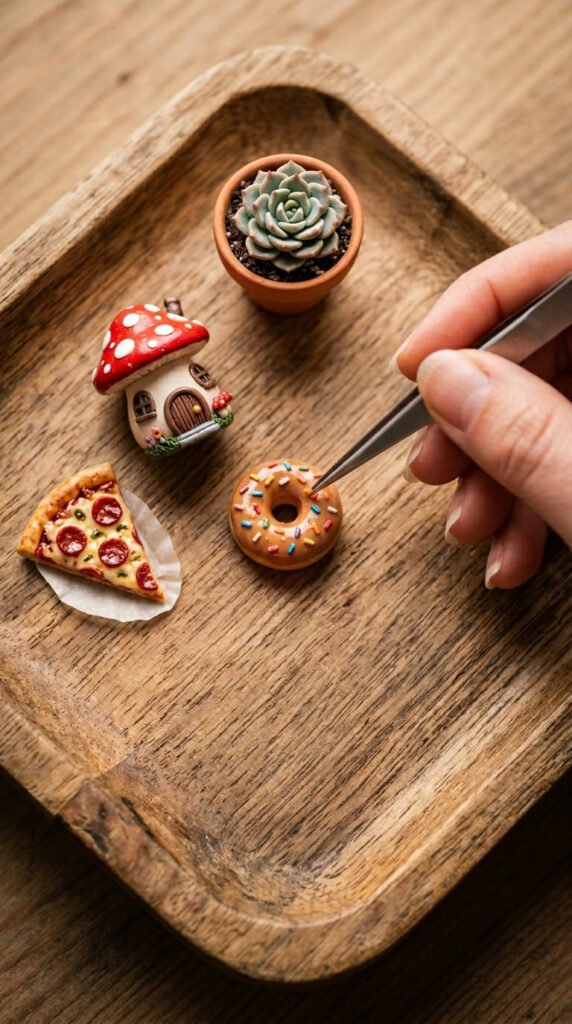
1. Tiny Polymer Clay Donuts
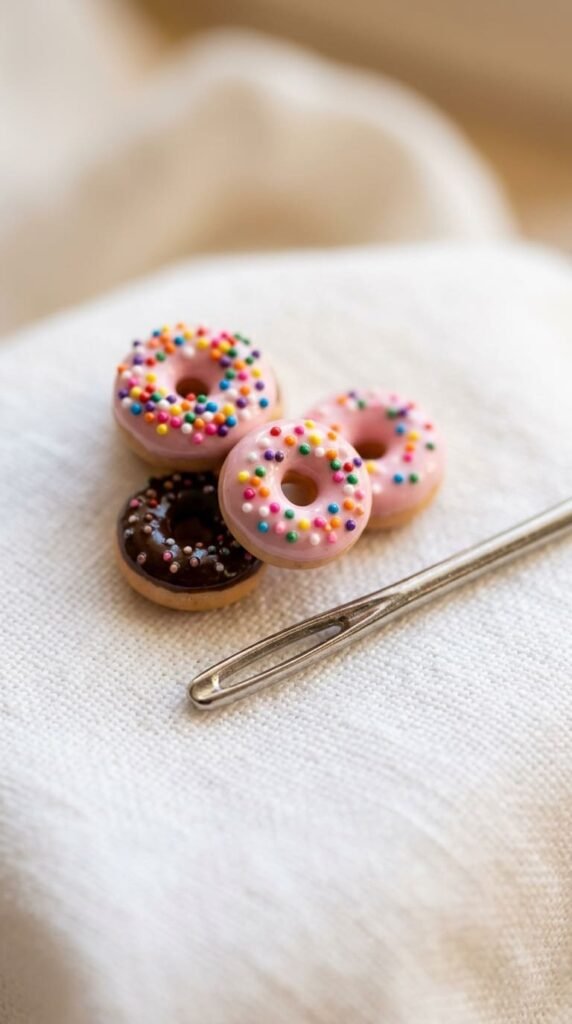
Donuts are the perfect first miniature. They are round, simple, and instantly cute.
Roll a small ball of tan clay. Flatten it slightly. Poke a hole through the middle with a toothpick.
That is your donut base. Bake it if you like, or keep going while soft.
For the glaze, flatten a thin sheet of pink or brown clay. Drape it over the top and trim the edges.
Now the fun part. Add tiny sprinkles by rolling micro-thin threads of colored clay and snipping them short.
A 2-ounce pack of Sculpey Premo costs around $5 and makes dozens of these.
Budget tip: no real sprinkle tools needed. Cut thin clay strands with a craft blade or even nail scissors.
Bake on the temperature printed on the clay packet, usually low and slow in a cheap toaster oven.
Glue a pin back on later and it becomes a magnet or a charm.
Make a whole box of donuts in different glazes. They look adorable lined up together.
2. Miniature Pizza Slice Charms
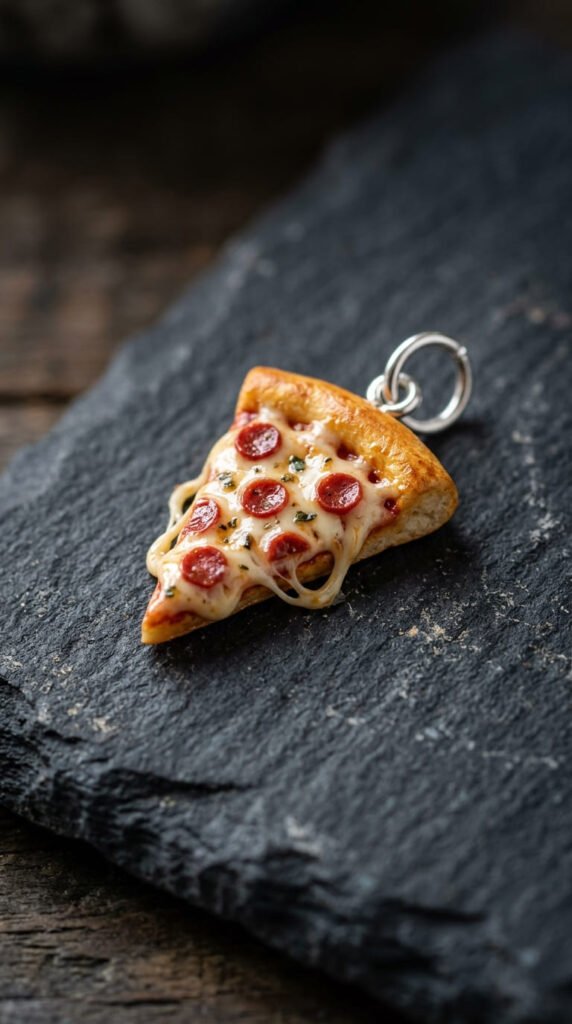
A pizza slice charm packs a lot of detail into a tiny triangle. It always gets a smile.
Roll a beige triangle for the base. Press the wide edge up slightly to form the crust.
Add a thin red layer for sauce. Then pull tiny white strands for melted cheese.
Top with micro red dots for pepperoni and green flecks for herbs.
This is a great way to practice layering at a small scale.
Budget tip: use a toothpick as your main shaping tool. It pokes, lifts, and presses better than most pricey tools.
Push a small jump ring or eye pin into the top before baking so you can hang it.
Bake, then add a drop of gloss to make the cheese look melty.
A bit of UV resin gives a shiny, wet finish if you have it. Clear nail polish works in a pinch.
Attach it to a keychain, a zipper, or a phone charm.
These dual-purpose charms also work as fridge magnets with a glued pin back.
3. Clay Fridge Magnets
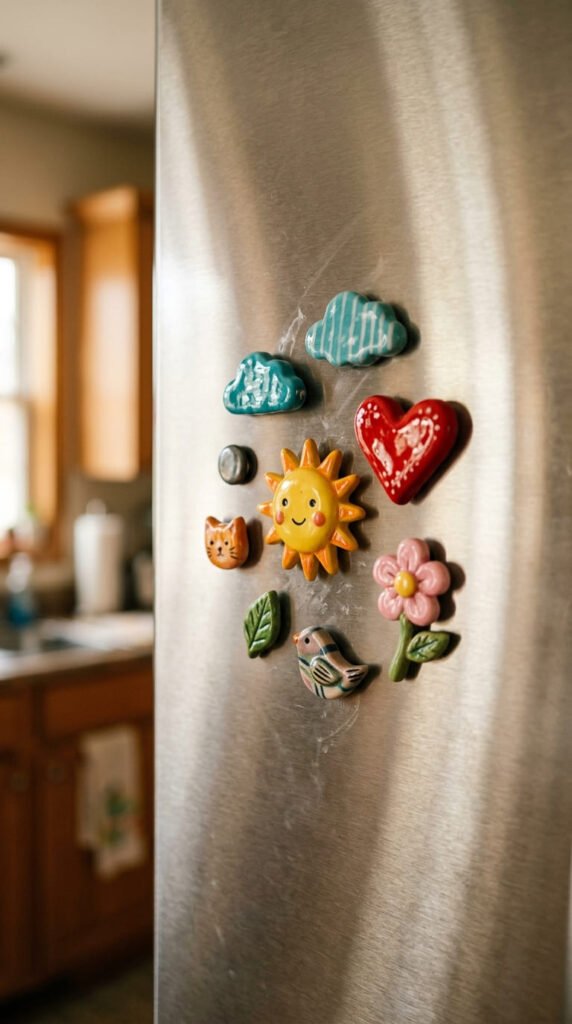
Clay magnets are having a real moment. Searches jumped around 300% over the past year.
The reason is simple. They are tiny, quick, and make great gifts.
Shape any small design you like. A heart, a star, a tiny animal, a little fruit.
Keep it flat on the back so it sits against the fridge.
Bake the clay first. Then glue a small magnet disc to the back once cool.
Budget tip: small magnet discs come cheap in bulk online, often pennies each. Buy a pack and you are set for dozens.
Strong craft glue holds them well. Let it cure overnight before use.
Make a themed set. Tiny fruits for the kitchen, or little planets for a kid’s room.
These also turn old fridge clutter into something charming.
A flat shape dries and bakes evenly, so cracking is rarely an issue.
Sell them, gift them, or cover your own fridge. They are one of the easiest wins in clay.
4. Mini Cereal Bowl

This one hits the nostalgia button hard. A tiny breakfast bowl unlocks childhood memories.
Make a small pinch pot for the bowl. Roll a ball, push in a thumb, shape the walls.
Bake it so it holds its shape.
Now make the cereal. Roll tiny clay rings or little balls in bright colors.
Drop them into the bowl. Add a layer of clear resin for the milk.
Budget tip: no resin? A blob of white glue dries semi-clear and works as milk for a cheaper look.
The colorful cereal is just thin clay snakes cut and curled into loops.
This is a fun way to recreate a favorite childhood snack in miniature.
Make it your real cereal brand’s colors for an extra hit of nostalgia.
Keep the bowl small so it bakes without cracking.
Add a tiny clay spoon resting on the rim for the finishing touch.
People love these because they feel personal. Everyone has a cereal they grew up with.
5. Fantasy Cottage
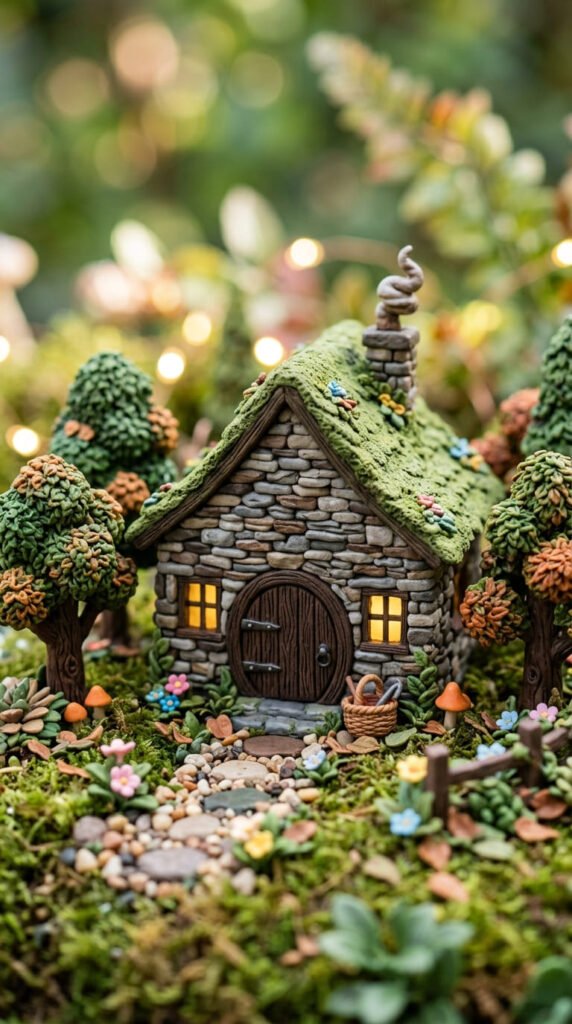
Fantasy cottages are the heart of the cottagecore trend. They tell a little story.
Start with a small box shape for the house. Add a pointed roof on top.
Press in a round door and tiny windows with a needle tool.
Now build the stone look. Press small flattened bits of grey clay onto the walls, layering them like stones.
Drag a wire brush over the surface for rough stone texture.
Budget tip: an old toothbrush gives a similar stone texture for free. A fork works too.
Add tiny clay trees, vines, and a little path.
Use soft pastels rubbed on with a brush to age the stone and add shadow.
Bake it slowly so the thick walls cure all the way through.
A bright overhead lamp helps you see the tiny details as you work.
Once baked, dab on a clear coat to protect it.
These little houses look like they belong in a storybook. They take patience, but the payoff is huge.
6. Little Mushroom House
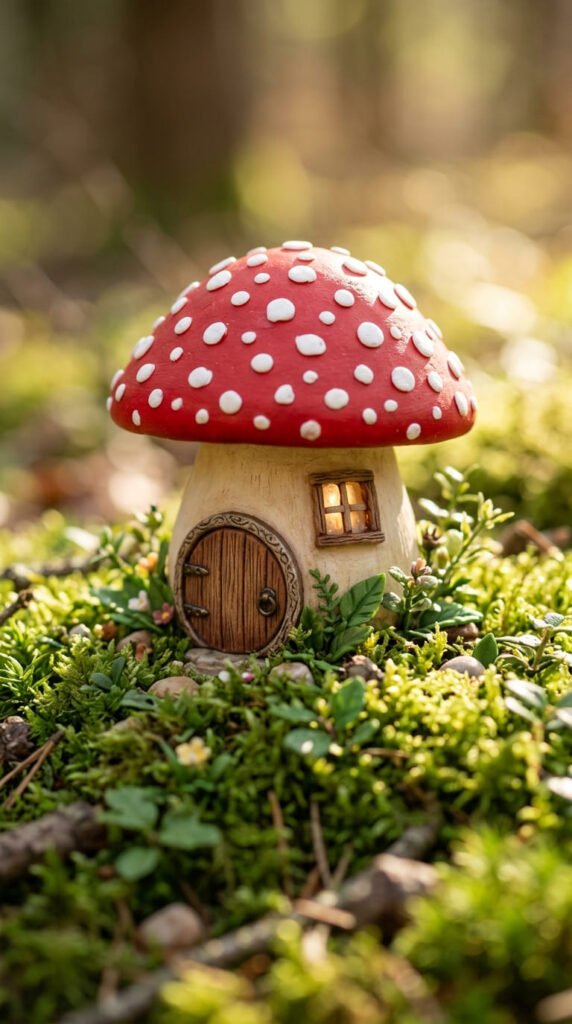
A mushroom house mixes cottagecore charm with a fairytale feel. It is simpler than it looks.
Make the stem first. Roll a thick white or cream cylinder for the base.
Press a door and a window into it.
Now the cap. Shape a red dome and press it on top like a mushroom cap.
Add white dots on the cap for that classic toadstool look.
Budget tip: roll the white dots tiny and press them flat with a toothpick. No special tool needed.
Carve a wood-grain texture on the door with a needle.
Set it on a base of green clay for moss.
Bake low and slow so the cap and stem cure evenly.
A little UV resin on the cap makes it look dewy and fresh.
Add a tiny clay snail or ladybug climbing the stem.
These make charming shelf pieces or fairy garden additions.
The bright red and white combo always grabs attention. A sweet, beginner-friendly fantasy build.
7. Nostalgic Snack Cakes
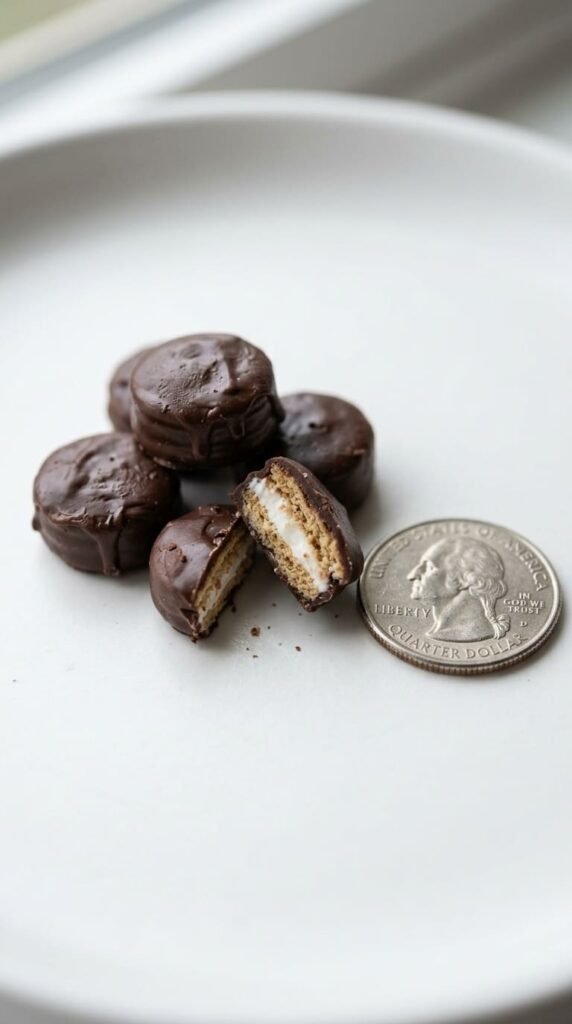
Miniature snack cakes tap straight into core memories. Everyone recognizes their childhood favorites.
Roll a small oval or rectangle for the cake body in a sponge color.
For a cream filling, layer a thin white strip through the middle.
Coat the outside in chocolate brown clay if you want the dipped look.
Slice one open to show the layers inside. That cross-section is the magic.
Budget tip: a single craft blade does all the slicing and shaping. A $4 pack of hobby blades lasts ages.
Add tiny swirls on top with a needle for that bakery look.
Bake on the packet’s temperature in a small toaster oven.
These recreate the snacks you grew up with in tiny form.
Pick a specific snack everyone knows for instant recognition.
Gloss the chocolate coating so it looks rich and real.
Make a few and stack them like a little snack display.
The nostalgia hook makes these popular gifts and easy sellers.
8. Mini Succulents in Pots
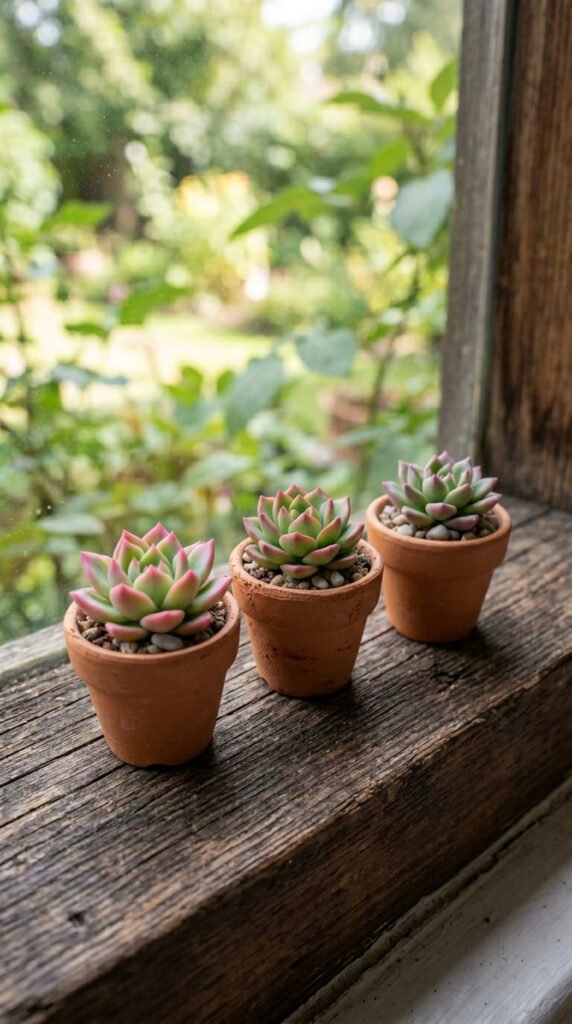
Tiny succulents look impressive but use very simple shapes. Just leaves stacked in a rosette.
Roll lots of small teardrop leaves in green. Pinch one end to a point.
Press them together in a spiral, starting from the center and working out.
The leaves overlap to form a rosette, just like a real succulent.
Make a small pot from terracotta-colored clay. Set the plant inside.
Budget tip: mix a little brown into red clay to fake terracotta. No need to buy a special color.
Brush the leaf tips with pink or purple pastel for a sun-kissed look.
Add tiny clay pebbles on top of the soil for detail.
Bake the whole pot together so everything sets at once.
Keep the leaves thin but not so thin they snap.
These tiny planters look great on a shelf or as a desk decoration.
Make a row of different succulent types for a mini garden.
No watering, no sunlight, no dead plants. The best kind of houseplant.
9. Walnut Shell Mouse
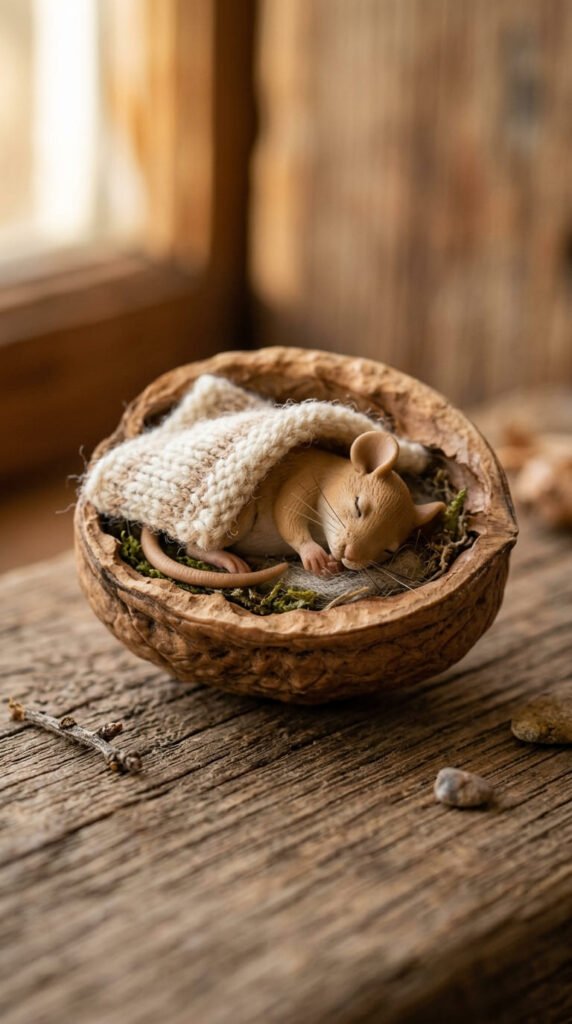
This upcycled craft turns a snack leftover into a tiny scene. Save half a walnut shell.
The shell becomes a cozy little bed. Line the inside with a thin clay mattress.
Roll a small grey mouse to tuck inside. Pinch a pointed nose and add round ears.
Lay a tiny clay blanket over the mouse so just its head pokes out.
Budget tip: the shell is free after snacking. A scrap of real fabric works as the blanket if you prefer.
Dot two tiny eyes with a needle.
This mixes miniature sculpting with upcycling found materials.
Bake carefully, keeping the shell away from direct heat on the element.
Add a tiny clay candle or book beside the bed for a full bedtime scene.
These cozy little setups are wildly popular online.
Acorn caps work the same way for even tinier creatures.
The natural shell gives the piece a charm you cannot fake with clay alone.
A sweet, nearly free project that looks like a storybook page.
10. Acorn Cap Creatures
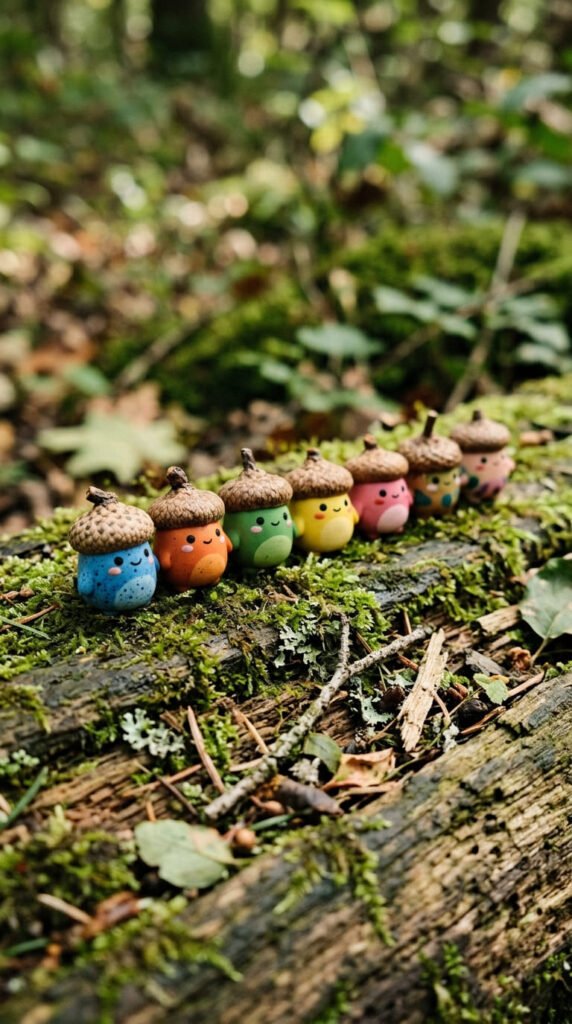
Acorn caps make perfect tiny hats. Collect a few on your next walk.
Roll a small round body in any color. This is your creature.
Add a simple face with a needle. Two eyes and a little smile.
Press a real acorn cap on top like a hat. It fits perfectly.
Budget tip: the caps are free from any oak tree. Let them dry out before using so they do not mold.
Add tiny arms or feet if you like, or keep it as a simple blob creature.
These work great as dreamcore style pieces. Add a single eye or a tiny mushroom for a surreal touch.
Bake the clay body, then glue the acorn cap on after.
Make a whole family in different colors.
Glue a pin back and they become quirky little magnets.
The mix of natural acorn and bright clay gives them real character.
These are fast, cheap, and endlessly fun to vary.
A perfect project when you have a handful of acorns and ten spare minutes.
11. Food Keychains
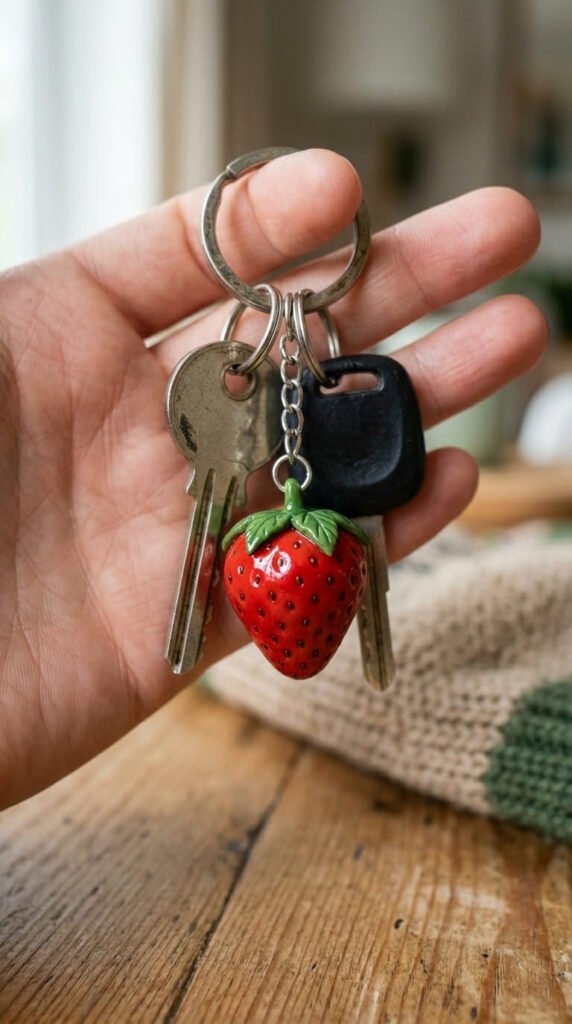
A food keychain is a charm you actually carry around. Same skills, more use.
Pick a simple food. A strawberry, a lemon, a tiny burger.
Shape it small and add the key details. Seeds, a leaf, a sesame bun.
Push an eye pin into the top before baking so you can attach it.
Budget tip: eye pins come cheap in bulk from craft suppliers. One pack makes dozens of charms.
Bake the piece, then add a keyring through the pin.
A coat of gloss or UV resin makes the food look juicy and protects it from daily wear.
These hold up well on keys, bags, and zippers.
The same charm works as a magnet, a necklace, or a phone charm too.
Make a matching set for friends as little handmade gifts.
Strawberries and lemons are great starters since they are forgiving shapes.
Keep the eye pin pushed in deep so it does not pull loose.
A practical, wearable miniature that shows off your work everywhere you go.
12. Tiny Sushi Set
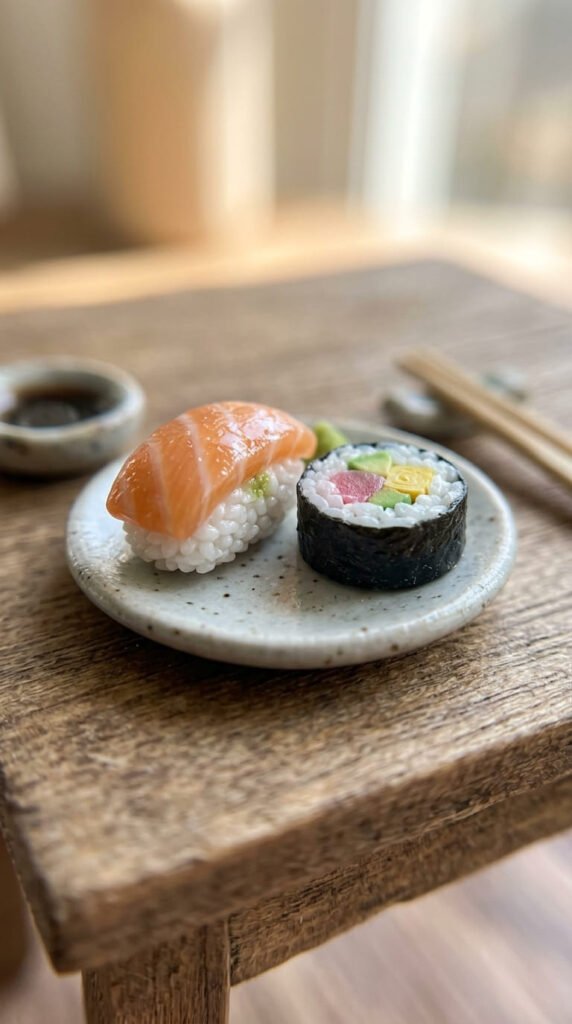
A sushi set looks fancy but breaks down into easy pieces. Each bit is tiny and simple.
For nigiri, roll a small white oval of rice. Lay a thin orange strip on top for salmon.
For a maki roll, wrap a black clay sheet around white rice with a dot of filling.
Slice the roll to show the swirl inside.
Budget tip: a craft blade is all you need for clean sushi slices. The cheap hobby blades work perfectly.
Add tiny dots of texture to the rice with a needle so it looks like grains.
Make a small clay plate and a dab of green clay for wasabi.
Bake everything together on the packet temperature.
A little gloss on the fish makes it look fresh.
Sushi sets look impressive lined up on a tiny plate.
This is a fun way to practice layering and slicing at a small scale.
Add tiny chopsticks from clay-coated toothpicks for the full set.
People love how detailed these look despite being so simple to build.
13. Miniature Books
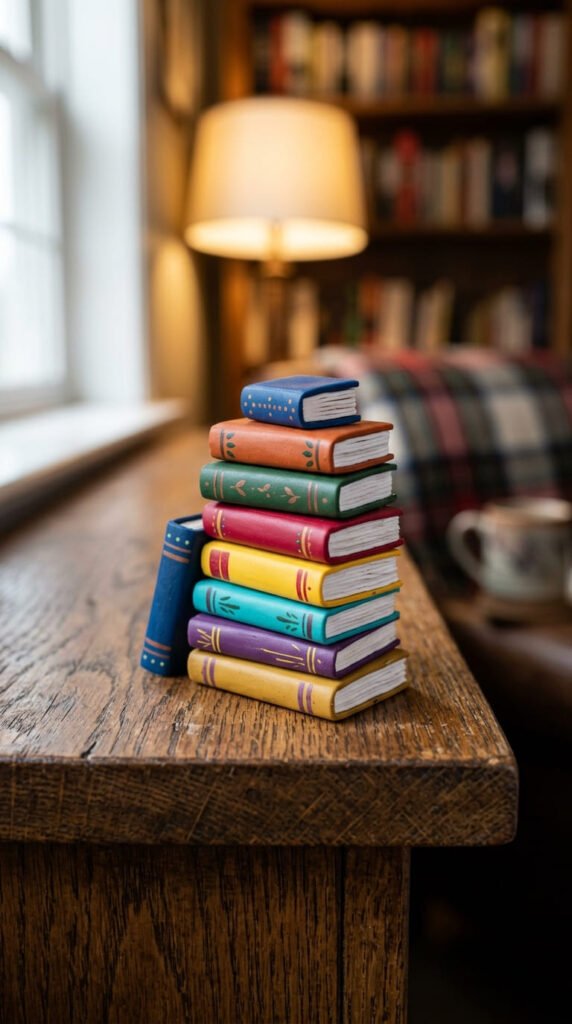
Tiny books are a favorite for shelf decorations and dollhouses. They are mostly straight lines.
Roll a small rectangle for the pages in white or cream clay.
Wrap a thin colored sheet around it for the cover, leaving the front pages showing.
Press lines into the page edges with a blade so it looks like real pages.
Budget tip: a single craft blade scores the pages and trims the cover. No other tool required.
Add a tiny title detail on the spine with a needle, just texture, no real words.
Bake the books and they hold their shape forever.
Stack a few in different colors for a mini library look.
Brush a little pastel on the covers for a worn, vintage feel.
These fit perfectly in dollhouses or as desk decorations.
Make an open book by curving a folded sheet for variety.
Glue a magnet on the back and they become bookish fridge decor.
Tiny books are calming to make and look great in a stack.
A simple build with a cozy, charming result.
14. Mini Ice Cream Cone
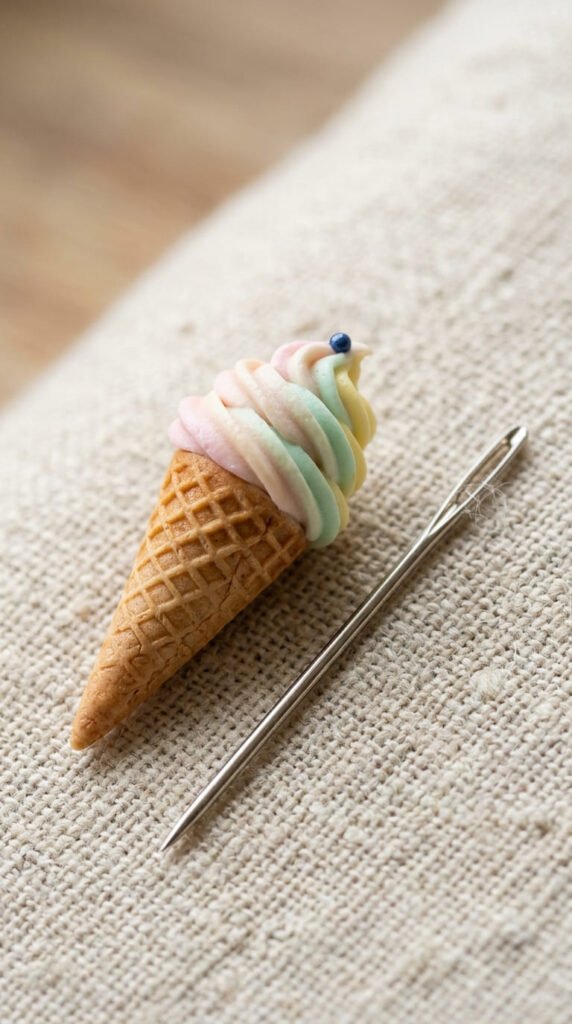
A mini ice cream cone is a classic cute charm. The waffle texture sells it.
Roll a small tan cone shape. Then press a crosshatch pattern into it with a blade for the waffle look.
Roll a ball or swirl of pastel clay for the scoop. Set it on top.
Add a tiny sprinkle or a clay cherry for the finish.
Budget tip: press the waffle texture using the back of a knife or a small mesh strainer. Both are free and work great.
Push an eye pin in if you want it as a charm.
Bake on the clay’s packet temperature.
A drop of gloss makes the scoop look creamy and cold.
Make several in different scoop colors for an ice cream shop display.
A two-scoop version just stacks another ball on top.
Keep the cone tip thin but not fragile.
These are quick, cheerful, and great for beginners.
The crosshatch waffle detail makes them look far harder than they are.
A sweet little win every time.
15. Tiny Teacup and Saucer
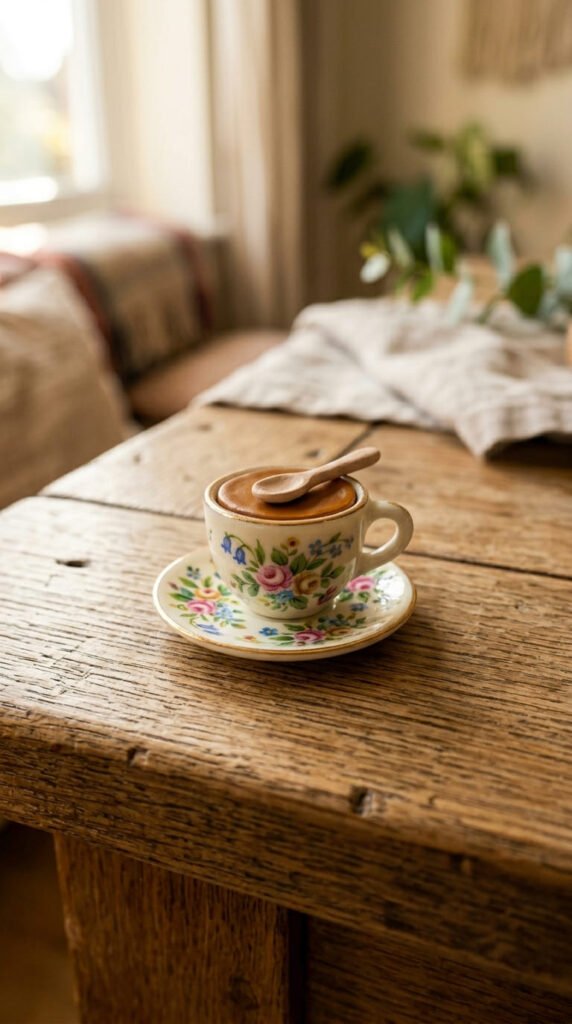
A tiny teacup feels elegant and is surprisingly doable. It starts as a small pinch pot.
Roll a ball, push in a thumb, and shape thin walls for the cup.
Add a tiny handle from a thin curved clay strand.
Make a flat round saucer to sit underneath.
Add a drop of brown clay or resin inside for the tea.
Budget tip: shape the cup around the end of a paintbrush for an even, round interior. A free tool you already own.
Keep the walls thin for a delicate look, but not so thin they crack.
Bake the cup and saucer together.
Brush tiny pastel flowers on the outside for a vintage china feel.
A gloss coat gives it that shiny porcelain look.
Make a matching set for a dollhouse tea party.
Add a tiny clay spoon on the saucer for extra charm.
These delicate pieces look impressive on a shelf.
A calm, careful project with a refined result that always wows.
16. Mini Cactus Garden
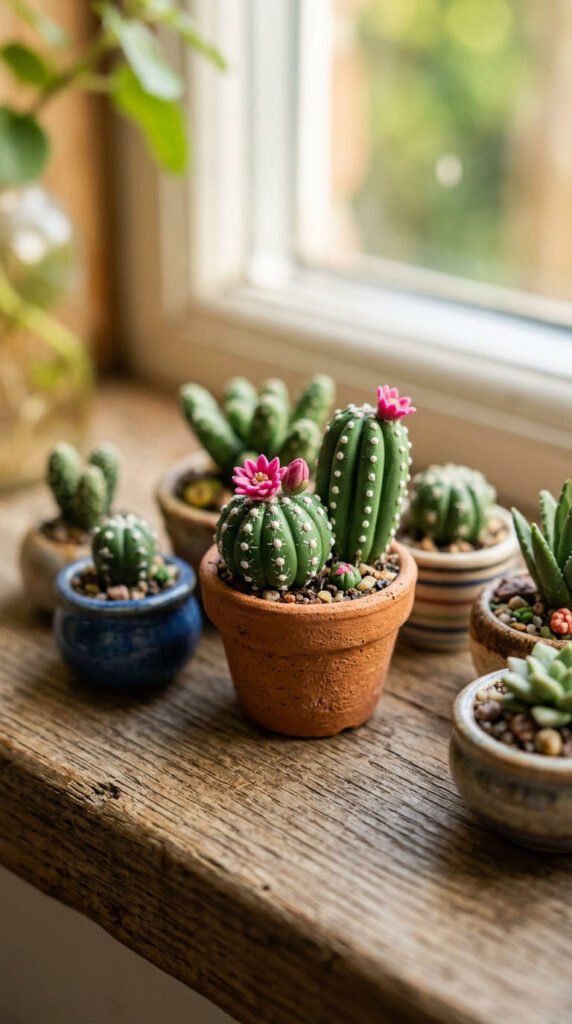
A cactus garden is even easier than succulents. Cacti are just simple green shapes.
Roll a ball or a tall oval in green for each cactus.
Press tiny white dots all over for the spines using a needle.
Add a tiny pink or yellow clay flower on top.
Set each cactus in a small clay pot.
Budget tip: poke the spine texture with a real pin or needle. It is the perfect tool and free.
Add clay pebbles or sand-colored clay on top of the pots.
Bake the whole arrangement together.
Make a few different cactus shapes. Tall, round, and a paddle-shape prickly pear.
Group them for a tiny desert garden.
Brush a little darker green pastel into the grooves for depth.
These look great on a desk or windowsill.
No spines to poke you, no watering to remember.
A cheerful, beginner-friendly project that fills a shelf fast.
Group several pots together and the whole garden comes alive.
17. Galaxy Bead Charms
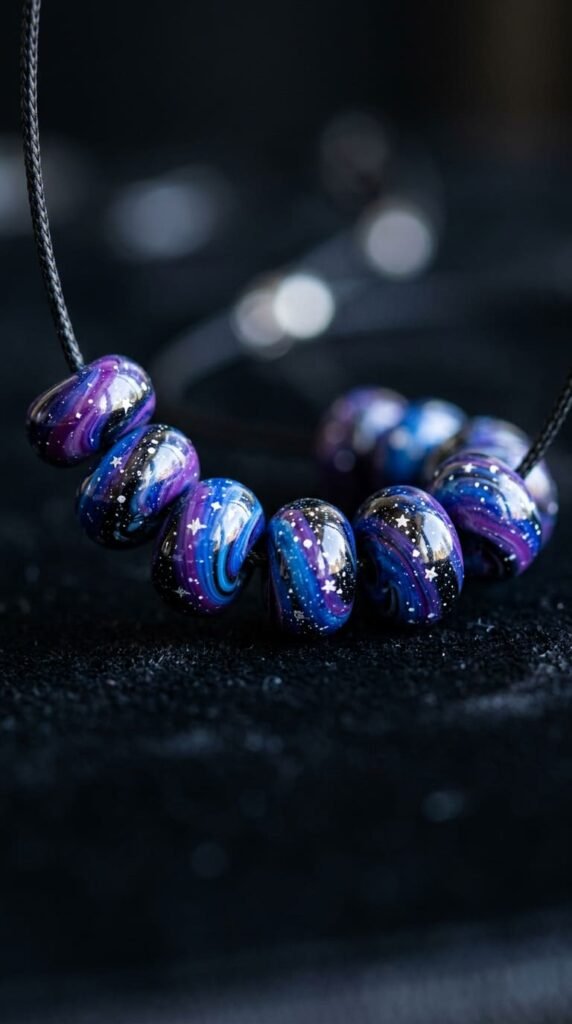
Galaxy beads turn leftover clay scraps into tiny dreamy worlds. They suit the dreamcore look.
Take small bits of purple, blue, and black clay. Twist them together loosely.
Roll into a ball. Do not over-mix, so the colors stay swirled like a nebula.
Add tiny white dots for stars by pressing in micro clay bits.
Pierce a hole through the bead with a toothpick before baking.
Budget tip: this is the perfect way to use up scrap clay. Nothing goes to waste.
Bake the beads, then coat them in gloss so they shine like deep space.
Thread them on cord for a bracelet or necklace.
A bit of UV resin gives the deepest, glassiest finish.
Mix in a touch of glitter for extra sparkle if you have it.
Make a whole set of swirled galaxy beads.
Keep the hole open and clear so it threads easily.
These look magical and use almost nothing but leftovers.
A surreal, low-cost project with a stunning shiny result.
18. Tiny Sleeping Cat
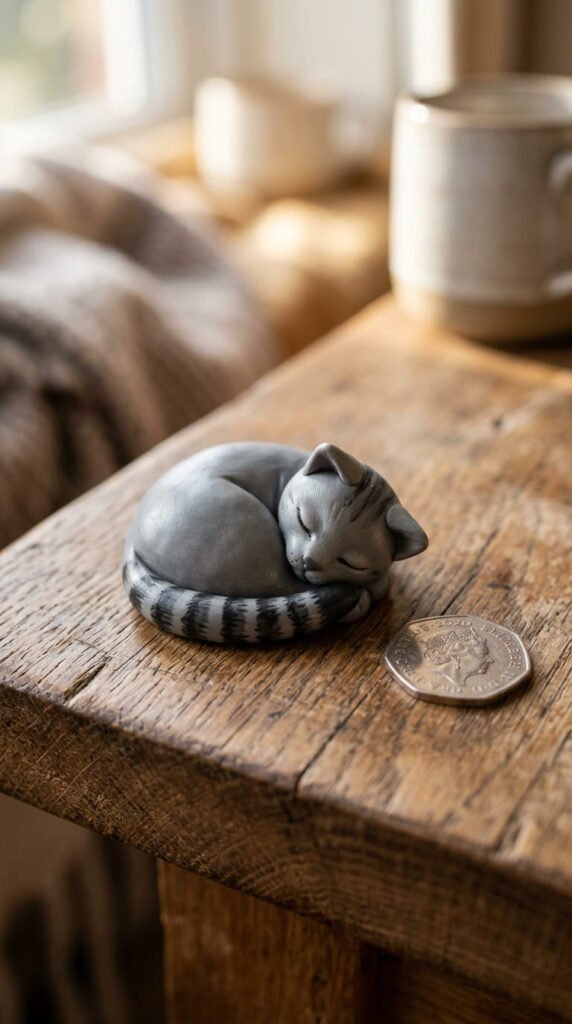
A curled sleeping cat is one of the easiest animal miniatures. The pose hides the tricky parts.
Roll a ball of clay and gently shape it into a curled oval.
Tuck a small head against the body. Add two tiny triangle ears.
Wrap a thin tail around the front.
Press closed sleeping eyes with a needle and a tiny nose.
Budget tip: a single needle tool shapes the whole face. Cheap metal stylus sets run about $6 for three.
Add stripes or spots with thin clay or pastel.
Because the cat is curled, you skip the hard work of legs and standing balance.
Bake on the clay’s temperature.
Brush a little pastel for soft fur shading.
Make a few in different colors for a sleepy little family.
Add a tiny clay pillow or bed underneath.
These cozy cats are calming to make and instantly lovable.
A wire core is not needed since the curled shape supports itself.
The sleeping pose makes a beginner piece look advanced.
19. Mini Croissant Charms
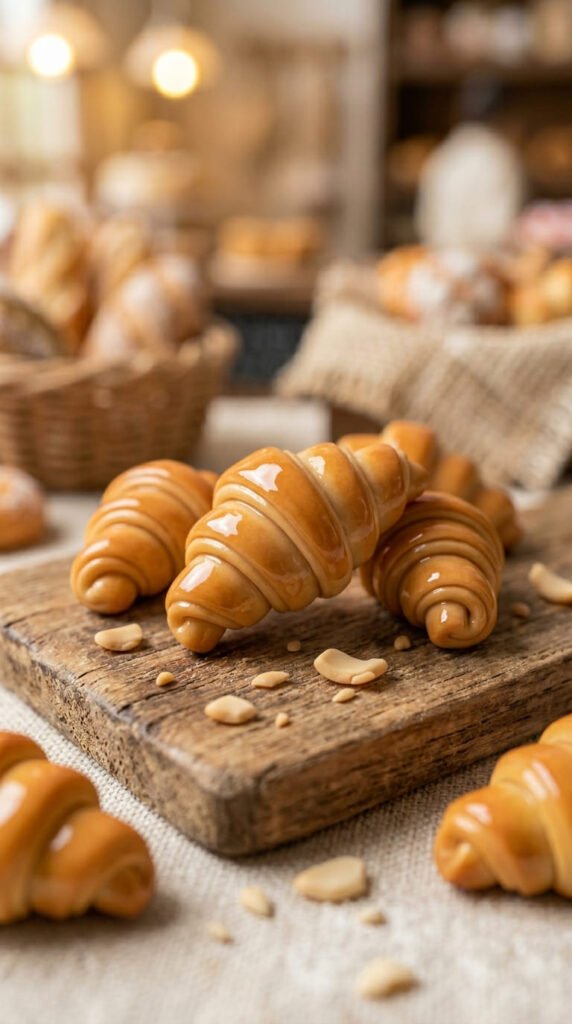
A tiny croissant looks like it came from a real bakery. The trick is the rolled shape.
Flatten a thin triangle of tan clay. Roll it from the wide end to the point, just like a real croissant.
Curve the ends inward into that classic crescent.
Press flaky lines along the layers with a needle.
Budget tip: dust the baked croissant with brown pastel for a golden, toasted look. A cheap pastel stick lasts for years of projects.
Brush the tips darker for that fresh-from-the-oven feel.
Bake on the packet temperature.
A light gloss gives it a buttery shine.
Make a few and pile them on a tiny board for a bakery display.
Add a chocolate version by tucking a dark clay strip inside.
Push an eye pin in for a charm, or glue a magnet on the back.
These look impressive but use one simple rolling move.
The golden pastel shading is what makes them look truly baked.
A cozy, satisfying miniature that always impresses.
20. Stone Cottage with Textured Walls
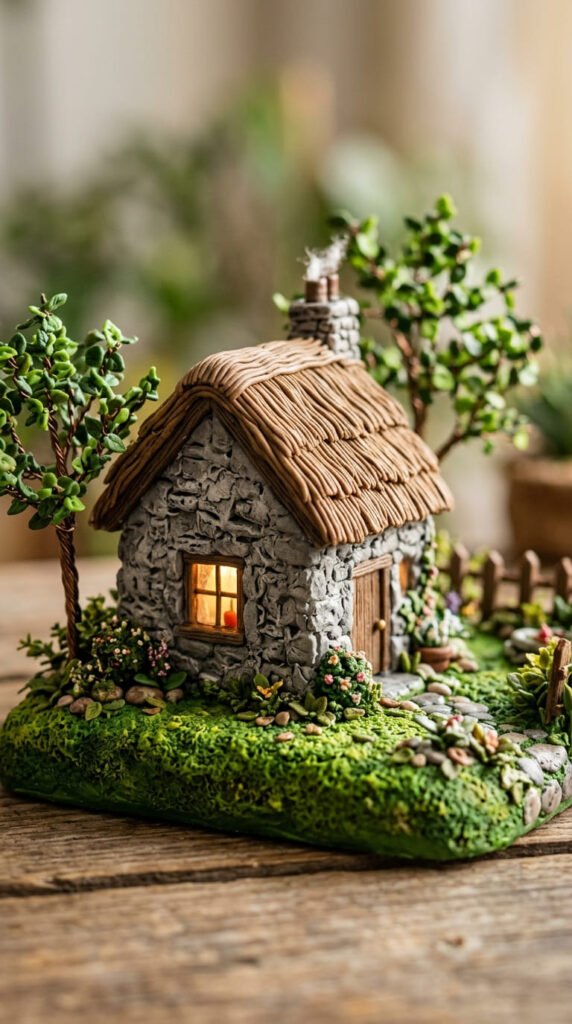
A rough stone cottage leans on texture instead of neat detail. That makes it forgiving.
Build a small house shape with a roof.
Cover the walls in grey clay, then attack it with texture.
Drag a wire brush across for rough stone. Press in small stones with a needle.
The rougher and more uneven, the more real it looks.
Budget tip: an old toothbrush or a crumpled piece of foil makes great free stone texture.
Use soft pastels to add grime and shadow between the stones. This ageing trick adds instant realism.
Add a thatched roof by scoring lines into brown clay.
Bake slowly so the thick walls cure all the way through.
Press a little yellow clay or resin behind a window for a glowing look.
Set the cottage on a green base with tiny trees.
Mistakes actually help here, since real stone is messy.
This is a great build for practicing texture and weathering.
A rugged, storybook cottage that looks far harder than it is.
21. Tiny Planter Pots
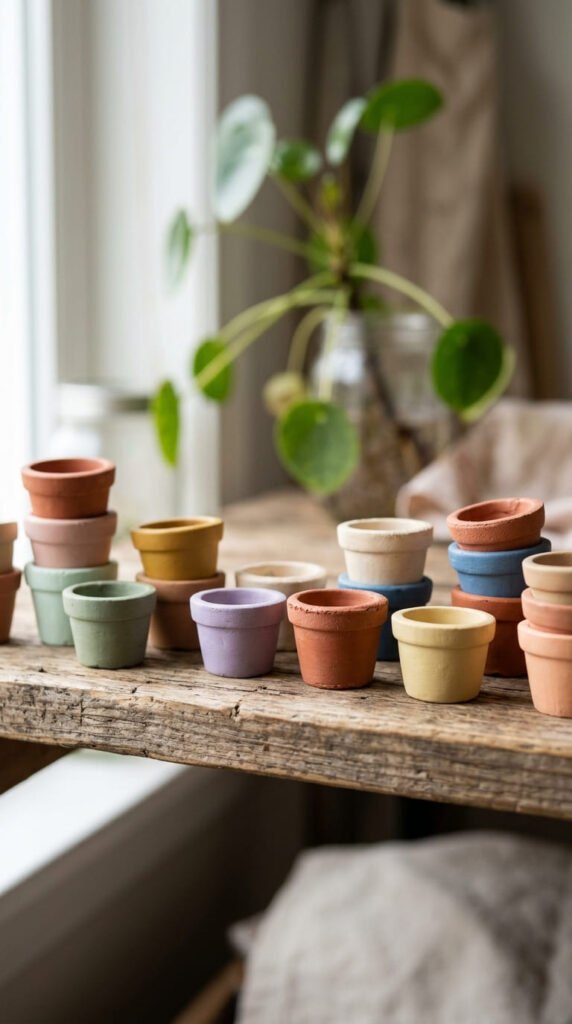
Tiny pots are useful little builds you can fill with anything later. Start simple.
Make a small pinch pot. Roll a ball, push in a thumb, shape the walls.
Smooth the rim with a wet finger.
Add a rolled rim around the top for a finished look.
Budget tip: shape the pot around a marker cap for a clean, even interior. A free tool from your desk.
Keep the walls even so it bakes without cracking.
Make them in terracotta, white, or soft pastels.
Bake on the packet temperature.
Fill them later with clay succulents, cacti, or flowers.
Empty, they hold tiny treasures, rings, or pins.
Make a stacked set in graduated sizes.
Brush a little texture on the outside for a rustic clay-pot feel.
These are quick, useful, and pair with so many other miniatures.
A drainage-hole detail poked in the bottom adds realism.
Simple to make, endlessly handy to keep around.
22. Mini Fruit Slices
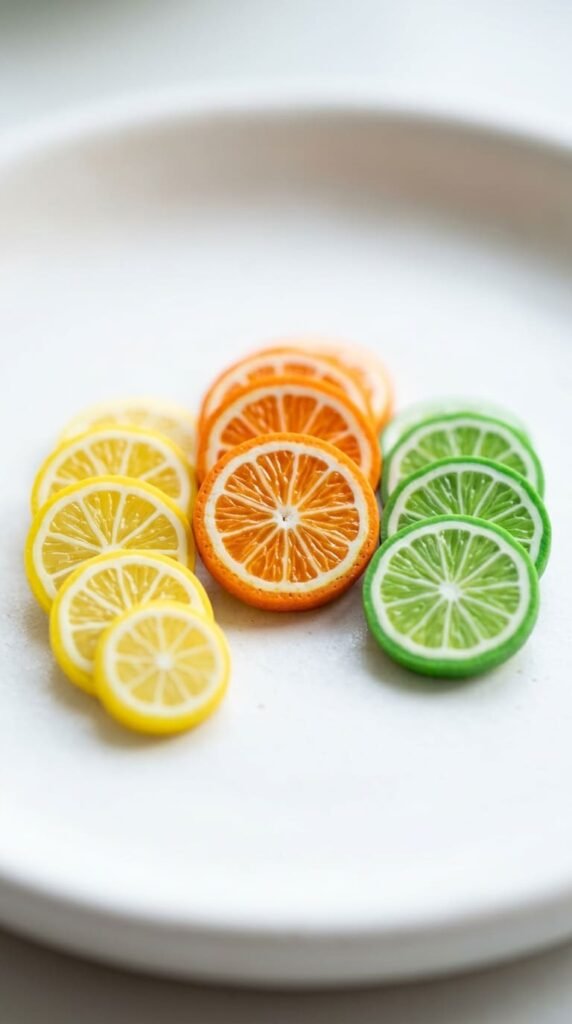
Fruit slices use a clever cane trick that makes the detail almost automatic. It feels like magic.
Build a small log of clay that looks like the inside of a fruit. White center, colored segments, a rind around the edge.
Roll thin white strands between the segments for the pith.
Then slice the log thin. Each slice shows a full fruit pattern inside.
Budget tip: this is the famous cane technique, and it only needs a craft blade. One log makes dozens of slices.
Try orange, lemon, lime, kiwi, or watermelon.
Bake the thin slices flat on the packet temperature.
Gloss them for a juicy, wet look.
Use the slices as charms, magnets, or earring pieces.
The first cane takes practice, but every slice after is effortless.
Keep the log firm before slicing so it does not squish.
Make a citrus set with all the colors.
These look professional but rely on one repeatable trick.
A satisfying project that rewards you with many pieces from one build.
23. Mushroom Magnets
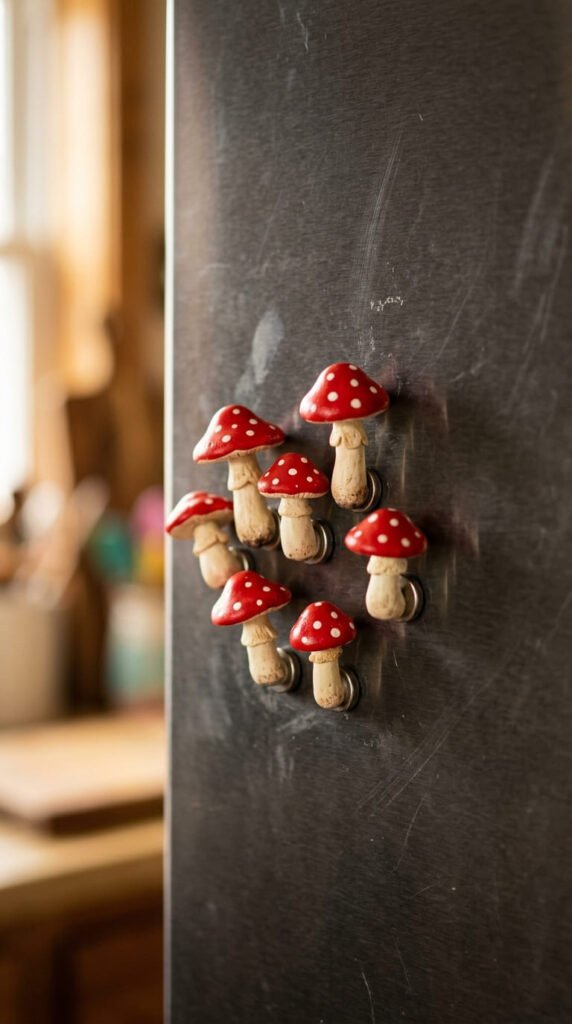
Mushroom magnets close out the list with a tiny, cheerful build. They are fast and forgiving.
Roll a cream stem and a colored cap. Press them together.
Add white dots on the cap for that classic toadstool look.
Keep the back flat so it sits against metal.
Bake the mushroom, then glue a magnet disc on the back.
Budget tip: cheap magnet discs in bulk cost pennies each. One pack makes a whole set.
Make them in red, brown, and pastel caps for variety.
Brush a little pastel under the cap for soft shading.
Add a tiny face for a cute kawaii version.
A gloss coat keeps them shiny and protected.
These mushrooms tap into both cottagecore and dreamcore trends at once.
Make a cluster and stick them together on the fridge.
They sell well at craft fairs and make sweet little gifts.
Tiny, quick, and endlessly likable.
A perfect note to end on, since you can make a dozen in one sitting.
Conclusion
Miniature clay sculptures prove that small really can be mighty. With a $5 block of polymer clay, a toothpick, a craft blade, and a cheap toaster oven, you can make charms, magnets, tiny food, and storybook cottages that look far harder than they are. The tricks repeat across projects: roll, layer, texture, bake, and gloss. Cane slicing gives you dozens of fruit pieces from one log. A wire brush turns plain clay into stone. Soft pastels add instant realism. Best of all, scraps and found bits like walnut shells and acorn caps cost nothing. Pick one project that catches your eye, clear a small corner of your table, and start tiny. Grab your clay this week and see just how much character you can pack into something the size of a coin.