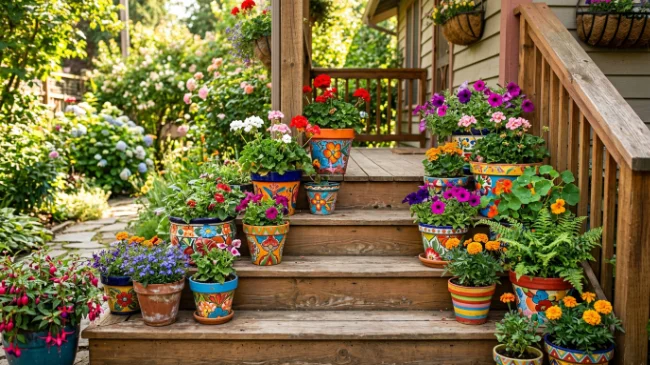
A painted flower pot can change a porch fast, but only when the design survives sun, rain, and daily outdoor wear. The best outdoor flower pot painting ideas start with simple prep, durable paint, and patterns that look good from a distance. Use primer on terracotta, multi-surface paint on plastic, and a clear outdoor sealer at the end. These ideas are affordable, beginner-friendly, and made for real porches, patios, balconies, and garden corners.
1. Ombre Sunset Flower Pots
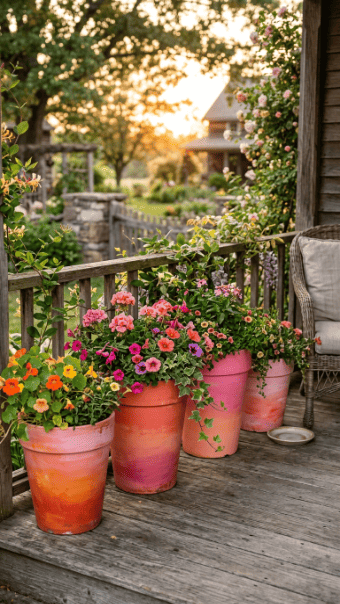
Ombre pots look bright without feeling messy. Start with a light base coat, then move from deep orange at the bottom to coral or pink near the rim. Use a sponge to soften the color change. Do not overwork the paint or it will turn muddy.
This idea works well on terracotta because the warm clay color supports sunset shades. Prime first so the pot does not soak up paint unevenly.
For a cheap version, use leftover outdoor paint samples. Seal with a clear outdoor spray after drying.
2. Black Gloss Porch Pots
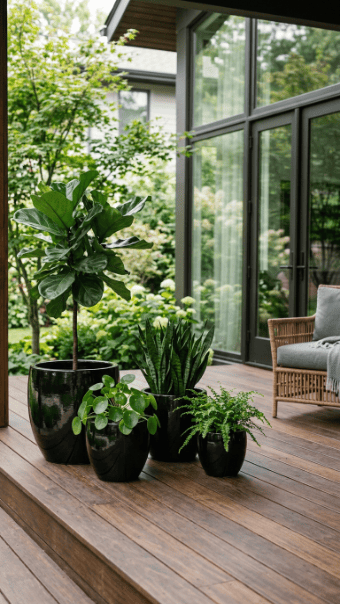
Black gloss pots are simple and sharp. They make green leaves and bright flowers stand out. Use outdoor spray paint for a smoother finish than brush paint.
Clean the pot first. Plastic pots may also need light sanding so paint grips better. Apply thin coats instead of one heavy coat.
This design is strong for small porches because it keeps the space from looking busy. Add white flowers, lavender, or trailing ivy for contrast.
Budget tip: Paint mismatched old pots black so they look like a matching set.
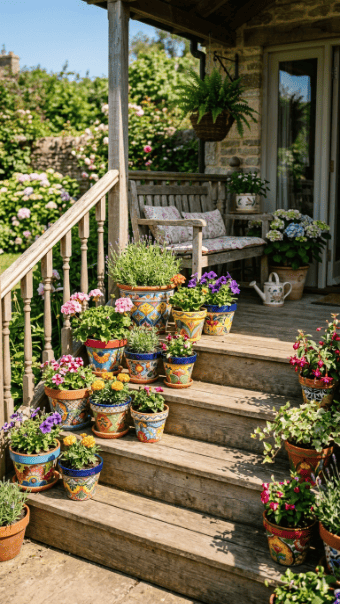
3. Blue and White Mediterranean Pots
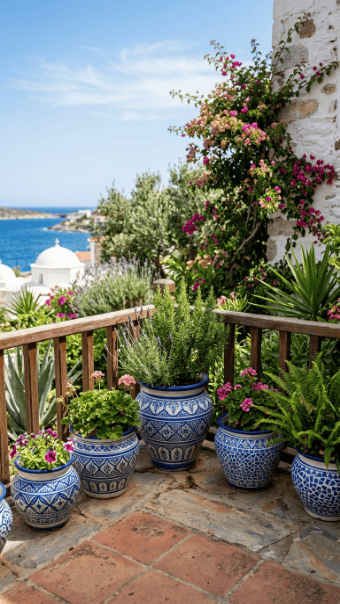
Blue and white pots bring a calm patio look. Start with a white base, then add blue dots, arches, stripes, or tile-style patterns.
Use stencils if hand painting feels risky. Small mistakes are easier to hide when the pattern repeats.
This idea works well for herbs, olive trees, lavender, and white flowers. Keep the colors limited so the pots look clean.
Budget tip: Make your own stencil from cardboard or painter’s tape. Finish with outdoor sealer to protect the blue from fading.
4. Geometric Triangle Pots
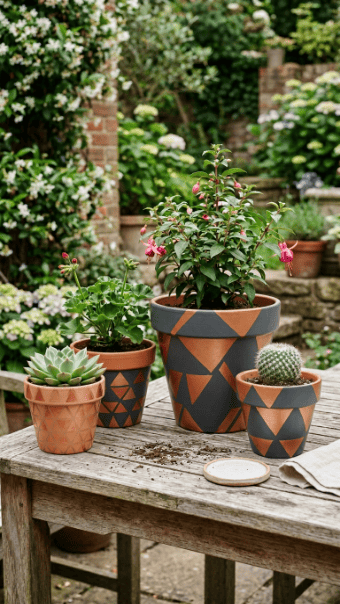
Geometric pots look modern, but messy lines ruin them. Use painter’s tape. Press every edge down firmly before painting.
Choose two main colors and one accent color. Copper, gold, or white works well against terracotta.
Paint thin layers. Remove tape before the paint fully dries so the edges stay clean.
This is a good idea for plastic pots because smooth sides hold sharp patterns better. Seal the finished pot with a clear outdoor coat.
Budget tip: Use leftover wall paint for the base and a small craft bottle for accents.
5. Leaf Stamp Flower Pots
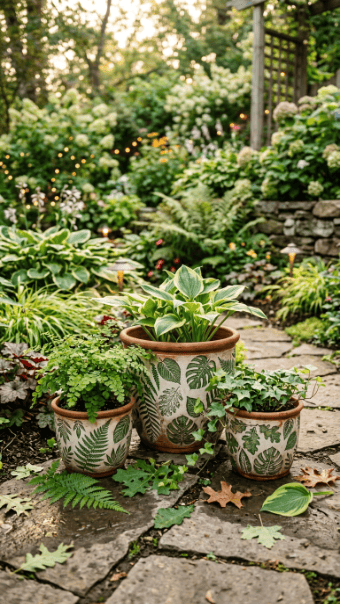
Leaf stamping is easy and cheap. Pick leaves with clear veins. Paint the leaf lightly, press it onto the pot, then lift it slowly.
Do not overload the leaf with paint. Too much paint removes the detail.
Use greens, white, tan, or muted yellow for a garden-friendly look. This style works especially well on plain terracotta pots.
Budget tip: Collect leaves from your yard and use a foam brush. No special tools required.
Seal the pot once dry. Leaf prints can rub off quickly without protection.
6. Rainbow Stripe Flower Pots
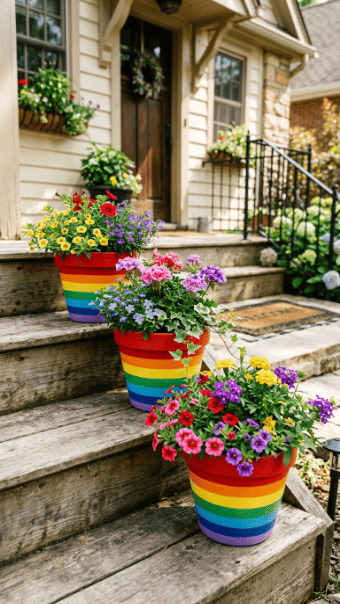
Rainbow stripes are bold, cheerful, and easy to see from the street. The trick is spacing. Use painter’s tape instead of guessing.
Paint one stripe at a time and let it dry before adding the next. Thin coats keep the surface smooth.
This idea works best on medium or large pots. Tiny pots can look crowded.
Budget tip: Use leftover paint from other crafts or sample pots from the hardware store.
Seal well because bright colors fade faster in direct sun.
7. Metallic Rim Pots
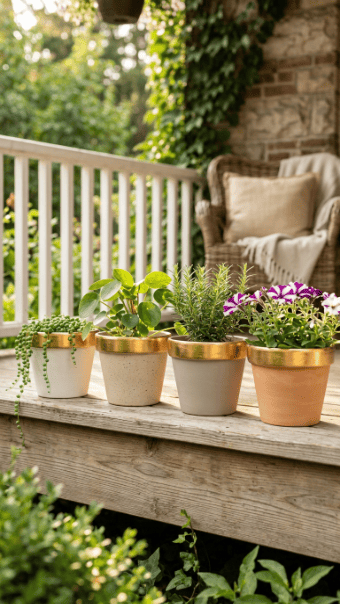
A metallic rim is a small detail that makes a pot look finished. Paint the whole pot white, cream, black, or clay red. Then tape off the rim and add gold, silver, or copper.
Use metallic paint lightly. Thick coats can look uneven.
This idea is great when you want porch decor that feels polished but not loud.
Budget tip: One small bottle of metallic paint can cover many rims.
Use outdoor sealer carefully. Too much can dull the shine.
8. Polka Dot Patio Pots
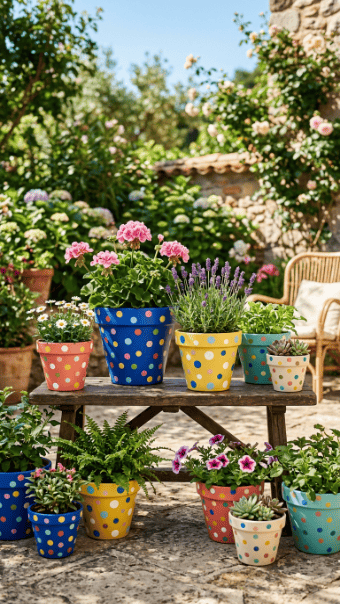
Polka dots are beginner-friendly. Use the end of a paintbrush, a pencil eraser, or a cotton swab for round dots.
Keep the background simple. White dots on black, yellow dots on blue, or pastel dots on terracotta all work.
Spacing matters. Random dots can look messy, so start with larger dots and fill gaps with smaller ones.
Budget tip: This is perfect for using tiny amounts of leftover paint.
Finish with outdoor sealer so the dots do not chip after rain.
9. Marble Pour Pots
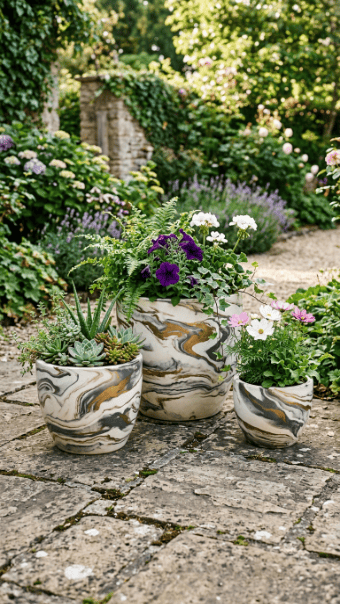
Marble pour pots look fancy but are mostly controlled mess. Thin your paints slightly, pour them over the pot, and rotate the pot slowly.
Use only two or three colors. Too many colors turn dull fast.
Place cardboard or a tray underneath because paint will drip. Let the pot dry fully before touching it.
This idea works best on smooth plastic pots or sealed terracotta.
Budget tip: Use cheap acrylic paint, but finish with a strong outdoor clear coat.
10. Watermelon Painted Pots
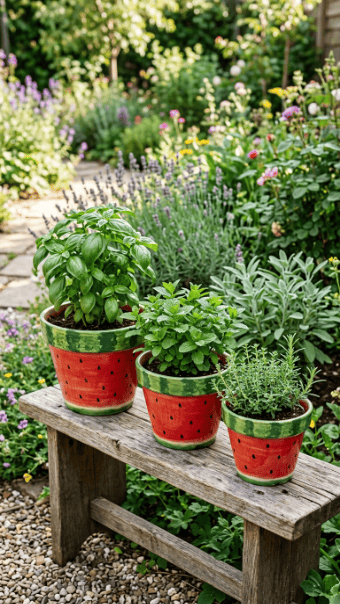
Watermelon pots are great for summer porch decor. Paint the rim green, the body red or pink, then add small black seed shapes.
Keep the design simple. If you add too much detail, it starts looking childish.
This works best on round pots because the shape already matches the fruit idea.
Budget tip: Use one red sample paint and mix green from basic craft colors.
Seal the design well, especially if the pot sits in full sun.
11. Whitewashed Terracotta Pots
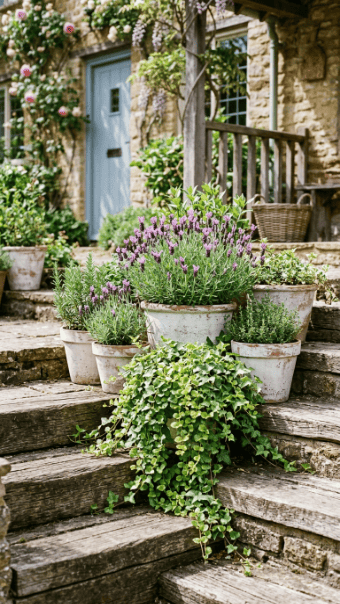
Whitewashed pots are perfect if you like a softer porch look. Mix white outdoor paint with a little water, then brush it over terracotta.
Wipe some paint away before it dries. That keeps the clay texture visible.
This style looks good with herbs, lavender, ferns, and pale flowers.
Budget tip: Use old terracotta pots instead of buying new ones. Chips and age marks actually help the look.
Seal lightly so the finish holds up outdoors.
12. Stenciled Star Pots
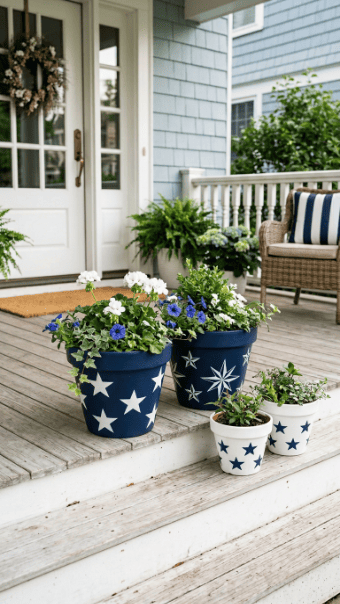
Star stencils are fast and clean. Paint the base color first, tape the stencil in place, then dab paint through it with a sponge.
Do not brush side to side. That pushes paint under the stencil.
Navy and white works well, but you can also use black and gold or green and cream.
Budget tip: Cut star shapes from thick paper instead of buying stencils.
This design is strong for porch steps because the pattern is visible from a distance.
13. Wavy Coastal Stripe Pots
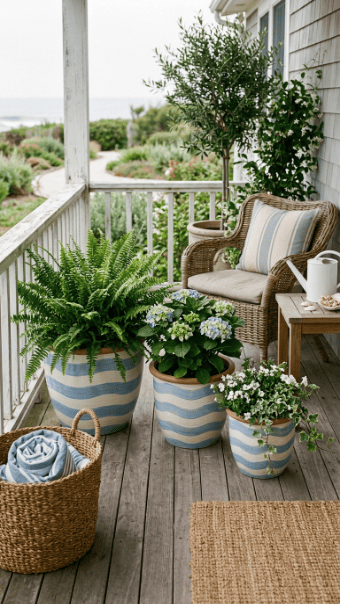
Wavy stripes are more forgiving than straight lines. Use a pencil to sketch loose waves around the pot before painting.
Blue, white, sand, and teal shades work best. Keep the lines relaxed.
This is a good choice for patios with wicker chairs, beach grass, or pale wood furniture.
Budget tip: Use a small artist brush for the waves and leftover paint for the base.
Add sealer after drying. Outdoor moisture can wear thin stripe details quickly.
14. Checkerboard Porch Pots
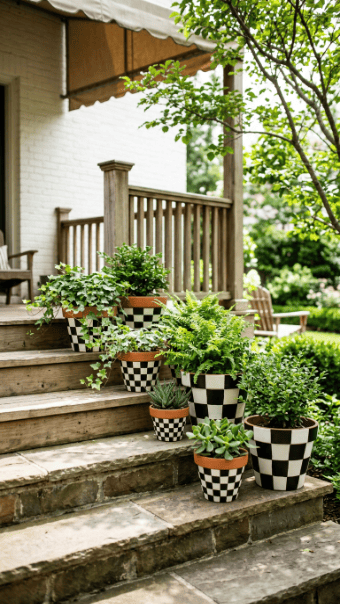
Checkerboard pots look trendy, but they require patience. Mark the grid lightly before painting.
Use painter’s tape for straight rows. Paint every other square, let dry, then fill the rest.
Black and white is classic, but green and cream also looks good outdoors.
Budget tip: Paint only the upper half of the pot if a full checkerboard feels like too much work.
Seal the pattern so the edges stay crisp through weather changes.
15. Cottage Floral Painted Pots
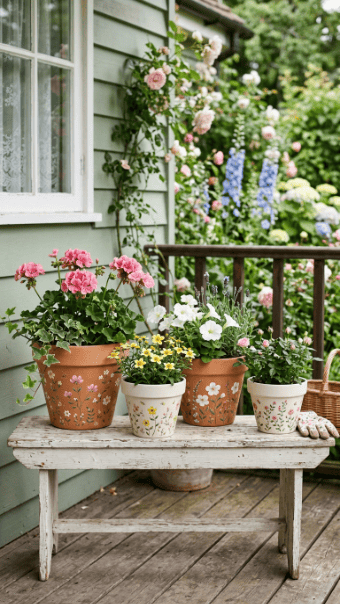
Small flowers can look charming if you keep them loose. Do not try to paint perfect roses. Use simple dots and short strokes.
Start with a pale base color. Then add tiny petals, leaves, and stems.
This idea works well for porch corners, window boxes, and small herb pots.
Budget tip: Use cotton swabs for flower centers and a toothpick for stems.
Seal gently so the painted details do not smear.
16. Neon Accent Pots
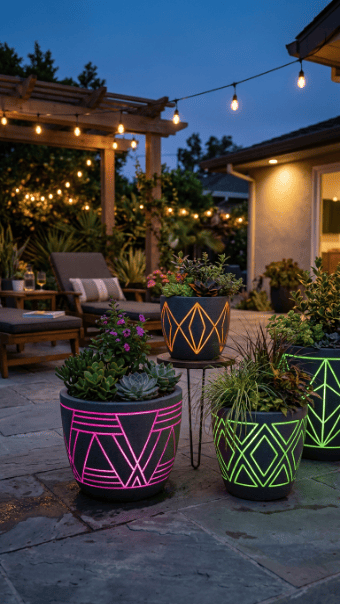
Neon can look tacky if you cover the whole pot. Use it as an accent only.
Start with black, white, or gray. Add neon stripes, triangles, or dots.
This design works well for patios used at night because the color catches light.
Budget tip: Buy one neon color and use it across several pots.
Use outdoor-rated paint when possible. Neon craft paint fades fast without sealer.
17. Rustic Clay and Cream Pots
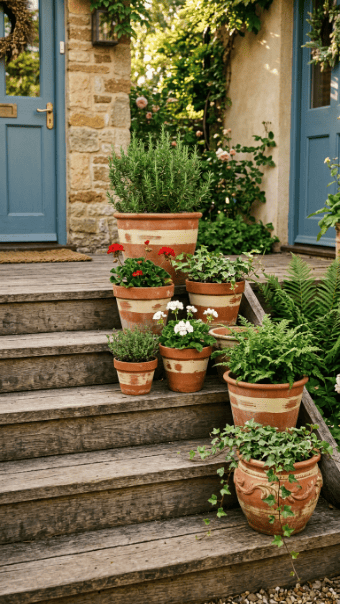
This idea keeps the natural clay look while adding structure. Paint cream bands around the pot, leaving some terracotta exposed.
Do not aim for perfect coverage. Slight brush marks make it feel handmade.
This style pairs well with herbs, grasses, and simple porch furniture.
Budget tip: Use masking tape for clean bands or freehand for a softer look.
Prime only the painted areas if you want the raw clay to show elsewhere.
Seal the painted bands, but avoid heavy shine.
18. Painted Face Planters
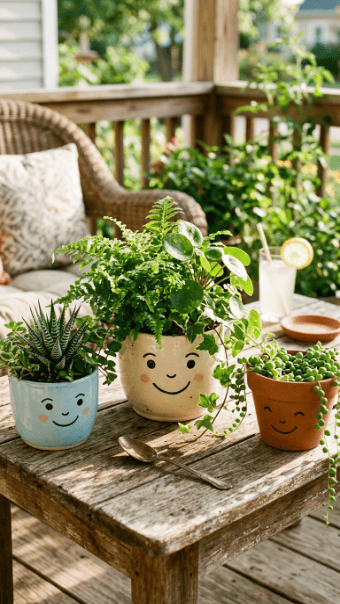
Face pots are fun when kept simple. Paint two eyes, a small nose, and a soft smile. Let the plant act like hair.
Avoid too many facial details. That can make the pot look cluttered.
Use white, tan, blush, or terracotta backgrounds. Black lines work best for features.
Budget tip: Use a permanent outdoor paint marker for the face instead of tiny brushes.
These are great for kids’ garden projects, but still look good when the design is minimal.
19. Herb Label Color Band Pots
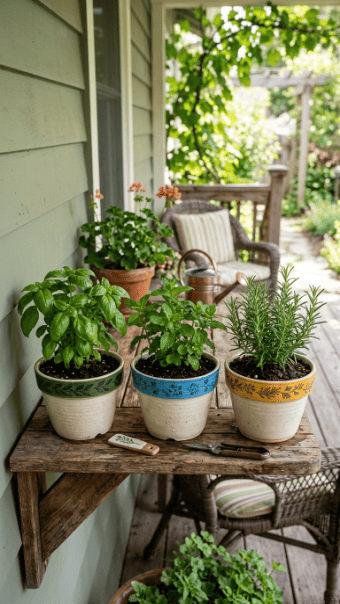
Skip written labels if you want image prompts without text. Use color bands instead. Green for basil, purple for lavender, gray for rosemary, yellow for mint.
Paint the rim or lower third of each pot. Keep the rest plain.
This makes herb pots organized without looking busy.
Budget tip: Use sample paint and one brush. You can finish a whole herb shelf quickly.
Seal the painted bands because watering herbs often splashes the pot.
20. Terracotta Negative Space Pots

Negative space means the unpainted pot becomes part of the design. Tape off shapes, paint around them, then peel the tape away.
This works beautifully on terracotta because the clay color adds warmth.
Try arches, half-circles, diamonds, or simple stripes.
Budget tip: You use less paint because part of the pot stays bare.
Seal the painted areas and the exposed clay if the pot will face rain often.
This design is clean, affordable, and easy to repeat across many pots.
21. Jewel Tone Textured Pots

Deep jewel tones make porch pots feel richer. Use emerald, burgundy, navy, or plum.
Add texture with a dry brush or sponge. Keep it subtle. Heavy texture can peel outdoors.
These colors look best with white flowers, ornamental grasses, or dark green leaves.
Budget tip: Buy paint samples instead of full cans.
Use primer first, especially on terracotta. Deep colors can look patchy without it.
Finish with a clear outdoor sealer to protect the color from harsh sun.
22. Speckled Stone-Look Pots
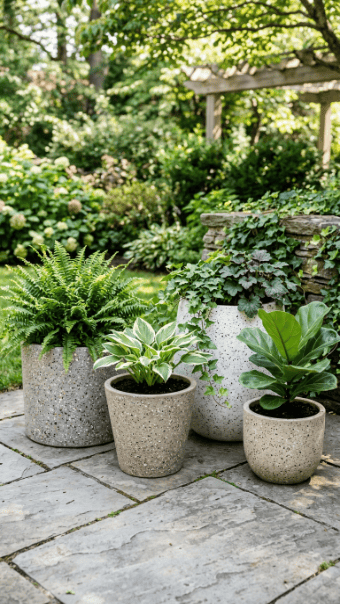
Stone-look pots are great if you want a natural style without buying heavy planters.
Paint the pot gray, beige, or off-white. Then flick tiny speckles using an old toothbrush.
Practice on cardboard first. Speckles can get out of control fast.
This design hides dirt well, which is useful outdoors.
Budget tip: Use leftover neutral paint and tiny amounts of darker paint for speckles.
Seal with a matte outdoor finish so the pot still looks like stone.
23. Half-Dipped Color Pots
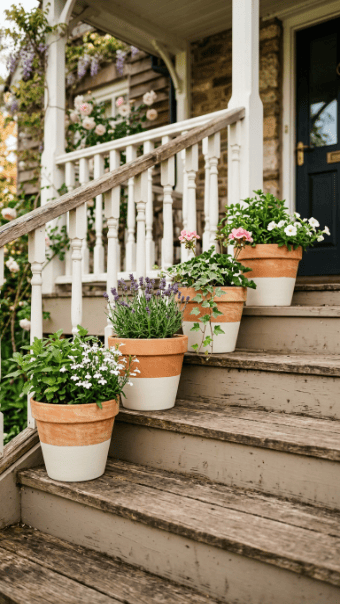
Half-dipped pots are clean and easy. Tape around the middle, paint the bottom half, and leave the top natural.
White, sage, black, and terracotta combinations work well.
This is one of the fastest ways to make old pots look planned.
Budget tip: Paint only the visible side if the pot sits against a wall. No one will know.
Use thin coats to avoid a thick ridge at the tape line.
Seal the painted half so rain does not lift the edge.
24. Vertical Stackable Painted Pots
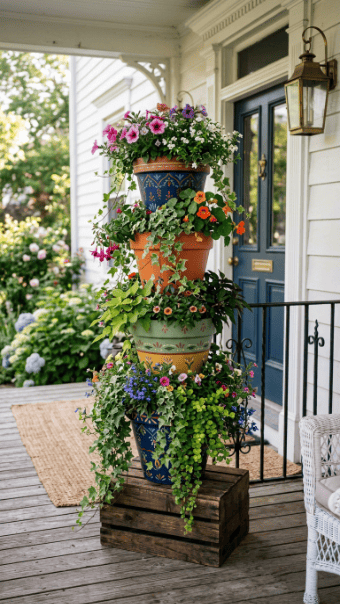
Stackable pots save space and create height. Paint each pot in a related color family so the tower looks planned.
Use lighter shades near the top and darker shades near the bottom. This keeps the display grounded.
Make sure every pot is fully dry before stacking. Paint can stick if rushed.
Budget tip: Use old plastic pots and repaint them instead of buying a new tower planter.
Add trailing flowers or herbs so the design feels full.
Seal each pot separately before building the stack.
Conclusion
Painted outdoor flower pots are one of the cheapest porch upgrades that actually show. The winning formula is simple: clean the pot, prime when needed, use outdoor-friendly paint, and seal the finished design. Start with one easy idea like stripes, rims, or half-dipped color blocks. Once that works, try marble pours, stencils, or stacked planters. Don’t make it complicated. A few painted pots can make your porch look cared for without spending much.