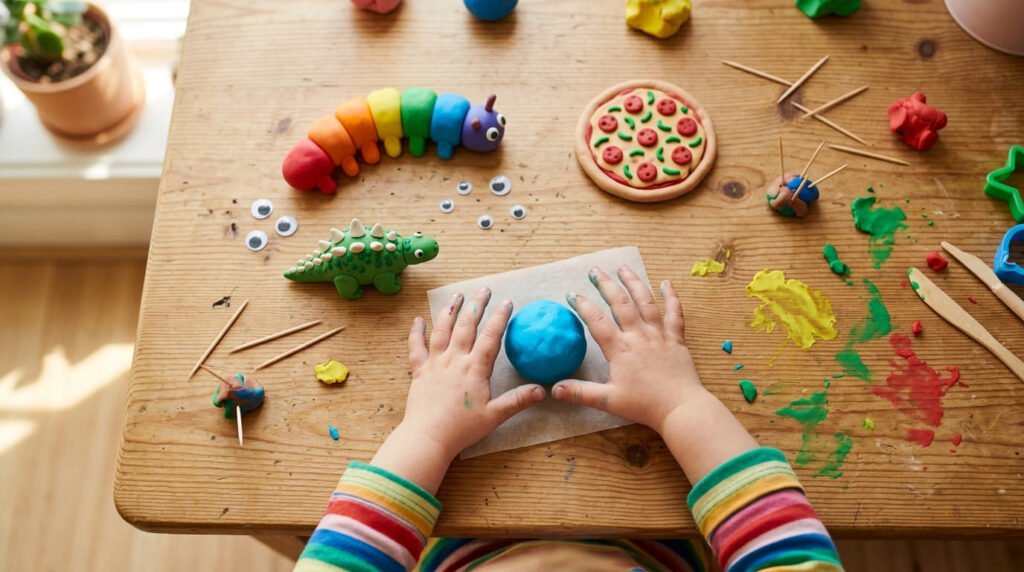

Clay is one of those rare activities that keeps kids busy for hours without a single screen in sight. It squishes, rolls, and sticks, and every lump turns into something new. Better still, most of these projects cost almost nothing. A block of air-dry clay, a few kitchen tools, and some googly eyes will carry you a long way. This list gives you 21 simple, fun clay sculpture ideas for kids of every age. Each one builds real skills like fine motor control, color recognition, and storytelling, while feeling like pure play. Grab some clay, cover the table, and let the little hands get messy.
1. Rainbow Caterpillar
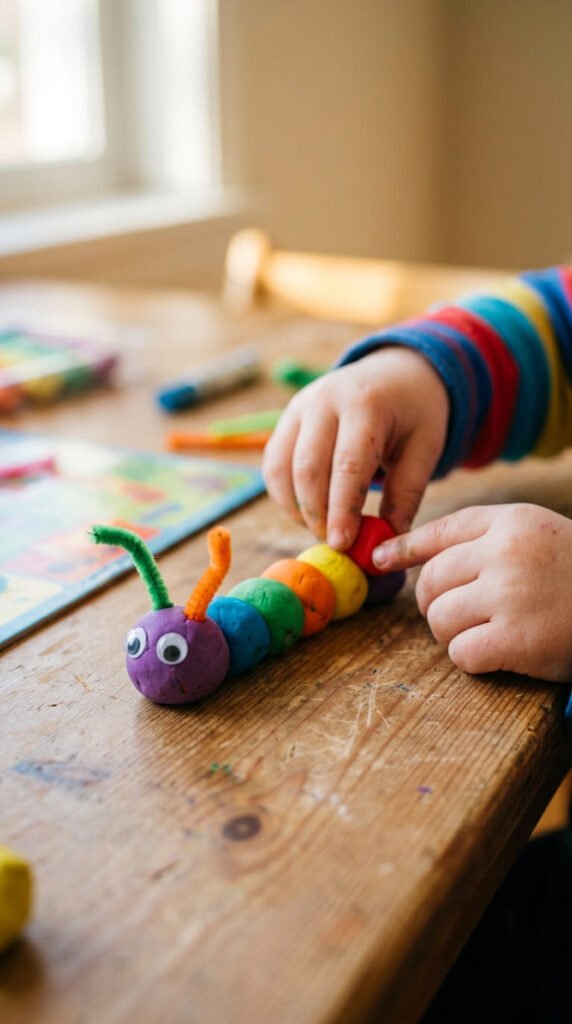
This is the project almost every kid starts with, and for good reason. It works from age 3 and up.
The idea is simple. Roll small balls of clay in different colors. Line them up in a row. Press them lightly so they stick together.
Add two googly eyes on the front ball. Poke in two bits of pipe cleaner for antennae. Done.
Along the way, your child practices rolling, sequencing colors, and counting the segments. All of that helps little hands get stronger for writing later.
Budget tip: no googly eyes at home? Press in two tiny balls of white clay and dot them with a marker once dry. Bits of dry spaghetti make great antennae too.
Let kids pick their own color order. A purple-green-orange caterpillar is just as good as a neat rainbow.
Keep the balls small so the caterpillar dries evenly without cracking. Set it somewhere cool and out of the sun.
This one rarely fails and always gets a proud smile.
2. Mini Clay Pizza
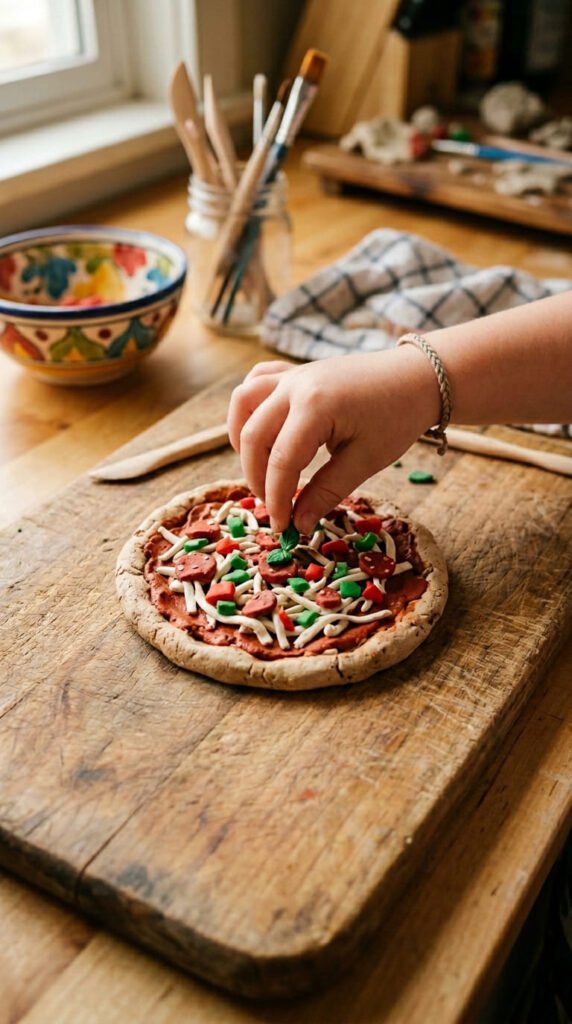
Kids love food they can make and never have to eat. This one suits ages 4 and up.
Start with a flat circle of beige clay for the base. Roll it, then press it flat with a palm.
Add a thin red circle on top for sauce. Pull thin white strands for cheese. Then let your child add toppings.
Tiny red balls become pepperoni. Small green bits turn into peppers. Brown crumbs make mushrooms.
This teaches layering and shape cutting. It also opens up hours of pretend play. Let kids take pizza orders from the family.
Budget tip: a bottle cap makes a perfect pepperoni cutter. The flat side of a fork presses lines into the crust edge.
Press the toppings in gently so nothing falls off when it dries.
Make a few small pizzas and set up a pretend pizza shop. Add clay plates and cups for a full play kitchen.
It is cheap, fun, and keeps little chefs busy long after the clay is shaped.
3. Pinch Pot Bird Nest
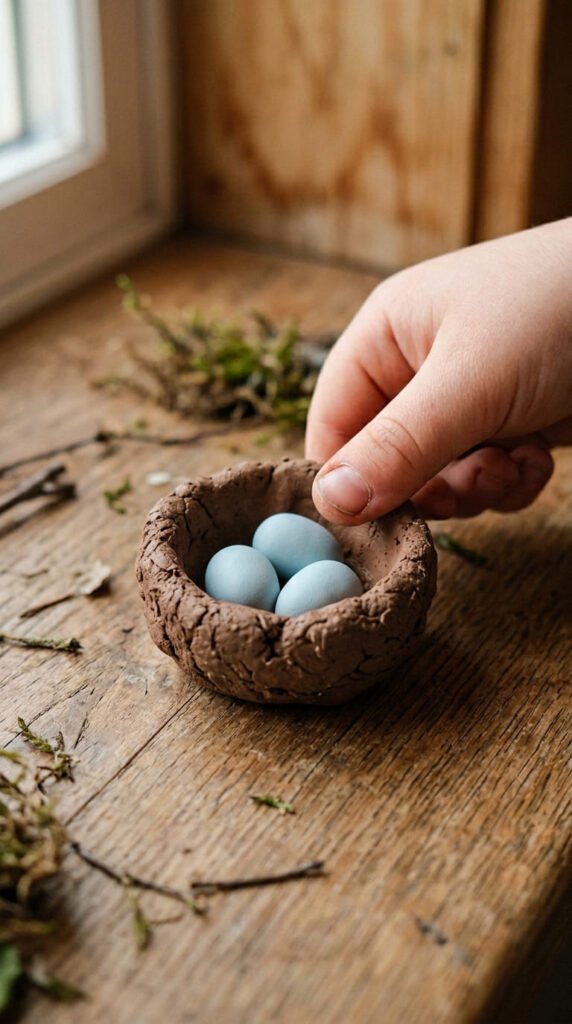
Pinch pots are the first real vessel-shaping skill kids learn. A nest makes the lesson fun.
Roll a ball of brown clay. Push a thumb into the middle. Then pinch the walls outward, turning as you go.
You end up with a small bowl. That is your nest.
Roll three tiny eggs in pale blue or white. Set them inside.
Want it to look real? Roll thin clay snakes and press them around the outside like twigs.
This is a lovely spring project. Pair it with a walk to spot real nests and birds.
Budget tip: press real twigs and dry grass into the clay for instant nest texture. No paint needed.
Keep the walls a little thick so the nest does not crack as it dries.
Older kids can add a small clay bird on the edge. Younger ones are happy with just the eggs.
Once dry, it makes a sweet keepsake or a gift for grandparents. Simple shaping, big charm.
4. Ocean Octopus
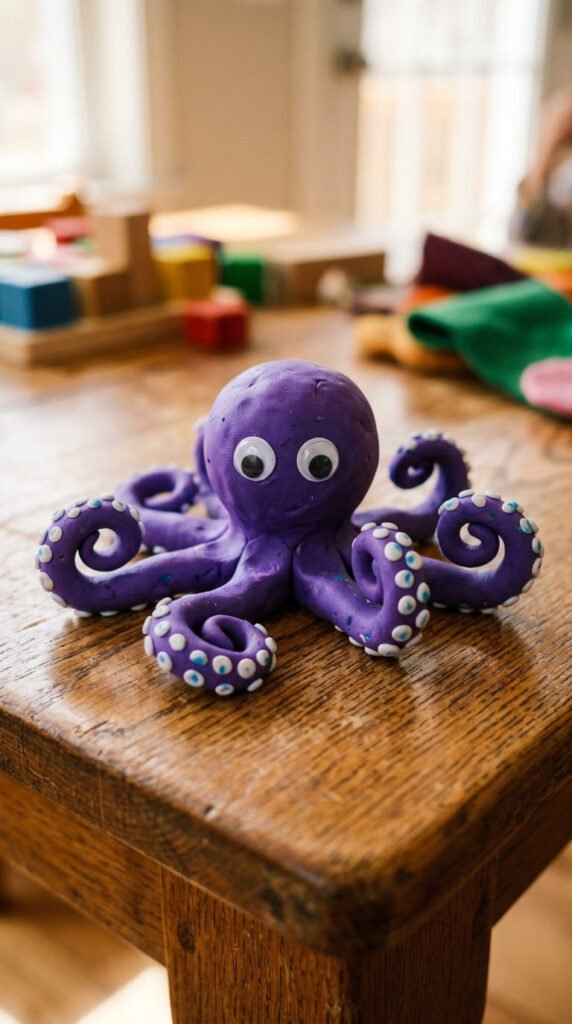
Ready to build something with more parts? An octopus suits ages 5 and up.
Start with a round ball for the head. Then roll eight thin coils for the arms.
Press each arm onto the bottom of the head. Curl the tips up so they look playful.
Add googly eyes. Then press tiny dots along each arm with a toothpick for suction cups.
This teaches counting to eight and a little marine biology. Talk about how octopuses live and move.
Budget tip: use a pencil tip or a straw end to press the suction-cup dots. Both work as well as any tool.
Keep the arms a bit chunky so they do not snap when dry.
Want a whole ocean scene? Add a clay starfish and some seashells. Press a real shell into clay to copy its shape.
Let kids pick wild colors. A pink and yellow octopus is far more fun than a plain grey one.
This project mixes building skills with story time about the sea.
5. Dino Land
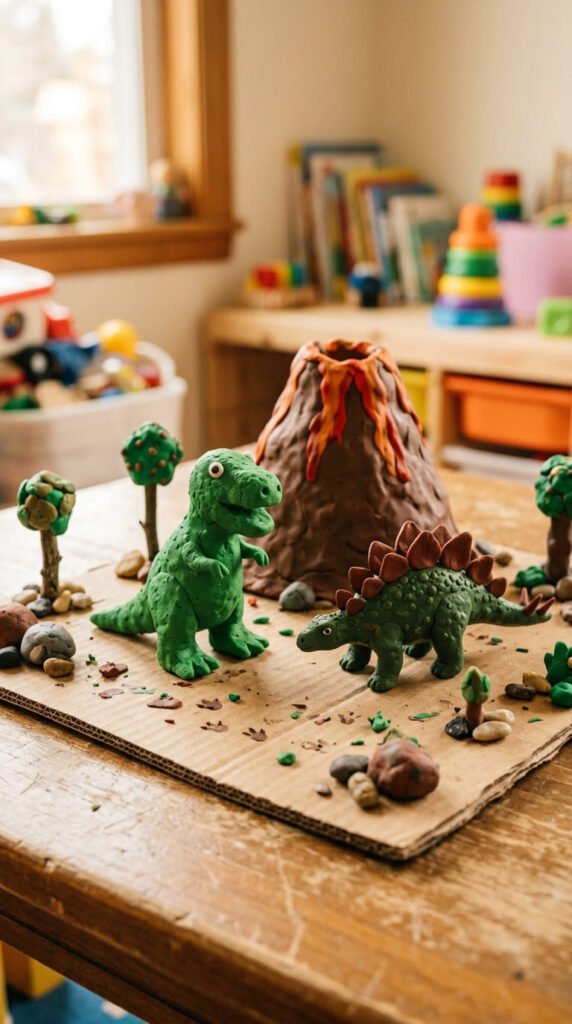
For dino-loving kids, this one is gold. It works for ages 5 to 10.
Pick a dinosaur. A T-Rex is a fat body with tiny arms. A stegosaurus is a round body with clay spikes down the back.
Roll the body, add legs, then pinch out a head and tail.
Build a small volcano from brown clay beside them. Hollow the top so it looks like it could erupt.
Add clay rocks and trees to finish the scene. Set it all on a cardboard base.
This one is less about neat shapes and more about role-play and storytelling. The dinosaurs become characters in adventures.
Budget tip: an old shoebox lid makes a great base. Paint it green and brown for grass and dirt.
Press a toothpick along the spine for scaly texture. Use it to poke nostrils and eyes too.
Keep the legs thick so they hold the body up once dry.
Let kids invent the whole story. Dino Land grows every time they play.
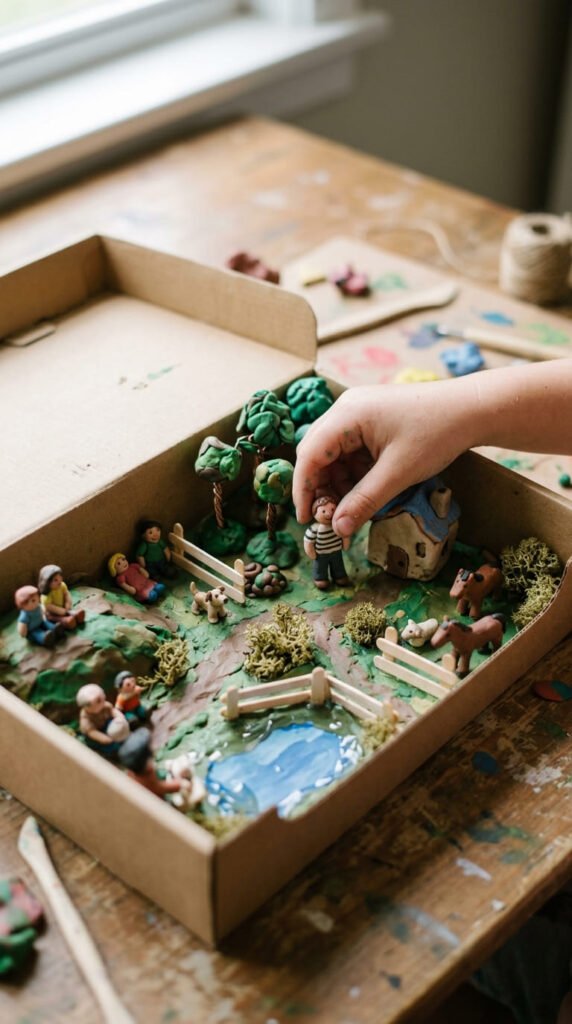
6. Tiny Town
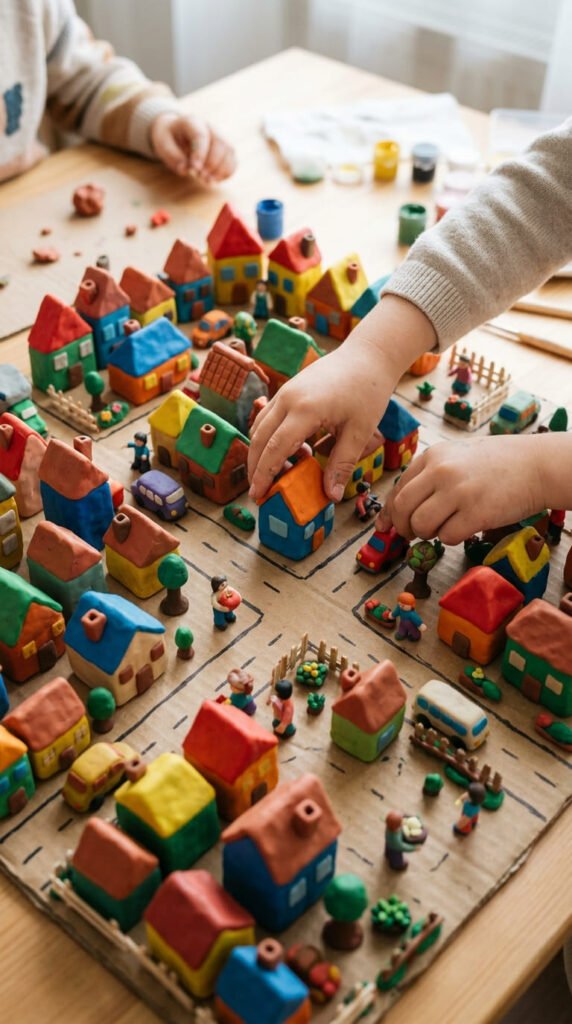
This one is perfect for siblings or friends to build together. It suits ages 6 and up.
The goal is a little town. Houses, cars, trees, and people.
Make a house from a clay cube with a triangle roof on top. Press in windows and a door with a toothpick.
Roll small cars. Shape tiny people. Add clay trees and a road.
Set everything on a big cardboard base so the town has a layout.
This builds spatial awareness and teamwork. Kids decide where roads go and who lives where.
Budget tip: draw roads and a river straight onto the cardboard with markers. No clay needed for the ground.
Let each child build their own street, then join them into one town.
Keep buildings small and chunky so they dry without toppling.
Add to it over weeks. A school, a shop, a park. The town can grow as long as their imagination does.
It is open-ended play at its best, with everyone pitching in.
7. Salt Dough Cookie Shapes
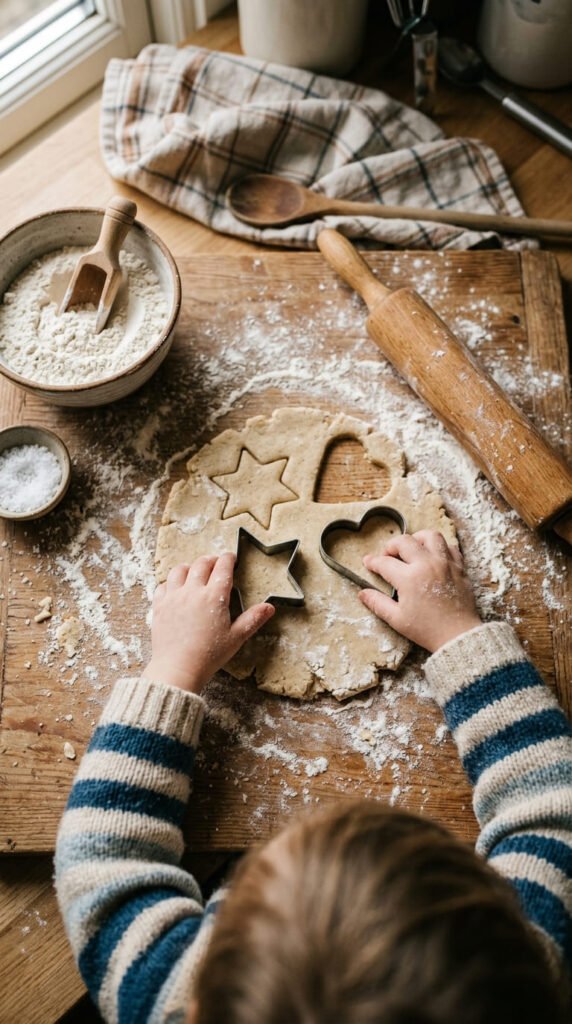
No clay in the house? Make your own. Salt dough takes three kitchen items.
Mix 1 cup flour, half a cup of salt, and half a cup of water. Knead it for about 10 minutes until firm.
Roll it flat, about a quarter inch thick. Then press cookie cutters into it.
Stars, hearts, animals, whatever shapes you own. Poke a hole at the top if you want to hang them.
Let them air dry or bake low and slow until hard.
This is the cheapest clay option there is. You likely have everything already.
Budget tip: a drinking glass rim cuts perfect circles if you have no cutters. A fork adds patterns.
Add a few drops of food coloring to the water for colored dough.
Once dry, kids can paint the shapes. They make great ornaments, magnets, or gift tags.
Store leftover dough in a sealed bag for up to three weeks.
It is messy fun and a little kitchen science lesson rolled into one.
8. Lace and Doily Texture Hearts
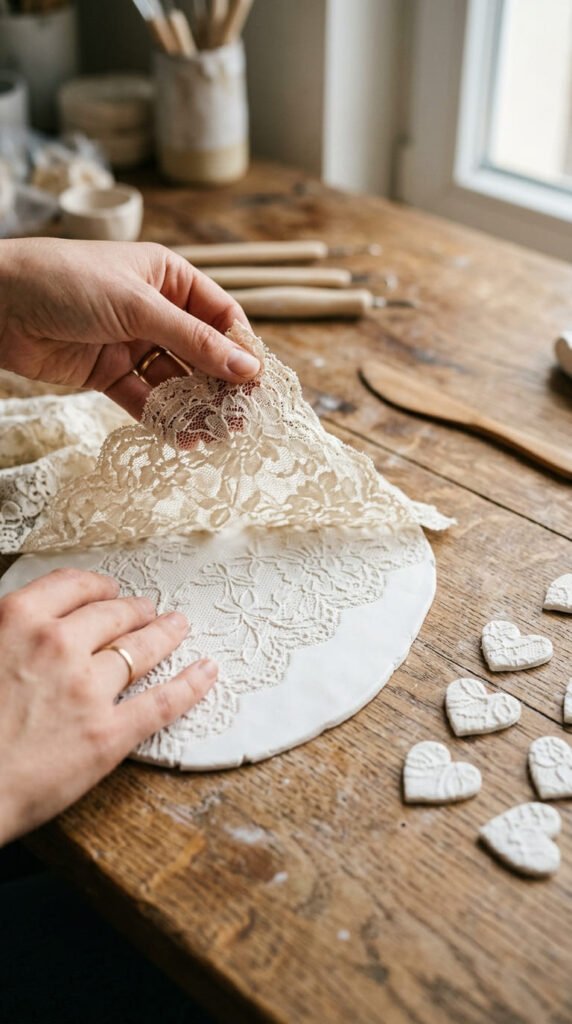
Want pretty results with zero skill? Texture stamping is the trick.
Roll the clay flat. Then press a piece of lace or a paper doily firmly onto the surface.
Peel it back and a delicate pattern stays behind.
Cut hearts, stars, or circles from the textured clay with a cookie cutter.
Poke a hole at the top. Once dry, thread a ribbon through for ornaments or magnets.
This makes kids feel like real artists, even the youngest ones.
Budget tip: look around the house for texture. Leaves, buttons, bubble wrap, and the bottom of a sneaker all leave cool marks.
A kitchen sieve presses a fine dotted pattern. A fork makes neat lines.
Keep the clay an even thickness so the shapes dry flat.
Make a whole batch in one sitting. They turn into gifts, decorations, or even handmade jewelry.
Let kids hunt the house for the best texture-makers. The search is half the fun.
Simple, cheap, and the results always look lovely.
9. Bottle Cap Caterpillar
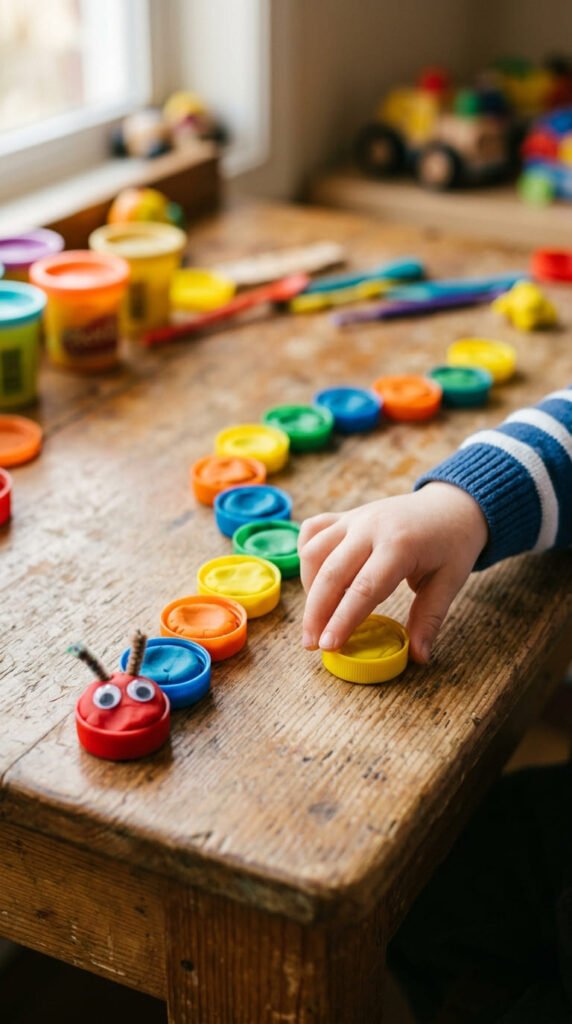
Here is a craft that recycles trash into a friend. Start saving your bottle caps.
Press a ball of colored clay into each cap so it sits like a dome.
Line the caps up in a row. The clay tops become caterpillar segments.
Add googly eyes to the front cap. Poke in antennae.
This mixes clay with upcycling, which teaches kids to reuse instead of throw away.
Budget tip: the caps are free from drink bottles you already buy. Wash and save a handful before crafting day.
You can glue the caps to a strip of cardboard so the caterpillar holds its shape.
Use a different bright color in each cap for a rainbow body.
Walnut shells work the same way. Fill them with clay for little bugs or mice.
Talk about why reusing materials helps the planet while you build.
It is a fun, green project that costs nothing but a few saved caps.
10. Walnut Shell Mouse
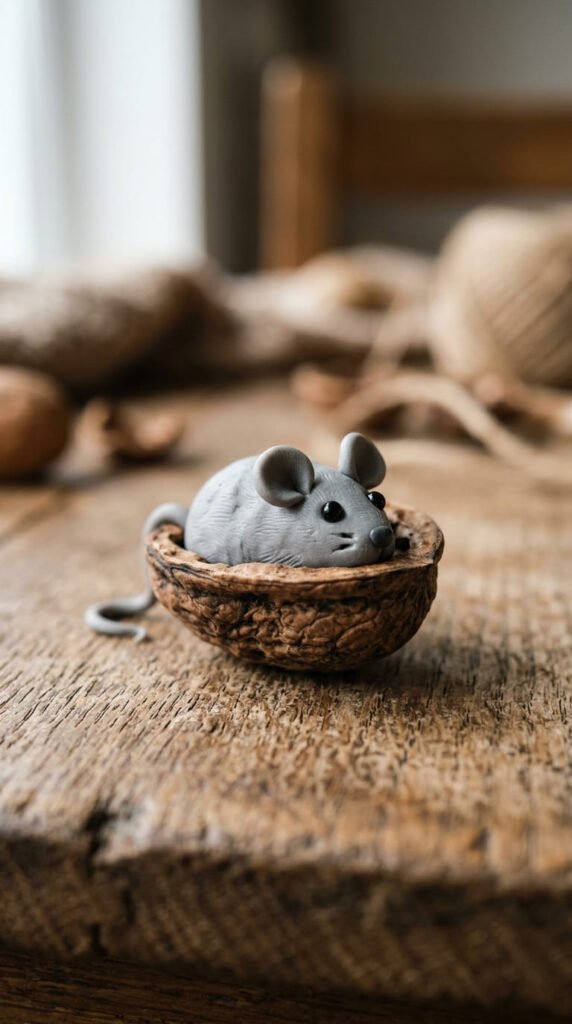
This one is small, sweet, and made from a snack leftover. Save half a walnut shell.
The shell becomes the mouse’s curved body. Fill the open side with a little clay to hold it.
Add a small grey clay head at one end. Pinch out a pointed nose.
Press on two round ears. Roll a thin tail and stick it on the back.
Dot two tiny eyes with a toothpick.
It is a tiny project, so it suits patient hands and works well for ages 5 and up.
Budget tip: the shell is free after snack time. A sunflower seed makes a great tiny nose if you have one.
Want a scene? Add a small wedge of yellow clay as cheese.
Keep the clay parts small so they grip the shell well.
These mice are addictive. Kids often make a whole little family.
Set them on a shelf or use them in a small world play scene.
A cute craft that turns a shell into something special.
11. Coil Pot Snake Bowl
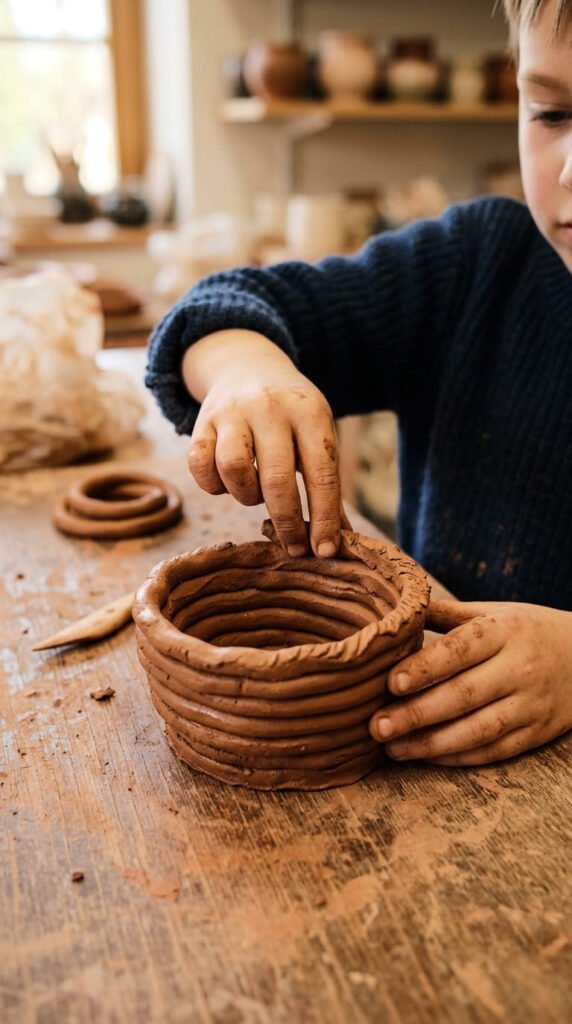
Coil building is a classic clay skill, and it starts with a snake. Kids love rolling snakes.
Roll long, even ropes of clay on the table. These are your coils.
Start with a flat clay circle for the base. Then wrap a coil around the edge.
Stack more coils on top, round and round, until you have walls. Press them together as you go.
You end up with a small bowl or vase.
This teaches a real pottery technique in the simplest way.
Budget tip: no tools needed at all. Just hands and a flat table.
Smooth the inside walls with a wet finger so the coils stick and the bowl holds together.
Younger kids can leave the coils showing for a textured look. Older ones can smooth them flat.
Let it dry slowly so the walls do not crack.
Once dry, paint it bright. The finished bowl can hold trinkets, coins, or tiny treasures.
A hands-on lesson that feels like play.
12. Nature Print Tiles
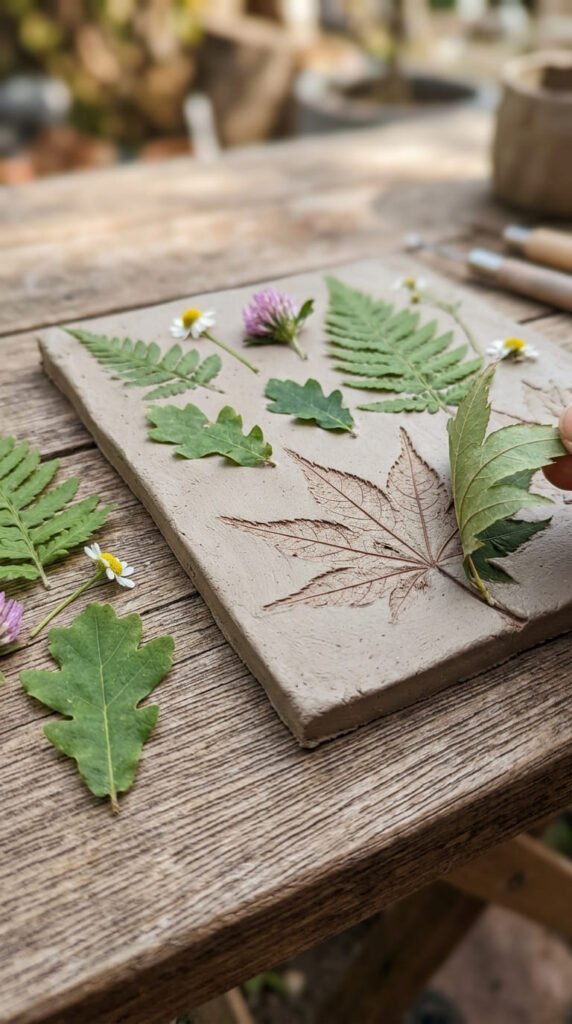
Take the craft outside for this one. It mixes art and science beautifully.
Go on a short nature walk. Collect leaves, flowers, and small twigs.
Back home, roll the clay flat into small tiles. Press a leaf firmly onto each one.
Peel it back to reveal the vein pattern stamped into the clay.
Try different leaves and flowers. Each one leaves its own print.
This sparks talk about plants, shapes, and how leaves work.
Budget tip: everything you need grows outside for free. The walk is part of the fun.
Poke a hole at the top of each tile to hang it later.
Press hard enough to catch the fine details but not so hard you tear the clay.
Once dry, kids can paint the prints or leave them plain and earthy.
Make a set of tiles from one walk and string them together as a garland.
It is a calm, sensory project that connects kids to nature.
13. Fairy House
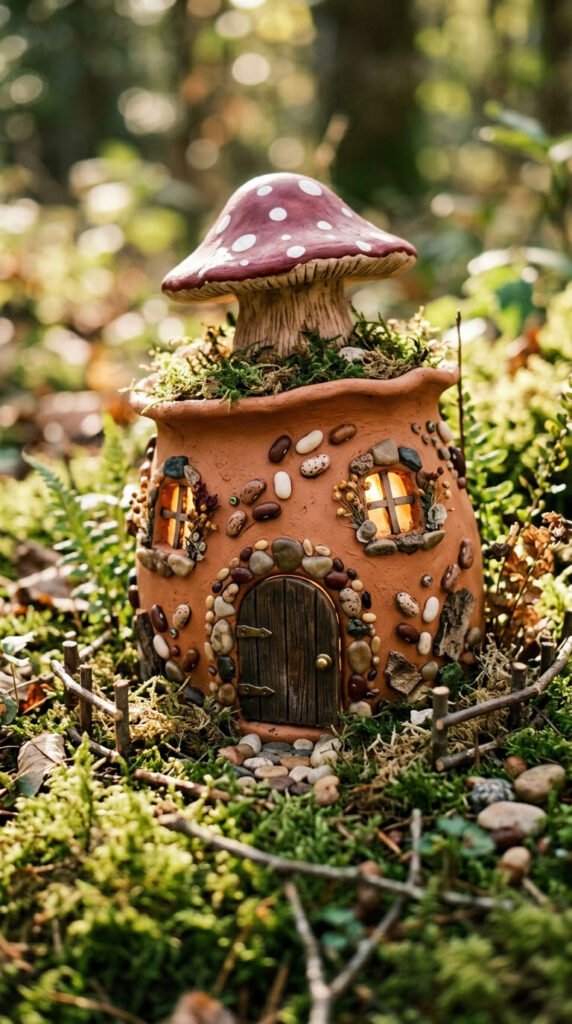
This one fuels hours of imaginative play. Every kid wants a fairy to visit.
Start with a clay dome or a small pot shape for the house.
Press in a round door and tiny windows with a toothpick.
Now decorate. Push in beans, pebbles, and seeds for a stone-cottage look.
Add a mushroom roof or a twig chimney from things found outside.
This blends building with fantasy play. Kids invent who lives there.
Budget tip: found nature is your decoration. Acorn caps, small shells, and dried beans all work and cost nothing.
Keep the walls thick so the house stands strong.
Make a tiny path of pebbles leading to the door.
Once dry, set it in the garden or on a windowsill as a fairy home.
Add little clay toadstools and a bench nearby for a whole scene.
Let kids leave a tiny note or treasure inside for the fairies.
It is open-ended magic that grows with their imagination.
14. Mosaic Pinch Pot
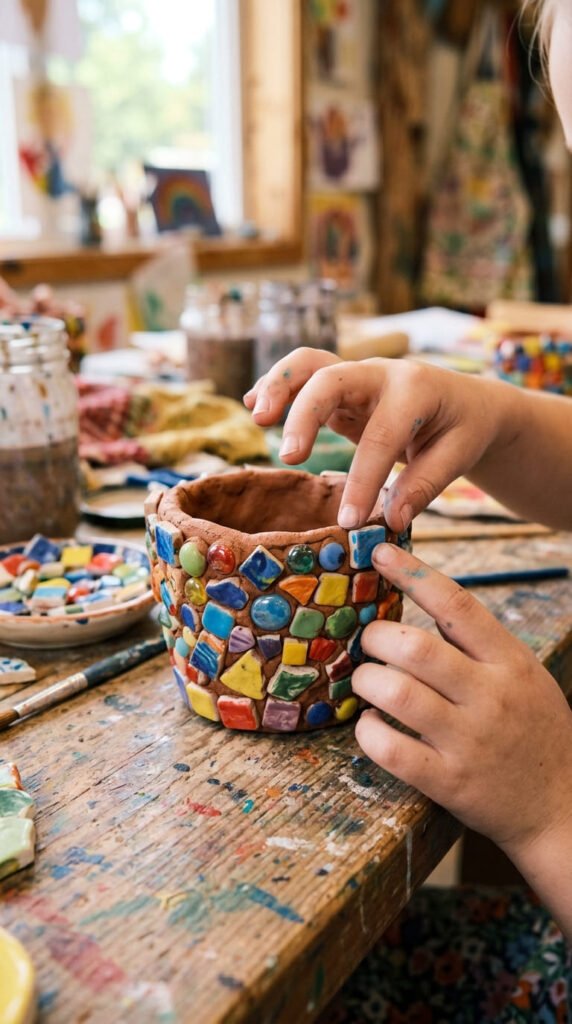
This craft turns recycling-bin bits into art. Dig through the bin first.
Make a simple pinch pot. Roll a ball, push in a thumb, and pinch out the walls.
While it is still soft, press small bits into the surface. Beads, buttons, broken tile, or pieces of dried painted clay.
Arrange them in patterns or scatter them freely.
This mixes a clay skill with upcycling and design.
Budget tip: the recycling bin is your craft store. Bottle caps, foil bits, and old beads all work.
Press each piece in firmly so it holds once the clay dries.
Leave gaps between pieces for a true mosaic look.
Younger kids can just press random colors in. Older ones can plan a flower or a star.
Once dry, the pot holds pencils, coins, or little treasures.
You can also paint the gaps between the pieces for extra color.
It teaches that broken or used things can become something pretty again.
A colorful, planet-friendly project.
15. Glow Coral Reef
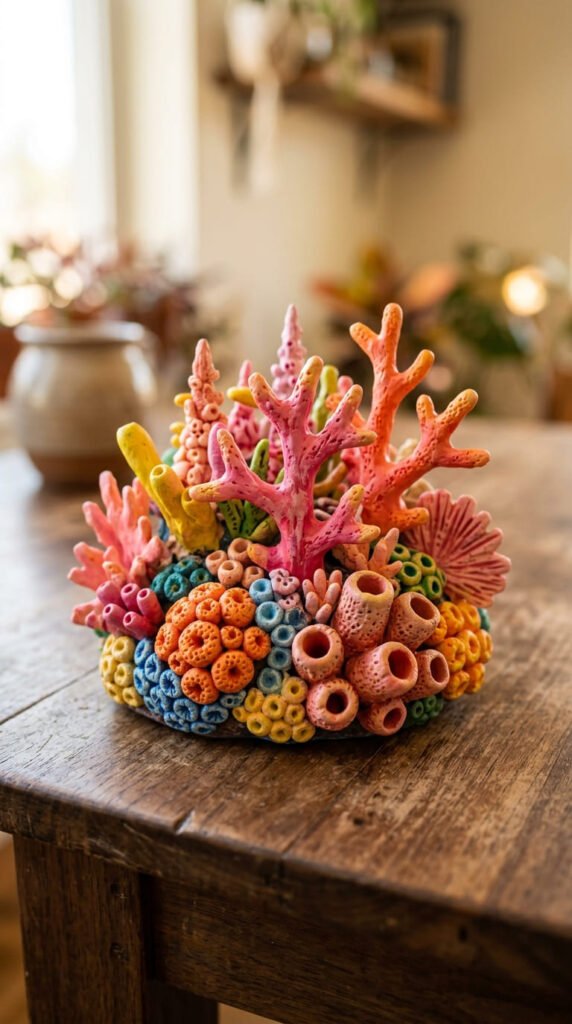
For kids who love the sea, a coral reef is a fun 3D project.
Build coral from clay in fun shapes. Roll branching twigs, stack bumpy mounds, and shape tube-like fingers.
Use a toothpick or fork to press texture all over so it looks real.
Set the pieces on a clay base so they stand up.
Paint it in bright pinks, oranges, and purples once dry.
This pairs craft with a chat about ocean life and reefs.
Budget tip: a small pot of glow-in-the-dark paint turns it magical at lights-out, but plain bright paint works great too.
Keep coral branches a little thick so they do not snap.
Add clay fish or a starfish hiding in the reef.
Press a real seashell into the base for extra detail.
Let kids make each coral piece different. Reefs in real life are wonderfully varied.
Once dry and painted, it makes a striking shelf display.
A project that mixes building, painting, and learning about the sea.
16. Handprint Trinket Dish
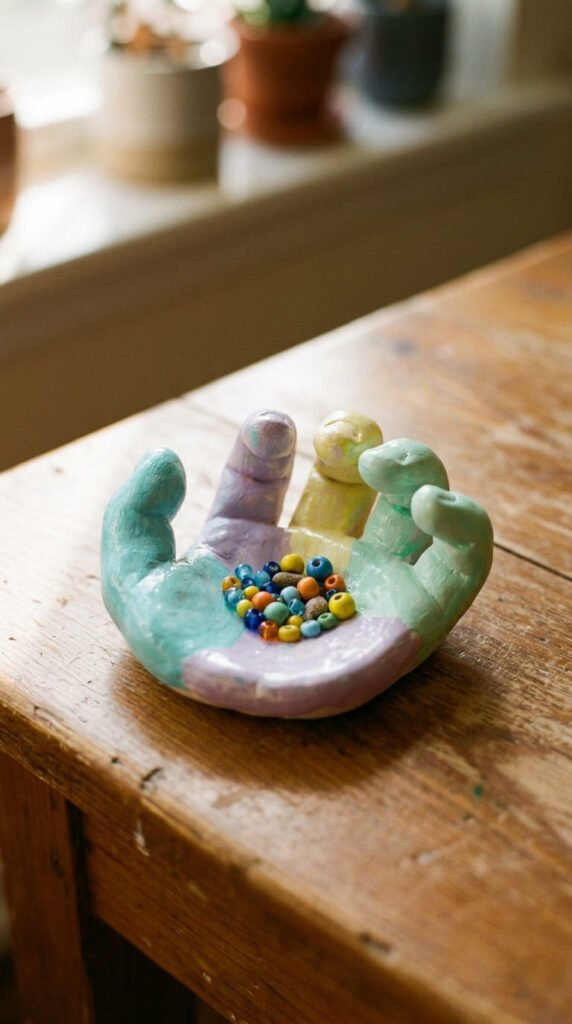
This one becomes a keepsake parents treasure for years.
Roll the clay into a flat circle. Then press your child’s hand firmly into it.
Trim around the print if you like, or leave it round.
While the clay is soft, curl the edges and fingers up slightly. This forms a small dish.
Let it dry in that curved shape.
It captures their hand at this exact age, which makes it special.
Budget tip: this uses just a handful of clay and costs almost nothing. The keepsake value is huge.
Once dry, kids can paint it any color they like.
The little dish holds rings, coins, hair clips, or tiny treasures.
Make one each year to see how their hand grows.
These also make heartfelt gifts for grandparents or on Mother’s Day.
Press the print deep enough to show the lines clearly.
A simple shape, a lasting memory. Few crafts give back this much.
17. Beaded Heart Ornaments
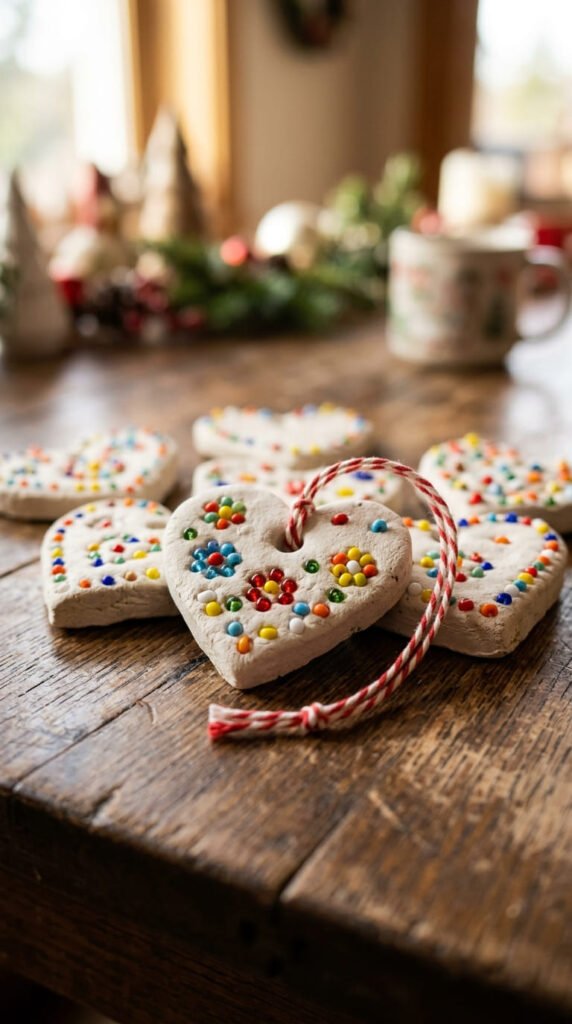
This craft works for every age, from 4 and up, and never fails.
Roll the clay flat. Cut hearts with a cookie cutter.
Poke a hole near the top with a straw so you can hang it later.
Now the fun part. Press small beads into the surface in patterns.
Make a border, a swirl, or just scatter them.
This builds fine motor skills as little fingers place each bead.
Budget tip: raid an old broken necklace for free beads. Buttons and sequins work just as well.
Push each bead in firmly so it stays put once dry.
Thread a ribbon or string through the hole after drying.
Hang them on a tree, a window, or a doorknob.
Stars, circles, and animals work the same way if you have other cutters.
Make a big batch as gifts or holiday decorations.
Kids feel proud handing out something they made themselves.
Cheap, easy, and lovely every single time.
18. Googly-Eyed Monsters
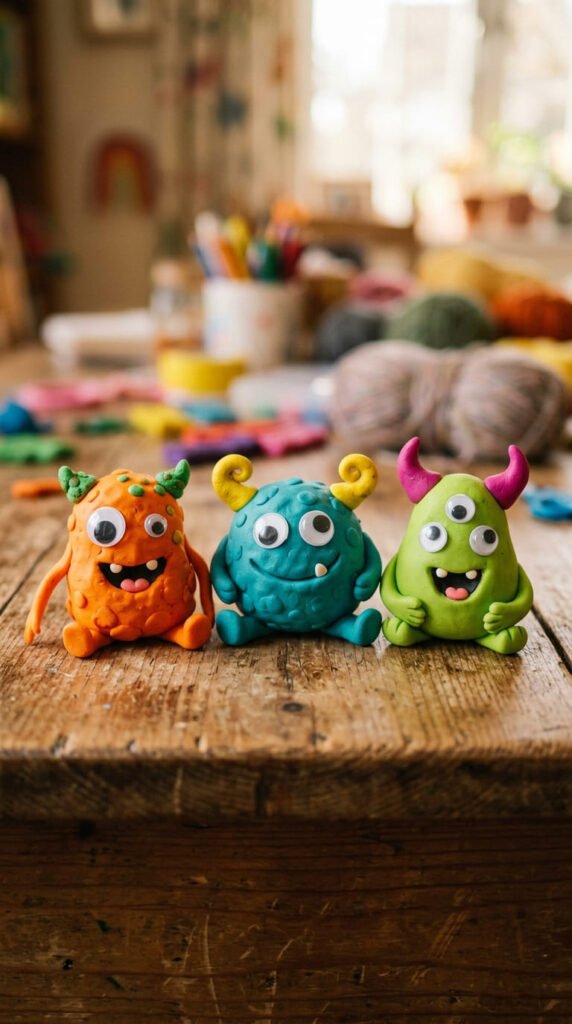
When there are no rules, kids get the most creative. Monsters have no rules.
Hand over the clay and let them build any creature they want.
One eye or five. Bumpy or smooth. Horns, spikes, or floppy ears. Anything goes.
Add googly eyes to bring each monster to life instantly.
This is pure open-ended play. There is no wrong way to make a monster.
Budget tip: mix leftover scraps of different colors for funny marbled bodies. Nothing goes to waste.
Use a toothpick to give them silly grins and sharp teeth.
Pipe cleaners make wild antennae and arms.
Let kids name each monster and invent its story.
Make a whole family of them, big and small.
Because there is no model to copy, even the youngest kids succeed.
It builds confidence along with creativity.
These goofy creatures often become a child’s favorite thing they have made.
Silly, free, and full of personality.
19. Small World Diorama
A small world is a tiny scene kids build and then play with. It follows their current interests.
Pick a theme. A farm, a jungle, a space base, or a candy land.
Make small clay figures, animals, trees, and props to fit it.
Arrange them all inside a shoebox lid or on a cardboard base.
Then the real magic starts. Kids play stories inside their little world.
This is open-ended creativity at its finest. The scene can change every day.
Budget tip: the box lid is free. Color the ground with markers or scrap paper for grass, water, or sand.
Keep figures simple and chunky so they survive play.
Add bits from around the house. A small mirror becomes a pond. Cotton wool becomes clouds.
Let kids rebuild and rearrange whenever they like.
Whatever they love this month, they can make a world for it.
It blends building skills with hours of imaginative play.
A craft that turns into a toy.
20. Clay Bead Jewelry

Kids love making things they can wear. Clay beads turn into bracelets and necklaces.
Roll small balls or short tubes of colored clay. These are your beads.
Push a toothpick through the center of each one to make a hole. Do this while the clay is soft.
Let the beads dry fully with the holes open.
Then thread them onto string or elastic in any pattern.
This builds fine motor skills through rolling and threading.
Budget tip: elastic cord from a craft shop costs little. In a pinch, strong thread or a shoelace works too.
Mix bead shapes for a fun, varied look. Round, square, and tube beads together.
Roll two colors together for a marbled bead.
Once dry, kids can paint the beads or leave them as is.
Make matching sets for friends as gifts.
Patterns help too. Three blue, one red, repeat. That sneaks in a little math.
Wearable art they will actually use.
21. Penguin Family
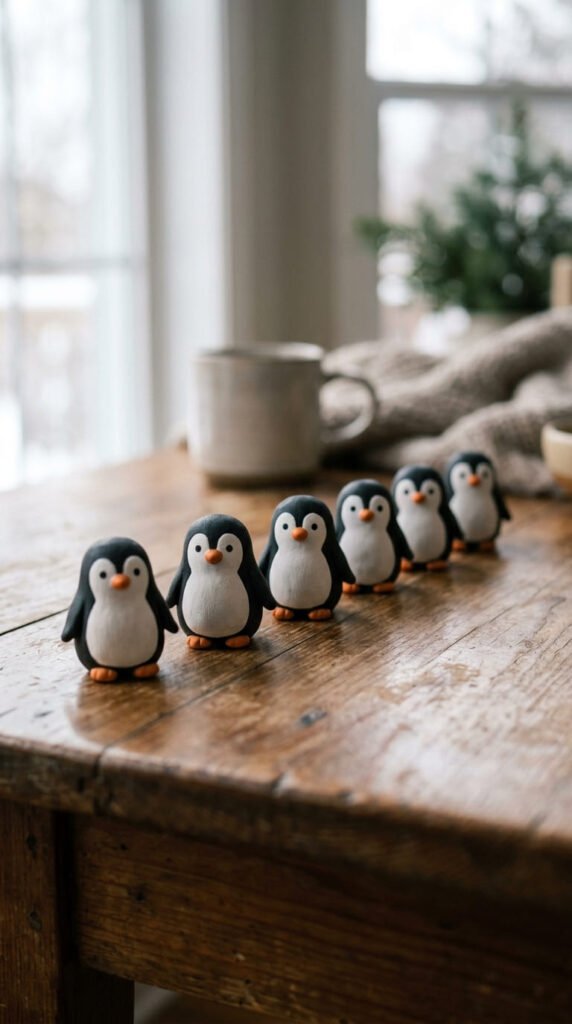
This seasonal favorite is perfect for winter crafting. Penguins are simple and cute.
Roll a fat black oval for the body. Press a white clay belly onto the front.
Add two tiny black flippers on the sides.
Pinch a small orange triangle for the beak. Press it on. Add two orange feet at the bottom.
Dot two eyes with a toothpick.
Make a few in different sizes for a whole family.
This works for a range of ages and builds shaping and detail skills.
Budget tip: no orange clay? A dab of orange marker or paint colors the beak and feet once dry.
Keep the body chunky so the penguins stand on their own.
Add a tiny clay scarf or hat for a festive touch.
Set them on cotton wool to look like snow.
These make sweet winter decorations or little gifts.
Kids can line up the family by size, biggest to smallest.
A cheerful project that brings the cold weather indoors.
Conclusion
Clay gives kids something screens never will: a chance to squish, build, and create with their own two hands. From a rainbow caterpillar for tiny beginners to a whole small world for older storytellers, these 21 ideas grow right along with your child. Each one quietly builds fine motor skills, color sense, patience, and imagination, all while feeling like play. Best of all, you barely need to spend a thing. Saved bottle caps, kitchen salt dough, found leaves, and a few googly eyes carry most of these projects. Pick one that matches your child’s age and mood, cover the table, and let them lead. Grab a block of air-dry clay this week and watch what their hands can make.