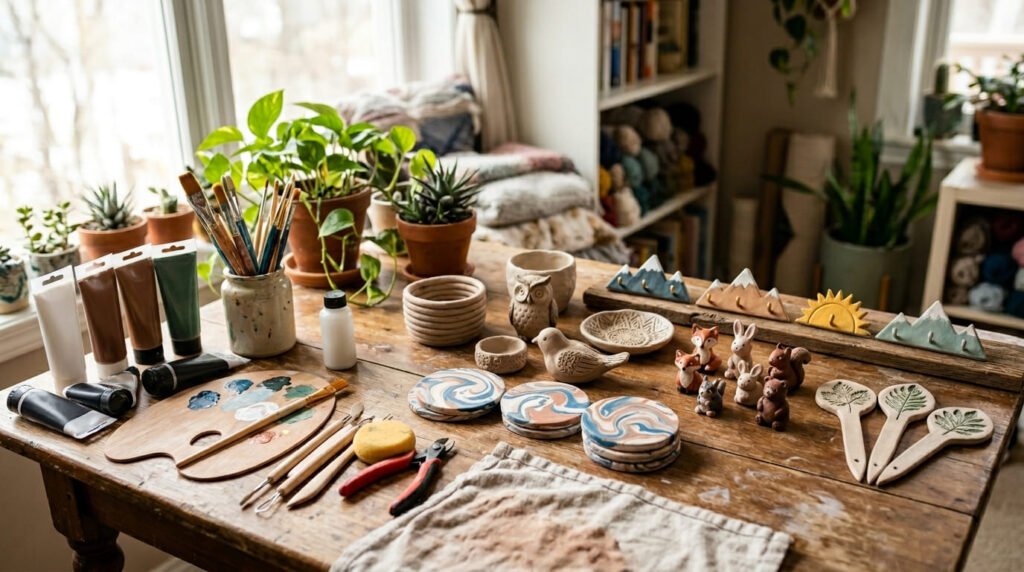
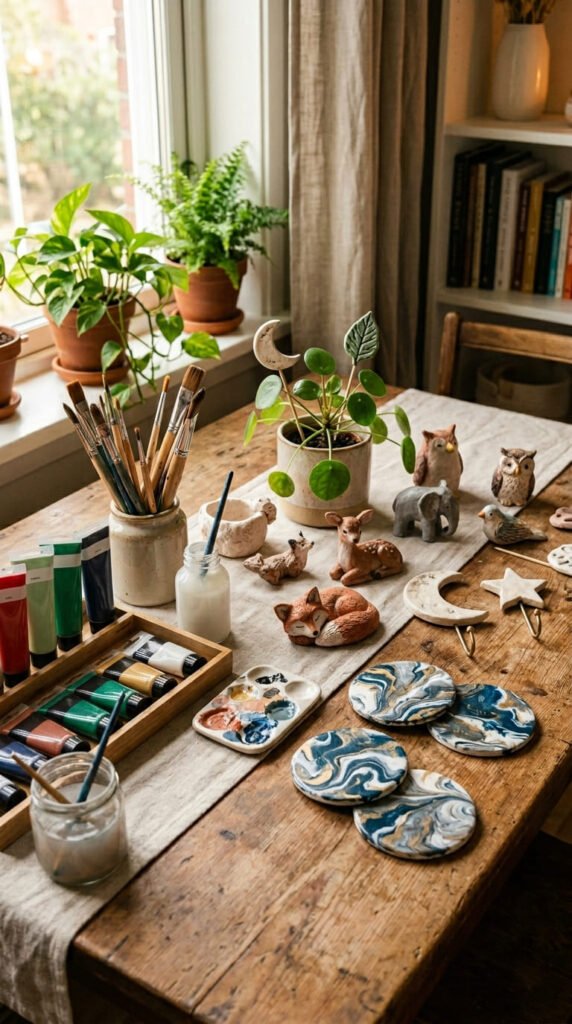
Clay sculpture is one of the most satisfying crafts for adults because it turns simple materials into decor, gifts, desk pieces, and home accents you can actually use. Air dry clay is great for relaxed weekend crafting, while polymer clay works well for small details and stronger mini pieces. These clay sculpture ideas are practical, stylish, and beginner-friendly enough to try at home with basic tools, acrylic paint, and a little patience.
1. Marbled Clay Coasters
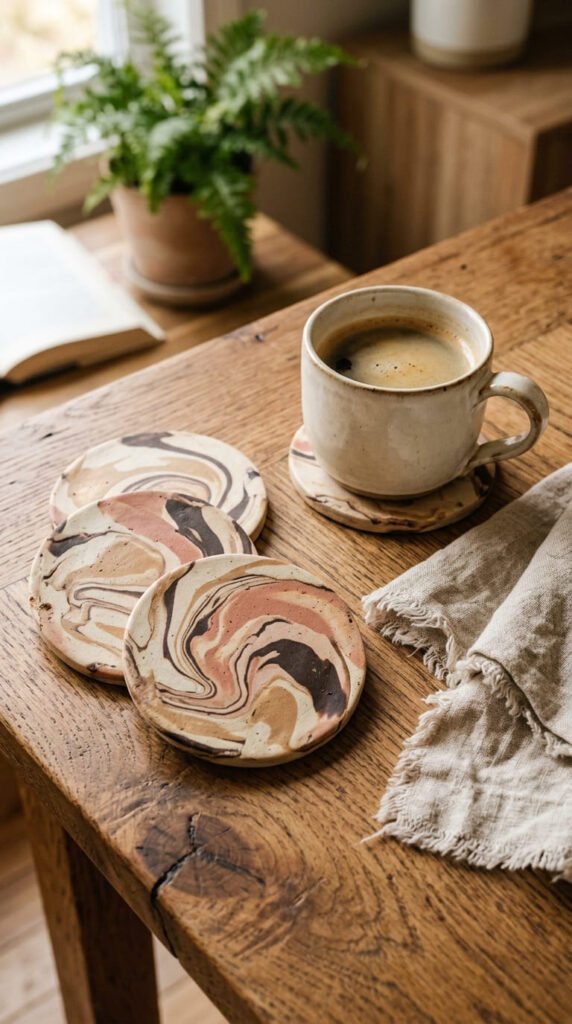
Marbled clay coasters are a great adult craft because they look polished but take very little skill. Start with white air dry clay. Add small ropes of tan, black, rust, or blush clay.
Twist the colors together, fold them once, then roll the clay flat. Do not overwork it. The soft swirls are what make the coasters look expensive.
Cut circles with a glass or jar lid. Smooth the edges with a damp finger. Let the pieces dry flat on parchment paper.
Once dry, sand the edges lightly. Paint the rims with gold, copper, or matte black acrylic paint. Add clear sealer so the surface handles mugs better.
Budget tip: use leftover clay scraps for the marbled lines. Small bits make a rich pattern.
Make a set of four and tie them with cotton cord. They work as coffee table decor, housewarming gifts, or small craft fair items.
For a clean adult style, stick to two or three colors. Too many shades can make the pattern look messy.
2. Chic Clay Wall Hooks
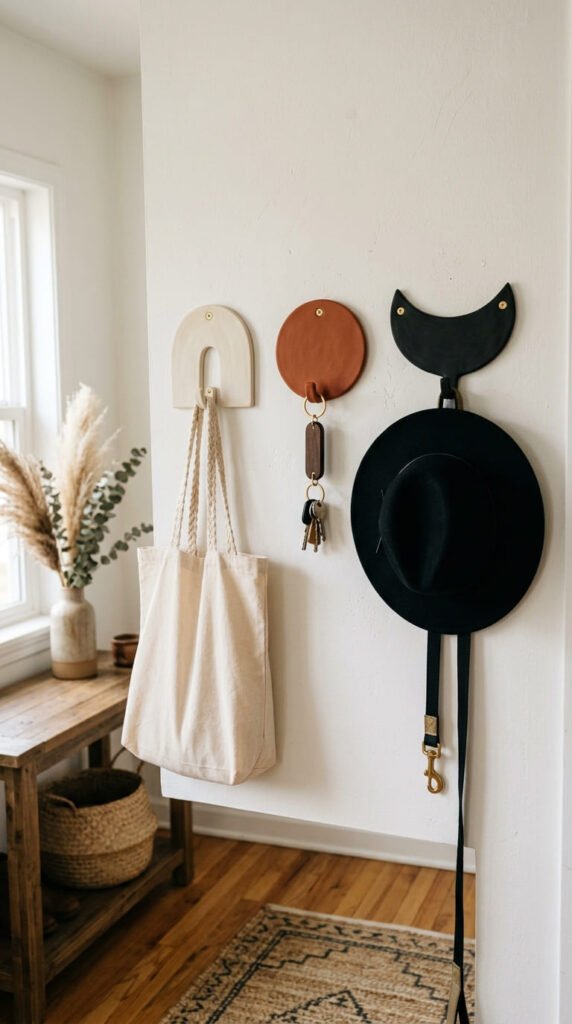
Clay wall hooks turn a plain wall into a useful decor spot. Use metal or wooden hooks as the strong base. Then add clay shapes to the front for style.
Try arches, circles, flowers, shells, moons, or simple raised dots. Keep the clay part decorative, not load-bearing. The hook underneath should carry the weight.
Let the clay pieces dry fully before gluing them to the hooks. Paint them in colors that match your room. Matte cream, black, terracotta, olive, and tan all feel grown-up.
Seal the clay so it holds up to daily touch. Use the hooks for keys, necklaces, light scarves, hats, or small bags.
Budget tip: update old hooks instead of buying new ones. Clay covers scratches and gives them a custom look.
Make three hooks in the same color family for a neat wall set. Hang them near the door, beside a vanity, or above a craft desk.
Simple shapes and repeated colors make this project feel more like home decor than a random craft.
3. Clay Plant Stakes
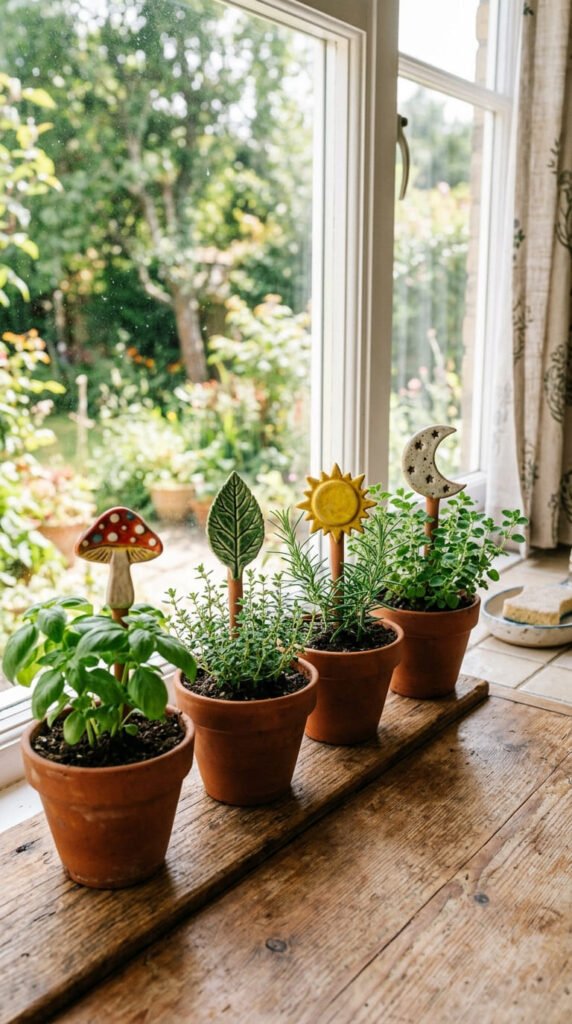
Clay plant stakes are small, useful, and perfect for adults who love indoor plants. Roll thin rectangles for the stake part. Add a small topper, such as a mushroom, leaf, sun, moon, flower, or tiny house.
Keep the stake long enough to sit firmly in soil. If your clay feels too soft, press a wooden skewer into the back before drying. This makes the stake stronger.
Let the pieces dry flat. Paint them with acrylic paint once fully dry. Earthy colors like sage, cream, terracotta, mustard, and brown look lovely with green plants.
Seal the finished stakes so light moisture does not damage them.
Budget tip: make the toppers from leftover clay. These tiny projects use scraps beautifully.
Place them in herb pots, succulents, seed trays, or gift plants. You can make a set of three for a plant-loving friend.
For a cleaner look, skip written labels and use shapes instead. A basil leaf, chili pepper, or tiny lemon can hint at the plant without using words.
4. Handmade Clay Holiday Ornaments
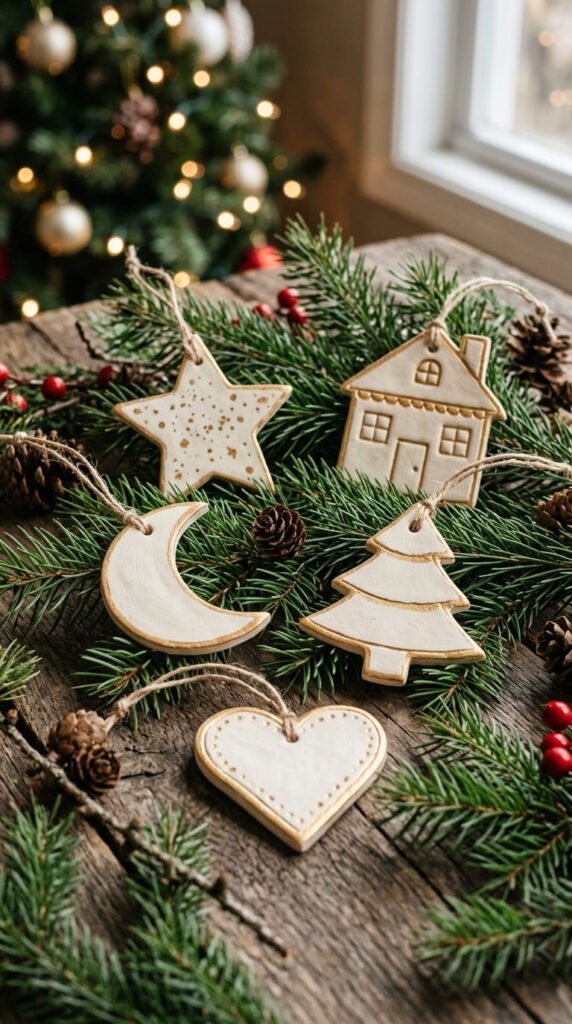
Clay holiday ornaments are easy to make in batches and fun for adult craft nights. Roll air dry clay into an even sheet. Cut shapes using cookie cutters, jar lids, or paper templates.
Stars, moons, tiny houses, bells, trees, hearts, and arches all work well. Add a hole at the top with a straw before drying.
Press lace, leaves, stamps, or simple dots into the clay for texture. Let the shapes dry flat so they do not bend.
Paint them in ivory, black, red, green, terracotta, or gold. A thin painted edge makes each ornament look finished.
Budget tip: use ornaments as gift tags. Tie one onto wrapped gifts, then the person can hang it later.
Make sets of six in matching colors. Place them in a small box with tissue paper for a low-cost handmade gift.
These ornaments work for Christmas, winter birthdays, dinner parties, wedding favors, or shelf garlands.
Keep the shapes simple. Clean edges and a soft matte finish make them feel more high-end.
5. Pinch Pot Mini Cat

A pinch pot mini cat is a cute beginner sculpture for adults who want a small win fast. Start with a clay ball. Press your thumb into the center, then pinch around the sides to form a small dome-like body.
Turn the open side downward so the dome becomes the cat’s body. Add two small triangle ears, a tiny tail, and little paws.
Use a toothpick to mark whisker dots and a soft mouth line. Keep the face simple. Two dot eyes and a tiny nose are enough.
Let it dry slowly. Paint it white, gray, black, orange, or calico style. Add soft pink inside the ears if you like.
Budget tip: make this from one small lump of clay. It is perfect for using leftover material.
Display it on a shelf, desk, plant pot, or windowsill. You can also make several cats in different colors for a sweet mini collection.
This project teaches basic pinching, shaping, and attaching without becoming too complex.
6. Simple Dome Shell Turtle
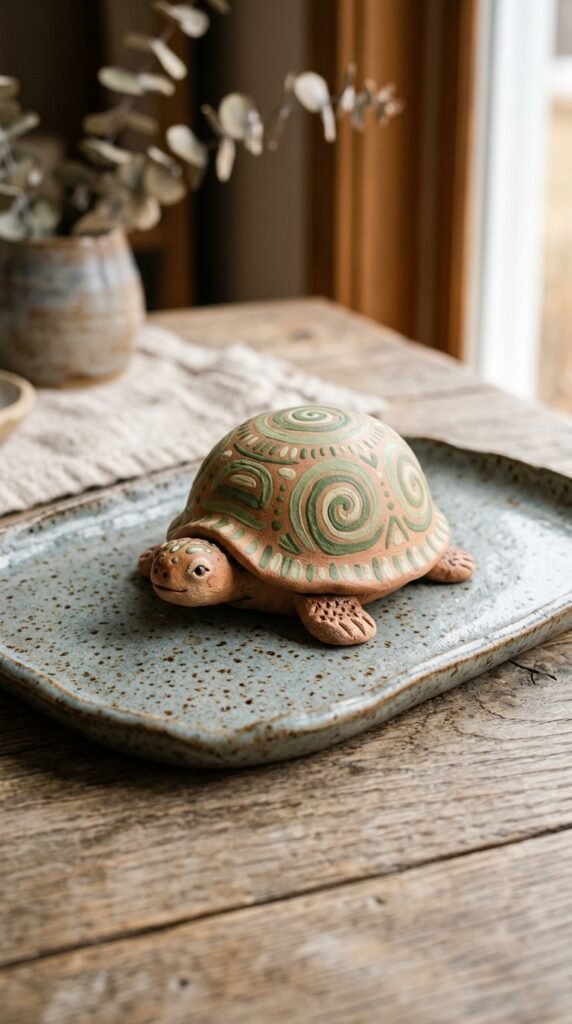
A clay turtle is calm, cute, and beginner-friendly. Make a round dome for the shell first. You can shape it by rolling a ball, pressing the bottom flat, and smoothing the top.
Add a small head, four short legs, and a tiny tail. Keep the legs thick enough so they do not snap.
Use a toothpick to press shell lines into the dome. You can make hexagon-style marks, curved lines, or simple stripes.
Let the turtle dry fully before painting. Use green, brown, cream, or teal. Dry brush a lighter shade over the shell texture to help the pattern show.
Budget tip: use a bottle cap or small bowl to help shape the shell. Household items make great clay guides.
This turtle works as desk decor, shelf decor, plant pot decor, or a gift for someone who loves animals.
For a more grown-up look, use muted colors instead of cartoon brights. Olive green, sand, and warm brown make it feel more like handmade decor.
7. Tiny Clay Whale
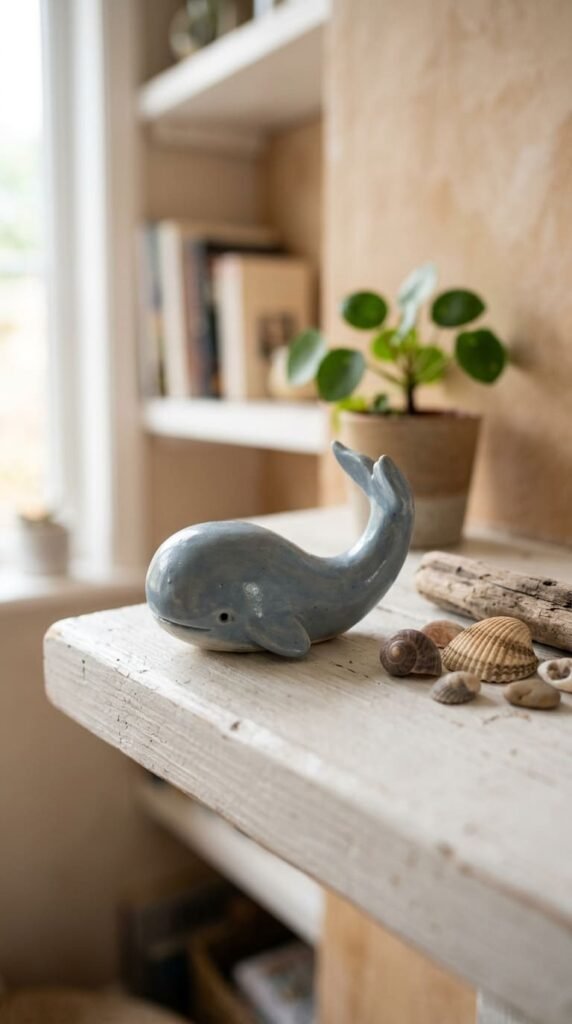
A tiny clay whale is perfect if you like smooth shapes. Roll a small oval body first. Pinch one end slightly to form the tail area. Add two thin tail fins and two side fins.
Keep the tail curved upward for movement. A little curve gives the sculpture personality without adding hard detail.
Use a toothpick for tiny eyes and a smile. For a minimalist look, leave the face very small.
Let the whale dry on its side. Support the curved tail with a folded paper towel if it droops.
Paint the whale in blue-gray, navy, white, or soft teal. Add a pale belly for contrast.
Budget tip: make a group of three whales in different sizes. A small set looks like shelf art and uses very little clay.
This sculpture fits bathrooms, coastal rooms, nurseries, desks, and bookshelves.
For a stylish adult finish, skip bright cartoon colors and use ocean-inspired muted tones. Add a matte sealer for a soft ceramic look.
8. Coiled Clay Snail
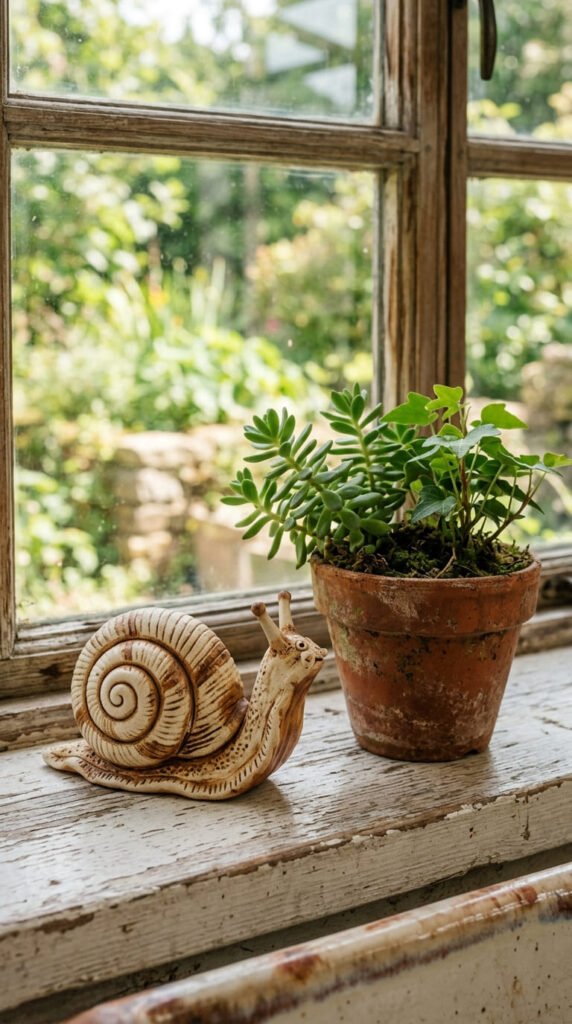
A coiled clay snail is a great way to practice rolling clay evenly. Roll one small oval for the body. Then roll a long clay rope for the shell.
Curl the rope into a spiral. Press it gently onto the body. Smooth the join with a damp brush or fingertip.
Add tiny eye stalks with short pieces of clay. Keep them thick enough so they stay strong. If they feel weak, skip the stalks and paint eyes directly on the head.
Let the snail dry slowly. Paint the body beige, gray, or brown. Paint the shell with rings of cream, terracotta, tan, or green.
Budget tip: place the snail on a small stone or wood slice for display. Found materials make the finished piece feel styled.
This project is great for plant shelves, fairy gardens, desk corners, and gifts.
The coiled shell teaches control without pressure. If the coil is uneven, it still looks handmade and charming.
Make several snails in different color palettes for a small nature-inspired collection.
9. Playing Card Trinket Tray
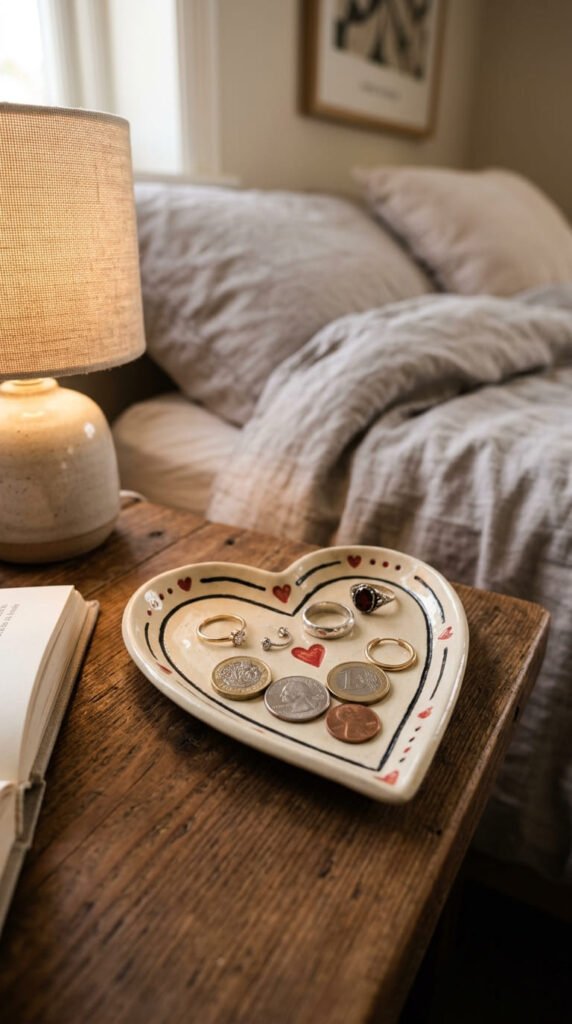
A playing card trinket tray is bold, graphic, and useful. Roll clay flat and cut a rectangle, heart, diamond, club, or spade shape.
Lift the edges slightly so jewelry and coins stay inside. If the clay cracks at the edges, smooth it with a damp finger.
Let the tray dry over parchment paper. Support raised edges with paper towels while drying.
Paint the base cream or white. Add black and red details, or keep it minimal with one large suit symbol in the center.
Seal the surface once the paint is dry. This tray can hold rings, keys, dice, paper clips, or small desk items.
Budget tip: cut your template from cardboard. It helps keep the tray shape clean and saves clay.
This project is great for game lovers, poker nights, office desks, and modern bedroom decor.
For a more high-end result, paint the rim black or gold. A strong edge color makes the tray look more finished.
Make a full set with all four card suits for a fun handmade gift.
10. Orchid Trinket Tray
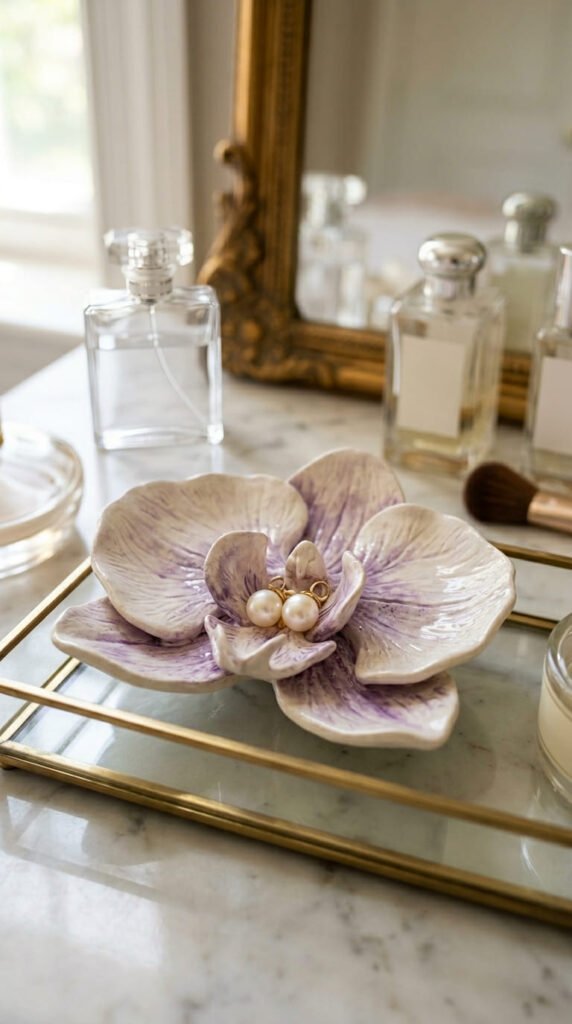
An orchid trinket tray feels floral, elegant, and adult without being hard to make. Start with a shallow oval or round tray base. Then add simple petal shapes along one side.
Flatten small clay balls into petals. Pinch one end and overlap them slightly. Smooth the bases where they touch the tray.
Do not worry about copying a real orchid perfectly. Focus on soft petal shapes and a balanced layout.
Let the piece dry flat. Paint the tray white, ivory, blush, or pale lavender. Use a tiny brush to add deeper purple or pink at the flower center.
Budget tip: make the tray small. A compact size looks delicate and uses less clay.
This piece works on a dresser, vanity, bathroom shelf, or bedside table. It can hold earrings, rings, hair pins, or perfume samples.
Seal it with satin varnish for a soft shine.
For a gift, add a pair of simple earrings inside the tray. The handmade base makes even a low-cost gift feel thoughtful.
11. Cactus Trinket Tray
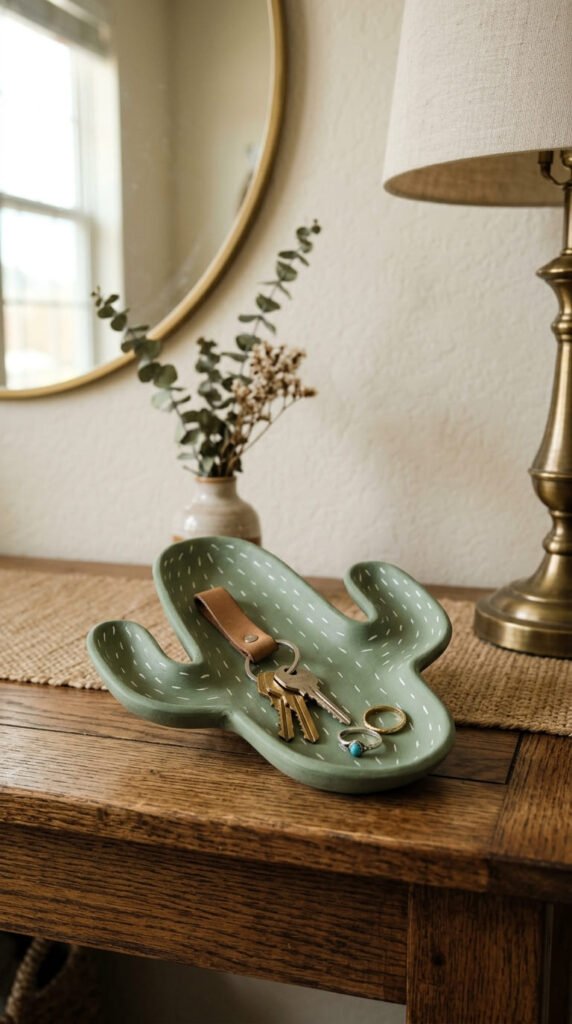
A cactus trinket tray is playful but still stylish. Draw a cactus shape on paper first. Cut it out and use it as a template over rolled clay.
Cut around the template with a craft knife. Lift the edges just a little to form a tray. Smooth the rim with water.
Use a toothpick to press tiny dash marks across the surface. These will look like cactus spines after painting.
Let the tray dry flat. Paint it sage, olive, or bright green. Add white dash marks if you did not press texture into the clay.
Budget tip: use one sheet of rolled clay to cut several mini cactus trays at once.
This tray works for keys near the door, jewelry on a vanity, or paper clips on a desk.
To make it more grown-up, pair green with cream, tan, or gold. Avoid too many extra colors.
Add a matte sealer when finished. It gives the tray a soft ceramic-style look and keeps the paint from wearing down.
12. Froggie Desk Calendar Holder
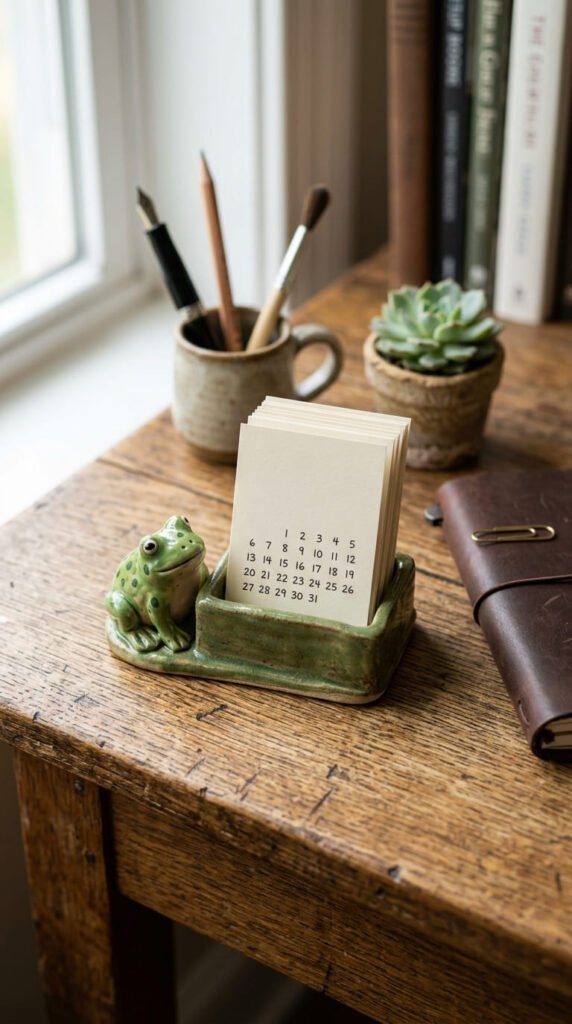
A froggie desk calendar holder is cute, practical, and perfect for adults who like playful desk decor. Start with a round green frog body. Add two raised eyes, a wide smile, and tiny front feet.
Make a small slot behind the frog using a thin piece of cardboard wrapped in plastic. Press the cardboard into the clay, then remove it once the clay firms up.
The slot will hold a mini calendar card, photo, note, or reminder.
Let the frog dry fully. Paint it green, then add black eyes, pink cheeks, and a pale belly. Seal it so it can handle daily use.
Budget tip: use scrap cardstock for small calendar cards. You can cut twelve small monthly cards by hand.
This project is great for office desks, study spaces, craft rooms, or gift baskets.
For a more adult style, use muted green and cream rather than neon colors. Add a tiny clay mushroom or lily pad base if you want extra detail.
It is a small sculpture that gives your desk personality every day.
13. Funny Clay Toothbrush Holder
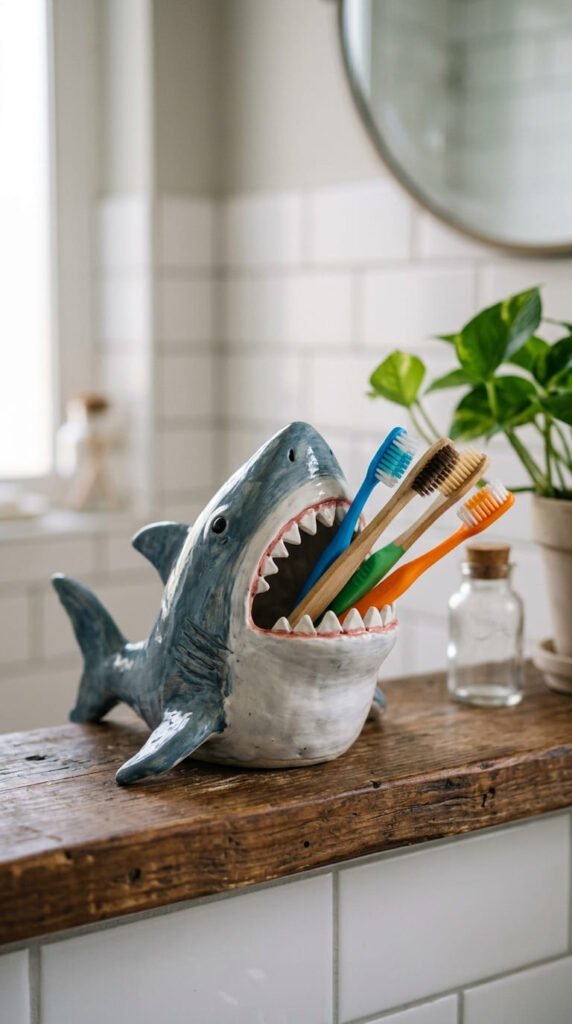
A clay toothbrush holder can make a bathroom feel more personal. Try a shark, dog, chick, frog, or monster shape with an open mouth holding the toothbrushes.
Start with a sturdy base. Add a raised character head or mouth shape. Use a straw or dowel to make toothbrush holes before the clay dries.
Keep the holes wide enough for real toothbrush handles. Test with a spare handle if possible.
Let the piece dry fully. Paint it with acrylic paint, then seal it very well. Bathrooms can be humid, so extra sealer helps.
Budget tip: build the clay around a small glass cup or plastic insert. The insert keeps the inside easier to clean.
This project is fun for adults who like quirky home accessories. It also makes a great handmade housewarming gift.
For a cleaner look, use one main color and simple facial details.
Do not let air dry clay sit in standing water. Wipe the holder dry often and place it where it can air out.
14. Faux Fossil Clay Pieces
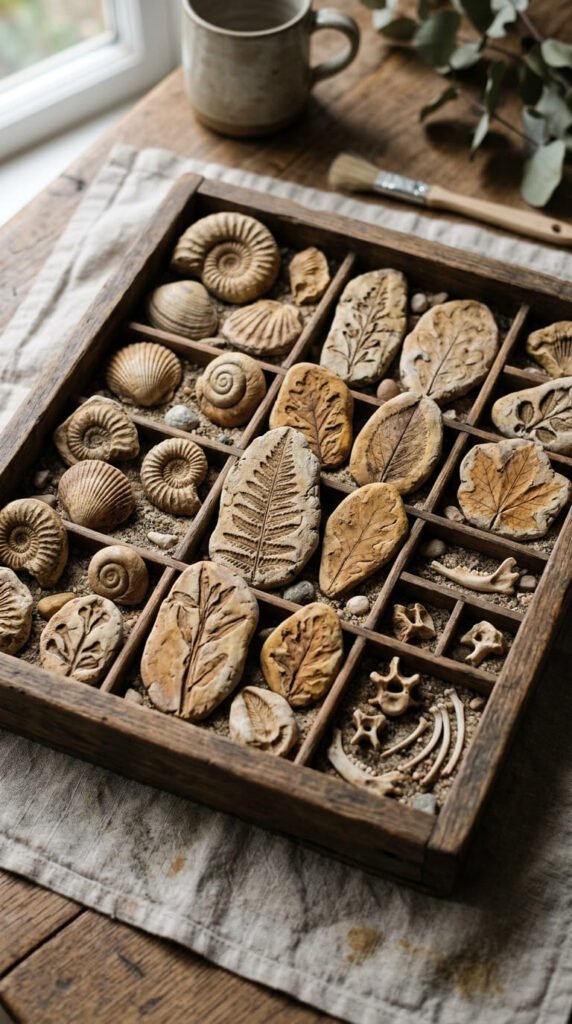
Faux fossils are easy, earthy, and relaxing to make. Roll clay into small flat stones. Keep the shapes uneven so they look natural.
Press shells, leaves, toy bones, dried flowers, or textured fabric into the clay. Peel the object away to reveal the imprint.
Let the fossils dry flat. Sand any rough edges, but keep the natural shape.
Paint with beige, tan, brown, gray, or clay-colored acrylic. Brush darker paint into the imprint and wipe the raised surface. This makes the fossil marks stand out.
Budget tip: use objects you already have at home. Shells, leaves, buttons, and lace create great textures.
Display the fossils in a bowl, tray, shadow box, or shelf arrangement. They also work as paperweights or handmade gifts for nature lovers.
This project is low-pressure because imperfect edges make the pieces look more real.
For an adult craft night, set up a texture station with found objects and let everyone make a fossil set.
15. Sculptural Fruit Bowl
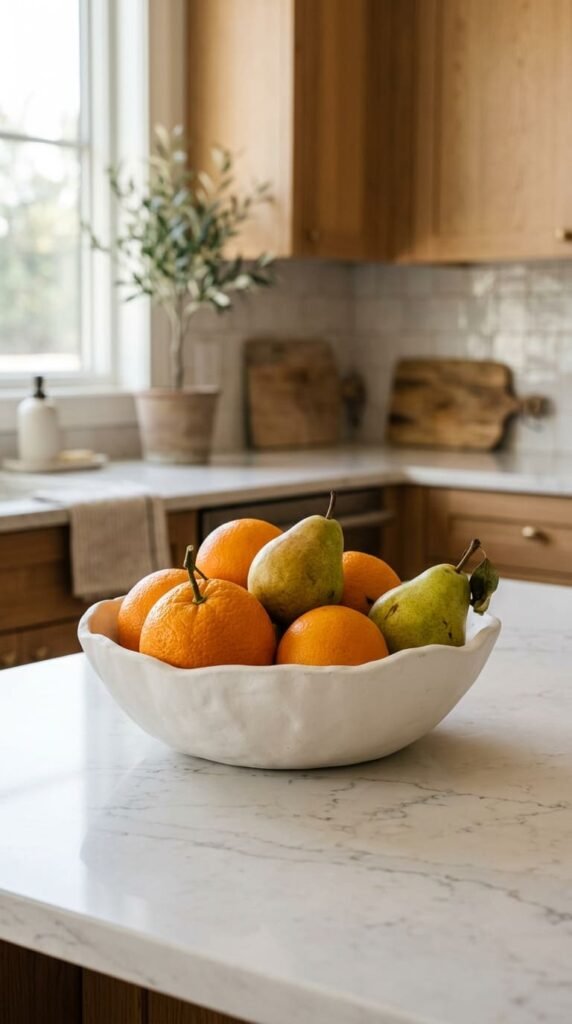
A clay fruit bowl is a bigger project, but it feels rewarding. Start with a wide bowl as your mold. Cover it with plastic wrap so the clay does not stick.
Roll clay into a large slab and place it over the outside of the bowl. Press gently. Trim the edge into a wavy or uneven shape for an organic look.
Let it firm up before removing it from the mold. Dry it slowly to reduce cracking.
Once dry, sand the rim. Paint the bowl matte white, stone gray, terracotta, or black. Add sealer for protection.
Budget tip: make it as a decorative bowl for fruit, wrapped snacks, or faux produce. Avoid wet foods or anything messy.
This project works beautifully on kitchen counters, dining tables, or open shelves.
For extra style, add small raised dots, carved lines, or a painted rim. Keep the outside simple so the shape stands out.
A handmade bowl does not have to be perfect. Slightly uneven edges can make it look sculptural and intentional.
16. Wire and Clay Basket Sculpture
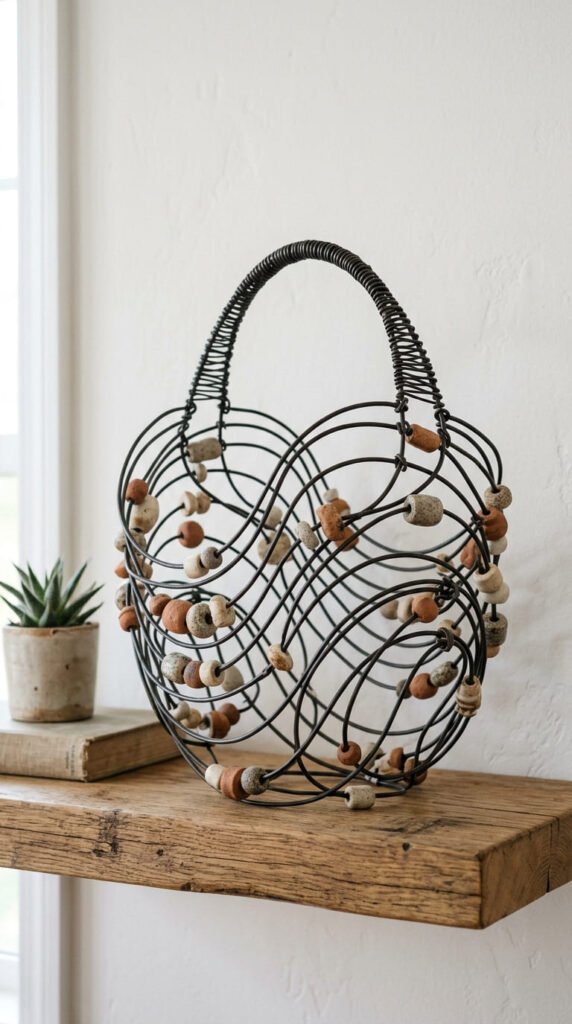
A wire and clay basket sculpture is great for adults who want something more artistic. Use craft wire to make a simple basket frame. Keep the shape open and lightweight.
Add clay beads, small discs, coils, or wrapped clay strips around parts of the wire. Do not cover the whole structure. Leaving open space makes it look more modern.
If using air dry clay, let the clay dry on the wire. If using polymer clay, check that the wire is oven-safe before baking.
Paint the clay parts in one or two colors. Black, white, rust, gold, or gray all work well.
Budget tip: use wire from old craft supplies or floral wire. Small clay accents can make basic wire feel like sculpture.
Display the finished piece on a shelf, wall bracket, or side table. It can hold lightweight dried flowers, notes, or simply stand as art.
This project is better after you have tried a few simple clay crafts. The wire adds structure, while the clay adds shape and texture.
17. Air-Dry Clay Cameo Portrait
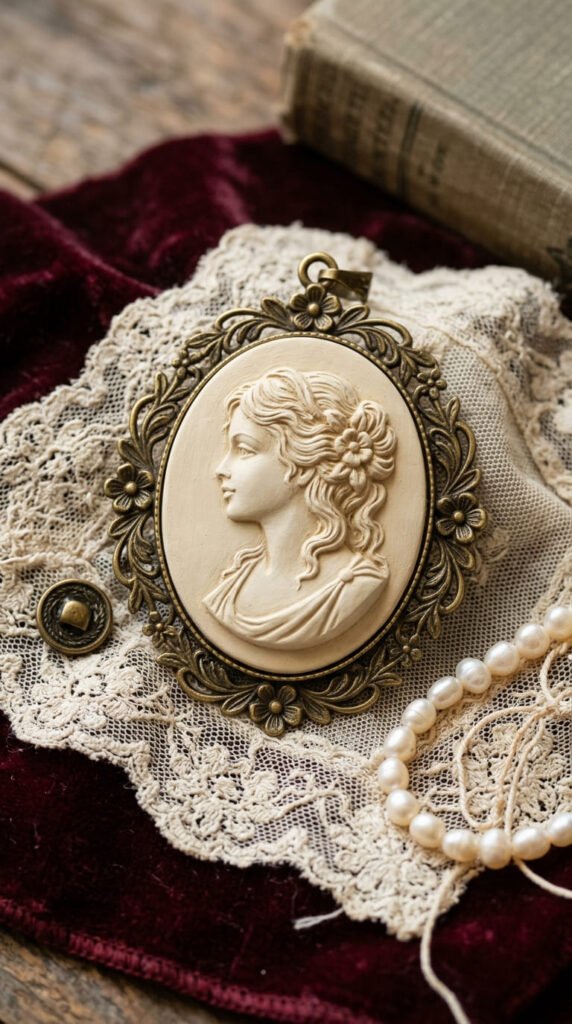
A clay cameo portrait is a beautiful project for adults who enjoy detailed work. Start with a small oval plaque as the base. Then make a simple side profile from thin pieces of clay.
Focus on the outline first: forehead, nose, lips, chin, and neck. Keep the shape soft and readable. You do not have to sculpt every detail.
Add hair as smooth coils, waves, or a bun. Use a toothpick to mark light texture if desired.
Attach each piece to the base with a little water and gentle pressure. Let it dry flat.
Paint the cameo one color for a classic look. Ivory, clay pink, black, or terracotta works well. A single color makes the raised profile stand out through shadow.
Budget tip: use a photo silhouette as your guide. Trace the outline on paper, then shape the clay over it.
Frame the finished cameo or glue a hanger to the back. It makes lovely wall art, a keepsake gift, or vintage-style shelf decor.
18. Realistic Clay Geode
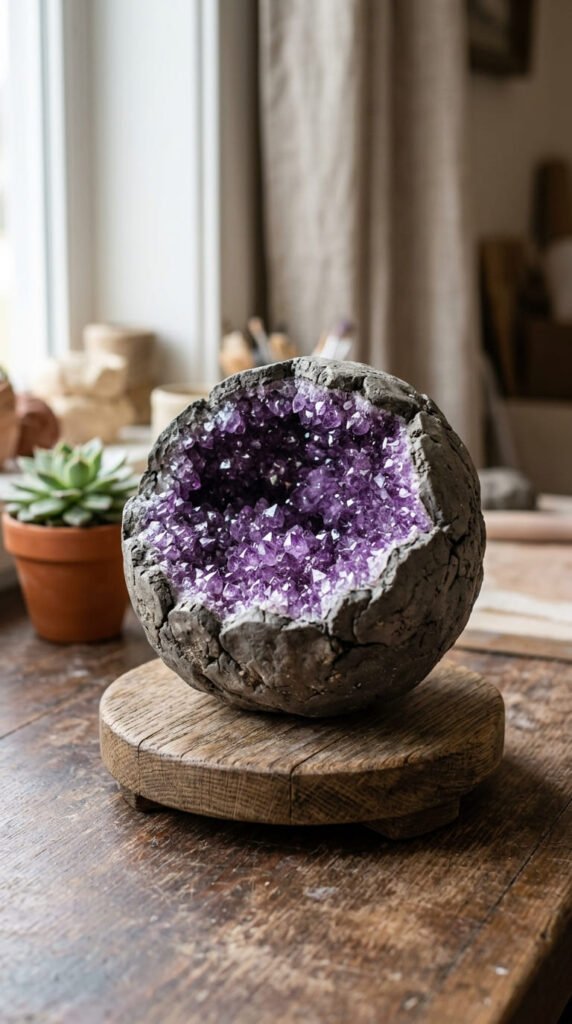
A realistic clay geode is perfect if you like mineral-inspired decor. Shape a rough oval or rock form from clay. Cut or press an opening into the front to create the crystal center.
Texture the outer shell with a toothbrush, foil, or rough sponge. Make the inside uneven so it looks like a natural cavity.
For crystals, add tiny clay points, crushed glass-like beads, or painted raised shapes. Keep safety in mind if using real sharp materials.
Let the piece dry fully. Paint the outside gray, brown, or black. Paint the inside purple, blue, teal, white, or rose.
Add gloss varnish only to the crystal area. This makes the center shine while the outside stays rock-like.
Budget tip: use glitter paint or metallic acrylic instead of real crystals.
Display the geode on a shelf, desk, or tray. It also makes a great handmade gift for anyone who loves crystals, geology, or earthy home decor.
This project looks harder than it is because texture does most of the visual work.
19. Pinch Pot Finger Puppets
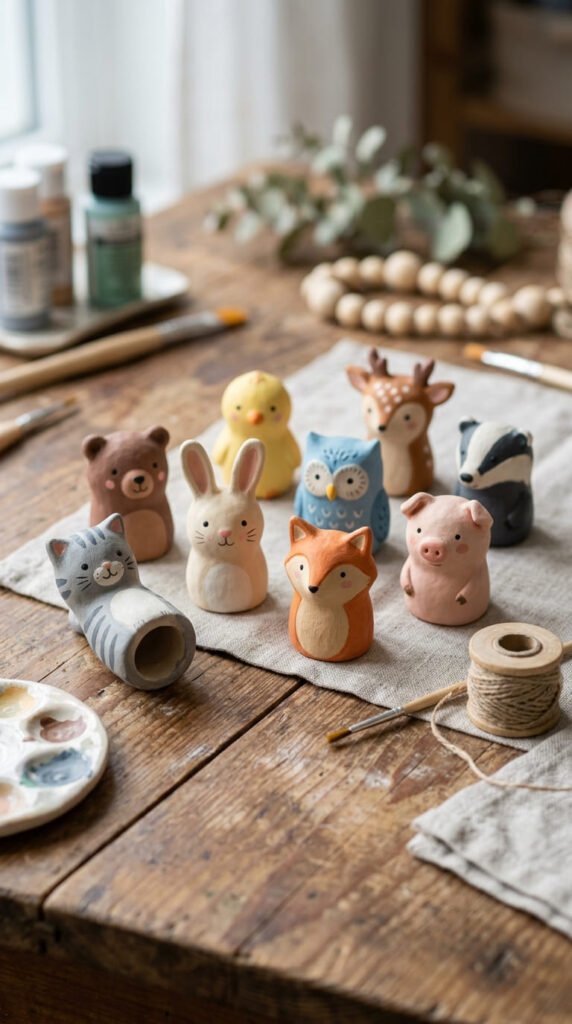
Pinch pot finger puppets are playful, but adults can make them look artful. Start with a small clay ball. Press your thumb into the center and pinch the sides into a hollow shape.
The opening should fit over a finger. Keep the clay walls even so the puppet dries well.
Add ears, horns, snouts, hair, or tiny arms. Try a fox, owl, cat, frog, bear, or mushroom person.
Smooth seams with a damp finger. Let the puppets dry upside down so the opening stays clear.
Paint them with acrylic paint. Use simple faces and soft colors for a cleaner look.
Budget tip: make a full set from one block of clay. Each puppet is small, so the material goes far.
These are fun for gifts, desk decor, shelf displays, or creative workshops.
You can also turn them into mini planters for faux flowers or dried stems. Just keep them dry.
This project gives you practice with hollow forms, character design, and tiny features without making a large sculpture.
20. Decorative Clay Mask
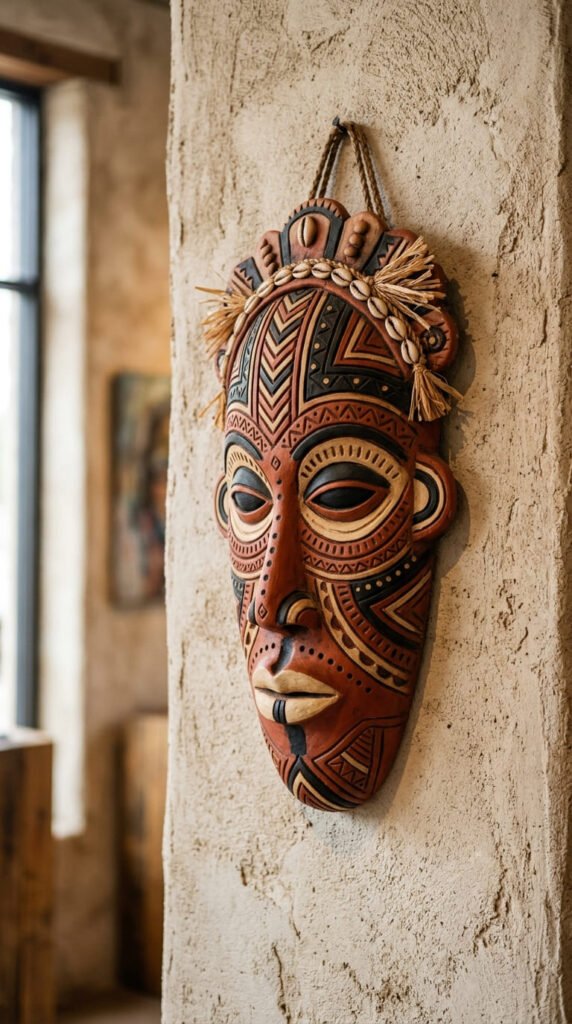
A decorative clay mask is a bold adult sculpture project. Start with an oval or long face shape. Keep it flat enough to hang, but curved enough to feel sculptural.
Add raised brows, nose, lips, cheek lines, dots, and carved patterns. Use simple geometric shapes instead of tiny detail. Repeated lines and dots can create strong visual impact.
Let the mask dry slowly. If it is thick, give it extra time before painting.
Paint with earthy colors such as terracotta, black, cream, brown, rust, or gold. A matte finish makes the surface feel more handmade.
Budget tip: make a small mask first, about the size of your hand. Large masks can get heavy and are harder to hang.
Add a hanging loop or attach it to a backing board. Display it on a gallery wall, hallway, studio wall, or shelf.
This project is great for adults ready to move beyond tiny sculptures. It teaches shape, symmetry, texture, and wall display all in one piece.
Conclusion
Clay sculpture gives adults a creative way to make decor, gifts, and useful home pieces without a huge supply list. Start with small projects like coasters, plant stakes, snails, or trinket trays. Then try bigger ideas like fruit bowls, cameo portraits, geodes, masks, and wire sculptures. Use simple shapes, smooth seams, acrylic paint, and varnish for a polished finish. Pick one idea today, gather your clay, and turn a quiet craft session into something you can proudly display.