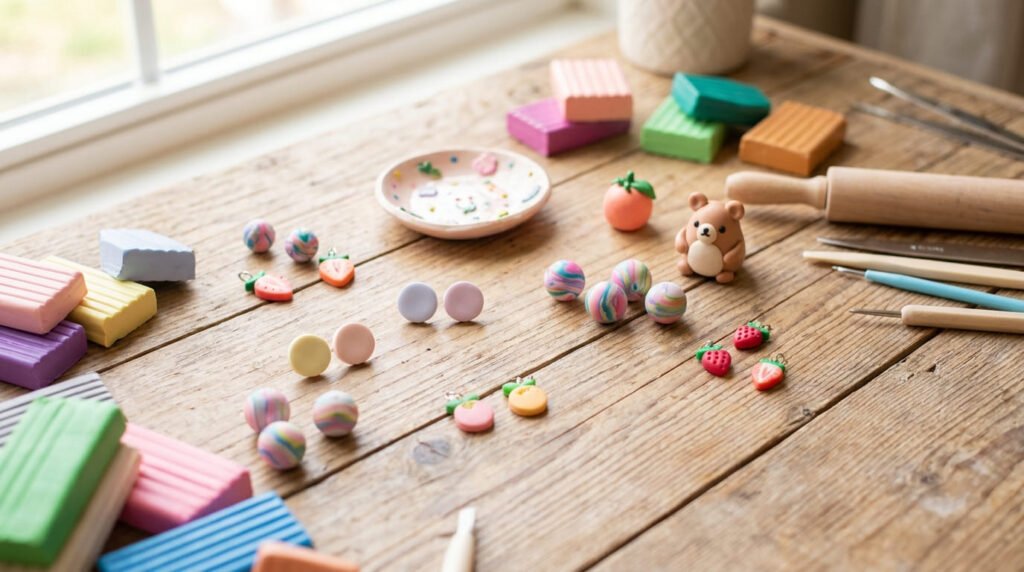
Polymer clay is the friendliest craft material out there. It’s soft, colorful, cheap, and forgiving. You bake it in your home oven and suddenly you’ve made something real. No kiln. No fancy studio. Just a block of clay and your hands. If you’ve ever wanted to make cute earrings, charms, or little decor pieces but felt unsure where to start, this list is for you. Here are 24 easy beginner polymer clay projects that look far harder than they actually are.
1. Simple Stud Earrings
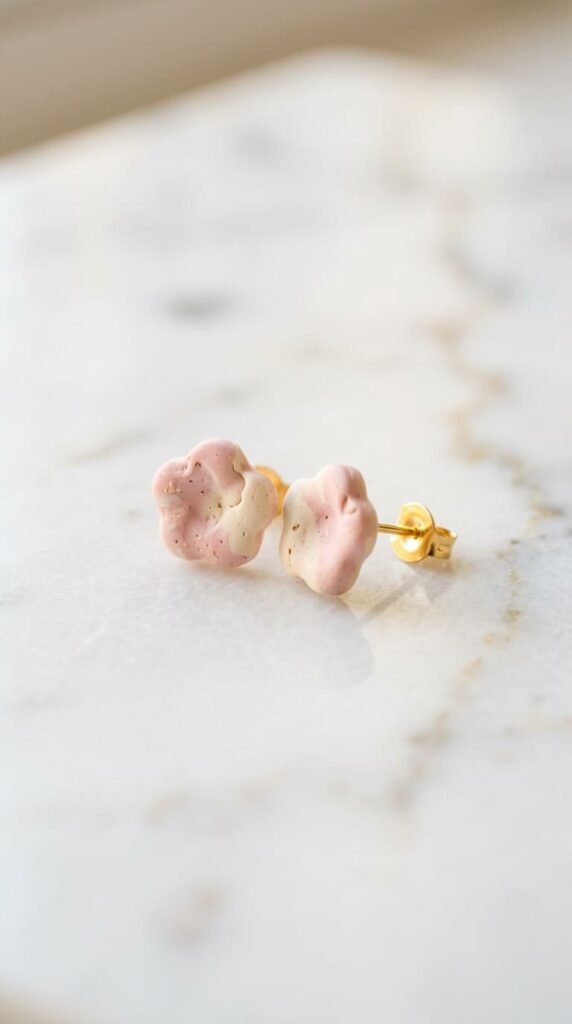
Studs are the perfect first project. Small, quick, and hard to mess up.
Roll out a flat sheet of clay. Keep it about two playing cards thick.
Cut tiny shapes with a small cutter or a knife. Circles, hearts, and little flowers all work.
Make two of each so they match.
Bake them following the package instructions. Most cure around 130°C for 30 minutes.
Once cool, glue a flat earring post to the back with strong jewelry glue.
Budget tip: a pack of posts costs a couple of dollars and makes dozens of pairs.
Want them prettier? Marble two colors together before cutting. Or paint a tiny detail after baking.
Keep the shapes simple at first. Clean edges look more professional than fussy designs.
These are also great little gifts. Make a few pairs in different colors.
A whole afternoon of studs costs almost nothing and builds real confidence.
Start here, and the rest of this list feels easy.
2. Marble Beads for Bracelets
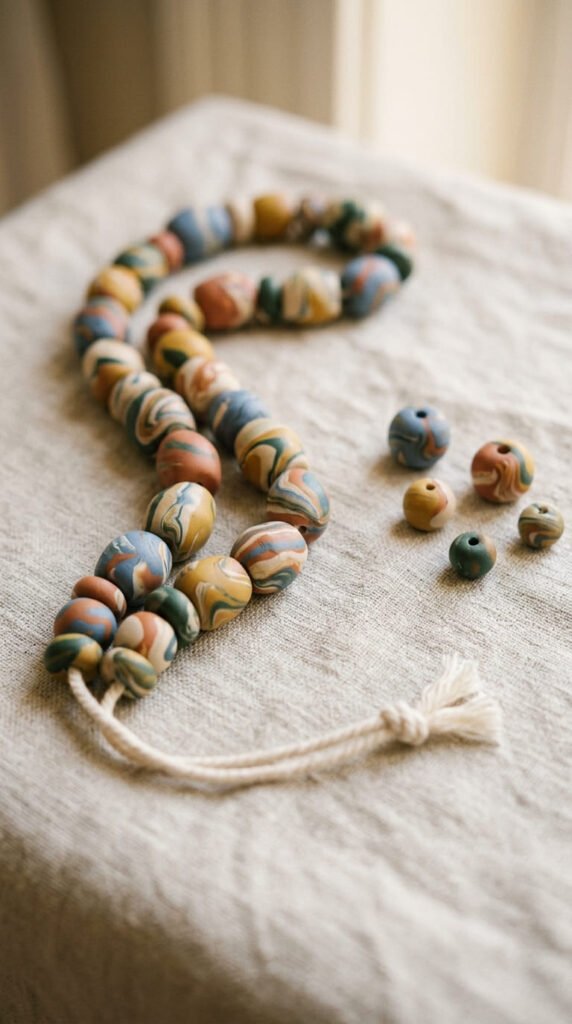
Beads teach you the basics, and you wear the results.
Pinch off small bits of clay. Roll each one between your palms into a smooth ball.
Twist two colors together first for a marble effect. Don’t overmix. You want soft swirls.
Push a toothpick through each bead to make the hole. Do this before baking.
Bake them on a tray. Let them cool fully.
Then string them on elastic cord for a stretchy bracelet.
Budget tip: one block of clay makes a huge pile of beads, so cost per piece is tiny.
Mix bead sizes for a more interesting look. Add a few plain ones between the marbled ones.
This is a great project to do while watching TV. Very relaxing.
Make a matching necklace with the leftovers.
Keep the holes a bit wide so the cord slides through easily.
Simple, wearable, and endlessly customizable.
3. Mini Keychain Charms
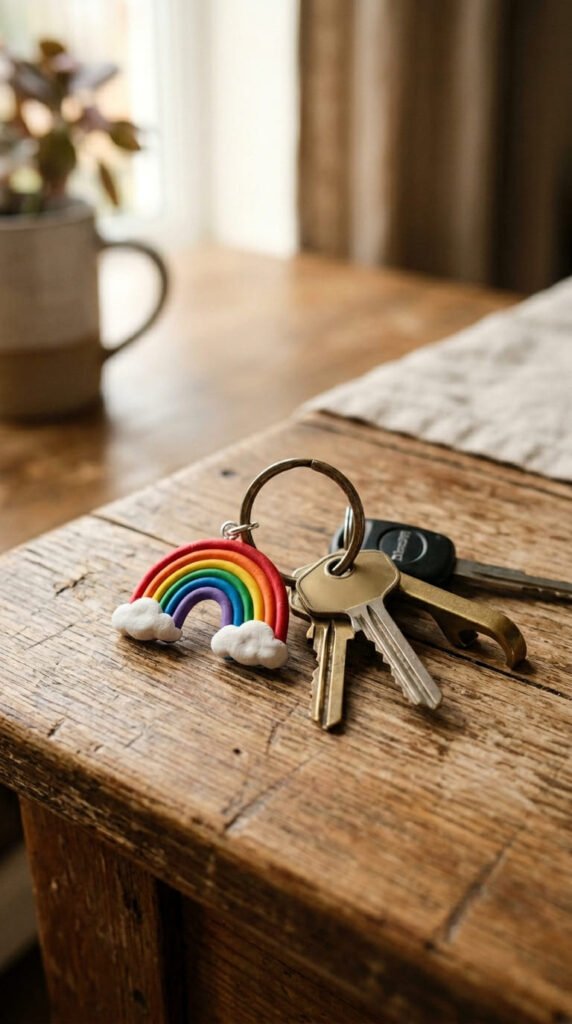
Keychain charms are fun, fast, and useful every single day.
Shape a small motif. A rainbow, a cloud, a star, or a little heart.
Keep it under two inches so it stays light on your keys.
Poke a hole at the top before baking. This is where the ring goes.
Bake and cool.
Thread a jump ring through the hole and clip it to a keyring.
Budget tip: craft keyrings come in cheap multipacks, perfect for making gifts in bulk.
Paint a face or details after baking to add personality.
These also work as bag charms or zipper pulls.
Make a batch for friends. Everyone loves a tiny handmade charm.
Keep the shape chunky so it doesn’t snap off with daily use.
Quick win, big smiles.
4. Polymer Clay Fridge Magnets
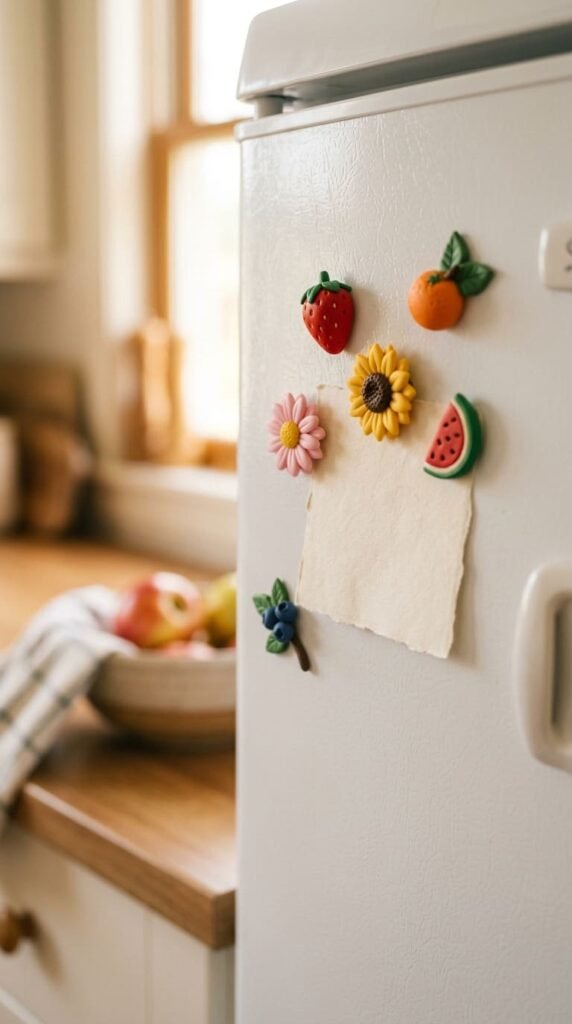
Magnets are one of the easiest beginner projects going.
Shape small flat pieces. Fruit slices, flowers, hearts, or little animals all work.
Keep them flat on the back so the magnet sits flush.
Bake and cool.
Glue a small round magnet to the back. Strong magnets come cheap in packs.
Budget tip: a bag of magnets makes dozens, so this is one of the lowest-cost crafts here.
Use them to pin notes, photos, and lists on the fridge.
They beat the boring free magnets every time.
This is a perfect project to do with kids or a younger sibling. Low mess, fast payoff.
Make a themed set. All fruit, or all flowers, for a styled cluster.
Paint tiny details to make them pop.
Cheerful, practical, and quick to finish.
5. Trinket Dish

A trinket dish is craft and decor in one.
Roll out a flat circle. Press a small bowl on top to mark the size.
Gently lift the edges to form a shallow lip.
Smooth any cracks with a damp finger.
Bake it on something curved, like a foil-lined bowl, to hold the shape.
Budget tip: one block makes several dishes, so you can keep a few and gift the rest.
Use it for rings, earrings, or coins by the door.
Marble the clay first for a designer look. Or add a gold rim with paint after baking.
Keep the edges a little wavy. That handmade feel is the charm.
Set it on a desk, dresser, or bathroom shelf.
Useful storage that doubles as a styled little object.
A favorite beginner project for good reason.
6. Coasters
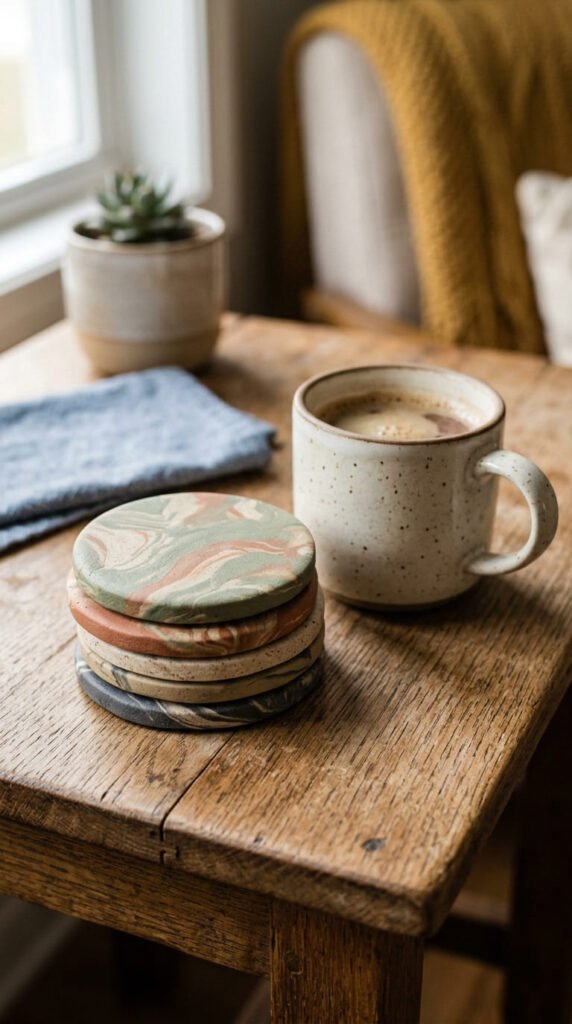
Coasters are simple, useful, and satisfying to make.
Roll your clay flat and even. Keep them a bit thick so they feel sturdy.
Cut circles or squares with a cutter or a cup rim.
Smooth the edges with a damp fingertip.
Marble two colors for a soft pattern, or keep them solid.
Bake and cool fully.
Budget tip: seal them with a cheap matte sealer so drinks don’t leave marks.
Glue a felt circle on the bottom to protect your table.
Make a matching set of four. Stack them with a ribbon for a tidy gift.
Keep the tones earthy and warm so they suit any room.
These look great on a coffee table.
A practical project that levels up your styling.
7. Tiny Food Charms
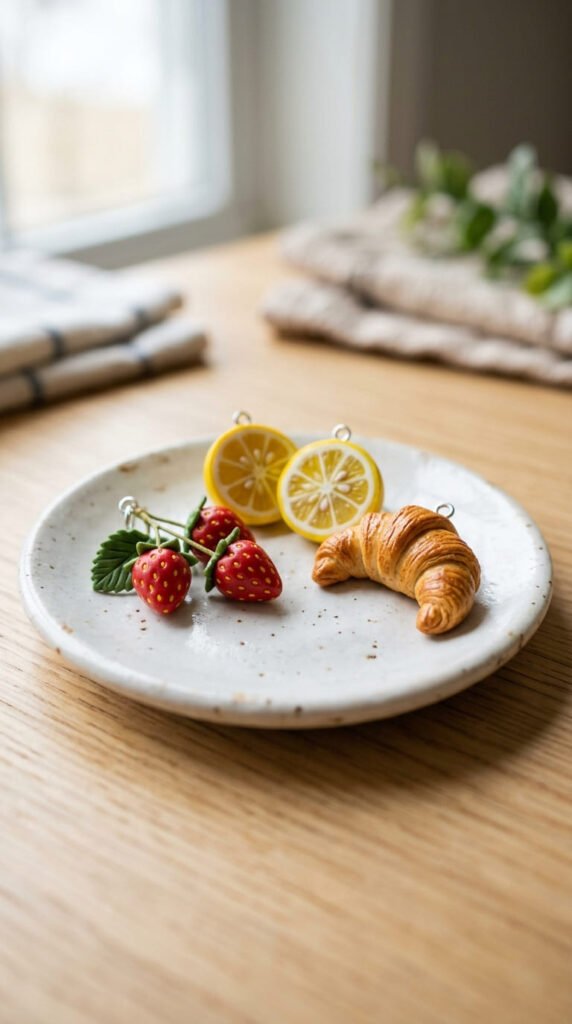
Tiny food charms are pure joy to make. And weirdly addictive.
Start with easy shapes. A strawberry, a lemon slice, a little donut.
Mix colors to match real food. Red for the berry, yellow for the lemon.
Add tiny details with a toothpick. Seeds, frosting lines, or a bite mark.
Keep them small, under an inch.
Bake and cool.
Budget tip: these use tiny scraps, so a leftover handful of clay makes loads.
Turn them into earrings, charms, or magnets afterward.
They look impressive but take almost no skill.
A lemon slice is just a yellow circle with thin white lines. Easy.
Make a whole tiny food collection.
Cute, quick, and a guaranteed crowd-pleaser.
8. Animal Miniatures
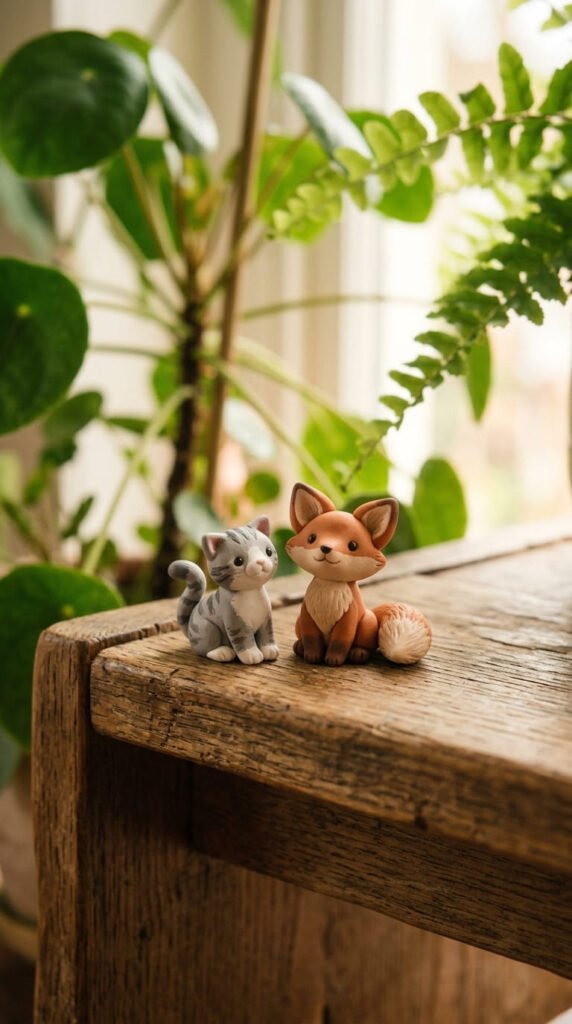
Little clay animals are a beginner favorite for a reason.
You don’t need to be a sculptor. Simple, rounded shapes work best.
Start with an easy one. A cat is just a body, a head, two ears, and a tail.
Press the pieces together firmly so they don’t fall off after baking.
Use a toothpick to add eyes and tiny details.
Bake and cool.
Budget tip: practice with cheaper clay first, then use your nicer colors once you’ve got the shape.
Paint details after baking if you like.
Make a tiny family of animals for a shelf.
Keep them small and chunky so they hold together.
A blob with ears already looks adorable. Don’t overthink it.
These build your shaping skills while making something sweet.
Fun, forgiving, and full of character.
9. Pendant Necklace
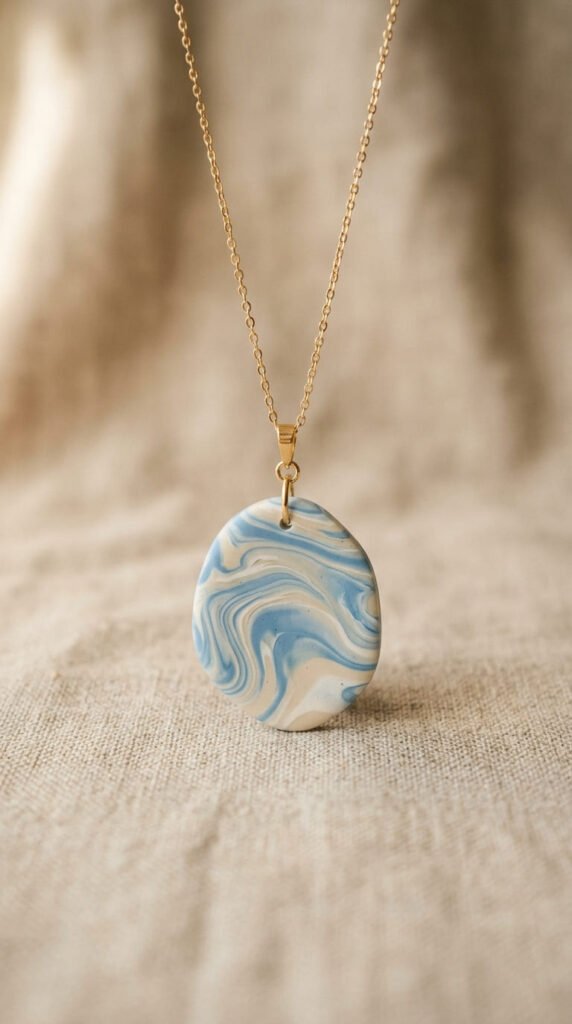
A clay pendant turns a plain chain into something personal.
Roll out a sheet. Cut a shape you love. A circle, a teardrop, or an organic blob.
Marble the colors for a stone-like look.
Poke a hole at the top before baking.
Bake and cool.
Thread a jump ring through the hole and hang it on a chain.
Budget tip: plain chains are cheap online, and one pendant transforms them.
Sand the edges smooth for a polished finish.
Add a coat of glossy sealer to make the colors pop.
Keep it lightweight so it sits nicely.
Make a few in different shapes to match your outfits.
A simple shape on a good chain looks boutique.
Easy to make, lovely to wear.
10. Ring Dish
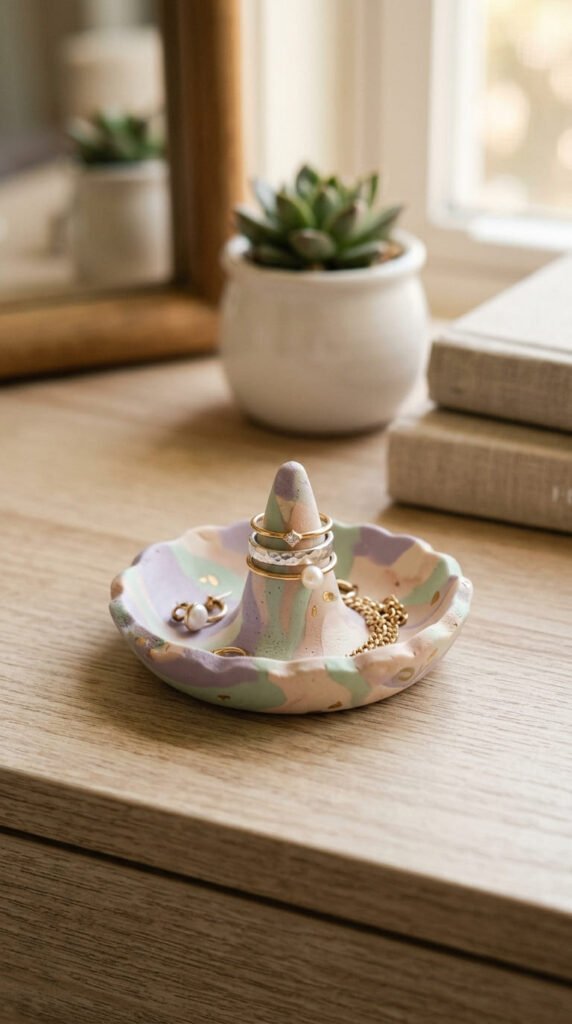
A ring dish keeps your jewelry safe and looks pretty doing it.
Shape a small shallow dish. Pinch up the edges gently.
Add a little cone in the center if you want a spot to stack rings.
Smooth everything with a damp finger.
Bake on a curved surface to hold the dish shape.
Budget tip: this uses very little clay, so it’s near free if you have scraps.
Marble the colors or paint a gold rim after baking.
Set it by the sink or on your nightstand.
Now your rings won’t go missing.
Keep the dish small and the center post low.
These make thoughtful little gifts too.
A tiny piece that solves a real daily problem.
11. Hair Clips
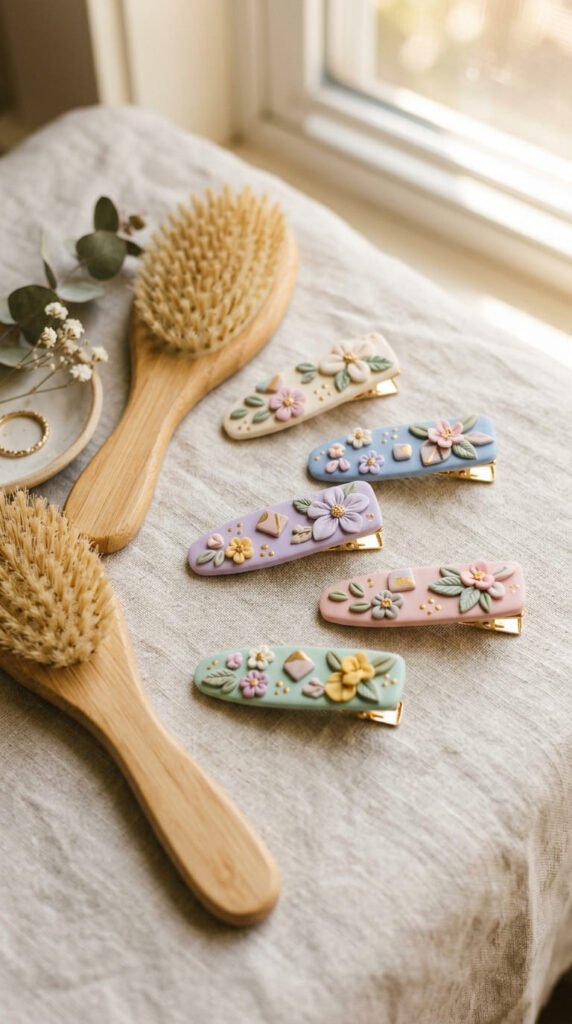
Clay hair clips are cute, quick, and easy to personalize.
Shape a flat motif. A flower, a bow, or an abstract squiggle.
Keep it flat on the back so it glues well.
Bake and cool.
Glue the clay piece onto a plain metal hair clip or snap clip.
Budget tip: blank clips come in cheap multipacks, perfect for making a whole set.
Marble the colors or paint details after baking.
Make a matching pair for a styled look.
These work for everyday wear or as small gifts.
Keep them lightweight so they don’t tug.
Mix shapes and colors for variety.
A simple way to refresh your accessory drawer for almost nothing.
12. Bookmarks

A clay bookmark adds a sweet touch to your reading.
Shape a small flat motif. A leaf, a heart, or a little mushroom.
Keep it thin and light so it doesn’t weigh the page down.
Poke a hole at the top before baking.
Bake and cool.
Thread a ribbon or cord through the hole. Tie it so it dangles past the pages.
Budget tip: ribbon scraps work great here, so this costs almost nothing.
Paint a detail after baking to make it pop.
These make lovely gifts for the readers in your life.
Keep the motif small so it tucks neatly into a book.
Make a few in different shapes.
Practical, charming, and quick to finish.
13. Plant Markers
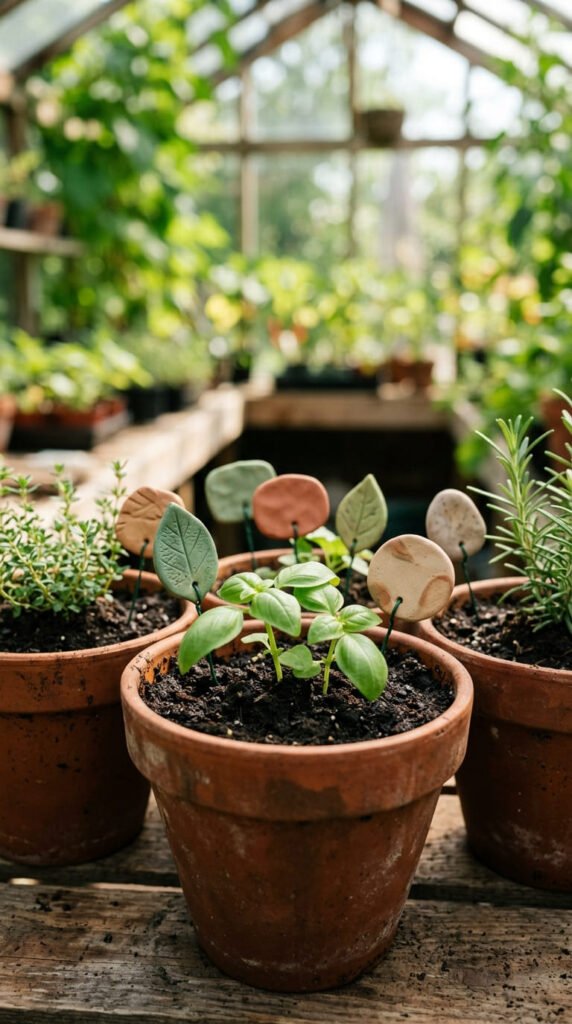
If you grow herbs or houseplants, clay markers keep things tidy and cute.
Roll out a thin slab. Cut small tag or leaf shapes with a pointed bottom.
The point pushes into the soil.
Press a simple symbol in before baking. A leaf for basil, a flower for mint.
Bake and cool.
Budget tip: these use tiny scraps, so a leftover handful makes a dozen.
Paint the tops in soft colors or keep them natural.
Push them into your pots beside each plant.
They look far better than plastic stakes.
Group your potted herbs on a sunny sill with these in place.
The whole setup looks styled.
Tiny, useful, and great for the kitchen window.
14. Wall Hanging Discs
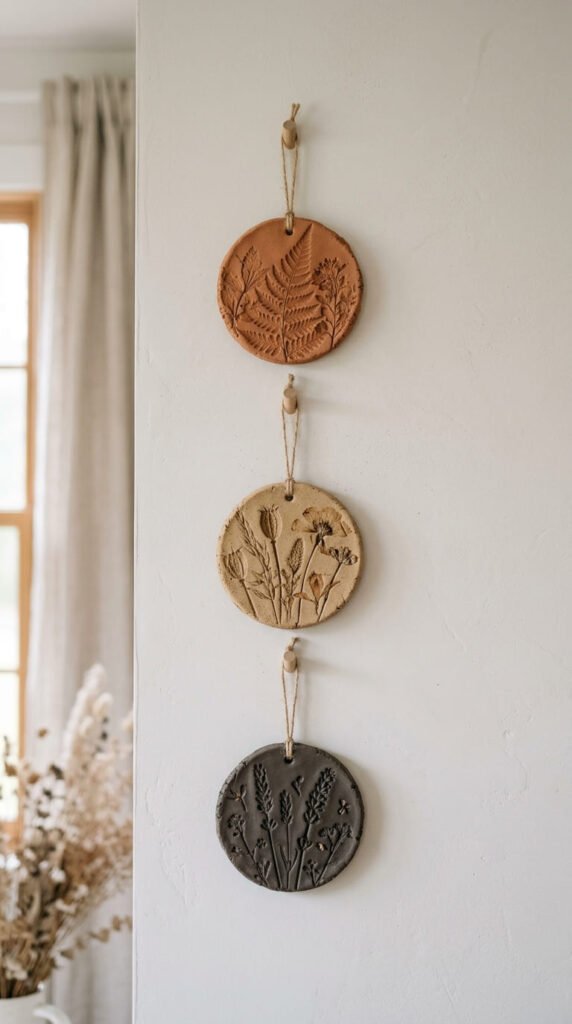
Want easy wall decor? Hanging discs deliver big impact for tiny effort.
Roll out flat circles in a few sizes.
Press a texture into each. A leaf, a stamp, or carved lines.
Poke a hole near the top before baking.
Bake and cool.
Thread jute string or cord through the holes.
Budget tip: one block makes several discs, so a whole wall display costs a few dollars.
Paint them in warm earthy tones, or mix raw and painted.
Hang them in a line or cluster them in a loose triangle.
The empty wall above a desk or bed is perfect.
It fills space without buying framed art.
Keep the spacing a little uneven for a natural look.
Simple shapes, gallery-worthy result.
15. Decorative Tiles
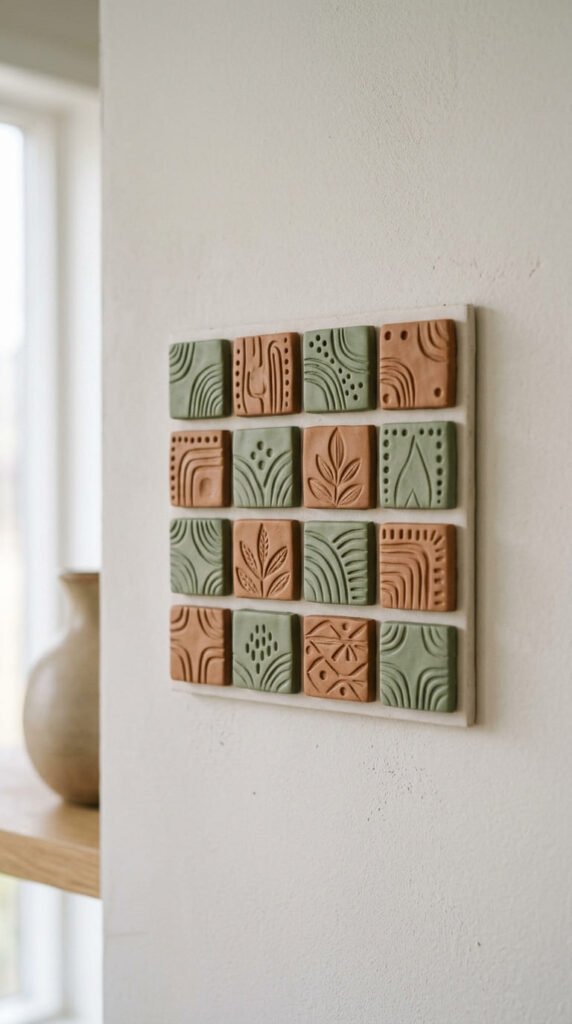
For a modern look, try a small set of decorative tiles.
Cut even squares or hexagons from a flat slab. A ruler keeps the edges crisp.
Carve a simple pattern into each. Lines, arches, or dots.
Keep the design consistent so they read as a set.
Bake flat so they stay even.
Budget tip: mount them with removable strips so renters can hang with no holes.
Paint them in soft muted tones or one calm color.
Arrange them in a tight grid for a clean panel.
This adds texture to a bare wall cheaply.
It works above a sofa, desk, or bed.
The repeated shapes feel intentional.
Modern, tactile, and easy on the wallet.
16. Translucent Tealight Holder
This one looks advanced but isn’t. The trick is translucent clay.
Shape a small cup just big enough for a tealight.
Use translucent clay so light glows through the walls.
Keep the walls thin in spots for a soft glow effect.
Always use a metal-cased tealight so the flame never touches the clay.
Bake and cool.
Budget tip: a small amount of translucent clay goes a long way here.
Add tiny cutouts or texture for patterns of light.
Light it in the evening for instant cozy mood.
Group a couple together on a tray.
Keep an eye on any open flame, as always.
A simple project with a magical payoff.
17. Incense Holder
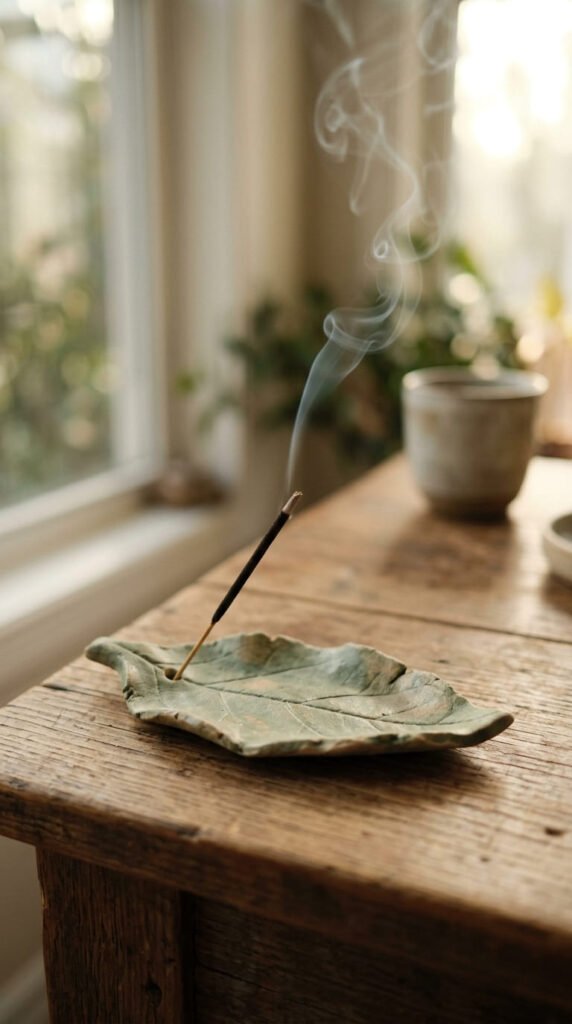
If you love incense, a handmade holder beats the flimsy ones.
Shape a small flat base. A leaf, a pebble, or a little dish.
Poke a hole for the stick while the clay is soft. Angle it slightly.
Make a shallow channel to catch ash.
Bake and cool.
Budget tip: this uses just a scrap of clay, so it’s near free.
Paint it a calm earthy tone or leave it natural.
Set it on a windowsill or desk.
Light a stick and watch the smoke curl up.
The organic shape looks like art even when not in use.
Make a couple in different shapes.
A tiny, calming object that does a real job.
18. Bud Vase
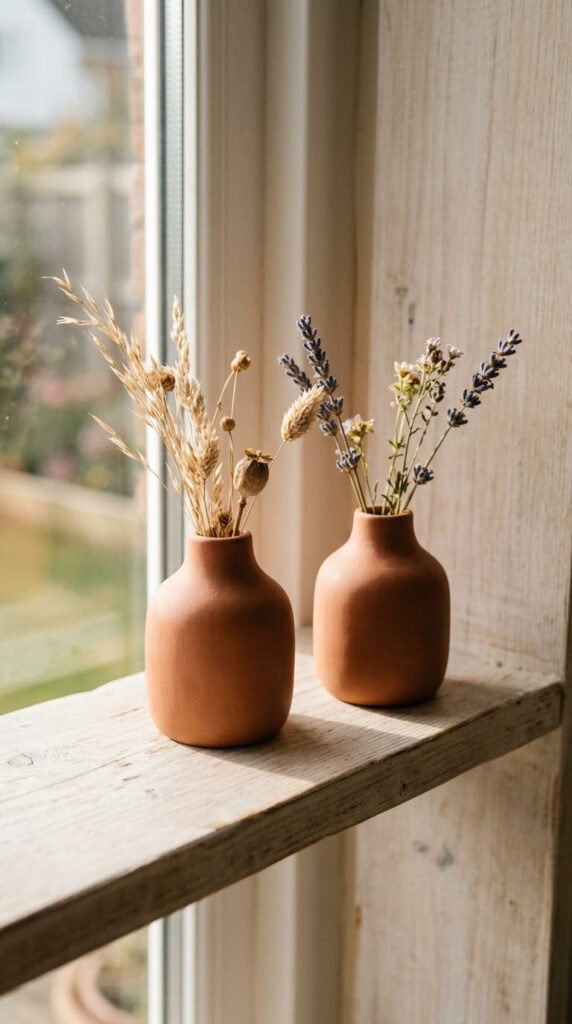
A tiny vase makes any shelf look styled.
Build a small pot by coiling thin ropes of clay. Stack them and smooth the seams.
Keep the opening narrow for dried stems.
Bake and cool.
Polymer clay isn’t waterproof, so skip fresh flowers unless you line it.
Budget tip: drop a small glass tube inside if you ever want real water and stems.
Fill it with dried pampas, wheat, or lavender. These cost little and last for months.
Paint it earthy or leave it natural.
Group a couple in different heights. Odd numbers look best.
Place one on a desk, shelf, or bathroom counter.
A small vase and a few stems make the corner look intentional.
Simple, charming, and low-maintenance.
19. Phone Charms
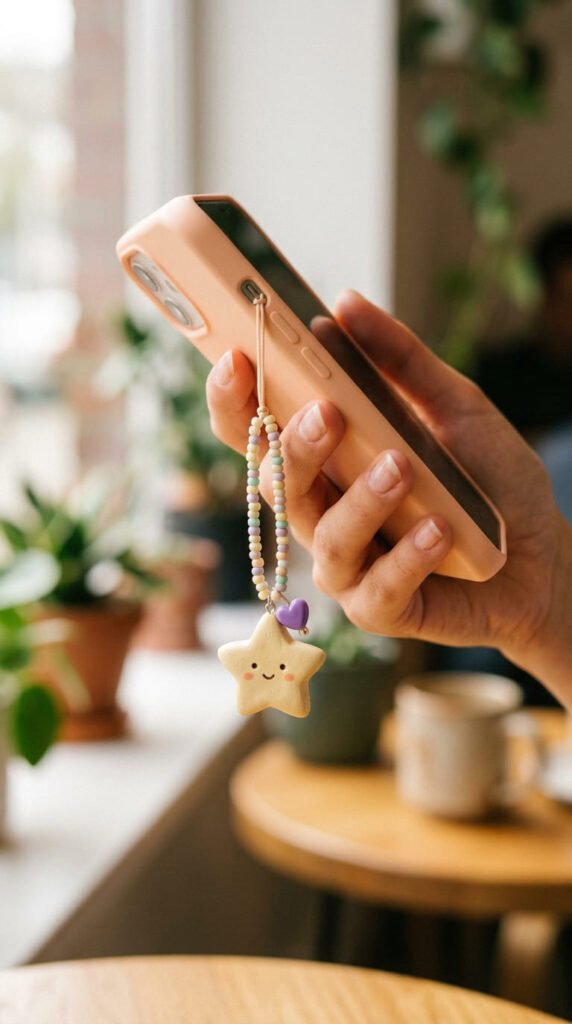
Phone charms are back, and they’re easy to make.
Shape a tiny motif. A star, a flower, or a little fruit.
Keep it small and light so it dangles nicely.
Poke a hole before baking.
Bake and cool.
Attach it with a jump ring to a beaded strap or cord.
Budget tip: add a few cheap beads to the strap for a trendy look without spending much.
Make a couple to swap out with your mood.
These also work on bags and pouches.
Keep the charm chunky so it survives daily use.
Mix beads and clay pieces for variety.
A small, trendy touch that feels custom.
20. Pumpkin Figurines

Seasonal projects are fun, and pumpkins are the easiest start.
Roll a small ball of orange clay.
Press gentle lines down the sides with a toothpick for the ridges.
Add a tiny green or brown stem on top.
Keep them small, around an inch.
Bake and cool.
Budget tip: a small amount of clay makes a whole pumpkin patch.
Make them in different sizes for a cute cluster.
Set them on a shelf or windowsill in autumn.
Add a coat of matte sealer for a natural finish.
These also work as little place markers for a fall dinner.
Cute, seasonal, and beginner-proof.
A pumpkin is just a ball with lines. That simple.
21. Snowman Ornaments
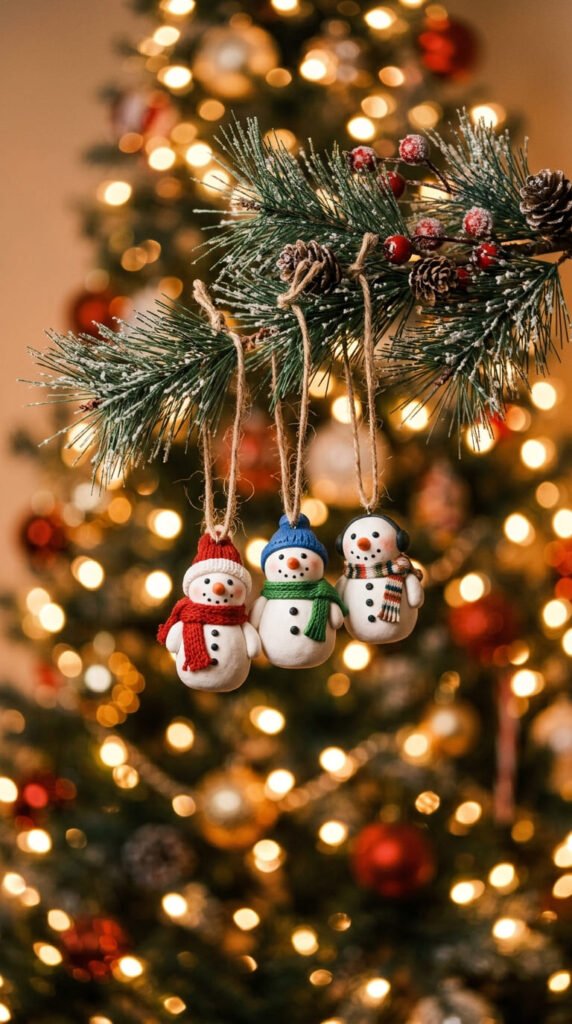
When winter rolls around, clay snowmen are a sweet, cheap craft.
Stack two or three white balls for the body.
Press them together gently so they hold.
Add a tiny carrot nose and dot eyes with a toothpick.
Poke a hole at the top before baking for hanging.
Bake and cool.
Budget tip: one block of white clay makes a whole set of ornaments.
Paint on a scarf or buttons after baking.
Thread twine through the hole and hang it on the tree.
These make heartfelt handmade gifts.
Tie one to a present as a tag.
Make a batch in an afternoon.
They store flat for next year.
Festive charm for almost nothing.
22. Gnome Figures
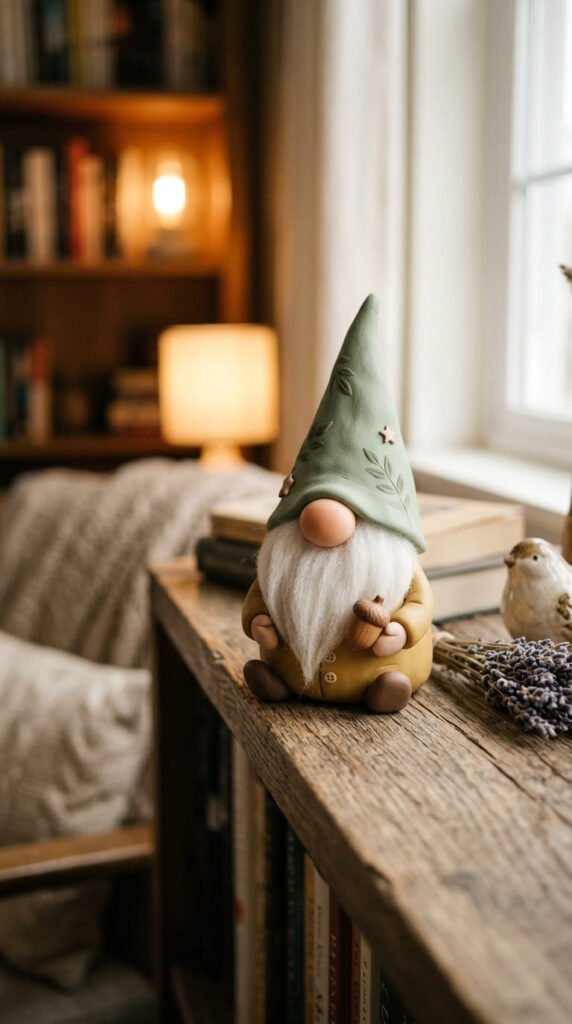
Gnomes are trendy, adorable, and surprisingly simple.
Shape a cone for the body and hat. That’s most of the work.
Add a round ball nose poking out under the hat.
Give it a little beard with a flat piece of clay.
Skip the eyes. The hat covers them, which is the whole gnome look.
Bake and cool.
Budget tip: use up odd color scraps for the hats, since variety looks cute.
Paint details after baking if you like.
Make a little gnome family for a shelf.
Keep them chunky so they stand on their own.
These work for any season with a color swap.
A cone, a nose, and a beard. Done.
Charming, easy, and full of personality.
23. Pencil Toppers
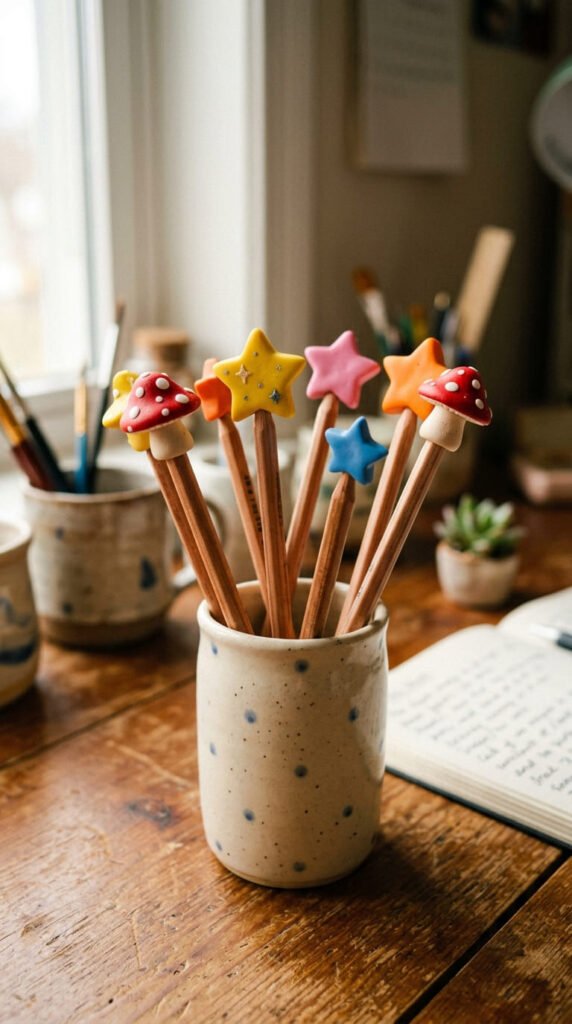
Pencil toppers make a desk fun and brighten study time.
Shape a small motif. A mushroom, a star, or a little animal.
Press the clay around the pencil eraser while soft, then slide it off carefully.
This makes a snug hole for later.
Bake the topper separately, not on the pencil.
Once cool, glue it onto the pencil top.
Budget tip: these use tiny scraps, so a leftover bit makes several.
Paint details after baking.
Make a set in different shapes.
These are great for kids or as small desk gifts.
Keep them light so the pencil doesn’t tip.
A cute, cheap way to make plain pencils playful.
24. Heart Magnet Gift Set

End your list with a giftable little set.
Make several small clay hearts. Marble the colors for variety.
Keep them flat on the back.
Bake and cool.
Glue a small magnet behind each one.
Budget tip: package three or four in a tiny box with ribbon for a gift that costs almost nothing.
These work as fridge magnets, board pins, or sweet little tokens.
Make a batch in matching tones for a styled set.
Add a coat of glossy sealer to make the colors shine.
Tuck a handwritten note in the box.
A handmade gift set always feels thoughtful.
Quick to make, lovely to give.
The perfect project to wrap up your beginner journey.
Conclusion
Polymer clay proves that making something beautiful doesn’t take talent or money, just a little clay and a free afternoon. Start with the easiest wins like studs, beads, and magnets. Then move into dishes, pendants, and seasonal figures as your hands get more confident. Every project here uses cheap materials and basic tools you’ll reuse again and again. Pick one idea this week. Roll out a bit of clay, shape something small, and bake it. You’ll be hooked after the first piece, and your shelves, your jewelry box, and your gift list will thank you.


