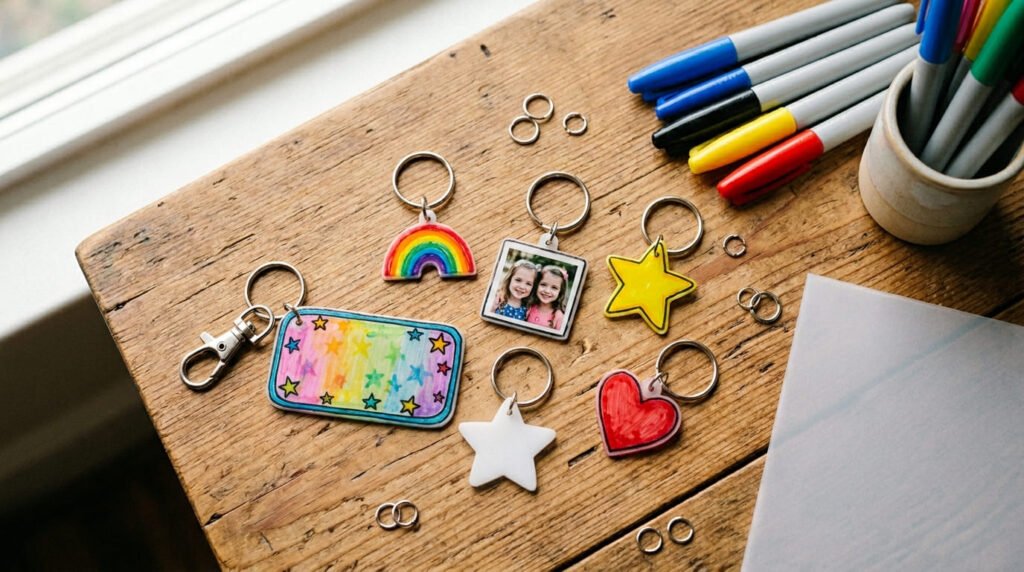
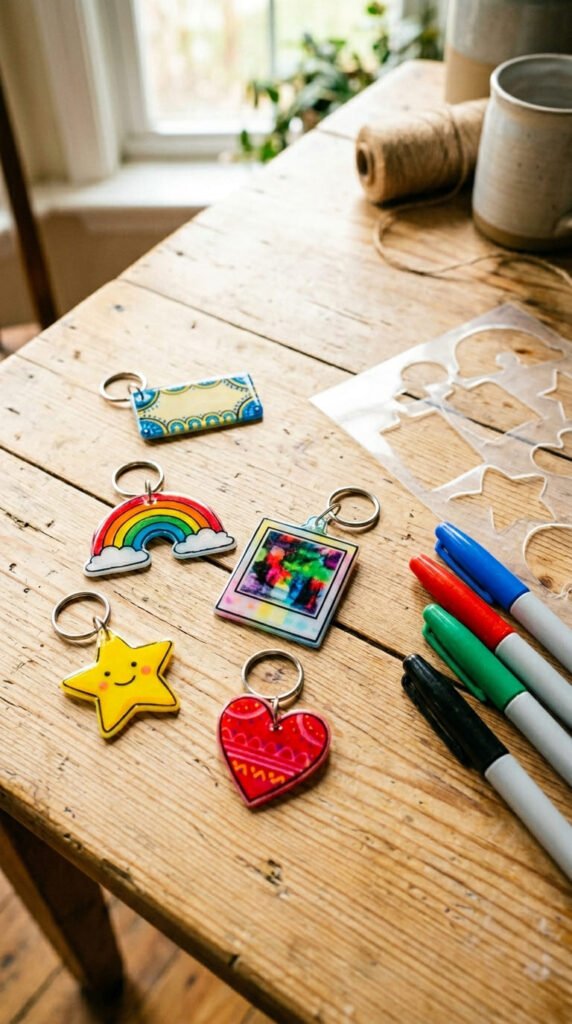
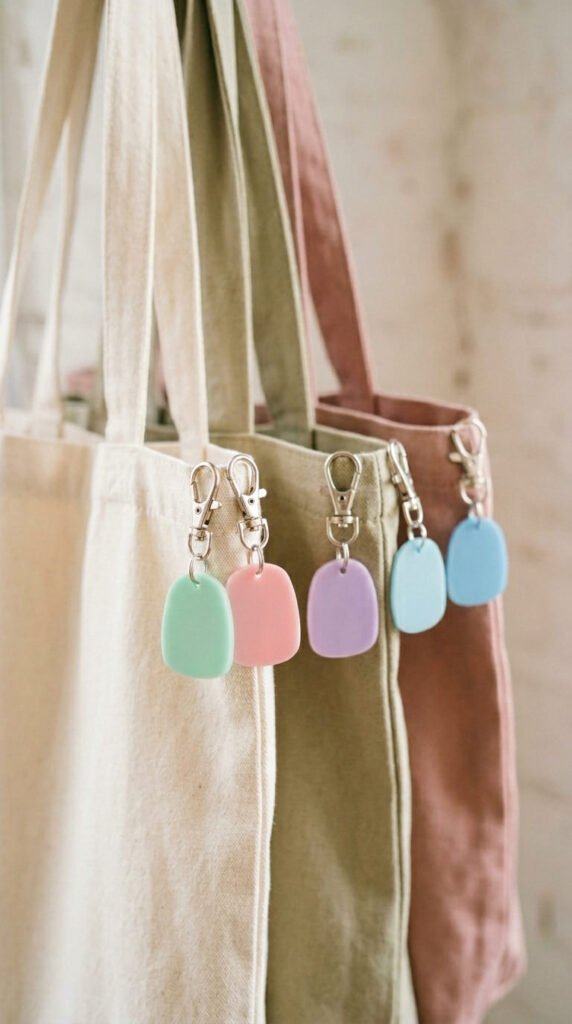
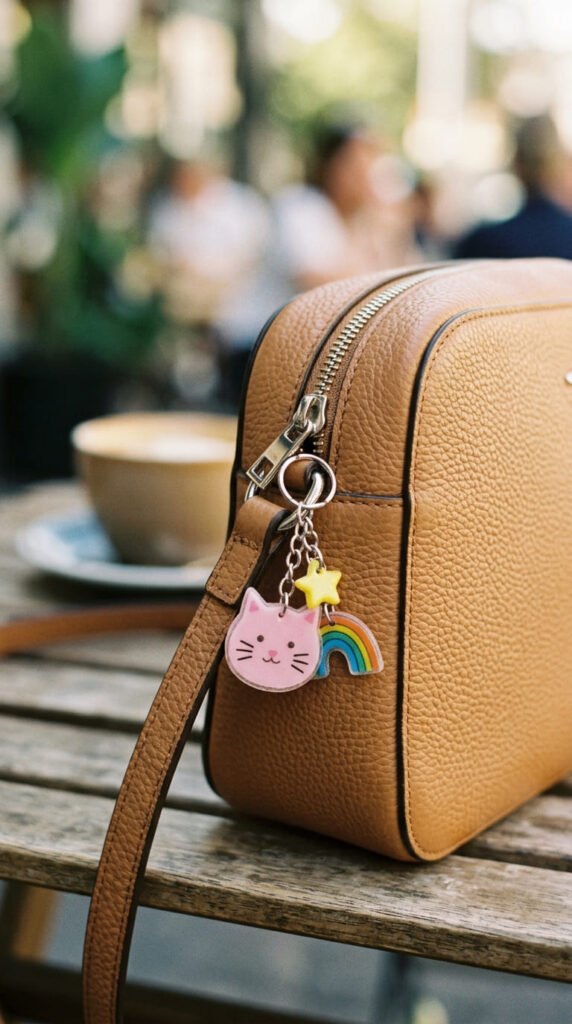
Shrinky dink keychains are pure craft magic. You draw a design, pop it in the oven, and watch it shrink into a thick, glossy little charm in under three minutes. They’re cheap, fast, and endlessly customizable. Kids love them. Adults love them. And they make sweet handmade gifts and party favors. All you need is shrink plastic, a few markers, a hole punch, and some keyring hardware. Here are 22 adorable shrinky dink keychain ideas to make this weekend.
1. Personalized Name Keychains
A name keychain is the classic place to start.
Draw the name in big, bold letters on the frosted side of the shrink plastic.
Remember, it shrinks to about a third of the size. So draw it large.
Add a fun border or little doodles around the name.
Punch a hole at the top before baking. This is where the ring goes.
Bake at 300–350°F for 2–3 minutes. It curls, then flattens.
Let it cool, then attach a split ring.
Budget tip: one sheet of shrink plastic makes a whole batch of name tags for a class or party.
Use bright permanent markers for bold color.
These are perfect for backpacks, lunchboxes, and water bottles.
Kids feel proud carrying their own name.
Make a set for a birthday party as personalized favors.
Simple, cheap, and always a hit.
2. Photo Keychains
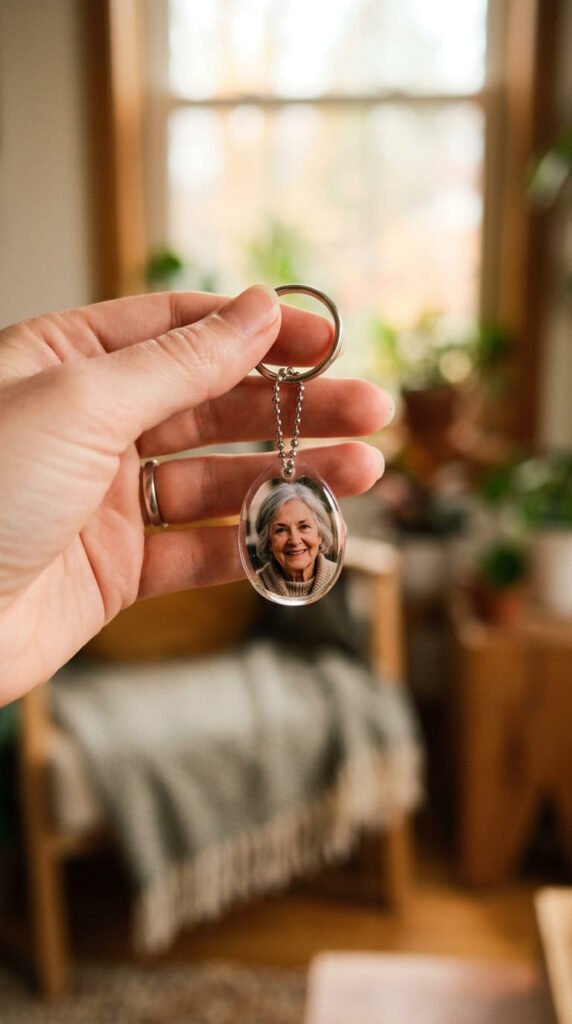
Photo keychains feel personal and make wonderful gifts.
You’ll need printable shrink film for this one. It runs through a home printer.
Pick a clear photo with a simple background. Faces work best.
Print it, then cut around the image. Leave room at the top for a hole.
Punch the hole before baking.
Bake following the film instructions, usually a couple of minutes.
Let it cool fully.
Budget tip: printable shrink film costs a little more, but one sheet makes several keepsakes.
Add a coat of sealer for a glossy, protected finish.
These are lovely for grandparents, couples, or pet lovers.
Make one with a family photo as a gift.
Keep the image small so it stays sharp after shrinking.
A handmade keepsake that means a lot.
3. Cute Initial Charms
A single initial makes a clean, modern keychain.
Draw one big letter on the frosted side. Keep it bold.
Pick a fun font style. Bubble letters, script, or simple block.
Color it in or fill the background instead.
Punch the hole before baking.
Bake until it flattens, then cool.
Attach a small ring.
Budget tip: initials use very little plastic, so you can make a set for the whole family from one sheet.
Match the colors to each person’s style.
These work great as bag charms or zipper pulls.
Make a matching set for siblings or friends.
Keep the letter chunky so it survives daily use.
A small, stylish, personal touch.
4. Glow-in-the-Dark Keychains
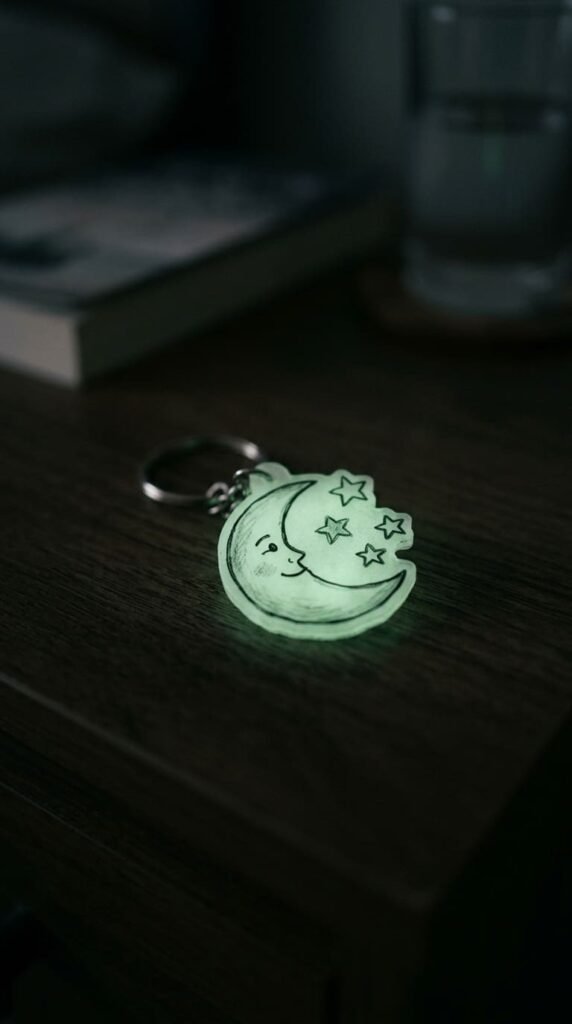
Glow-in-the-dark keychains are a fun surprise that kids adore.
Draw your design as usual. A moon, stars, or a ghost work well.
After baking and cooling, paint over it with glow-in-the-dark paint.
Let it dry fully. Then charge it under a lamp.
It glows softly in the dark.
Budget tip: a small bottle of glow paint lasts for many keychains.
Keep the design simple so the glow reads clearly.
These are perfect for night-time visibility on backpacks.
Make a batch as party favors that double as a game.
Add a coat of clear sealer to protect the paint.
Star and crescent shapes glow beautifully.
A little extra step for a big wow.
5. Pet Portrait Keychains
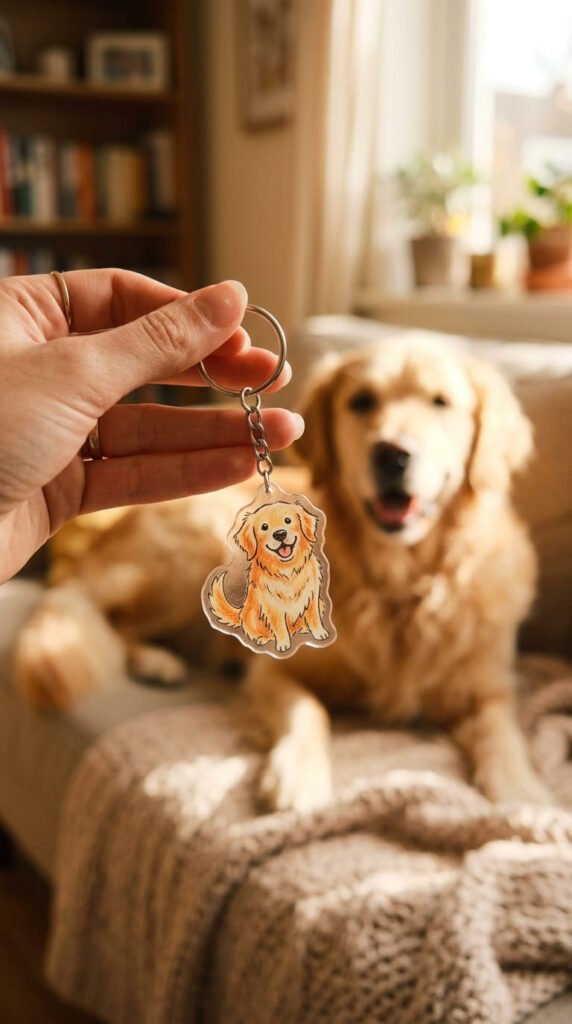
A keychain of someone’s pet is a heartfelt gift.
You don’t need to be an artist. A simple cartoon version works great.
Trace a pet photo by taping it under the shrink plastic. Then draw over the outline.
Keep the features simple and cute.
Color it in with markers or colored pencils.
Punch the hole, then bake.
Budget tip: tracing means even non-artists get a clean result for free.
Add the pet’s main colors and markings.
These make sweet gifts for pet-loving friends.
Make one of your own furry friend to test.
Keep the design bold so it stays clear after shrinking.
A tiny tribute that warms the heart.
6. Tiny Food Charms
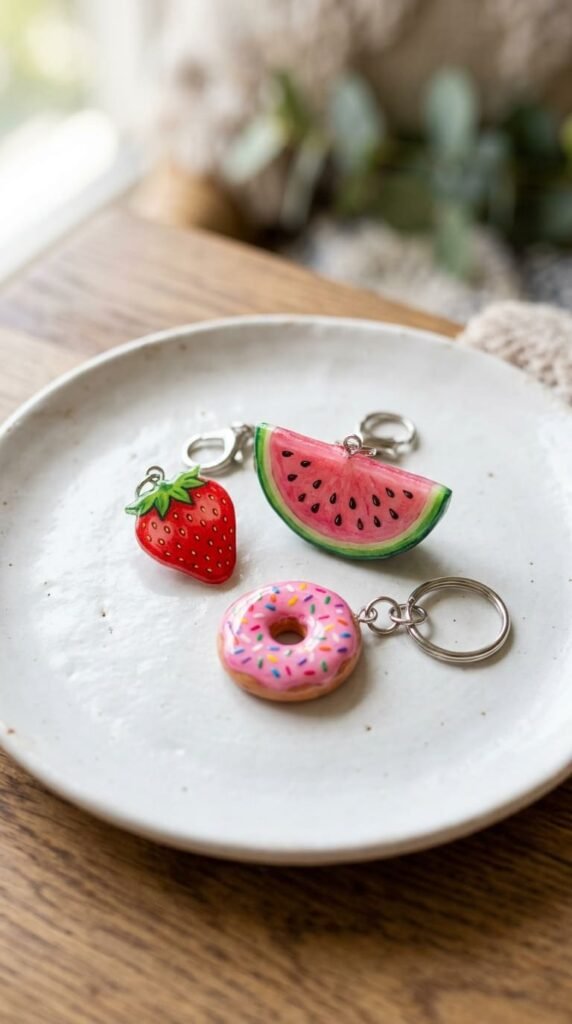
Tiny food charms are cheerful and fun to draw.
Pick simple foods. A strawberry, a watermelon slice, a donut.
Draw the outline big, since it shrinks a lot.
Fill in with bright color. Add little details like seeds or sprinkles.
Punch the hole, then bake.
Budget tip: these tiny shapes mean you fit loads on one sheet, so cost per charm is tiny.
They look glossy and candy-like after baking.
Make a whole food collection for a charm bracelet too.
These are great party favors for kids.
Keep the details bold and simple.
A watermelon slice is just a half circle with seeds. Easy.
Sweet, colorful, and crowd-pleasing.
7. Animal Shape Keychains
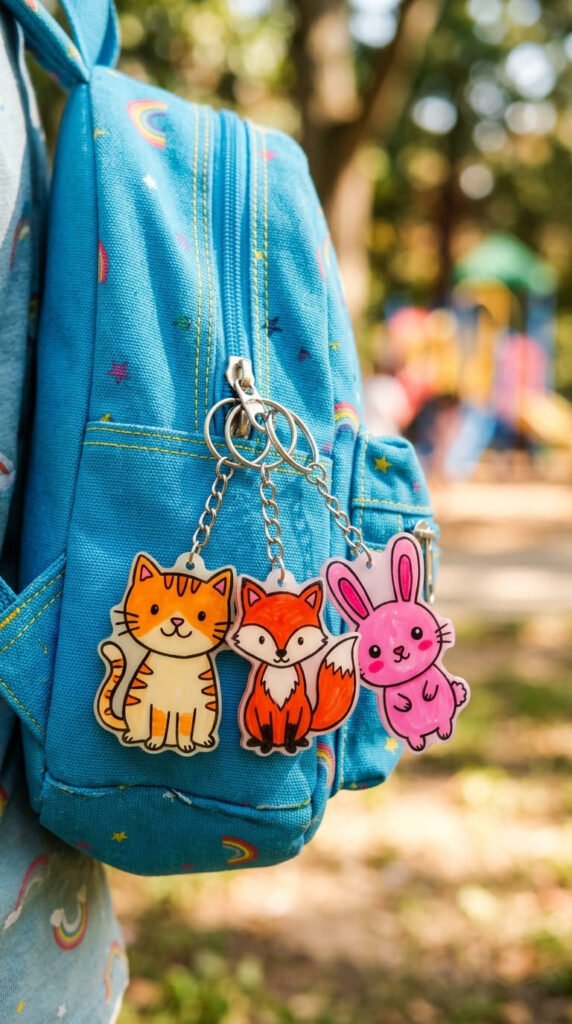
Animal keychains are a kid favorite and easy to make.
Pick a simple animal. A cat, a bunny, a fox.
Draw a bold cartoon outline. Keep it rounded and cute.
Color it in with markers.
Punch the hole at the top before baking.
Bake until flat, then cool.
Budget tip: trace from a coloring book page if you want a clean shape for free.
Attach a ring and you’re done.
These work as backpack charms and zipper pulls.
Make a little zoo of different animals.
Keep the lines thick so they stay clear.
A cute critter for every kid at the party.
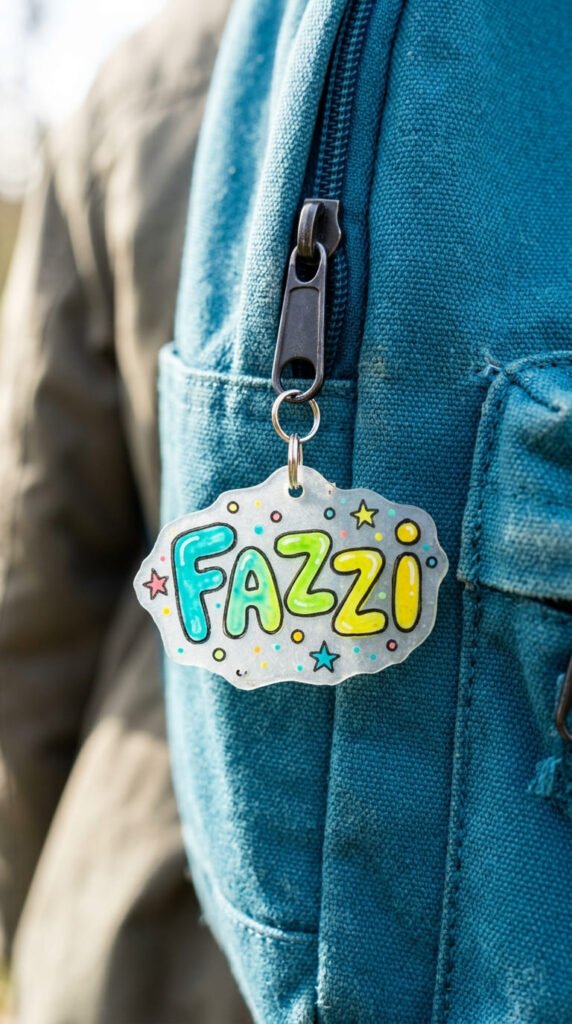
8. Back-to-School Backpack Tags
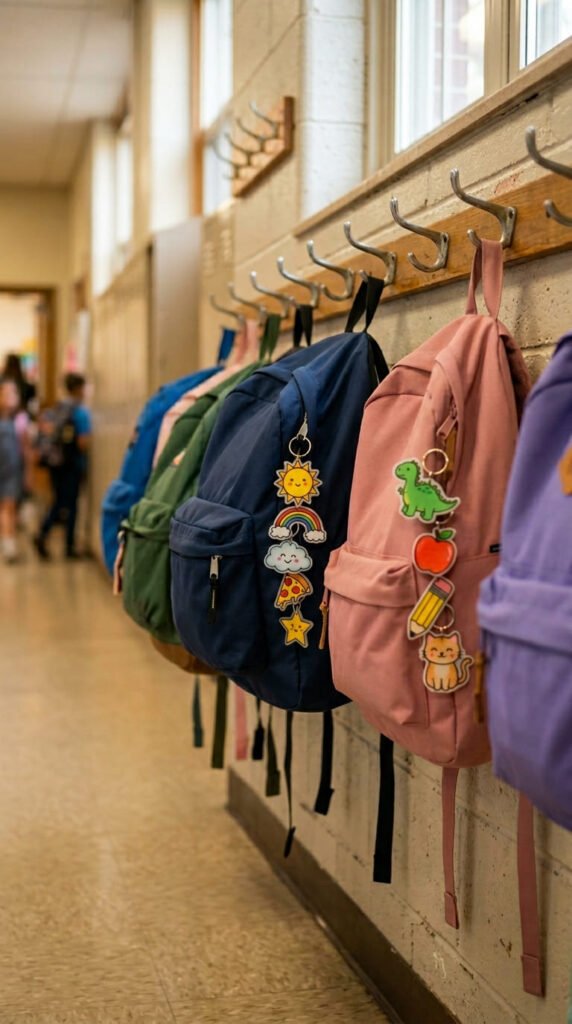
Backpack tags help kids spot their bag in a sea of others.
Draw a bold icon plus the child’s name or initial.
Pick something they love. A rocket, a flower, a soccer ball.
Make it big and colorful so it stands out.
Punch the hole, then bake.
Budget tip: make the whole class a set from one or two sheets for a cheap teacher project.
Use a sturdy split ring so it survives daily backpack abuse.
These are perfect for the start of the school year.
Make matching tags for siblings.
Keep the design simple and bright.
A practical craft that solves the lost-bag problem.
Cute and genuinely useful.
9. Teacher Appreciation Keychains
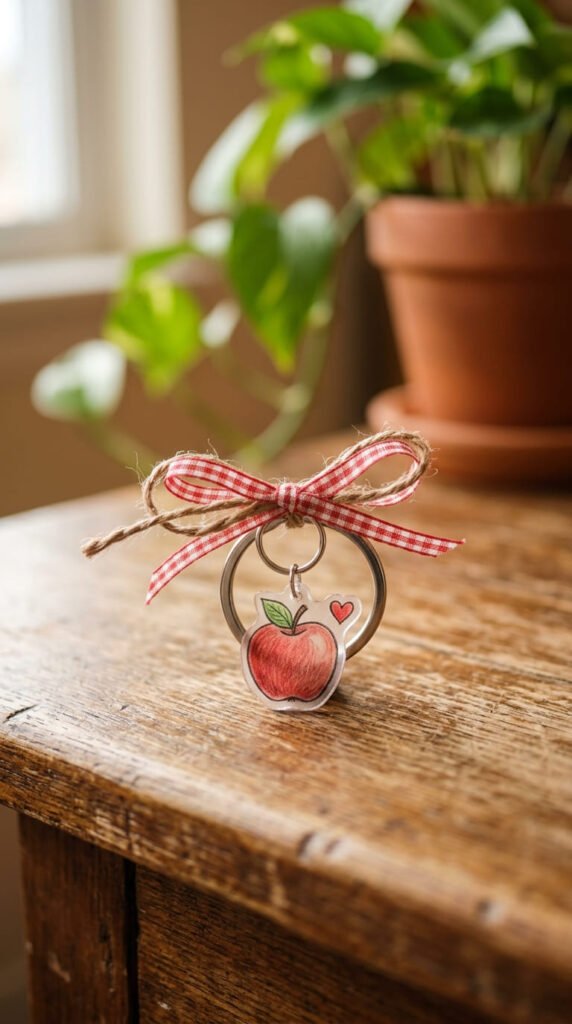
A handmade keychain makes a sweet teacher gift.
Draw a simple apple, a heart, or a tiny pencil.
Add the teacher’s initial if you like.
Color it in brightly.
Punch the hole, bake, and cool.
Attach a ring and tie it with a small ribbon.
Budget tip: this costs pennies but feels far more personal than a store-bought gift.
Have the kids draw their own for an extra-special touch.
These work for end-of-year or appreciation week.
Make a matching set for multiple teachers.
Keep the design clean and cheerful.
A small gift that shows real thought.
10. Matching Couple Keychains
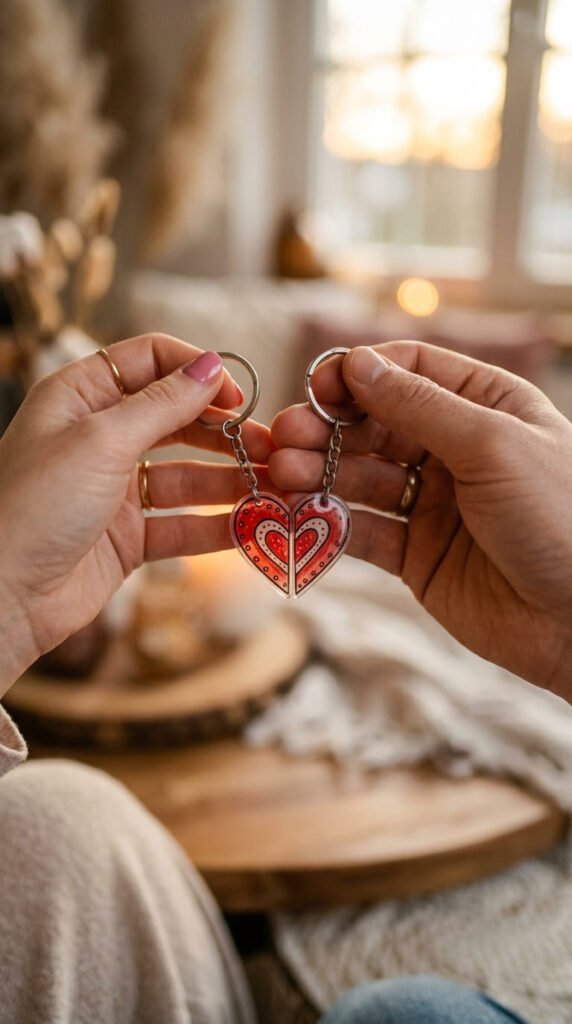
Matching keychains are a cute gift for couples or best friends.
Draw a design that splits into two halves. A heart, a puzzle piece, or two birds.
Each person carries one half.
Color them to match.
Punch holes, then bake both.
Budget tip: one small design makes a pair, so this is a very cheap meaningful gift.
Add initials to each half for a personal touch.
These work for anniversaries or friendship gifts.
Make a set for you and your best friend.
Keep the halves simple so they read clearly.
A sweet little symbol you both carry.
11. Zodiac and Star Sign Keychains
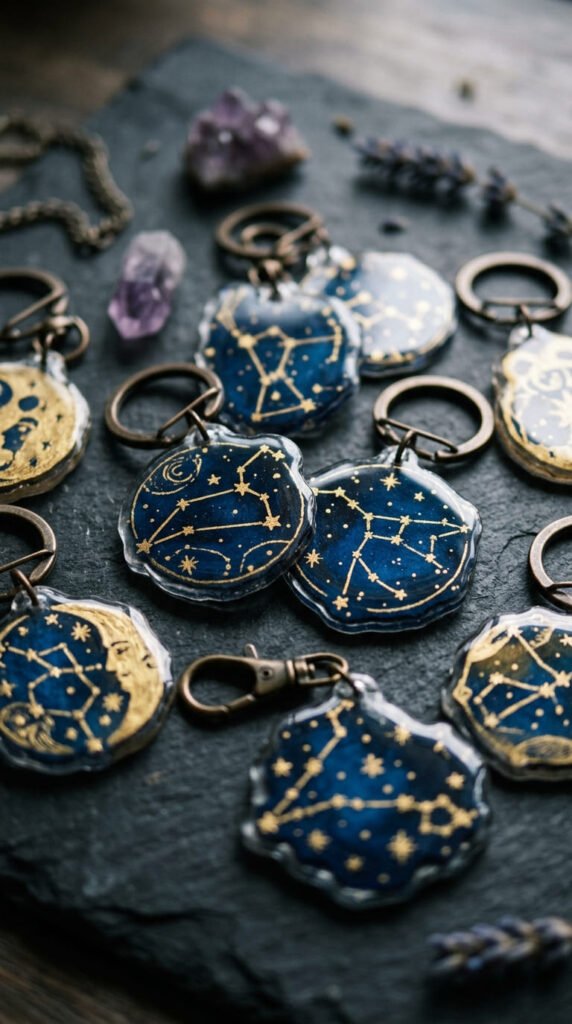
Zodiac keychains feel personal and trendy.
Draw the constellation as simple dots and lines. Or draw the symbol.
Keep it bold so it shrinks clearly.
Color the background dark and the stars light for a night-sky look.
Punch the hole, then bake.
Budget tip: look up constellation patterns online and trace them for free.
Add a tiny moon for extra charm.
These make great gifts matched to each friend’s sign.
Make a full set of all twelve for a craft fair.
Keep the dots large enough to survive shrinking.
A cosmic little keepsake.
12. Floral Keychains
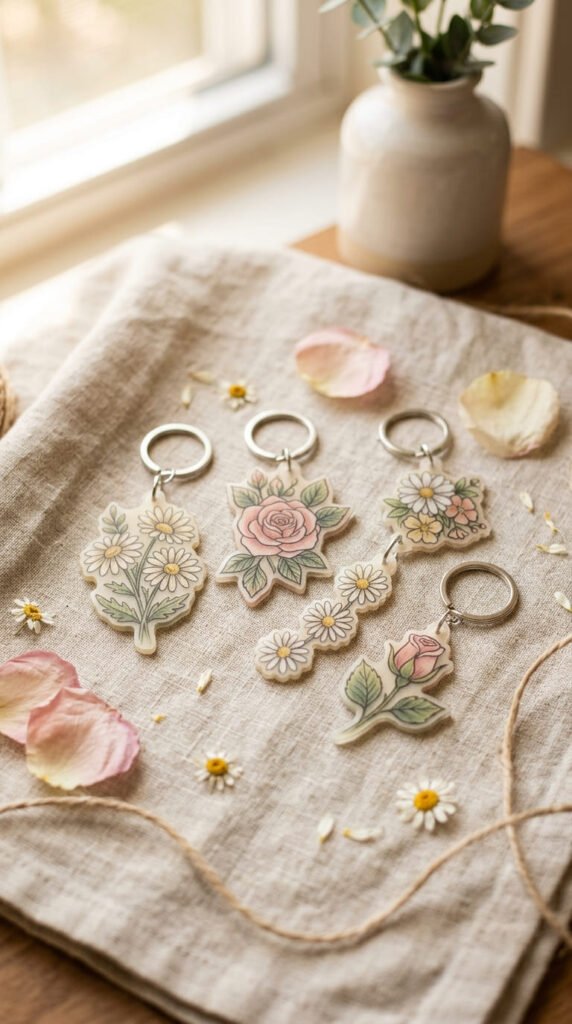
Flower keychains are pretty and beginner-friendly.
Draw a simple bloom. A daisy, a rose, or a tulip.
Keep the petals bold and rounded.
Color them in soft or bright tones.
Punch the hole, then bake.
Budget tip: flowers are forgiving shapes, so even shaky drawing looks charming.
Add a green leaf or two for detail.
These make lovely spring or Mother’s Day gifts.
Make a little bouquet of different flower keychains.
Keep the lines thick so they hold up.
A sweet, simple design anyone can draw.
13. Colored-Pencil Filled Designs
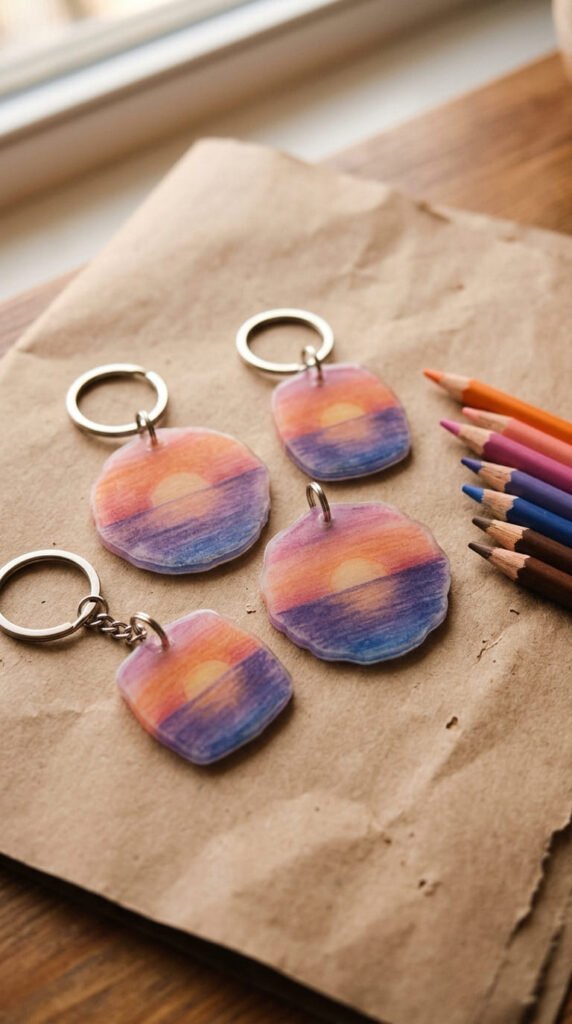
For a softer look, fill your designs with colored pencils instead of markers.
Pencils give a gentle, shaded effect.
Draw your outline with permanent marker first.
Then color the inside on the rough frosted side so the pencil grips.
Punch the hole, then bake.
Budget tip: you likely already own colored pencils, so this method costs nothing extra.
The colors deepen as the plastic shrinks.
Try a sunset gradient or soft rainbow.
This method looks more artistic and muted.
Keep the shading even for the best result.
A pretty alternative to bold marker designs.
14. Holiday Shape Keychains
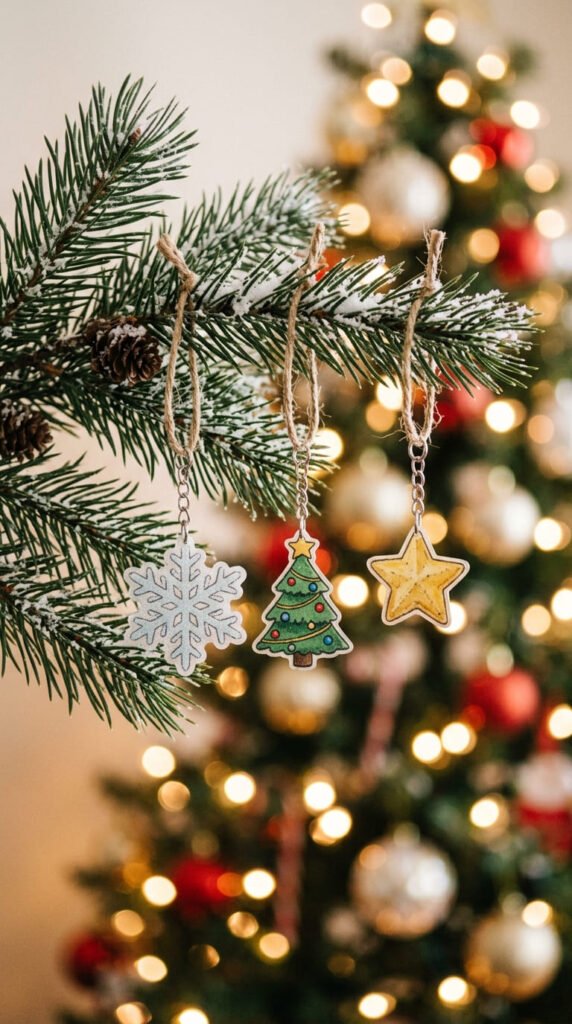
Holiday keychains make cheap, cheerful seasonal gifts.
Pick a shape for the season. A snowflake, a pumpkin, a heart, a tree.
Draw it bold and color it festively.
Punch the hole, then bake.
Budget tip: make a big batch as stocking stuffers or party favors for almost nothing.
Add glitter or sealer for a little sparkle.
These work for any holiday with a shape swap.
Make matching sets for the whole family.
Tie them to gifts as charm-style tags.
Keep the design simple so it reads after shrinking.
Festive little keepsakes made in minutes.
15. Bag Charms and Zipper Pulls
Shrinky dinks aren’t just for keys. They make adorable bag charms.
Draw any cute shape you like. A cloud, a star, a tiny character.
Punch the hole, then bake.
Attach a lobster clasp instead of a plain ring so it clips on and off easily.
Budget tip: clasps come cheap in multipacks, perfect for making a bunch.
Cluster a few charms together for a trendy look.
These clip onto handbags, backpacks, and pencil cases.
Make a set in matching colors.
Swap them out to match your outfit.
Keep them lightweight so they dangle nicely.
A small accessory that feels custom.
16. Birthday Party Favors
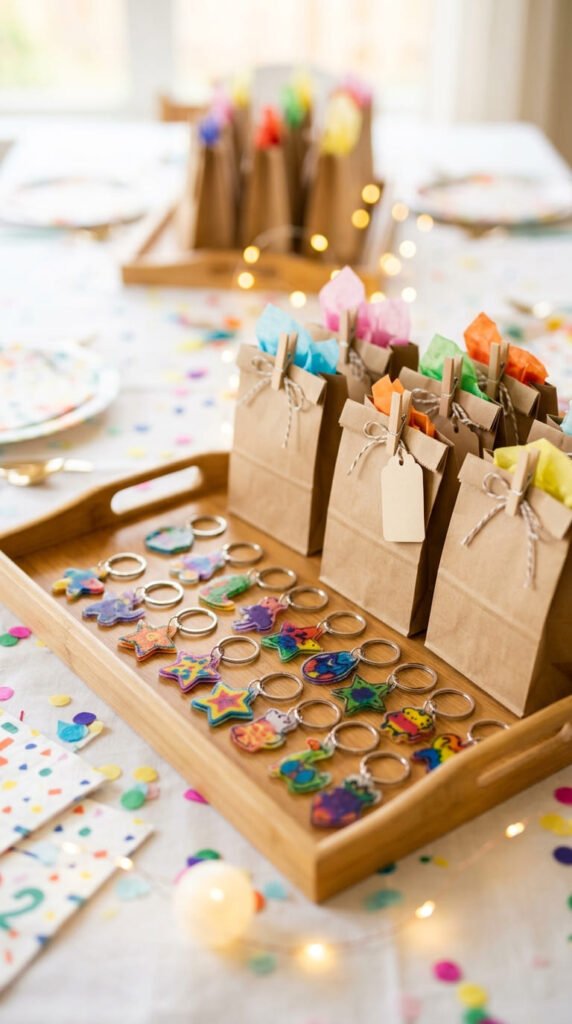
Shrinky dink keychains make memorable party favors.
Pick a theme to match the party. Dinosaurs, unicorns, superheroes.
Make one for each guest, with their name if you have time.
Draw, punch, and bake them in batches.
Budget tip: one craft session makes favors for a whole party at a fraction of store-bought cost.
Better yet, let the kids draw their own at the party.
That turns the favor into an activity too.
Pop each one in a small gift bag.
Use bright, fun colors throughout.
Keep designs simple for fast batch-making.
A favor guests actually keep and use.
17. Emoji and Doodle Keychains
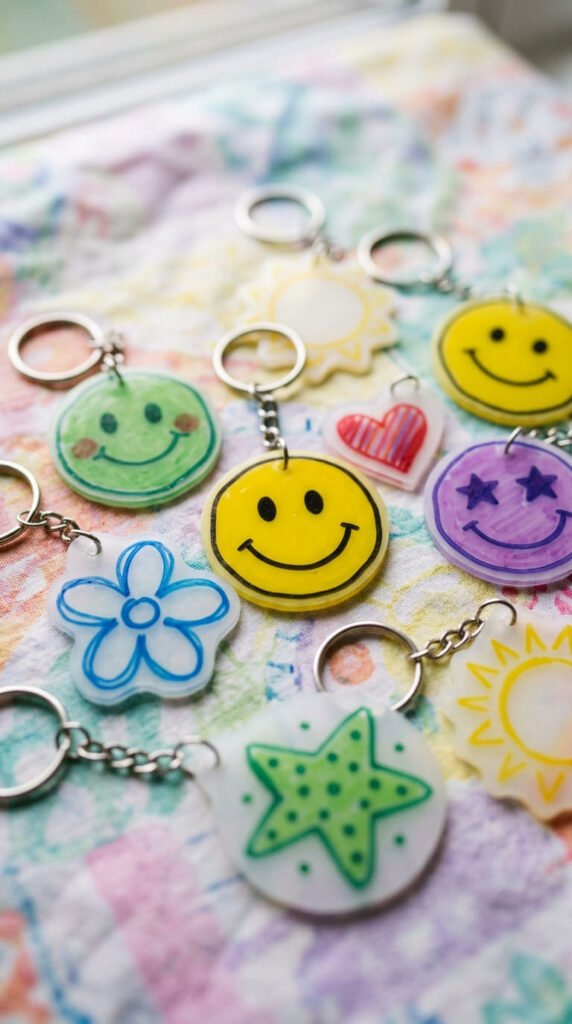
Simple doodles make some of the cutest keychains.
Draw a smiley face, a heart, a star, or a little cloud.
These take seconds and need zero art skill.
Color them in bright, happy tones.
Punch the hole, then bake.
Budget tip: doodles are tiny, so you fit dozens on one sheet for next to nothing.
Make a whole mood collection of faces.
These are perfect for teens to make in a group.
Mix and match them on a keyring.
Keep the lines bold and simple.
Fast, fun, and impossible to mess up.
18. Fruit Slice Keychains
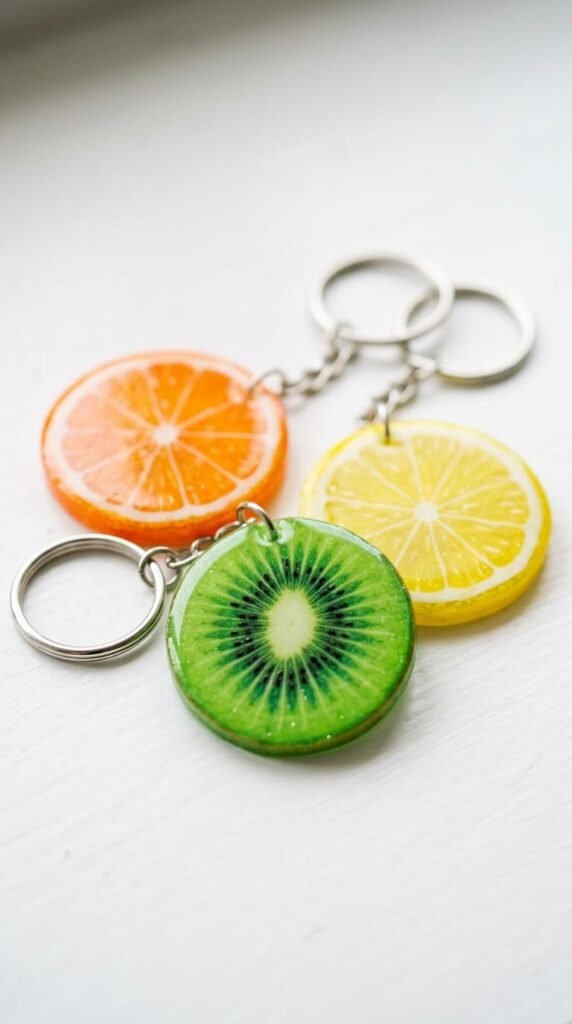
Fruit slices make bright, glossy keychains that pop.
Draw a circle, then add the inside pattern. Orange segments, kiwi seeds, lemon wedges.
Keep the colors bold and juicy.
Punch the hole, then bake.
Budget tip: these simple shapes are quick, so you make a big batch fast.
The glossy bake finish makes them look candy-like.
Make a matching summer set.
These are cheerful party favors and bag charms.
Keep the inside details bold so they stay clear.
A lemon is just a yellow circle with white lines. Simple.
Colorful and fun to make.
19. Inspirational Mini Symbols
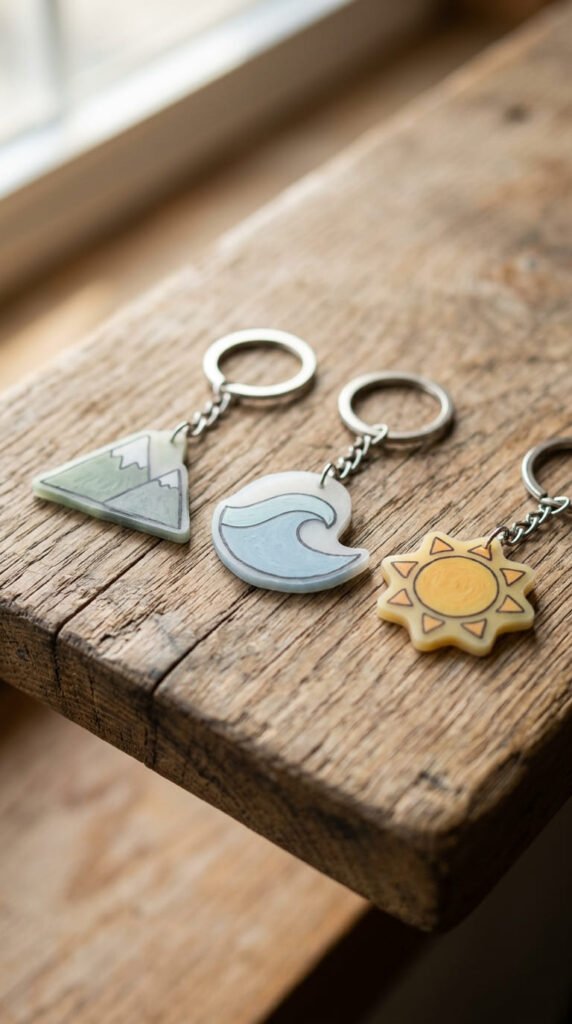
Simple symbols carry meaning in a tiny charm.
Draw a sun, a wave, a mountain, or a little plant.
Pick something that means something to the person.
Keep it bold and minimal.
Color it in calm tones.
Punch the hole, then bake.
Budget tip: minimal designs use little ink and plastic, keeping costs tiny.
These make thoughtful little gifts.
A mountain for a hiker. A wave for a beach lover.
Make a set matched to each friend.
Keep the symbol simple so it reads clearly.
A small charm with a personal message.
20. Number and Date Keychains
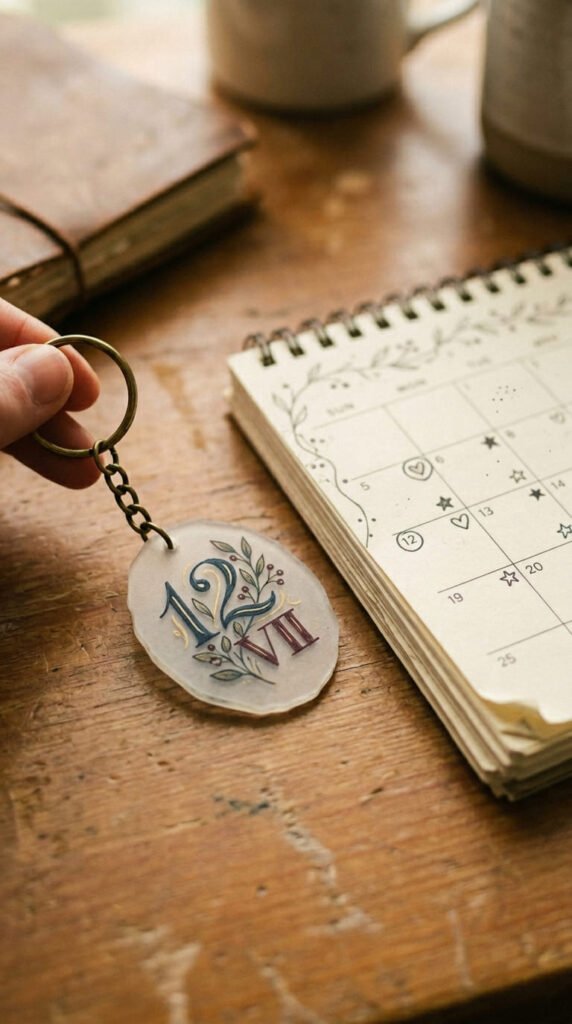
A special date or number makes a meaningful keychain.
Draw a wedding date, a birthday, or a lucky number.
Make the numbers big and bold.
Add a small heart or border around them.
Punch the hole, then bake.
Budget tip: this simple design is cheap to make but feels deeply personal.
These work for anniversaries and milestones.
Color it to match the person’s style.
Make one to mark a graduation or new home.
Keep the numbers thick so they survive shrinking.
A tiny keepsake of a big moment.
21. Character Sketch Keychains
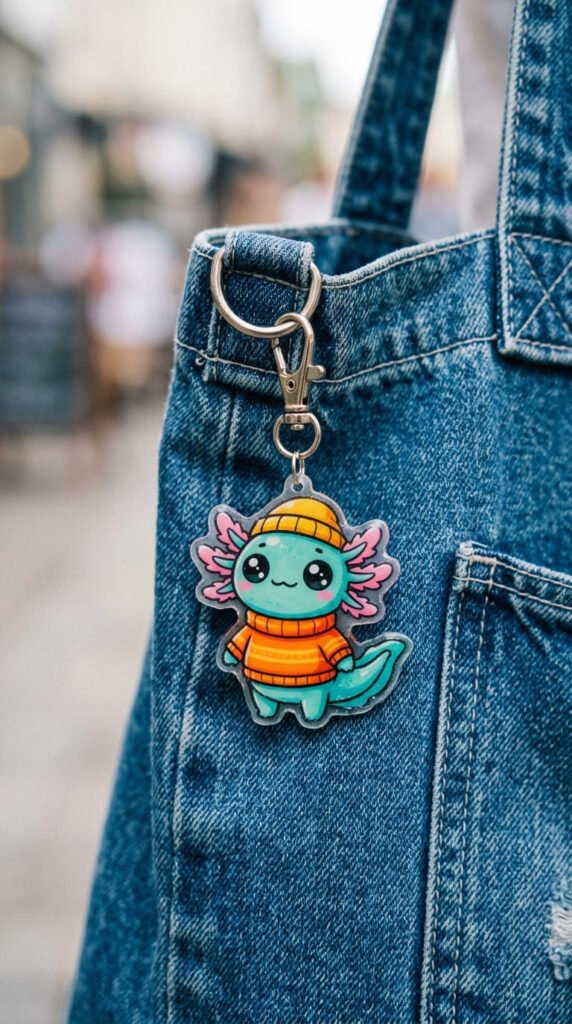
Draw your own cute character for a one-of-a-kind keychain.
Keep it simple. A round body, big eyes, a little smile.
You can invent a creature or draw a stick-style buddy.
Color it in fun tones.
Punch the hole, then bake.
Budget tip: original doodles are free and make your keychains truly unique.
These feel personal because no one else has the same one.
Make a little cast of characters.
Give them names for extra fun.
Keep the design bold and rounded.
A custom buddy to carry around.
22. Mini Map or Location Keychains
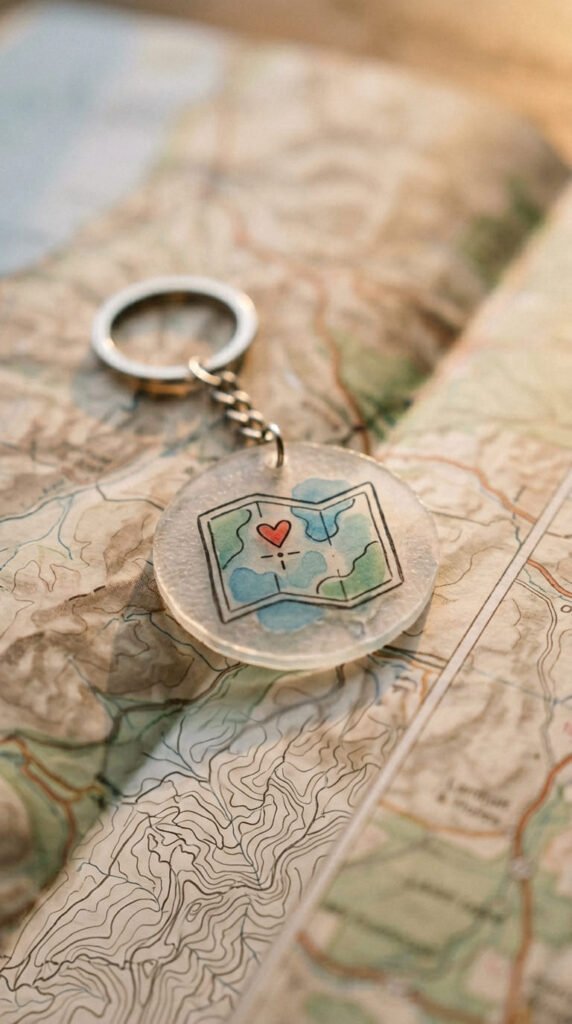
A location keychain marks a place that matters.
Draw a simple outline of a country, state, or city shape.
Add a little heart on the special spot.
Keep it bold and clean.
Color it in.
Punch the hole, then bake.
Budget tip: trace a map outline online for a clean, free template.
These make sweet gifts for travelers or long-distance friends.
Mark a hometown or a favorite trip spot.
Make a pair for two people in different cities.
Keep the shape simple so it reads after shrinking.
A small charm tied to a big memory.
Conclusion
Shrinky dink keychains prove that the simplest crafts are often the most fun. A sheet of shrink plastic, a few markers, and a quick bake turn your doodles into glossy, durable charms in minutes. Start with an easy one like a name tag or a smiley face. Then work up to photo keychains, pet portraits, and matching sets as you get the hang of the shrink. Every idea here is cheap, fast, and perfect for gifts or party activities. Grab a sheet this week, draw something you love, and watch it shrink into a little treasure you’ll want to make again and again.


