There’s nothing worse than spending time on a cute shrinky dink design, only to pull it out of the oven and find the colors went muddy, patchy, or rubbed right off. The good news? A few simple tricks fix all of that. The secret isn’t fancy supplies. It’s knowing which medium to use, how to prep the surface, and how to seal it after baking. Get those three things right and your designs come out bold, glossy, and built to last.
Let’s get into it.
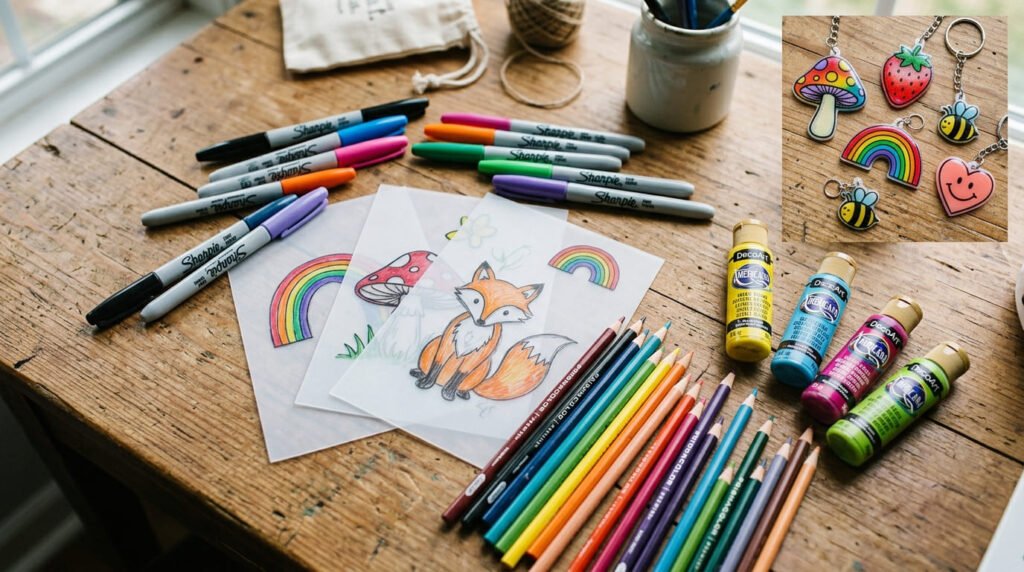
Pick the Right Coloring Tool
Your tool choice shapes the whole look. Here’s the quick breakdown:
- Permanent markers (Sharpies): Best for bold outlines and bright, fast fills. The go-to for clean, vibrant designs.
- Colored pencils: Best for soft shading and gradients. They give you more control and a gentle, artistic finish.
- Acrylic paint: Best for solid, opaque color. Often used to fill in after baking.
There’s no single winner. It depends on the look you want.
Want crisp cartoon-style charms? Reach for markers. Love soft, blended color? Pencils are your friend.
Budget tip: you likely already own Sharpies and colored pencils, so you can start without buying a thing.
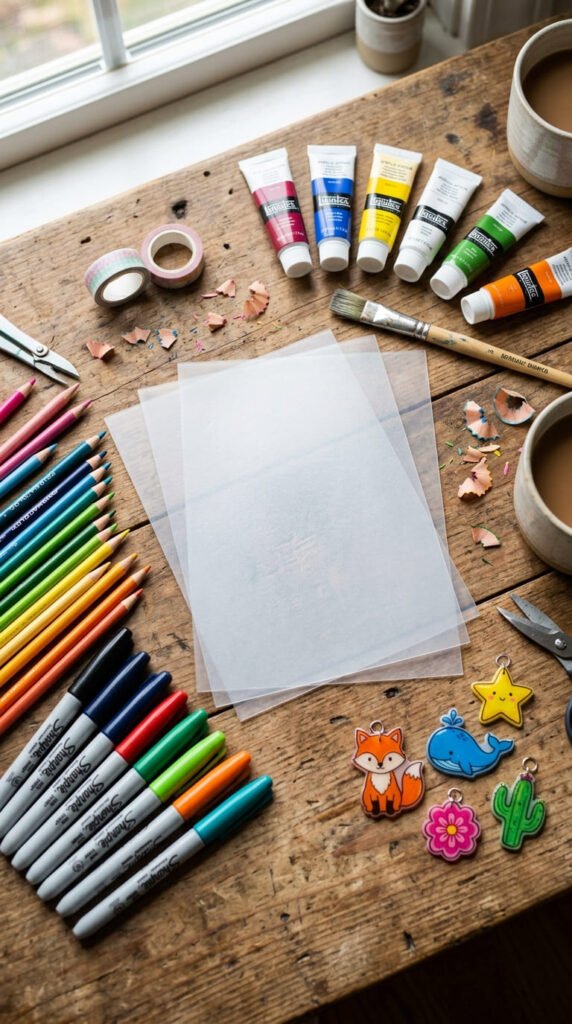
Prep the Surface First
This is the step most beginners skip. And it’s the one that makes the biggest difference.
Shrink plastic has a smooth side and a rougher, frosted side.
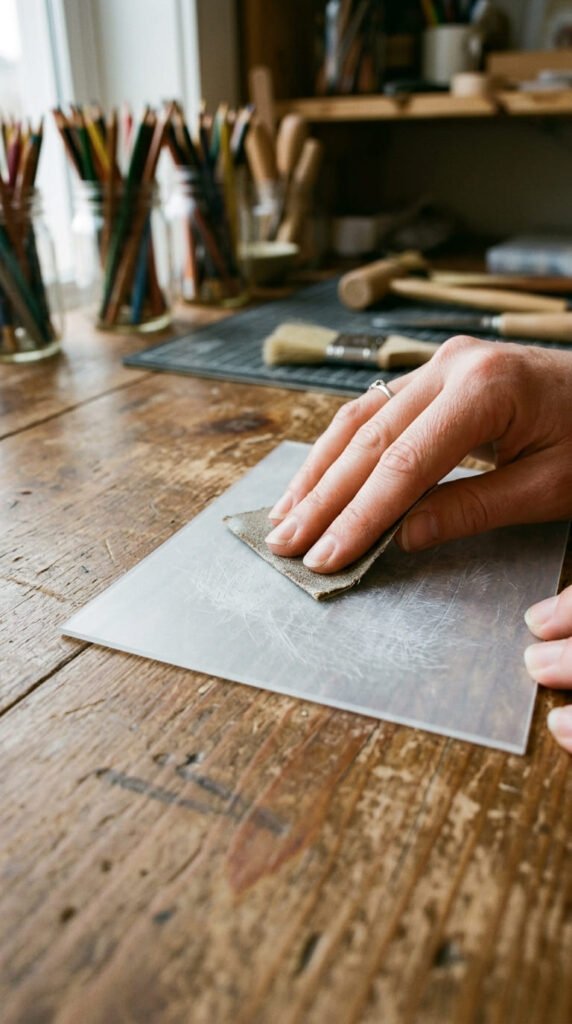
- Colored pencils need the rough side. The texture grips the pigment. Smooth plastic just won’t hold pencil.
- If your sheet feels slick all over, lightly sand it with fine sandpaper. A few passes in different directions is enough.
- Markers work on either side, but the frosted side still helps colors sit evenly.
Scuffing the surface helps every medium stick better. It takes ten seconds and saves you from patchy results.
Budget tip: any fine sandpaper from the garage works. No need to buy special grit.
Outline First, Then Fill
A clean outline makes any design look polished.
Here’s the workflow most creators swear by:
- Draw your black outline first with a permanent marker.
- Let it dry for a moment so it doesn’t smear.
- Fill in the color with pencils, markers, or paint.
This keeps your shapes sharp and stops colors from bleeding past the lines.
For shading, build color in light layers. Press harder where you want it deeper.
Don’t overload one spot. Even, gentle pressure looks better than heavy patches.
Remember: Colors Get Darker
Here’s the part that surprises everyone.
When shrink plastic shrinks, the design shrinks too. All that color squeezes into a smaller space.
So your colors come out much darker and more intense after baking.
That pretty medium blue? It bakes into a deep navy.
To avoid surprises:
- Color lighter than you think you need. The bake does the rest.
- Test swatches first. Color a small scrap, bake it, and see how each shade shifts.
- Keep a little reference chart of your before-and-after colors.
This one tip saves so much frustration. A quick test bake is worth it every time.
Budget tip: use the trimmed-off scraps from your sheet as free test swatches.
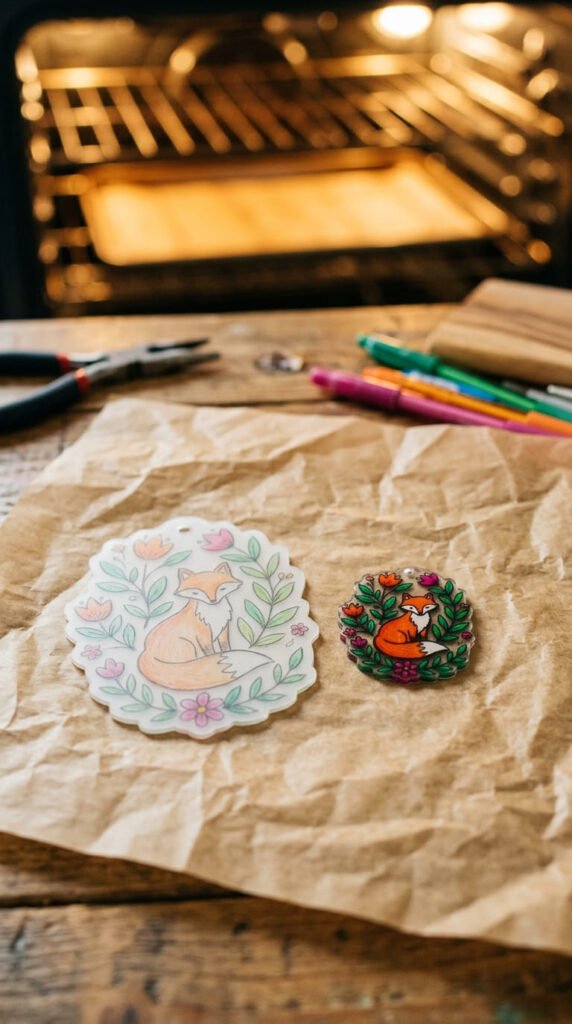
Bake It Flat and Even
Heat affects how your color sets, so the bake matters.
- Lay your piece on parchment paper so it doesn’t stick.
- Bake around 325°F for 1 to 3 minutes.
- It will curl up, then flatten back down. That’s normal. Don’t panic.
- Once it lies flat, give it about 30 seconds, then take it out.
If it curls and sticks to itself, gently uncurl it with a toothpick while warm.
Press it flat with a flat object once it’s out for an extra-smooth finish.
Using Acrylic Paint Without Bubbles
Acrylic gives rich, solid color, but it has one quirk.
Painted straight from the tube, it can go bubbly and uneven.
The fix is simple:
- Thin the paint with a tiny bit of water first.
- Apply in thin, even coats.
- Let each coat dry before adding the next.
Many people paint after baking, filling in behind the outline for a stained-glass effect.
Build up the color slowly. Thin layers always beat one thick, gloopy coat.
Seal It So the Color Lasts
This is the step that stops your hard work from rubbing off.
Once your piece is cool, add a clear protective layer:
- A clear coat spray or brush-on sealer
- A glaze product like Diamond Glaze for a thick, glassy shine
- Even clear nail polish works in a pinch
Sealing locks in the color and adds a glossy finish.
It protects pencil and marker work, which can otherwise smudge or flake.
Budget tip: clear nail polish you already own does the job for free.
Let the seal dry fully before attaching any hardware.
Your Turn to Make Something Bright
Vibrant, sharp shrinky dinks come down to a simple routine: pick the right tool, scuff the surface, outline then fill, color lighter than you think, bake flat, and seal once cool. Nail those steps and your designs come out bold and glossy every single time. The best way to learn the color shift is to just try it. Grab a scrap, color a quick swatch, and bake a test piece today.
Save this guide for your next craft session, and snap a before-and-after of your colors!


