Clay decor is having a real moment, and the best part is how little it costs to start. With a cheap block of air-dry clay and your own two hands, you can make trays, vases, and wall pieces that look handmade in the good way. No kiln. No fancy tools. Just earthy, aesthetic room decor you actually use. From trinket trays to terracotta-toned wall art, here are 23 simple ideas to style every corner of your home on a small budget.
1. Air-Dry Clay Trinket Tray
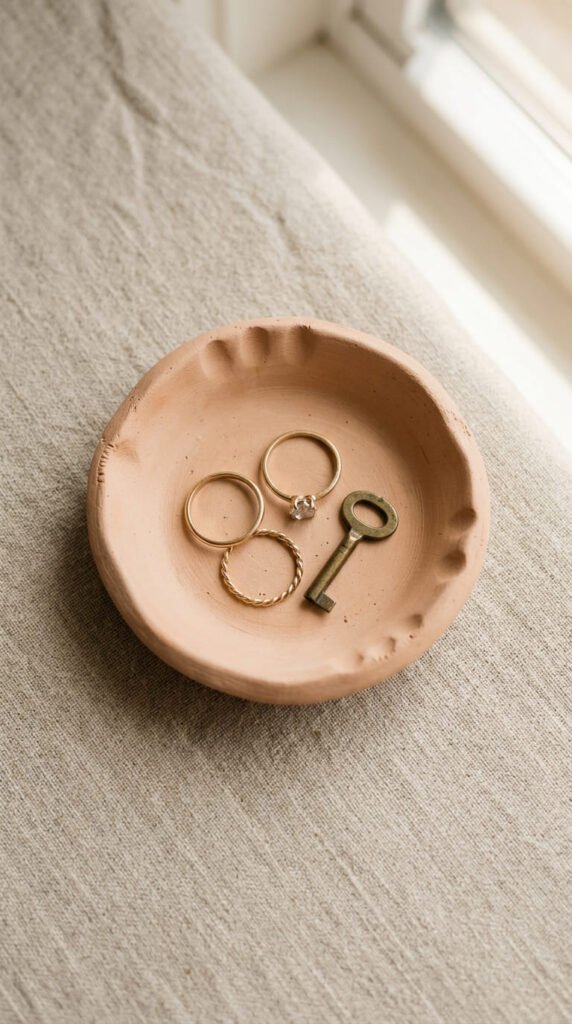
Start here if you have never touched clay. A trinket tray is the easiest win.
Roll out a flat circle. Press a small bowl on top to mark the size. Then gently lift the edges to make a shallow lip.
Let it dry overnight. Sand it smooth the next day.
You can leave it raw for that natural look. Or paint the inside a soft color and keep the rim earthy.
Budget tip: one $5 block of clay makes three or four trays. Make a few and gift the extras.
Use it for rings, keys, or earrings by the door. Drop it on your desk for paper clips and coins.
Want it fancier? Press a real leaf into the surface before drying. Peel it off once firm. You get a soft botanical imprint with zero skill.
These trays photograph beautifully on a shelf. That is why they show up everywhere on craft reels.
Keep the shape a little wobbly. Handmade and imperfect is the whole point.
2. Pinch Pot Ring Dishes
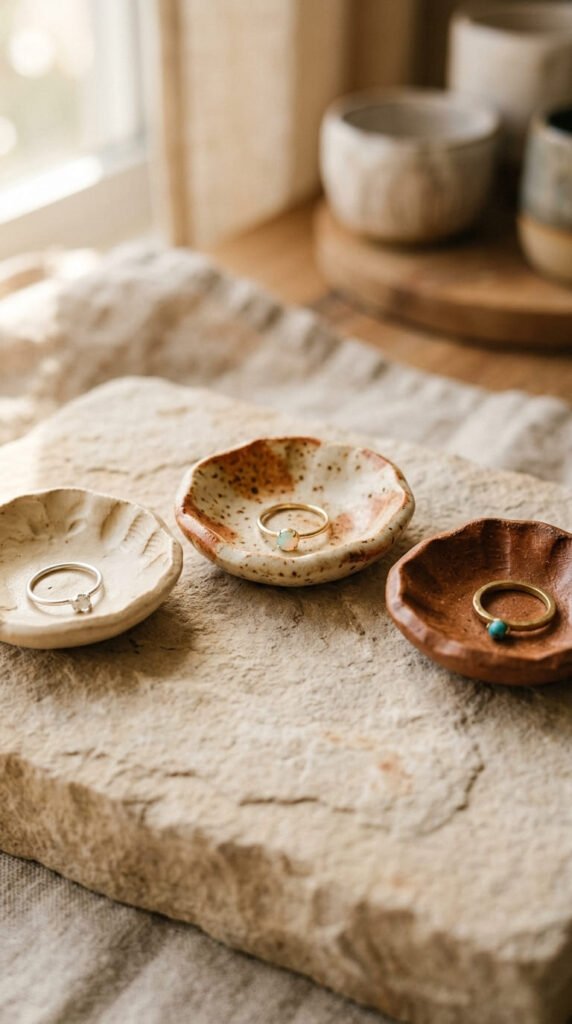
A pinch pot is the oldest trick in clay. It is also one of the cutest.
Roll a ball about the size of a golf ball. Push your thumb into the center. Then pinch the walls outward, turning as you go.
That is it. You have a little dish in five minutes.
These mini ring dishes are perfect for tiny things. Stud earrings. A single ring. A spare button.
Make a whole set in slightly different sizes. Line them up on a windowsill.
Budget tip: this uses almost no material, so it is a great way to use leftover scraps.
Keep the thumbprint marks visible. They give it that warm, handmade feel that store-bought dishes never have.
Paint just the inside if you want a pop of color. Dip the rim in a muted glaze-look paint for a softer edge.
These also make sweet little gifts. Tuck a ring inside and you have a present that feels personal.
Quick to make. Quick to love.
3. Textured Clay Coasters
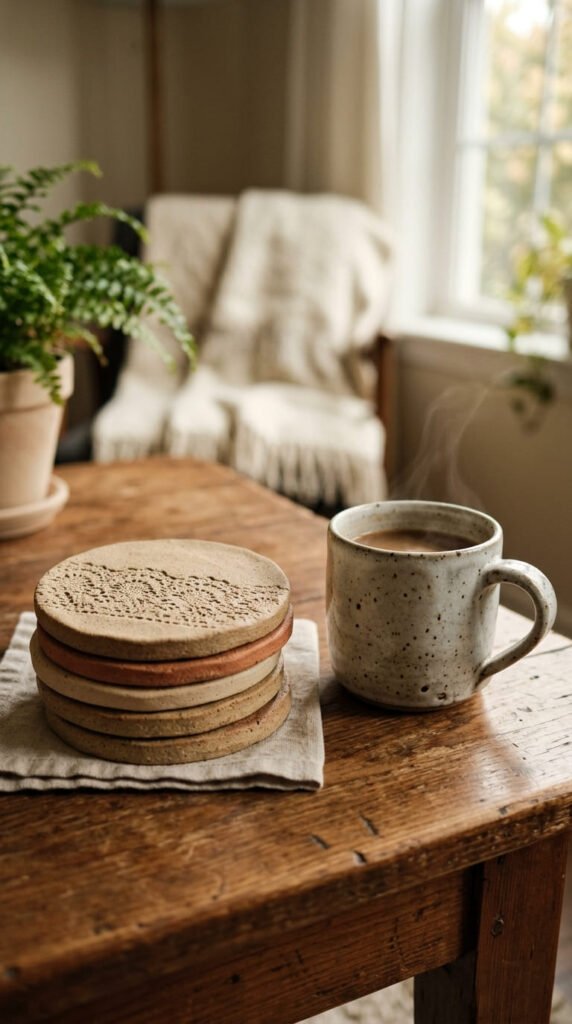
Coasters are useful, cheap, and weirdly fun to make.
Roll your clay flat and even. Aim for about a quarter inch thick so they sit sturdy.
Cut circles or squares using a cup rim or a cookie cutter. Smooth the edges with a damp finger.
Now add texture. Press a piece of lace, a doily, or a textured fabric into the surface. Peel it off and you get a soft pattern.
Let them dry fully. This takes a day or two for thicker pieces.
Budget tip: seal them with a cheap matte sealer or even a few coats of clear nail polish. This stops water rings.
Glue a small felt circle on the bottom. It protects your table and stops scratches.
Make a matching set of four. Stack them with a little ribbon for a tidy gift.
Keep the tones earthy and warm so they suit any table.
These look great in photos and even better under a morning coffee.
4. Clay Fridge Magnets
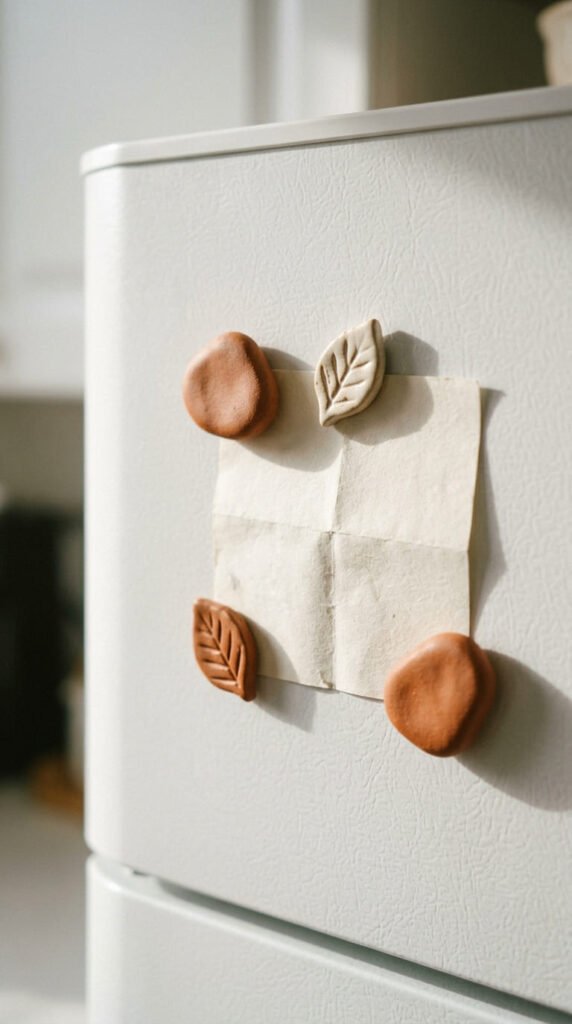
Magnets are the perfect tiny project. Great for using up clay scraps.
Shape small flat pieces. Try pebbles, leaves, little hearts, or simple geometric blobs.
Keep them under two inches so they stay light.
Let them dry. Then paint them in soft earthy tones or a single bold color.
Glue a small magnet to the back. You can buy a pack of strong round magnets cheaply online.
Budget tip: one bag of magnets makes dozens of these, so the cost per piece is tiny.
Use them to pin notes, photos, or your weekly list. They beat the boring plastic ones that came free.
This is also a brilliant project to do with kids or a younger sibling. Low mess, fast results, big smiles.
Make a themed set. Try all leaves for a nature look. Or all pebbles for a calm, minimal vibe.
Group three or four on the fridge for a styled little cluster.
Small effort. Cheerful payoff every time you grab a snack.
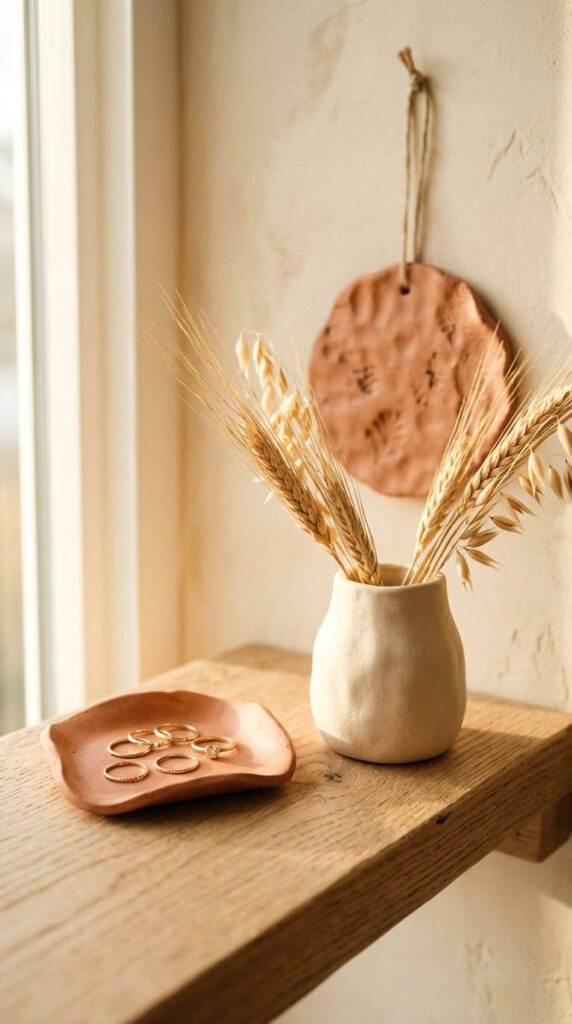
5. Pinch-Pot Vases for Dried Stems
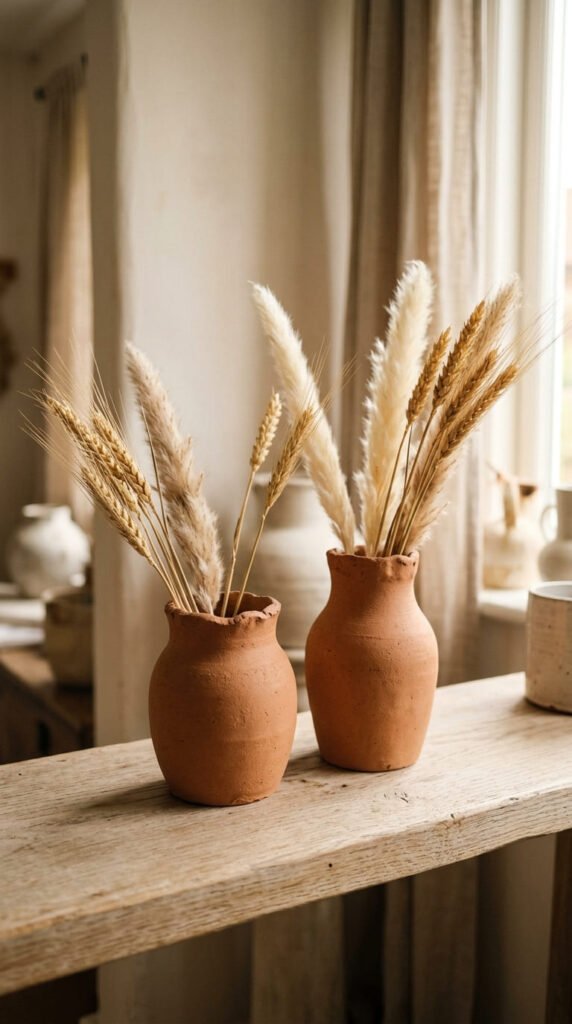
A tiny vase makes any shelf look styled. And dried stems mean zero watering.
Build a small pot by coiling thin ropes of clay. Stack them in a ring and smooth the seams with your thumb.
Or just shape a thick pinch pot with a narrow opening.
Keep it small. Three to five inches is plenty for dried flowers.
Let it dry slowly so it does not crack.
Here is the key: air-dry clay is not waterproof. So skip fresh flowers unless you line it.
Budget tip: drop a small glass jar or test tube inside if you ever want real stems and water.
Fill it with pampas, wheat, or dried lavender. These cost little and last for months.
Paint it a warm clay tone or leave it raw and natural.
Group a couple in different heights. Odd numbers always look better.
Place one on a desk, a bookshelf, or a bathroom counter.
A small vase, a few stems, and suddenly the corner looks intentional.
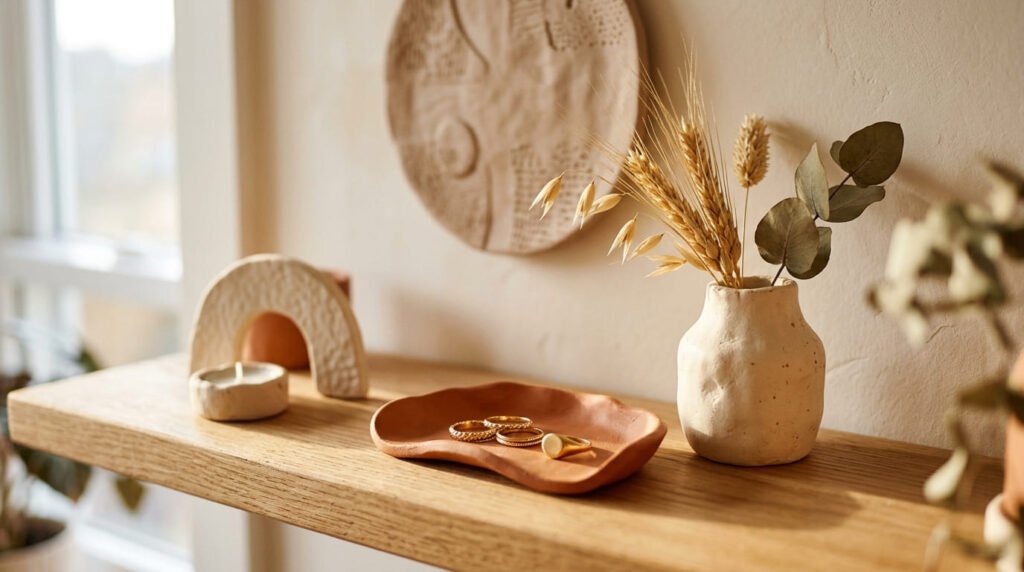
6. Clay Jewelry Holder Hand Stand

A clay jewelry holder keeps your favorite pieces off the counter and on display.
The hand-shaped stand is the trendy one. Shape a flat palm with fingers curving gently up. Prop the fingers on a rolled towel while it dries so they hold their pose.
Too tricky? A simple ring cone is easier. Just shape a smooth tapered cone. Slide rings down it.
You can also make a small dish with a tall center post for hanging necklaces.
Let it dry fully, since thicker shapes take time.
Paint it a soft neutral or a warm terracotta. Add a hint of gold on the fingertips for a styled touch.
Budget tip: this replaces those overpriced trinket stands at home stores for a fraction of the cost.
Set it on your dresser or bathroom shelf. Drape a couple of dainty chains over it.
It works as decor even when empty. The shape alone looks like art.
A practical piece that doubles as a little sculpture.
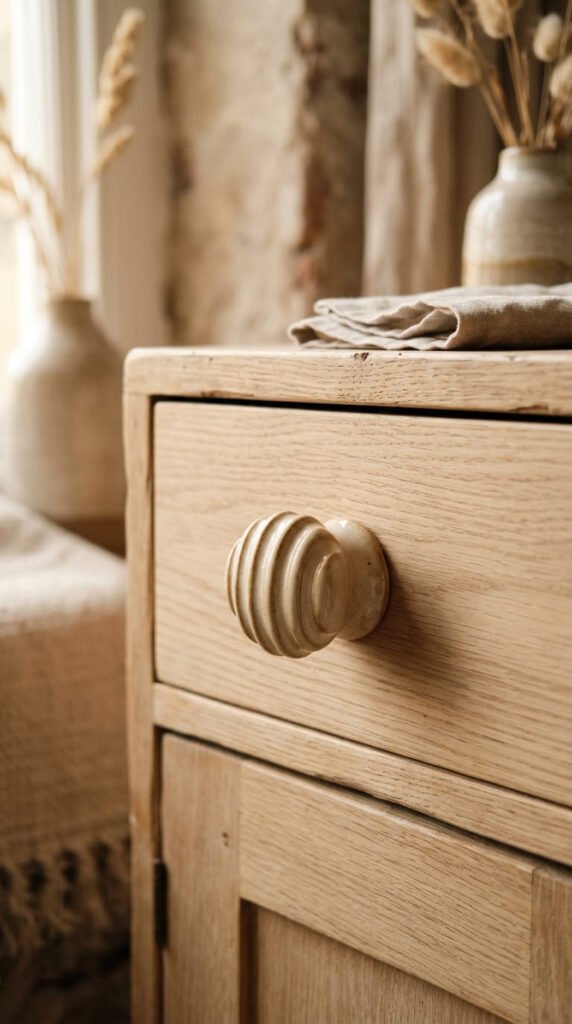
7. Clay Drawer Knobs
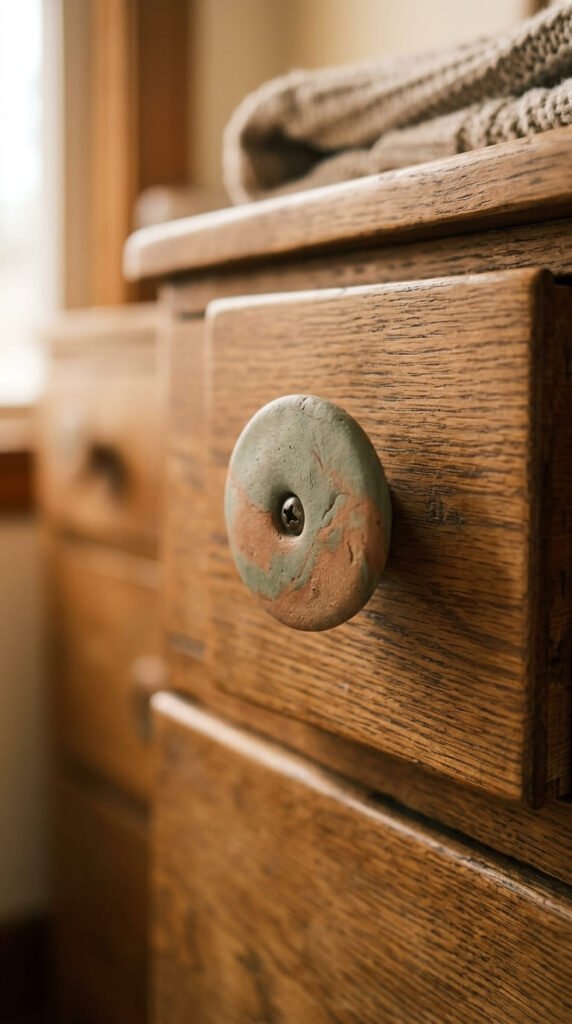
Swapping drawer knobs is one of the fastest ways to refresh old furniture.
Clay knobs let you do it on a tiny budget.
Shape small rounded knobs. Keep them simple: a dome, a flat disc, or a little fluted shape.
Here is the trick. Press a screw or bolt into the back while the clay is wet. Let it set around the threads.
Once dry, that gives you something to mount with.
Budget tip: reuse the screws from your old knobs so you spend nothing on hardware.
Sand them smooth. Paint them to match your room or keep them raw and earthy.
Seal the surface so they hold up to daily hands.
Use them on a dresser, a cabinet, or a bedside drawer.
A whole set turns a plain piece into something that looks handmade and custom.
This is a renter-friendly idea too. Keep the originals and swap them back when you move.
Small change. Big shift in how the furniture feels.
8. Wall-Mounted Clay Hooks
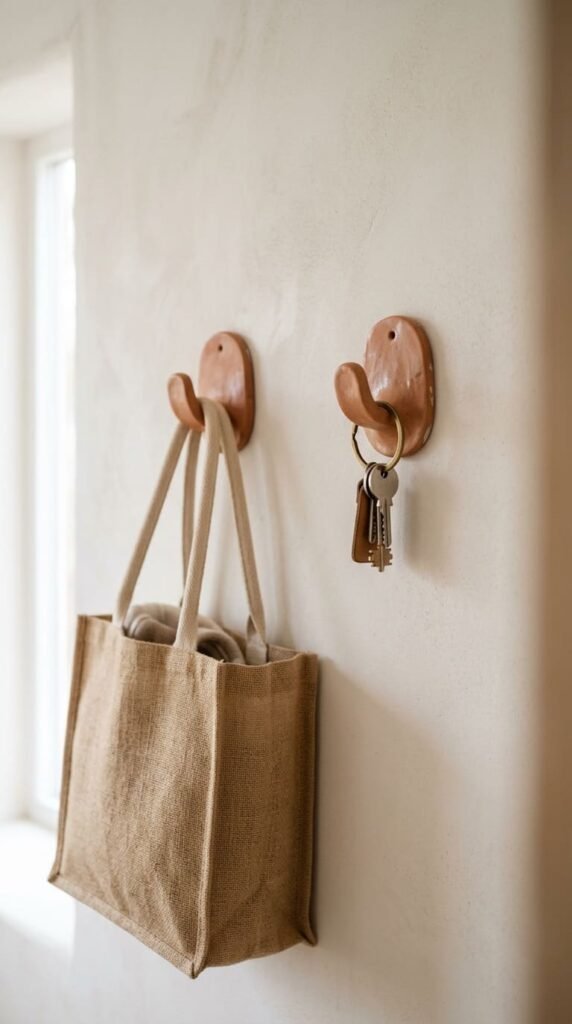
Hooks are decor that earns its place on the wall.
Make a flat backing shape. A circle, an arch, or an organic blob all work.
Press a sturdy hook or a bent piece of wire into the clay before it dries. Make sure it sits deep so it holds weight.
Add a small hole at the top for mounting, or plan to glue it up later.
Budget tip: cheap cup hooks from a hardware store cost almost nothing and work perfectly here.
Let it dry hard. Thicker backing means it can take more weight.
Paint it a warm earthy tone to match your entryway.
Mount one by the door for keys. Add a couple in the bathroom for towels. Line a few up for bags or jackets.
These look far nicer than plastic stick-on hooks.
Keep the shapes a little organic and uneven. That handmade feel is what makes them charming.
Useful, pretty, and quick to make in an afternoon.
9. Clay Key Bowl for the Entryway
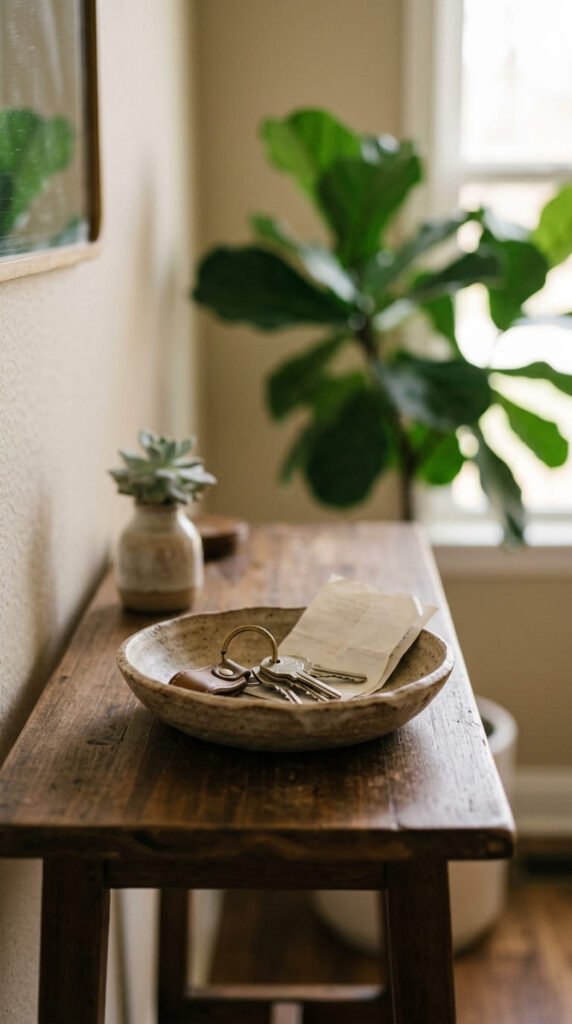
Every entryway runs better with a spot to drop your stuff.
A clay key bowl is that spot, and it looks good doing it.
Roll out a slab and shape a wide, shallow bowl. Keep the sides low so keys and coins are easy to grab.
Let the edges stay a little wavy. That organic shape is the look right now.
Smooth the inside so nothing snags.
Budget tip: make it bigger than a trinket tray to catch more daily clutter, all from one cheap block.
Dry it fully. Then paint or leave it natural.
Set it on your console table or entry shelf.
Now your keys, wallet, and loose change have a home. No more frantic morning searches.
Add a tiny dish next to it for rings you take off at the door.
Style it with a small candle or a short vase beside it.
A simple bowl that quietly keeps your entryway calm and tidy.
10. Clay Desk Organizer and Pen Pot
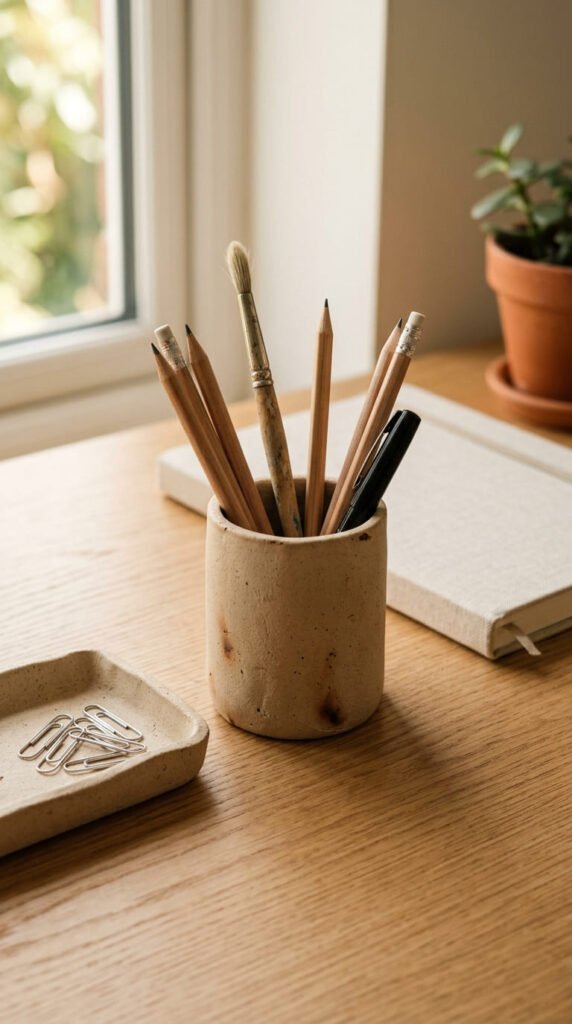
A clay pen pot makes a desk feel grown-up and styled.
Build a small cylinder. Roll a slab, wrap it into a tube, and press a flat circle on the bottom. Smooth the seam well so it does not split.
Or coil it up for a textured look.
Keep it tall enough to hold pens upright but not so tall it tips.
Pair it with a small flat tray for clips, pins, and sticky notes.
Budget tip: one block of clay makes a full matching desk set, far cheaper than buying organizers.
Let everything dry. Sand the rims smooth.
Paint them in muted earthy tones so they calm the space instead of cluttering it.
Set the pot in the corner of your desk. Add the tray beside it.
Suddenly your pens are not rolling everywhere and your desk looks intentional.
This is a great starter project because the shapes are forgiving.
Functional storage that also reads as aesthetic decor.
11. Clay Candle and Tealight Holders
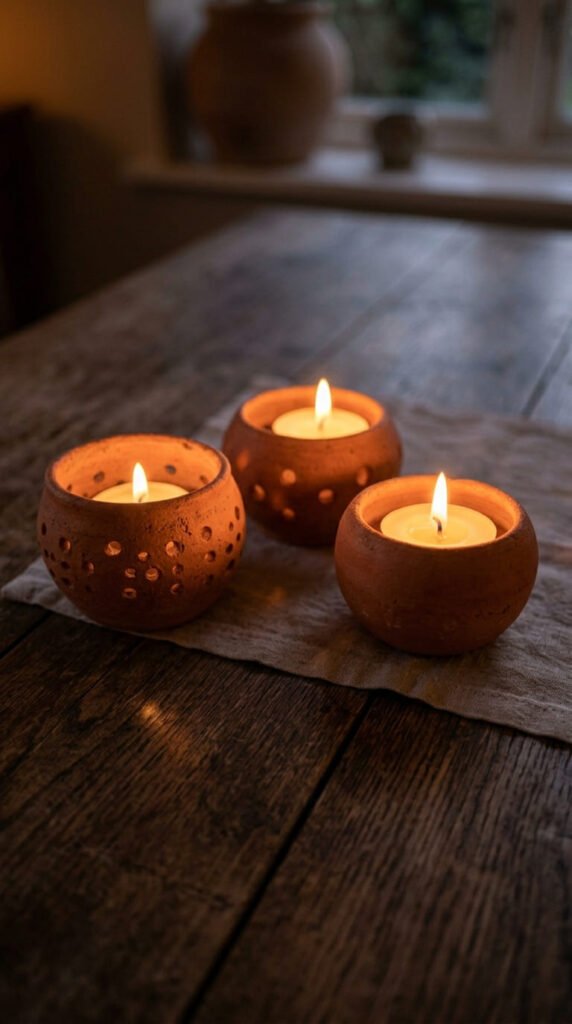
Nothing makes a room feel cozy faster than warm candlelight.
Clay tealight holders are simple and safe when made right.
Shape a small thick cup just big enough to hold a tealight. Press the candle in while shaping to size the hole correctly.
Keep the walls a little thick. This holds the heat safely and feels sturdy.
Always use a metal-cased tealight so the flame never touches the clay directly.
Budget tip: a bag of tealights is cheap, and one block of clay makes a whole cluster of holders.
Let them dry hard. Then paint them in warm clay tones or leave them raw.
Add a soft texture with a fork or a stamp before drying.
Group three or five together on a tray. Odd numbers look best.
Light them in the evening for an instant warm glow.
These also make lovely gifts paired with a candle or two.
Keep an eye on any open flame, as always.
Simple, snug, and full of mood.
12. Clay Incense Holders
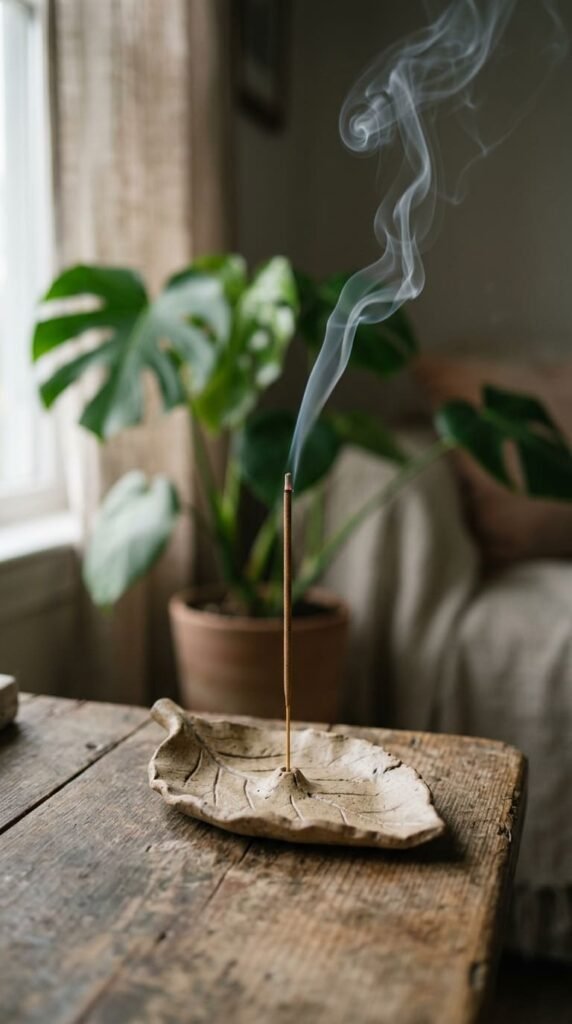
If you love incense, a handmade holder beats the flimsy ones you usually get.
Shape a small flat base. A leaf, a pebble, or a little dish all work well.
Poke a hole for the incense stick while the clay is soft. Use a toothpick and angle it slightly.
Make a shallow channel or lip to catch the ash.
Let it dry fully so it sits flat.
Budget tip: this is a near-zero-cost project since it uses just a scrap of clay.
Paint it a calm earthy tone or leave it natural for a grounded look.
Seal it if you want, though ash wipes off easily.
Set it on a windowsill, a desk, or a meditation corner.
Light a stick and let the thin smoke curl up.
The organic shape makes it look like a small piece of art even when not in use.
Make a couple in different shapes for variety.
A tiny, calming object that does a real job.
13. Pebble Soap Dishes
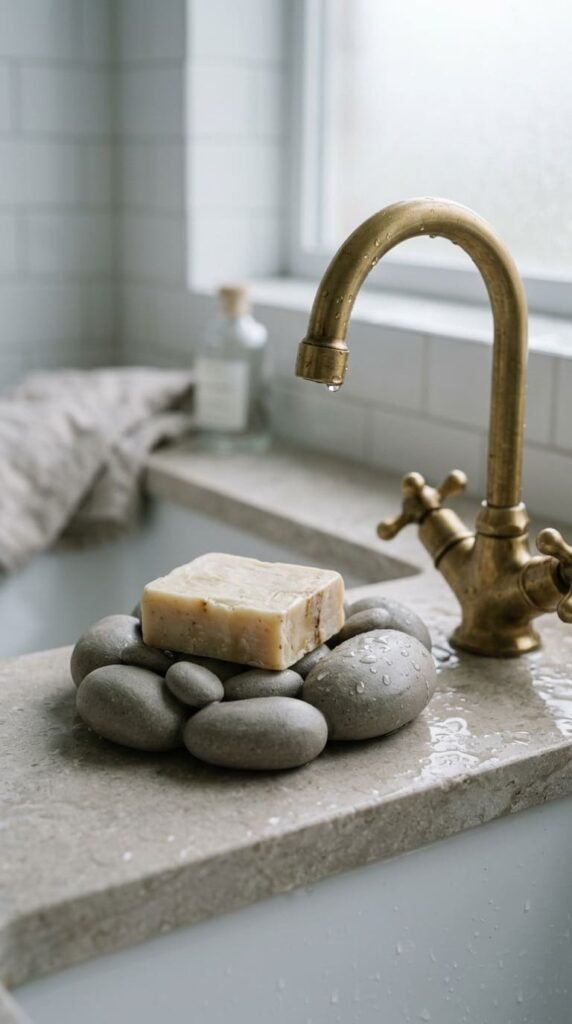
A clay soap dish brings a calm, spa feel to the bathroom.
Shape a flat base with a few raised bumps. The bumps lift the soap so water drains and the bar dries faster.
Pebble shapes look natural and soft. Make a small cluster of rounded mounds on the dish.
Here is the catch. Air-dry clay soaks up water. So seal it well with a waterproof sealer before use.
A few coats matter here. Let each one dry.
Budget tip: a small bottle of sealer lasts through many projects, so the per-piece cost stays low.
Keep the tones soft and earthy to suit any bathroom.
Add tiny rubber feet underneath to keep it off the wet counter.
Set your favorite bar soap on top.
Empty the little pool of water now and then so it stays fresh.
This small detail makes the whole sink area look styled.
Quietly practical, quietly pretty.
14. Clay Catchall with a Faux Marble Look
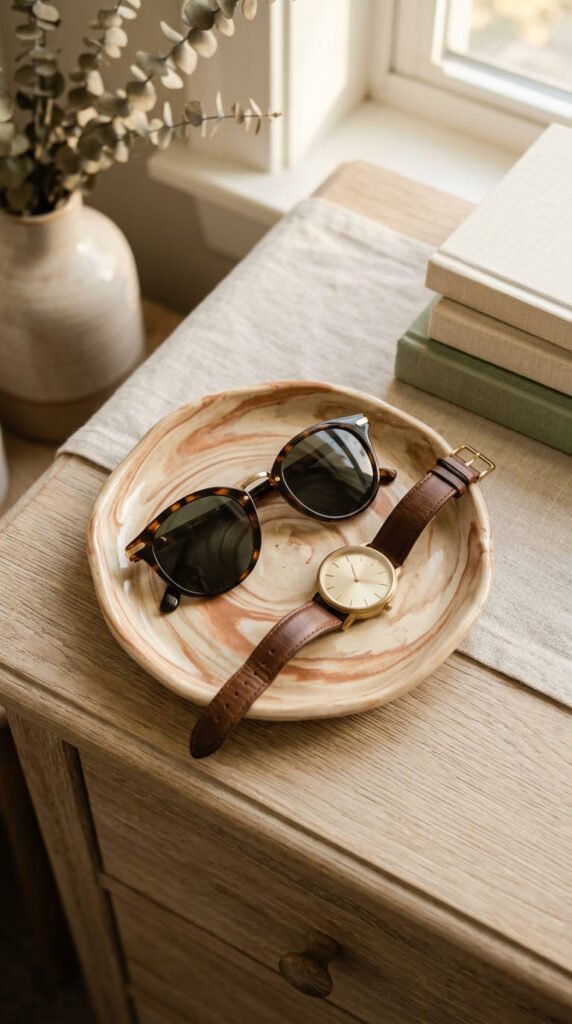
A catchall is a slightly bigger trinket tray that holds your everyday carry.
The fun part here is the faux marble effect.
Take two or three clay colors. Roll thin ropes of each. Twist them together loosely, then roll them flat.
Do not over-mix. You want soft swirls, not mush.
Shape it into a shallow dish with a gentle lip.
Budget tip: mix a little paint or food color into white clay to make your own tones instead of buying colored packs.
Let it dry. Sand it smooth so the marble pattern shines.
Seal it for a soft sheen.
Set it on your dresser for a watch, sunglasses, and spare change.
Or use it on the desk for daily bits.
The marbled swirl makes a cheap clay dish look like a designer piece.
No two ever come out the same.
Roll, twist, flatten, shape. That simple.
15. Clay Napkin Rings
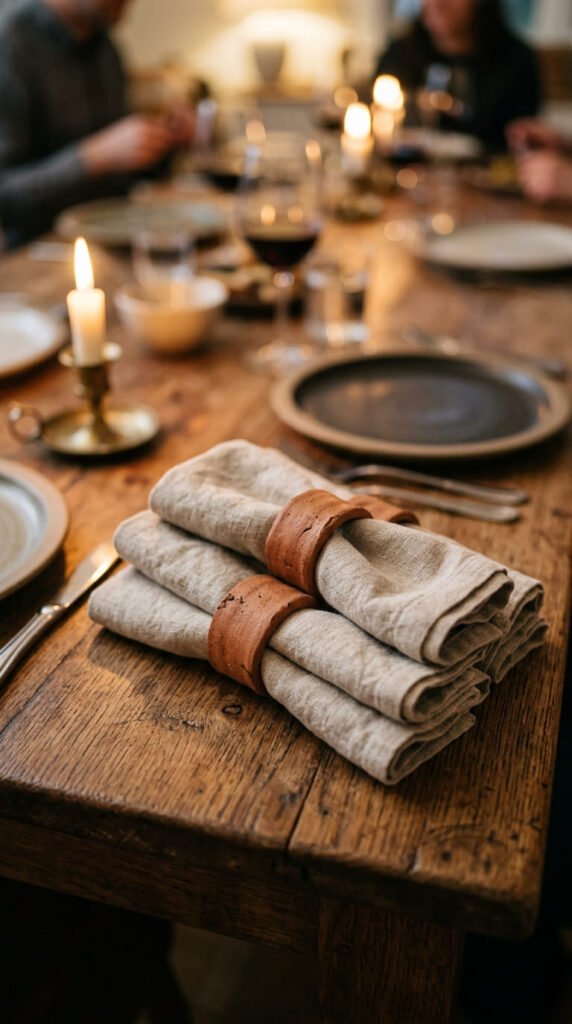
Napkin rings sound fancy but are one of the easiest projects going.
Roll a clay rope. Wrap it around a marker or a small bottle to make a ring. Smooth where the ends meet.
Slide it off once it holds shape. Let it dry on the form.
Keep them all roughly the same size for a matching set.
Budget tip: a single block makes a full set of six, perfect for hosting on a small budget.
Paint them a warm earthy tone or leave them natural and raw.
Press a tiny leaf or texture in before drying for a soft detail.
These turn a plain dinner table into something that feels thought through.
Use them for holidays, dinner parties, or just a cozy weekend meal.
Pair them with simple linen napkins for that handmade, homey look.
Store them in a small box between uses.
A quick craft that makes your table feel special.
16. Plant Pot Markers
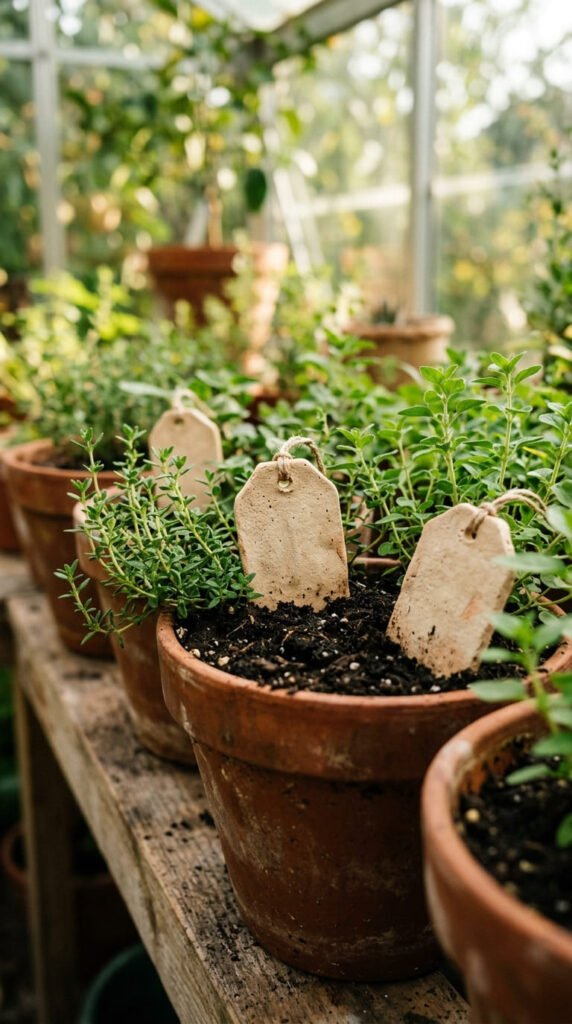
If you grow herbs or houseplants, little clay markers keep things tidy and cute.
Roll out a thin slab. Cut small tag or leaf shapes. Add a pointed bottom so they push into soil.
You can press a simple symbol in before drying. A leaf shape for basil. A flower for mint.
Or just shape them differently for each plant.
Let them dry hard and seal them, since they live in damp soil.
Budget tip: these use tiny scraps, so a leftover handful of clay makes a dozen.
Keep them natural or paint the tops in soft muted colors.
Push them into your pots beside each plant.
They look far better than plastic stakes from the garden center.
Group your potted herbs on a sunny sill with these markers in place.
The whole arrangement looks styled and intentional.
Great for the kitchen window or a small balcony garden.
Tiny, charming, and genuinely useful.
17. Clay Photo and Card Stands

A little stand for photos or cards adds a personal touch to any shelf.
Shape a small base. Press a thin slot into the top while the clay is soft. That slot holds a card or photo upright.
Keep the base wide enough so it does not tip.
Make a few in different shapes. A pebble, a small block, a curved wedge.
Let them dry fully.
Budget tip: print your favorite photos cheaply at home or a local shop and let these stands show them off.
Paint them a soft neutral or keep them raw and earthy.
Use them for photos, postcards, or little prints.
Swap the card out whenever you like. It keeps the shelf feeling new.
Line a few along a mantel or bookshelf.
They also display recipe cards in the kitchen or a daily note at your desk.
Small, simple, and full of personality.
A sweet way to show off the things you love looking at.
18. Hanging Clay Wall Discs
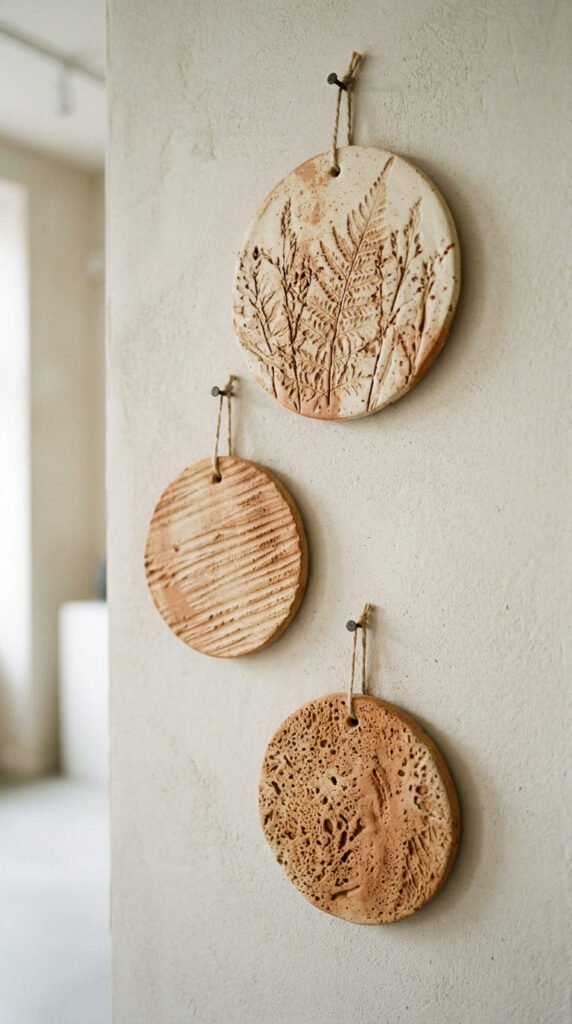
Want easy wall decor with real impact? Hanging discs are the answer.
Roll out flat circles in a few sizes. Press a hole near the top of each for hanging.
Now add interest. Stamp a texture, press a leaf, or carve a simple line pattern.
Let them dry flat so they do not warp.
Thread jute string or thin cord through the holes.
Budget tip: a single block makes several discs, giving you a whole wall display for a few dollars.
Paint them in warm earthy tones, or mix raw and painted for contrast.
Hang them in a vertical line. Or cluster them in a loose triangle.
The empty wall above a desk or bed is perfect for this.
It fills space without the cost of framed art.
The organic shapes feel calm and handmade.
Keep the spacing a little uneven for a natural, gallery look.
Big visual change, tiny effort.
19. Geometric Clay Wall Tiles
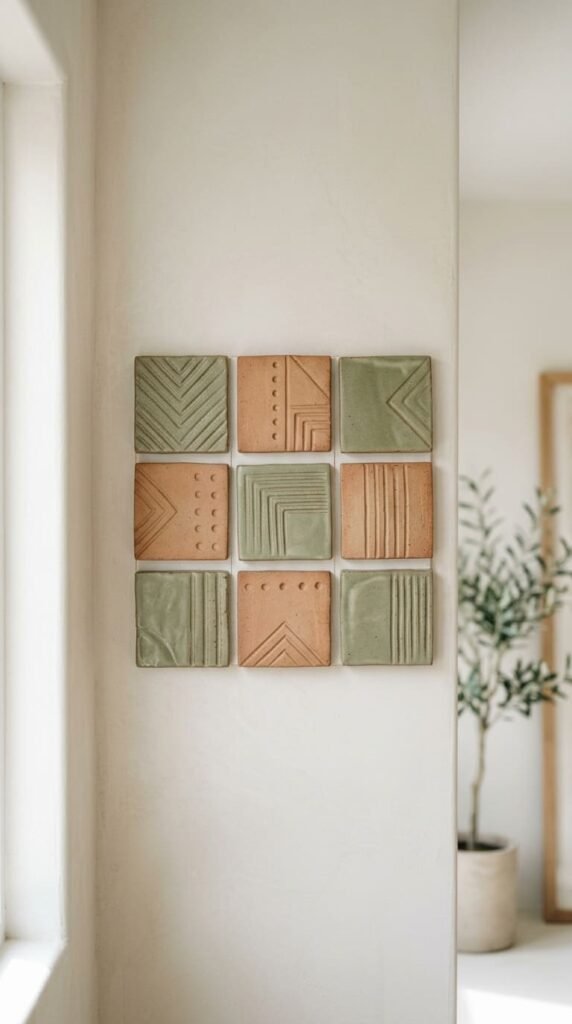
For a more modern look, try a small set of wall tiles.
Cut even squares or hexagons from a flat slab. A ruler and a knife keep the edges crisp.
Carve a simple pattern into each one. Lines, arches, or little dots all work.
Keep the design consistent so they read as a set.
Let them dry flat to stay even.
Budget tip: mount them with removable adhesive strips so renters can hang them with no holes.
Paint them in soft muted tones or a single calm color.
Arrange them in a tight grid for a clean, modern panel.
This adds texture to a bare wall without buying pricey art.
It works above a sofa, a desk, or a bed.
The repeated geometric shapes feel intentional and styled.
Mix two colors for a subtle checker effect if you want.
A small set goes a long way.
Modern, tactile, and easy on the wallet.
20. Organic Clay Bookends
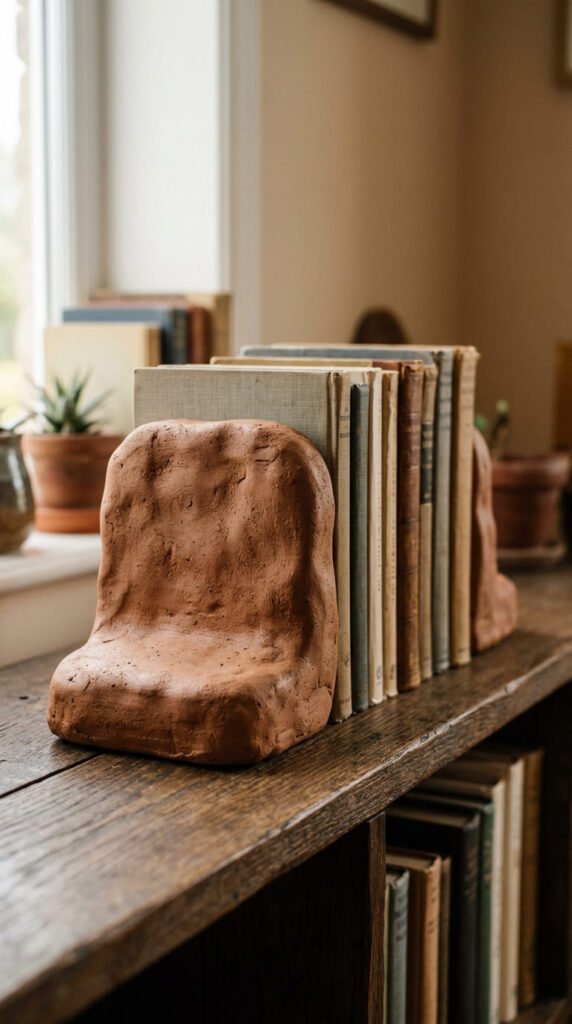
Bookends are a chance to make something chunky and sculptural.
These need to be heavy, so build them thick and solid.
Shape two organic forms. Rounded blobs, arches, or simple curved shapes all look great.
Make one flat side so they sit flush against the books.
Here is the weight trick. Tuck a small stone inside the clay as you shape it. That adds heft so books stay put.
Let them dry slowly and fully. Thick pieces take a few days.
Budget tip: use rocks from your garden for free weight inside.
Paint them in earthy clay tones or leave them raw and natural.
Set them on a shelf to hold your favorite reads.
The bold organic shapes double as decor even between paperbacks.
Make them a matching pair or two slightly different shapes for character.
These feel solid and grown-up.
A practical project that looks like a small sculpture.
21. Terracotta Pot Makeover with Clay Accents
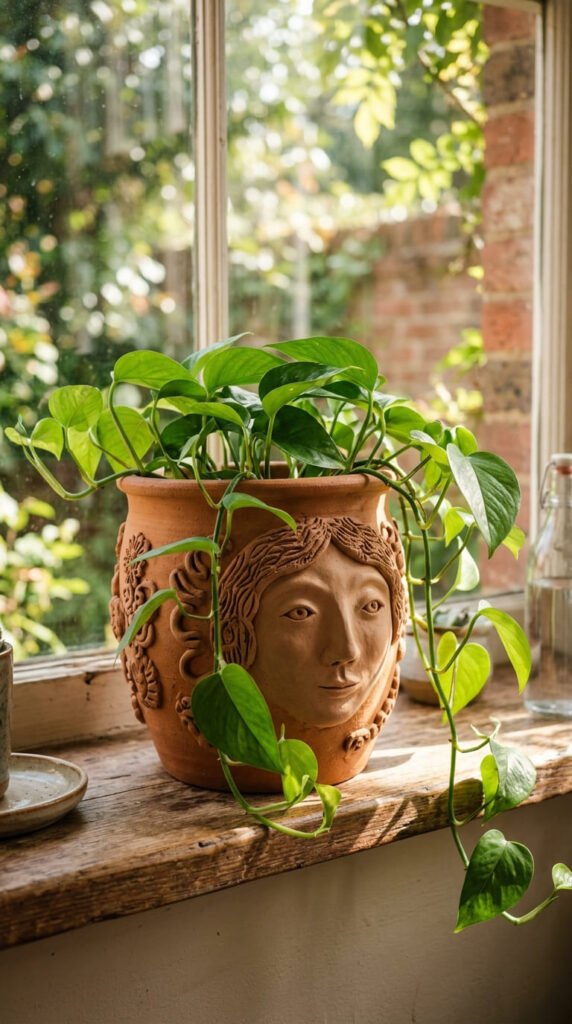
Already have a plain terracotta pot? Give it a soft makeover with clay accents.
Shape small details and attach them to the pot. Try a simple face, raised dots, or a curved relief design.
Use a little water or glue to stick the clay on. Press it firmly so it holds.
Let it dry on the pot.
Budget tip: grab cheap plain pots from a garden store or reuse old ones you already own.
Once dry, you can leave the natural terracotta tone, since it already matches the clay.
Or paint the whole thing in a soft cream for contrast.
Pop a trailing plant inside and set it on a sunny sill.
The added texture turns a basic pot into a styled piece.
This rides the warm terracotta revival look that is everywhere right now.
Make a small group of pots with different accents.
Cheap base, custom result.
A plant home that looks anything but plain.
22. Holiday Clay Ornaments
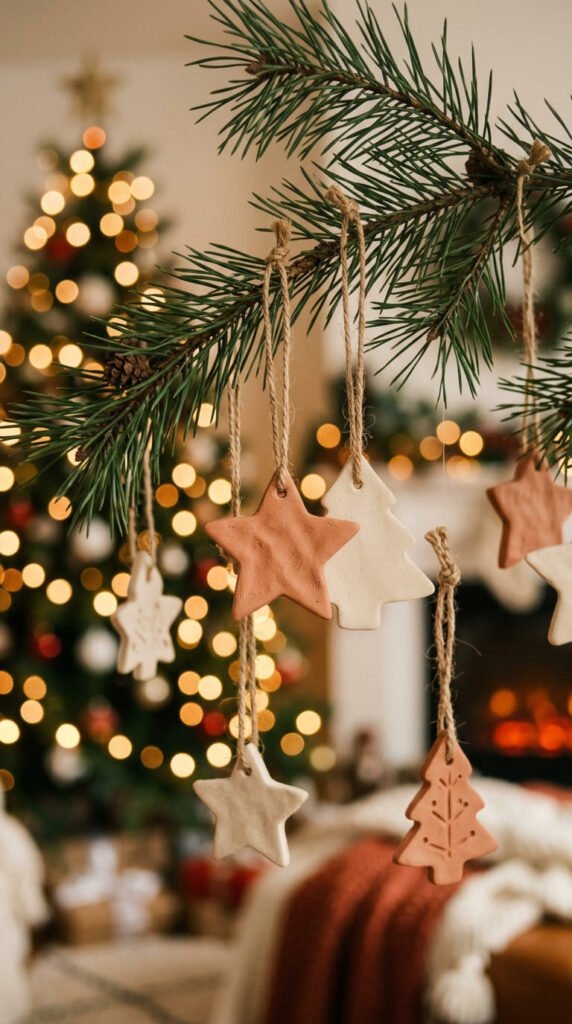
When the holidays roll around, clay ornaments are a sweet, cheap way to decorate.
Roll out a flat slab. Cut shapes with cookie cutters. Stars, trees, hearts, and simple circles all work.
Poke a hole near the top for hanging before they dry.
Press a texture or a small stamp in for detail.
Let them dry flat so they stay even.
Budget tip: one block makes a tree full of ornaments, far cheaper than store-bought sets.
Paint them in warm earthy tones, or keep them raw for a natural look. A touch of gold goes a long way.
Thread twine through the holes.
Hang them on a tree, a branch, or a garland.
These also make heartfelt handmade gifts. Tie one to a present as a tag.
Make a batch in an afternoon while music plays.
They store flat in a box for next year.
Seasonal charm that costs almost nothing.
23. Decorative Clay Knob and Drawer Pull Accents
End your project list with a small detail that ties a room together.
Sculptural drawer pulls and accent knobs add character to plain furniture.
Shape pulls with a little more flair than basic knobs. Try fluted ridges, a twist, or a soft curved bar.
Press a screw or bolt into the back while wet so you can mount it later.
Keep them sturdy and thick enough to handle daily use.
Budget tip: reuse the hardware from your old pulls so you only spend on clay.
Sand them smooth. Paint or leave them earthy and natural.
Seal the surface so they survive being touched all the time.
Fit them on a cabinet, a small dresser, or a bedside table.
A full set of matching sculptural pulls makes cheap furniture look custom.
These are renter-friendly too. Keep the originals and swap them back later.
It is the kind of small change that makes a whole room feel pulled together.
Tiny detail, big finish.
Conclusion
Clay decor proves you do not need a big budget or special skills to make your home feel warm and personal. A few dollars of air-dry clay, a little patience, and your own hands are enough to fill every room with trays, vases, hooks, and wall pieces that look genuinely handmade. Start with the easy wins like a trinket tray or some magnets. Then work up to bookends, wall tiles, and sculptural pulls as your confidence grows. Pick one idea from this list this week. Roll out a slab, shape something simple, and let it dry. You will be surprised how quickly a plain shelf or empty wall starts to feel like yours.


